
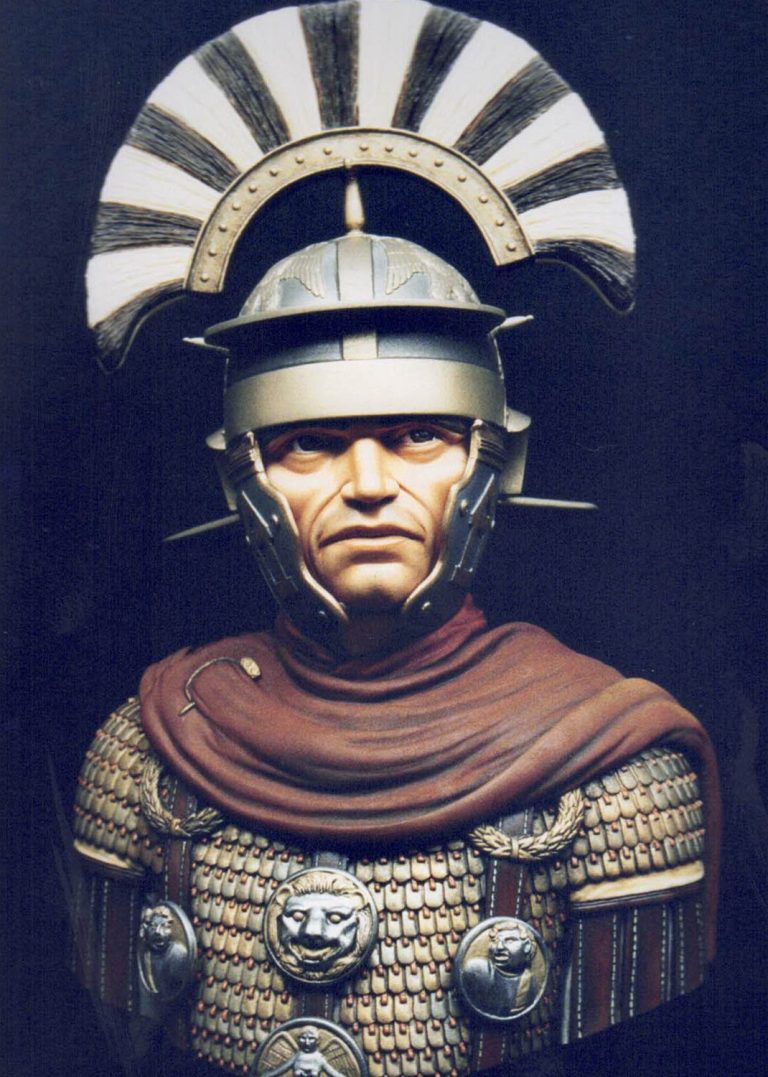
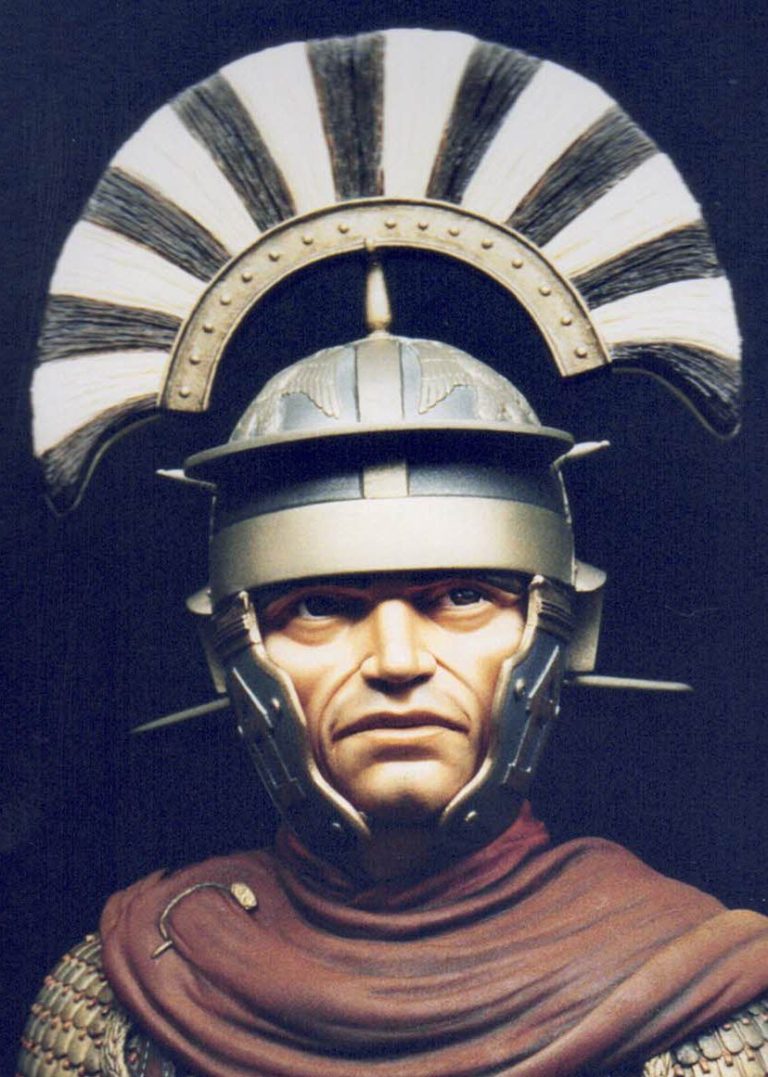
Roman Primus Pilus
1/4 scale Resin kit from Verlinden
Article in Military Modelling magazine in 1999
Larger scale models have been around for a while now, granted it’s more commonly seen in fantasy or sci-fi subjects, but one or two military pieces surface now and then.
It's a double edged sword so to speak, after all, put one of these on the competition table, and no-one's going to miss it. However, they're not going to miss any shortcomings on the paint job either.
Background History
The subject matter in this case is a "Primus Pilus" which is basically the senior / first Centurion within a Legion. This was the ultimate goal of the Legionary Centurion, and the term of office was held for one year.
Candidates would logically have been from one of the older soldiers within the Legion, possibly in his late forties, more likely pushing into his fifties though. He would also probably have been regarded as one of the braver men of the legion, for example having collected decorations for being first soldier onto a walled fortification when attacking a town or city.
The office of Primus Pilus was largely honorific, acting as a spokesman for the other Centurions to the Legate. Also the Legionary Eagle was usually guarded by the First Cohort, which would mean that the Primus Pilus would ultimately be answerable for this symbol of the Empire.
At the end of the term of office, a Primus Pilus might go on to further posts if he had strong and influential patrons. However it seems to be more usual that he would retire and play a part in the affairs of his municipality. He would however carry the title of "primipilaris" ( ex-primus pilus ) throughout the rest of his life.
Other benefits the rank engendered were that a primipilaris' sons would be eligible for direct commission as Centurions, particularly in command of Auxilliaries, or possibly a cavalry unit.
The rank of Primus Pilus was largely beyond the reach of even the most ambitious of legionaries, mainly because it required a man of learning, with skills in administration rather than just skill and strength of arms. Thus many who possessed the desirable skills would have entered the army at a higher level, possibly in the Praetorian guard or by a direct commission. It is interesting to note that some men had served forty years within the army and not reached the post of primus pilus.
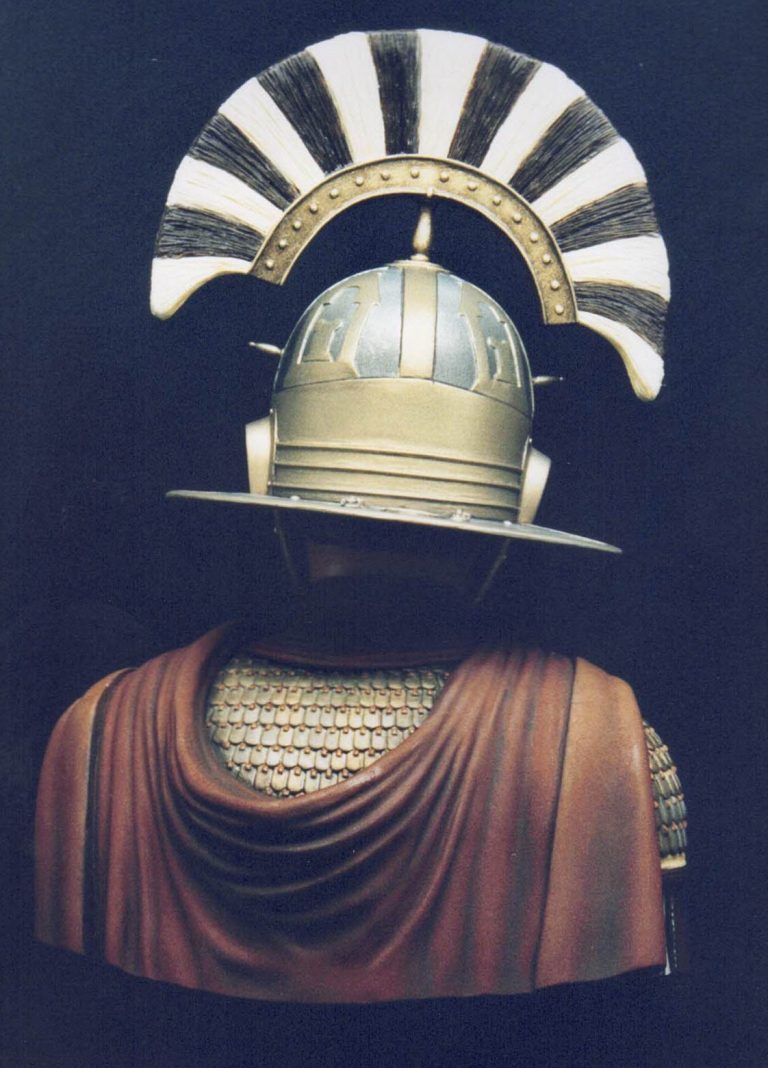
Our model here is seen to be wearing several decorations, the laurel
wreaths and the phalerae on his chest being replicas of actual archaeological finds in Germany. By way of interest, a Primus Pilus might also have been awarded a "Hasta Pura" a silver spear shaft which was a typical decoration for officers within the equastrian order.
Some research sources
Now having been "pulled up" about the colour of the cloak on my last attempt at a Roman, and quite rightly so, and also having become acquainted with Dr Mike Thomas because of his correspondence, I thought I'd be cheeky and get some information from him regarding colours in general for the model.
From him I gleaned that the cloak in this case had a high possibility of having been made from a reddish material, probably dyed with henna or some similar colour.
That stumped me, because I was aching to do something different. When I made that comment Mike mentioned that "running" repairs on the armour would probably have been quite common, and that any type of metal might possibly have been utilised for this. In fact there are documented cases of different metals having been used on this type of body armour, and so what a good excuse I had to employ several different colours for this one area alone.
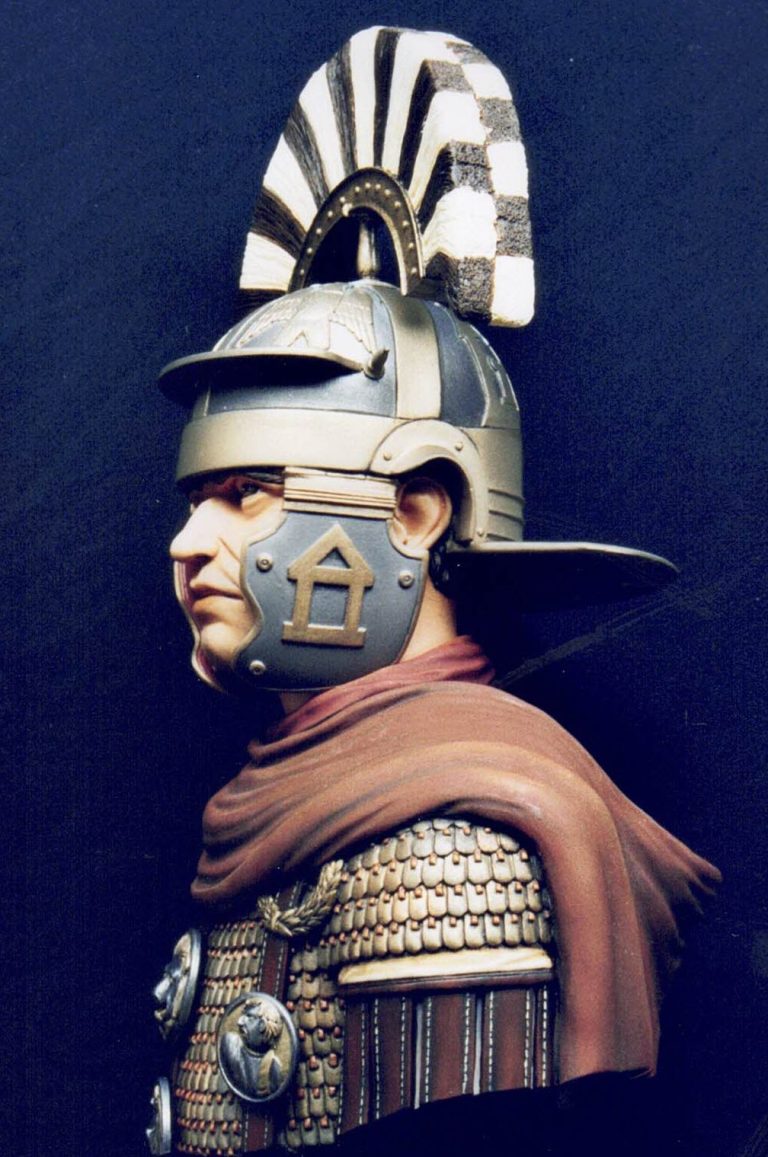
The helmet seems to be a rendition of an Imperial Italic type of helmet found in Germany, a picture of which is shown on page 228 ( no. 11 ) of the Peter Connolly book " Greece and Rome at War". This book also shows the Phalerae decorations on page 245 and on the right colour plate on page 305 ( not to mention the cover too ). If you have the older, separate versions of this book, then the page numbers will be different.
The Model
The moulding is typical of Verlinden’s releases, almost bubble free resin, certainly no air bubbles visible on the detail surfaces of the model, although there were a few on the underside of the bust. These don't matter much as a wipe of filler will sort them out, and they won't be visible once the model is made anyway.
The Box art I can't really speak about, as this was a pre-production model that I came to have thanks to Derek Holmes who is the sculptor of this piece. No doubt though, the box art will follow along the lines of other Verlinden releases, and as with the larger models, a front and back view will be on the box - I make assumptions here, not statements of fact.
O.K. so the moulding is bubble free. the large components - the head / helmet and the shoulders / body don't seem to have those large, and to my mind hard to remove, mould plugs, but are cast in such a way as to reduce work in cleaning up. Congratulations Verlinden, at last I can throw away the industrial band saw.
The bit to watch though is the thinner parts such as the cheek guards and the neck protector. These have been moulded very thinly indeed, and in order that there are no bubbles or holes in the resin, Verlinden seem to have gone to some trouble to make the casting gates a little bit wider. the only problem this may cause is that the hasty modeller ( my hand usually goes up in the air here ) can be caught out because the gates encroach onto some of the edge detail on each of the parts. Don't get me wrong here, it's done in such a way that the offending material is easy to file off. But it's also quite easy to damage the curve of each part should one get too happy with the old razor saw. Luckily I was doing the right cheek guard and the small amount of damage that occurred is hidden where the guard meets the scarf. So no-one will know.......Oooops.
General fit of parts was good on my example, the neck was a little tight fitting into it's socket, but a small amount of filing took care of that.
The underside of the helmet, where the neck protector joins on is about the worst place to get to fit, and I found that removal of about half of the location lug on the protector itself helped immensely. No other fit problems were encountered though, and it's possible to assemble the whole of the model except the neck protector and the plume without the use of glue or blu-tac. All parts were tested for fit and the joints pinned, but glue was not used until the painting was completed.

Painting
Now for the fun. I'd given myself about 20 hours, spread over a week, to paint this humungous piece. The reason for this being that I wanted it in the competition at Euro Militaire. So to begin with I airbrushed a few light coats of white enamel over all of the components, having fastened them to various bits of wood dowel ( in the case of the big bits, and wire ( in the case of the small bits.
I used the airbrush to paint the black / iron area of the helmet, using Humbrol matt black as an undercoat, followed by Testors Steel, and finally topping this off with a few dustings of Testors "Aluminium"
These latter two are Testors own airbrush paints, and the metallic pigment is ground up very finely indeed. They come ready for use in the bottle, and I've found them to be most satisfactory. Unfortunately, I'm beggared if I can get hold of any more.
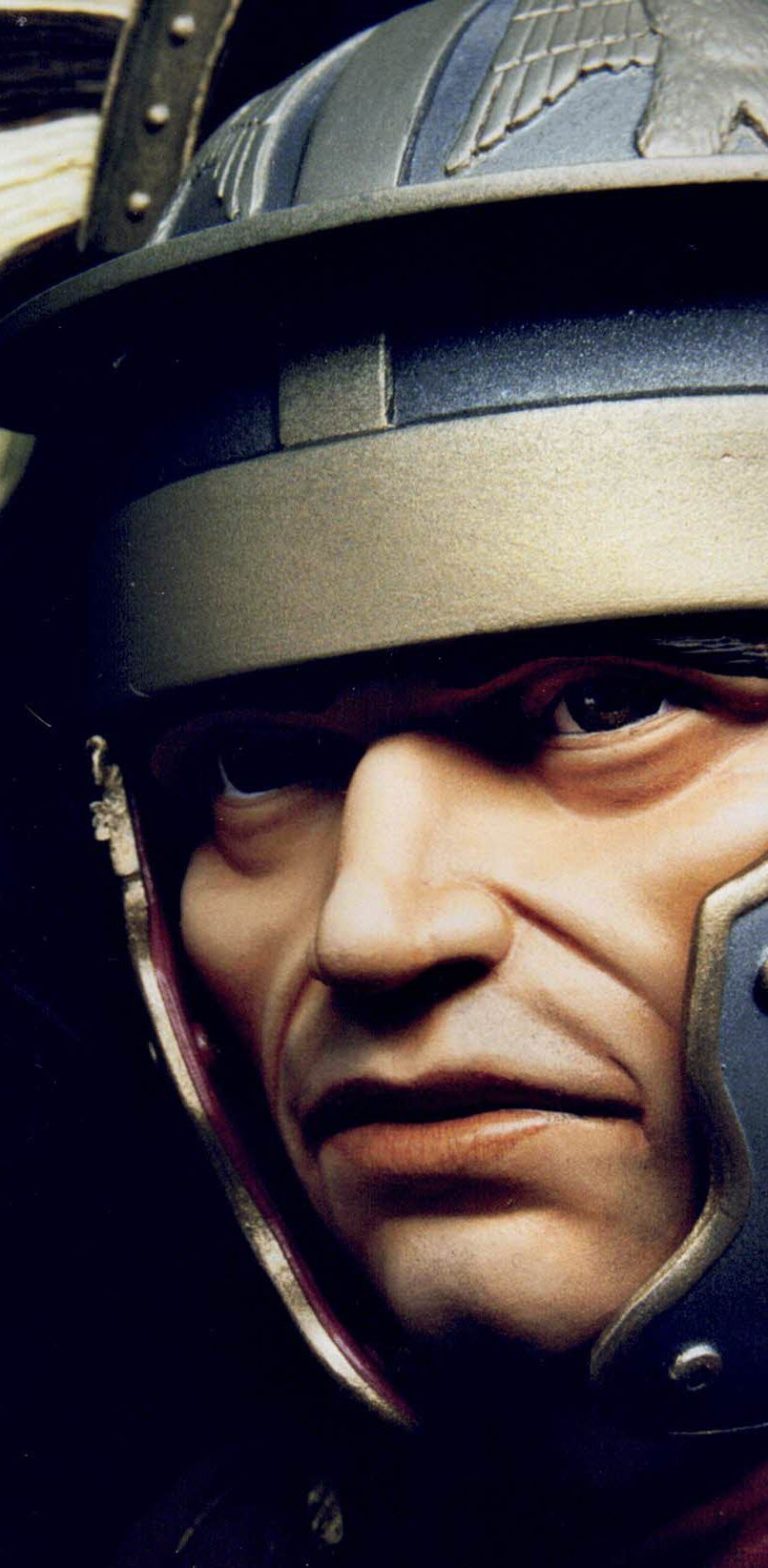
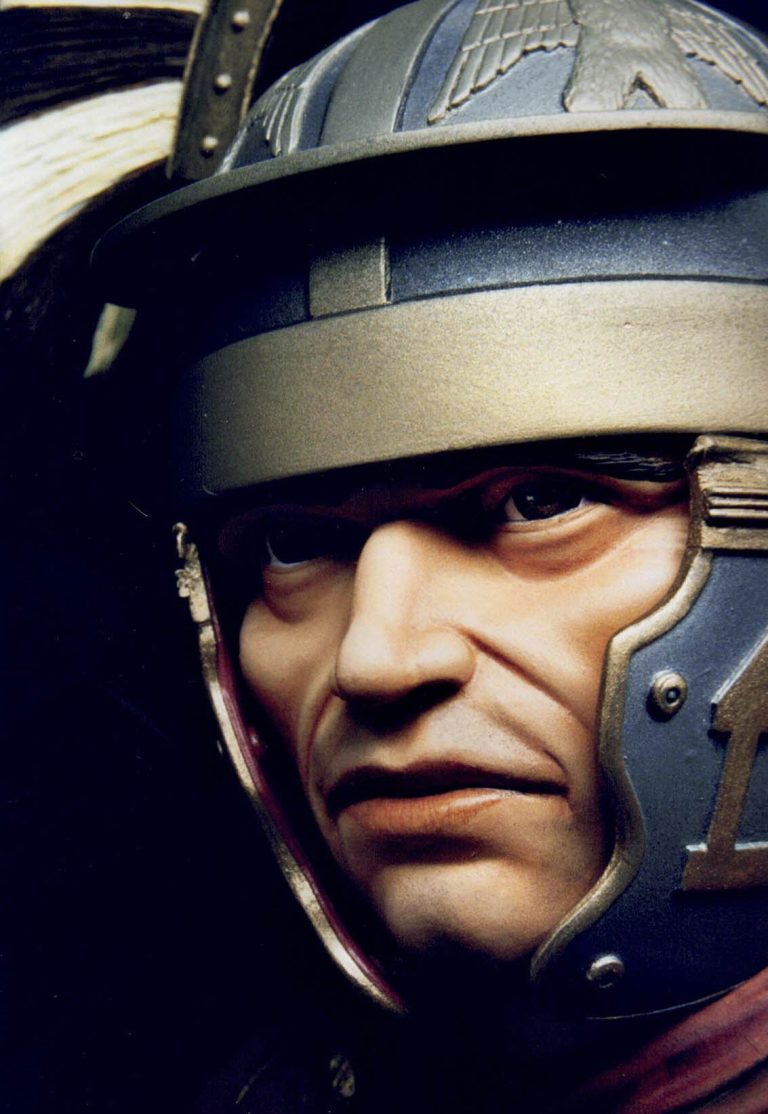
Now for the face. This was my standard mix of oils over an acrylic base coat, no problems here at all, apart from compensating for the size of the model. The eyes can be as complex as the modeller chooses, veining on the white is easy enough with a steady hand and a fine brush.
Colour of the iris can be detailed too, instead of just a one or two colour affair, flecks of yellow, black, green or gold can be added to liven things up. I chose to do the eyes after the helmet was finished, mainly to allow the flesh colour to dry thoroughly.
I also added a 12 o'clock shadow to the face, even though most of this won't be seen due to the cheek guards. I used Paynes grey oil paint, stippled on gently with an almost dry brush.
Another interesting note here came to light after I'd done this ( don't you love it when folk are really interested in what you're doing ), is that the Romans apparently weren't too keen on body hair. Either plucking it out - ouch, or in the case of facial hair, it was sometimes "worn" away with either a pumice stone or ground up pumice powder. Personally I'll stick to my Gillette razor thank you.
Problems, problems
On to the Gold / brass on the helmet. Now this was awkward, and it shouldn't have been. I painted a couple of coats of Testors antique gold on to the white primer ( probably my first mistake was not using a sand colour undercoat ). This looked a little patchy, so a further coat was added. Time was running out, and so instead of an oil wash, I mixed up some Tamiya "Clear" acrylic colours instead. I used Yellow, Red and Blue to make a brown colour, and diluted this 1:1 with water. This was then painted thinly onto the gold, and hey presto instant shading.... Um, no actually. Instant disaster !
The acrylic dried unevenly, in places attacking the underlying enamel.
This one lost me completely, because I'm sure I've used the method before and had excellent results. So once dry, out came the sand paper and the majority of the offending gold was rubbed off. Euro was looming ever larger. O.K. then, acrylic gold, no problem with that, Games Workshop do a couple of good ones, and I opted for the "Shining Gold" this went on patchy too, but stabilised after a couple more coats, and with a wash of the Tamiya mix looked O.K.
Next morning however there were ugly collections of the brown Tamiya paint on the lower areas of the gold. I'd not allowed for the slower drying time, and the paint had pooled gradually down. Out with the Isoprpanol an wash the offending collection of acrylic paint off, this ate nicely into the underlying gold....... Do you get the picture yet.

The Gold eventually went on, was shaded and dried. But it was a mix of the Testors gold, a covering of gloss varnish, and then oil paint that succeeded, all that went before was a disaster. I think it would have been easier to cover the gold areas in foil and so have a much more striking effect, even though the plume and the eagles would have been awkward to do. Still one lives and learns.
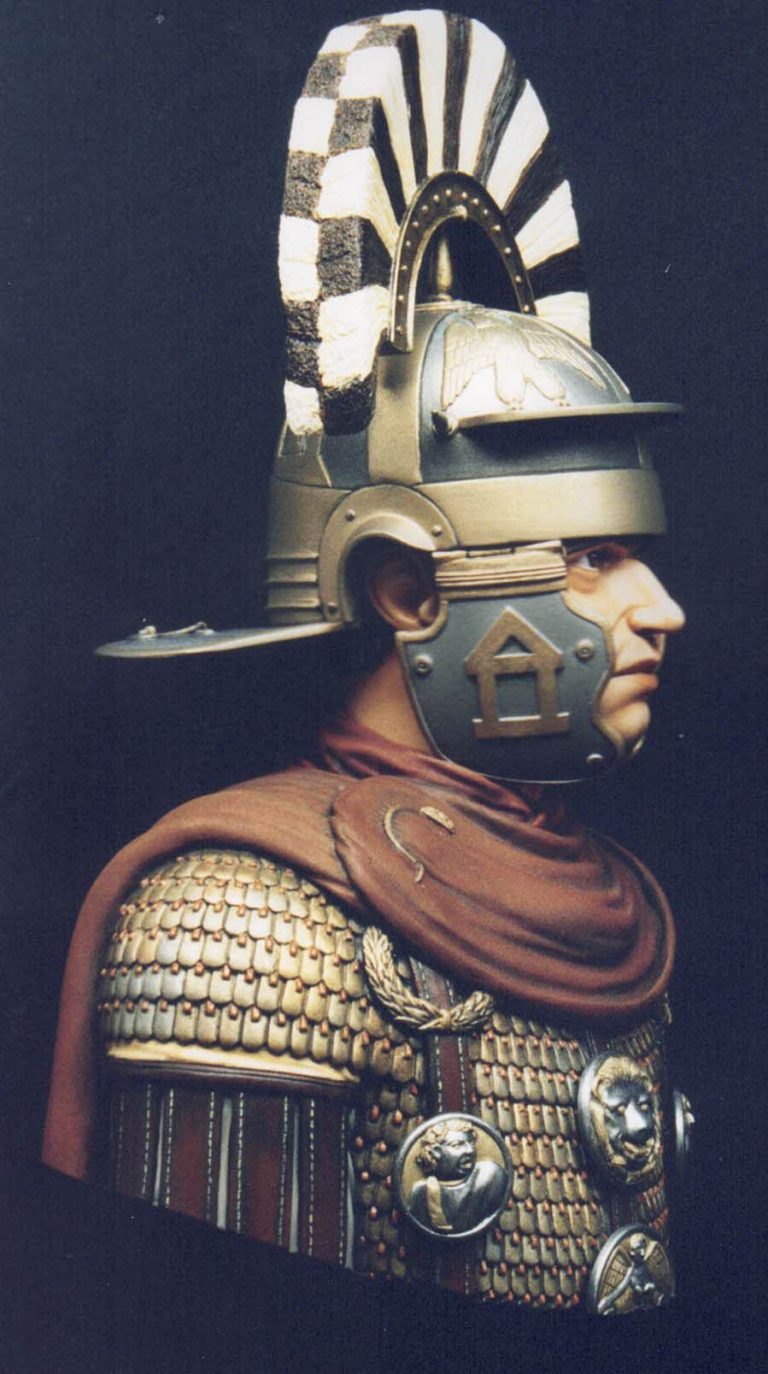
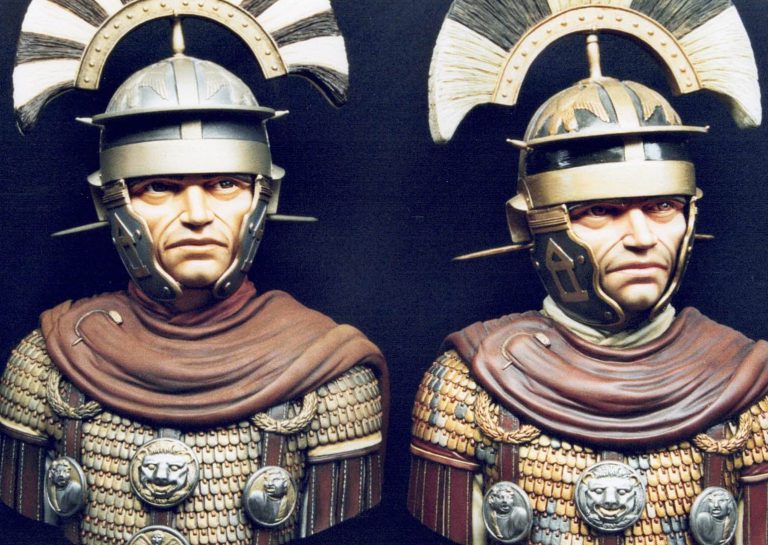
More armour
The chest armour was done in a similar manner to the initial attempt on the helmet, but before adding the Tamiya acrylic to shade it, the leather strips fastening the pieces of the armour together were painted in. The shading colour would then work on both the metallic and the leather coloured paints.
Before the shading was added however, the different coloured scales were painted in, this being done with Games Workshop " Chainmail" and "Shining Gold" acrylics, and also Testors "Pale Gold" enamel. I tried to make the patches of "new" armour look to be in logical places, which would be likely to receive damage in the heat of battle, clumping together small groups of the different colours, to enhance this effect.
After the overall shading had dried, I added a thin layer of olive green oil paint to the areas in deepest shadow, and also those that would have been constantly exposed to moisture. I thinned the paint application out once on the model with a dry brush, so that the paint tended to gather in the recessed detail. This I thought looked more effective than just the brown shading on its own, hinting at some small amount of verdigris on the brass scales.
The cloak
With this area drying fairly quickly, I could move on to painting the cloak. As discussed earlier, this has a high probability of having been a red/brown colour, fading due to wear possibly to a paler red/brown. I chose to make mine quite dark, hinting that although the armour has had to be repaired, the officer was wealthy enough to afford a decent cloak.
I began with an undercoat of Games Workshop "Swamp Brown" acrylic, this being a close match to Burnt Sienna. Over this I added a thin coat of Brown Madder Alizarin oils, stippling this with a large dry brush to add texture, and also to remove any excess of the paint. On top of this, whilst still wet, I blended in some Burnt Sienna oils, finishing off the highlights with some Light Red.
Once dry I planned to airbrush over the cloak with a lightened version of the red/brown colour, mixed from enamels. The colours used were a mix of Humbrol "Leather" and "Desert Sand". the reason I did this was to attempt to give a "fuzzy" surface look to the cloak, like that seen on woollen clothing that's been washed a few times. Not only that, the enamels dry completely matt.
Leather and linen
Underneath the shoulder / arm protection armour is what appears to be a tunic of some type. I assume that this would be of a lightish material, probably akin to cotton. I opted therefore to paint it in a bleached linen colour, beginning with Raw Umber oils, these being painted straight onto the white primer. Over this I then added a mix of Yellow Ochre and titanium white as a mid-tone, following that with a few highlights of pure white.
The leather strap type arm protection, together with the straps on the chest holding the Phalerae was painted with a sand coloured acrylic undercoat, this was then covered with burnt sienna oils, and highlighted with light red and then some touches of Yellow Ochre and White.
Once dry, the area was coated with a diluted gloss varnish, and then the stitching added using some more of the sand coloured acrylic. To give some depth to this latter addition, Burnt Umber oils were painted over the stitching and gently wiped off so that the dark brown paint was left in the recessed detail.
The neck scarf was done last of all, mainly because I didn't want to end up hitting it with the paint from the airbrush. I used a couple of good coatings of white acrylic primer to begin this area. This being overcoated with an off white mix of Titanium White and a little Yellow Ochre. Some small amounts of Raw Umber were used to block in the deeper shadows, and to make the cloth look a little grubby. Final highlights were added from pure Titanium White.
Finishing off
All that was left on this part now was the addition of the cloak pin, this being in gold with silver highlights.
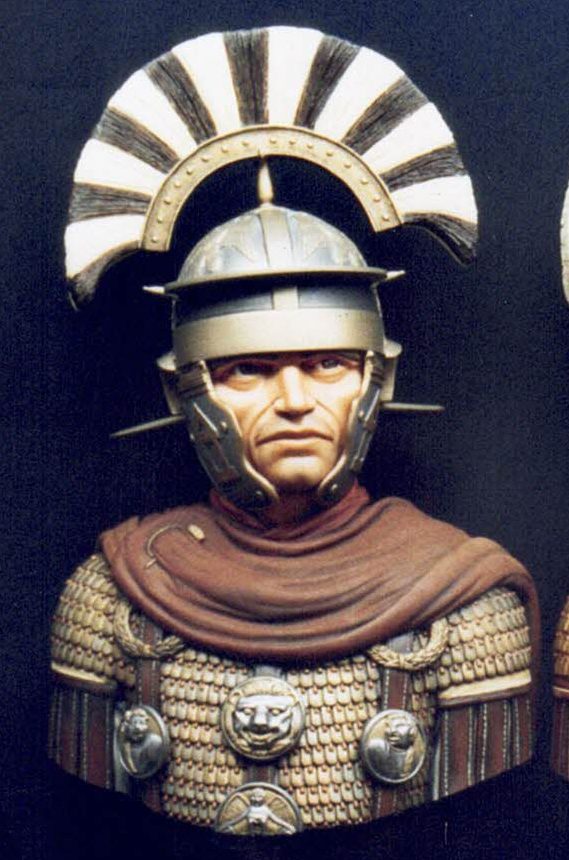
Now to finish the helmet off.
The neck and cheek guards were treated much the same as the rest of the helmet, Make sure though to paint the inside of the cheek guards a dark colour.
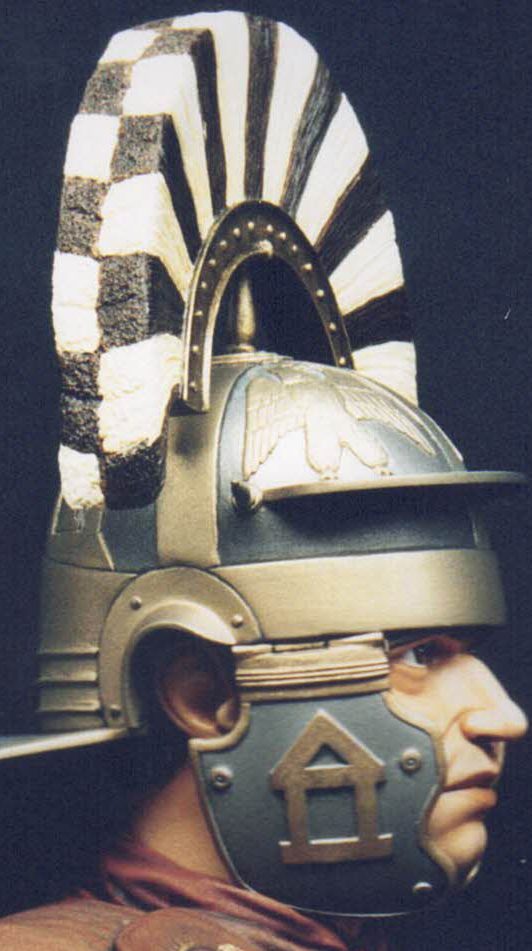
The plume was first treated to the metallic colours, as used on the helmet and cheek guards, then the "hairy" areas, which I take to have been made from horse hair on the real thing, were painted with the white primer.
As Horse hair on white horses, is very rarely pure white, I added a light wash of Yellow Ochre, this being followed by a heavier wash of Raw and Burnt Umber mixed together with a high proportion of White spirit. Once dry a light dry brushing of white picked out the highlights. The dark stripes were given a wash of Black and Burnt Umber mixed, and a light dry brushing of white and Raw Umber mixed for the highlight.
As the Phalerae are miniature representations of an actual find, pictured in the Conolly book, I could paint these as they would have been 1900 years ago. This being of polished silver with gold trimmings. For the silver I began with a couple of coats of Games Workshop "Mithril Silver" followed by a light drybrushing of Silver ink, and finishing off with a couple of light coats of Tamiya "Smoke" The gold was added after all this had dried, using the Testors Gold highlighted with Silver ink.
Out with the glue
Now for some glue. The neck to shoulder joint is a bit tight as mentioned earlier, but certainly needs no filler, and after pinning in place is not "going anywhere". The cheek guards slot in nicely, having a small location tongue on the upper edge, and sitting into a recess on the scarf at their lowest point. The neck guard I must own up to having had problems with.
Nothing major, but a little filing was necessary to get a good flush fit. The ear guards too need trimming, and although I thought I'd got this sorted at the cleaning stage, I had to do a few final small tweaks here and there to get them to sit properly.
The Plume was no trouble at all, I did use a three inch long piece of brass welding rod which went from the plume , through the cylindrical ferul and into the top of the helmet - this one ain't going anywhere either ! The Phalerae were glued in place, no need for pins here, as slots are provided on the rear surfaces.
Base and nameplate
Now all I needed was a suitable base. Quite a large one too. As it happened I'd bought this one a couple of years back, and had it going to rot on one of my shelves. It was given a quick wipe over - to get rid of "all that dust" that accumulates near frenzied modellers, and with two more pieces of brass welding rod the dirty deed of fastening a very large lump of resin to it was completed.
O.K. a nameplate. a couple of years ago I'd been on holiday to Tunisia, which just happened to have been heavily occupied by the Romans. They left an incredible amount of antiquities there, and having brought back quite a few pictures from the museums where some small amount of these treasures are housed, I was struck by the amount of mosaics that were on show. That's it thought I a simple Mosaic type plaque, easy.
I rolled out some Milliput quite thinly, and allowed it to harden for about half an hour. During this time I made a cocktail stick into a chisel pointed tool with which to mark out the design. I first pencilled in some lines onto which I placed the Roman styled lettering, "chiselling" this into place with the cocktail stick. I then drew lines onto the rest of the Milliput with the cocktail stick, splitting the rest of the plaque up into 1/2 mm squares. The plaque was then placed onto the wooden base, and formed to comply with the rounded surface of the wood.
Once dry I painted the whole plaque in a sand colour acrylic, and then started adding different colours to the sand coloured paint to make up slightly differing colours. I added various reds, browns and yellows and spotted these randomly onto the plaque to split up the monotonous sand colour.
When fully dry the "grouting" was added by painting over the whole plaque with white oil paint, rubbing this off gently with a soft cloth. Finally I painted in the lettering with black acrylic, and added a dark brown colour around the edges.
With the plaque fully dried, I broke off small pieces to mimic the mosaics I'd seen that weren't fully preserved. I then glued the plaque in place, and painted some white oil paint onto the places where tiles were missing from the design - to show the plaster that the tiles were fastened into.
Final addition
The only addition I've made to the bust is the small tie between the lower flaps of the cheek guards. I made this from a short piece of lead wire, and painted it brown, glueing it in place with a little superglue once the paint had dried.
Final Words
Another large scale bust for the display case. Yep, I really like these models, The detail on this is better than on the Fort Royal and VLS busts, but then again the latter two sets of models were designed primarily as "bronzes" and are of virtually one piece design. This one is engineered with the modeller in mind first and foremost, and so can be expected to have better detail due to its larger amount of components.
I'm certainly not decrying the Fort Royal and the VLS busts, but comparisons will be made, and where the earlier models are pure painters pieces, there is a greater amount for the modeller to do with this one. Having placed this next to the Pete Morton Roman bust that I reviewed several months ago ( now being marketed by VLS ), and compared the two, this seems to be slightly bigger in scale, possibly closer to 1/3rd scale than to 1/4. even so it's a nice piece, very enjoyable to assemble and paint, and looks darn good when finished.
Many Thanks
Finally, my thanks to both Derek Holmes and Francois Verlinden for giving me the chance to paint this very enjoyable model. Also to Anita Davis, who after seeing the components for the bust got totally absorbed in getting reference material for me. Also Thanks to Dr Mike Thomas, who was very helpful with his information about possible colours as noted in the above text.
Other reference sources used :- Peter Connolly "Greece and Rome at war"ISBN 1-85367-303-X
The "Fuentes" report sourced By Dr Mike Thomas.
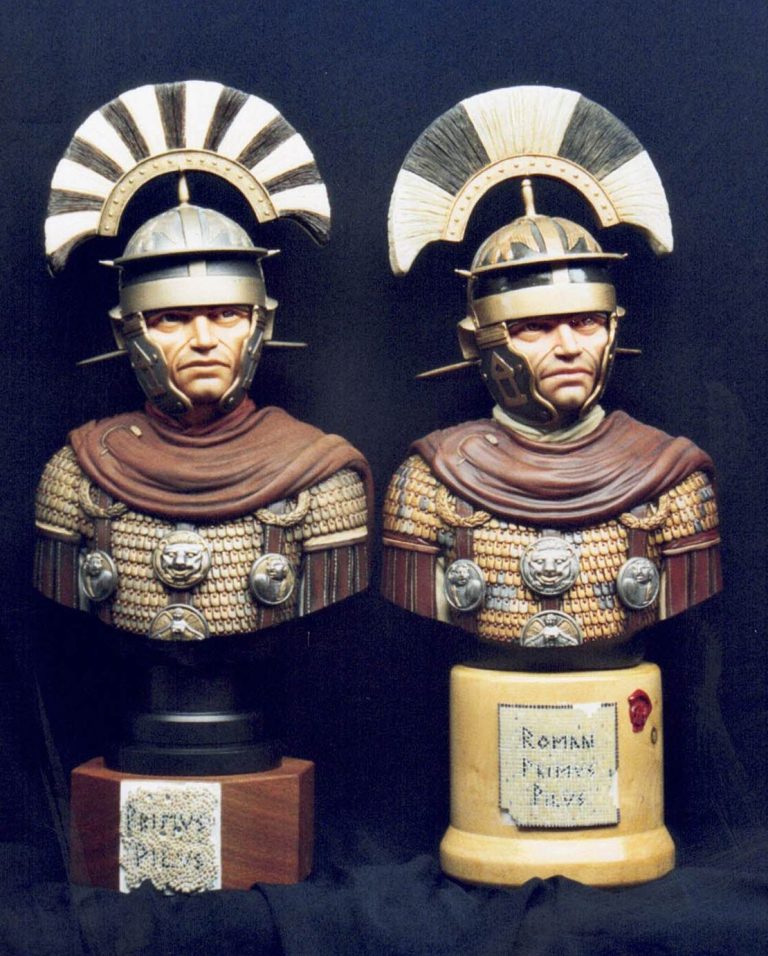
Final, final words
So you might wonder why there are two versions of this model in the last few photos, well, although the original one was painted in 2003, sadly the sculptor - Derek Holmes - dies suddenly in 2006.
I lost a very good friend, and the modelling community lost a great sculptor, one whi produced interesting and sometimes quirky models, and began experimenting in his last few uyears with action poses that were certainly at the forefront of what at the time were being produced as busts.
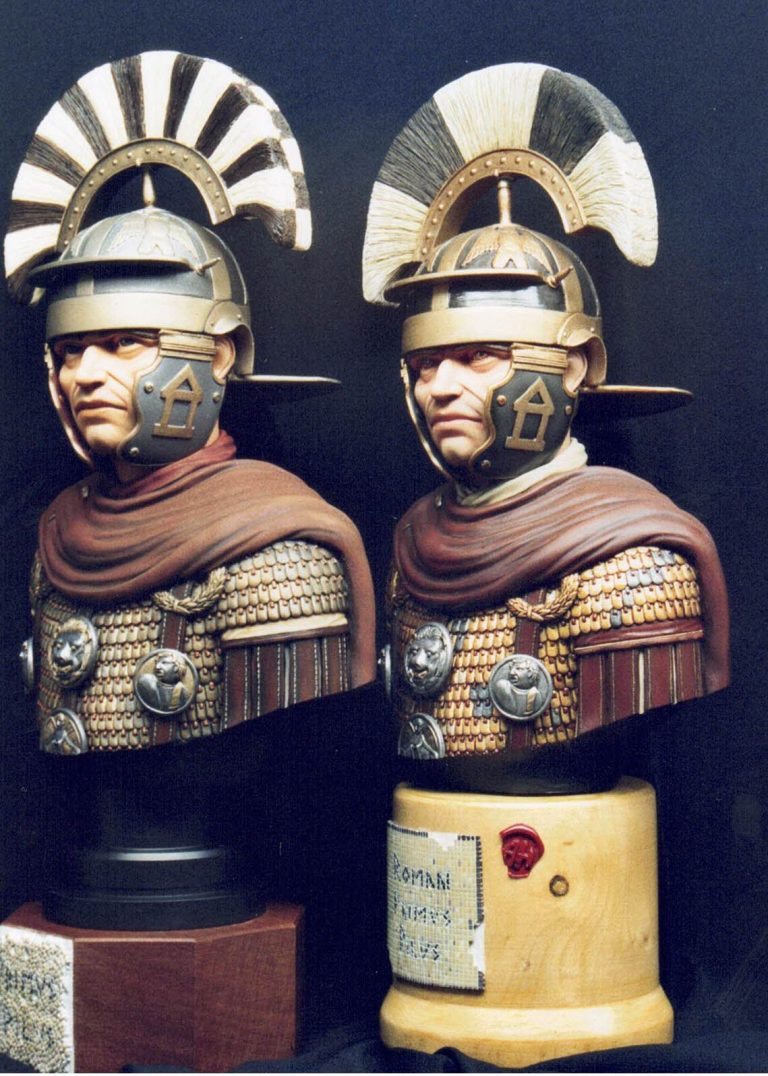
After his death I've kept in touch with Derek's parents, and they asked me to finish off painting the Primus Pilus bust that Derek had started.
I left all the areas that Derek had painted and just "filled in" the sections he'd not done to produce the version that's on the left in these pictures on the previous pages and features here in this shot.
It was a great honour to be trusted to finish the model, although rather sad that Derek didn't finish off the piece himself.
RIP Derek Holmes. 1964 - 2002
We need your consent to load the translations
We use a third-party service to translate the website content that may collect data about your activity. Please review the details in the privacy policy and accept the service to view the translations.