The Nurgly Hillbillies
Michael Kontraros resin kit with support from Games Workshop plastic figures
Painted in 2024
Some projects just seem to take a while to get done.
This one os a case in point, being started in 2016 and not getting finished until the beginning of 2024.
I’m not complaining, because it’s only because other projects take precedence for some reason – commissions, enthusiasm, or the initial idea isn’t working….. or boredom with the concept necessitating a period of re-evaluation.
The main figure, an 80mm tall Plague Marine produced by Michael Kontraros Miniatures has all his hallmark detail and quality that you’d associate with him if you’ve ever had a hold of one of his kits.
I started painting it, because I was enthusiastic about a large scale Plague Marine figure, with little or no thought behind how he would be displayed. It was a case of “This is COOL” and getting it out of the tin – yes, the model arrived in a small tin box similar to the type Edwardian Ladies stored tealeaves in – was a priority.
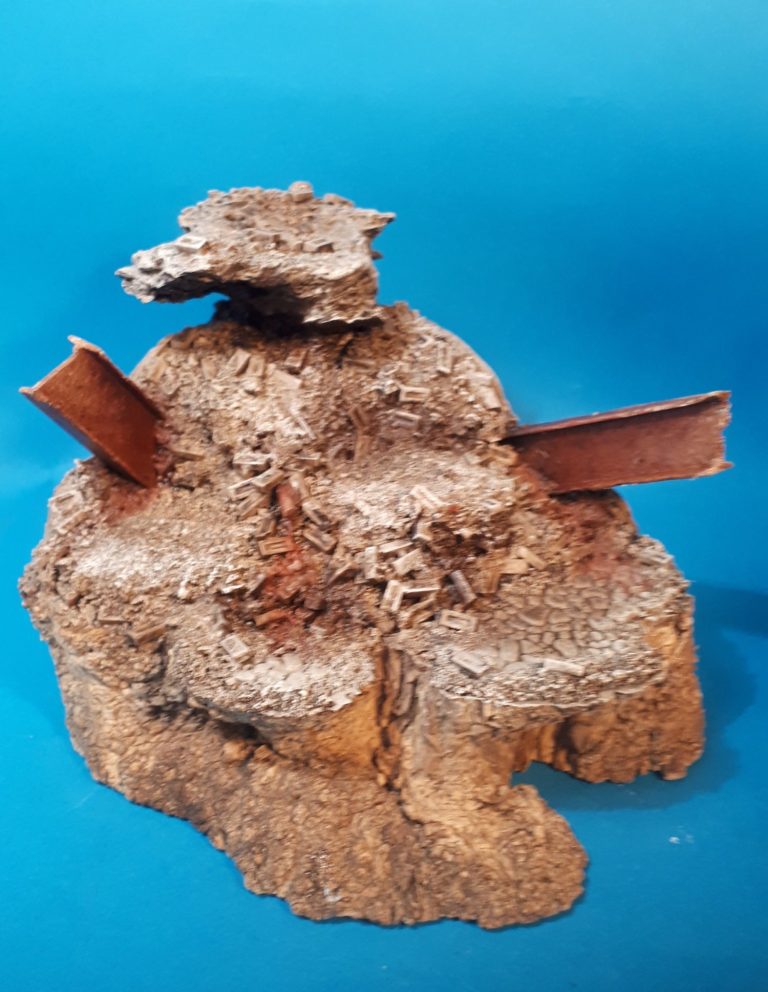
Photo #1 shows the main casting. Yes, that all came out of a mould in one piece apart from the head.
And for all it’s complexity I went and added some horns to the head…… Um…… Because. ( no further explanation can be made. )
Whilst in recent years the Nurgle colours have mutated from the grungy, festering dark greens that they were, to the bright, clean looking renditions they seem to be now. I’m firmly in the camp of “filth”.
Something corpulent, diseased and putrid is unlikely to be nice and clean.
Well, lets be honest, is it ?
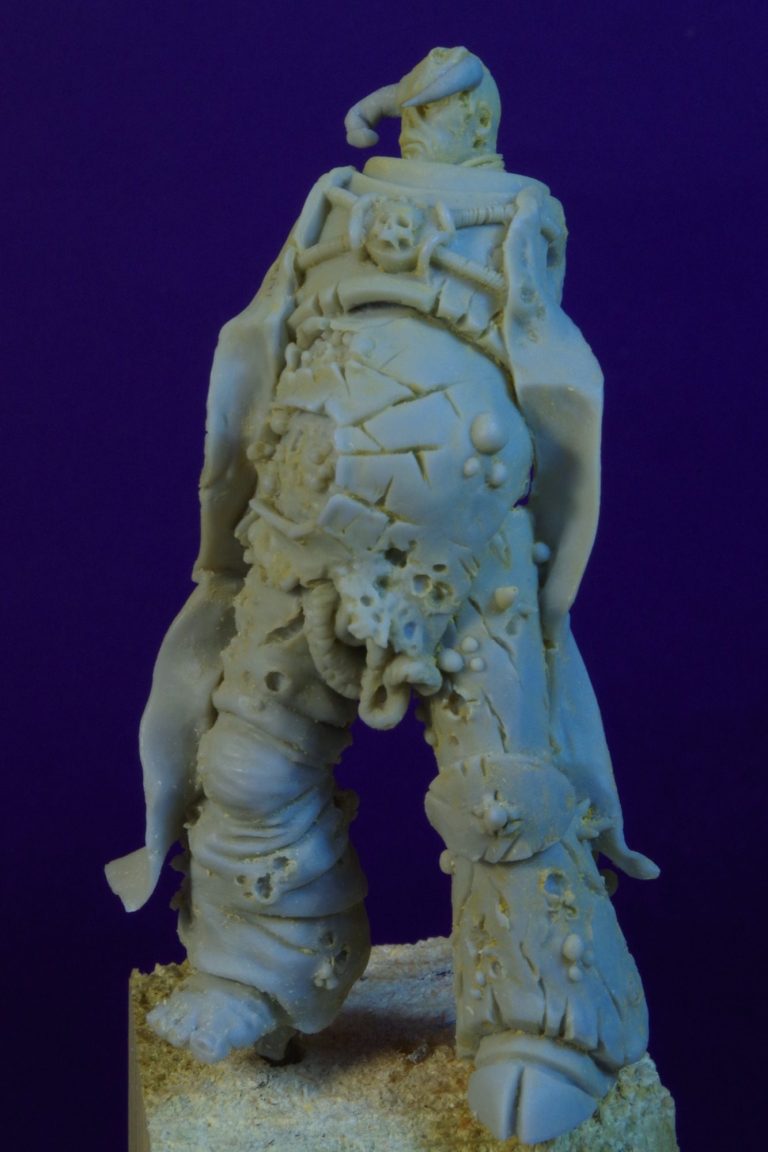
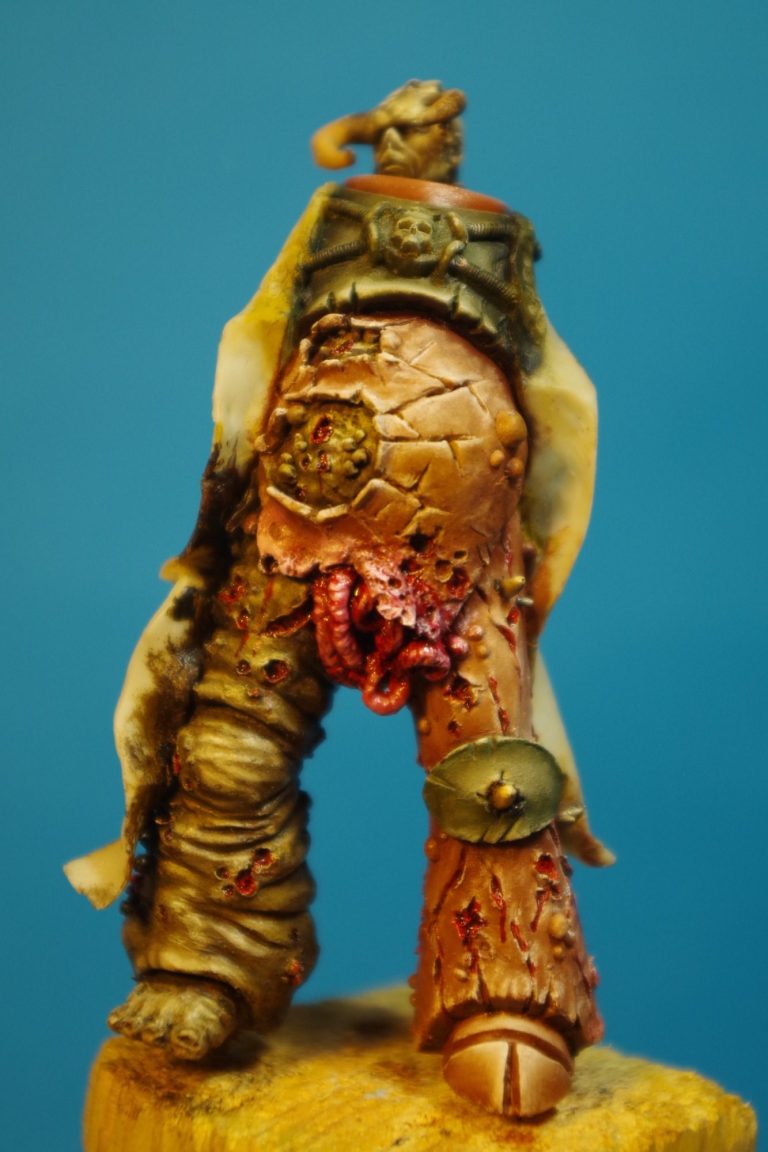
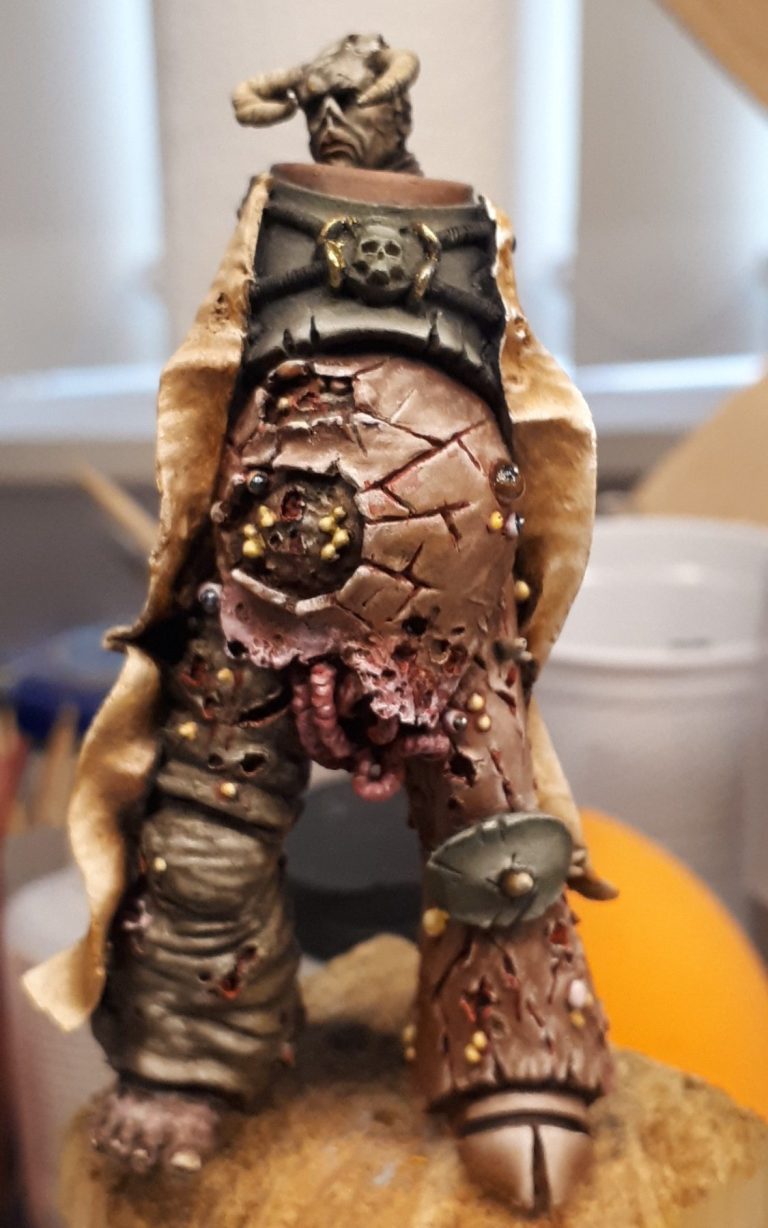
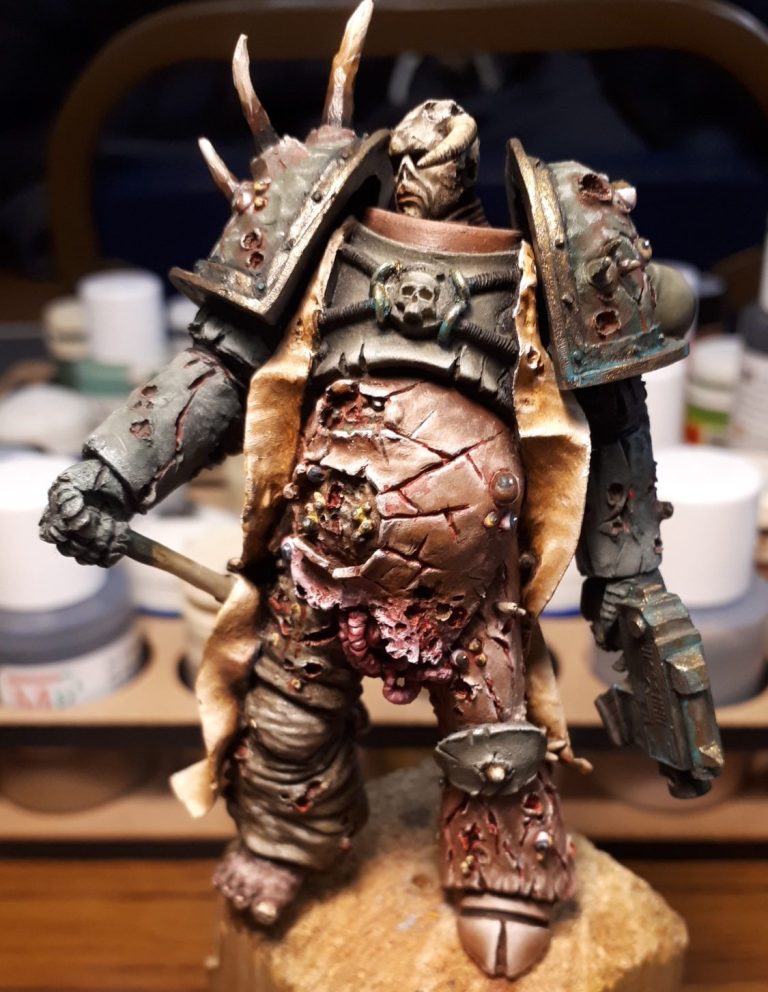
Photo #2 shows the painting having moved along quite a way with a mix of green and brown areas thrown together to colour the flesh and armour areas.
I wanted this to be a mix in such a way that the distinct areas could be either armour that has taken on the properties of skin, or skin that has taken on the properties of armour, so there isn’t actually a distinct rule for the colours to follow.
The green areas are Olive Green oils with Buff Titanium and Titanium White additions for bring out mid-tones and highlights, and the brown areas are Mars Brown with additions of the same two pale colours, again to bring out mid-tones and highlights.
The wounds and viscera have been painted with a white acrylic and then Carmine oils used as the main colour with some slight highlighting from Titanium White.
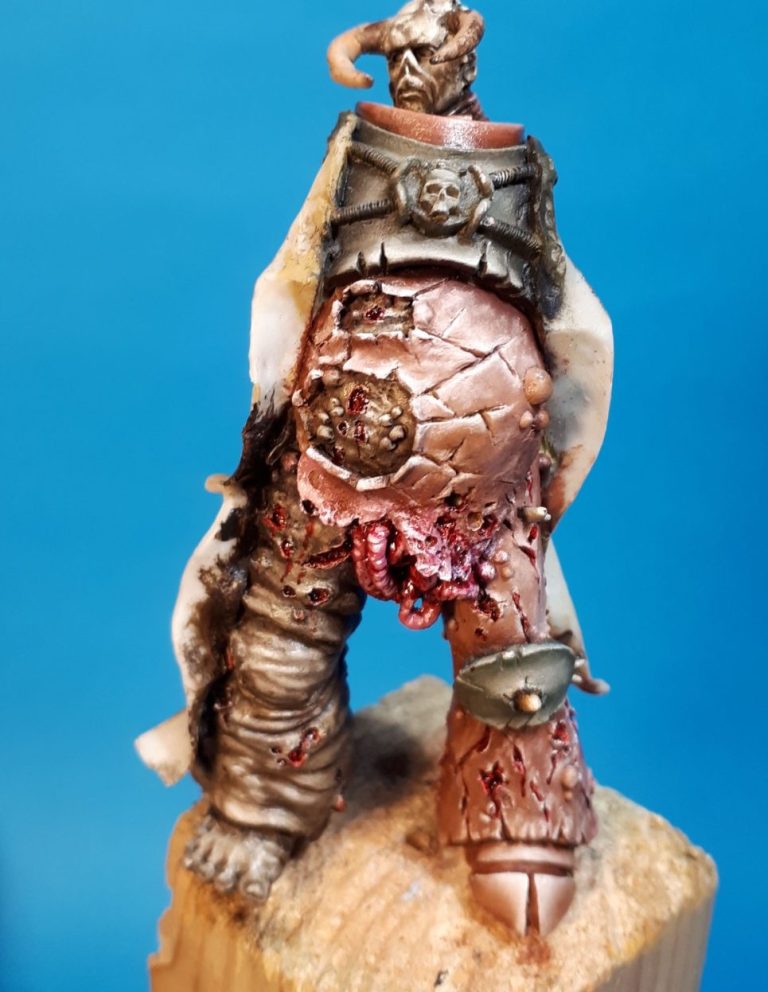
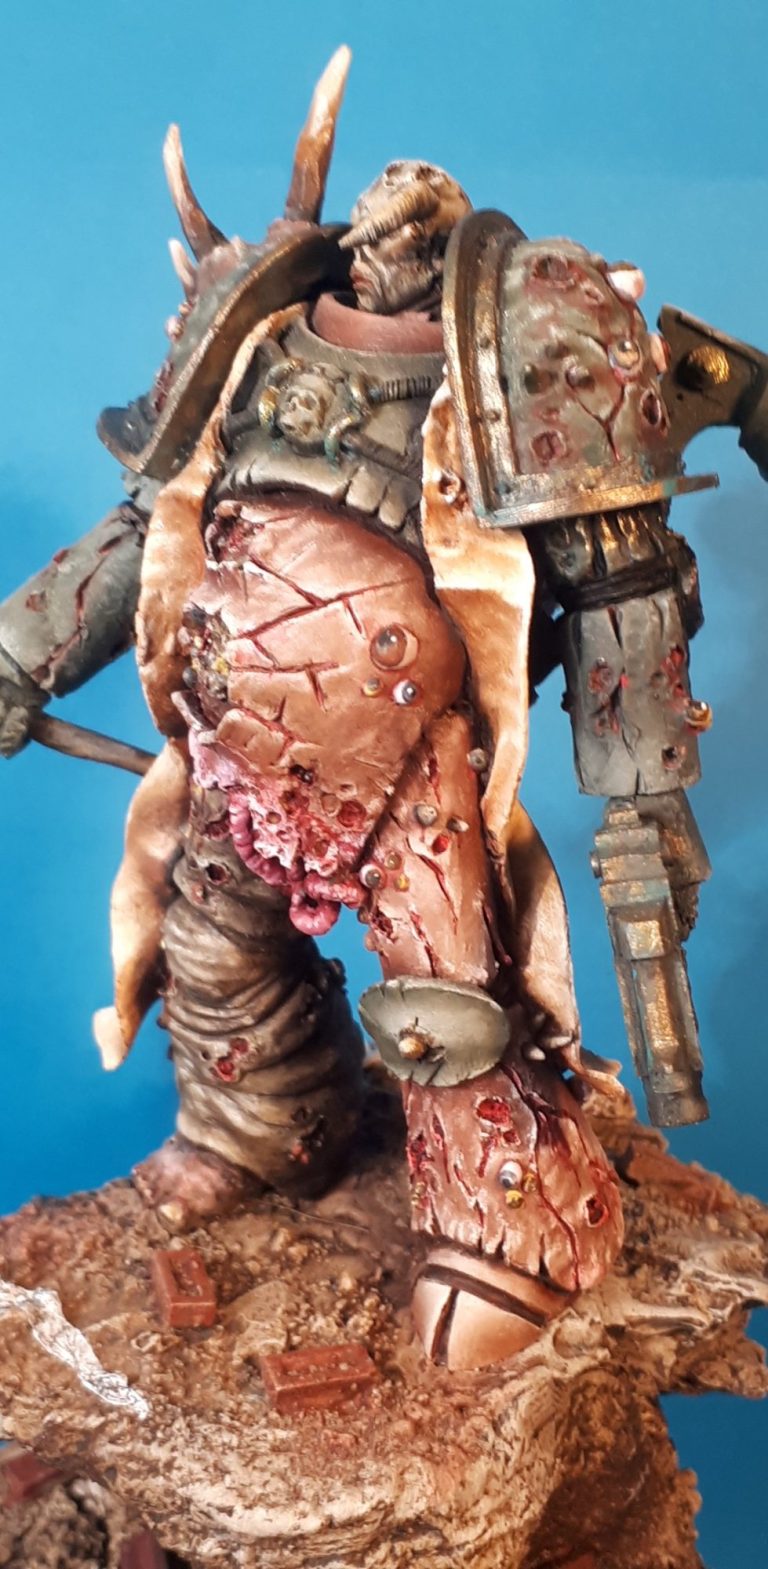
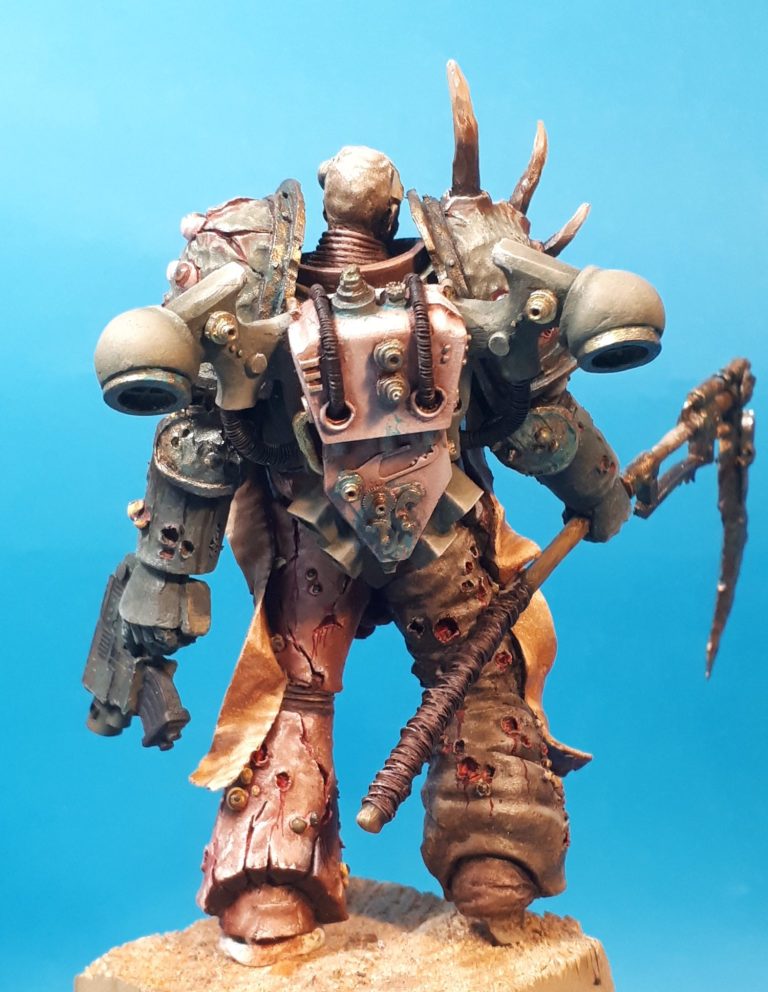
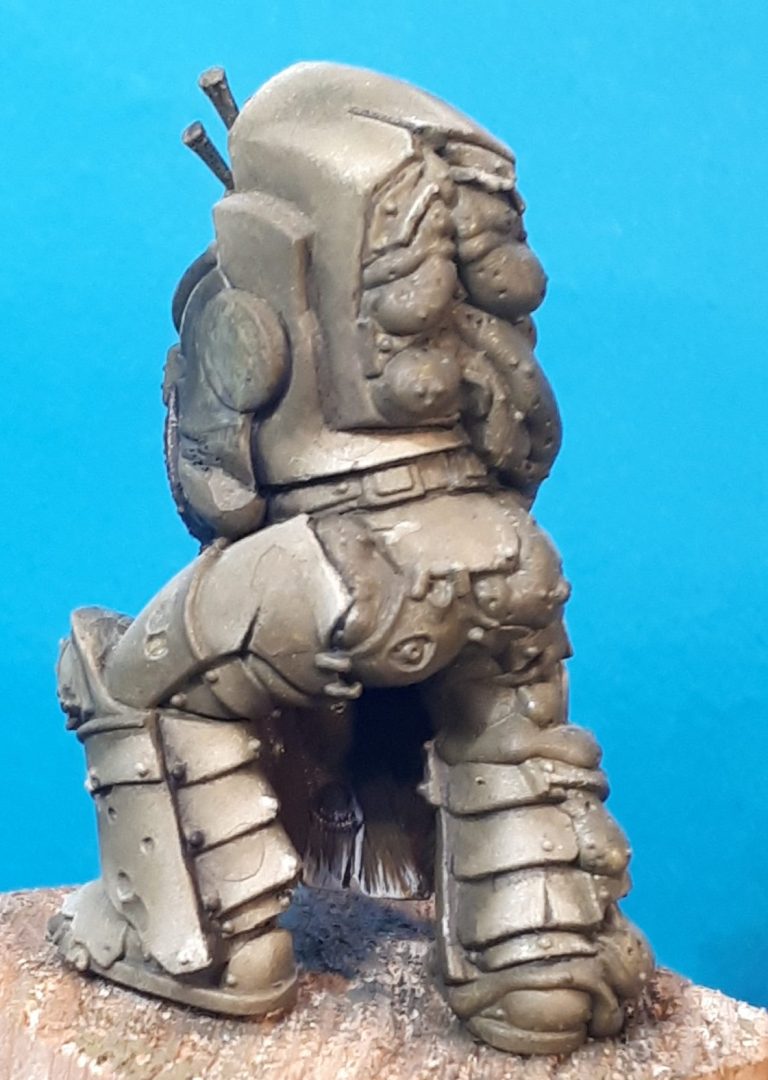
Photo #3 shows the back of the figure with the upper torso receiving a lot less detail, simply because the backpack will cover this completely. The legs have had lots of work lavished on them though.
Photo #4, and the eyes have it. There’s lots of little spheres dotted around his body and legs, and I painted them to look like eyes - all sorts of different colours, all looking in different directions, and lots of fun to paint.
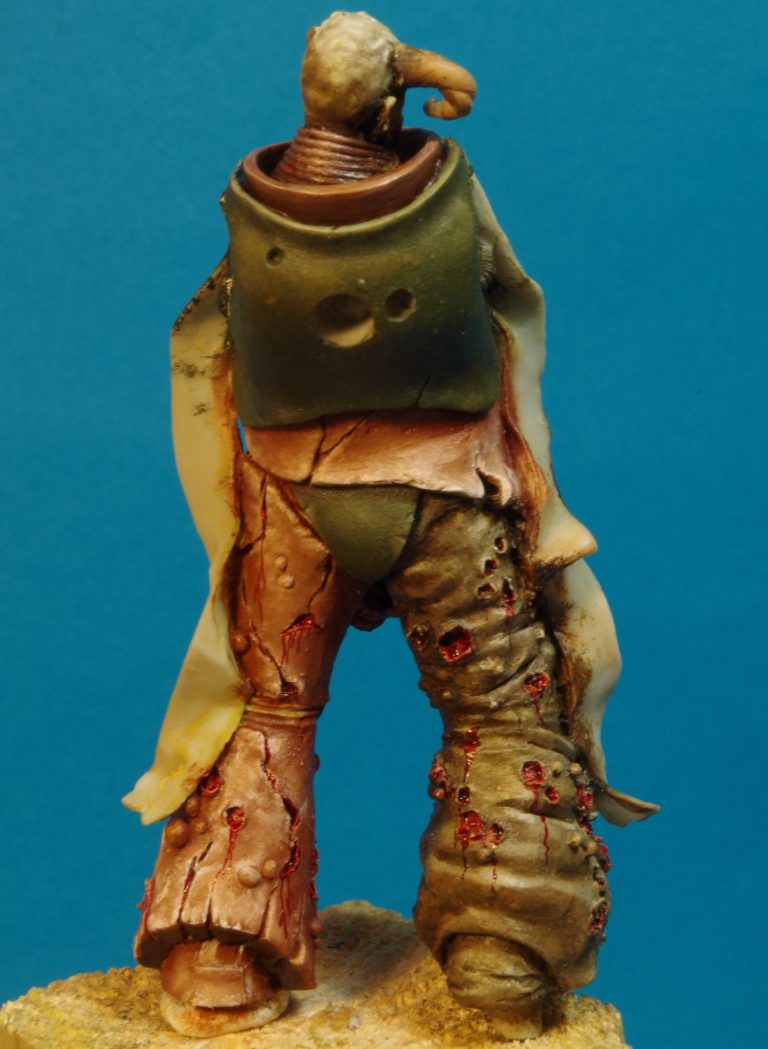
Photo #5 doesn’t really look all that different, but I’ve been right round the model adding deeper shadows to all the recesses of detail to make them stand out more. I used a very dark green oils on the green sections and some Vandyke Brown oils on the flesh coloured areas.
It’s a case of thinning the paint with an equal amount of White Spirit, and then using a fine brush to apply it to the recesses.
It’s a long drawn out procedure, but the whole model looks a lot better for it in the end.
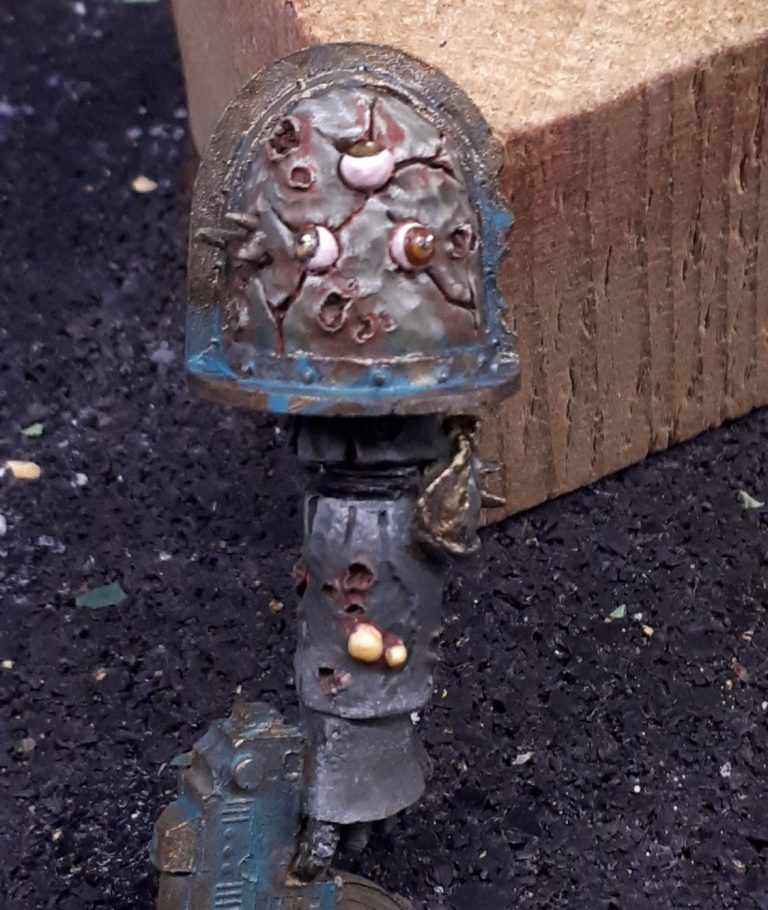
The arms still retain the Space Marine armour, albeit rather cracked and diseased. In photo #6 I’ve got the left arm almost finished, using the same green paints on the main area on the shoulder pad, arm section and glove, and then used a dark brass colour from the Darkstar range of metallic acrylics to paint the outer rim of the shoulder pad.
With a little highlighting from a pale gold from the same range, and after allowing the acrylics to dry fully, I used a wash of Viridian oils mixed with just a touch of Titanium White to add verdigris to the brass sections.
The colours were repeated on the elbow pad too.
The two pale spots on the forearm will be more eyes eventually.
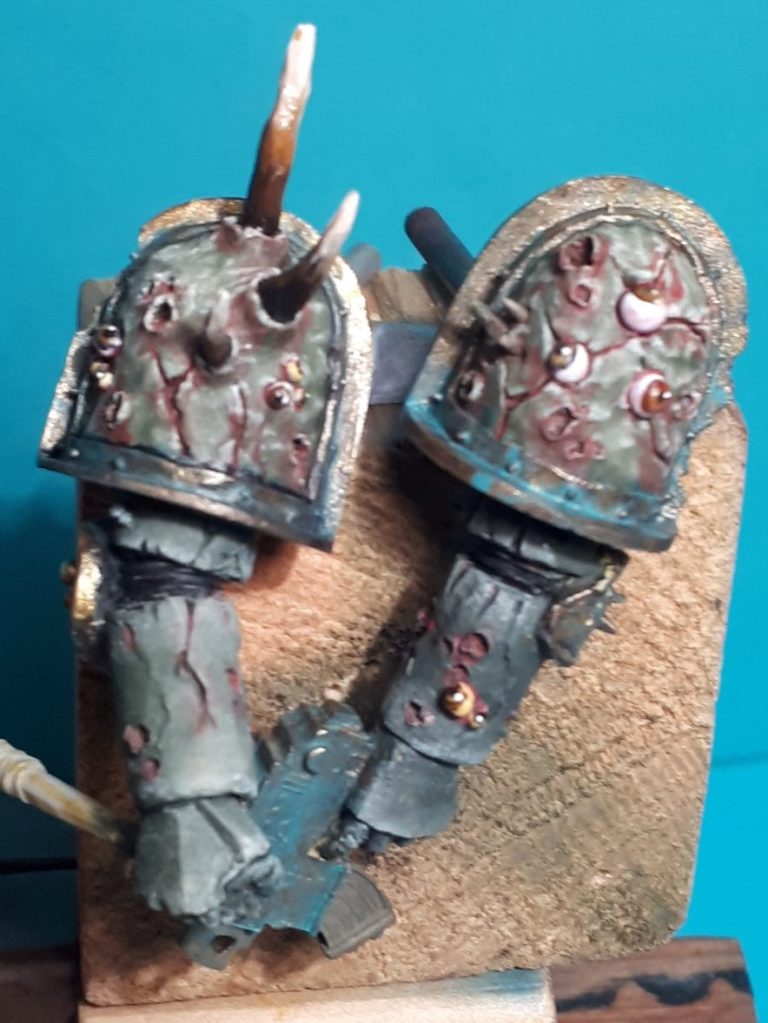
Photo #7 shows both arms completed, the horns began as a pale cream acrylic undercoat, adding Vandyke Brown oils to the base of each of them, then a little mars Brown and finally Buff Titanium working to Titanium White at the tip.
The trick is to use and old brush once the four areas of oils are on the horn and use the old brush ( one that’s got the bristles splitting away from any notion of a point ) and beginning at the base of the horn to gently stroke up towards the point. This will drag the darker paints up towards the point and make a lined effect.
It might take a few goes to get it to look right, but with practice the method works well to make the horn look natural.
This particular figure was one of those subjects that got started and then stalled, got a bit more paint, then stalled again, and to be honest, that happened more times than I can count. Whilst it might seem that I was tired of the model, or in some way frustrated, that wouldn’t actually be true.
Other models were bought, started and finished while this was hanging around the back of the bench, lurking in the drying cabinet or skulking on the “to be continued” shelf.

In this time, whilst glancing at it, or picking it up for a better look, ideas formed, mutates and solidified regarding how he was going to end up looking.
Lots of ideas, lots of possibilities, and a total lack of any planning related to the initial thoughts of “lets paint this kit”
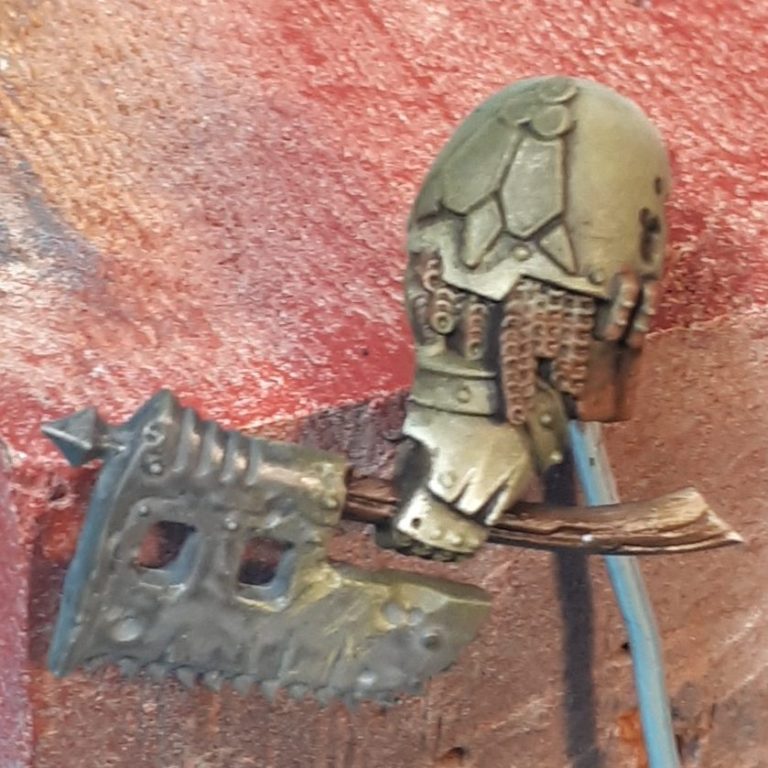
In all that time I managed to snap the handle of the axe-like weapon, fortunately where it joined to the hand, so it wasn’t a problem to drill out a little of the hand and fasten the shaft back into place.
Photo #8 shows the painted axe, matching the colours used on the edges of the shoulder pad.
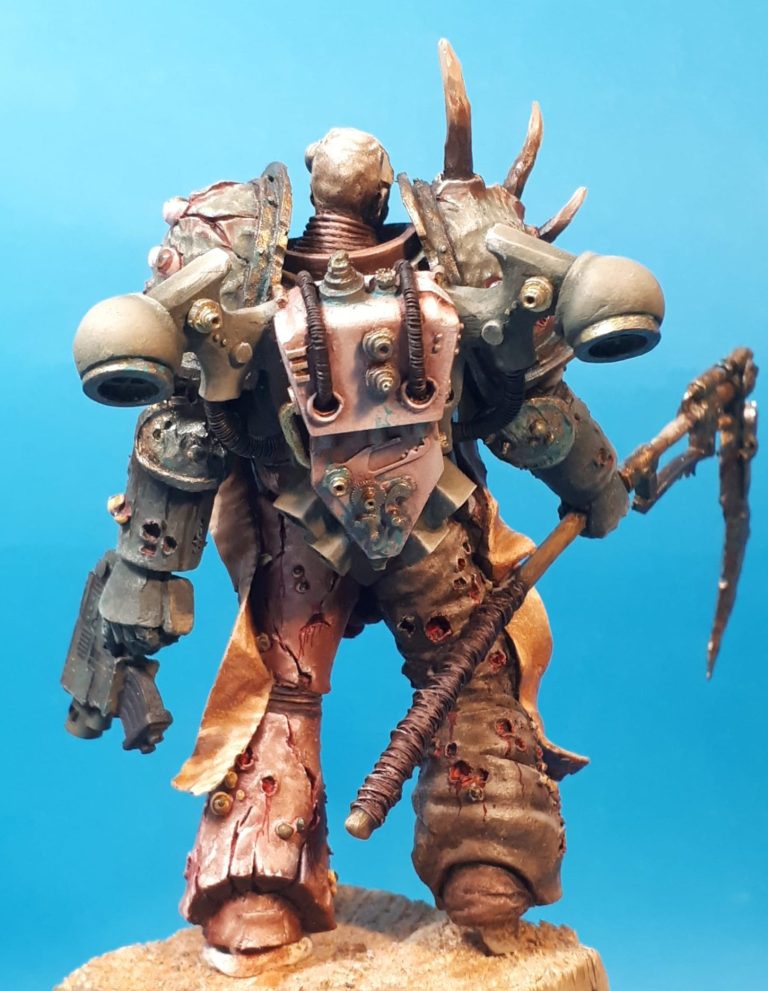
Photo #9 shows he arms temporarily fastened in place. What I had noticed early on was that the stance of the figure is kind of bent backwards. I’m not sure if this was intended by the sculptor, or if perhaps over the time he’s been standing in certain areas of my painting room, he’s just got too warm and the resin has become bent. Either way I’d have to have him standing on a bit of a slope so that he didn’t look unbalanced.
Photo #10 shows the back of the figure, the backpack is a model all on it’s own and is a superb bit of sculpting and casting. I painted it to match the flesh / green colour combination as the rest of the figure, adding a few touches of the brass / gold colouration to some of the valves and fittings.
In photos #11 and #12 I’ve painted the long scarf-like scripts to look like aging paper or possibly human skin ( it’s going to be the latter of those options really, isn’t it ? ).
It’s looking pretty complete now, although the arms are still only held on with blu-tac.
The small details keep on getting added now, trickles of blood-tinted ichor that are seeping from small wounds are painted on with thinned Alizarin Crimson oils, some cracking to the edges of the flesh coloured areas with Burnt Umber oils for the crack, and titanium White oils to highlight the edges of them.
All these and other little additions might not be instantly noticed, but they add to the look of the model as a whole.
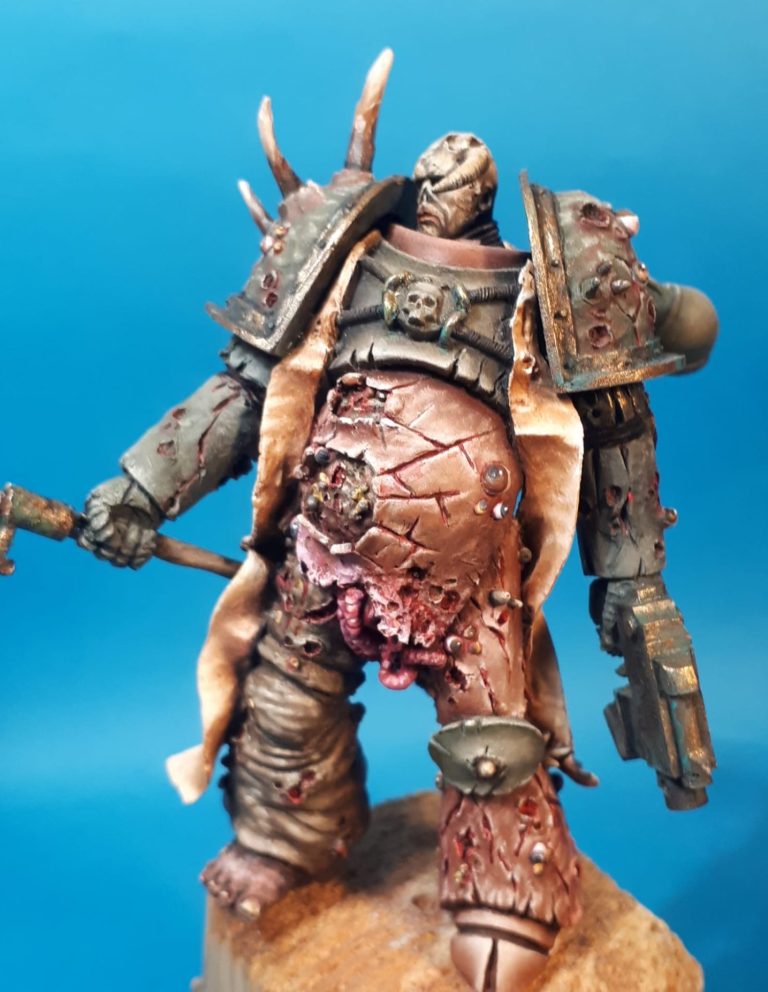
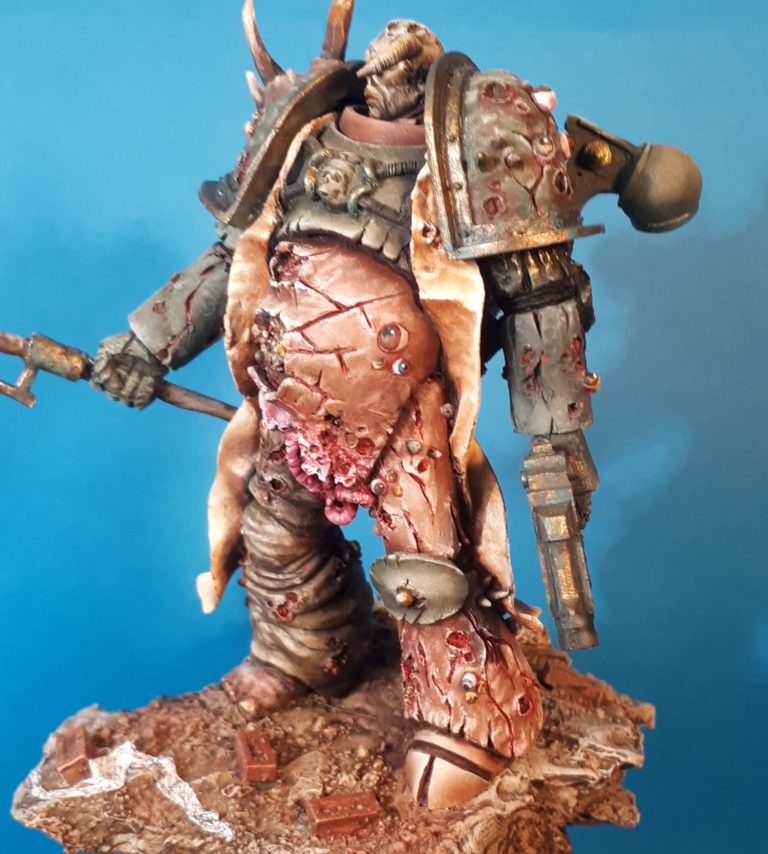
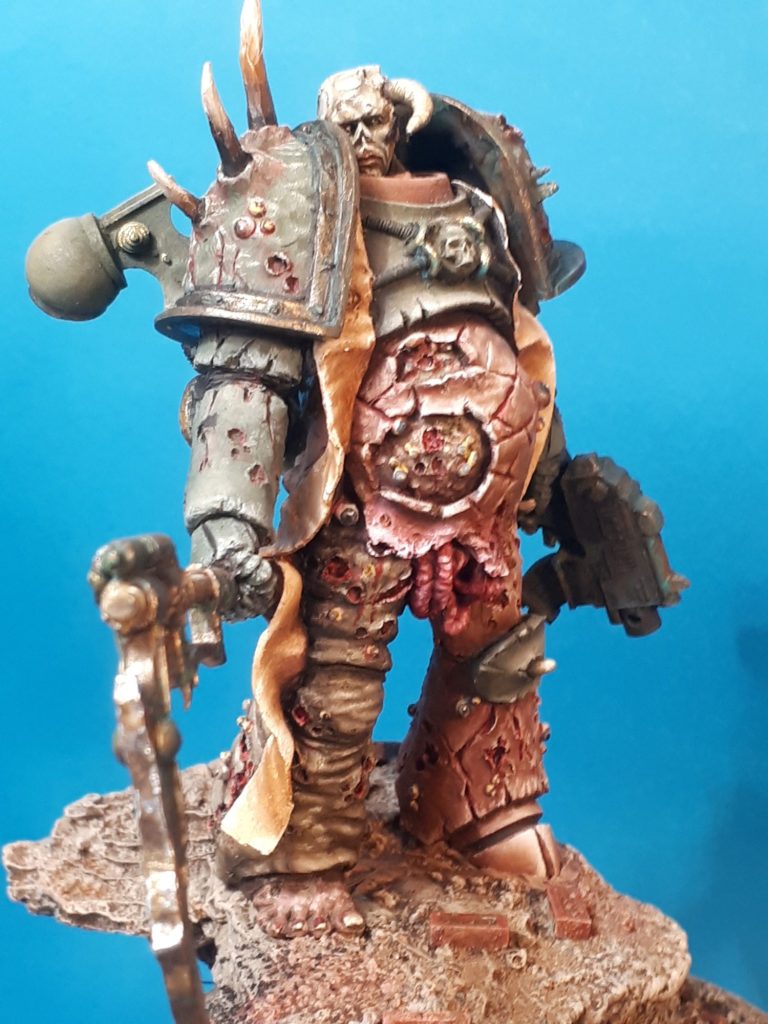
Photos #13 through to #20 show different views of the Michael Kontraros figure painted up and finished, he’s also been added to the final base, but I’ll get to that in a little while.
The setting and final idea for the model took a good long while to take root and flourish in my mind, and it was the release of the Games Workshop Primarchs – well me noticing them having been released, truth to tell – that gave me the idea.
The GW Primarchs are really nice individual figures, costly I know, and larger in size compared to normal space marines.
This gave me the idea that this large scale Nurgle-like figure could be one of the chaos Primarchs, having developed his chaotic look and infestations over hundreds of years, and now appearing more like a Nurgle Demon than the human that he began life as.
Maybe he’d grown even taller in stature too……
I’d got the GW Nurgle Plague Marines on a shelf, and like a lot of the plastic models that GW have replaced the old White Metal with, these are excellent little diseased fellows.
Initially I thought of adding two to a ( as yet unbuilt ) base with the much larger MK figure, but the set is so good I decided to make three of them.
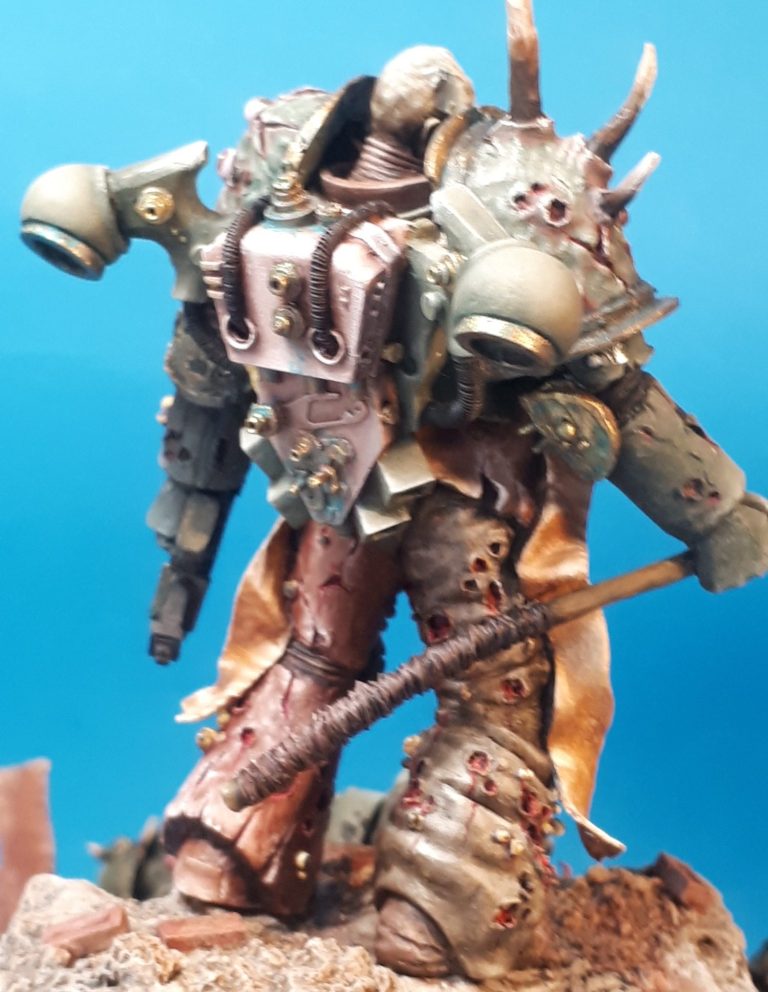
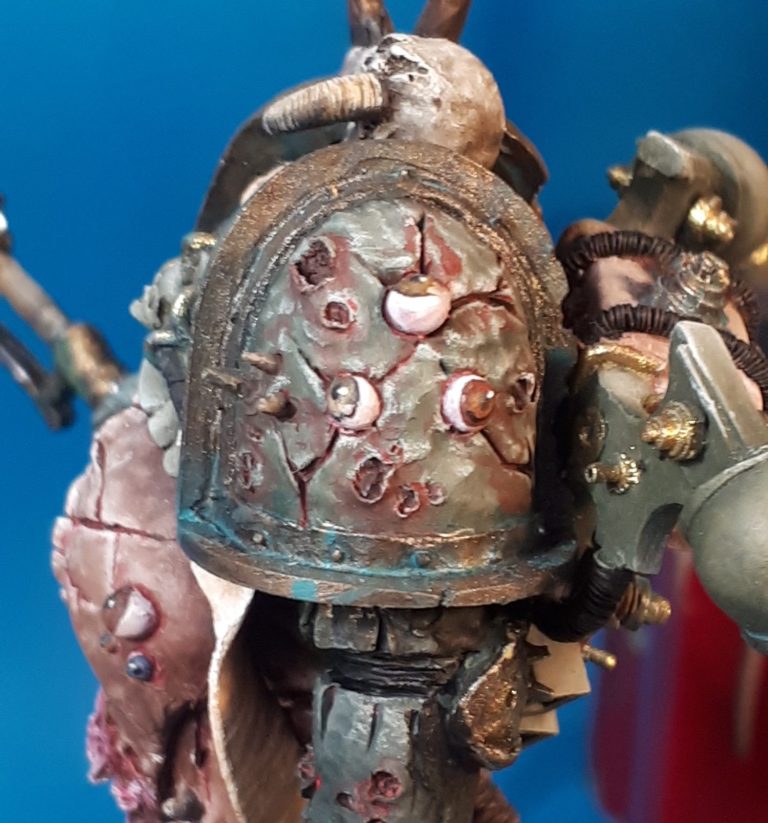
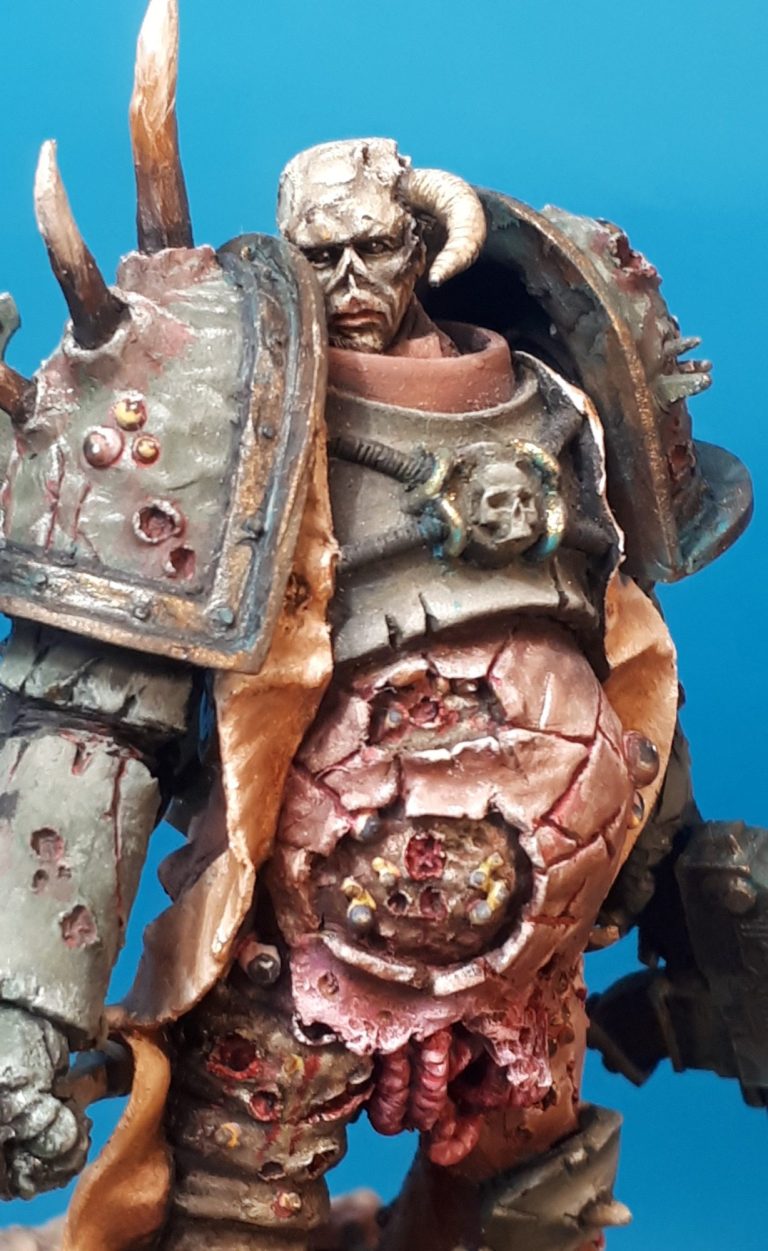
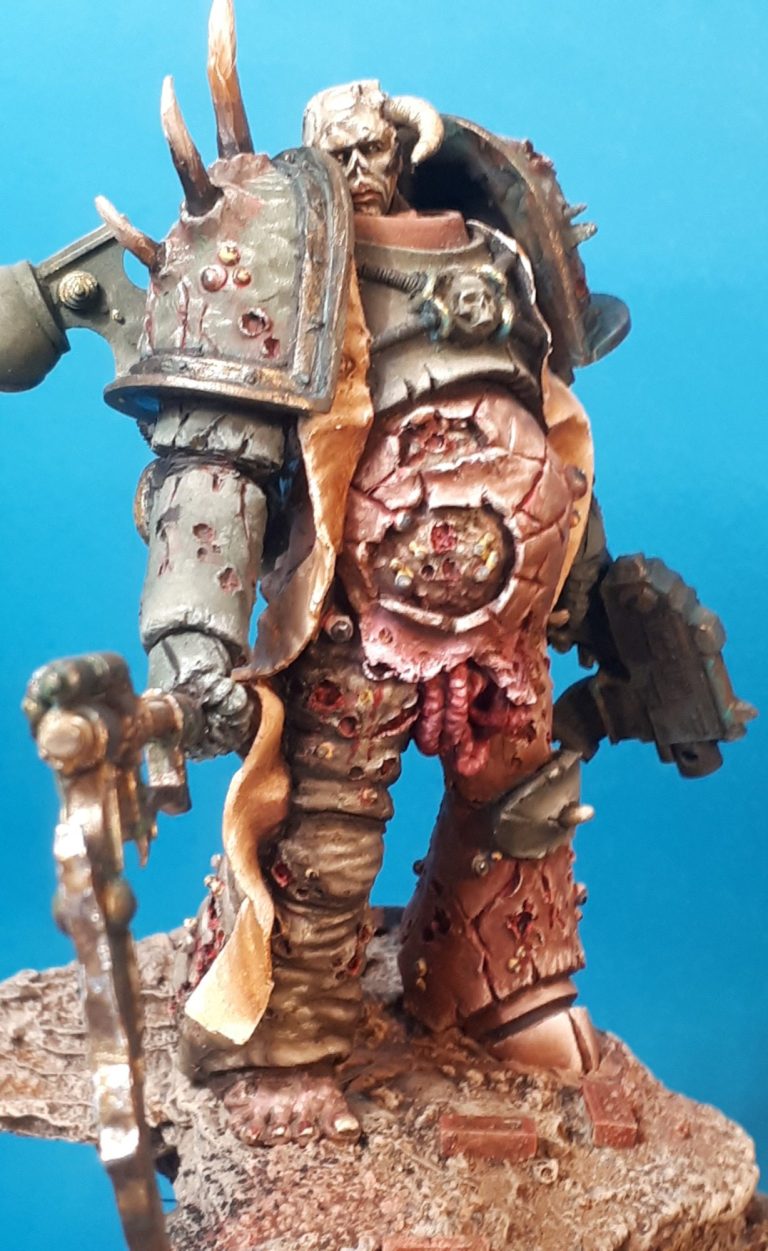
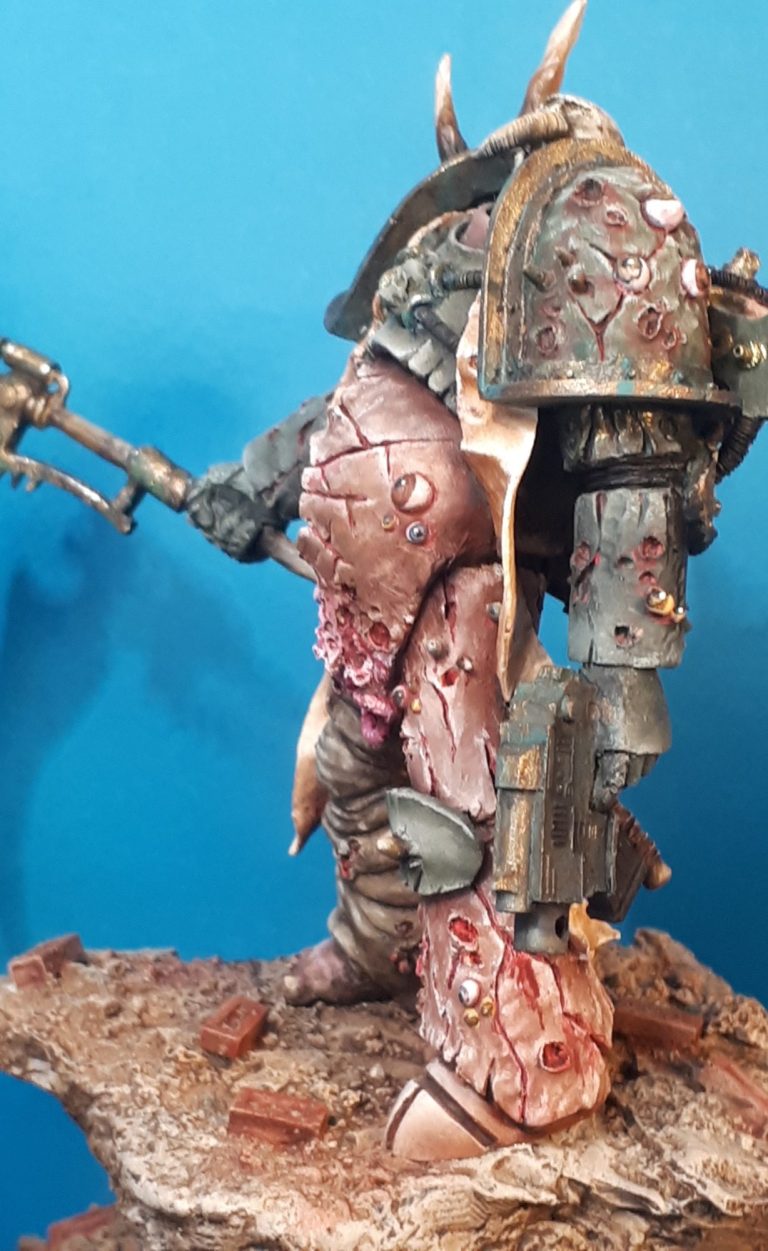
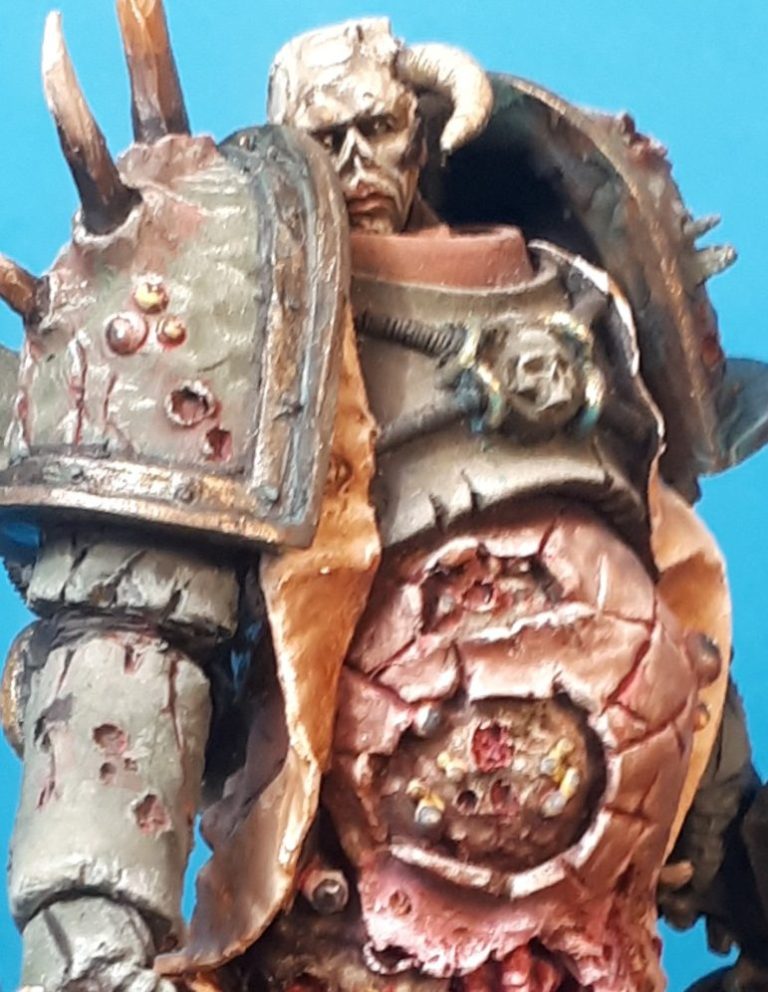
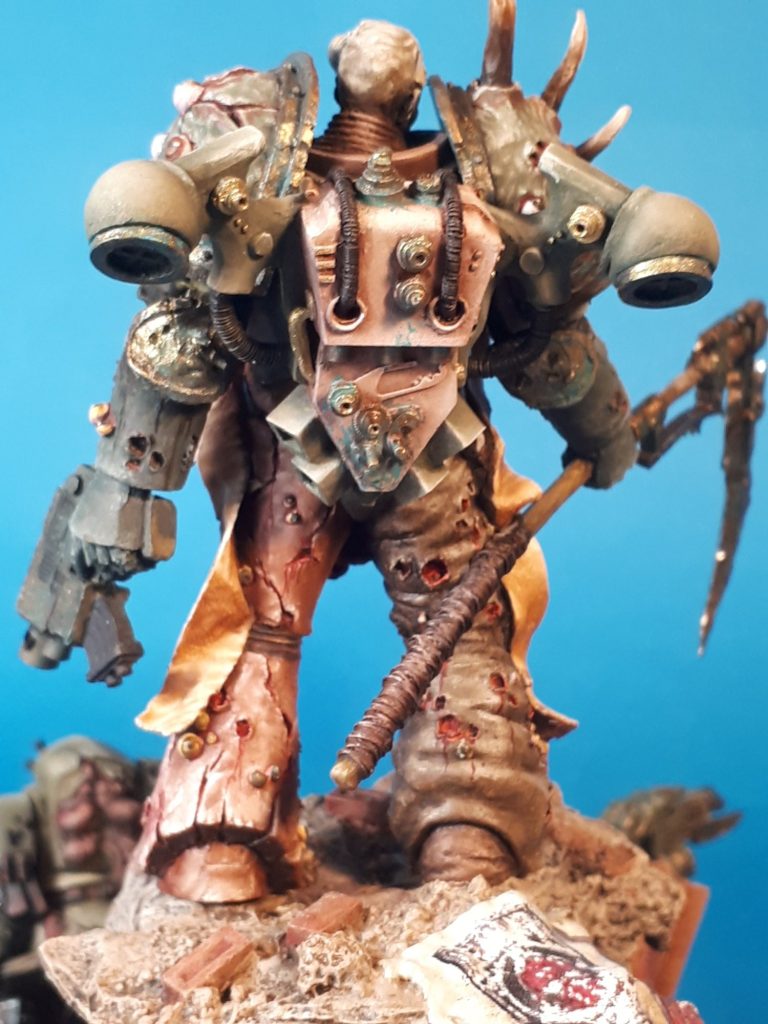
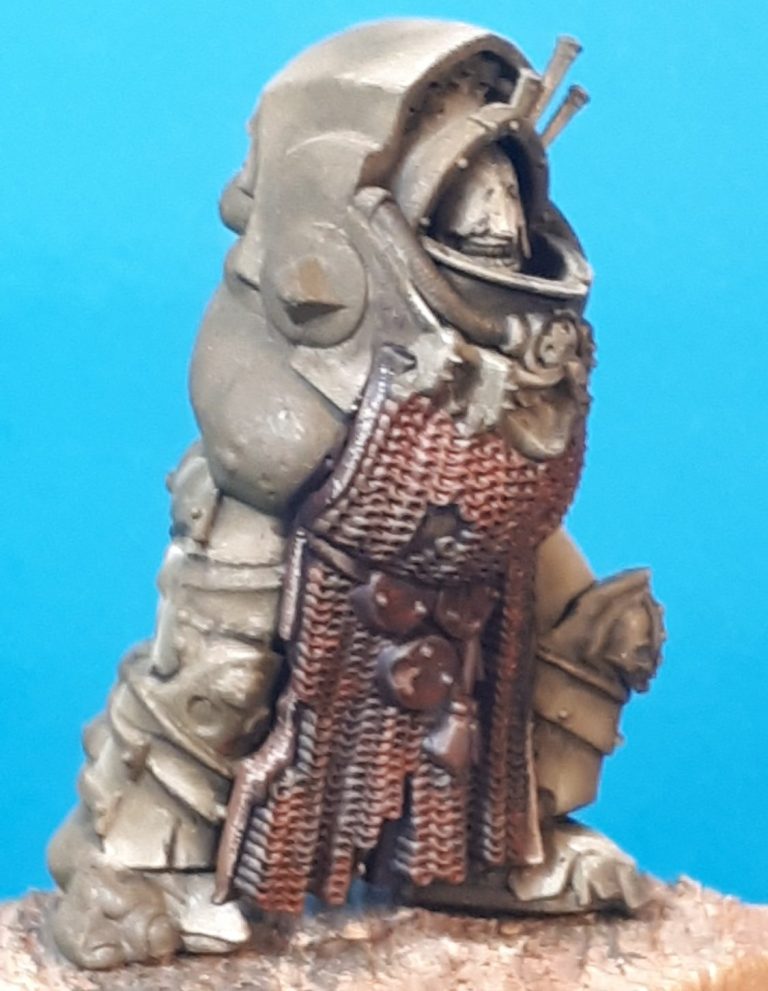
Photo #21 shows the first of these at the beginning of painting. I constructed the bodies but left the arms separate, and used a similar green mix – Mars Black and Chrome Green oils over an Olive Green acrylic undercoat, then adding a very small amount of Mars Yellow and Buff Titanium oils to the mix to build up the mid-tones and highlights.
At this point I’ve let those colours dry and also added the colours on the mail – some Dark Steel acrylic from the Darkstar Metallic acrylics range with pin washes of Light Red oils to make the metallic colours appear rusty.
Photo #22 shows the back of the same figure where I’ve started adding washes of a much darker green mix, thinned with White Spirit and painted into the deepest recesses of detail, or areas that I want to appear a lot deeper than they actually are.
This can be seen best on the scale armour on the lower legs, and I’ll continue this upwards on the body and head.
Photos #23 and #24 show the arms going through the same process of painting.
There’s a lot of details that can be brought out with forced highlighting and deepening of the shadows, and like the much larger MK figure, it takes time to do but pays dividends in the end.


Other details that have been added can be seen in photos #25 through to #30 with cracked leather straps and belts, little green “jewels” added to the fly motifs hanging from his lower armour, the brown and green fly motif on the shoulder pads and the rust staining on the axe-like weapon, stained teeth and little curls of tentacles peeping out from under his power armour….. The list goes on.


With photo #31 I’ve moved on to a second figure. The basic painting is the same as the first one with the addition of a cloak. I decided to paint the cloak with a pale colour almost matching the areas of flesh on the MK figure and added basic fly motifs to it in a dark brown..

Photo #32 shows the size difference between the MK figure and one from GW, quite a big difference in fact, but one I thought worked well.
Photo #33 jumps forward quite a way to partially reveal the final setting for the models, and showing the first of the GW pieces on a piece of ground strewn with rubble.
Photo #34 returns to the second of the GW figures, this one still has an arm missing, although the right arm being stretched out the right allowed me to fasten it in place prior to painting.
There’s some small clawed arms to paint on this one too, and quite a lot of horns and spikes.


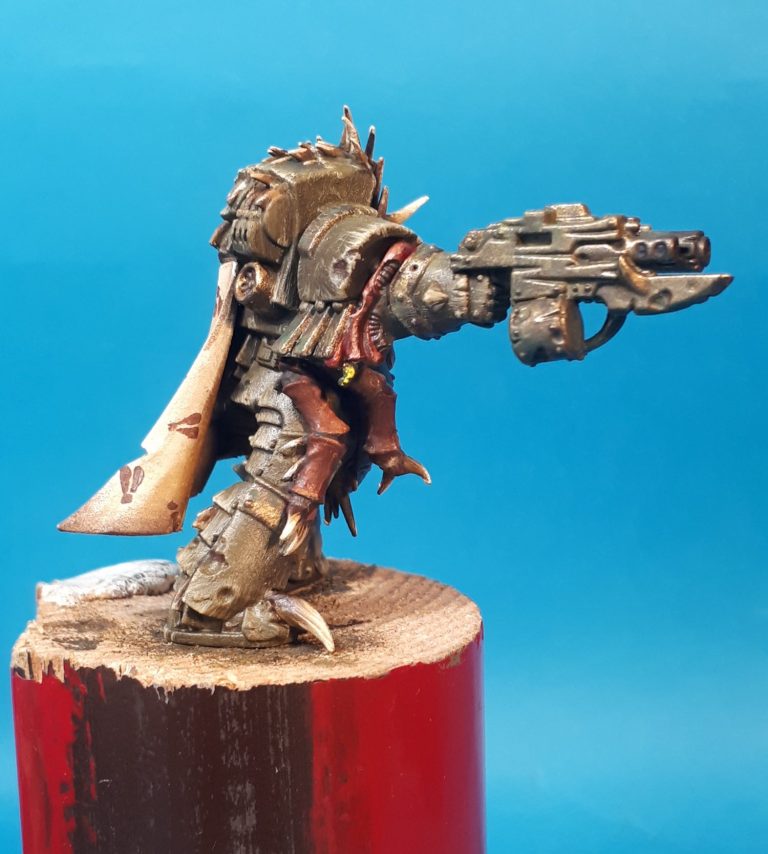
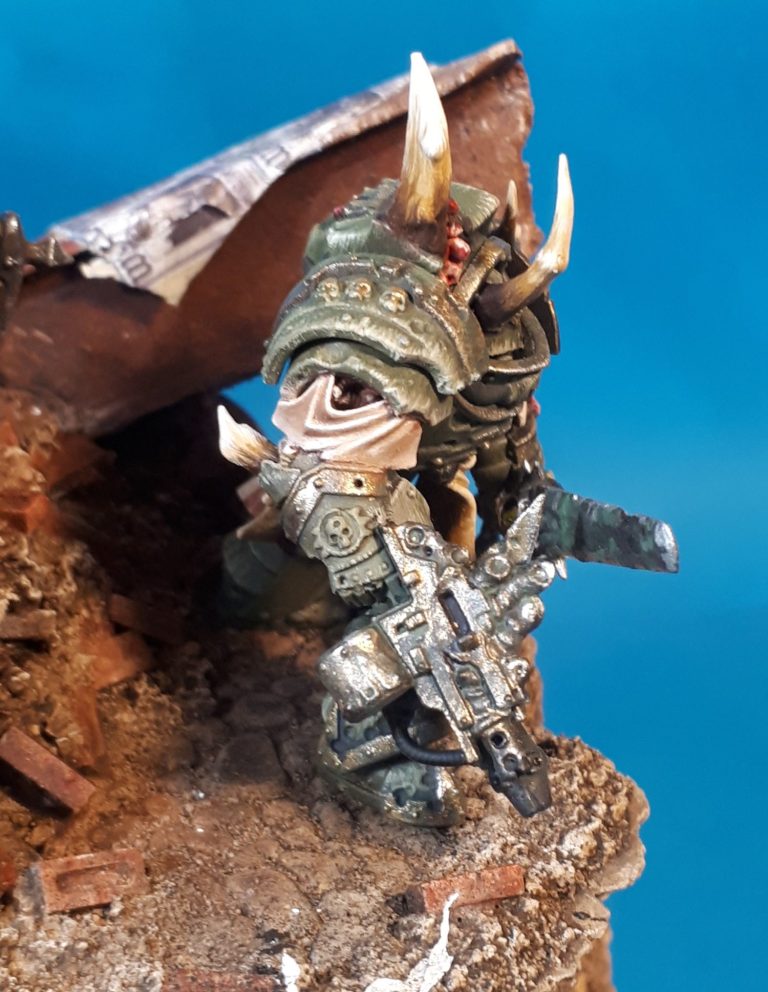
Photo #35 shows a side view, the clawed arms being more visible from this angle along with the decayed looking bolt pistol.
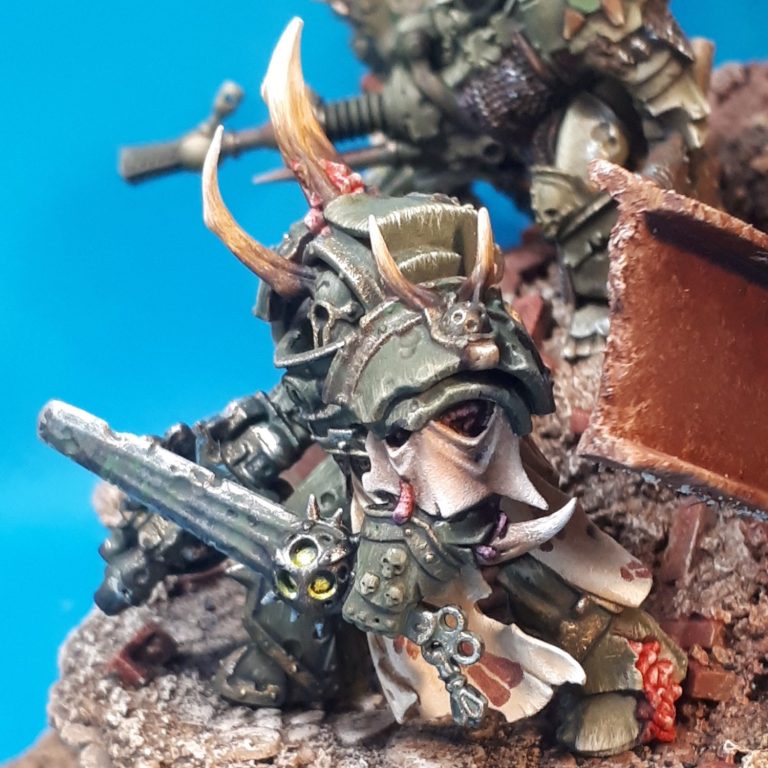
Photo #36 moves onto the third and final GW figure, again painted in a similar colour scheme but with a few more corroded brass areas added to the edges of the armour.
There’s a couple of ragged cloth sections too, the larger one having the fly motif in brown to match the second GW figure.
Photo #37 gives a view of the back of this third marine, some drippy ichor coming out of the left leg and the cooling fan on his back added a break from the green and cream colourations.


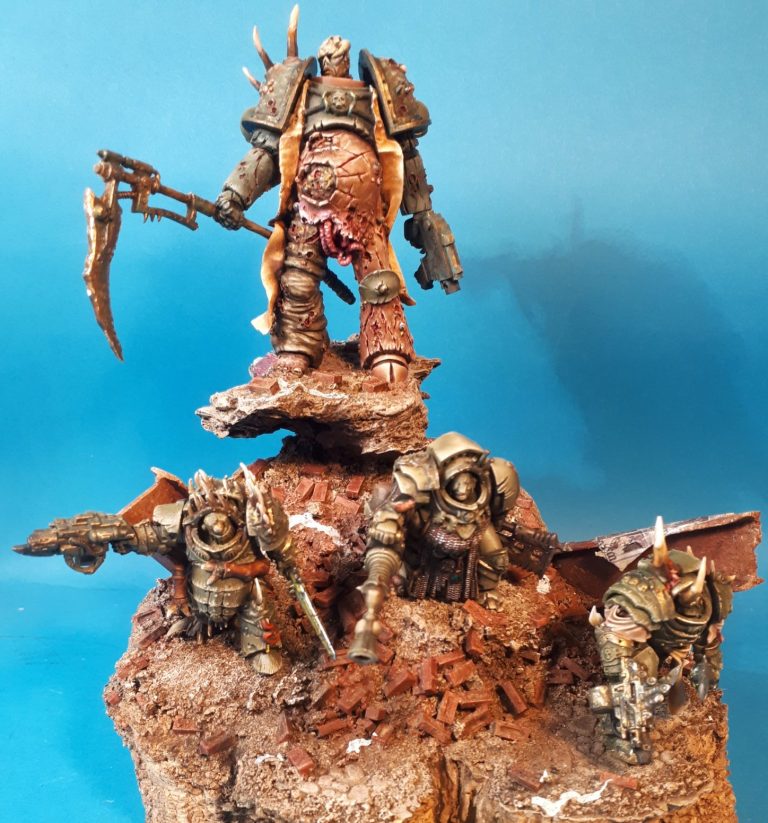
Photo #38 shows a test of the final scene. The groundwork hasn’t been painted yet, it’s simply a case of having chosen a suitable plinth from Oakwood Studios, planned for the MK figure to be uppermost and most prominent, and the three smaller GW figures to be placed lower down amid the destruction.
So how was this built then ?


Photo #39 shows the components that would be used. Starting at the top left, there’s the already mentioned plinth from Oakwood Studios, and the white stepped piece to it’s right is two layers of polystyrene that would be used to build up the back of the groundwork. Next to that is the original piece of resin groundwork that comes with the MK figure. This will be used for him to stand on and raise him even further above his little minions.
A box of milliput epoxy putty is self-explanatory and will be used to form the groundwork upper layers.
There’s two pieces of wood veneer that will cover the back and left hand side of the base and along the bottom of this picture is a piece of resin cobbles that will be used in the foreground and a couple of pieces of “I” beam plastic that will be painted up to resemble broken girders.
In addition to this I’d use some 1/35th scale bricks and some Chinchilla Bathing Sand to build up the texture of the groundwork.
In photo #40 I’ve begun combining all those ingredients, fastening the polystyrene in place along with the two veneer side-pieces and then added the resin groundwork to the top of that using Milliput to hold it in place.
The resin cobbles were snapped into two parts and glued to the plinth at the front.


Photo #41 shows a side view of the base so far, the resin piece overhangs the back slightly, and I wish I’d thought a bit more about that and pulled it’s edges into the scene more so that I could fasten the model into a carry case a bit more easily….. But I didn’t, so it’s a bit of a problem to transport.
Photo #42 shows the front of the base again, this time with the girders in place. And who knew that superglue melts polystyrene…. OK, hadn’t thought of that, but apparently one discovers these things sometimes.


Photo #43 and a side view again. I intentionally had the girders poking up at different angles, I wanted to step well away from any kind of order on the base, and keep the chaos theme going even with the groundwork ingredients.
With photo #44 the groundwork begins to solidify with the addition of the Milliput.
Why add that, isn’t it a waste ?
Well, in order to securely pin the models to the base I’d need a fairly solid substrate. The polystyrene doesn’t supply this, so the models would be likely to move about, if not become totally detached from the base, so a thick layer of Milliput goes a long way to supporting the models and giving the pins something solid to poke through.
The two parts of the Milliput are mixed and then rolled out on a tile with some French Chalk to stop the putty sticking. One side of the flattened putty is then wiped with a dampened tissue and then that side is placed onto the base. I also add a thin layer of wood glue to the polystyrene to help the milliput stick, although once it goes hard, it’s unlikely to be going anywhere soon.


It still looks a bit too evenly stepped, and the girders came off for the Milliput to be added – they’d lost their grip on the polystyrene anyway.
Photo #45 and before the Milliput cures, as piece of stone is used to texture the surface of the putty and break up the stepped appearance a bit.
The trick to stopping the putty sticking to the stone is to have a bowl of water to hand, and dip the stone in the water fairly regularly - see the previous shot.
Photo #46 shows the putty after it’s been textured and moved into better shapes. I’ve added some Milliput to the resin at the top too, and textured it to match in to the resin.
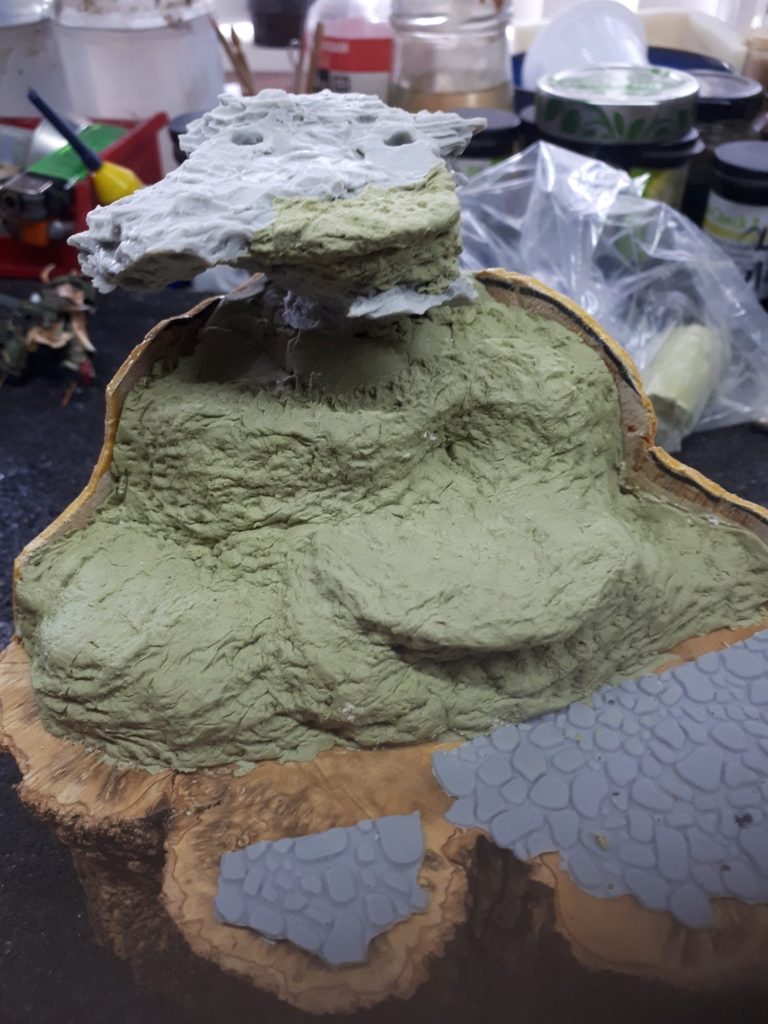
Photo #47 – Superglue, cat litter and Chinchilla Bathing Sand, which will be used to cover some of the Milliput along with some of the 1/35th scale bricks that are shown in photo #48.


Photo #49 shows one of the girders back in place, and I’ve added on some of the sand, litter and bricks to the side of it. They form a natural slope and by carefully dribbling on Superglue ( Don’t breath the fumes and only add a little of the glue at a time ) onto the mix of sand etc it is fastened in place.
Photo #50 shows more of this having been done to the right hand side of the base, covering some of the Milliput but adding a lot of detail to the scene.
Photo #51 and I’ve added more of the sand / litter / brick debris along with a brass tube that will be a dripping waste pipe.
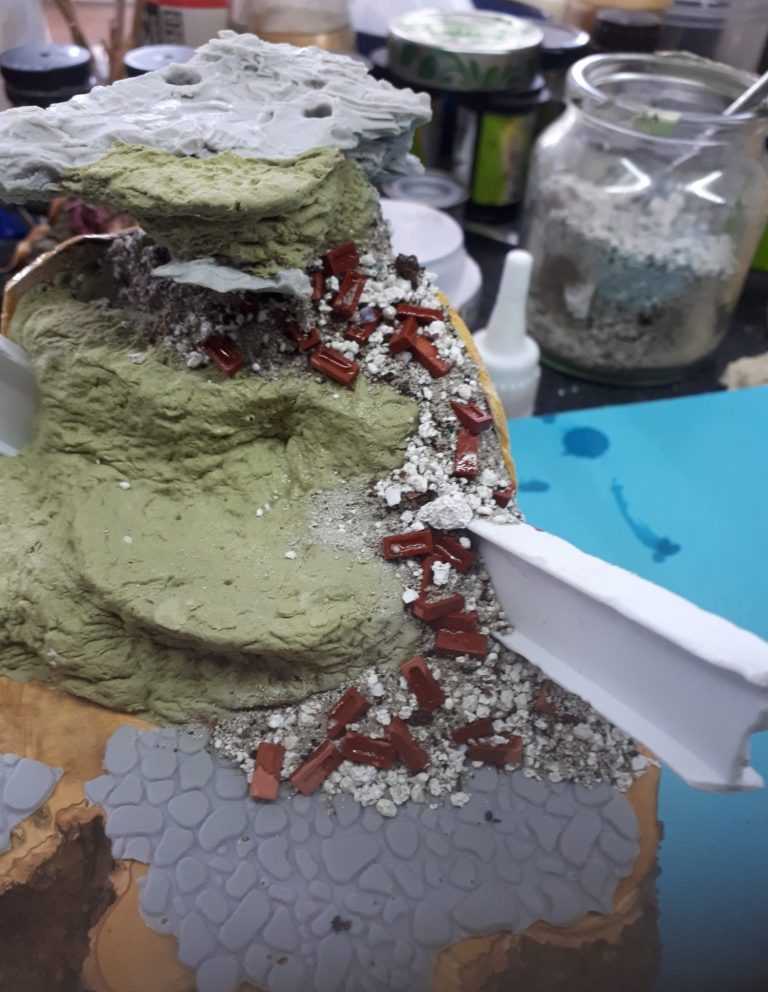


Photo #52 and the scene is almost complete and ready for painting.
The connection between the different ingredients that make up the skeleton of the groundwork are all connected together with the sand / litter / brick mix, there’s just a bit of sand needed at the front to hide the gap in that resin cobble section and the wood plinth.
In photo #53 I’ve added a couple of coats of acrylic paint to the groundwork to blend all the different materials together prior to adding oil colours.
Photo #54 shows this process beginning with the girder having been painted with rust colours – Mars Brown, Light Red, Mars Yellow and Buff Titanium, and the groundwork having been coated with a thinned Vandyke Brown oil layer which was left for about half an hour before adding Buff Titanium Oils with a large brush, almost drybrushing this on, but with some stippling to even out the colours a s well.
Once dry some more of the Light Red was added to the ground around the base of the girder to look like rust seeping off it.
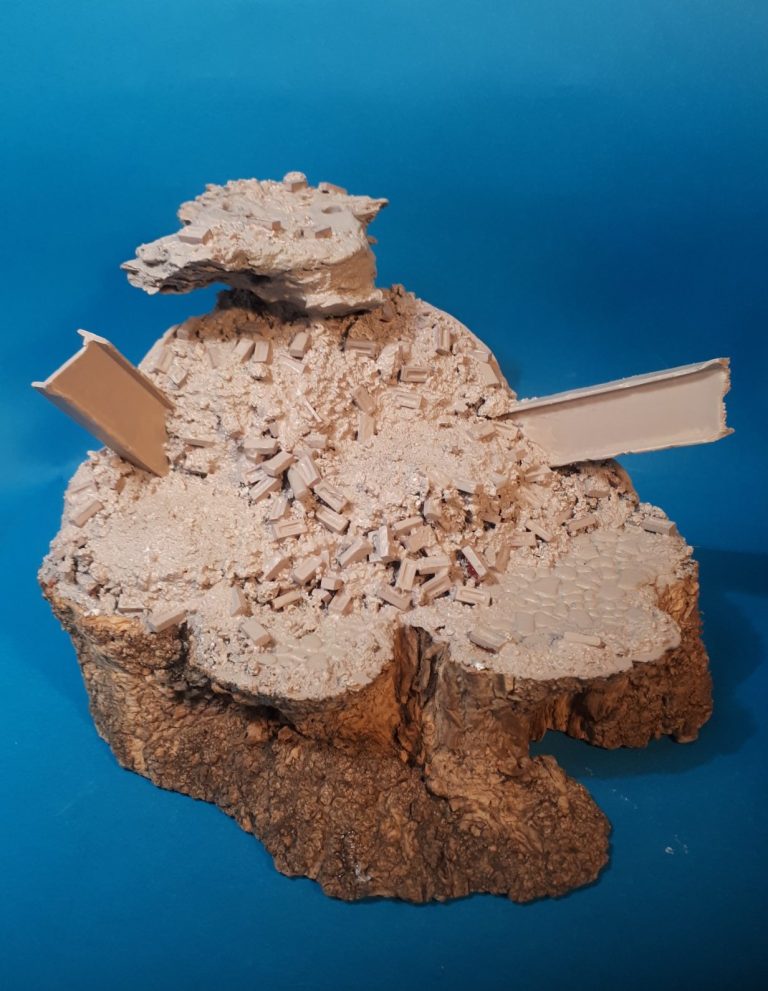
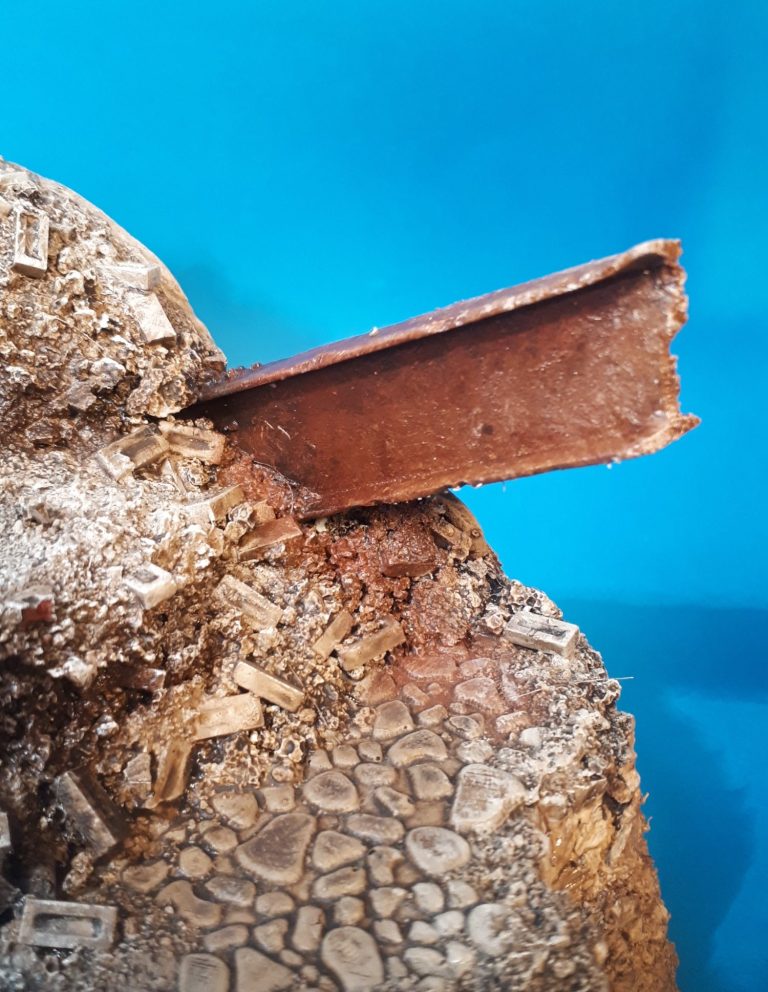
Photo #55 shows the other girder, treated in exactly the same way, and looking just as rusted and corroded.
Photo #56 shows an overall view of the groundwork at this stage. It looks very flat and needs some darker colours adding in to pick out the different areas, plus all of those bricks needed picking out too.

Which brings us nicely to photo #57 with the figures all in place. One thing that I haven’t noted is that when gluing the sand mix in place, I had to make a slight depression that would accept each of the figures – doing this by having removed the tab of plastic from underneath each one, the tab that slots into the usual black plastic base, and then putting the figure where it’s going to be to make the slight depression.
Any gaps can be filled afterwards with a small amount of sand and superglue, and then painted to match the surrounding terrain.
One final addition I made was some propaganda decals that I’d printed off, and also some spare bits of white decal sheet that when crumpled up, look like old paper rubbish strewn about the base.
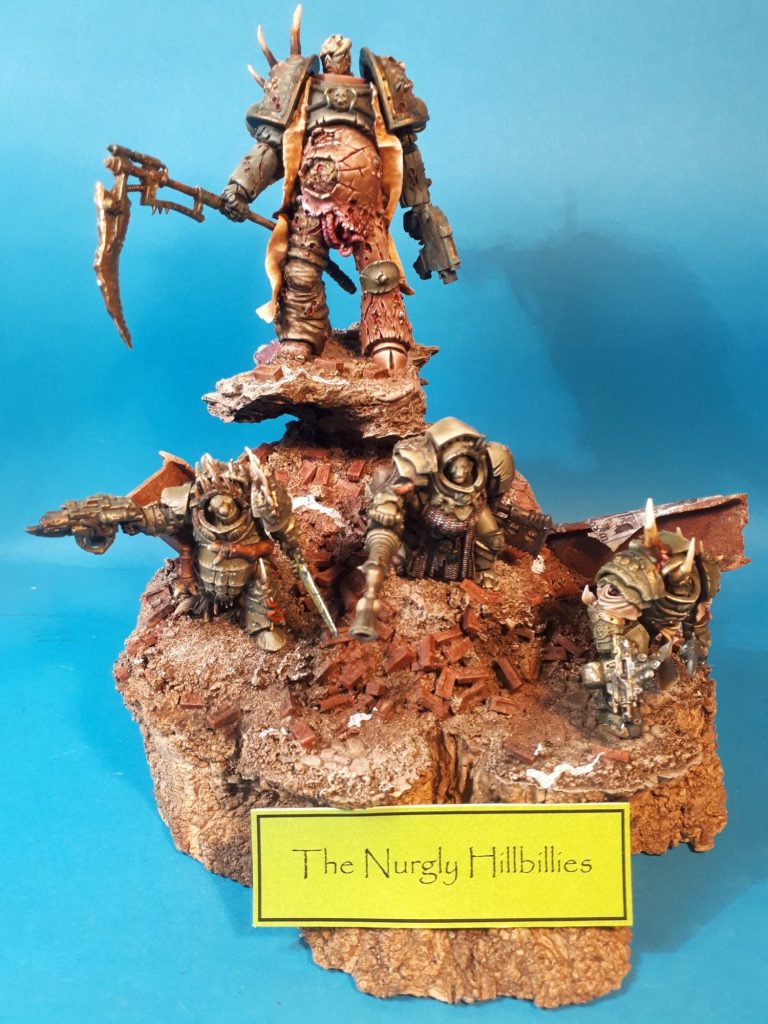

As for the name, I’m not sure if “The Nurgly Hillbillies” was my idea, or someone else’s, but it somehow seemed to fit the little group, and perhaps gave folk of a certain age a chuckle.
The rest of the shots show some close ups of the GW figures in their finished state along with the groundwork they’re set into.
Final thoughts.
In all I think this little project took around five years to complete from when I first put paint onto the large MK figure, well, that’s what the dates on the photo files are telling me. It actually feels a lot longer that the MK figure has been staring at me in an accusing manner, trying to get me to finish him.
However I did enjoy the process of making the little scene, and although I kept breaking off to do other things, it doesn’t mean that I didn’t like any of the models, I just had other things to do.
I’m particularly pleased with the groundwork, the debris-strewn base isn’t something I’ve attempted before, and the stepped idea with multiple models is a departure for me too.
MK along with Scibor Miniatures have done a few GW related or inspired figures, and both companies are worth taking a look at for something linked, but distinctly different that can be blended well with the GW universes.