Siamese Fighting Fish
Original Fighter is a 1/1 scale Resin kit from Robot Rocket Miniatures with Additional scratch built fish.
Painted in 2023
So why fish ?
Well, it’s my other long-term hobby.
I got my first fish tank for my 10th birthday, back in the misty past of air pump driven under-gravel filters. It makes me feel old to say that that was 49 years ago.
At age 13 I even started work helping out at weekends in our local Tropical Fish shop – Aquascope - in Blackburn, and although I had to leave there and get full time work after leaving school, I have returned to working in a similar place – Pier Aquatics in Wigan - part time now I’m semi retired.
When Robot Rocket Miniatures released the model of a Siamese Fighting fish ( Betta Splendens ) I wanted one for the grey army, to paint “at some point”.
By the time “at some point” changed to “I’ll paint that now” I’d seen a few examples of what people had achieved colouration-wise, and my thoughts turned to all the real life examples that we had in the shop for sale – excellent references, if they’d stay still long enough to get a decent picture !
The kit
Is lovely, it’s around life sized for what shops would term “Extra Large”, although most of the time shops sell fish that are a lot smaller and younger than the one the model is based upon.
The kit comes with all the fins as separate components, slotting into furrows in the back, tail and underside for the Dorsal, Caudal and Anal fins respectively, and the Pectoral and Ventral fins fitting in to recessed areas in the appropriate places.
As people had painted the model as-supplied, I thought I’d try something different and asked if there were any spare castings of the body that I could buy.
Unfortunately there weren’t, but after a quick discussion I was very kindly given permission from Matt at Robot Rocket Miniatures to make a mould and take a casting of the body of the fish, which I promised would be for my own use on this project only.
Having done that, I made three castings of the body to get one perfect one, one to practice on, and a spare just in case things went wrong, and then cut up the rubber moulds, destroying them completely.
The Plan
So a bit of background of what I wanted to do.
Siamese Fighting Fish are a peculiar species. Most other fish will tolerate others of their kind with little or no problem, the only exceptions being if there is too little space, or if a breeding pair decide to set up a space to lay eggs.
Fighting Fish are unusual in that males of the species will display and fight with other males at any time, doing physical damage to each other with little let up and with none of the above reasons of space or mating.
They actively seek to fight with each other and can be seen displaying at each other, even in shops where they’re usually kept in very small tanks.
However, they are, the males will live quite peacefully with other fish in a community tank.
Females of the species can be kept together peacefully and for breeding purposes multiple females are kept with a single male.
As for breeding the fish, well the male makes what is termed a “bubble nest” literally blowing small bubbles at the surface of the water and assembling them into a mound, usually attached to a leaf or other object at the water surface. In captivity the nest is usually at the surface in the cornet of the fish tank.
Once the “nest” has been built he then entices a female under the floating bubbles and curls around her to release eggs, which he fertilises at the same time, and then gathers the eggs to insert them up into the nest of bubbles.
The nest keeps them at a steady temperature and whilst the eggs develop, the male guards it.
Once the eggs hatch, the fry – which can number a couple of hundred – tend to exit the nest and basically get all over the place. Sometimes a male will try and catch them and put them back, but sheer numbers means he’s fighting a losing battle.
The fry quickly develop into free-swimming fish, and so long as other fish aren’t in the tank to eat them, and given that food is readily available, they grow relatively quickly.
My plan was to make a model of the stage where the male is curling around the female fish beneath the nest.
Sounds simple….. Um, maybe not as simple as I thought…..
Putting it into motion
Photo #1 shows the original kit partially assembled. I decided to glue the larger fins to the body and fill any slight gaps, leafing off the smaller ventral and pectoral fins as I wasn’t sure how the two fish would be joined together and whether these smaller fins might get in the way of making a close joint.
I’d been thinking of a way to support the fish, and had decided that the best way to do this in the final setting would be to have a wire inserted into his side and attach the other end of the wire into something….. OK, not much of a plan, but a work in progress for sure and hence he’s fastened to the bit of wood in the manner shown.
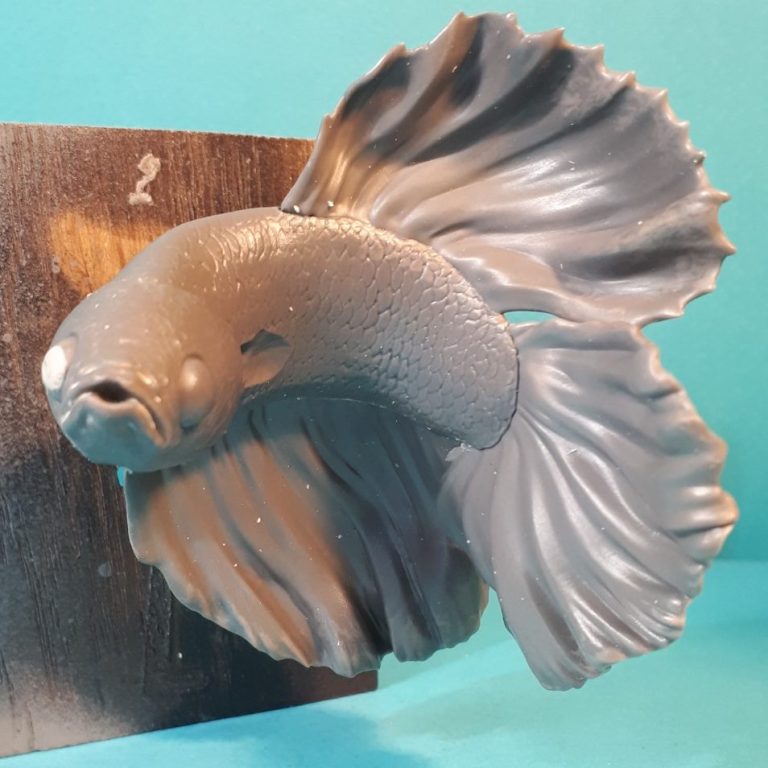
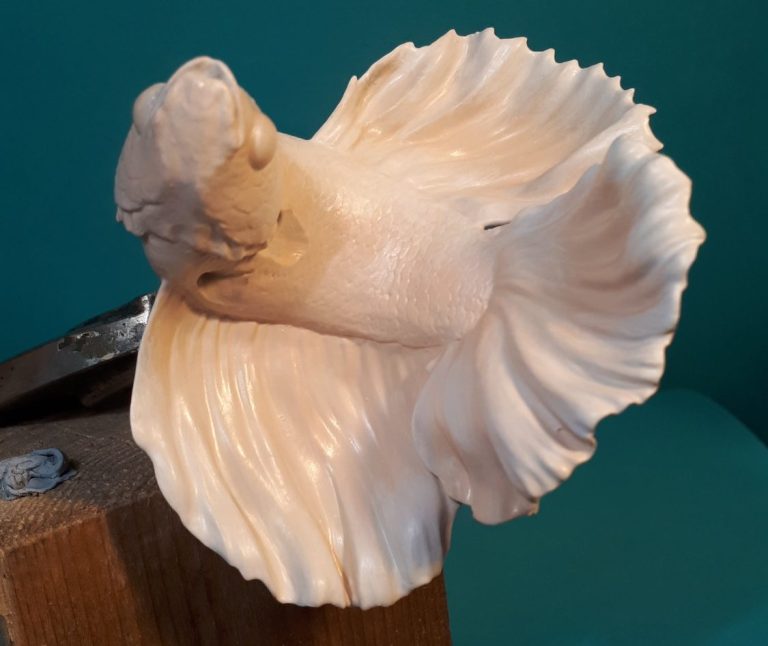
Photo #2 and whilst the wood block was good for a counter-weight, I wouldn’t be able to get to most of the back of the model to paint it, so the wire was held in a set of mole grips so that he could be primed, which is the point where this shot was taken.
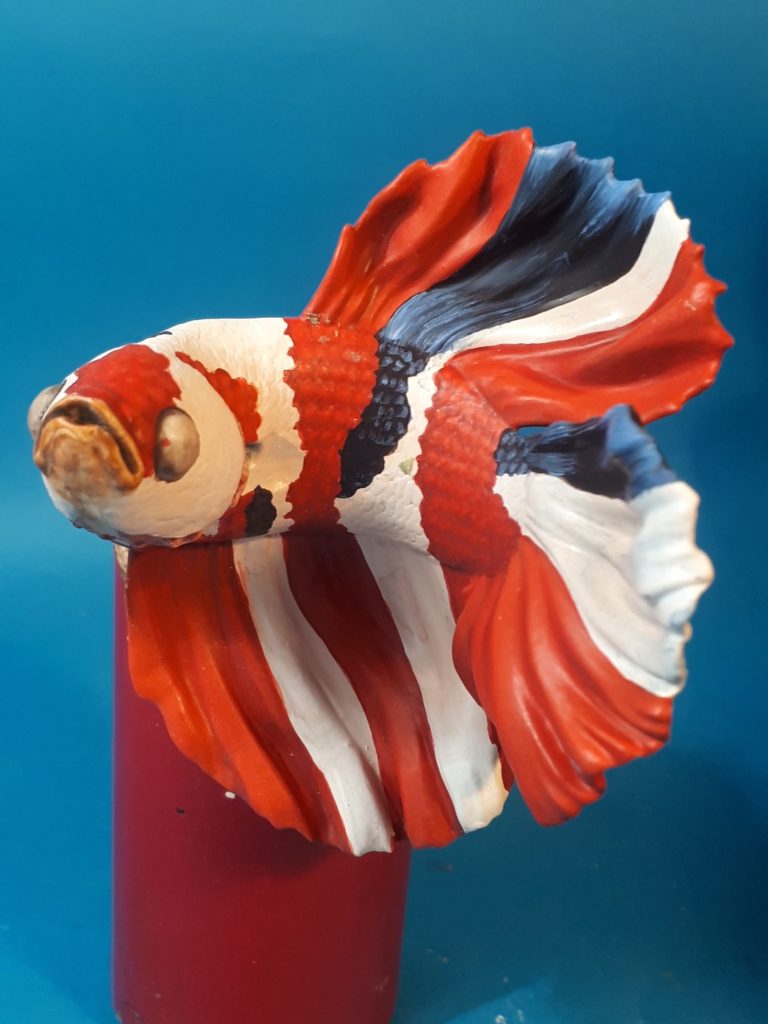
Photo #3 Ha, ha, references, and they abound at my place of work. In fact I had so many colour choices to choose from, it was a little bit difficult to decide “I’ll paint it like that one”
In the end I did choose to base the colouration on the fish in this photo, although altering some of the colour positioning was necessary as the tail fin had some clear sections.
This of course raised the question – should I have made moulds of the main fins and cast them up in clear resin ?
Nope, I felt that this would be overstepping the trust that Matt had given me, although it would have been a cool idea.
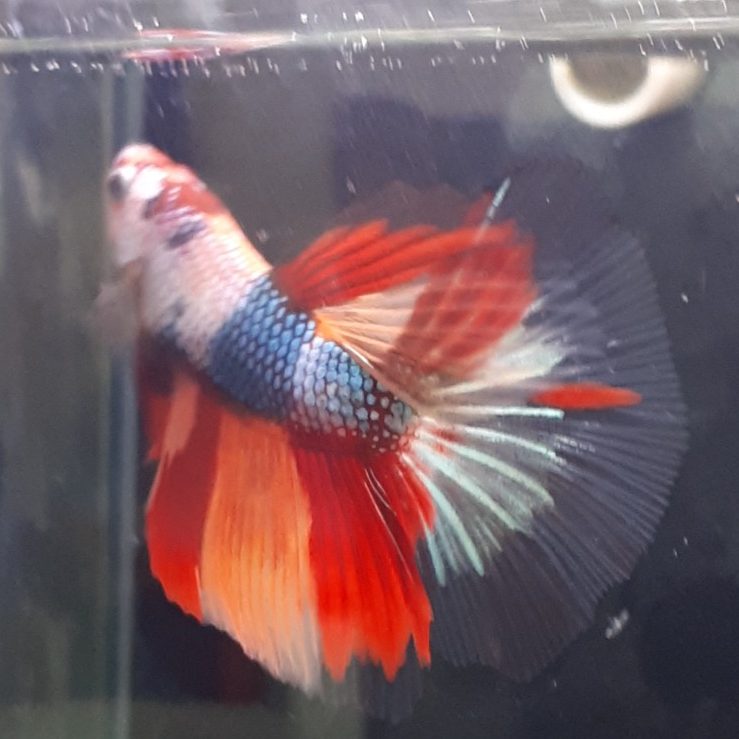
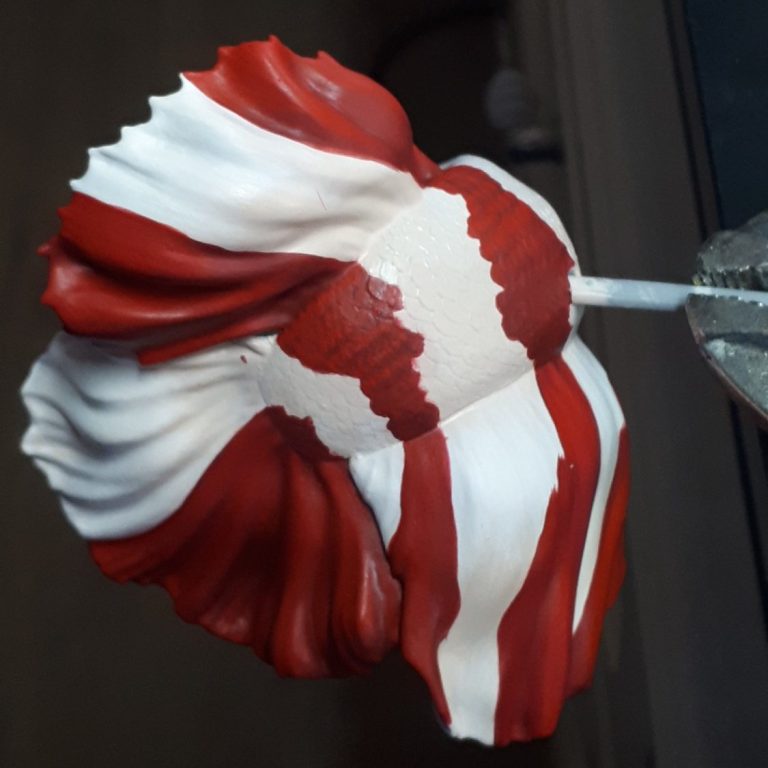
Photo #4 shows the initial addition of red to the male fish. As usual, acrylic undercoats using a Humbrol Crimson, topped off with Carmine Oils as a shadow colour and mid tones and highlights built up from Scarlet and a small amount of Cadmium Orange.
The scales on these fish are large enough to be picked out as individuals, but small enough that there’s a lot of them to paint….. Some cursing was involved.
Photo #5, and I’ve begun adding the blue sections, again acrylics as an undercoat, with oil colours over the top.
And photo #6 showing that process a little further along, and again lots of separate scales to paint on the body.
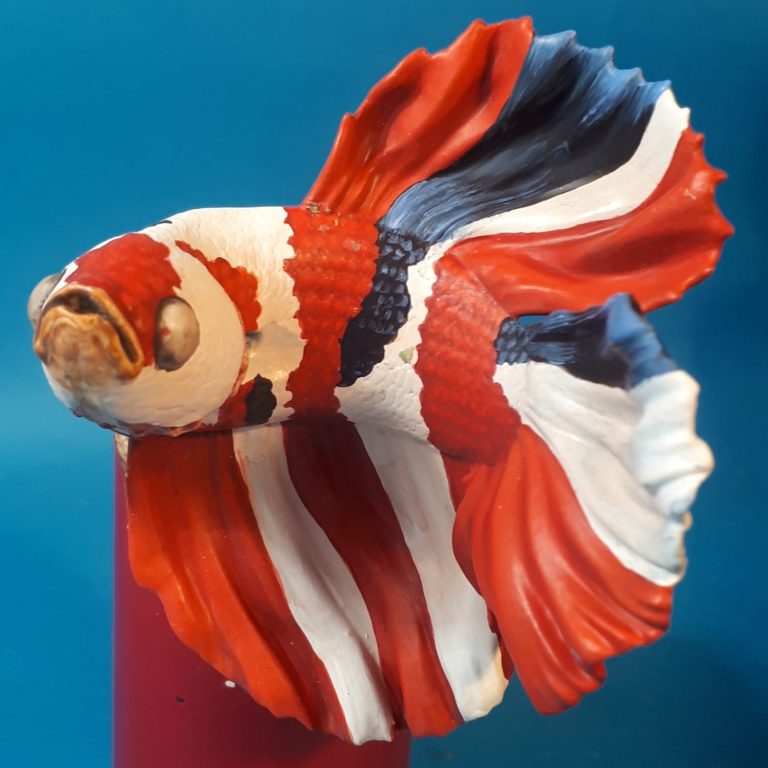
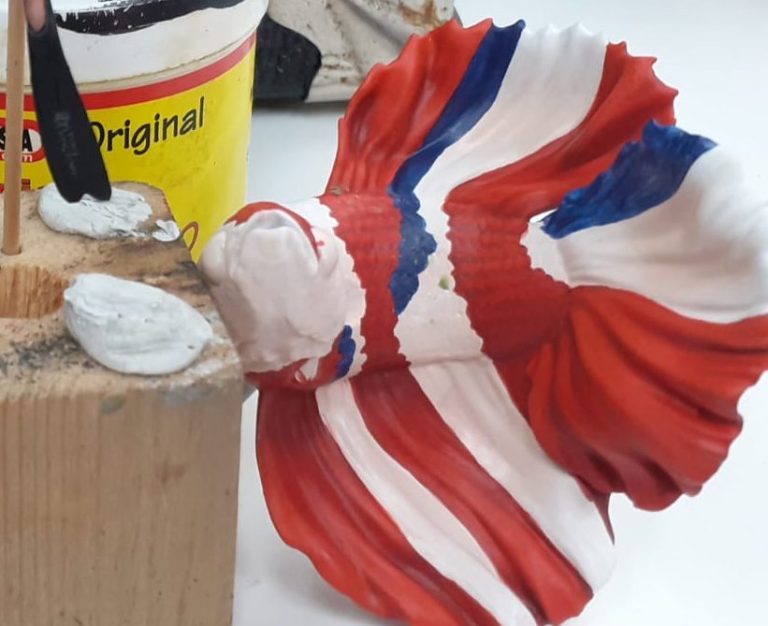
Photo #7 shows the painting mid way through the blue section on the body being done. The dark colour just below the dorsal fin is Prussian Blue, and to form mid-tones and highlights I mixed in and blended Titanium White. The same colours were used for the sections on the fins.
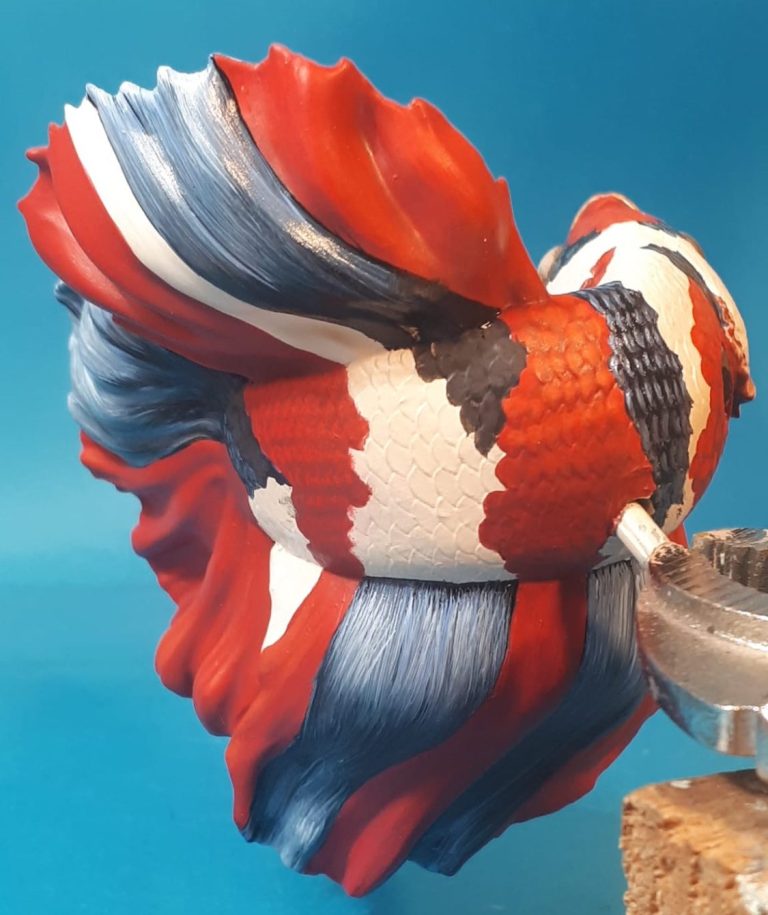
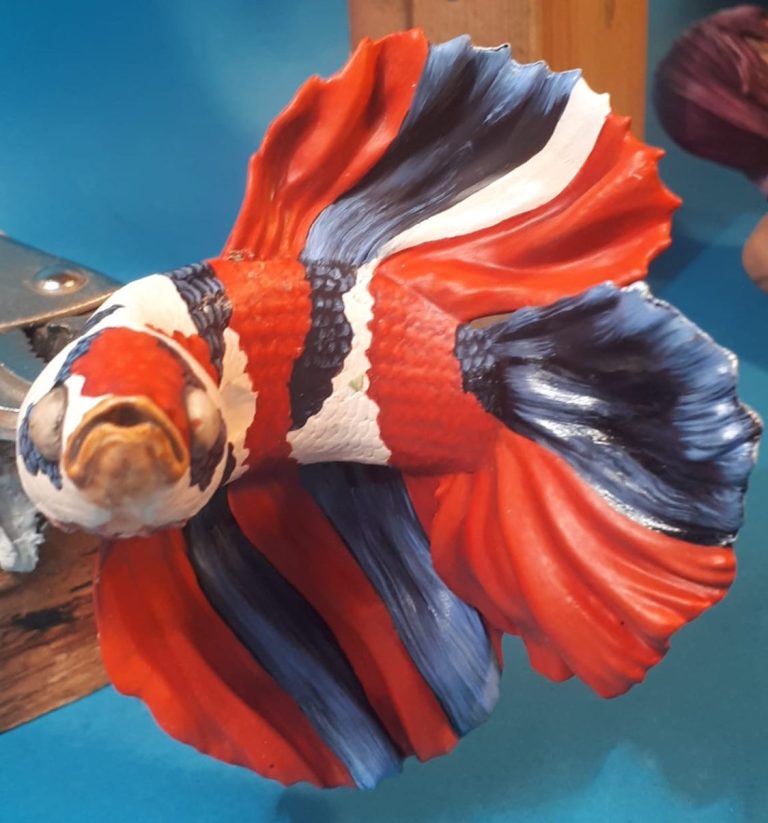
Photo #8 and the painting is nearing completion. The white areas, now I’d decided which were to remain white that is, were painted with a thin wash of Flesh coloured acrylic, and then each scale picked out with a mix of Flesh colour and White, then pure White used to form the highlights.
I realise that a lot of the areas painted with such painful patience would actually be hidden once the female fish was added at the front and the support for the two fish was added at the back, but it’s easier doing it now, than trying to fudge it when everything’s glued together and access for a paintbrush is a lot more difficult.
Time to look at the female fish.
Photo #9 shows the body having been fastened to a thick wire and then a lot of holes drilled into the places where the dorsal, Caudal and Anal fins would join to the body.
I fastened thin wires into each of the holes, and these would support the epoxy putty that I’d use to form the fins.
Female Siamese Fighters have much shorter fins, and the wires shown here would need to be trimmed back a little before adding the putty.
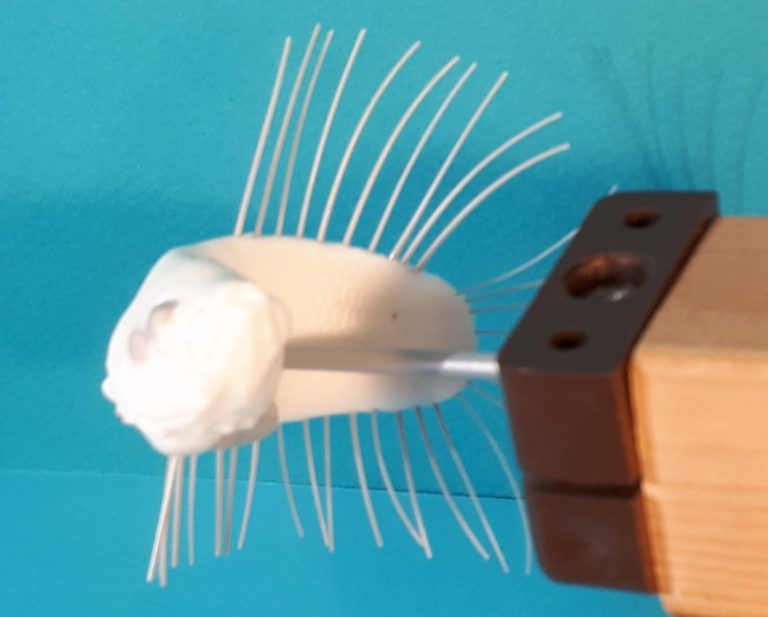
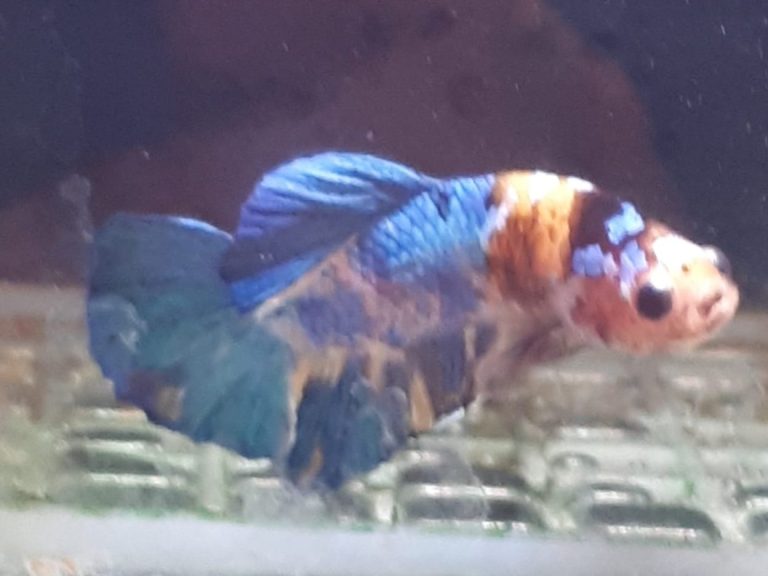
Photo #10 shows the fish I’d base the female’s colouration on. Another male admittedly, but as females are imported in large quantities, and also housed in one large tank together, it’d difficult to get a shot of a single fish as they swim about.
It used to be a case that females of most species of fish were less colourful than males of the same species, but with selection by breeders, female fighting fish have become a lot more colourful, and although shorter finned, are easily comparable for colouration and pattern nowadays.
Photo #11, so having mixed up some epoxy putty, rolled it out on a flat surface using French Chalk to stop it sticking to things, and then wiping off the chalk with a damp tissue so that it would stick to itself when placed over the wire supports, I made the fins for the female fish.
I purposely made the edges of the fins a little ragged, as the chasing the female receives from the male in order to get her into position beneath the nest often results in both fish looking a little ragged.
In this shot I’ve sprayed the fish with a white primer and begun to add the blue sections to the body and fins.
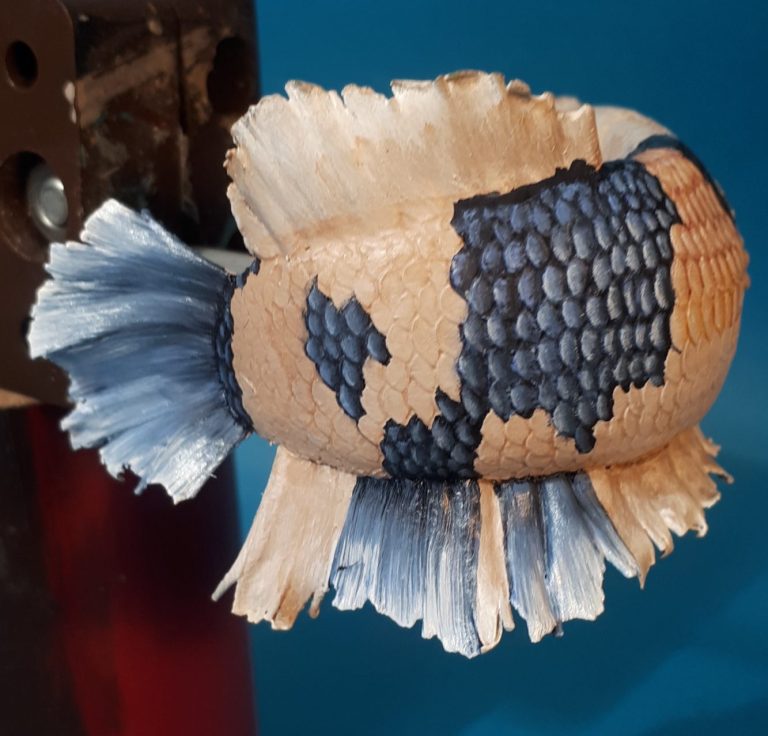
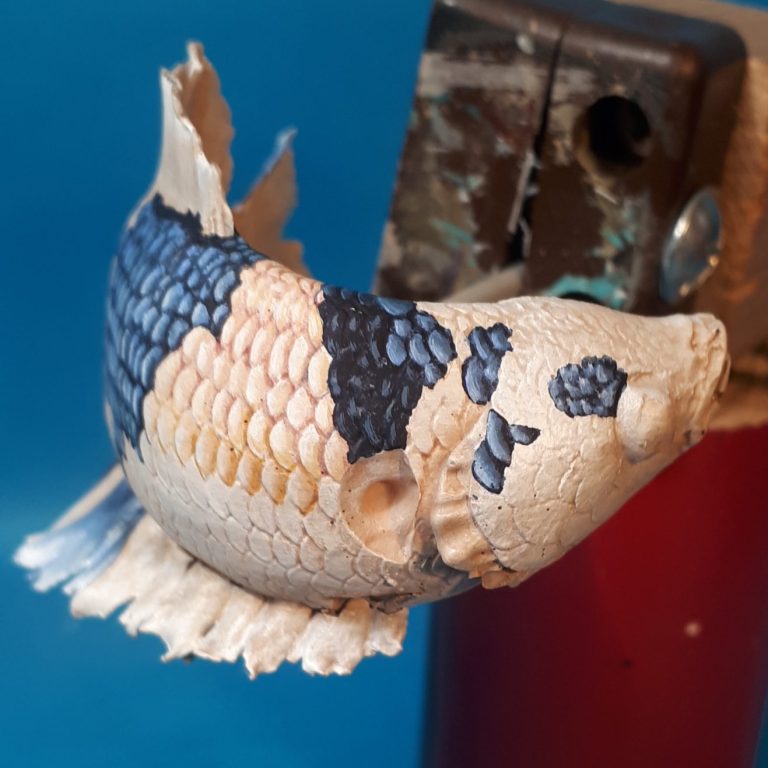
Photo #12, continuing the addition of colour to the front of the female,
and in photo #13 I’ve added the pectoral fin, which fell off and would need gluing back in place before paint could be added.
Photo #14, the eyes in this shot are completed, and it was difficult again to render these effectively. I used a mix of Burnt Umber, Mars Yellow and Titanium White for the iris, allowing brushstrokes to remain visible pointing towards the centre of each eye.

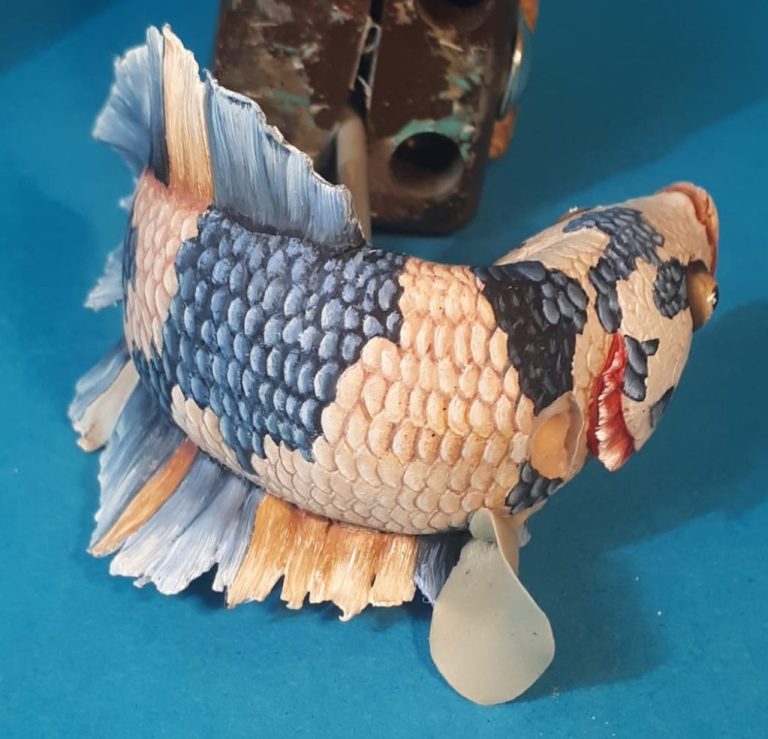
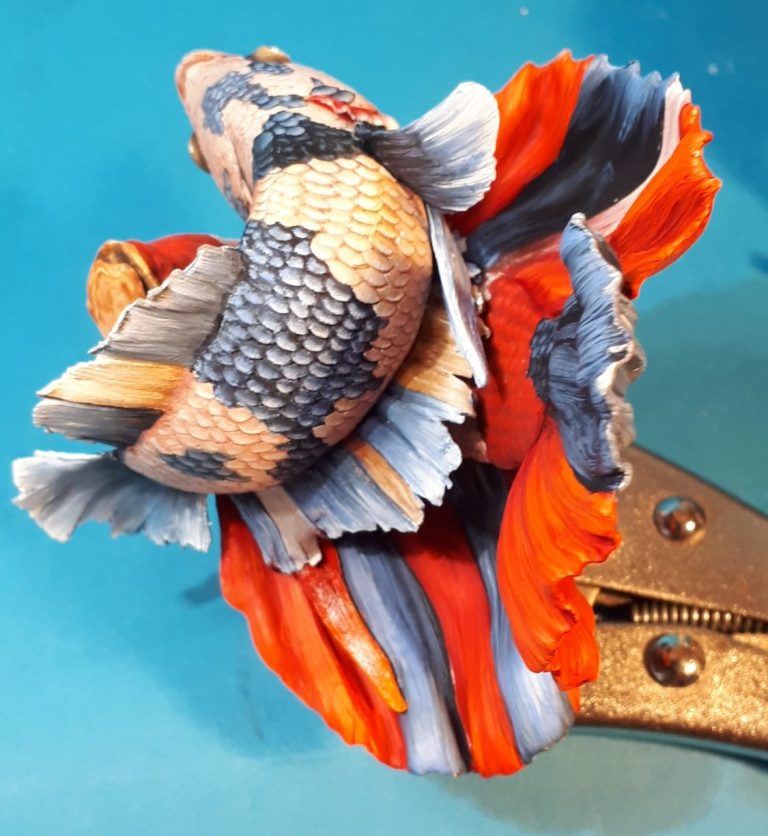
Photo #15 and it was time for a final test fit of the two fish.
I’d done this initially when the female was simply a single casting of the body, and then again when I’d added the wires for her fins, trimming them so they didn’t foul the body of the male.
This though was the final check, and by adding a blob of putty roughly shaped into her other Pectoral fin, pushing the two fish together whilst the putty was still soft, I formed a positive location point to add strength to the joint between the two fish.
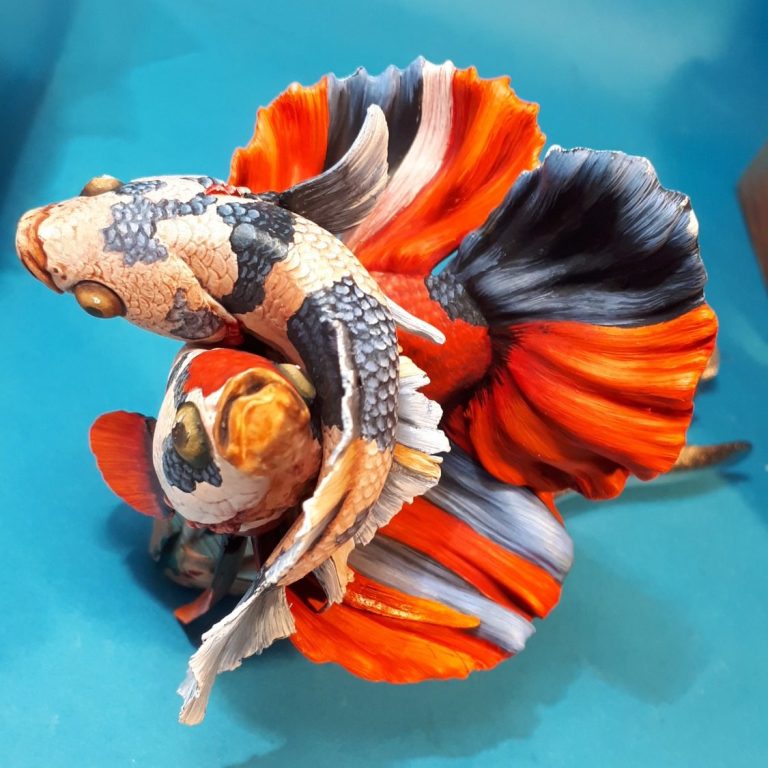
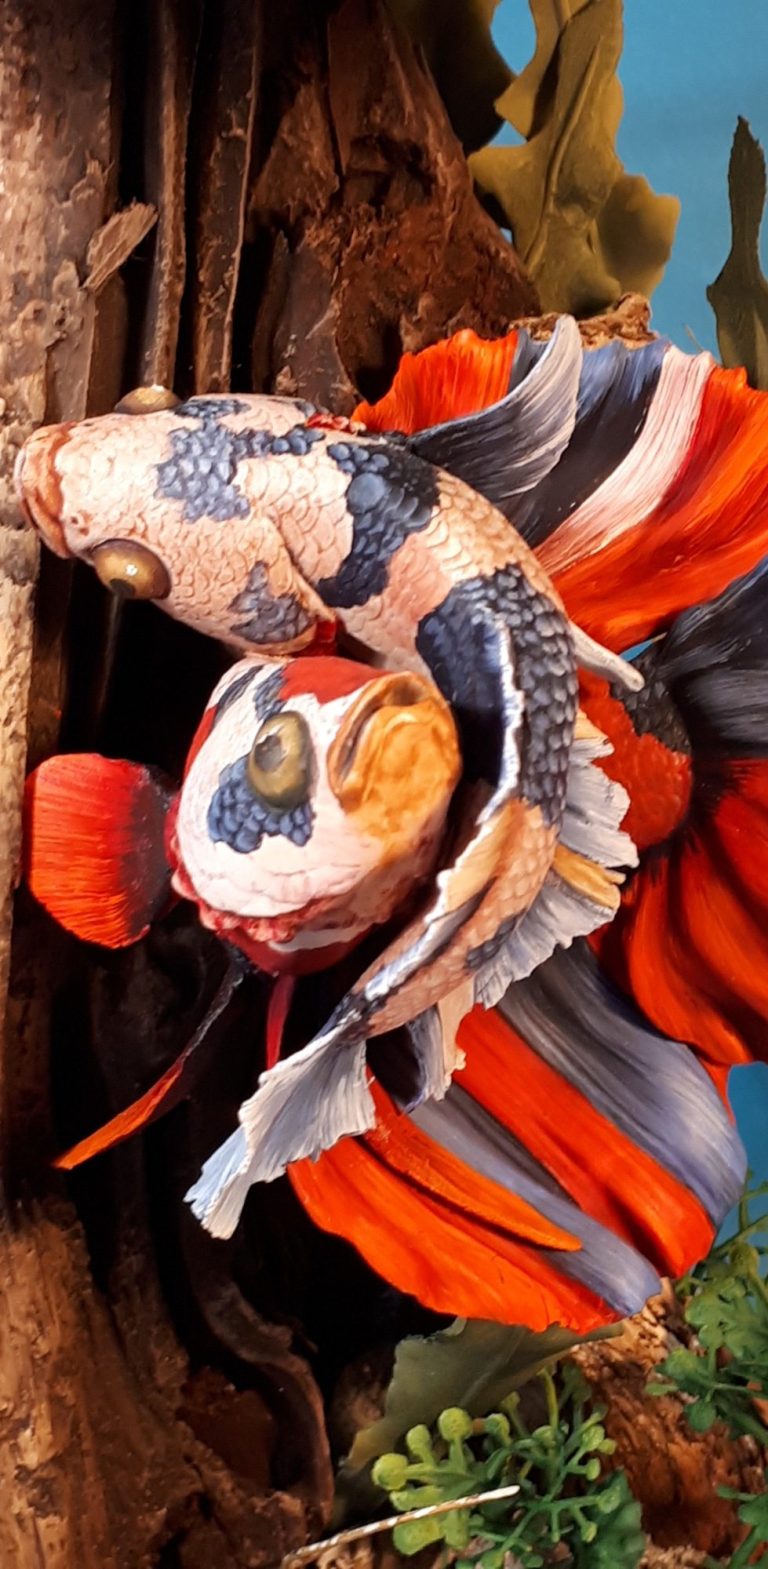
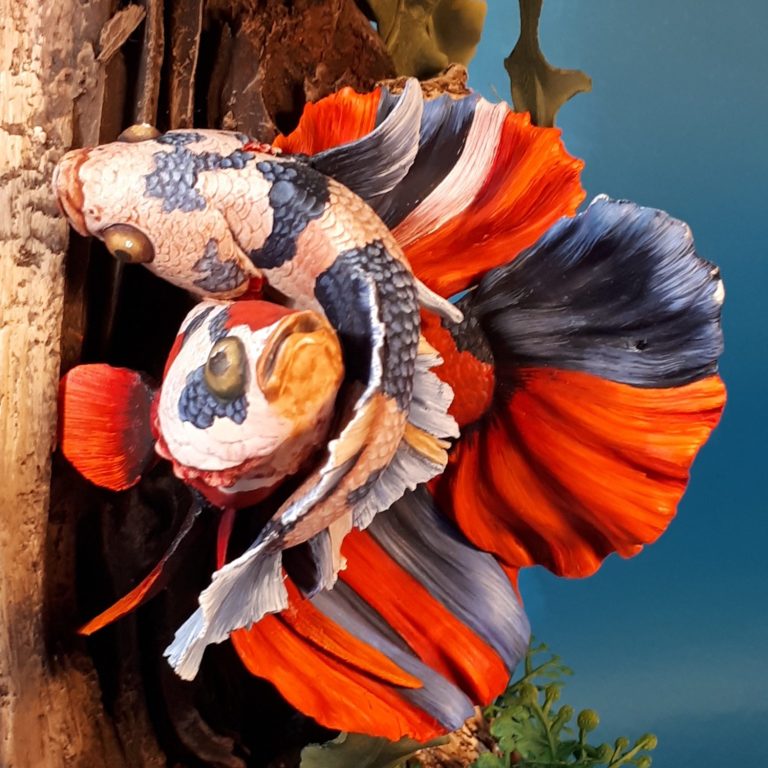
Photo #16 shows what little contact there actually is between the two bodies of the fish once they were finished.
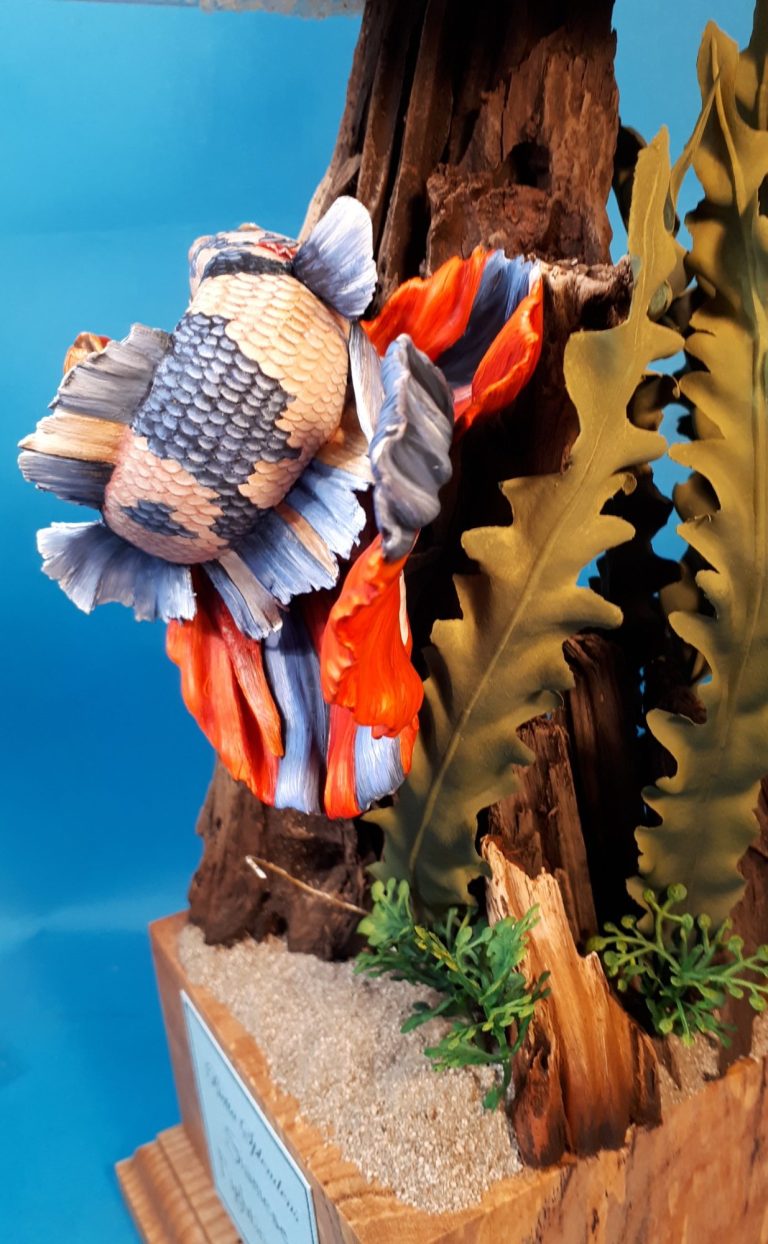
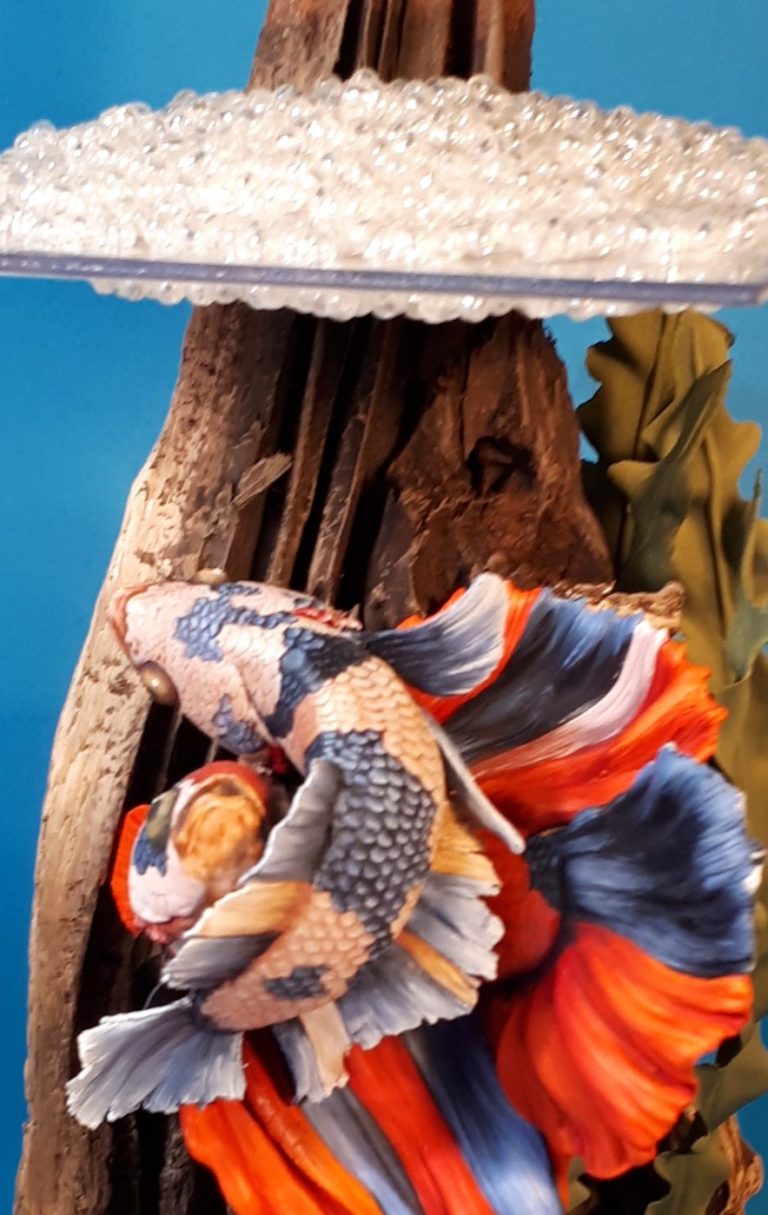
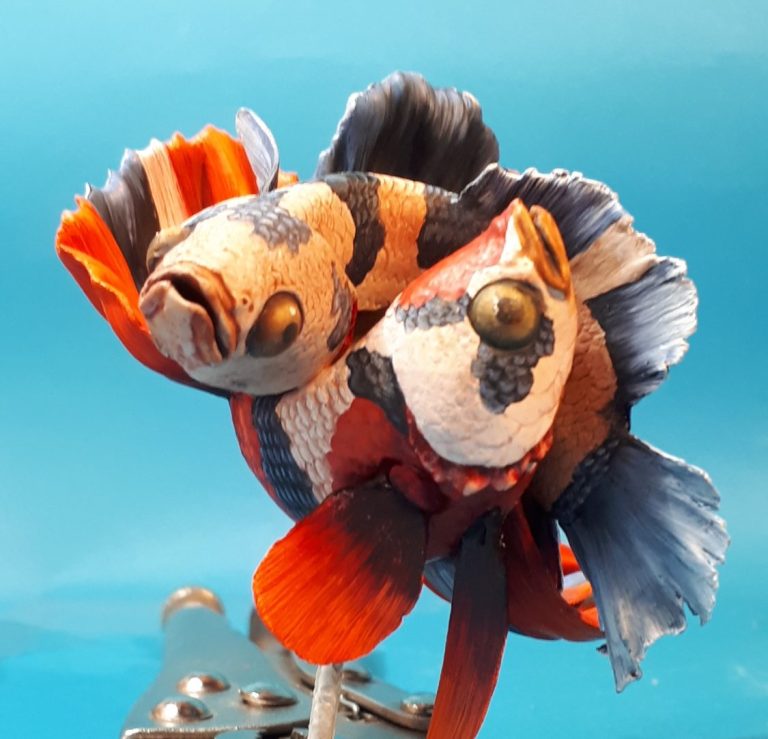
Photos #17 and #18 show the same stage from different angles and you get an idea of the actual size of the fish from photo #18 with the inclusion of my hand.
At this point I’d got my ideas of how the diorama was going to be set out, but I just couldn’t help myself from adding a little bit more to the proceedings.

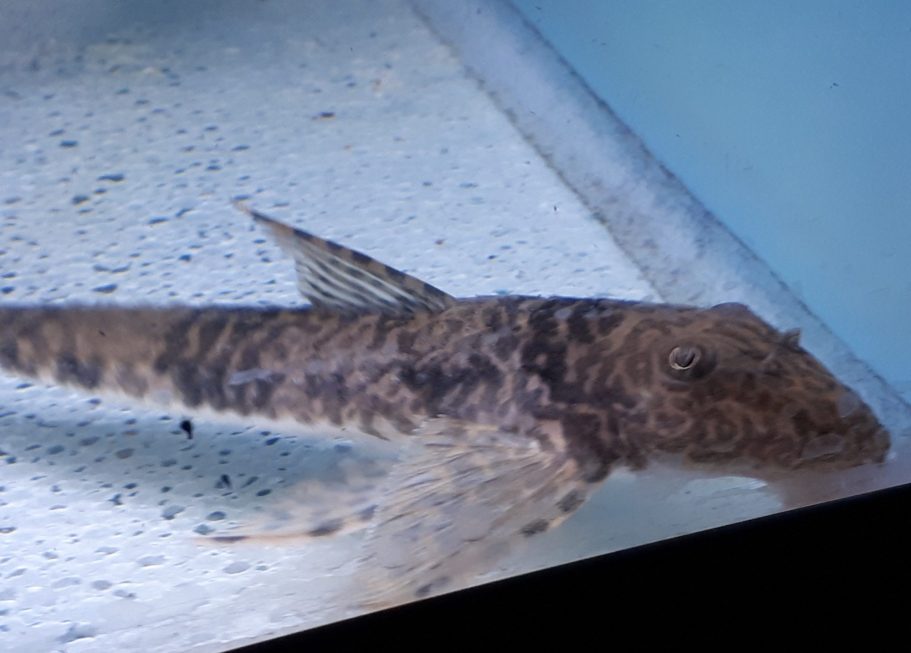
This came in the form of a couple of Whiptail catfish sneaking into the scene, a photo of a real fish being shown in photo #19.
There was no company making these, so if I wanted to include one, then I’d have to sculpt it myself.
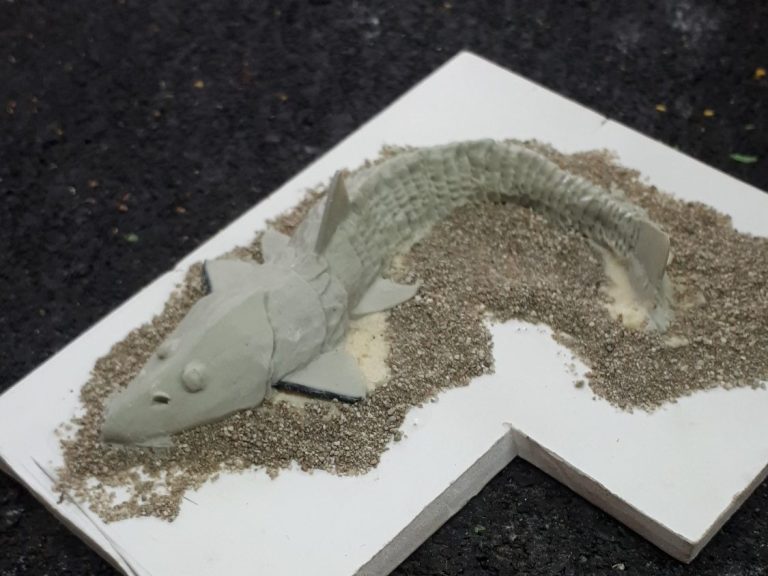
Photo #20 shows the master sculpt for that, having formed that up from Epoxy Putty and some fine sand to fill in any gaps around the sculpture.
After making a mould out of RTV rubber, I could make castings, and if you extract the resin at the right point – in this case just after it cures, but whilst it’s still a bit soft, you can bend into a slightly different shape – in this case straightening out the tail as shown in photo #21
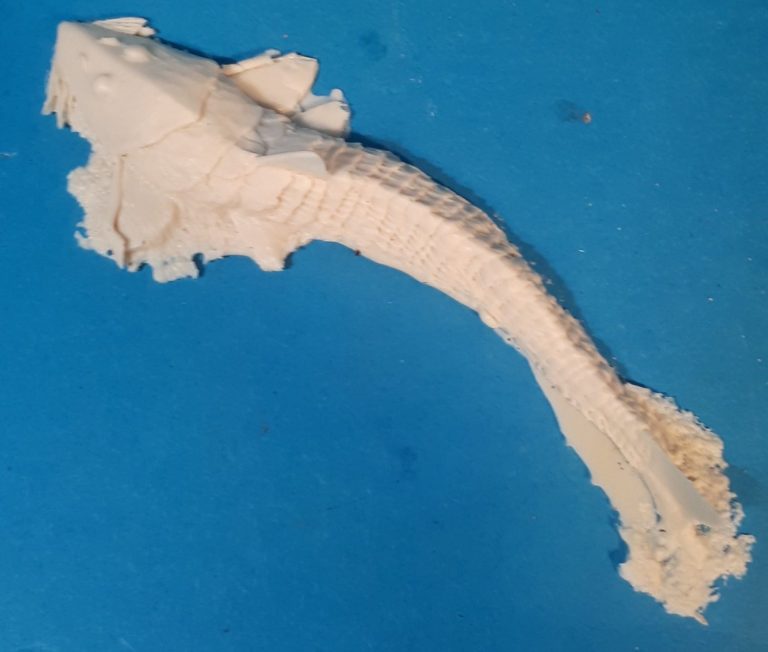
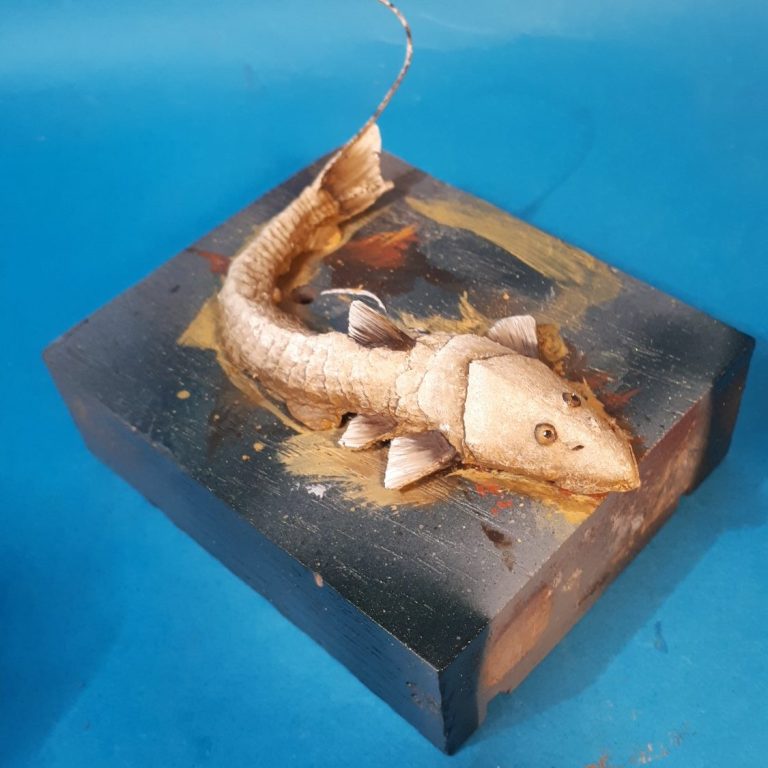
Photo #22 show one casting as per the mould with a tight curve to the tail remaining, and I’ve added a piece of flexible wire to the tail and then having been painted with a basic mottled pattern,
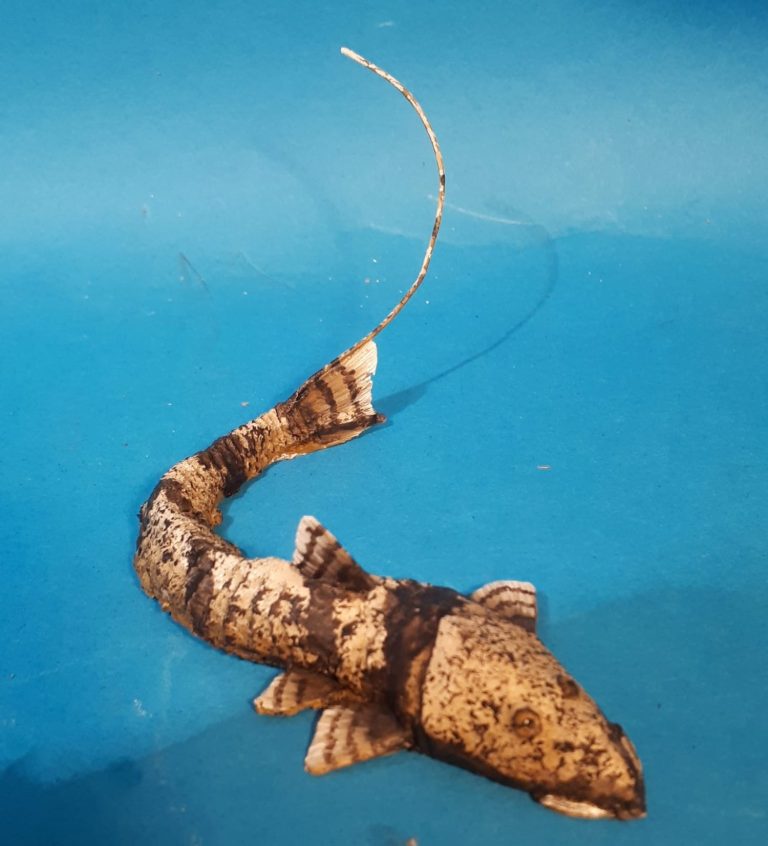
and photos #23 and #24 with further spotting added to mimic the colouration of the actual fish.

Setting the scene.
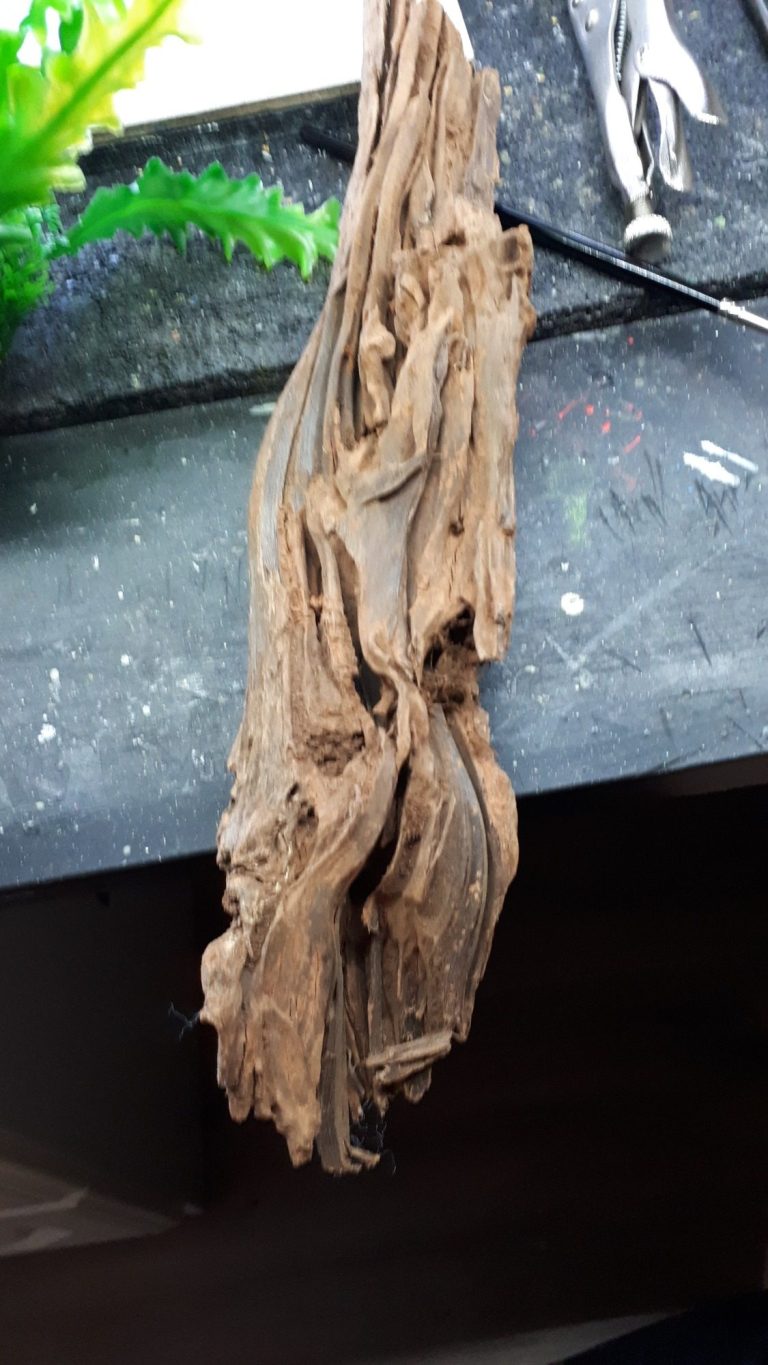
Although a lot of people use rocks to decorate their fish tanks, I much prefer the use of wood. And so I chose a slim piece of bogwood shown in photo #25 from the stock available from the shop. This would have to be trimmed at one end to make it flat so I could attach it to a plinth, but how to have it look like it was under water and with a bubble nest around it…… Thinking cap on !
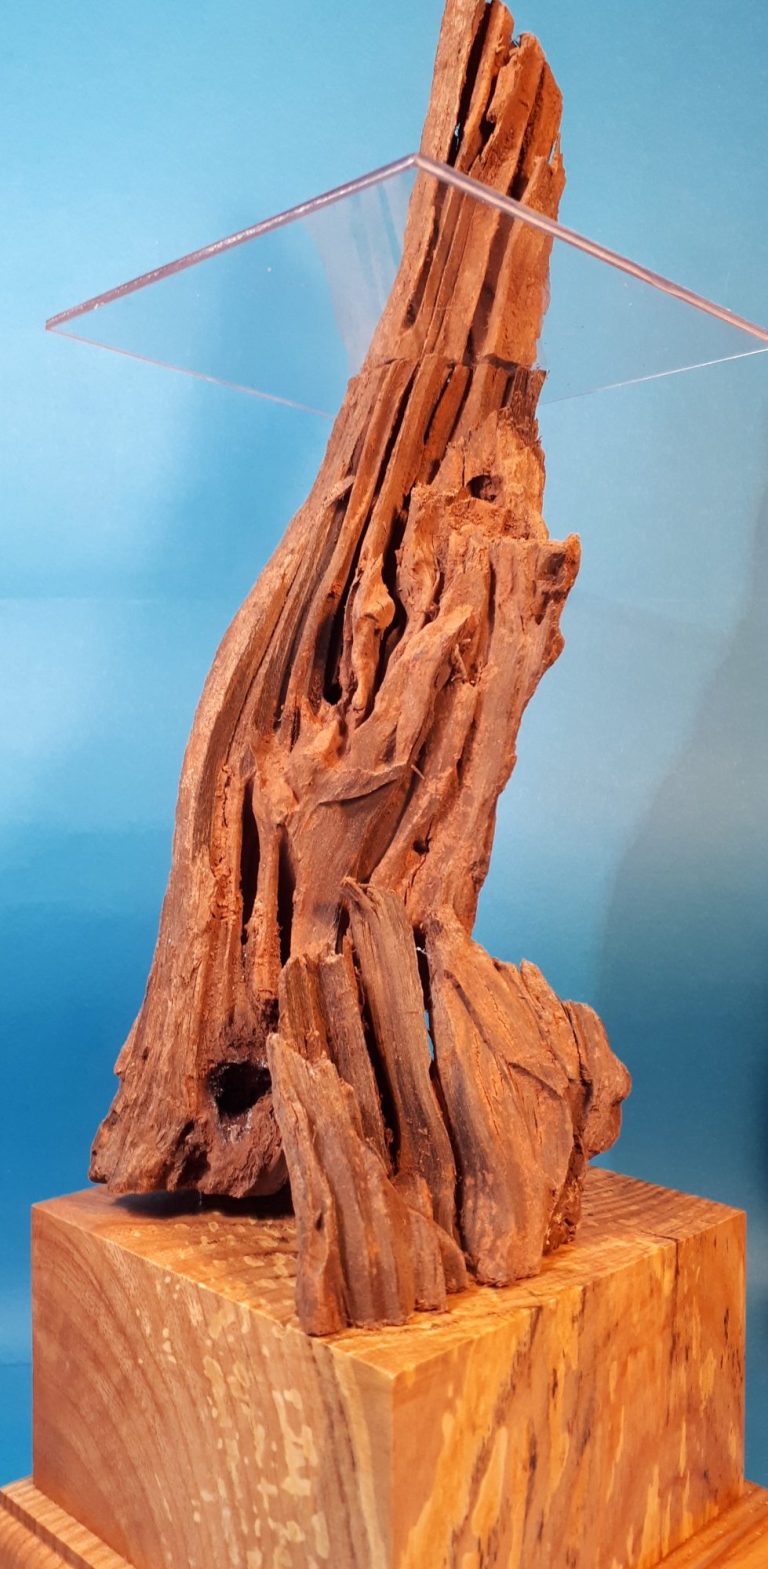
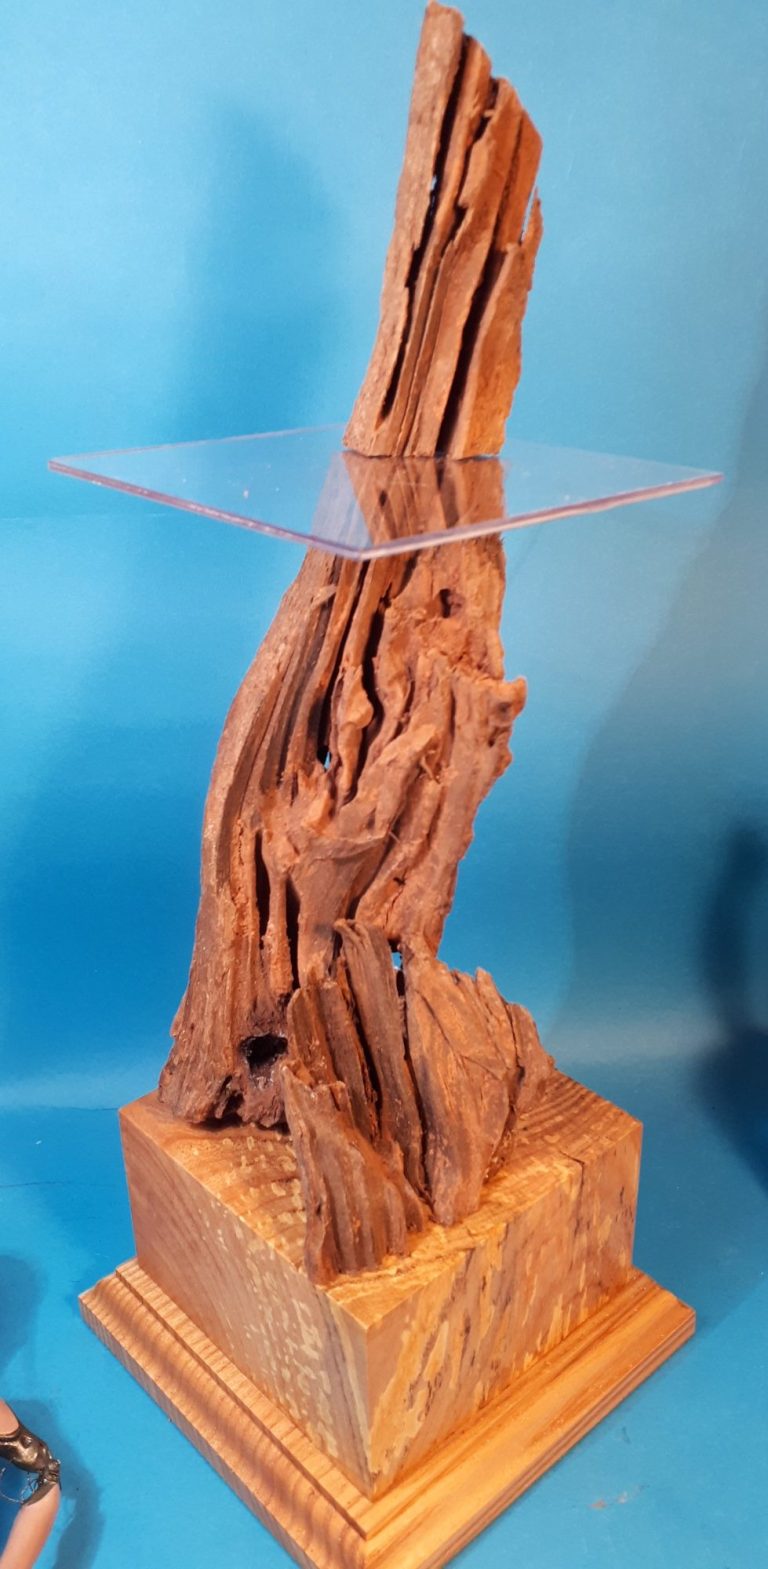
The solution is shown in photos #26 and #27, by cutting the wood again at the point where I wanted the water surface to be, adding a piece of clear plastic sheet that corresponded to the size and shape of the plinth, and then fastening the cut section to the top of the plastic, I could make the illusion of the scene being a section of water….
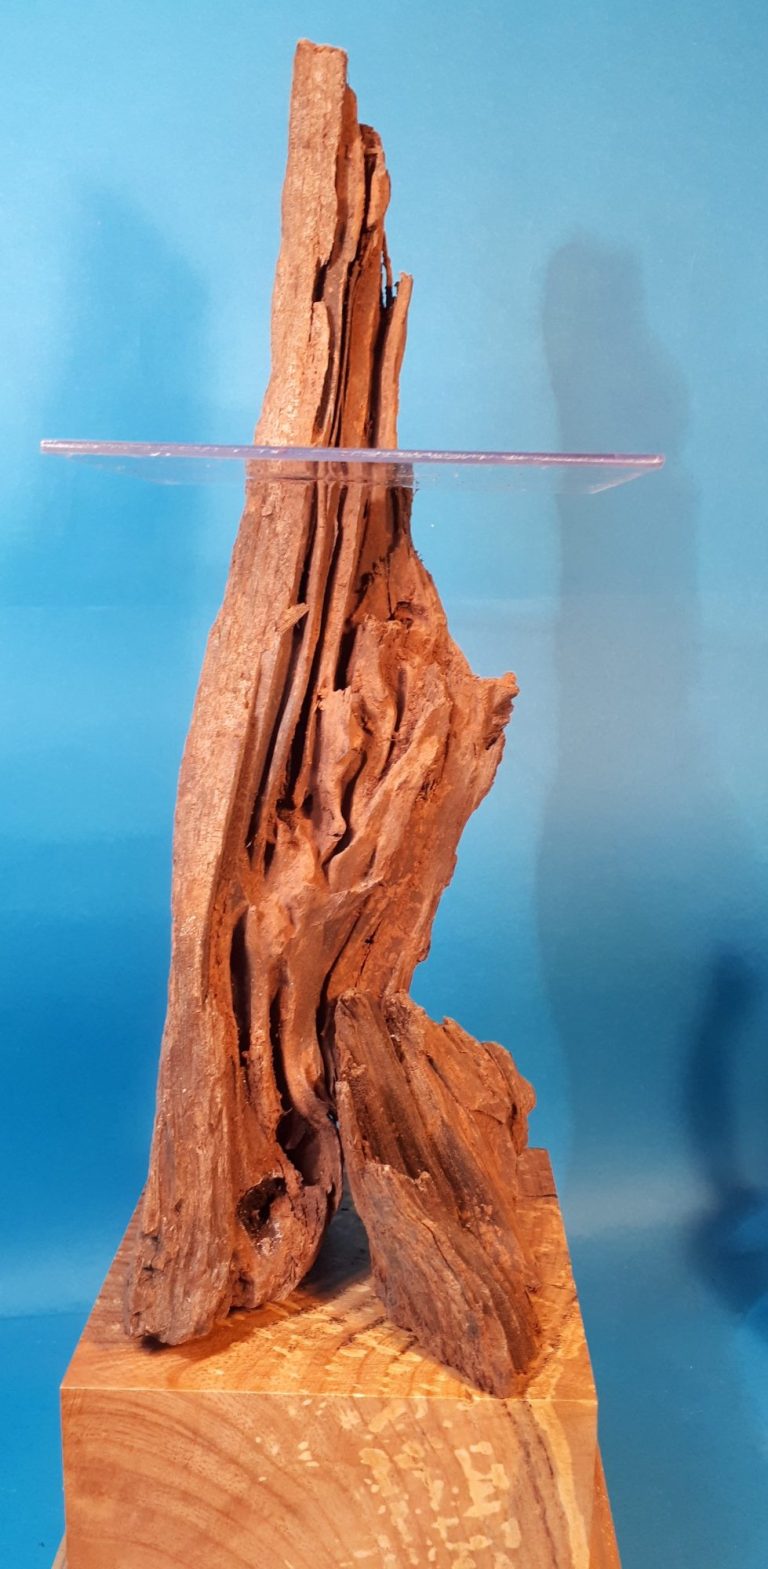
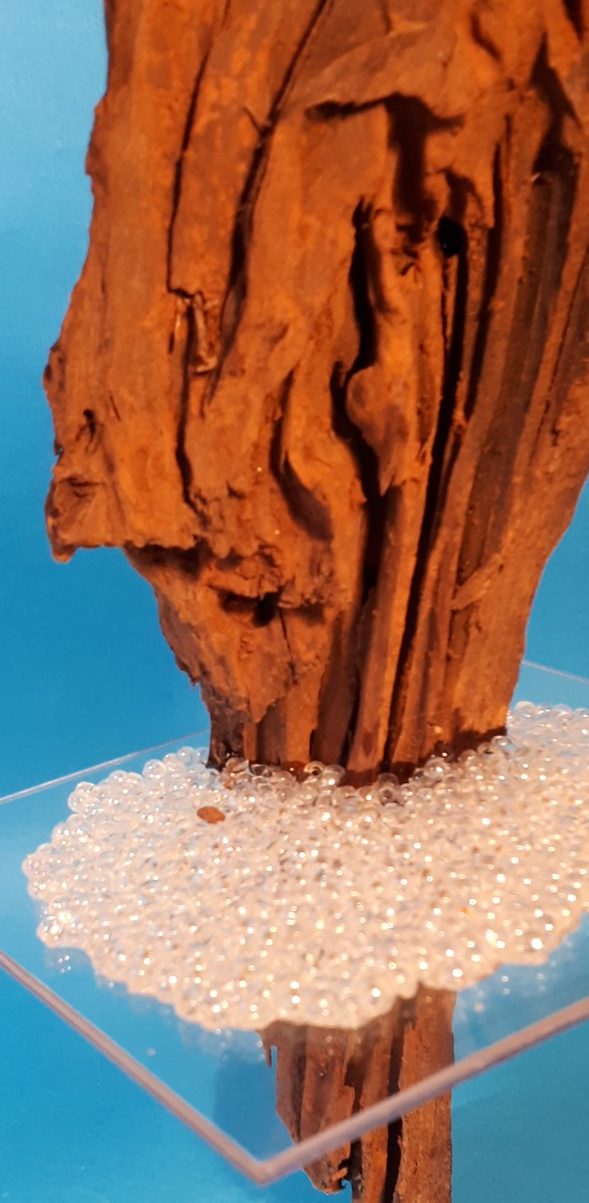
Photo #28 shows the same setting, but seen from the side with the water surface being formed by the plastic.
Photo #29 shows the initial formation of the bubble nest. Yes, the base is upside down in this shot, because the weight of the bubbles on the top of the nest forces the lowest level of bubbles below the surface of the water.
I thought that clear beads would give the visual effect of bubbles and used clear PVA glue to join them to the plastic sheet.
The reason it’s upside down ?
Whilst the glue set, I needed the plastic sheet to be flat and it was easiest to do the lower layer of bubbles below the water surface with the base braced in this position.
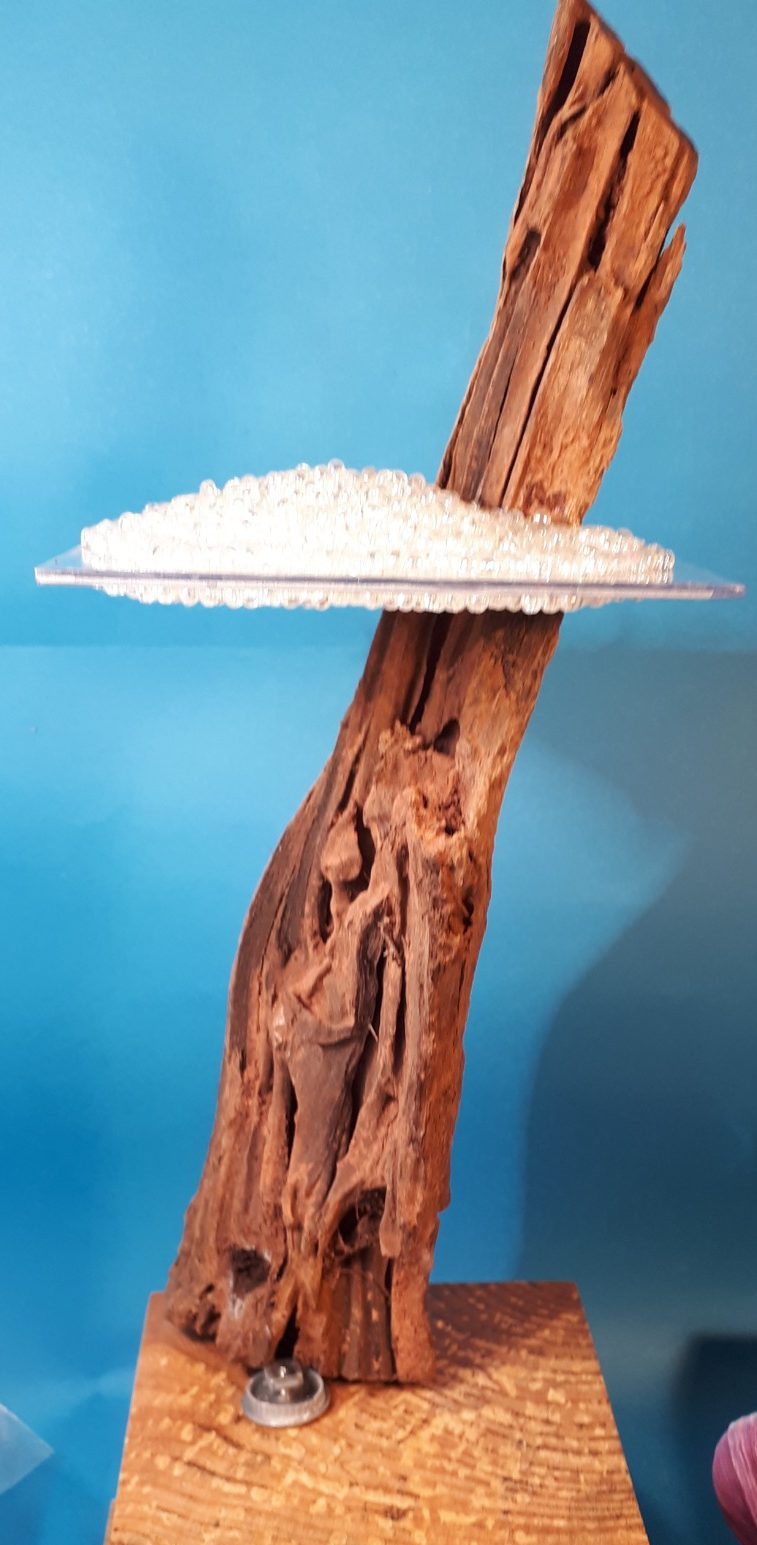
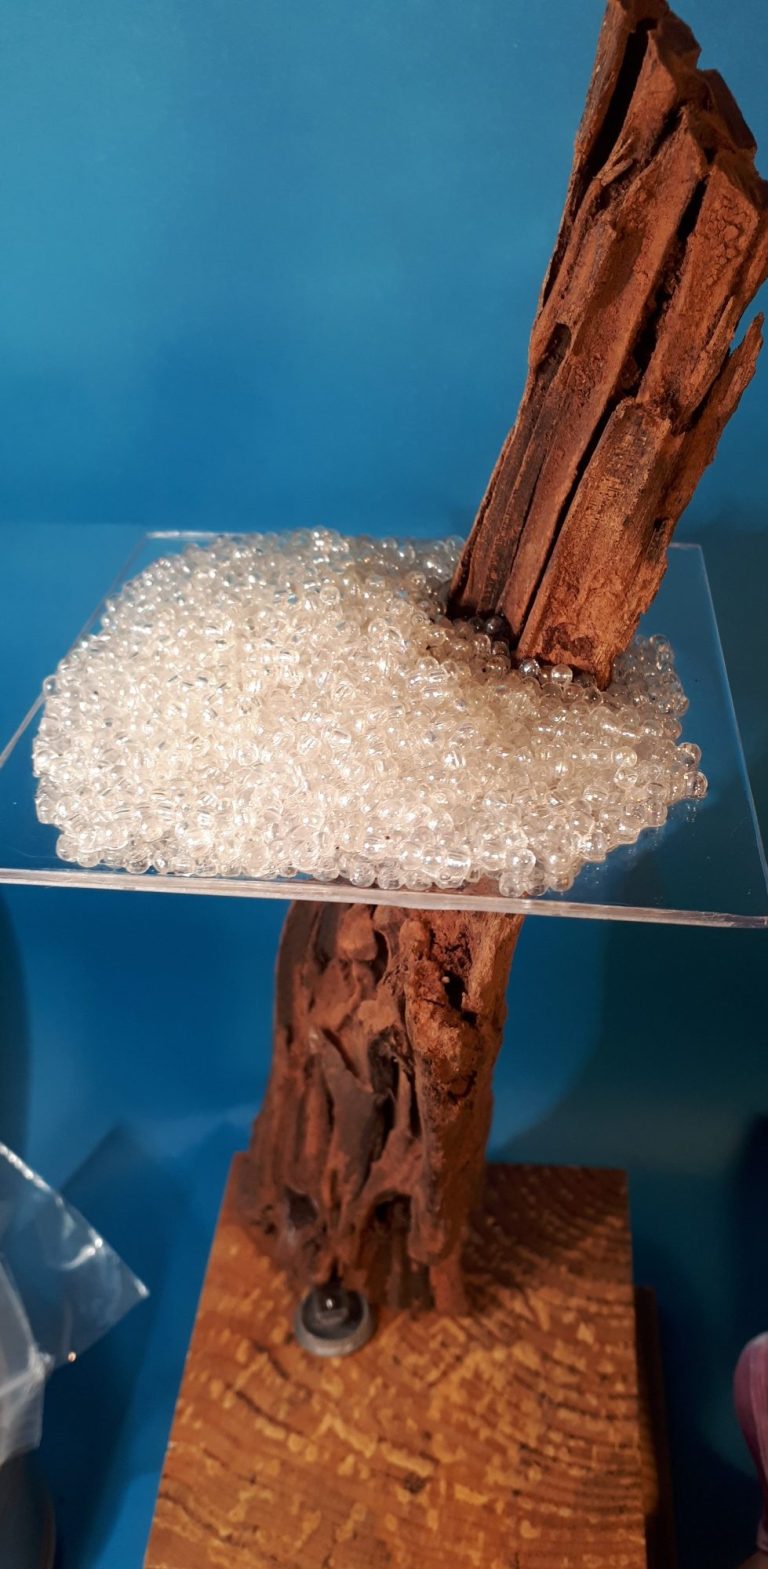
Photos #30 and #31 show the bubble nest formation from the side, the mass of bubbles piled up towards the centre and attached to the wood to moor them in place.
Photo #32 and this shows a section of the wood – a shorter section that would be added to the plinth – having the paint added. The colour fo the wood darkens when immersed, and painting it whilst leaving the upper section in it’s natural form would add to the illusion of the scene being underwater.
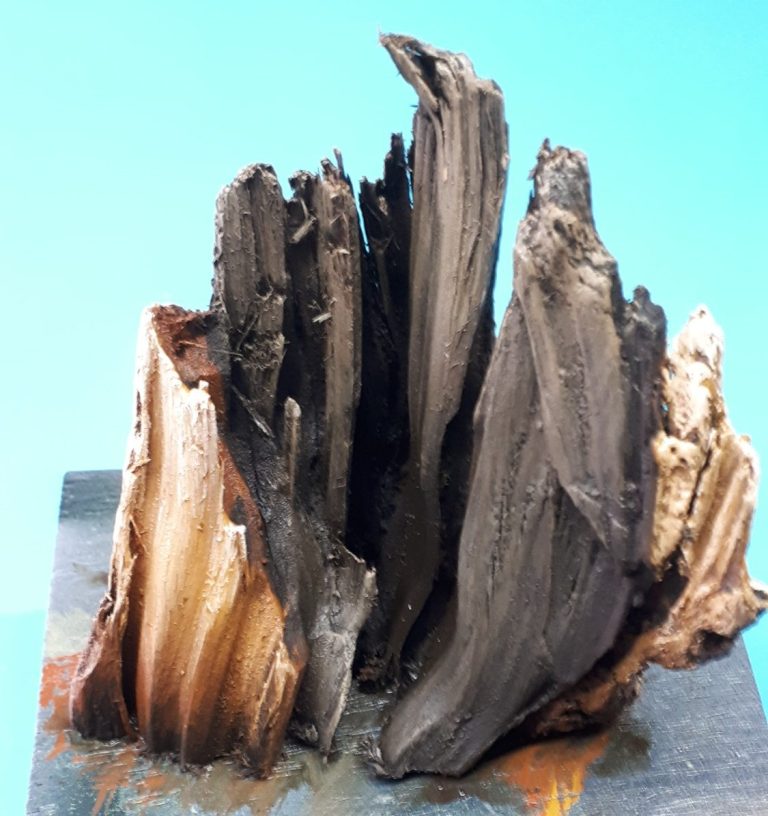
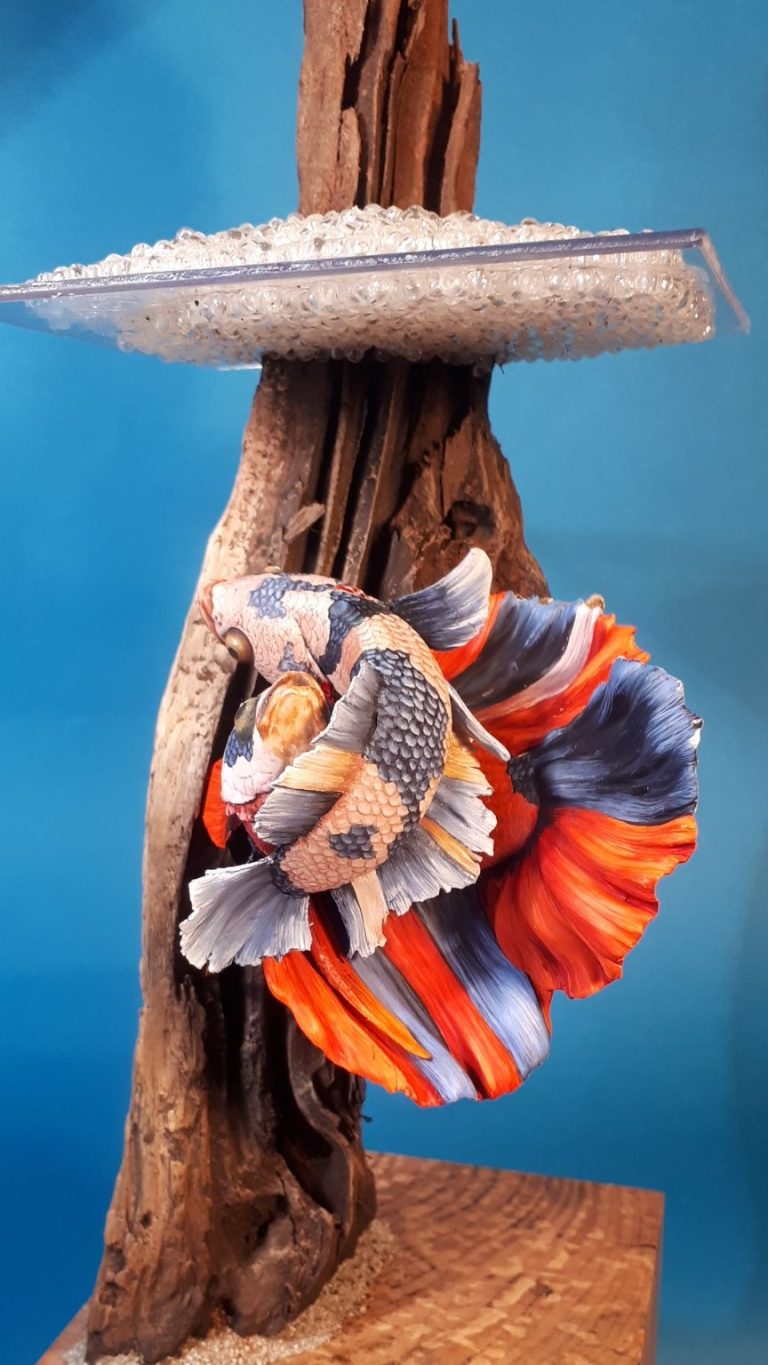
Photo #33 and it was time to test fit the fish in place. Nerve wracking to be honest because this would be the point at which the idea would become reality, and I’d see if the setting and the positioning of the fish actually worked.
A small amount of sand has been glued in under and around the base of the wood to fasten it to the plinth ( along with two thick pieces of wire ).
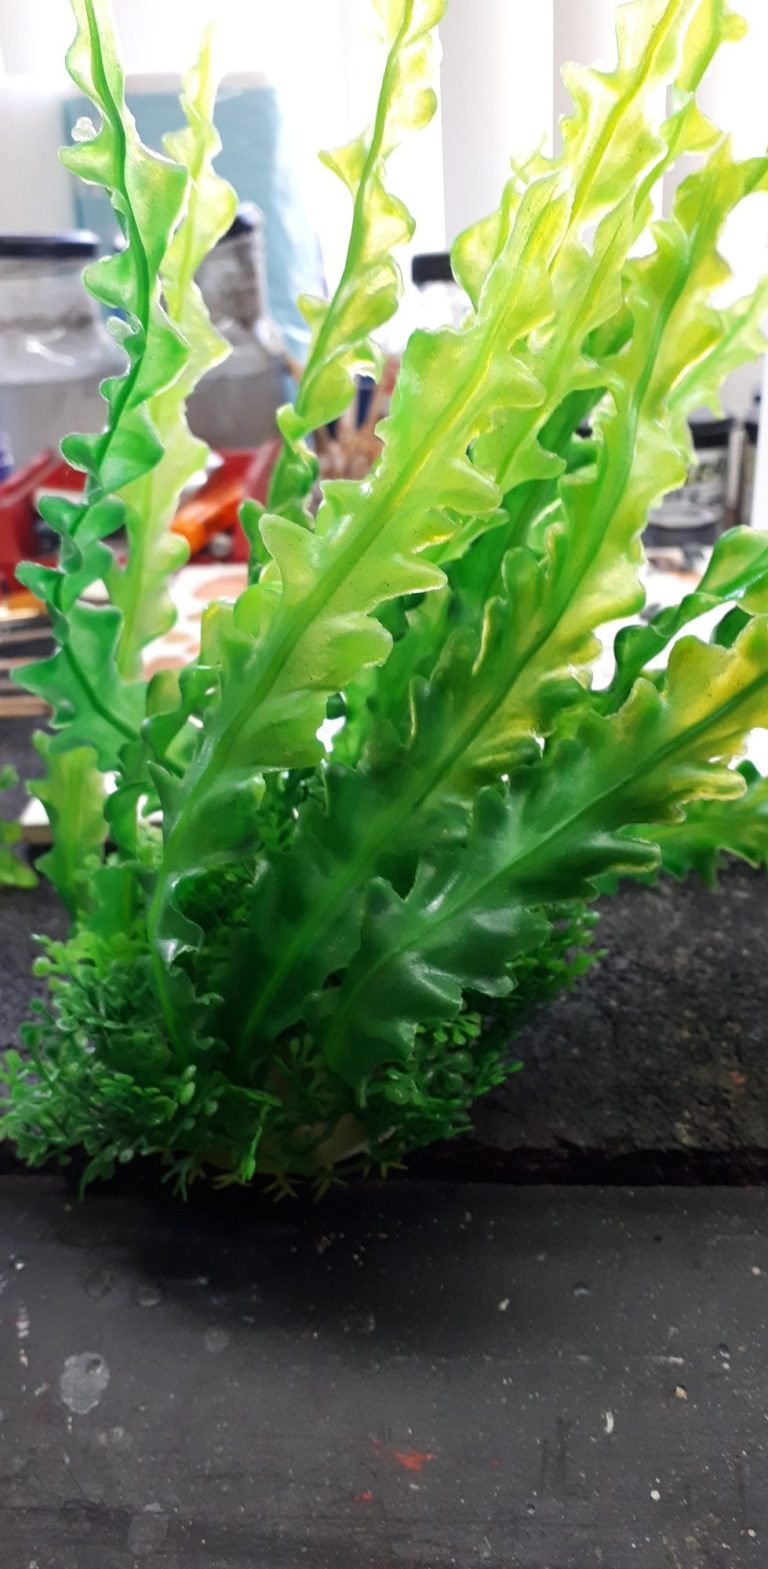
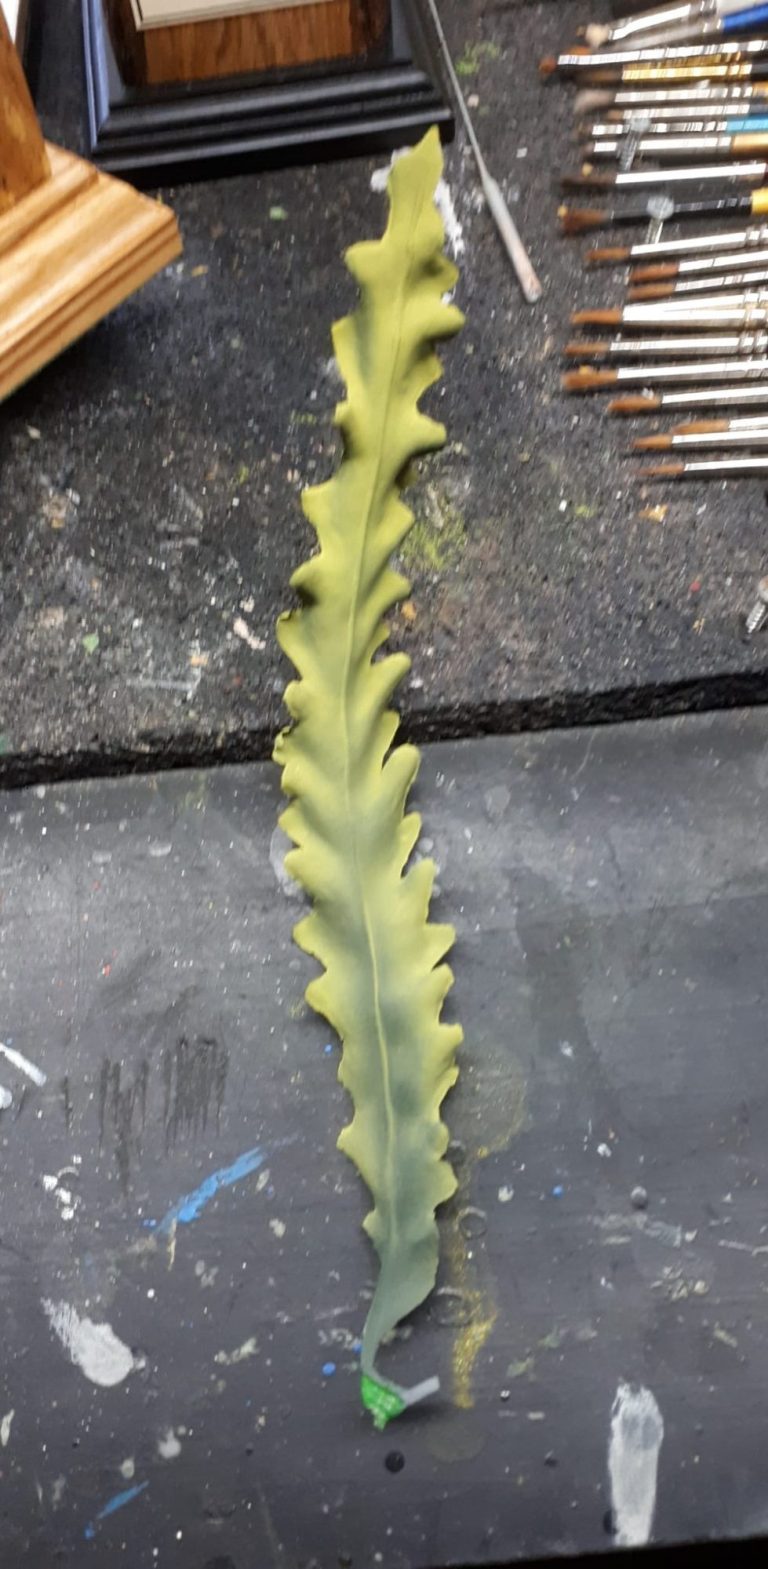
Photo #34 – plants. I’d tried preserving some aquatic plants by simmering them in a mix of water and Glycerine, a process that works well for moss and lichen, but failed abysmally in this case.
I resorted to plastic plants, again selected from some that were stocked at work, and although these needed a lot of mould overspill, they were useable once painted.
Photo #35, each plastic plant leaf was separated from the weighted base and had a wire inserted into its lower end. I then painted them using Tamiya colours through an airbrush.
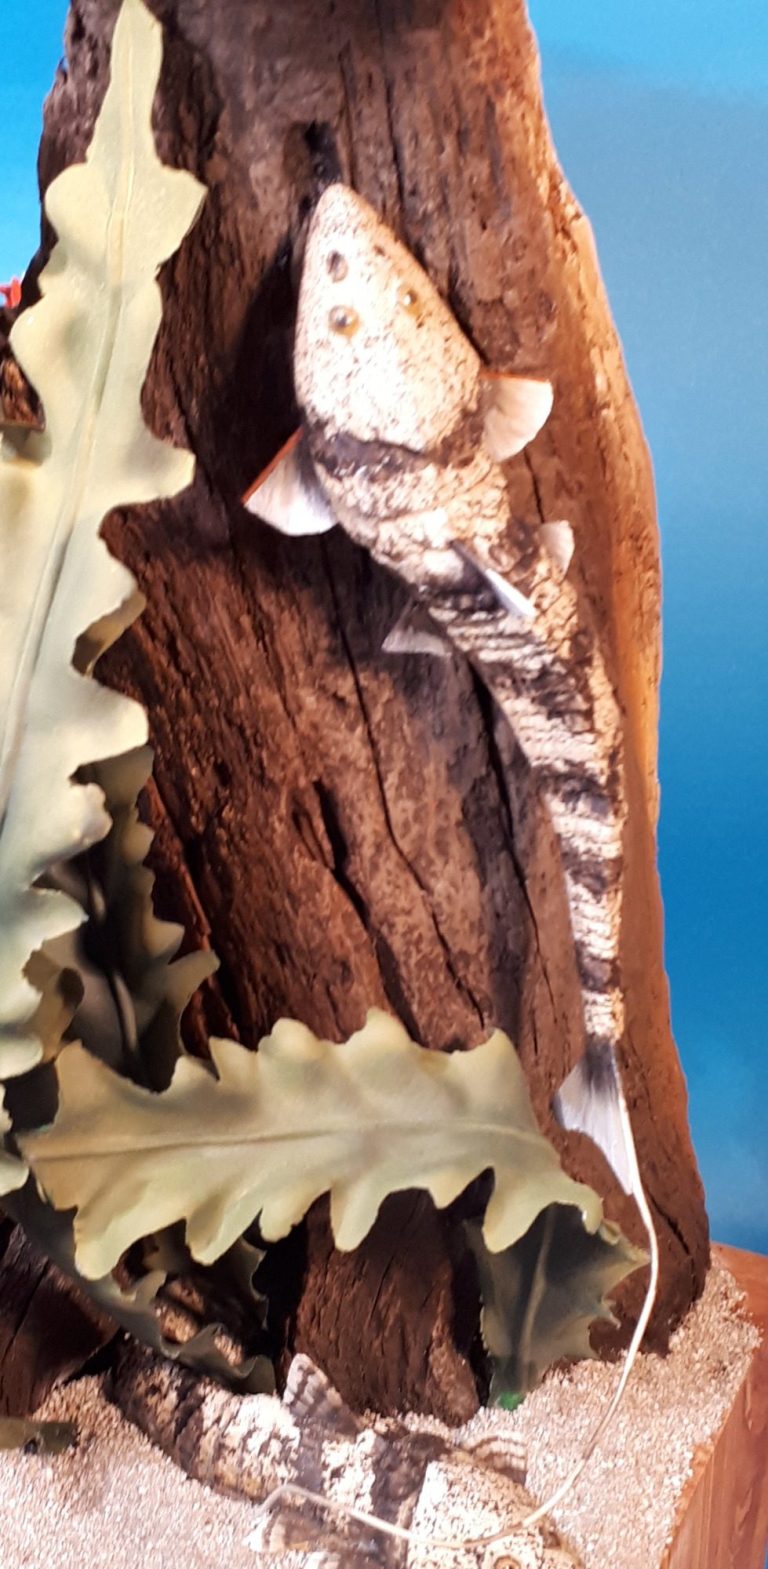
Photos #36 and #37 and after gluing the plants in place and positioning the Whiptail that had more of a curve to it’s body on the base, sand could be added, along with a couple of empty snail shells and everything glued down.
The Whiptail with the straighter body was glued to the wood this shot showing the back of the base and it can only be seen when the scene is turned around.
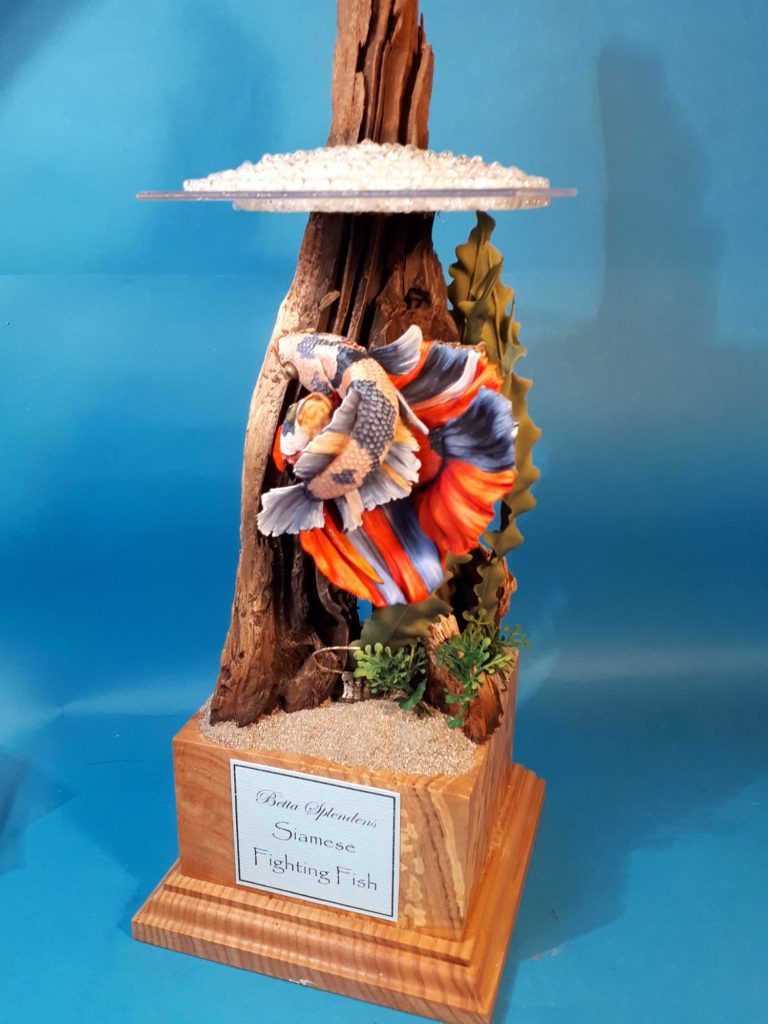
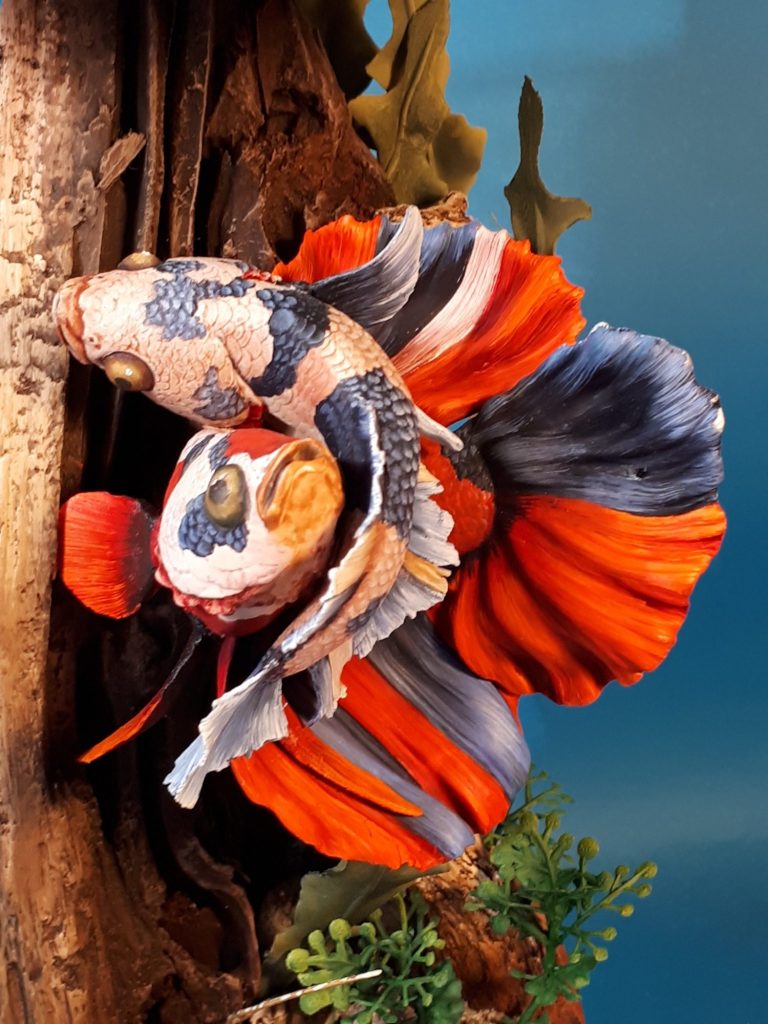
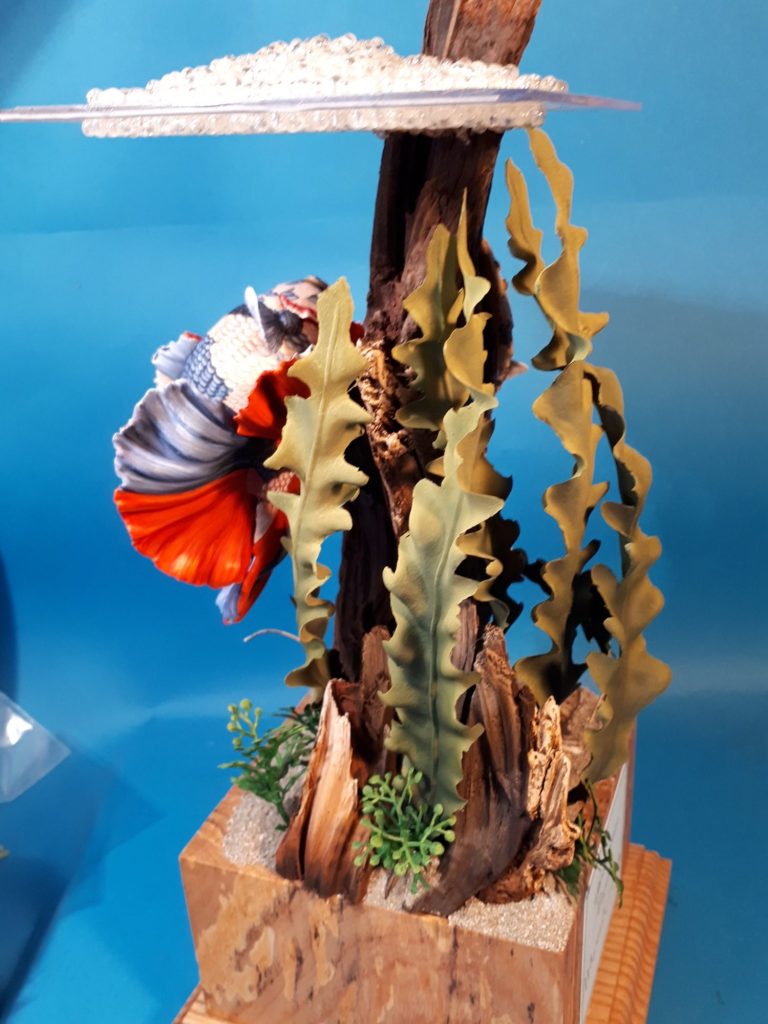
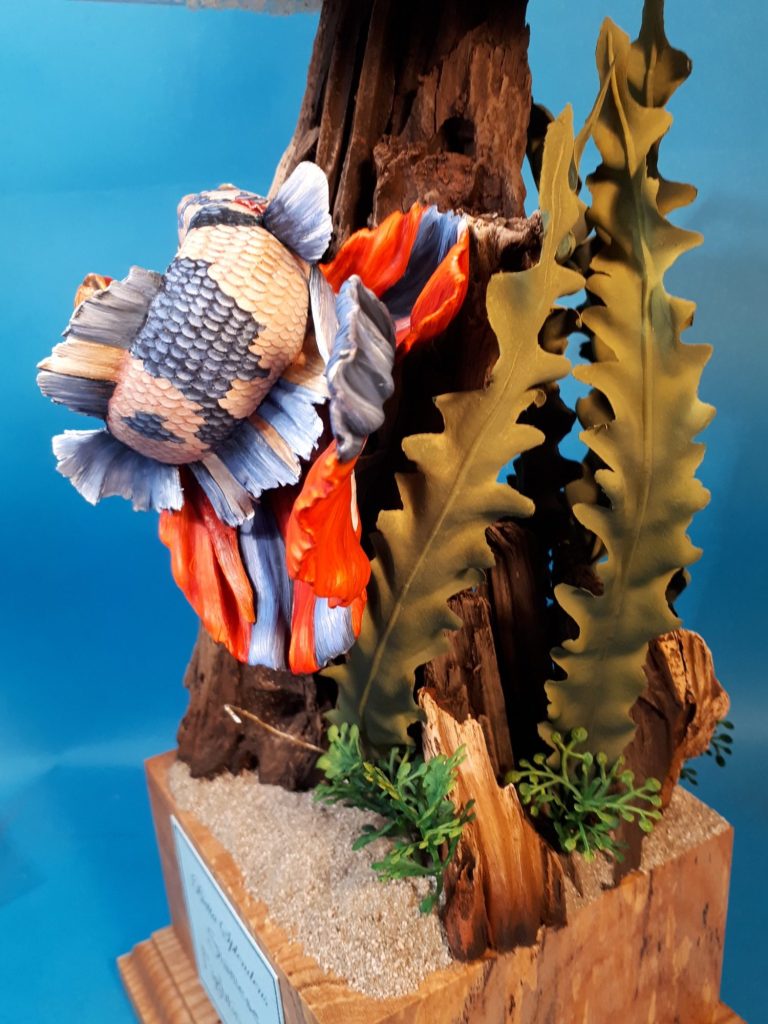
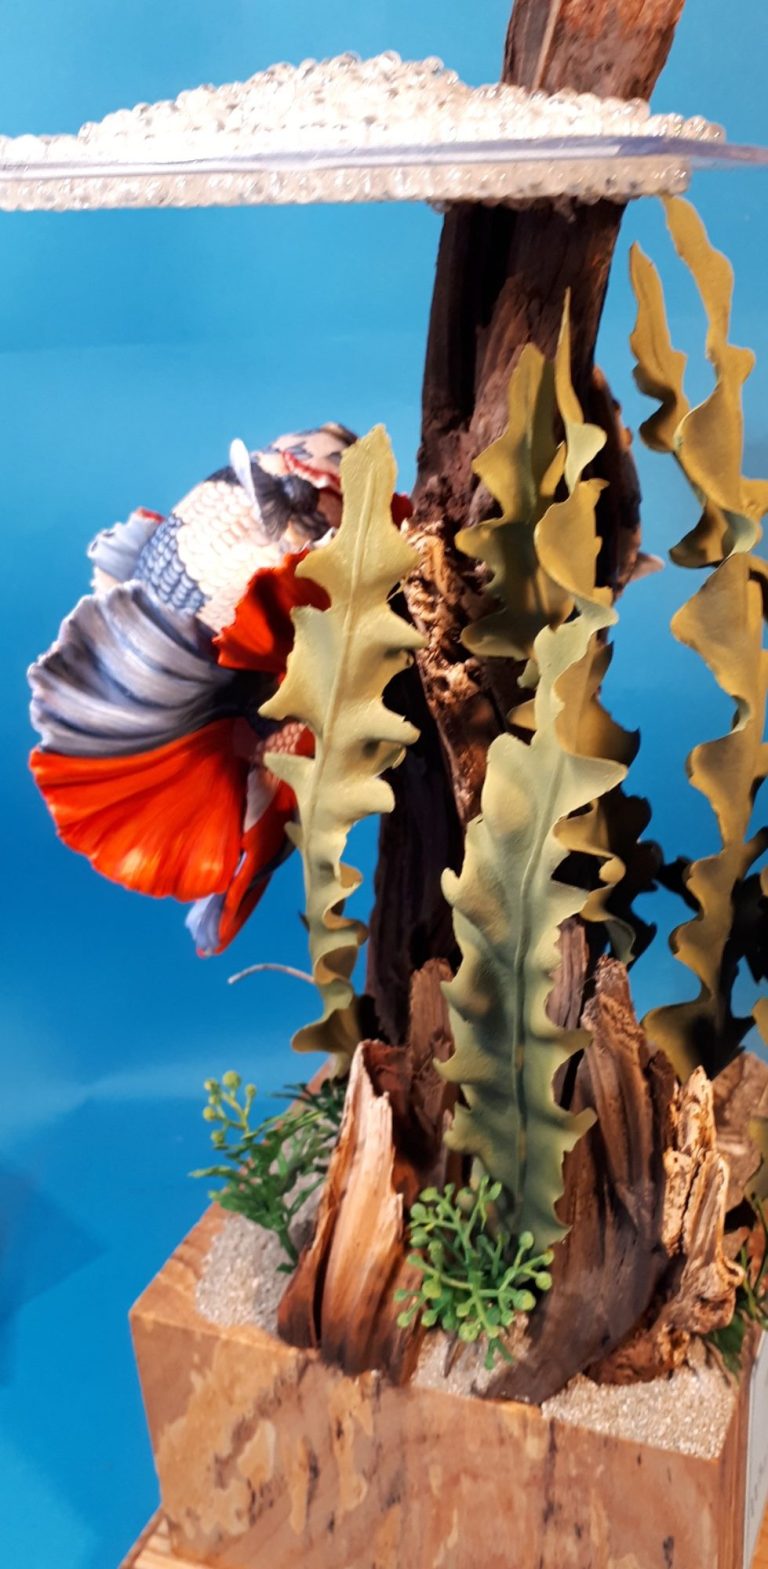
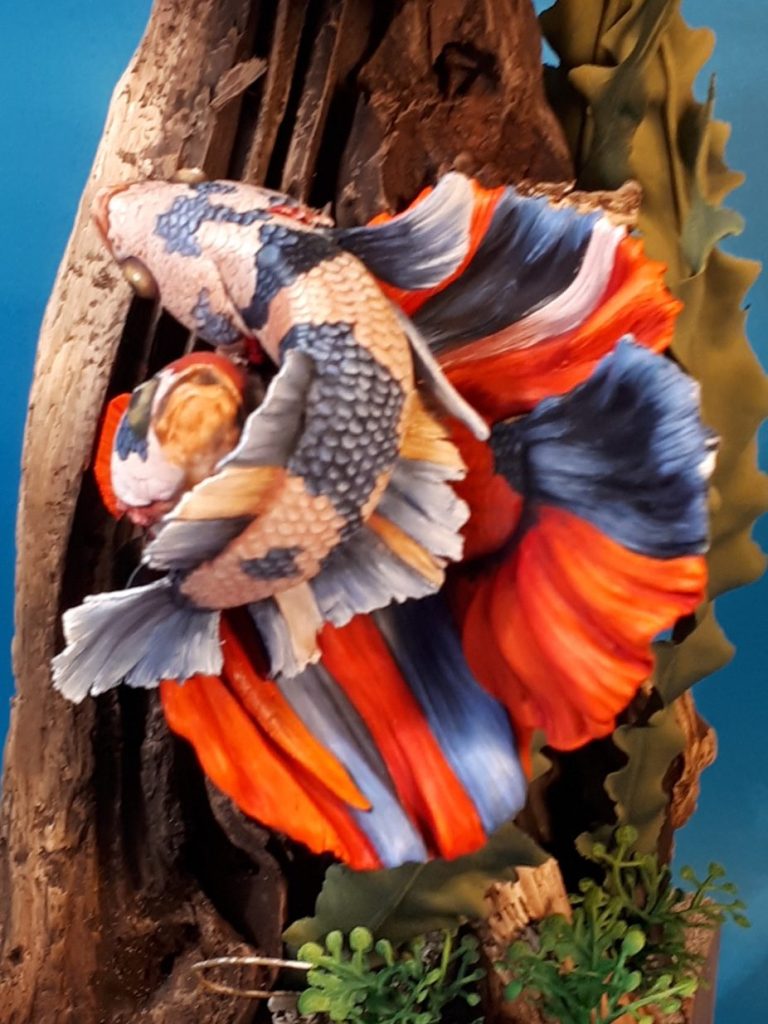
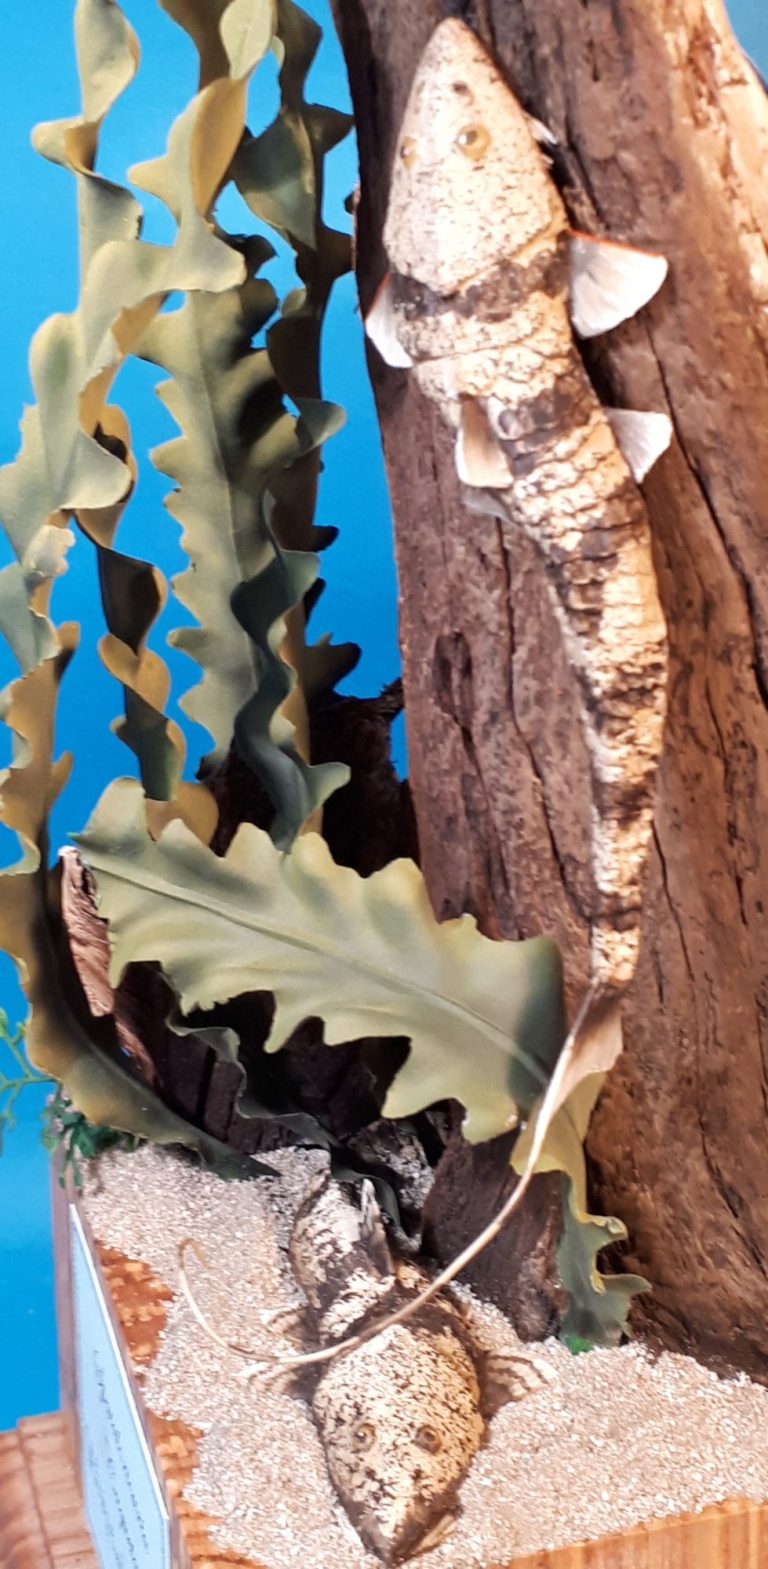
Photo #38 shows the pair of fighting fish in their final position, with the wood, plants and nest providing a suitable background.
The finished shots show various views of the diorama the tail of the Whiptail can be seen from the front, but that’s about all of those two fish that is visible from that angle.
I decided to put two nameplates on the model, one for the Fighters at the front and one for the Whiptails on the back.


Final thoughts.
I’m very pleased with how this turned out, the support for the fighters is completely hidden, and they appear suspended in mid-air, or should I say water ?
The nest idea looks OK, certainly the best I could come up with, and the addition of the Whiptails, whilst not visible from the front, adds a little bit of interest to the back of the scene.
I must admit to being amused when I put this into the competition at SMC in Eindhoven in 2023. Viewing this amongst all the surrounding tanks and AFV’s in the Diorama class looked plumb odd, and I’d have loved to hear the discussion from the judges as they reviewed the entries – it wouldn’t surprise me to hear that it began with “What the…. ?” and I thank them for the indulgence of awarding it a highly Commended – I really didn’t think it would get anything in what was really an armour class.
I’d like to thank Matt at Robot Rocket Miniatures for allowing me to make a copy of the body without which the diorama wouldn’t have been possible, and also to Neil and Rachael – the owners of Pier Aquatics - along with staff ( Tracy, Sarah, Alisha and Julie ) for their help, suggestions and support whilst putting this together.
It’s taken some thinking and some amount of rattling my grey cells to solve some of the challenges this scene provided, but I think it worked out OK in the end.