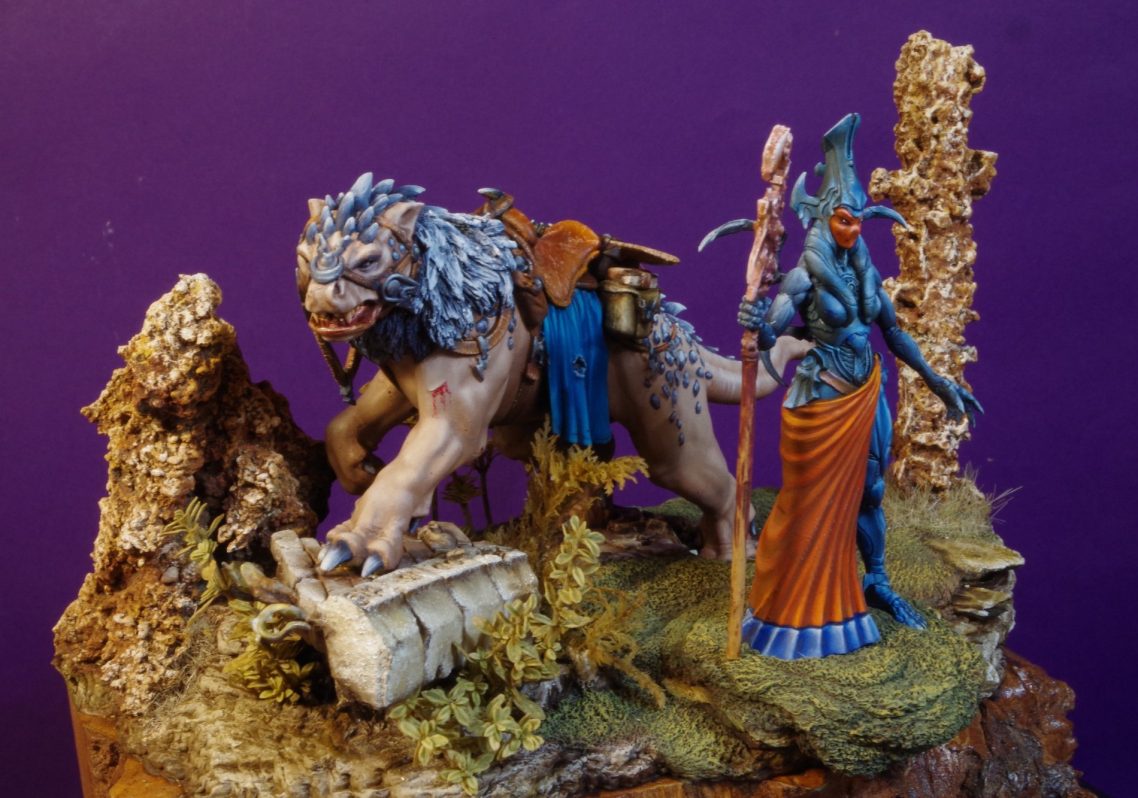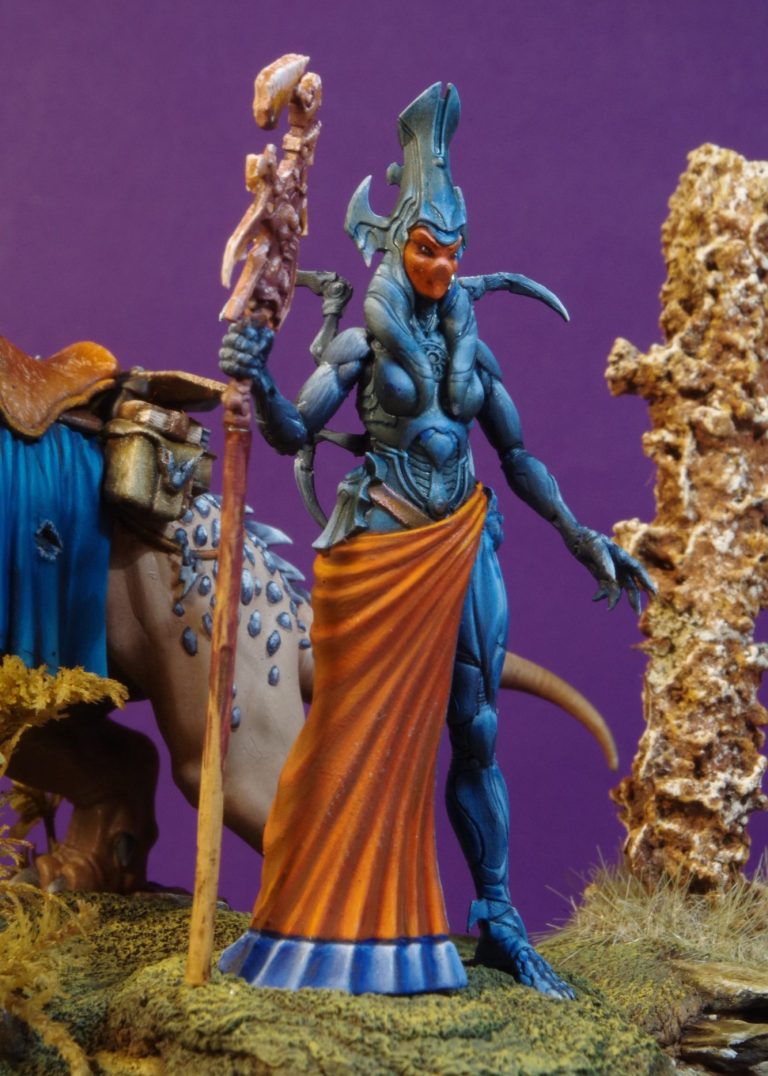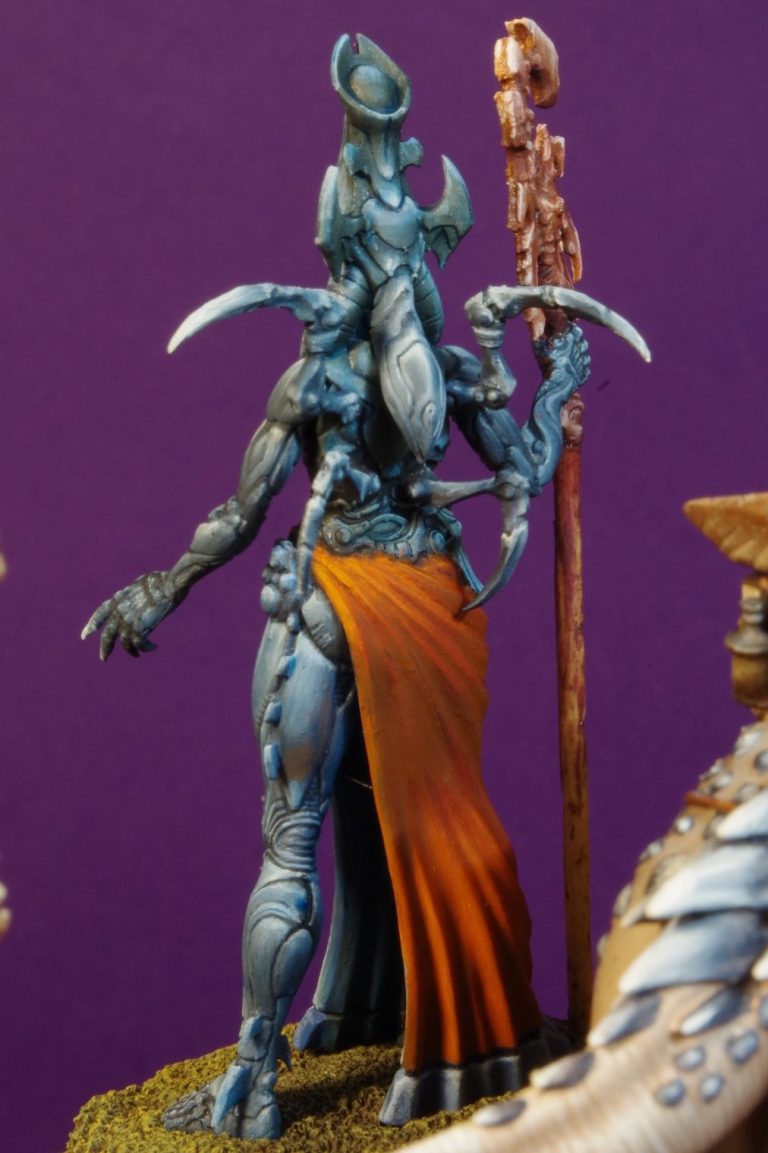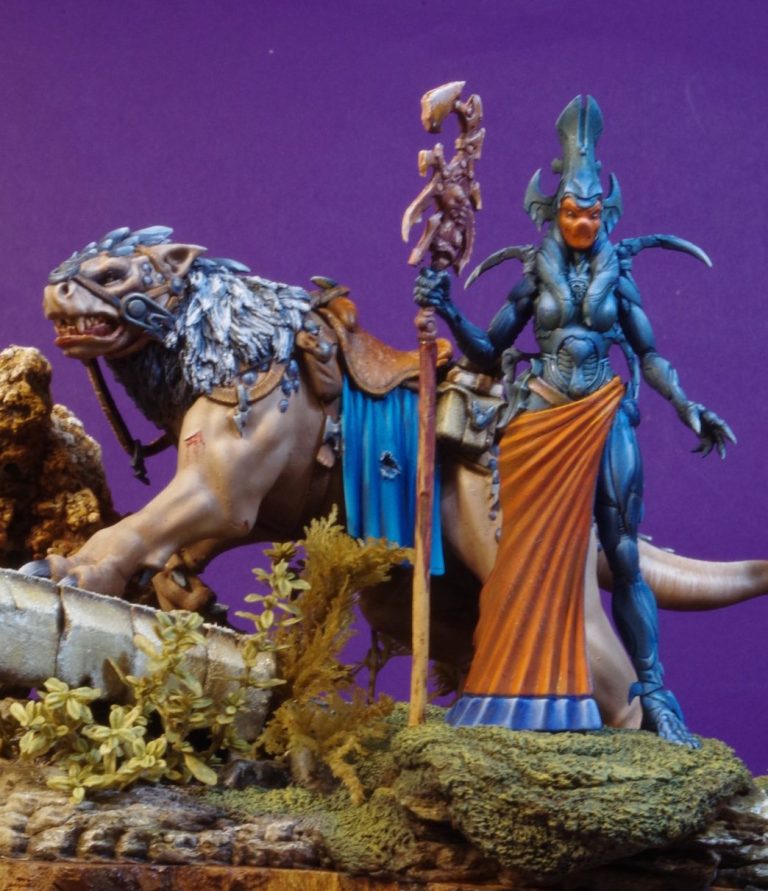
Virgin and Hunting Cat
JoeK figure
with GW mount
Painted in 2018
I met Joe Karame of JoeK Miniatures when running the FigureWorld shows and this figure is one of three that he produced as a Kickstarter, The Virgin, The Mother and The Crone
It’s a weird looking figure I admit, but in a really good way, and combining it with some kind of mount just seemed to fit in somehow.
The GW range of Age of Sigmar has some knights mounted on what can only be called a cross between a dragon and a large cat, and although they’re meant to have standard GW 30mm figures on them, coupling one with this 54mm figure seemed to work OK.
Let’s begin with the mount, GW were on a mission to make construction not only easy, but for multi-part models to click together without need of glue or filler.
Some very clever design work and mould making to do that, and this particular model, with quite a few parts worked very well indeed. There’s no loss of detail, in fact at that time, I thought that GW had really stepped up detailing on this piece.
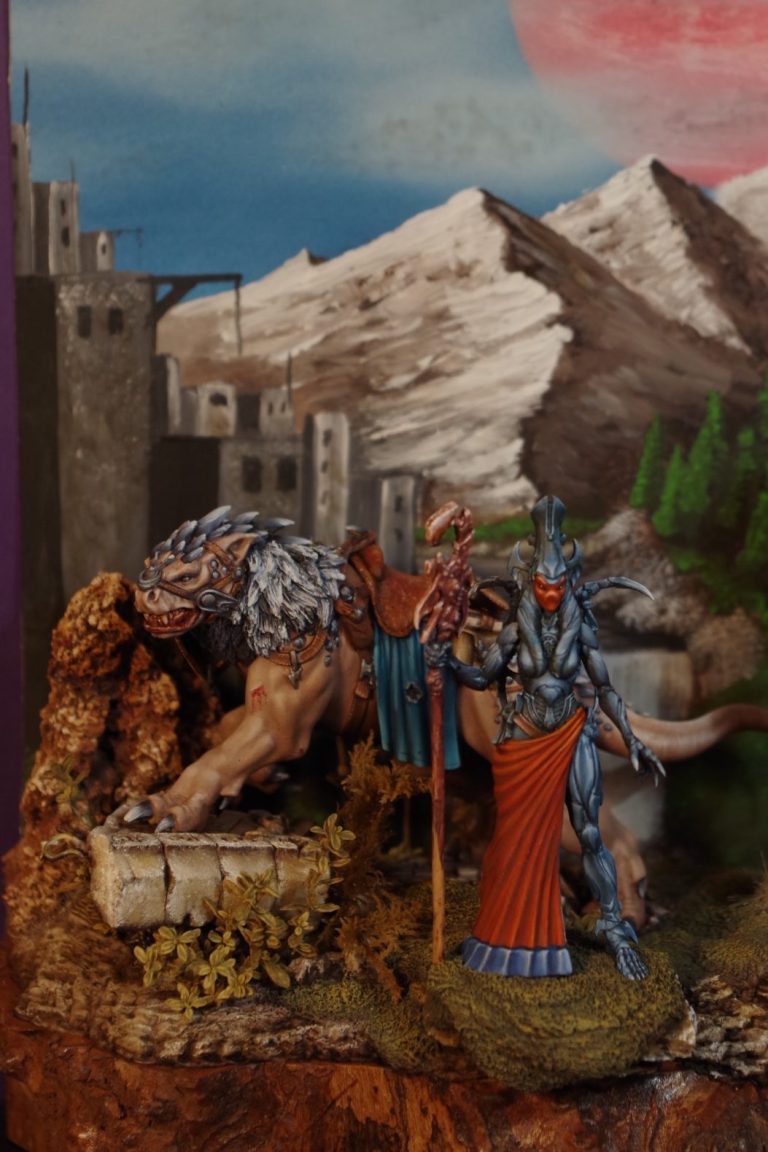
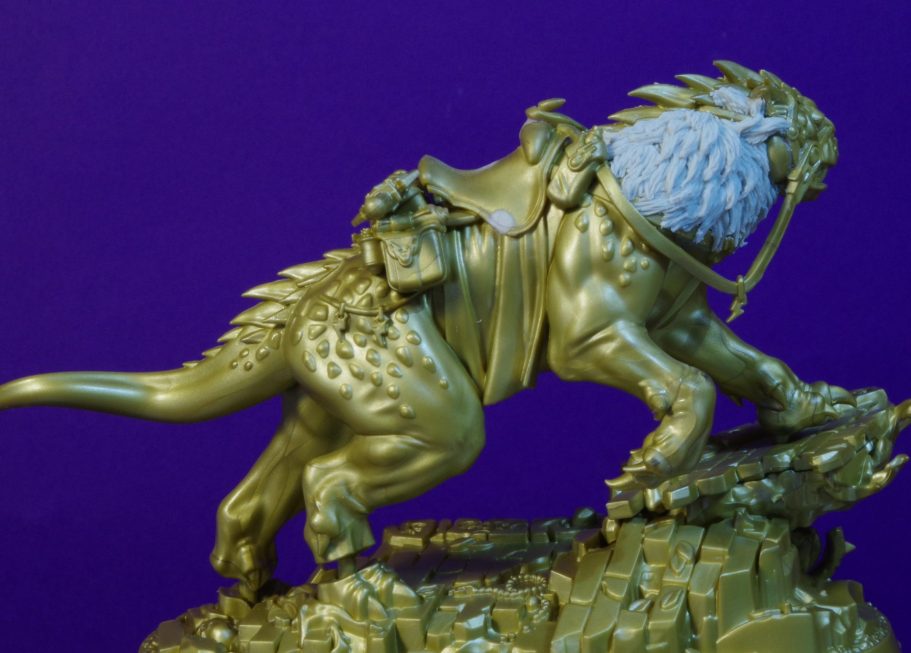
Photo #1 shows the beast built, the groundwork base comes with the model, and the only addition I made was to add a fur mane out of Magic Sculpt.

Photo #2 shows the front of the model, and I’ve added a coat of primer to it to begin the process of painting it.

Photo #3 shows a fair leap forward, with the skin having been painted with a pale pinkish cream.
I used Burnt Sienna oils for this, with a lot of Buff Titanium mixed in with Titanium White used to blend in the highlights.
The very bright saddlecloth is Winsor and Newton Turquoise, with highlighting and mid-tones built up with the addition of Titanium White.

Photo #4 and the details are beginning to get some paint.
The large scales on the beast’s back are painted with Payne’s Grey with Titanium White for the highlights, the saddle is Light Red oils with Yellow Ochre and Buff Titanium for the highlights and wear, and the sword scabbard and saddle bags are various brown oil paints mixed up to give a variety of shades to the different items.

Photo 5 and the small scales on the beast’s flanks and the claws have been painted to match the scales running down his spine, along with similar colours used for the fur of the mane.
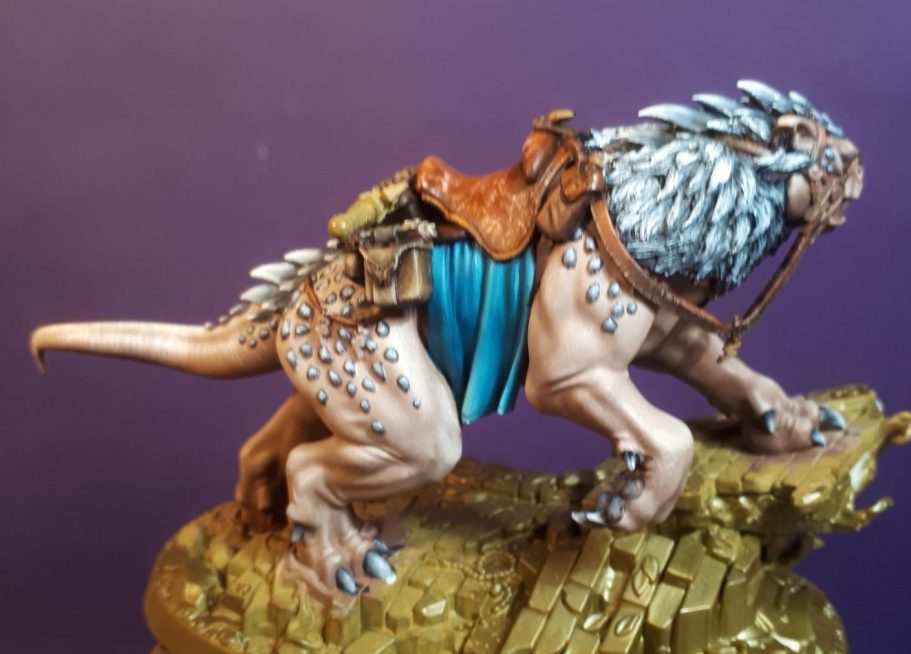
Photo #6 – just to prove that I’m painting both sides, and the leather of the beast’s reins have been painted, again with various brown’s and made to look a little worn by adding lighter colours in small lines to either edge with a fine brush.
With the beast complete, it was time to move onto the figure.
Photo #7 shows the main casting of the Virgin. The left leg and the arms are yet to be fastened in place, and will be painted separately.
There is a great deal of detail on this and I began by priming and undercoating with a sand colour acrylic, then moved on to add Prussian Blue oils to the body and headgear. Titanium White was added in very small amounts to each area to build up mid-tones and eventually highlights and then the oils were allowed to dry fully. Once that had happened, I added a thin wash of the Prussian Blue to the deeper recesses of detail to make sure that they stood out.
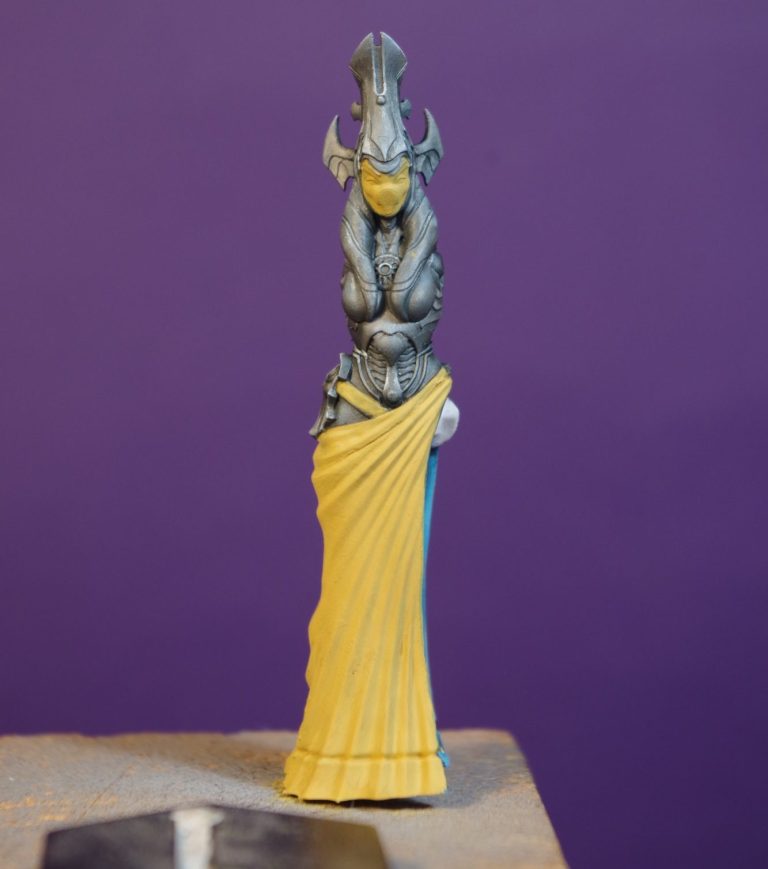
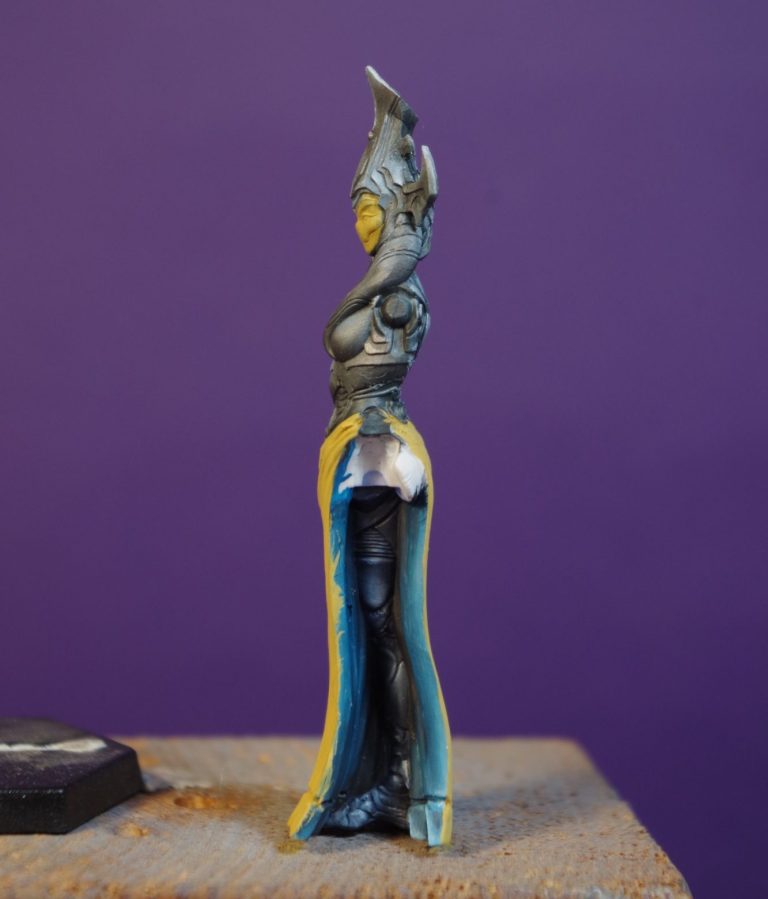
There is no face as such on this figure, just depressions that give the vaguest of hints that there is a face there. It somehow makes the figure a little threatening, without any effort of movement.
Photo #8 shows a side view of the figure at this stage, Whilst the inside of the right leg probably won’t be seen, I painted it with the blue / white mix anyway.
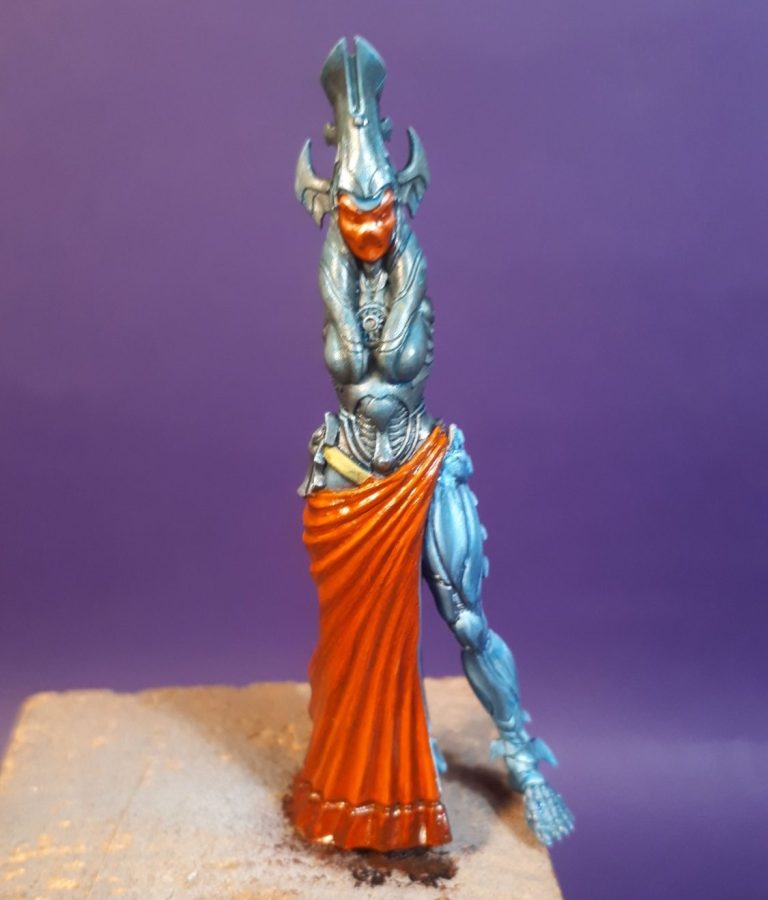
Photo #9 shows the front of the figure again, this time the left leg is in position and the skirt, which has a lot of Greek influence, has been painted with W&N orange oils. The shadows were added by mixing in a little blue to the orange and then blending it in with a fine brush, and Chrome Yellow was used as a highlight.
The same colours were used on the facemask, and while all of this looks rather shiny at the moment, that’s because the photo was taken while the paints were still wet. A week in the drying cabinet – yes, colours like orange and yellow do take that long to dry – would see them change to a matt finish.
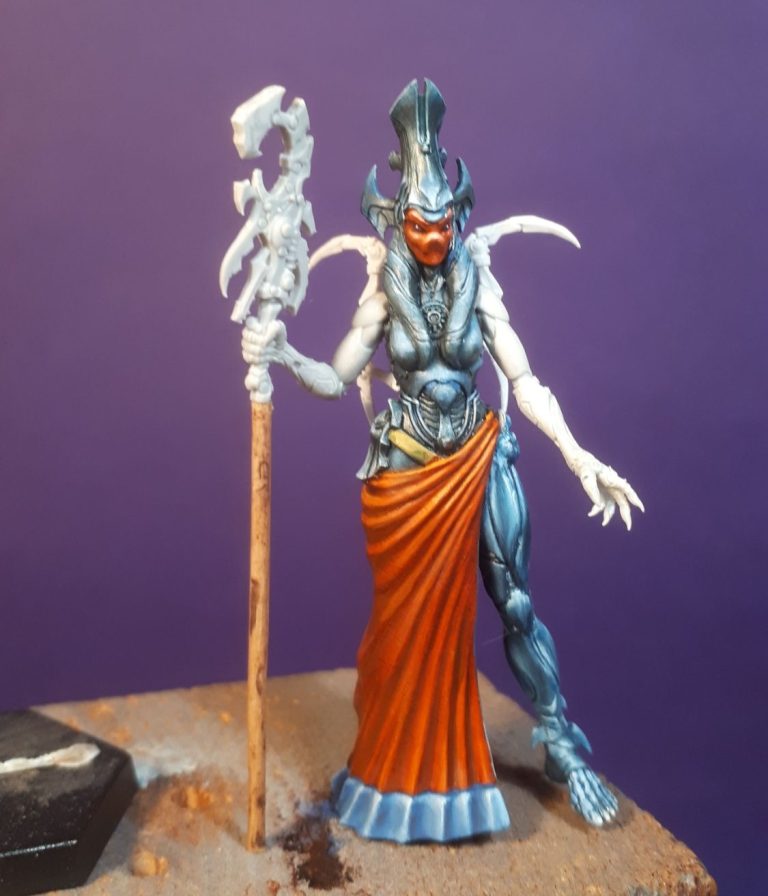
Which is shown in photo #10 along with the arms being glued in position. The shaft for the staff has been replaced with a section of cocktail stick, which has then been coated with a dark brown oil paint and the excess paint wiped off with a soft cloth.
I added eyes to the face, it looked a little blank without them, and in fact makes her look even more threatening, who’d have thought ?
I added a blue border to the bottom of the skirt using the same colours as I’d painted the body with, but added a little more Titanium White to make the overall colour of that area a little lighter.
Photo #11 shows the back of the figure at this stage, the skirt has gone completely matt now and the extra little spiky arms can be seen on her back too.

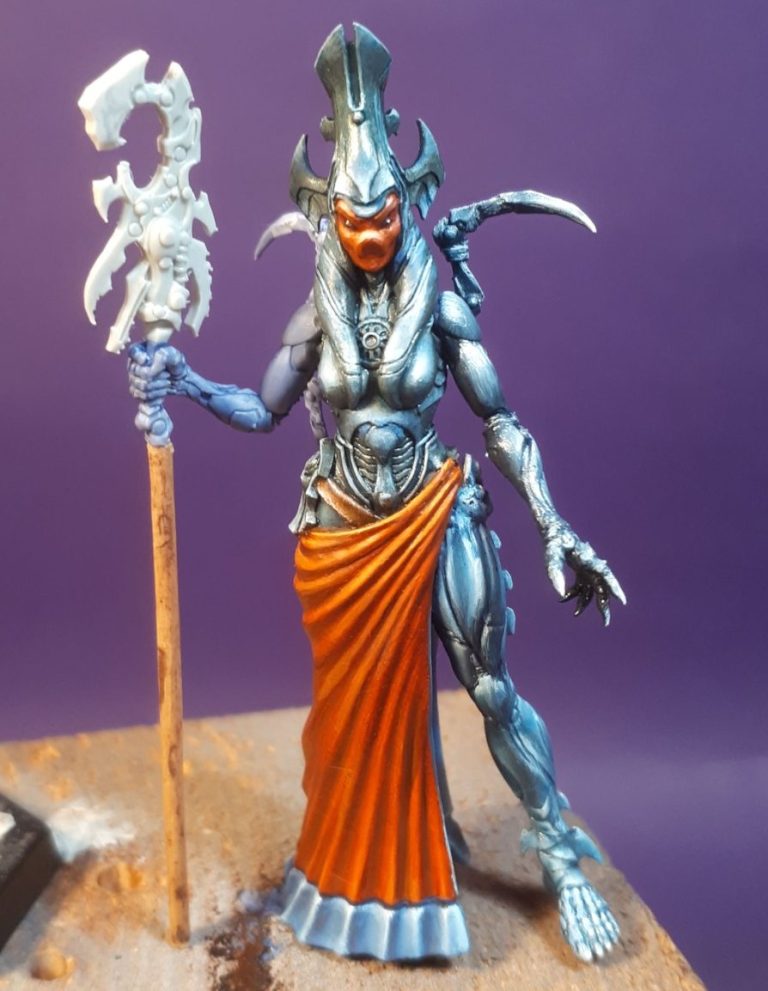
Photos #12 and #13 show the arms and spiky bits on the back have been painted to match the rest of the body, again a lot of surface detail for the painter to make the most of. It does make a lot of difference to go back once the main painting is done and add some extra shadows and highlights to make the details “pop”.
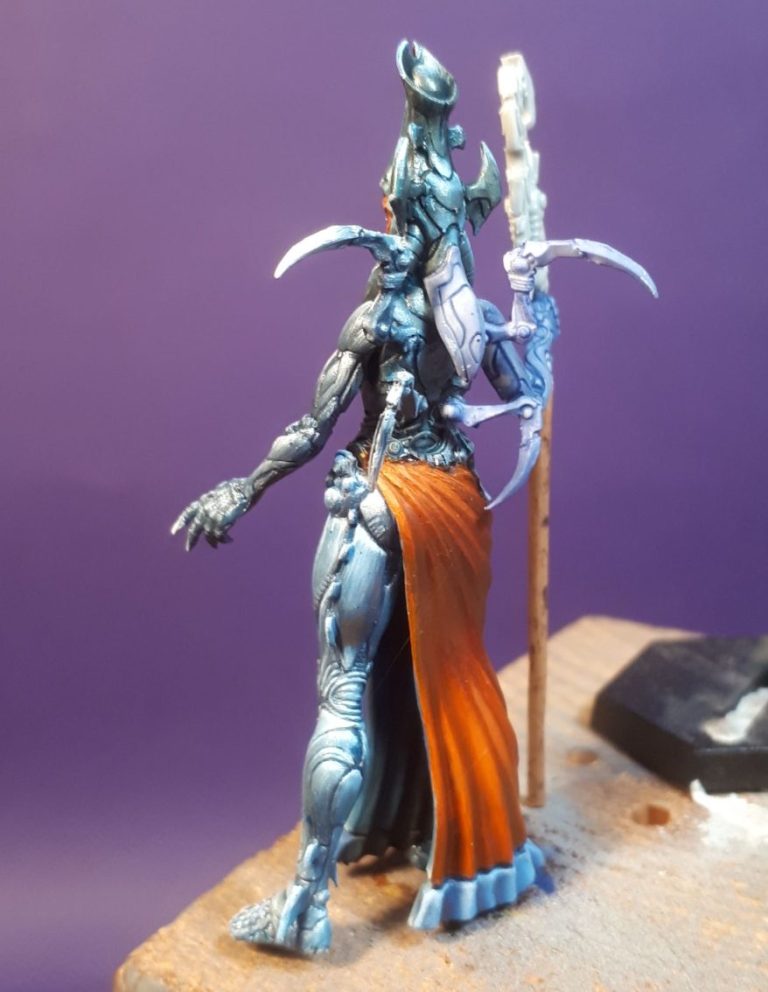
Photo #14 and whilst there’s not much difference here except the head of the staff having been painted gold, there’s a lot of little adjustments been made, particularly with deeper shadows on the skirt and under the arms etc.
It’s really a case of adding a little paint to an area, seeing how it looks, then balancing similar areas around the rest of the model to match them all to that initial change.

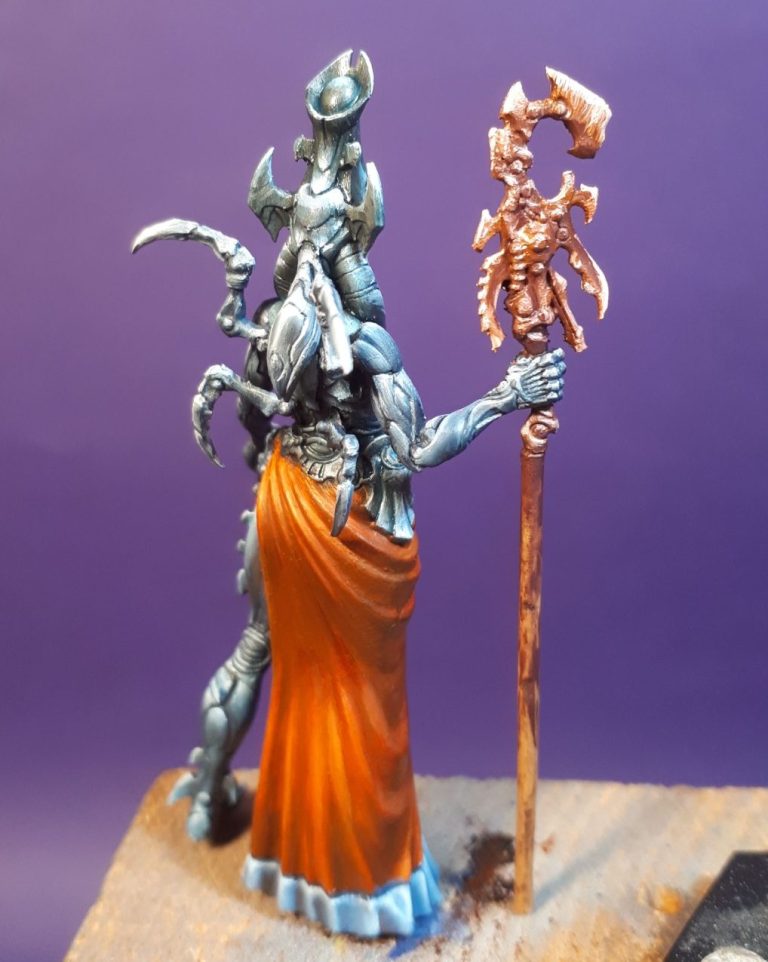
The changes and adjustments are perhaps more noticeable in photo #15 where the deeper shadows on the skirt at the hip and lower edges have been altered and the darker blue added at the waist.
Photo #16 shows a slightly different angle of the back of the model, and the effect the shadows give to enhance the curve of the cloth of the skirt can be seen here.
The shadow colour used was Mars Brown heavily thinned with White Spirit.


Photo #17 – a fair leap forward to setting a scene. I’ve used a wood plinth from Oakwood Studios that had a black base with a piece of Burr Wood on top, over this I added the hunting cat’s base and then blended that in to the wood with Milliput Epoxy Putty, stippling a texture into the putty with an old toothbrush – how old skool is that !!
The hunting cat already had location points on the base, in fact it was already secured to that, but whilst the putty was still soft, I pressed the feet of the Virgin into it so that she had a good solid location to be fastened into once the putty had gone off.

I’d found an old piece of Fish Tank decorative rock – Fossilised Wood – it was called at the time, and although great looking, it was really brittle and tended to break up, hence this small piece here that I found in a box of the stuff. That was pressed into the soft putty and glued in place.
Once the putty cured I could add paint and also a little static grass – I tend now to use the kind that comes in little clumps on a backing sheet as it’s very quick and easy to add if you just need small amounts of grass on a base.
Photos #18 and #19. I’d seen a few models with decorative backings added to their bases, and I thought that this piece looked a little bare on it’s own, so perhaps adding something “scenic” might add another dimension to it.
Now I’m no Bob Ross, although I could watch him and those like him paint for hours. However, I thought I’d have a go, and the two backings are shown here.
The one in #19 doesn’t have enough height to the scenery, although I think I prefer the painting over the one in #18 which has more height, but is perhaps too bright and could have done to be less saturated.
I think the model does look better for having the backgrounds added, and I think maybe I should think of doing more with this idea.


Final thoughts.
I’ve added a few shots showing the finished model, I think the amount of detail on both kits is worth it, and hopefully I’ve done them both justice.
Of the models painted in 2018, this I think is my favourite, it just seemed to fall together and although the scales shouldn’t really match, they seem to work well.
It also stretched me and took me a little way out of my comfort zone by adding the backing, and I do like the idea of “mounted figures” not actually being on their mounts.
I think that all started when I did the GW Goblin and Palace Dog that got me a Silver Demon in 1989.
So, great models from JoeK and GW I’m not sure if Joe is still producing the three figures, but it might be worth looking him up – Joe Karame – on Facebook to see if he still has any castings available. Blame me if he wonders how you found out about them please.
