Parliamentarian Bust
1/4 scale resin bust from Fort Royal Review
Article in Military Modelling in 1998
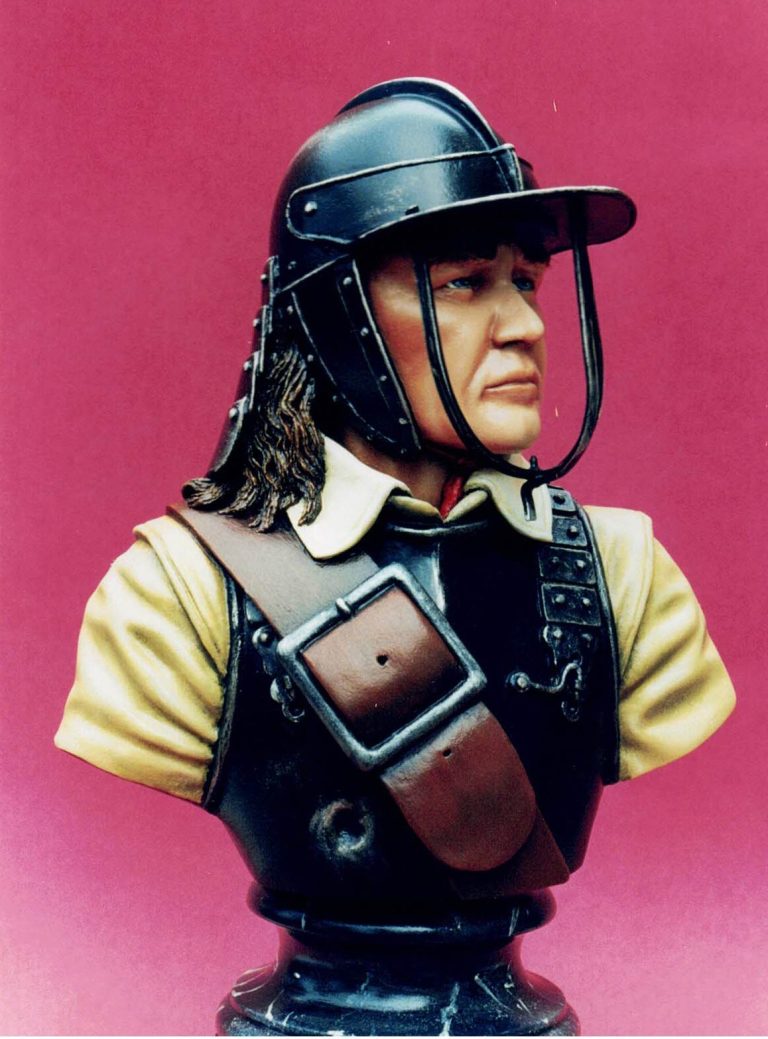
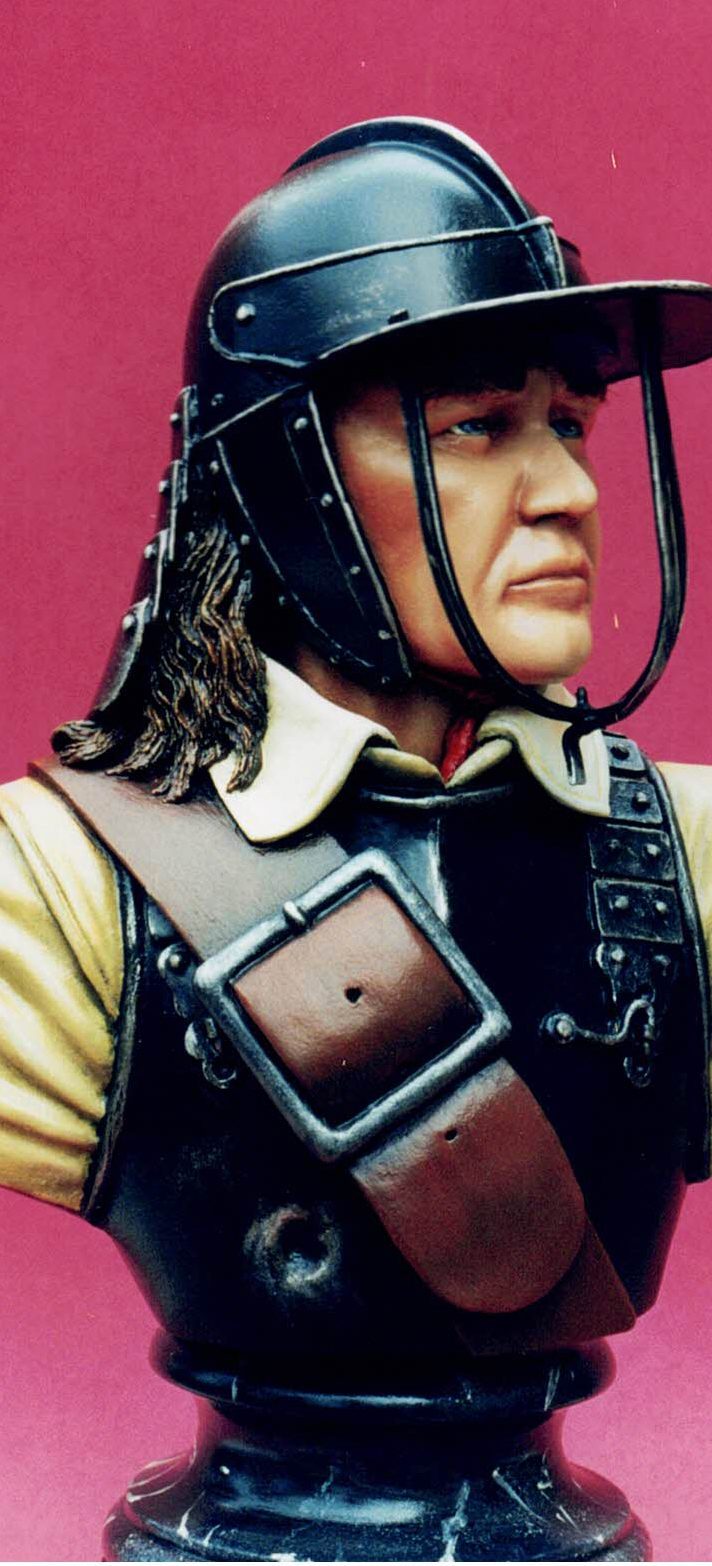
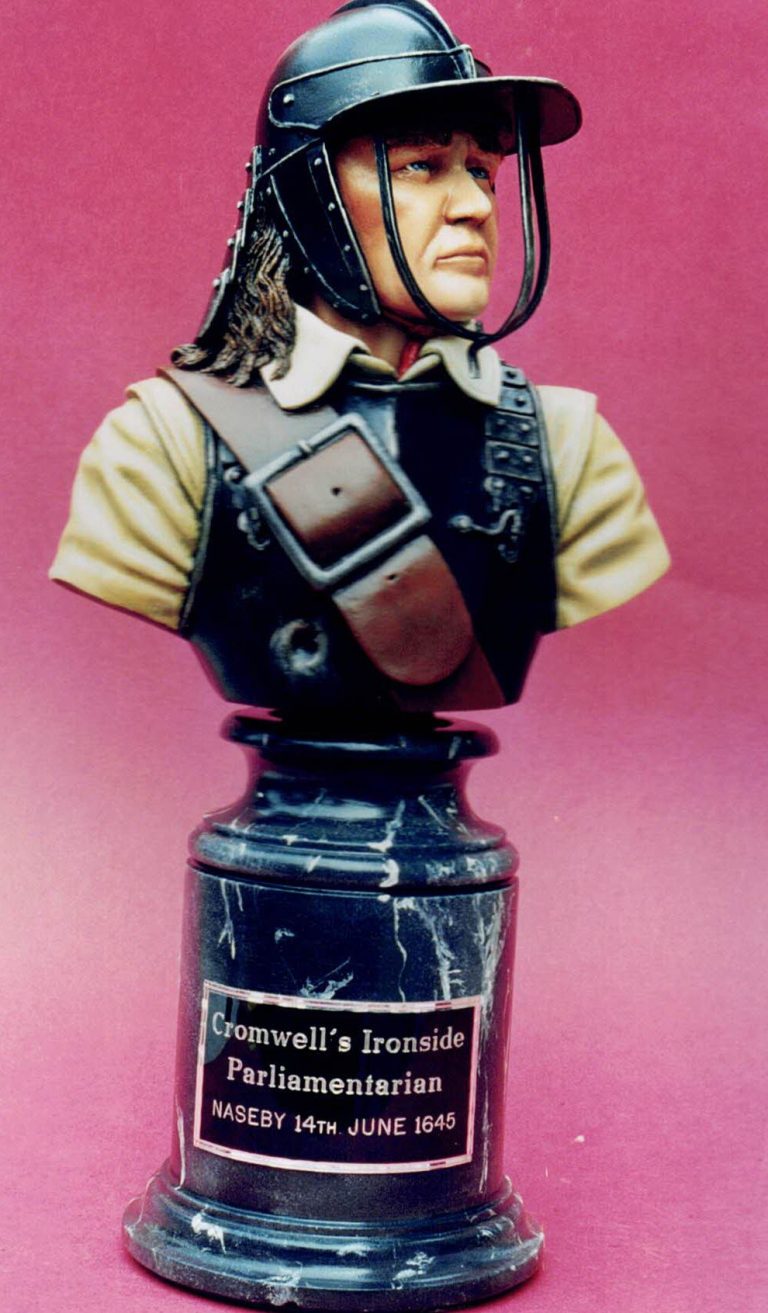
This was the fourth release from the now sadly defunct Fort Royal Review, and it continued their line of large scale busts, this one depicting a Parliamentarian from the English Civil War. As with the previous pieces, the parts are kept to a bare minimum, making this a range for the painter rather than the modeller.
This particular one comes in five parts, those being the main casting of head and shoulders, and also the separate base, both of these being cast in a fairly dense resin.
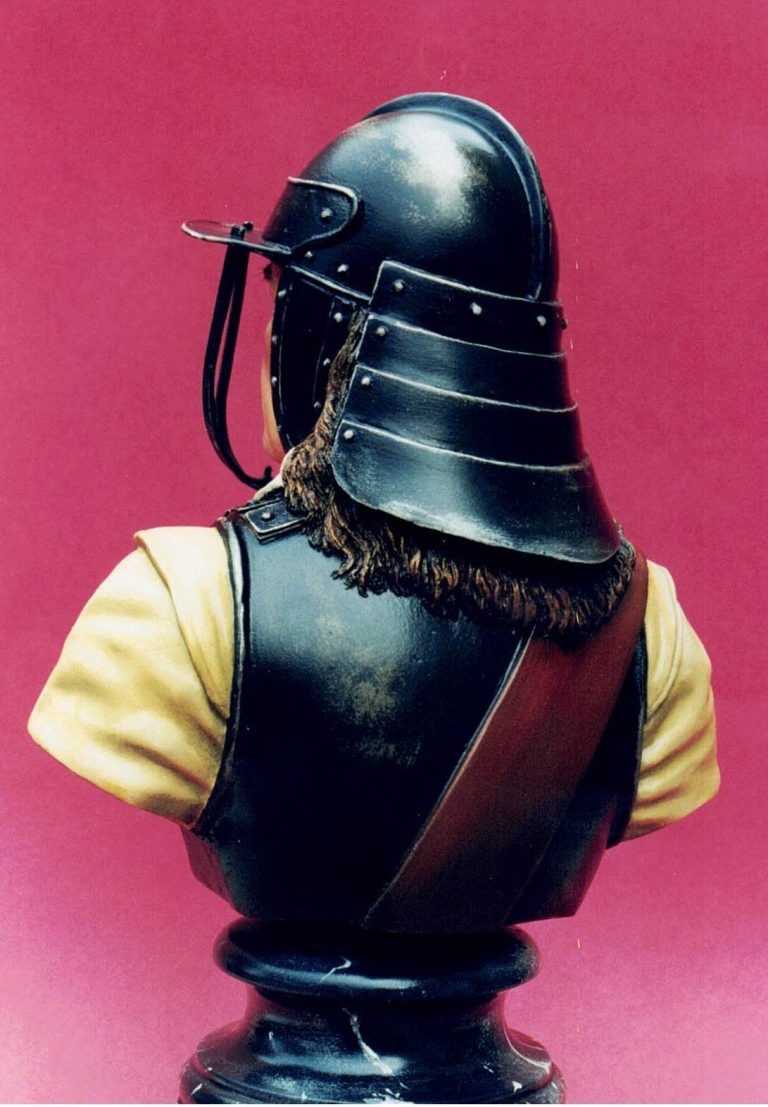
Three white metal parts are also included, one for the peak of the helmet, and two that go to make up the bar type face guard.
The casting of the resin is almost flawless, I just about managed to find a slight mould line on the inside of the shirt collar, which was fixed with the addition of a small amount of filler.
The white metal parts do suffer from some heavier mould lines, although these are easily removed with a file and emery cloth.
As with the previous models in this range I'll leave the painting methods for the face and clothing for some other time, and just give the details of the more unusual methods that I used to get some of the painted " effects."
Starting up
Now for some glue. I decided to add the peak to the helmet, fastening this in place with some superglue, and then added a small amount of Milliput to the joint line to hide a few small gaps.
The bars of the face guard were test fitted, but left off the model until the painting was complete as I didn't want them to get in the way when I was painting the face and collar of the shirt.
Now for some paint. during my research I found that the majority of the armour used by the parliamentarians was coated in a black coloured paint or lacquer, which I assume to have been a preventative measure against rust.
As with any metal that has a layer or two of paint added to it, the paint tends to rub and chip off after any amount of extended use.
To mimic this I began by painting the armour first - as opposed to the face - mainly because this method is messy, and if it went wrong I didn't have to be careful of other areas of paint whilst stripping the offending mess off.

The armour
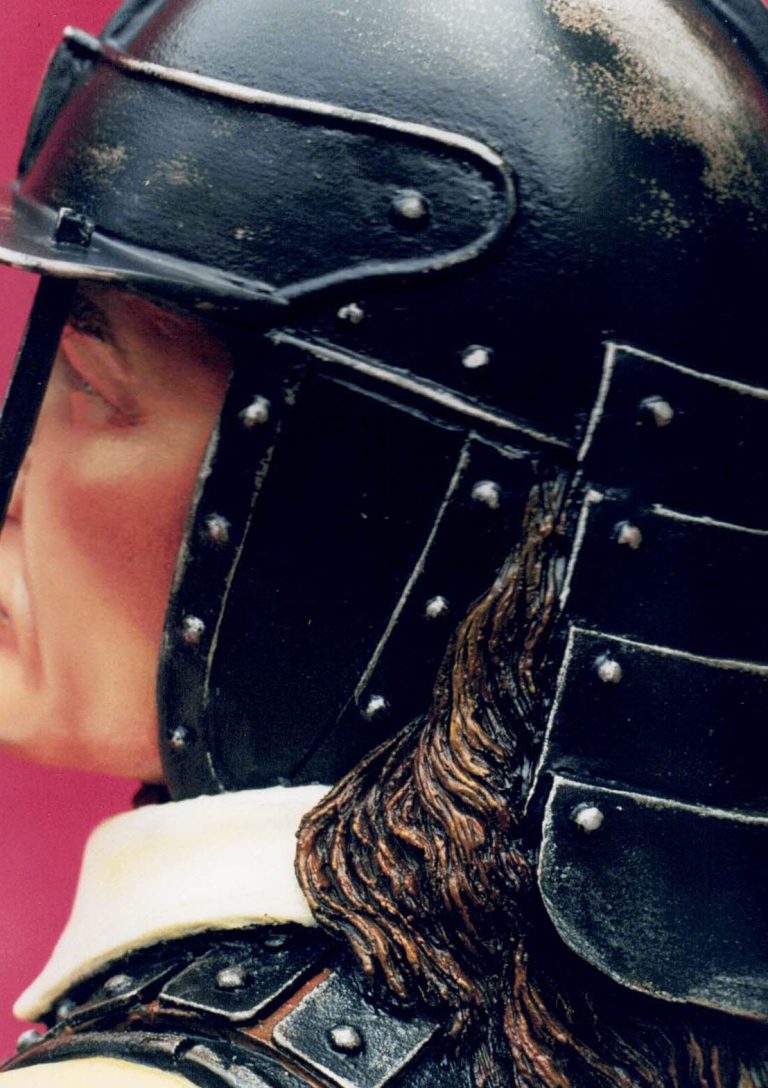
So first of all a mix of Humbrol rust ( reddish brown ) paint and silver was made, adding a touch of black to darken it slightly. This mix was then thinly coated onto all areas of " metal " including the three bar face guard which had been left separate. This was left to dry thoroughly overnight.
The next evening I added a couple of thin coats of black acrylic paint over the top of the rust colour, and allowed this a couple of minutes to dry.
Then I began scraping and scratching at the black paint on any areas that would tend to get worn or damaged through general wear and tear.
Because the acrylic paint is plastic based it tends to " tear " away from the surface of the model, replicating chipping of the surface paint, as seen on the edges of the helmet brim and most other raised edges of the armour.
So with all the edges of the armour looking ragged and well used, I then put a small amount of Isopropyl alcohol ( windscreen wash liquid to you and me ) on a cloth, and buffed up some of the flat areas, where the paint would be rubbed away in a more gentle fashion, but again due to wear and tear.
The alcohol being a solvent for the acrylic removes the paint fairly effectively - whilst it's fresh anyway - and creates the worn look on the helmet sides and the back of the breastplate.
Quality Control
Just a mention here about the large crater in the lower front area of the breastplate. For those of us ( me included ) who didn't know, this is actually supposed to be there and isn't a moulding fault.
This rather large dent is a 17th century form of quality control. To make sure a piece of armour was going to work, the piece of armour was propped against something solid and a gun was fired at it. If the shot bounced off, then the armour was deemed fit for use, and obviously if there was a hole in the armour then the armourer was going to have to reconsider his design strategy.
Anyway the dent is supposed to be there so restrain yourself from filling it in.
The only further work I did to the armour was to add some random touches of silver to emphasize the wear and usage of the armour. I did this once the painting was finished as the silver ink I use tends to rub of fairly easily unless coated with varnish.

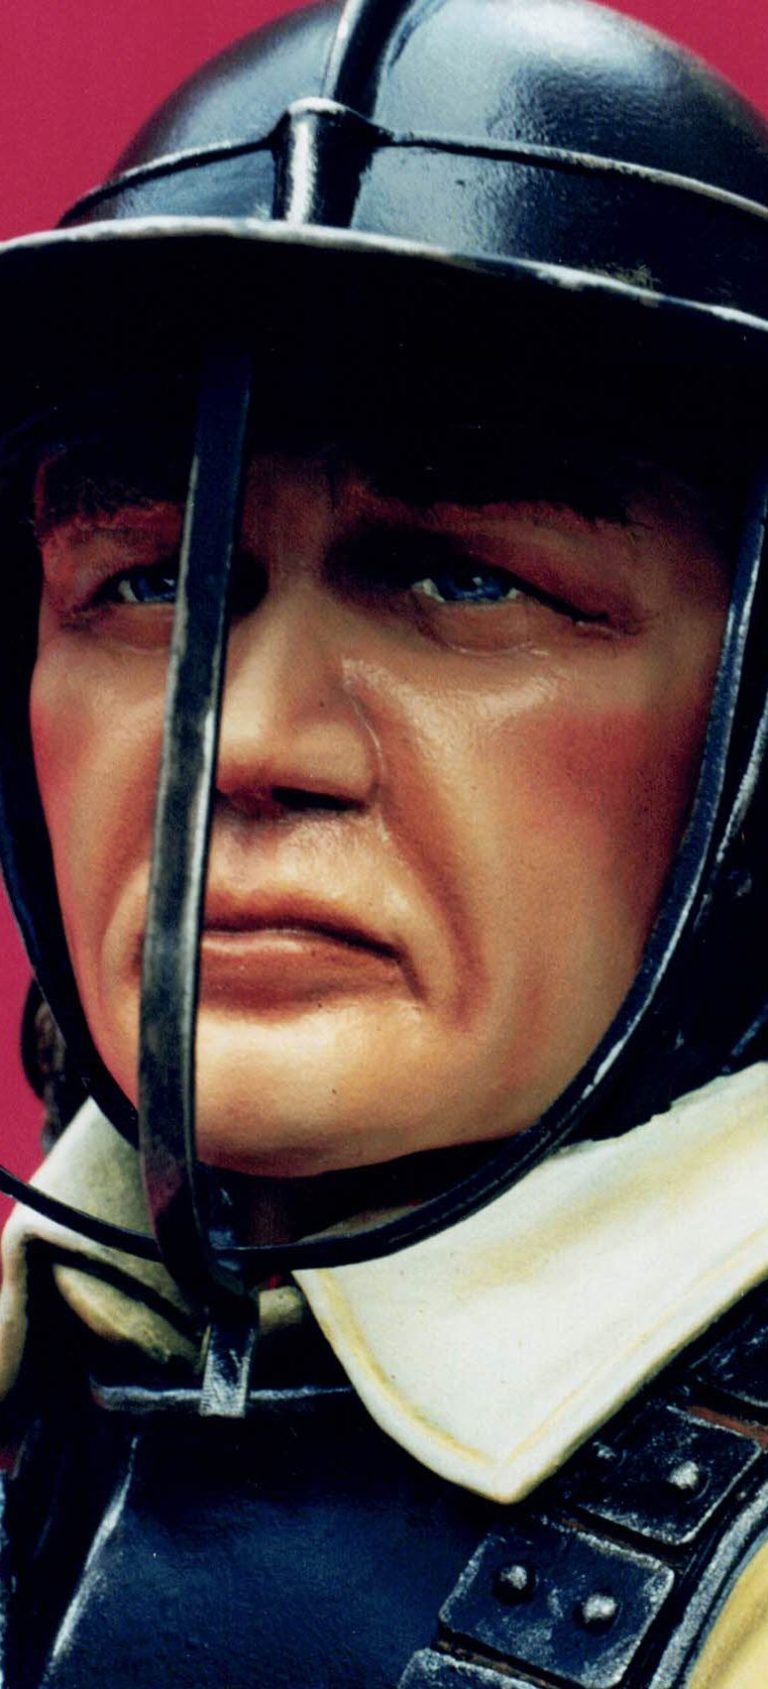
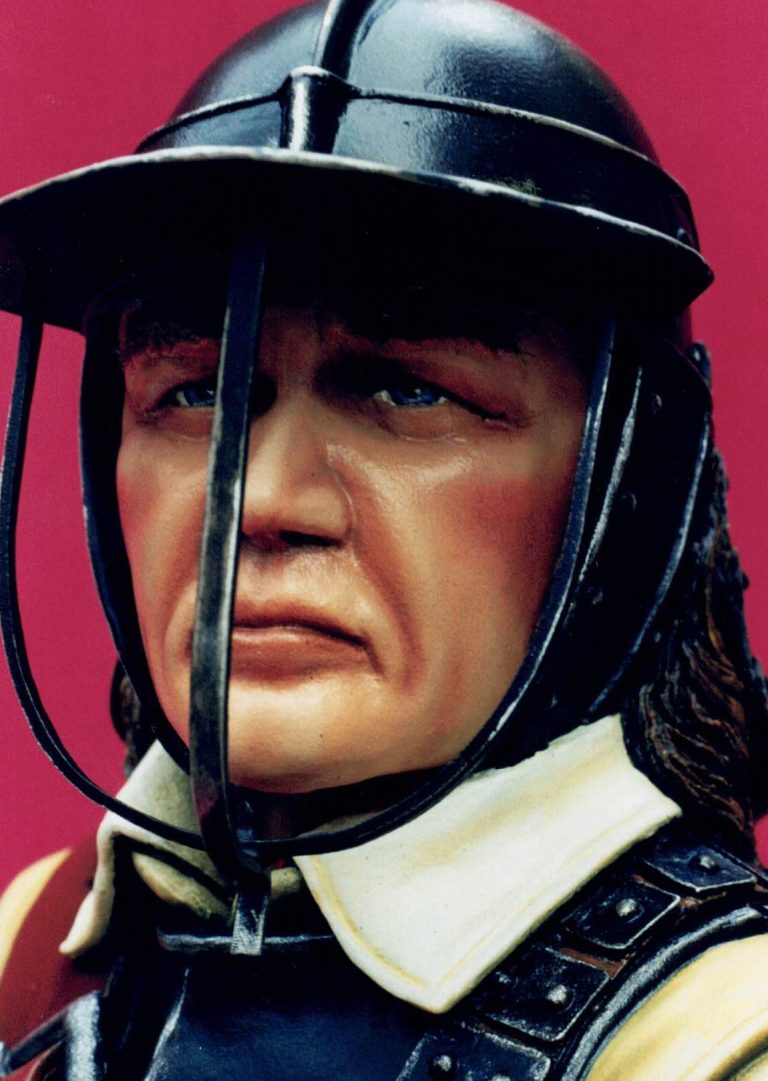
The face and a raised eyebrow - or two
The face was painted next, fairly standard practice here of oils over the top of a flesh coloured acrylic undercoat / primer. I'll just mention what I did with the eyebrows here, as it's one of the areas of a face that I really struggle getting done to my satisfaction.
As this is such a large scale, and the eyebrows are sculpted as raised lines, I thought I'd try adding flock to them ( in a similar manner to the Celtic warriors' cloak a few months ago painted by Phil Kessling ).
The method I used was the same as attaching the flock to a base - white glue painted on and the flock sprinkled on, and once dry the excess blown off and the flock painted to match in with the planned hair colour.
The method seemed to work better than just painting the eyebrows on.
Clothing and belts
The coat sleeves were painted to represent the long, thick protective coats sported by certain soldiers of New Model Army. Yellow ochre, raw umber and white being mixed to arrive at the creamy leather colour.
At a push this area could be painted in two different colours to represent a waistcoat type garment covering a shirt, the sleeves of the shirt being of a different colour to the leather of the waistcoat ( see Brasseys book " The English Civil War " - the chap sat on the right hand side of the picture on page 79 ).
The shirt was painted in an off white colour, utilising some of the leather colour to discolour the white, and also to provide the shading.
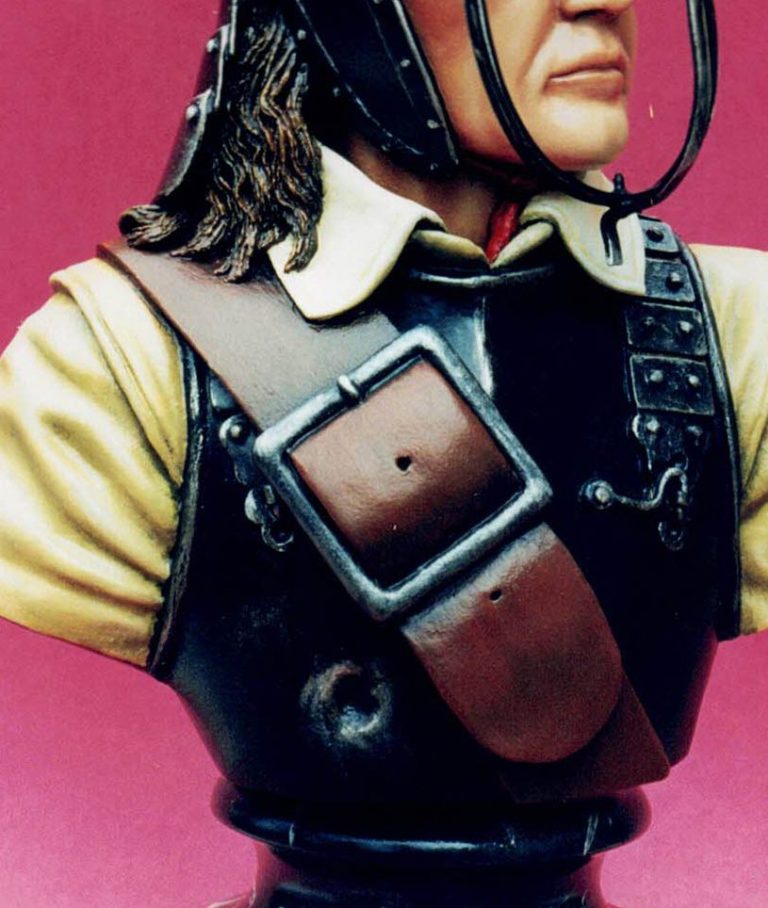
The cloth strip used as a chinstrap I decided to paint red, shading this with burnt umber in the deeper shadows.
This small addition of a bright colour was intentionally added to lift the model somewhat as I felt that the colours on the rest of the model - mainly black and brown - were tending to be dark, and a model like this deserves to stand out from the crowd.
More brown for the belt, and in between the armour sections on the shoulder straps on the breastplate. I'd been advised by Dave Gerritt of Fort Royal that the buckle on the belt should be in a dull iron colour, not brass as sometimes shown.
As he wanted the model for use as box artwork, and he's got reams of research material on the subject, I decided to comply - brass would look nice though ! - and used Humbrol Metalcote " polished steel " to do the honours.
Here I can take my bow to the audience for being a fool. After having read an article by Adrian Bay who had trouble coating metalcoat with an oil colour wash, and then smugly commenting myself in the Roman bust article that this problem could be avoided by adding a coat of acrylic medium, I go and forget to add the protective layer and just add the wash of black oils.
Needless to say a sorry metallic mess was the result and I had to strip off the metalcoat and re-apply / re-polish etc. the whole area again - yes O.K. I've a memory like a sieve.
Finishing off and basing up
The method used on the hair is similar to the one used for the Viking bust a couple of issues ago, starting off with a dark brown oil colour worked into all the detail, and then adding lighter colours to the raised detail to highlight the sculpting.
With the hair complete, it only remained for the underside of the bust to be painted black and that's the bust finished.
Aha, but hang on a minute, now for the base. I'd unwisely mentioned about a marble effect on one of these bases in a previous article, so I felt I'd better put my brush where my mouth was - so to speak.
This is quite an easy method really, and apparently has been shown in a program that was on the Sky " Discovery " channel a couple of months back. For those mortals such as I that don't have Satellite yet I'll give full details.
In this case for a black marble - to match in with the armour. First of all, an undercoat of black acrylic, I used a couple of thin coats for this, but more could be added, so long as an even black is arrived at, and there's no brushstrokes visible. To this is added a coat of very dark grey oil paint, the thinner the better, but it must block out the black underneath.
Now for the tricks.
Get hold of a small piece of the sponge foam packing that some of the model companies use - come on you've got some hidden somewhere - and use this to gently stipple all over the grey paint.
No I haven't added any different colour yet, this is just so that the brush marks in the oil paint are hidden and the finished article will have an even texture. Next get some white oil paint, and with a clean piece of the same sponge foam, stipple small amounts of the white onto the grey in random patterns.
Finally, whilst the paints are still wet, used a feather - any type of bird feather so long as it's one of the stiffer flight or tail feathers will do - to add irregular lines of white paint to the base.
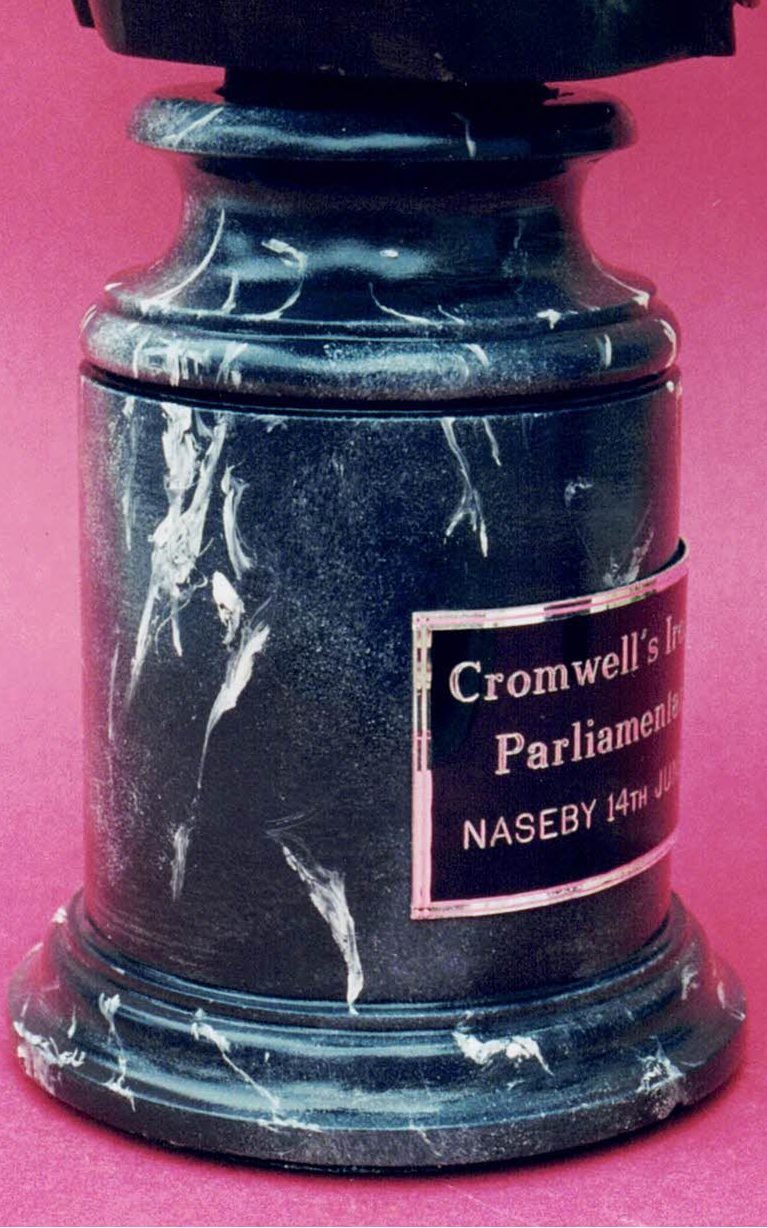
The easiest way to do this is to load one edge of the feather with some paint, and then " push " it against its " grain " so that the filaments of the feather skid and slide of to each side of the line of travel.
This final addition of paint gives the solid areas of white that ( hopefully ) mimic the marble lines in the real stone.
Once the oil paints were all dry, a coat of varnish was added, matt for the clothing, satin for the armour and gloss for the base and the eyes.
I then joined the bust to the base, added the nameplate, and the three bar face guard, these latter two thin pieces of metal are worth pinning together at their joint. I found that the joint was a lot stronger doing this rather that just relying on the glue alone.
Famous last words ?
Hmmm, another one for the cabinet. Well I'm not really breaking new ground by saying I like this one. I've liked all of Fort Royals models in this series.
However I'm going to risk all by saying that this one is my favourite so far, even if it’s only pipping the others to the post by a hair or two.
Research : Brasseys " English Civil War " by PHilipp J. C. Elliot-Wright ISBN 1-85753-211-2
Also : Dave Gerritt of Fort Royal who gave lots of hints and tips along the way.