Samurai Mounted Archer
Andrea Miniatures 90mm White Metal kit
Article in Military Modelling magazine 2008
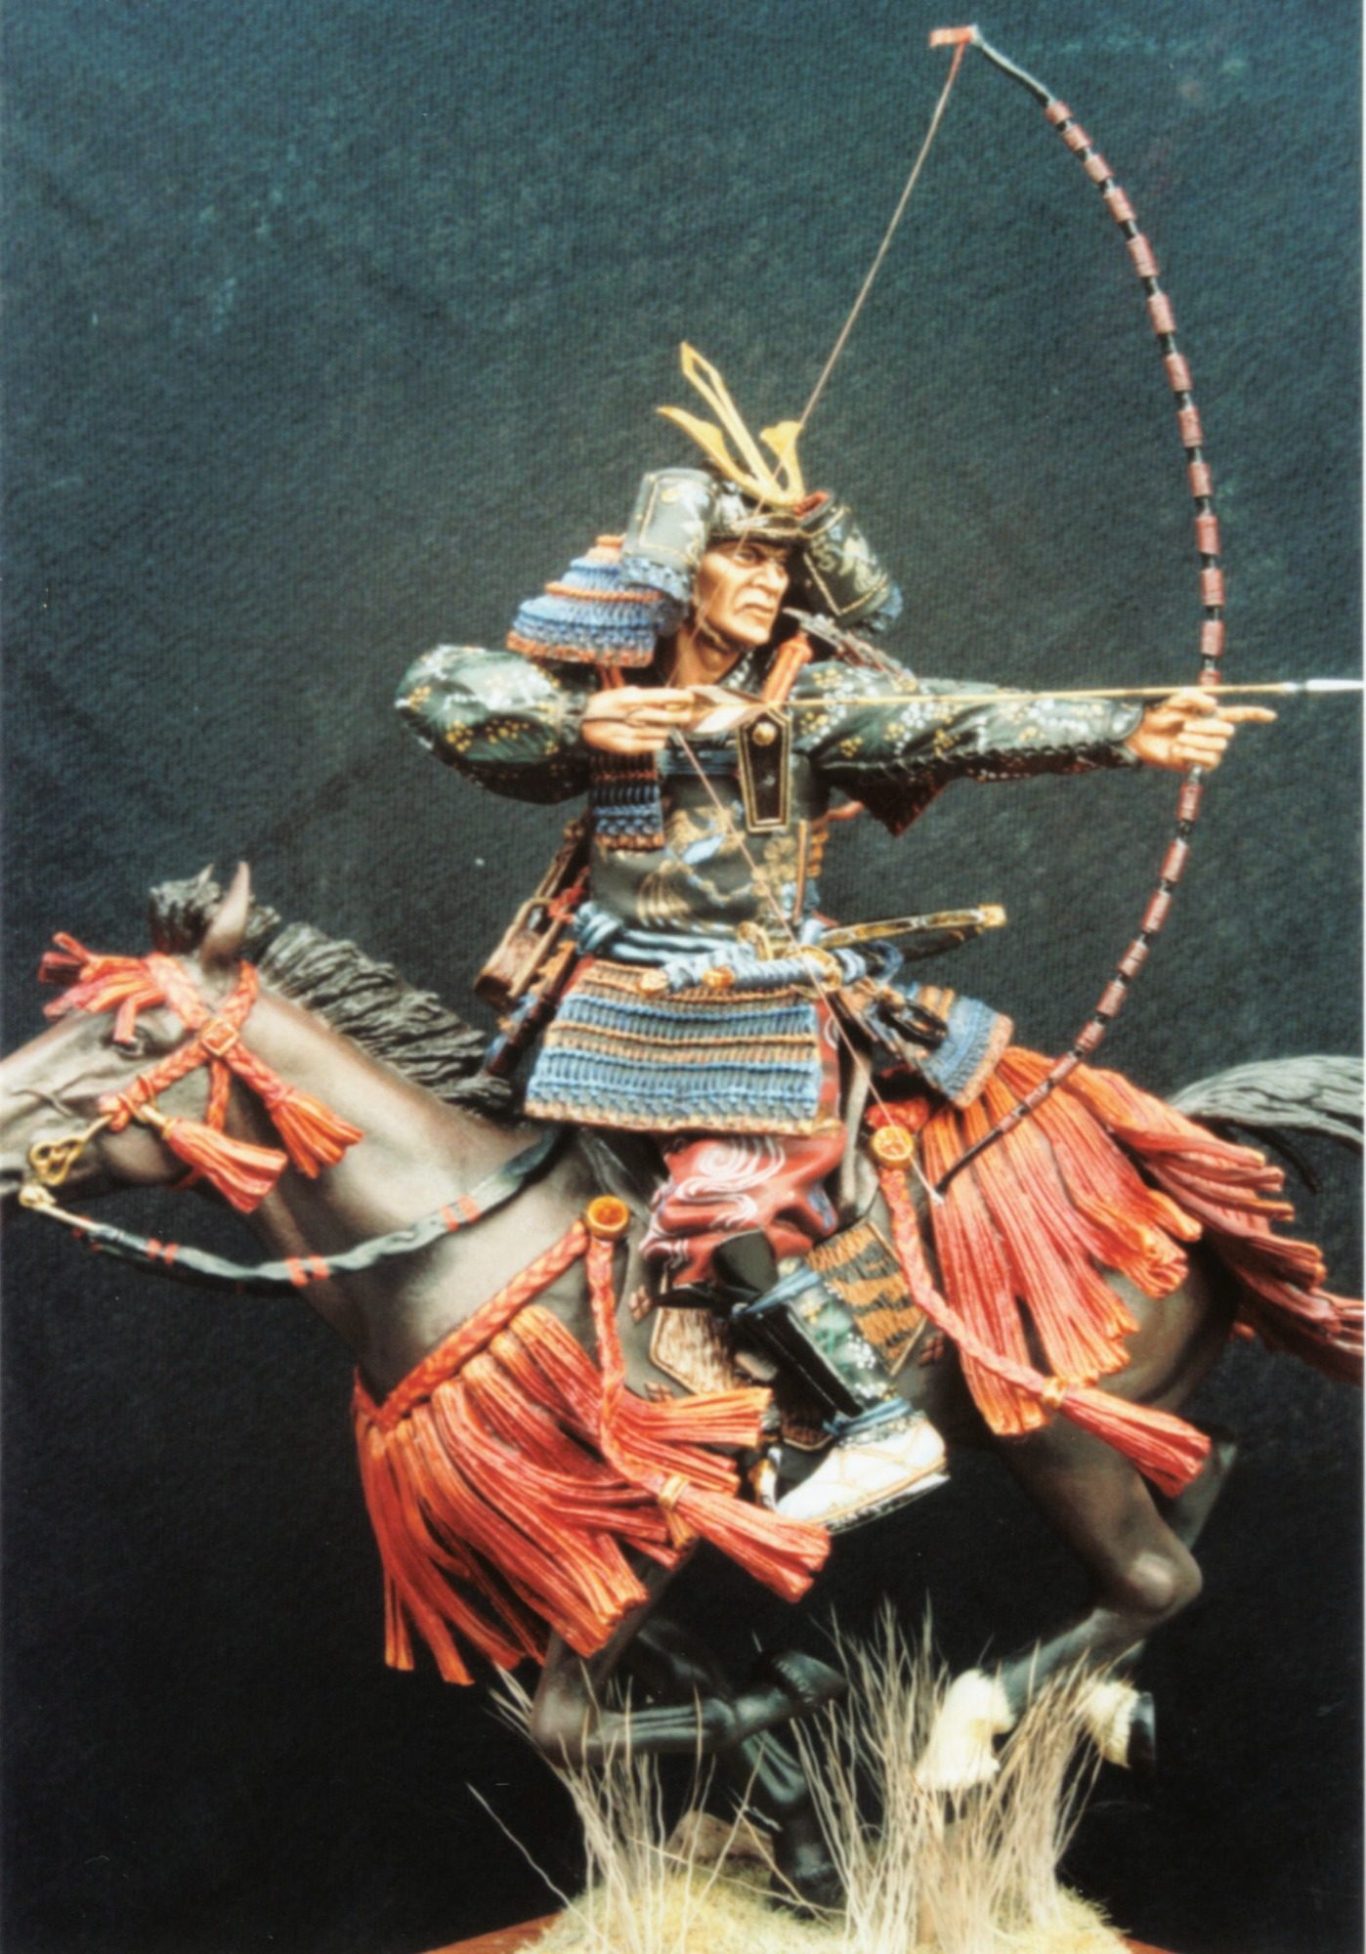
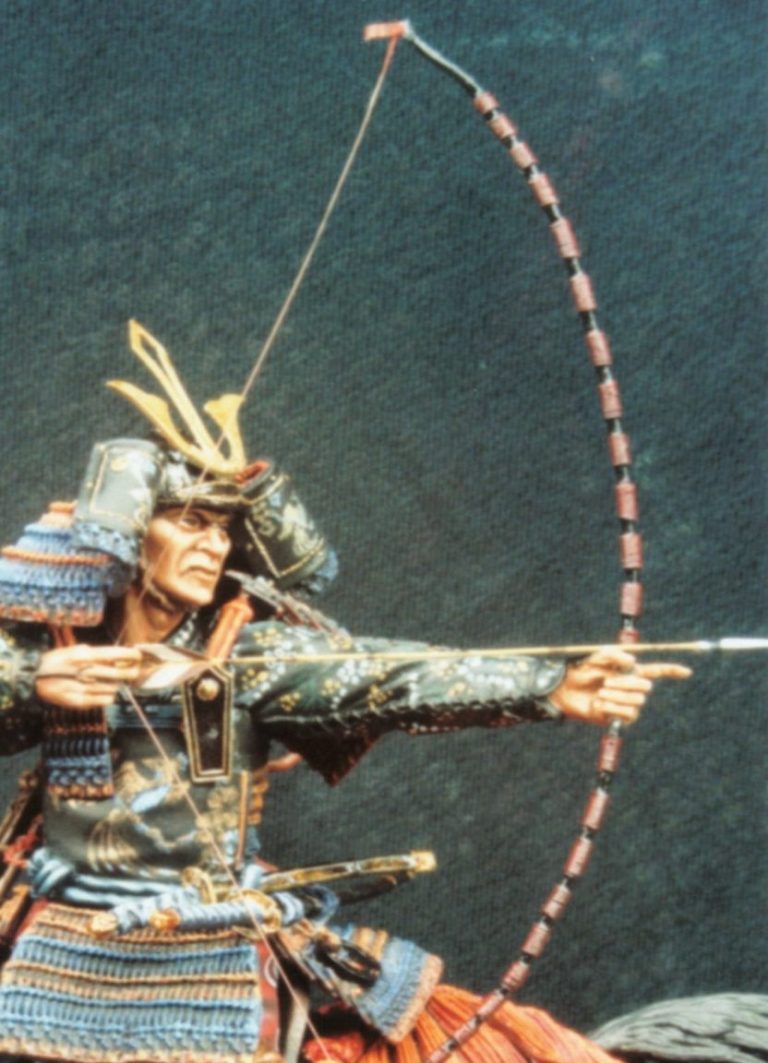
The Samurai Bow.
Whilst a lot of attention is paid to Samurai swords, particularly the Katana, there’s never much said about the bow. It’s an interesting weapon in itself, not least because of the way it has been adapted for use, and the way in which it is made.
Almost all Samurai were Buddhists, who, within their beliefs hold that killing, processing and the use of dead animals is abhorrent. This throws up problems if you want to use horn in construction of bows, not to mention producing leather for armour.
This is the reason behind much of the development of Japanese war gear, in that horn bows of the kind used by other warrior nations were never adopted, and a whole sub-class of men formed for the killing and dressing of food animals, not to mention the tanning of leather ( venison was referred to as “Mountain Whale” in some parts ).
Leather used to form armour, or parts of a Samurai’s kit was therefore only used minimally, either as decoration or for absolute necessities, and its origin was studiously ignored. Looking at a Samurai, there is actually very little in the way of animal based material in evidence, compared to say a western counterpart of a similar period. The main exceptions being the use of leather on areas of the saddle, the decorative skins used on the saddles or in clothing, and sometimes the ray or sharkskin used for sword grips.
Because of these beliefs, bows were made from a mixture of wood and bamboo laminates, glued albeit with animal glue, and tied with bindings of rattan. The basic set up was for a wood body to the bow, with, initially laminates of bamboo on the forward facing edge ( the edge facing away from the archer when he’s drawing the bow ). This was later augmented with more bamboo strips being added to the back edge, and spacing the rattan cording where the particular bowyer thought best. This shows up when any two bows are compared, as the cording is invariably slightly different, and is there for support more than it is in place to form a decoration.
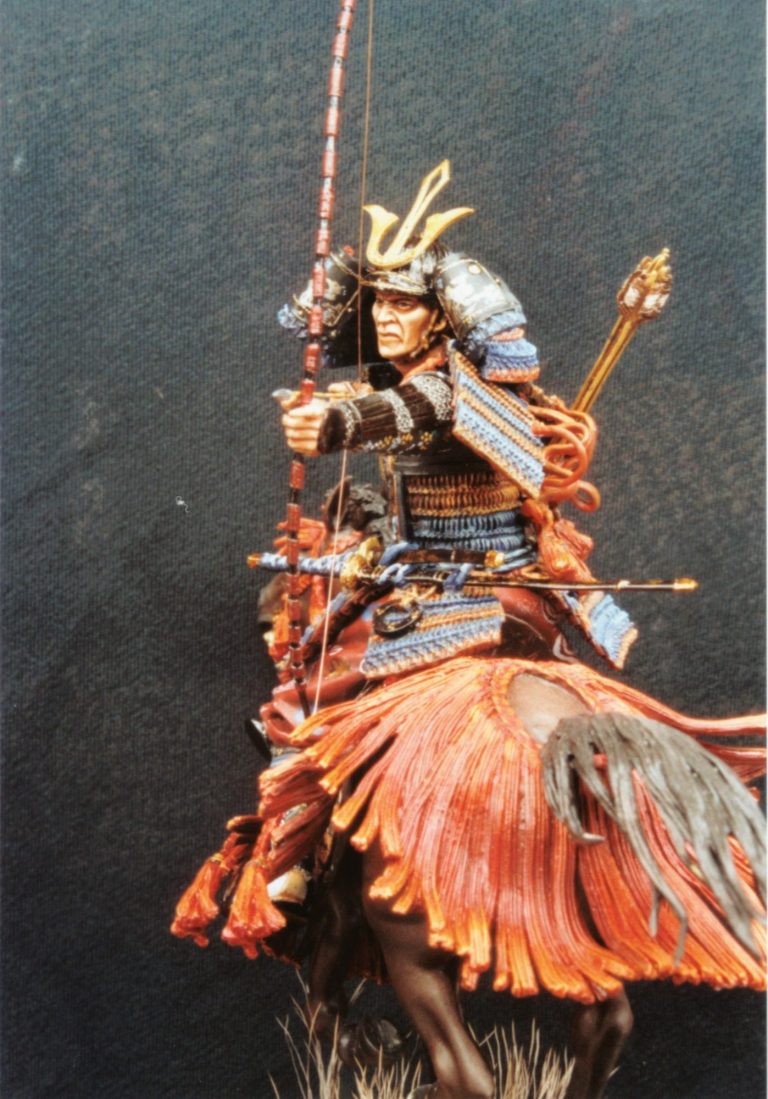

The lacquering was to protect the finished bow from the effects of damp, as animal glue is at best unstable, and is not in the least bit waterproof. To further protect the bow, it would be placed in a canvas bag when not in use; this, possibly might have been coated in oil or wax to further repel moisture.
Because of the construction method, power of these bows was relatively low, and to counter this, the length was increase to massive proportions. Most bows were 1.8m ( 6 feet ) or more in length, and there is one preserved example –said to have belonged to Yuasa Matashichiro - that is 2.7 m ( 8ft 9in ) long.
Bow strength came to be measured in how many men it took to string it, although there must have been an upper limit to how strong a draw could be achieved before the risk of the bow fracturing became too great.
The bowstrings were eventually developed so that, in the main, they could more easily be strung by one person; colour coding was added to the loops so that there was a distinct top / bottom to the string. Top was coloured red, and bottom white, both these being bindings of silk ribbon. There was sometimes an extra loop of silk at the top too, thus enabling the archer to grip this in his teeth to allow both hands free to bend the bow. Strings were usually made from either Hemp or Ramie; this provides a smooth relatively stiff cord once it’s been coated with wax.
With this huge bow came problems, not least how to shoot it from horseback; although with one that’s approaching nine feet tall, a chap would have to be fairly tall to hold that without scraping the ground. Anyway, this is why Japanese bows were built to be asymmetrical, simply by moving the grip down the shaft of the bow, effectively making them smaller at the bottom; the extra size giving the strength could be compensated for.


Because of the asymmetry of the bow, the grip had to be quite loose, because the bow hand would not be in a true upright position, the bend of the bow causing it to have a slight angle tilting the wrist forwards and downwards as more pressure was put into the draw.
To protect the hand drawing the string, a glove was usually worn, sometimes with only two fingers and the thumb covered. This glove would have reinforcements on the pad of the thumb as the string was drawn with the thumb, and the arrow held in place with the index and middle finger. This method is rather different to the way in which a western archer of say the Agincourt period would have drawn his bow.
Now for a quick look at the arrows. Again, the artistry in these is evident; they don’t seem to have been just functional, as with western weaponry. There are many different head designs to be found, many having a single application, such as armour piercing, broad headed ones for cutting flesh and the “Y” shaped heads thought to be for cutting cords on armour or in rigging.
But it’s the decoration put into the design that draws the eye. Some arrow heads have decorative holes in the metal, with even family marks ( mon ) worked into the head, granted though, that these are thought to have been more for votive offerings rather than as actual martial weaponry.
The basics of the arrow are still there though, a bamboo shaft with flights from bird feather – eagle, hawk, crane and pheasant being the most commonly pressed into use.
The shafts would be cut in November or December, apparently this being the best season to cut bamboo, and then trimmed, taking the outer skin off the nodes and also making cuts so that the nock would be just above a node. The usual way of producing these would be to put the nock in the end of the bamboo furthest away from the root of the plant, so that the taper of the shaft got thicker as it proceeded to the head of the arrow. On some connoisseur versions, the shafts were aligned so that they were cut in the same place, and the nodes would match up and look even when carried in a quiver.


Just a quick note on the quivers too: The box-like structure that the arrow heads were held in would usually have fine lines running across the top so that the arrows were held in place quite securely. An upper cord was sometimes used to loosely hold the shafts together too, particularly when the archer was mounted on a horse.
By the way, arrows are called “ya” and arrowheads “ya no ne”. Most arrows had only three feather fletchings, apart from those sporting a heavier arrowhead, these latter type usually having four fletchings.
Also as added value to this article, there are some photos of re-enactors, dressed in various Samurai costumes; taken by Frazer Grey at the Festival of Japan held in London in the late 1980’s. There are numerous points to pick up from these, not least the amount of decoration on even the most rudimentary of items, the collapsible / flexible quality of the armour ( particularly some of the shots showing the helmets almost being flat when put onto a solid surface ), and also the complexity of the cord knots.
Well, I think I’ve covered the unusual bits there, so lets have a look at Andrea’s offering.
The kit.
I was pretty pleased with myself, getting the chance to do this kit. I have in the past mentioned that I like Andréa kits, and this one looked pretty special.
As can be expected from Andréa, the box art is colourful, giving several pictures of a painted up example of the kit, to not only whet the appetite, but also give hints on parts position, and also ideas for colour scheme.
Inside the box, there is a full instruction sheet, giving a pictorial guide to how the model should be assembled.
It must be noted here, that as with some of Andréa’s other model kits, there are certain parts that must be added at particular times in the construction sequence. If you don’t, and add them earlier than specified, then you’ll find yourself having problems getting larger assembly’s to slot together.
I’ll mention these bits later.

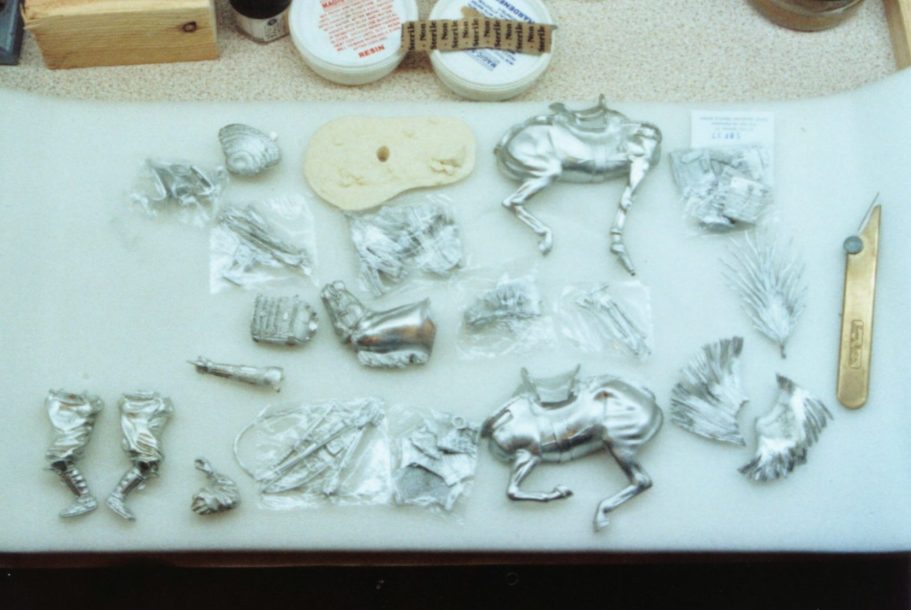
Otherwise, there is little to catch the modeller unawares, there are a lot of parts though, all in white metal, excepting the groundwork, which is moulded in resin. There’s now a few happy hours to be spent checking and cleaning away the restrained mould part lines. Photo #1 shows all the parts prior to me getting busy with a pot of glue and paintbrush.
Fit of parts is generally very good, and I only used the filler twice, once ( and I’ve not come across a mounted figure yet that didn’t need it ) for the joint between the horse body halves; and the second instance for the joint line between the legs and upper body on the archer himself.
Making a start.
I began by fastening some of the major components together, so that I had some large sub assemblies to work with. The legs and upper body of the archer were joined using superglue, and the filler added once the glue had cured fully. The horse halves, the neck and head were all fastened together too, again using superglue, and then adding the filler afterwards.
I’ll have a bit of a moan now, and although this kit is an example of what I’m on about, don’t you other kit companies out there think that this isn’t directed at you.
These mounted kits are expensive, a hundred and fifty quid and sometimes more.
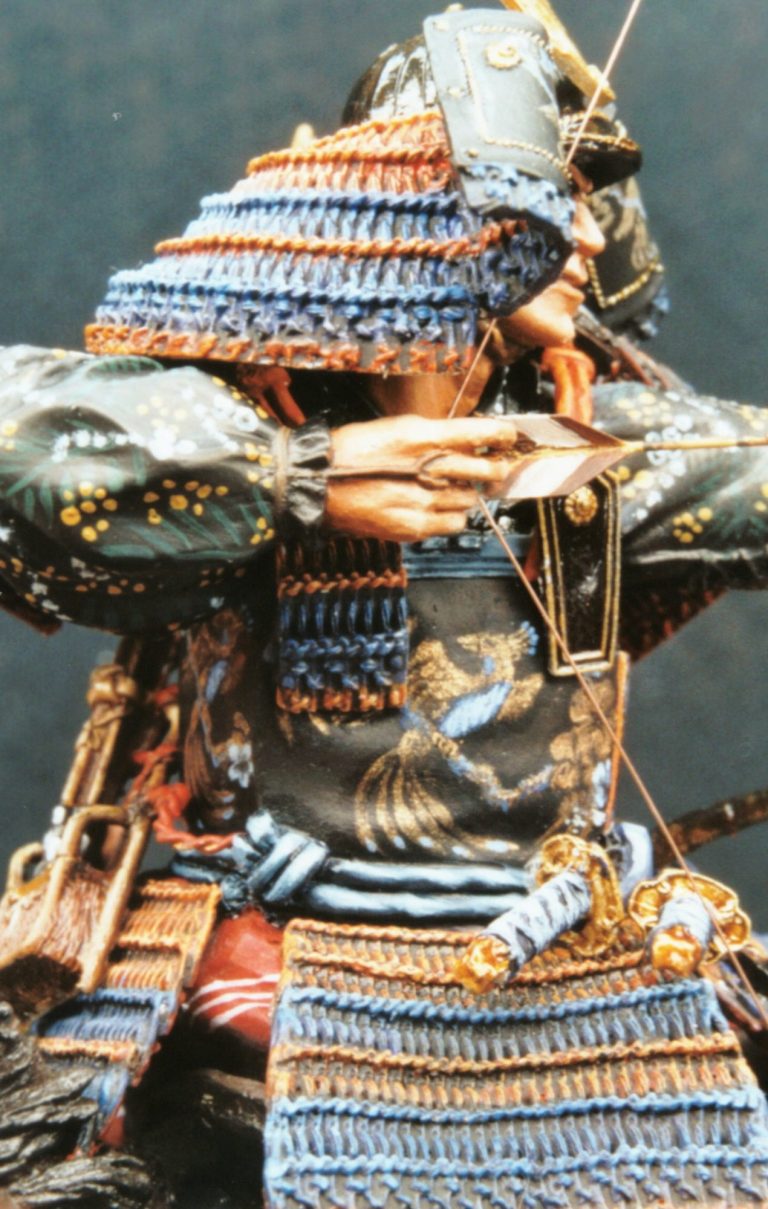
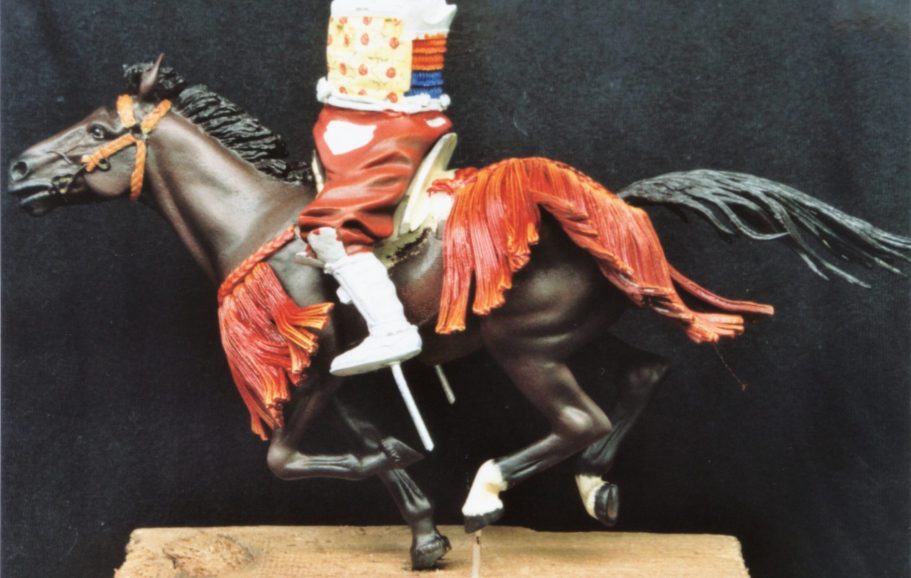
Although you do get a lot for your money, could I for one please beg kit companies to stop being so damn stingy with the steel support wire in the legs of the horse.
There’s about 5mm ( and that’s me being generous with the measuring stick ) of the steel wire protruding from the bottom of the white metal lug on the hoof – the only hoof for that matter – that’s holding the better part of 800gramms ( 28 ounces in English money ), of white metal in the air.
Now, not that I’m a pessimist you understand, but having paid out this amount of money, and lavished several minutes painting it, I’d like to think that it’s fastened to something relatively securely.
So please, all you gents at Andrea, Pegaso et all, can we have about 20mm of wire sticking out of our kits, it can’t possibly cost that much to give a little bit more, and we ( look I’m including you lot for added effect ) the consumer’s would be ever so grateful, honest !
That’s my only moan actually; it’s safe to read on now.
Right, with the horse glued together, I decided that I’d paint it, but first of all, the tail. Andrea have to be congratulated here I think. Instead of giving you a solid tail in full flow - and because of that, it being a heavy and cumbersome casting. They’ve moulded a fan-like object that can be bent as the modeller chooses to mimic the tail flowing with the horse’s galloping passage. I liked this idea, and after a little bit of playing around with the way I’d made it conform, it looked very good indeed.
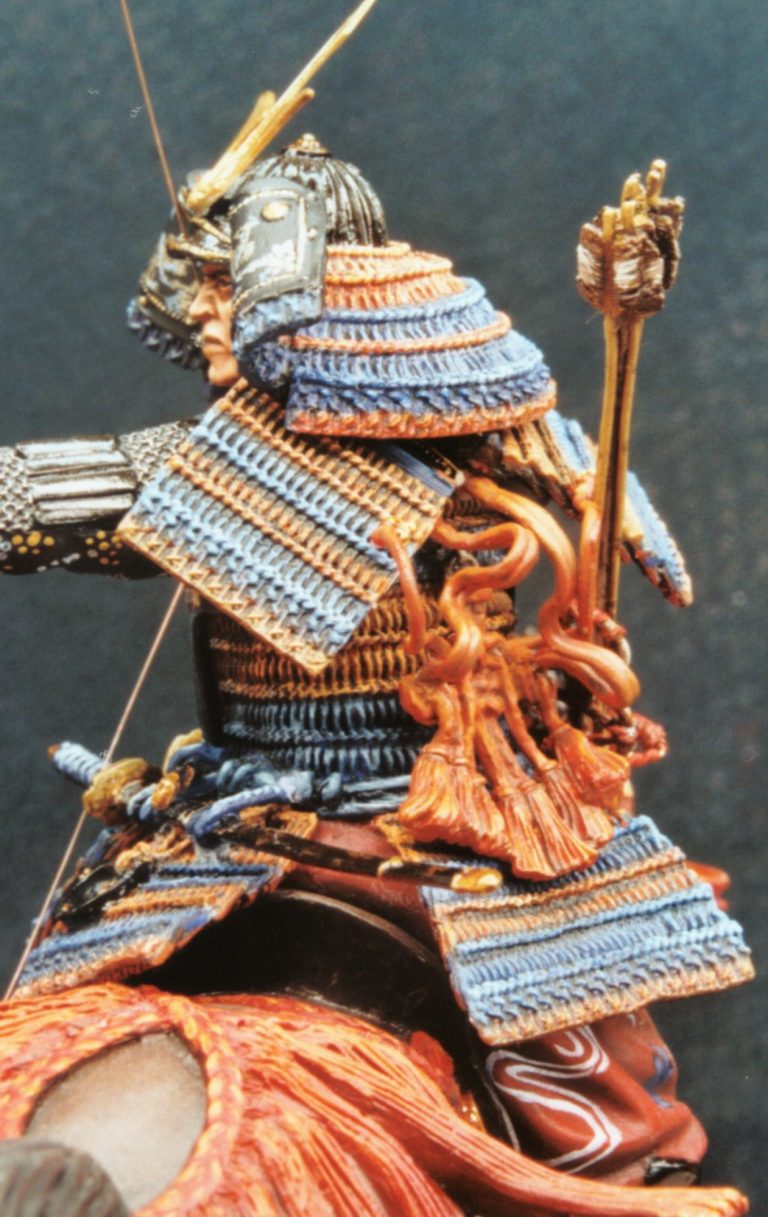
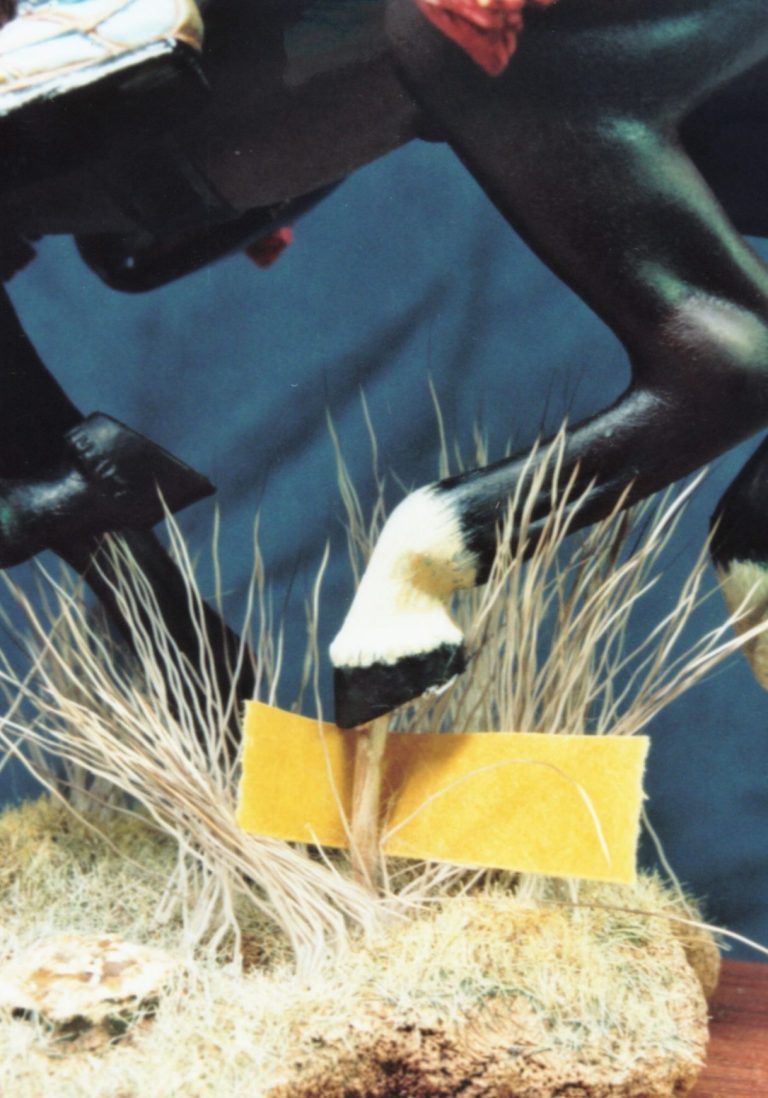
The only addition I made was to drill up into the right hand rear hoof so that a thick wire could be inserted to help support the model once it was put on it’s final base; this would eventually be hidden by some tall grass.
I drilled into both of the feet of the archer; this would then allow me to fasten him to a temporary base so that I had a handle to hold him by whilst painting. These can be seen in photo #2 – along with the initial paint scheme on the archer’s chest armour. This colour scheme wasn’t suitable, and was replaced, a minor irritation, having painted the same idea several times over, trying to get the effect I wanted – see, problems do happen to us article writers to, and in the best tradition of Homer Simpson, if it doesn’t work ….give up !
Whilst I had the drill out, I made similar holes into the arms, head and helmet so that similar wires could be added. The armour parts would simply be held onto pieces of wood with Blu-tac whilst they were painted.
Painting begins.
O.K. I bottled out here. I’d love to paint one of those brown and white patched horses that are typically seen with Samurai on them; but mine tend to look like brown versions of Friesian cattle for some reason. I therefore took the ever so easy route of painting an all brown horse.
Actually, being honest, I’d decided on this anyway, as I’d been looking through a couple of reference books on Samurai and their armour to get some ideas for a colour scheme. I think that the patched colour scheme horse would have clashed, or at least taken the eye away, from the orange and blue colours of the armour and horse furniture.
The brown horse was painted in a fairly standard way. I used a sand ( Games Workshop Orc Brown ) acrylic undercoat. I added some windscreen wash fluid to this for the initial coat, as it helps to stop the paint “beading” on the bare metal. A further two coats of the same colour were added to gain a solid colour, but these were thinned with plain water to make the paint flow.
After the acrylics had dried, I began with Artists Oils, using a very dark brown colour mixed from equal parts of Mars Black and Mars Brown ( all oils are from the Winsor and Newton range unless otherwise stated ). This was painted over all of the horse, leaving only the hooves and hocks bare.

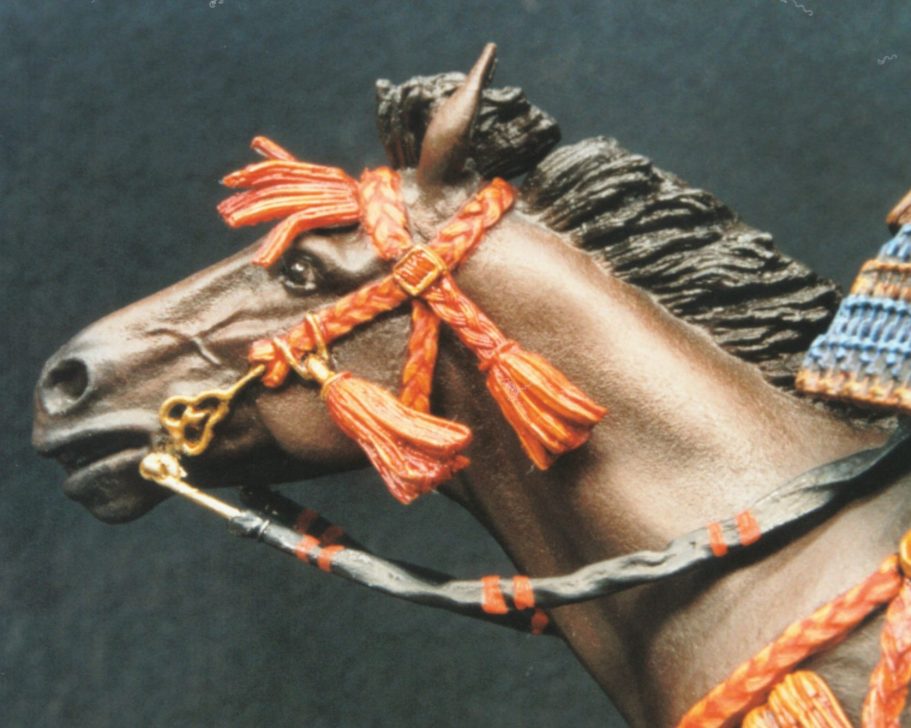
I used a large dry brush to stipple the model all over once this colour had been applied. This leaves a slight texture to the paint, not unlike the texture in miniature of horsehair, and also allows one to remove any excess amount of paint from the surface of the model.
To this I then added some areas of Mars Brown, building up highlights on the bunched muscles and upper areas that would catch the light. I used some Yellow Ochre to add some very small areas of highlights to the inner parts of these areas, and some Titanium White to the areas of the belly and between the hind legs.
These additional colours were blended into their surrounding colour with a medium sized, dry brush; again using a stippling action to allow the paint colours to mix. If too much paint built up on the brush, it was wiped onto an old T-shirt that I use just for this purpose.
The horse was then put into an old Tupperware container ( to keep the dust off it ) and placed on top of a radiator for a couple of days to dry.
Whilst that was drying, I began on the archer. Counter to my usual method of painting the face first, I left this unpainted and instead began on the trousers.
As these would be mostly hidden by the armour, and because I was going to put a pattern on them anyway, I only wanted a basic highlight / shadow job doing on the background colour. This would show up enough on the trousers to give an enhanced effect for the folds, and also give the pointers for where to highlight and shade the pattern areas, but wouldn’t take so long to do.

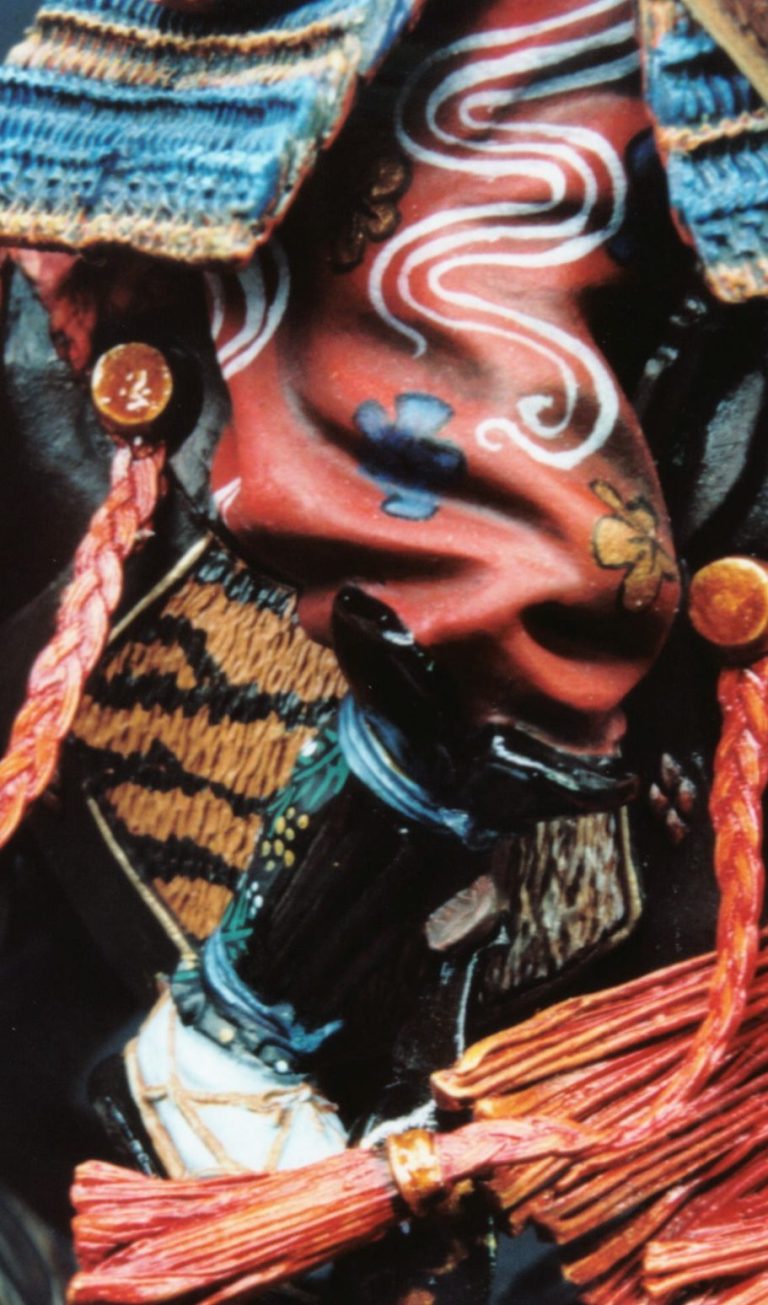
I decided to use acrylics for this, as this would allow me to get straight on and get the pattern done afterwards. I began by priming the whole figure, the armour, the horse fringed furniture and any other bits ‘n’ bobs with some GW Skull White, adding some of the screen wash liquid to this to thin it; then a couple more coats of the white, mixed with plain old water this time, to build up a solid base to paint on.
Then the trousers were painted with a mix of Humbrol Crimson acrylic and GW Forest Green. This was a fairly dark mix, using a ratio of around 4:1 respectively of each colour. Three thin coats of this were applied, and the final coat being a very heavily thinned version, this allowed me then to blend in some of the pure Humbrol Crimson to form some basic highlights, and some more Forest Green for the darker shadows.
With this done I added a combination of the white swirl pattern from Mitsuo Kure & Ghislaine Kruit’s book on “Samurai recreated in colour photographs” from the picture on page 27, and substituted the floral pattern on that clothing with some from plate 6 / page7 of Jeanne Allen’s book of “samurai patterns”. ISBN numbers for both these sources at the end of the article.
The Mitsuo Kure book is going to be used quite a bit for the patterns and paint ideas for this figure, and it’s really about the best pictorial reference I’ve got for Samurai that is commonly available.
I used some more of the Skull White for the swirls, greying this off in the shadows with a little Chaos Black. And for the flowers, I used W & N Bronze for the shadow colour and Renaissance Gold for the highlights.
These latter two colours were also used on a background of Chaos Black for the breastplate and the side armour to create the flower and bird design. This design is actually Chinese in origin, being reused by the Japanese in the Kamakura period. Chinese art was commonly used as a starting point, either directly or in slightly altered form by the Japanese; and it cropped up on all sorts of lacquered, painted, calligraphic and embroidered objects. As with the horse, this was left to dry over a radiator, inside a Tupperware tub to keep the dust off.
Having used a couple of blocks of wood as handles, and some Blu-tac to hold the fringed horse furniture in place on them, I began painting this. I used a mix of Humbrol Crimson and GW Flame Orange acrylic for the undercoat, topping this off with a thin coat of Carmine oils, to which I then added some Cadmium Orange to build up highlights.
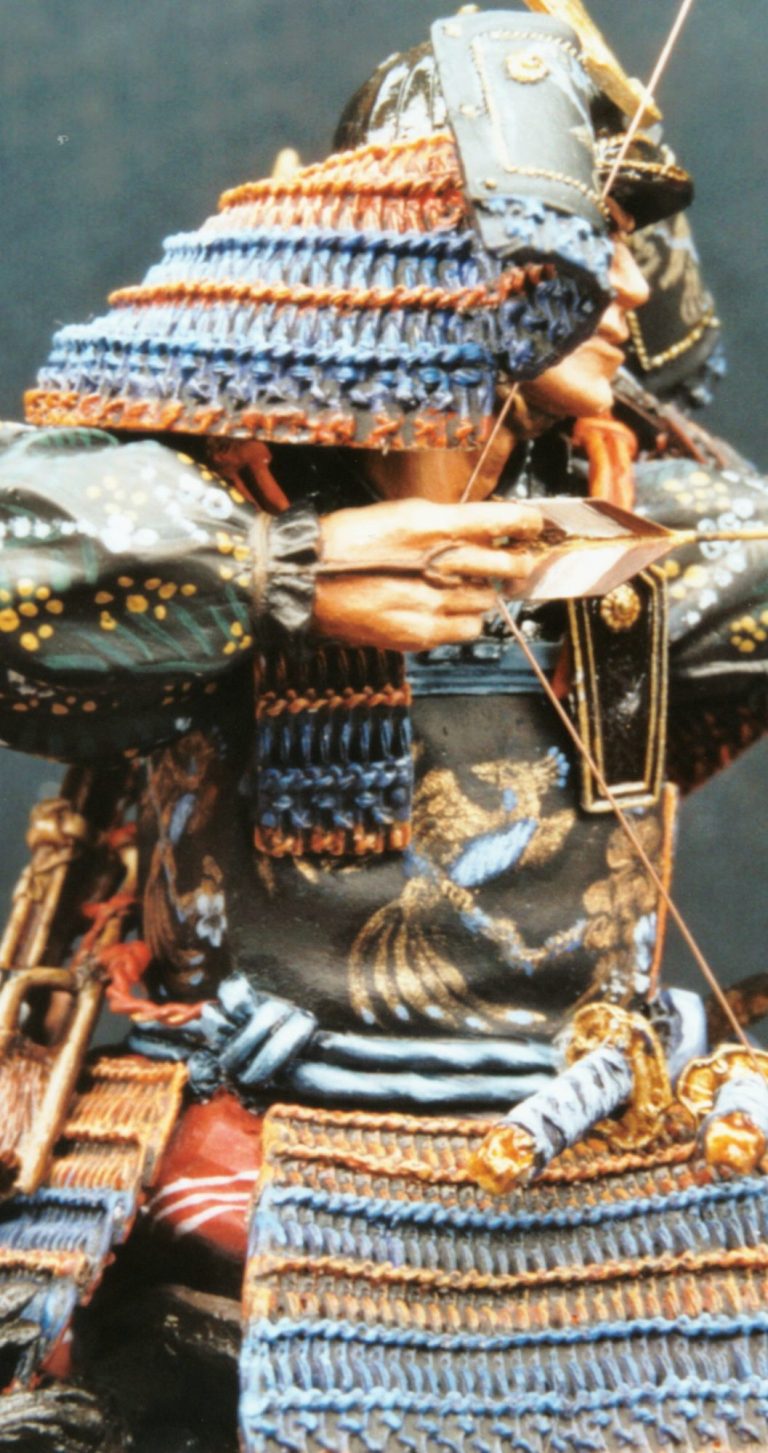
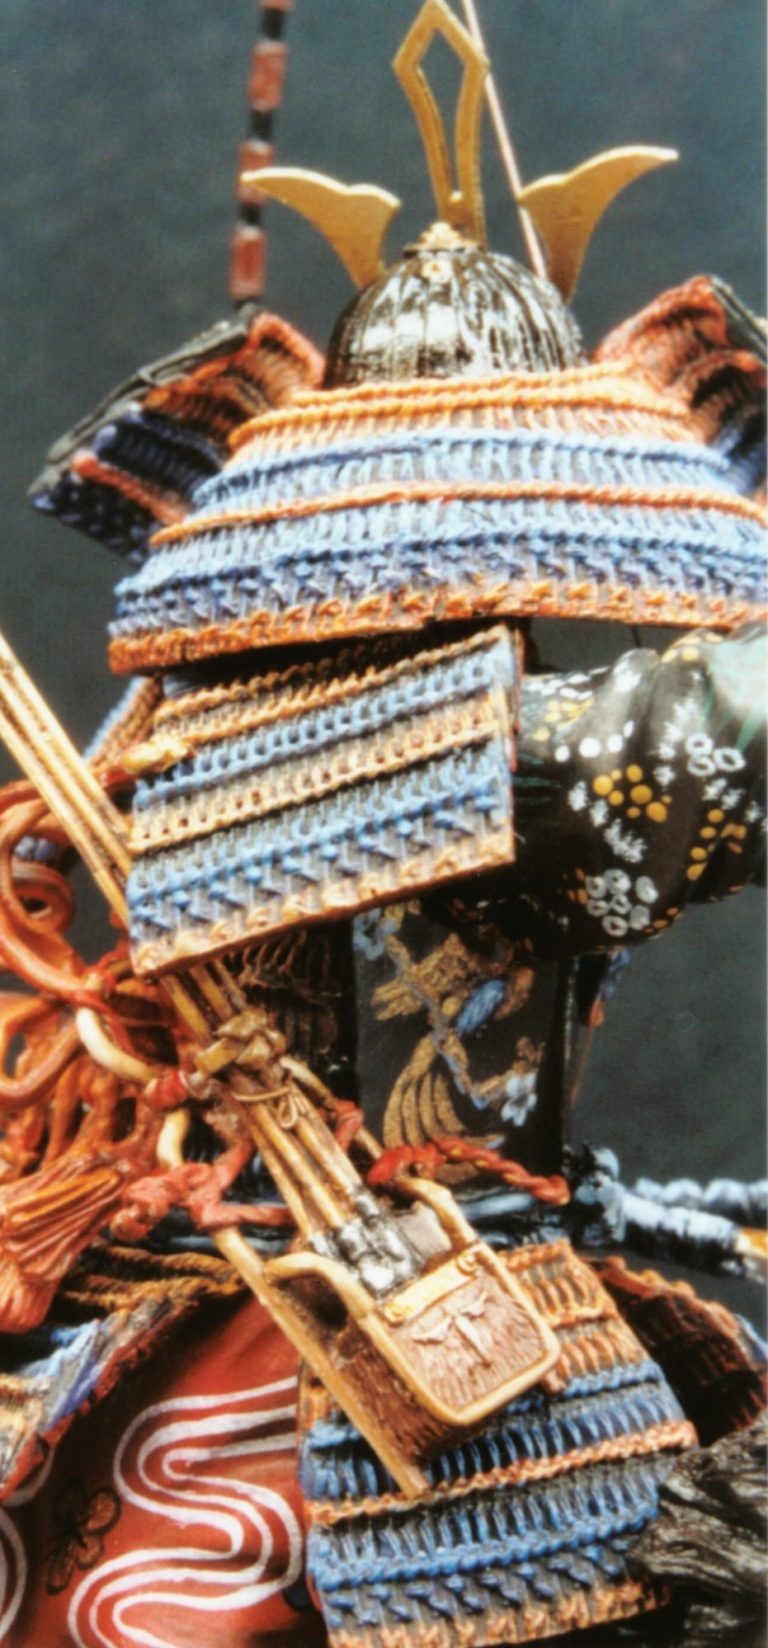
There’s a problem with these oils though, they tend to dry glossy, this instance being no exception, and no matter how many coats of matt varnish I seemed to add, that gloss still seemed to want to be there.
Moving on to the armour. This design being inspired by a colour scheme in the Matsuo Kure book, on the back cover in fact, the chap sat to the right of the picture was used for both the armour colouration and also the shirt too.
I began by painting the armour with Chaos Black – two coats – and then adding in the cords that hold all the little lamellar plates together. These were pained in using Ultramarine Blue and also Flame Orange ( the latter over an undercoat of Skull White ), all these being acrylics. I then put over two coats of Tamiya Clear Lacquer, mixing a brown colour from their Orange and Blue“clear” colour range. My Tamiya paints have become somewhat thick with the passage of time, so I mix them with a small amount of water to thin them for applications such as this. The clear colour flows into all the recesses though, and also adds a nicely lacquered look to the armour plates.
To finish off, a fine brush was used to add a mix of Permanent Blue and Titanium White ( two different mixes actually, one with a higher proportion of white ) for the mid-tones and highlights on the blue cording, and some of the Cadmium Orange ( a mid-tone with some Carmine mixed in ) for the orange cords.
These replaced the horse on the radiator, which was now dry.
Returning to the horse. I painted the white areas of the hocks, using a little Mars yellow for shading, and also added Mars Black to the upper shins, and also to the hooves. I used a fine brush to feather these colours together, wiping it clean on to the old T-shirt to remove the dark colour after each brushstroke.
Whilst I had some of the paint still wet from the fringed horse furniture, I used these same colours to paint in the plaited cords that hold the fringes in place. These are moulded onto the horse, and although the design of them is sculpted on fairly clearly, with a few coats of paint, that definition begins to disappear. It’s easy enough to paint the plaited design on though, to reinforce the sculpting, all that’s needed is a fine brush and a little patience.
The mane and the tail were painted with the Chaos Black acrylic, and I didn’t bother highlighting these, as it tends to make the hairs look dustier than anything else, and that’s an effect I didn’t want in this instance.
I decided to copy the tiger skin effect from the box art onto the saddle sides, though as the fur was sculpted in a downward direction, I changed the orientation of the stripes. Now I won’t admit to owning a Tiger, but we do have a cat. It’s fur tends to grow in a horizontal direction along it’s body, and I assume that a Tiger’s does the same, hence my changing the stripe’s direction. If you’ve got the kit, you’ll see my point.
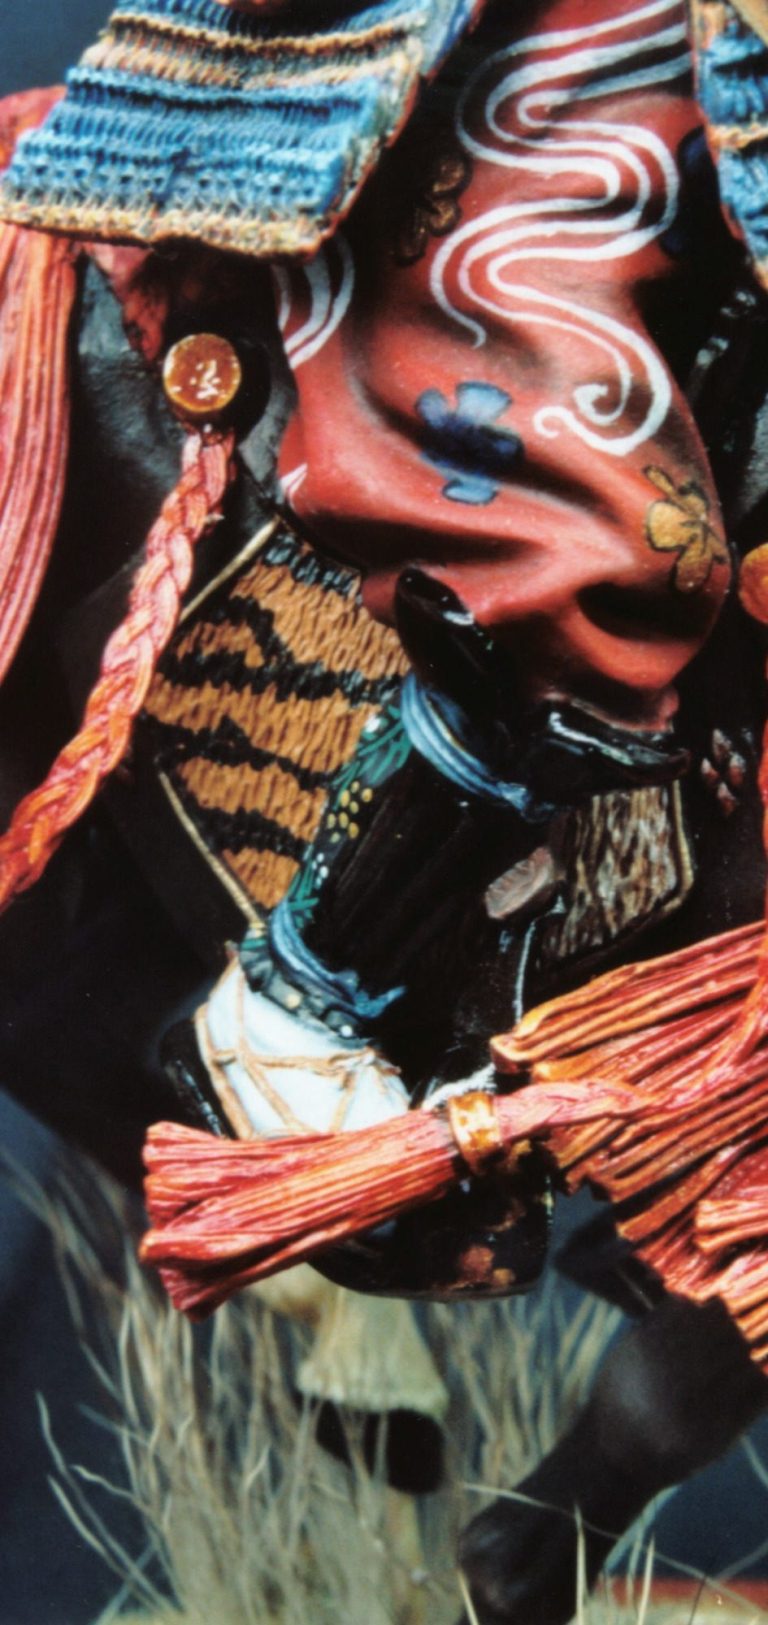

The edges of the saddle flaps were painted to resemble dark leather, and the diamond motifs painted with small amounts of Carmine and Cadmium Orange.
Once the fringes had dried, these were glued in place. There’s a distinct pattern to where these have to be put, and as both the front and rear fringes come in four parts each, getting them mixed up isn’t an option. It’s probably advisable to bend them prior to painting, which in fact I did, there’s still some small adjustments will probably need making once they’re fastened to the horse. Certainly I needed to alter the front right one that fouls the foot when the archer is being added, but the flexibility of the metal allows this alteration, with little danger of breaking.
Admittedly, I did add a small amount of filler to the fringes on the hindquarters of the horse, once the glue had dried. There was only a small amount needed, but the gap did look a little unsightly without it; and then retouched it with some of the Carmine / Cadmium Orange afterwards.
Now is the point to add the reins. I invariably forget to do things like that, up until the last minute, once the rider’s in place usually, and this was no exception. It is possible to add the reins once the archer is glued to his seat, and the armour added, but let’s face it; it’s a darn sight easier if I’d done it at this point instead. The fringes over the horse’s eyes, and also the other bridle decorations can be added at this point too.
That just about completes the horse, so once it had dried fully I created a base.
For this I used an octagonal piece of wood, adding a small amount of Milliput to the base and texturing this with a toothbrush – on the edges - and an old hobby paintbrush for the surface of the soil. I then added some Verlinden Static Grass, fastening this in place with some White Wood Glue.
Having made a rod for my own back ( I do seem to enjoy doing that ), what with the irregular shape of the groundwork, I proceeded to cut masking tape into small pieces, and added this around the groundwork so that I could use the airbrush to spray on some colour – look it kept me happy for ages, playing with tiny sticky bits of paper and some plastic scissors ( My wife’s taken the really sharp one’s off me for some reason ! ).


I used Tamiya colours for the groundwork, having grown to appreciate these after seeing my son use them on various models over the past couple of years. I used some of the Dark Brown, Desert Sand and Matt White, and reverted to the Humbrol’s only for a very thinned wash of Grass Green for ….well, the grass of course.
You've seen the extra support pin I added to the right hand rear hoof. I painted it with some sand coloured acrylic, adding to this some white acrylic streaks afterwards, so that a camouflage effect build up to blend it in to the deer-hairs that are used for the tall grass. I returned the deer-hair grass back to its normal position, and hopefully it’s not too easy to see the support wire anymore. Although it probably does look a little contrived to have grass in this position, by placing more clumps randomly over the other areas of groundwork, the effect will be better blended, and appear more natural. Sometimes a trade-off has to be made between security of the model’s integrity long-term, and the overall look of the model as a whole. I’ve compromised here, but have I hope, shown that such supports can be added to models such as this and still remain fairly well disguised.
After that, a simple nameplate was printed off from the computer, and stuck in place with some double-sided tape, and that’s it really…apart from the rest of the figure of course.
I started work now on the face, and it’s a good one too. Nothing too much out of the usual here, I began with some Andrea Flesh coloured acrylic, which is very good indeed, although lacking the grainy texture of the Humbrol acrylic which I’ve used in the past.
Over this I added my usual mix of oils, W&N Flesh Tint, with some Mars Yellow and Titanium White added. I used a little more of the Mars Yellow than usual, not too much though, just enough to hint at a realistic oriental skin tone, as I didn’t want to create a caricature.
This was shaded using a 1:1 mix of Mars Yellow and Mars Brown, with highlights of Titanium White. Once dry, further shadows were added using Burnt Umber spot washes.
Just a point for the uninitiated, the spot wash is a method of using a very thin paint, in this case around 8 parts of White Spirit to 1 part of Burnt Umber, and adding this with a very fine brush to selected areas of detail.
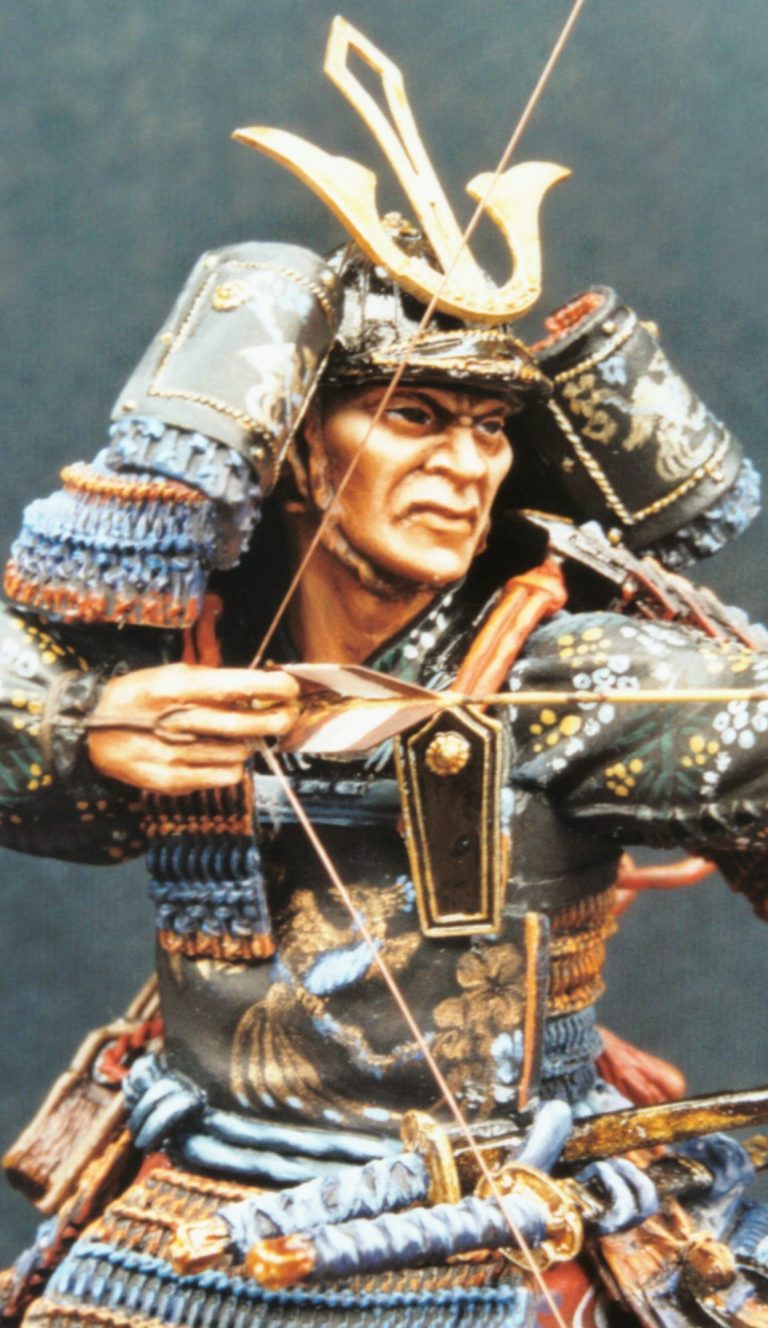

The beauty of this is that the amount of paint can be easily controlled, adding further washes once this one has dried, if the effect is still not dark enough; or easily removed – as it’s an oil paint, up to two hours after, with little or no stain remaining. The wash should dry quite quickly, four hours or so in a warm room, and as the white spirit evaporates even quicker, the paint can be feathered out using a soft dry brush after an hour, if the colour is too concentrated. This method is basically what some of the armour modellers use to pick out finer detail on vehicles, and works pretty well on anything where there’s a small but deep area of shadow needed.
The fun with any samurai figure is all the little bits of detail. The shirt I’d decided to copy of the Back cover of Matsuo Kure’s book began with an overall coat of the Chaos black acrylic, and onto this I added palm leaves with some Woodland Green, then some palm flowers using some Orc Brown. There are also some white spots and circles on the design that I chose to copy, and these were added using some of the Skull White. I found that whilst the palm leaves could be painted with a normal, fine sable brush, the flowers and white spots were easier to do with the tip of a cocktail stick, and the circles with an old fashioned fountain pen with a very fine nib.

This design was carried over to the cloth covering the back of the legs, behind the armour shin plates.
For the belt cords and also the armour edging I used a mix of oils, beginning with a thin coat of Indigo, creating mid-tones on this with Titanium White, adding more white to gradually build up to the lightest highlights.
I used a little of the spare Indigo from the last process, mixed with a lot of the white to paint in the socks. I added even more of the white to create highlights on these. The sandals were a very thin wash of Mars Brown onto the detailed sculpting, and then the highlights picked out once the wash had dried with some Mars Yellow mixed with Titanium White.
The was painted with a similar mix of the dark red used for the shadows on the trousers, highlighting this with some pure Crimson; and then the black areas added between the bindings with Chaos Black. The whole of it was then painted with a couple of coats of the brown mix of Tamiya lacquer.
Although the arrows in the quiver are adequate, I made new fletching for the one that the archer is holding. For these I added small pieces of plasticard to a length of wire, and then removed the arrowhead from the original arrow, gluing this into place on the wire. This was then painted with the appropriate colours.

I used an undercoat of Chaos Black on the sword scabbards, adding thinned Humbrol Gold to this in a random pattern, and then after this had dried, added some of the brown Tamiya Lacquer.
A similar effect was used for the stirrups, adding some gold flowers to these, similar to the ones on the breastplate. The stirrups were then glued onto the bottom of the feet, after removing those large wires from the soles of course.
The horse was now set on its groundwork base, and to it I glued the headless rider. I had, as mentioned, to bend the right hand front fringes away from the horse’s body to get him to fit, but apart from that, he went in place perfectly. The head and helmet were added, and then the armour plates. The one covering the groin is the one to be careful about, mainly because it slots into the mane first from one side, and is slid horizontally through the mane until over it’s location on the figure. If you glue all the armour on before sitting the rider on his horse, you’ll have to prise this one piece of armour back off, so that you can position him correctly ( thanks to Keith Clutton for this piece of advice. He’d built this model up a couple of weeks before me, and noted the possible pitfall ).
The swords were now glued in place, and then the very complex knot set on the back was tackled.
This is quite the most involved part of the kit I found, as though Andrea have made the job as simple as possible, whilst sticking to accuracy as closely as possible, it’s a little taxing getting the additional cords to fit and look realistic.


I glued the main knot and tassels on first, this is the bulk of the detail really, and is simple indeed, and then once this had set, started bending the additional cords, there’s four of these, so that they would have their ends in the appropriate places. Once they were as close a fit as possible, and only then, did I add the glue, doing these one at a time, and referring to Andrea’s excellent instructions. I found it easier to paint these separately with an undercoat and shadow colour before gluing into position, then once each component was set in place, to add the mid-tones and highlights, before adding the next part.
With the archer settled onto his mount, I could add the cords and tassels to the horse now There are four of these, and each one requires bending into form to enhance the feeling of movement of the subject.
The bow-case was added next, as well as the cluster of arrows, and finally the bow itself. This comes in two halves, and the larger one of these two goes to the top, the shorter one to the bottom. The fit is good, and although I would normally use a single hair ( not mine, I’m protecting the few I’ve got left ),my usual source has been to the hairdressers.
The final piece to be added was the helmet crest. This had been painted gold and lacquered, and was tacked in place with a tiny dot of superglue.
Finished.
And the verdict
Pleasing.
Although I do question the pose, could a samurai in full armour twist like this AND keep both feet level in the stirrups ? Hmm, not sure.
That’s my only quibble really. The model looks good, has managed to capture the movement well, and is very well thought out, produced and presented.
Granted, I have made a couple of comments about this and other similar offerings from various companies earlier in the article, but really, they are minor quibbles, and should not detract from what is a superb kit.


It is, admittedly a lot of money, but it will take you quite a while to build and finish, it’s definitely not a weekend project. I enjoyed doing it, even with a house move in the middle of it to dampen my enthusiasm.
To be honest, I usually feel quite fatigued by Samurai. The look beautiful when finished, but once one’s done, I really don’t fancy starting another one. The detail work is just too much to start out on all over again. This is an exception though, and I was quite surprised that not only did I want to get on with the next project, but I went straight for another Samurai subject.
This Andrea kit must really have something, to make me do that. The big question though, is it worth the money ?
Actually, yes, I think that it is. If you have a passion for Samurai, and want a larger model for your collection, then you could certainly do a lot worse.
The additional bonus is that although it is a mounted model, it’s quite compact, and put on a small base as I have, it doesn’t take up masses of room. On the other hand, the groundwork could be expanded, to make this into a display’s centrepiece.
At this point I’d like to thank Andrea for supplying this review kit, which was sent to Military Modelling, and appeared in that magazine a couple of years back.
References.
Mitsuo Kure & Ghislaine Kruit – Samurai recreated in colour photographs – ISBN 1-86126-335-X
Jeanne Allen – Samurai Designs – ISBN 0-500-27594-7
Arms & Armour of the Samurai – I Bottomley & A.P. Hopson ISBN1-870981-05-7
Osprey Men at Arms – Numbers 23 & 35 – The Samurai – both books by A.J Bryant with artwork by A. McBride
