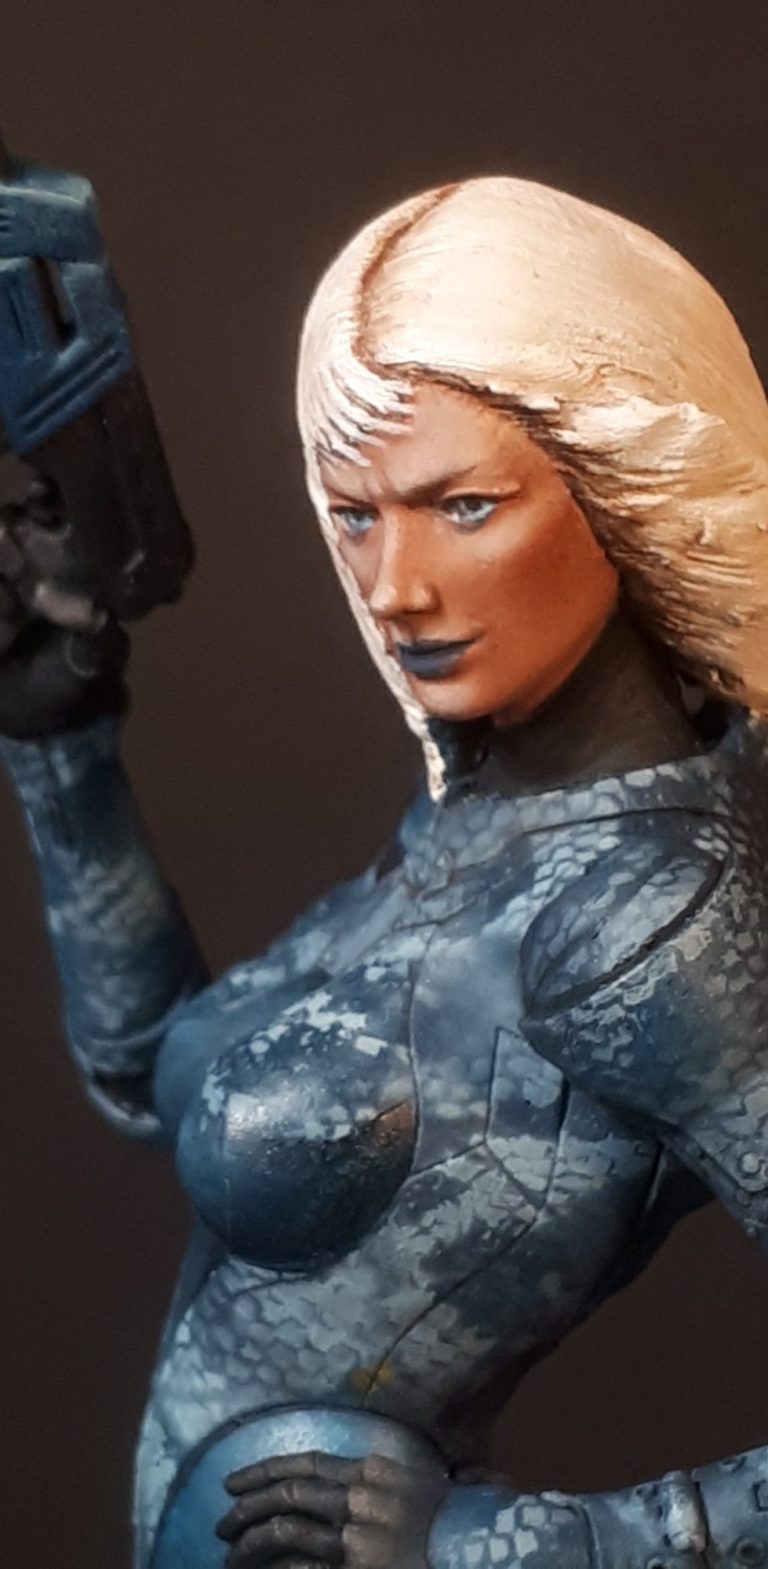

Operative 04
1/15th scale 3D resin print from CFPrints3D
Painted in 2024
I think there is a real possibility that eBay and one or two of its sellers – CFPrints3D being one such – could get me seriously close to bankruptcy if I wasn’t careful.
Having said that, I couldn’t resist this figure, because it reminded me so much of some of the Infinity Corvus Belli 28mm figure range.
The pose in particular mimicking some of the smaller scale figures from that range.
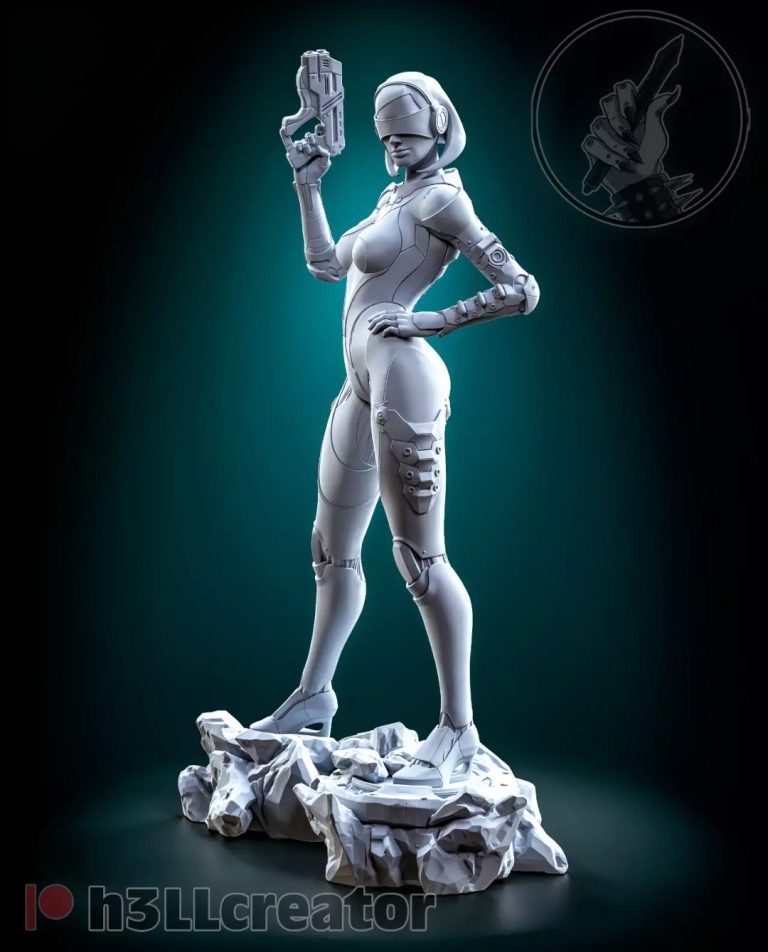
Photo #1 shows the 3D render for the figure,
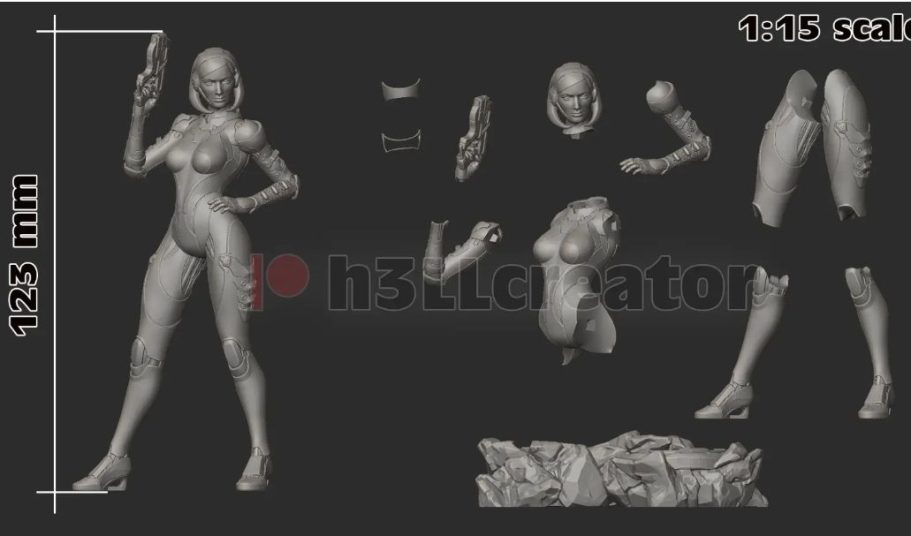
and photo #2 shows the parts breakdown that the kit would arrive in.
I have to say at this point that the print is very good, no supports to trim off, although there are traces of the places where the supports have been and whilst quite a few of these are hidden on the back of the figure on her torso, there are a few that are on smoother areas – the buttocks – that will need gently sanding off.
Otherwise, the fit of parts is very good, and there’s very little to bother the average modeller.
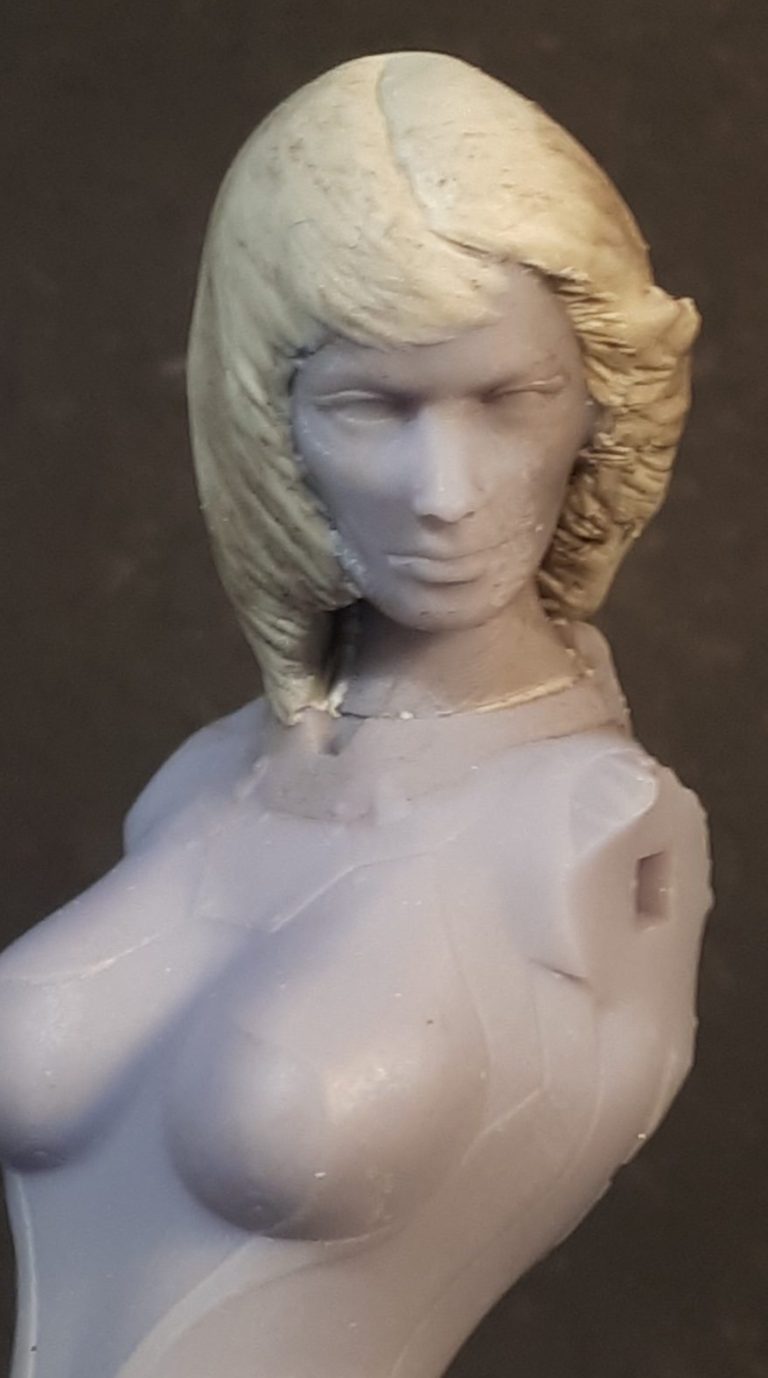
There were a couple of things that I thought I’d change though – one is the hair, I didn’t like the curling, horn-like projections either side of her face, and the other thing was to add a longer barrel to the pistol.
Photos 3 and #4 show the above additions made, the projections either side of the face were sawn off with a razor saw, and the hair added with some Magic Sculpt.
It was at this point that I noticed how brittle the resin used to print the figure was, although not a problem at this stage, it would create problems later.
The longer gun barrels for the pistol were turned brass / aluminium items from a 1/700 scale battleship. These are useful sets to pick up, as they come in various sizes and lengths, are dead straight and usually already have a hole drilled into the business end.
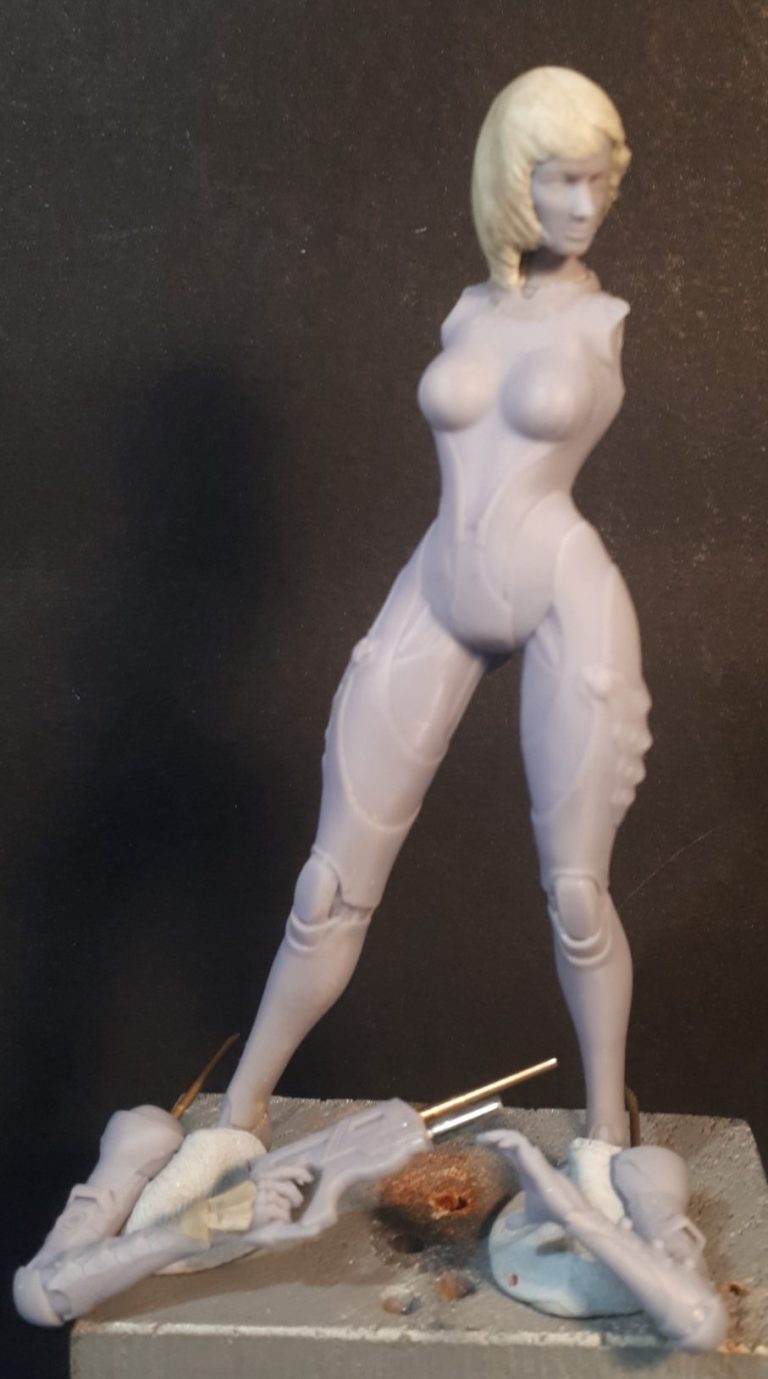
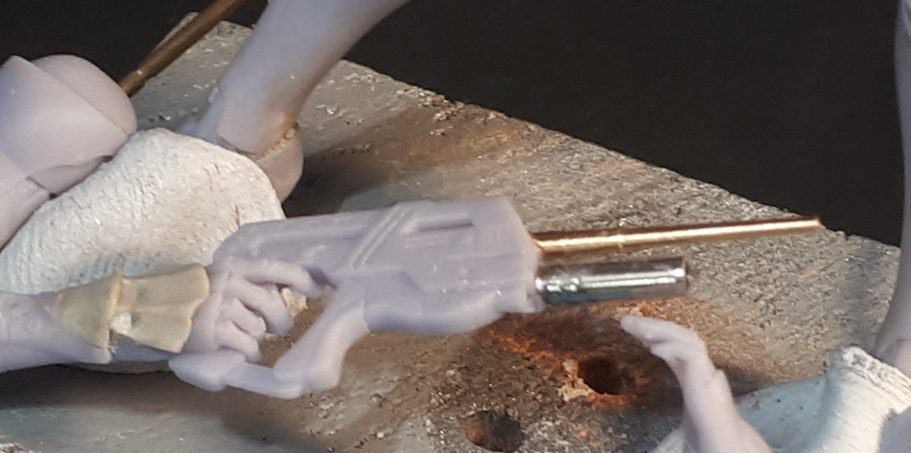
Photo #5 gives a closer look at the altered pistol, and also that I’ve added a little bit of putty to the back of the right hand to match up the guard on the back of the left hand.
I’d also drilled up through the bottom of each shoe heel to allow the insertion of a wire pin up into each leg. This would offer support to the model when fastened to the plinth once she’s finished.

Photos #6, #7 and #8. In the past I’m sure I’ve mentioned that I used to begin with painting the metallic areas, then the skin areas and only then did I consider the clothing.
I’ve adapted my painting a lot over the years, taking in moves from enamels to acrylics, acrylics to oils, and back and forth with the addition of different application methods.
I’ve begun using an airbrush more and more, certainly with regards to vehicle models, but now and again I’ve used it for camouflage clothing effects on larger figures.
It seems a waste of time having to mask things if not absolutely necessary, so in this shot, once the model has been primed and then painted with what I think could be called a “Wedgewood Blue” over most of the figure, I used a small piece of lace as a mask to spray through a much lighter blue – almost white – and the pattern created is what is shown here.


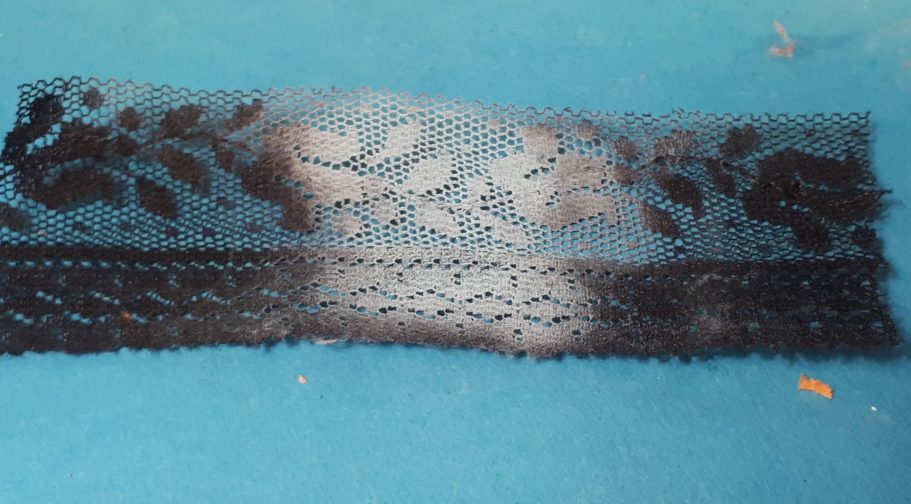
As the piece of lace was relatively small ( shown in photo #9 ) I had to move it around a lot to get the effect over the whole model, and fortunately the lace is quite thin and soft, so it forms around the various areas really well if held tight.
I used the same colours on the arms as well, although keeping them as separate parts made the whole operation a lot easier.

Photos #10 and #11, so with the airbrushing done, and the pattern covering all of the clothing areas of the figure, I could move on to separating the sections of armour and introducing other colours for the joints allowing her to move.
I chose to add the flexible parts in black, adding a little dark grey to bring out the corded details, and then found an oil colour that matched the “Wedgewood Blue” fairly closely to paint some solid colour sections on the chest and hips.

At this point I also painted the face – the usual Mars Brown / Titanium White mix of oils with a small amount of Carmine to tint the overall colour pink.
Lips and eyes were of course blue – and why not ? After all, I’d got some spare paint of that colour on the palette already.
Of course I considered adding some contrasting colour – orange would have been great. However, why would you wear a nice blue camouflage outfit, and then add a lovely bright colour to paint you as an obvious target.
This isn’t Warhammer 40k y’know !
As things were drying I began considering the groundwork. And again the question of why use the blue colour of camo ?
Well, because the majority of the terrain is blue, of course !
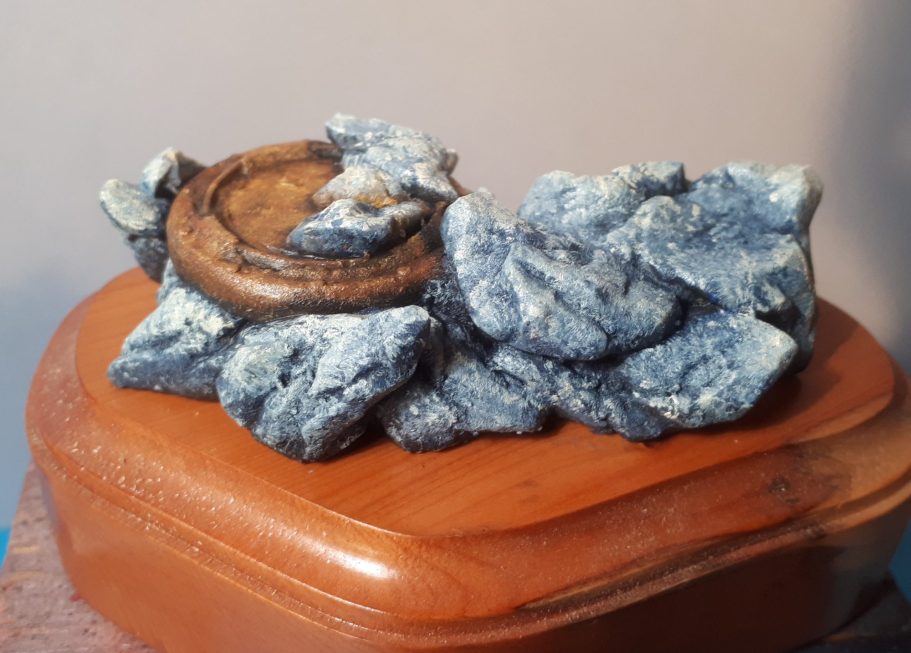
And photos #12 and #13shows the groundwork that comes with the kit; yes, I actually used the supplied groundwork for once.
It’s mainly what appear to be rocks with what looks like an access port to some subterranean shaft.


To fasten the groundwork to the plinth, I scribed the top of the wood with a scalpel to allow the superglue to get a better grip, and left the base for a few hours prior to adding any paint. The pins on the figure’s feet would pass through the resin groundwork and on into the wood plinth, adding a further additional hold for both the groundwork and figure.
So whilst painting the rocks with more of that blue colour oils, adding highlights of Buff Titanium and some small amounts of Titanium White, I got a chance to add a different colour and a little bit orange too, in the form of a very rusty looking access hatch.
Photo #14 and a fair leap forward, the hair is painted to look like a very pale blonde, beginning with Venetian Red oils and adding lots of Mars Yellow, then Buff Titanium and finally Titanium White to build up the colours, the gun has been painted with a very dark metallic grey, and a couple of the panels then painted with…. Wait for it… blue.
More details on the arms have been painted black at the elbows and also the gloves, and the whole figure has received multiple thin washes of a very dark blue to pick out the panel lines and also deepen the shadows where necessary.

Now come the problems.
Photos #15 and #16.
I'd had a couple of accidental breakages, well I say a couple, it was the same breakage that just kept reoccurring, and that was on the right ankle, and this happened repeatedly throughout the painting process.
It was my own fault for wanting to add a wire pin that was too thick and didn’t allow for much of the brittle resin to surround it, amplified by my not drilling the hole far enough up the leg and into the shin area so that the wire took all the stress, rather than the resin section just above where it ended above the ankle.
Also the stiletto heels pinged off into another universe when I was trying to fasten the figure onto the base. Again, my own fault for drilling the two location holes about 1mm too close together and trying to force the wires into them, causing the resin to shatter.

However, a bit of putty, a sculpting tool and the patience of a saint – good job he was helping out – and the heels were fixed.
I’m not sure where the idea of “Operative 04” came from, I think possibly I’ve seen a figure with some form of identification number on it, but wherever the thought came from, I used it to label this one up by adding a stylised 04 on her back and left thigh.
Again, I thought of adding it to one of the panels on her chest, but the whole point of stealth and camo is not being seen, The camo breaks up the outline, and two well formed numbers would undermine that now, wouldn’t they ?
The other shots show the model finished and with a darker background, which I think works a bit better than the pale coloured backing I used for the other photos.


It’s strange though, I only noticed that some of the scribing I’d done on the plinth was still visible in one of the finished shots – I really hadn’t noticed it before.
So back to the bench with the model and I added a mix of Chinchilla Sand and Cat Litter around the resin rockwork to hide the scribing and blend the resin section in to the plinth.
I should have done this in the first place really, but got side-tracked with another project.
The sand was painted with blue oils and some highlights added with a little Buff Titanium.
Final thoughts.
OK, so apart from my ineptitude with the rather brittle resin, and the problems I caused for myself, I really did enjoy the process of making slight alterations and painting this figure.
It’s really well sculpted in 3D with a casual pose that works.
The panels reflect each other logically from left to what is on the right ( or vice versa ), and that’s something of the ancient model aircraft builder in me that needs to see logical parity if panels are being used on a robot styled figure.
Is she a robot or enhanced human ?
Dunno, don’t care, I just really like the figure as a whole and heartily recommend looking this seller CFPrints3D on eBay.


Cetero oporteat sensibus his eu. Has ex vidisse perpetua, vis partem mollis mandamus at. Ea nam legere mentitum prodesset, no quo lucilius liberavisse, te oratio debitis omittantur eos. Sea ea iusto detracto, ut scripta sapientem suavitate cum, nam deleniti perpetua intellegam an. Ei per officiis detraxit probatus, vim at graecis tincidunt.


Cetero oporteat sensibus his eu. Has ex vidisse perpetua, vis partem mollis mandamus at. Ea nam legere mentitum prodesset, no quo lucilius liberavisse, te oratio debitis omittantur eos. Sea ea iusto detracto, ut scripta sapientem suavitate cum, nam deleniti perpetua intellegam an. Ei per officiis detraxit probatus, vim at graecis tincidunt.
Cetero oporteat sensibus his eu. Has ex vidisse perpetua, vis partem mollis mandamus at. Ea nam legere mentitum prodesset, no quo lucilius liberavisse, te oratio debitis omittantur eos. Sea ea iusto detracto, ut scripta sapientem suavitate cum, nam deleniti perpetua intellegam an. Ei per officiis detraxit probatus, vim at graecis tincidunt.


Cetero oporteat sensibus his eu. Has ex vidisse perpetua, vis partem mollis mandamus at. Ea nam legere mentitum prodesset, no quo lucilius liberavisse, te oratio debitis omittantur eos. Sea ea iusto detracto, ut scripta sapientem suavitate cum, nam deleniti perpetua intellegam an. Ei per officiis detraxit probatus, vim at graecis tincidunt.
Cetero oporteat sensibus his eu. Has ex vidisse perpetua, vis partem mollis mandamus at. Ea nam legere mentitum prodesset, no quo lucilius liberavisse, te oratio debitis omittantur eos. Sea ea iusto detracto, ut scripta sapientem suavitate cum, nam deleniti perpetua intellegam an. Ei per officiis detraxit probatus, vim at graecis tincidunt.


Cetero oporteat sensibus his eu. Has ex vidisse perpetua, vis partem mollis mandamus at. Ea nam legere mentitum prodesset, no quo lucilius liberavisse, te oratio debitis omittantur eos. Sea ea iusto detracto, ut scripta sapientem suavitate cum, nam deleniti perpetua intellegam an. Ei per officiis detraxit probatus, vim at graecis tincidunt.
Cetero oporteat sensibus his eu. Has ex vidisse perpetua, vis partem mollis mandamus at. Ea nam legere mentitum prodesset, no quo lucilius liberavisse, te oratio debitis omittantur eos. Sea ea iusto detracto, ut scripta sapientem suavitate cum, nam deleniti perpetua intellegam an. Ei per officiis detraxit probatus, vim at graecis tincidunt.
