Or, as I prefer,
The Horseless Headsman.
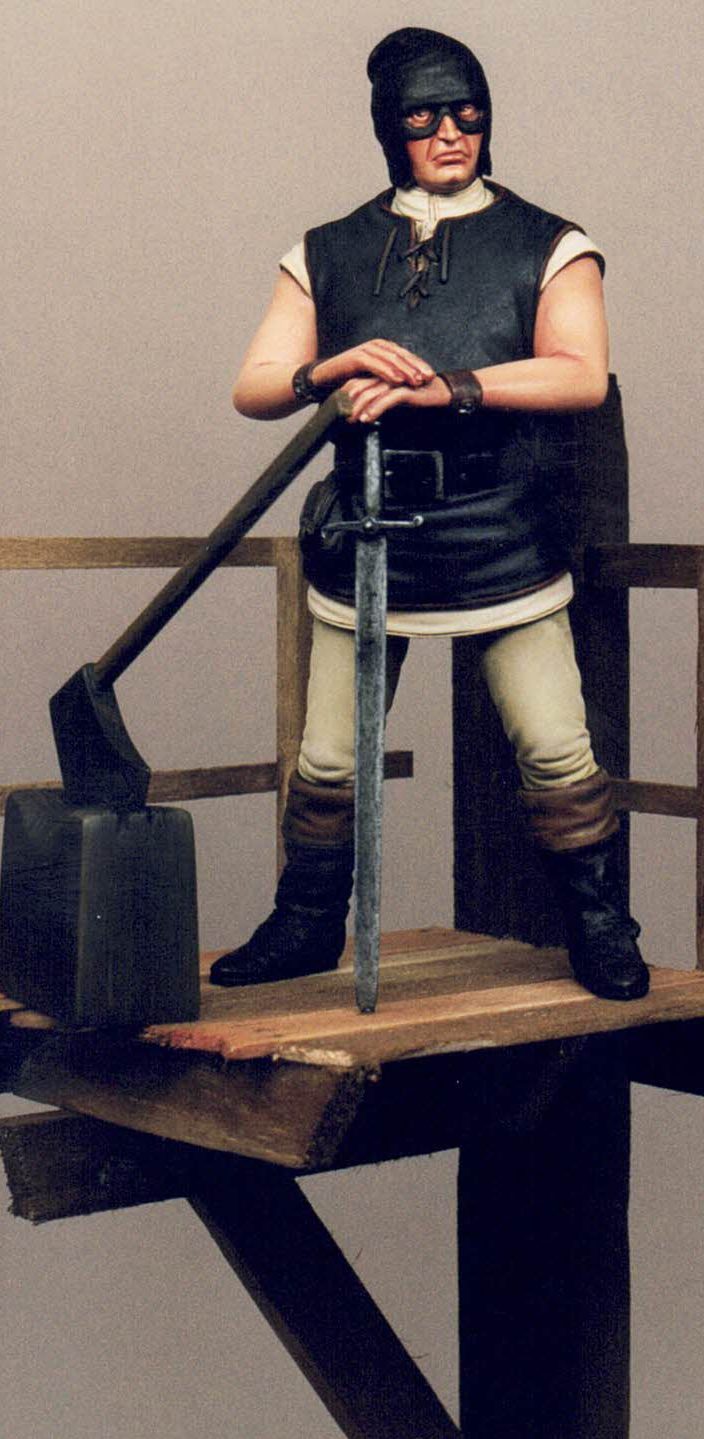
120mm resin kit from Verlinden.
Article in Military Modelling magazine in 2001
This was a model that I'd heard about whilst it was still merely putty in it's sculptors hands, being lucky enough to be talking to Derek Holmes whilst he was musing about an idea his mother had suggested for a model.
Something different. A Headsman.
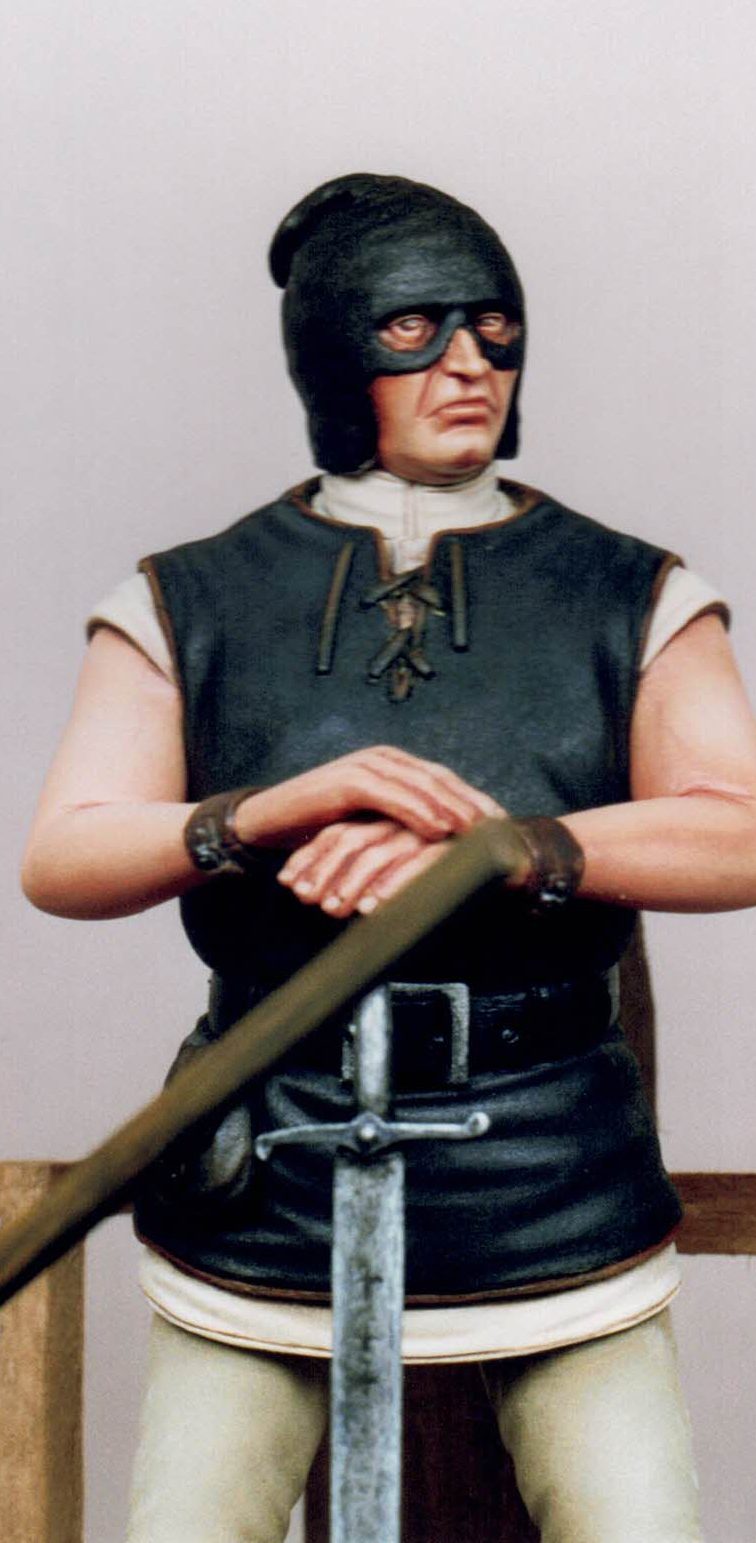
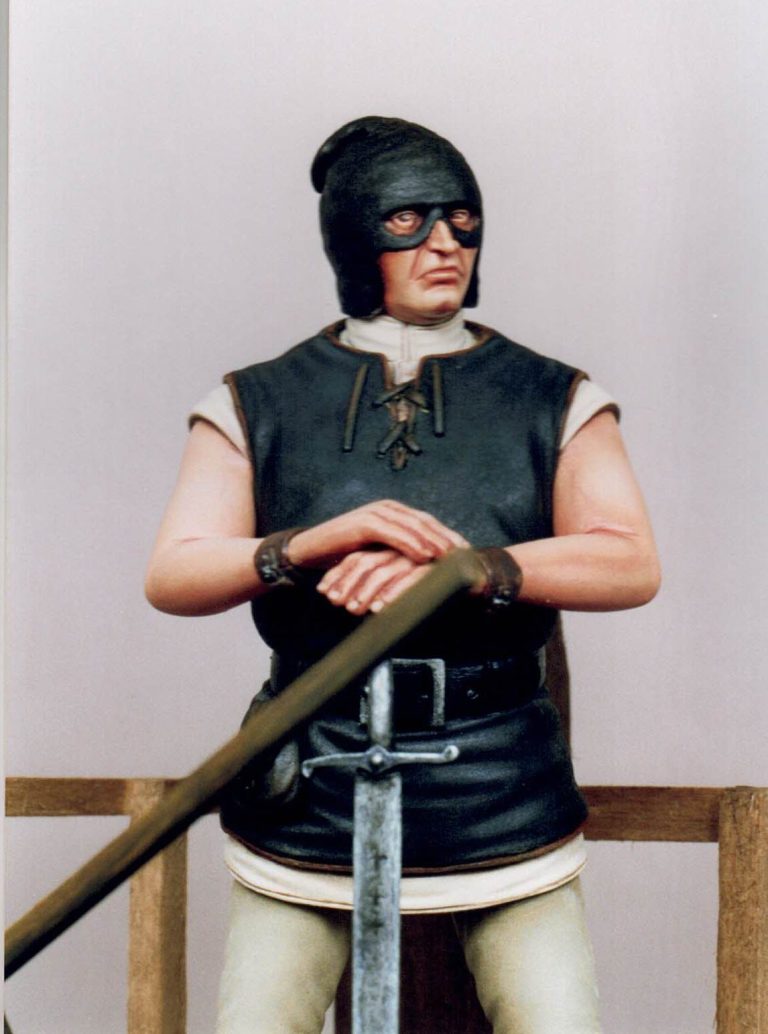
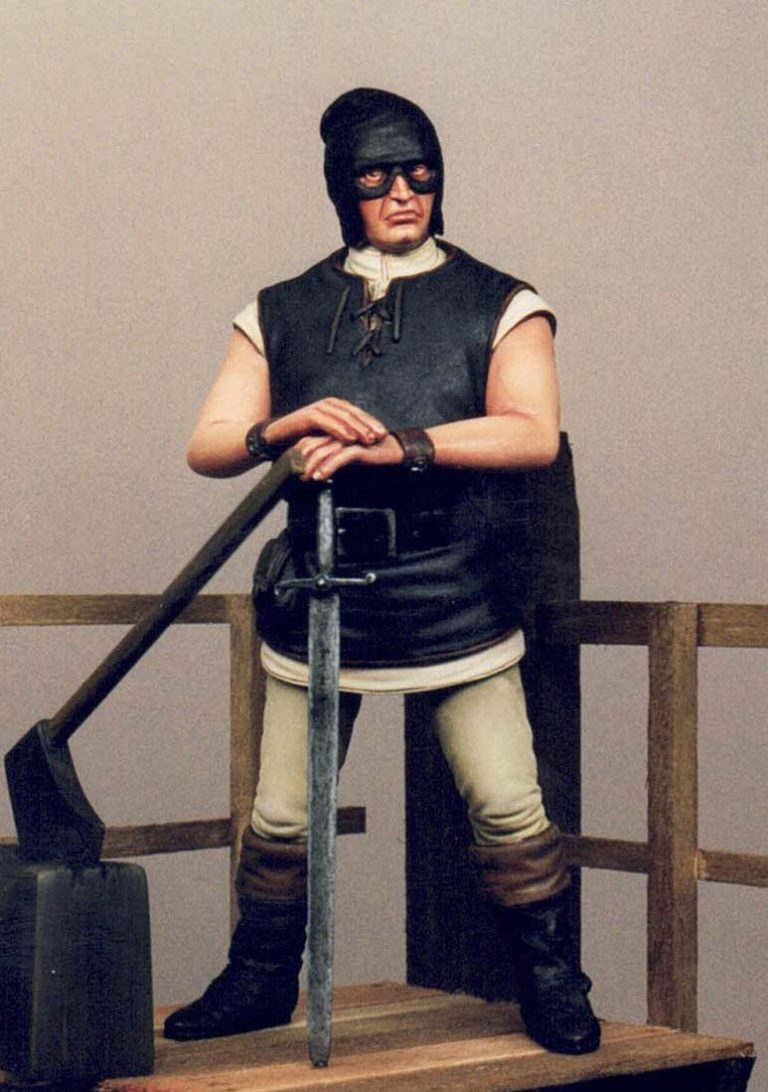
Derek was sculpting this to go in the Verlinden range, and I mentioned about headsmen using swords as well as axes to perform their duties. That much is certainly documented, Henry VIII wife Anne Boleyn was beheaded with a sword in 1536, the headsman making a terrible mess of the job and taking several strokes to eventually decapitate her.
My question was that I'd read in a book ( a fiction work by Gene Wolfe ) that some headsmen's swords had a "male" and "female" edge for use when decapitating the gender in question. Was this true ?
Having searched for veracity of this, I've drawn a blank, but Derek must have taken the information on board, and the sword with the model has curved quillons one pointing towards the hilt, the other to the blade, thus giving the hint that the two edges could possibly be used differently - if you want to read that into it anyway.
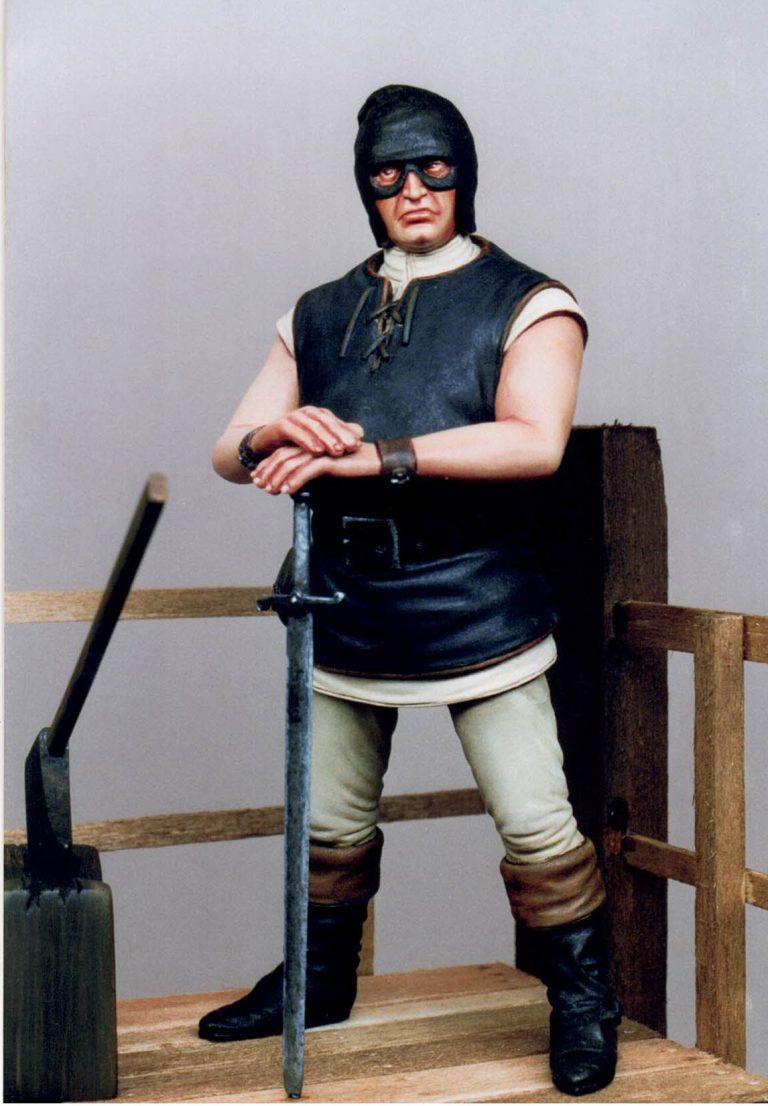
Models of headsmen are nonexistent as far as I know, I can't recall any others on the market at the moment in any scale, excepting a couple of larger scale fantasy pieces that is. This model from Verlinden is in their 120mm range, so it's handy for either adding in to a diorama, or even converting into other subjects ( change the head, add and apron some tools and a fairly useful blacksmith is there - that's just one option )
This offering from Verlinden is grounded in fact, the clothing being muted and plain, and the tools of the trade unadorned. As for a time period, well, that's fairly broad too, as the clothing is generic for the "trade" the model could be used in settings spanning from medieval times right up until possibly the sixteenth or seventeenth century.
As usual with Verlinden, the parts are moulded in a greenish soft resin, no bubbles present on the detail surfaces, and no mould part lines. The gates for the pouring points do need cleaning off though, but due to the relative softness of the material, they come away fairly easily.
I know I tend to enthuse about Mr Holmes' sculpts, but the real joy of them is that they fit together well. There's positive locking sockets on the joints so that there's no fiddling about to get the "best fit". It's simply there, right at the start, and must make things so much easier for the beginner.
The only drawback I feel can be levelled at Verlinden's kits is the lack of background material supplied with the model. Yes, I know that most of us have a library built up over many years, and that researching for a piece is part of the fun, but considering the amount of work I know Mr Holmes goes to for references, surely a short note or two wouldn't be too hard to put together.
This remark however is not meant to detract from this model, nor Verlinden's range. It's simply a thought on behalf of the beginners, who I believe, do tend to pick Verlinden's products not only because of their reasonable price, but also for their well above average quality. The hardened model fanatics amongst us probably think I'm just moaning for the sake of it, in which case my apologies.
But enough waffle. Out with the glue.
I fastened the boots on to the legs, locating these into the slots in the base to get the alignment correct, but without actually adding glue to the undersides of the feet - I had already decided against using the groundwork supplied.
I also fastened the upper body to the lower torso, and then drilled through the boots from underneath the soles right up into the legs.

After carving off the locators under the feet, I fitted a brass wire into these holes and added glue to fix the strengtheners in place.
The arms I left separate, drilling into these and adding wire loops to be used as holders whilst the parts were painted.
The head and hands were also kept separate, again adding wire loop holders to ease handling for painting. The only alteration I made was to check that the sword was long enough to fit in place of the axe - with the hands resting on its pommel, and then,
as it's fortunately too long, I rounded off the tip of the blade to match that of the "Sword of Justice" or "heading Sword" that I have a reference picture of.
Out with the paints
The parts were then all primed with a sand coloured primer, the only exception here being the flesh areas which received several thin coats of Humbrol Flesh acrylic.
The face, arms and hands were painted with my normal method of oils over the acrylic base, the face needing particular care to get the shadows dark enough for the depth of the hood, but also to leave it so that the visible features remain just that.
The clothing.
Ah, now then.
I had at first just assumed there'd be lots of black involved with this, but after thinking for a while, decided that it might be just a little too dark and boring.
It was a case of not using bright colours if at all possible, but breaking the black up as much as possible. I opted for pale linen trousers, dark brown hauberk over an almost white shirt, dark boots and an almost black hood.
All these being done in a similar manner to the flesh areas - oils over acrylic.
I began with a black undercoat on the hood, the hauberk and the boots, and once the acrylic had dried, added a thin coat of black oils over these areas. This was stippled with a dry brush to add a texture, but also to remove any excess paint.
The boots and the hauberk were highlighted with Burnt Umber, then some small touches of some spare flesh mix that I had left over.
The Hood is highlighted with Burnt Umber and then some very restrained additions of Titanium White.
To tie the clothing together I added a paler brown edging to the hauberk around the neck and arm holes, and matched this to the turndowns on the boots.
For the shirt and pants I used a pale stone undercoat - white with a little sand colour and black - then mixed up Titanium White, a dash of Yellow Ochre and a dash of Raw Umber to give a basic "mid-tone" to start each area off. More Raw Umber was added to the trousers for shadows, and some more white for the highlights, whilst only white was added to build up strong highlights on the shirt, using the mid-tone from the pants as the shadow for this area.
The metal on the buckles was painted, as too was the sword and the axe head, using acrylics and inks. The sword I tried to make as much like the one pictured in my reference source - Swords, Daggers and Cutlasses by Gerald Weland, page 26, which shows a sword of German manufacture from some time in the early 16th century.
This involved getting a pitted, grainy look to the weapon, and also adding three small cross markings on to the blade.
Returning to the figure for the final touches, I painted in the wrist supports and added some veins to the upper arms above the biceps, and once dry, glued the parts together with some superglue.
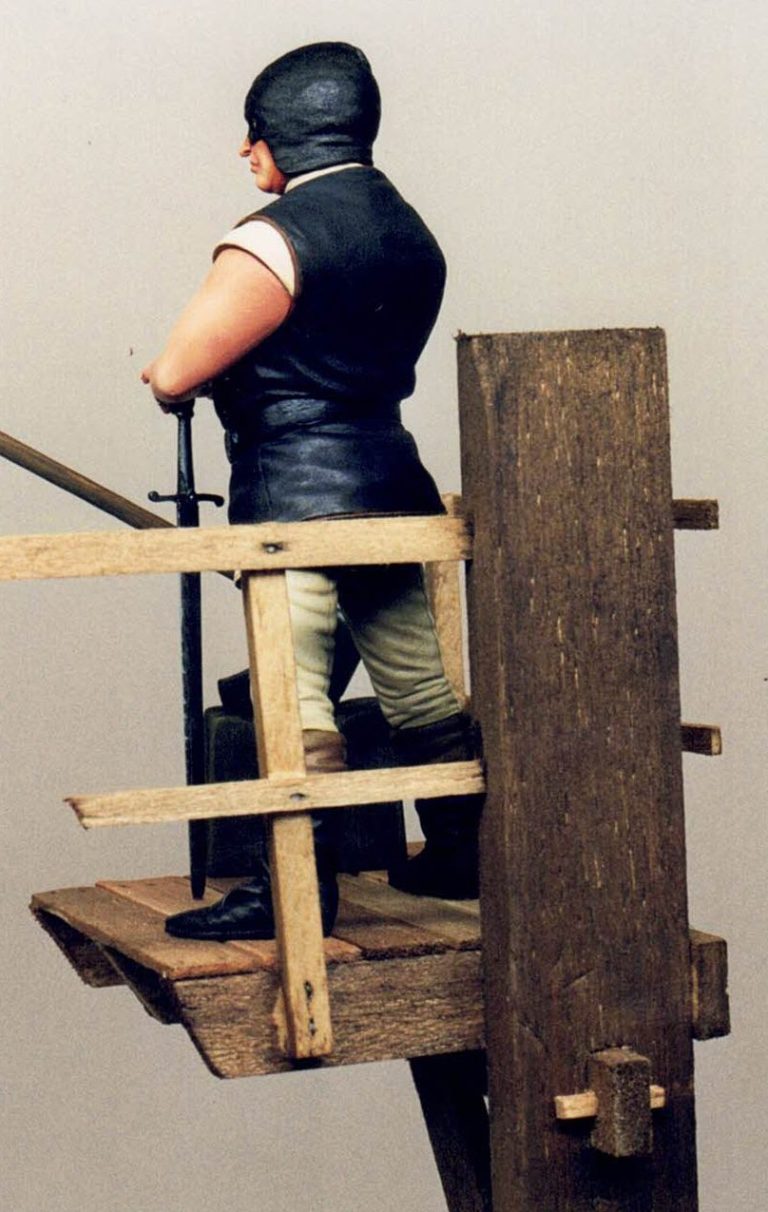
The base.
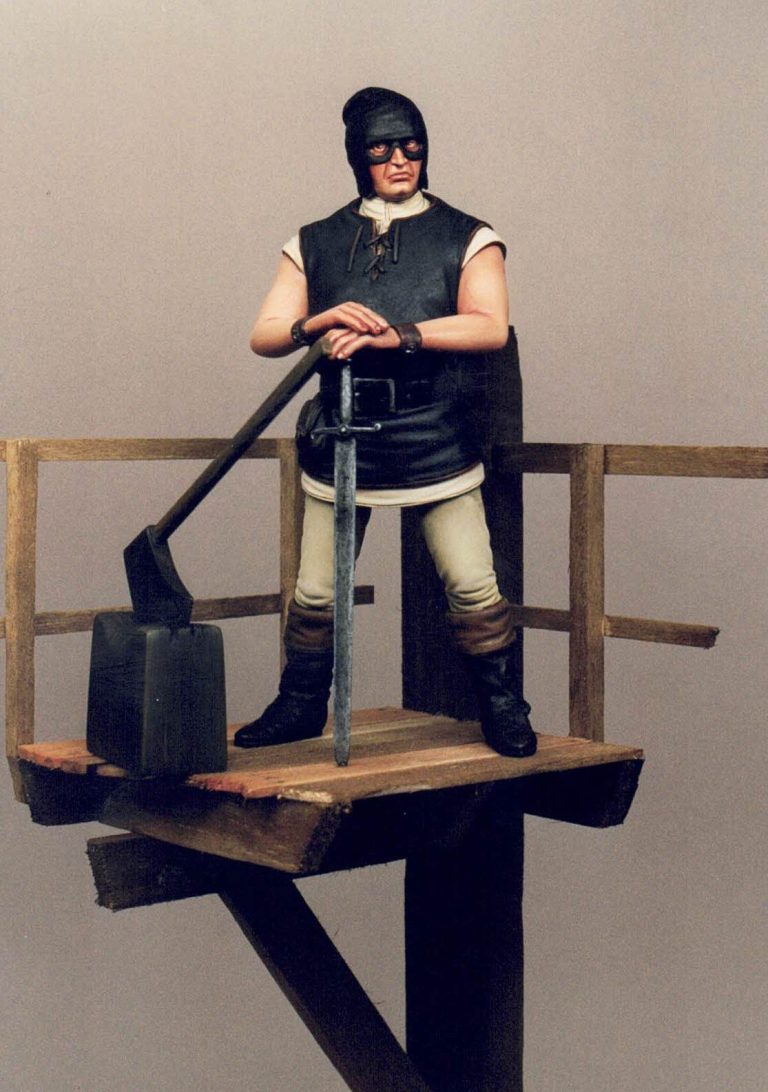
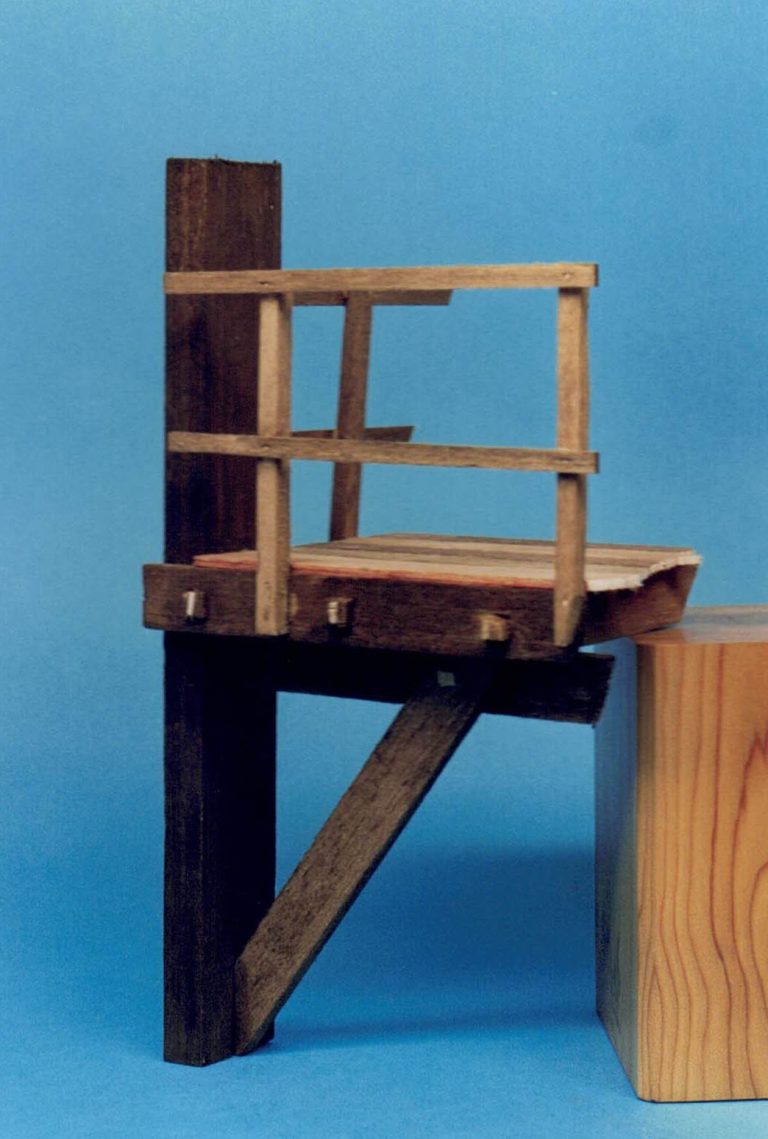
What headsman would be complete without his scaffold. Well, perhaps not a full one, I'd certainly not fit that in my cabinet, but part of one would be nice.
I built the corner of one up from balsa scraps, making mortise and tenon joints where necessary in the joists, and adding wedges to hold the pieces together.
Sounds very clever, but it's easy really as the balsa is so soft and easy to work, and there's nothing stopping the use of superglue when fastening things together - the wedges are just for show. As too are the nail heads, which aren't real nails at all, but two indentations opposite each other, made with the point of a scalpel.
Talking of scalpels, I thought I'd have the axe head buried in the block, but got a little too enthusiastic with the scalpel when trimming the blade so that it would fit. This must be one heck of a strong fellow to get the axe so far into a block of wood !
Finally, the balsa was stained with Burnt Sienna and Burnt Umber oils, thinned quite heavily with White Spirit, and then fastened to a wooden plinth with a couple of long brass rods, drilled up into the main support beam as far as I could.
To finish things off I added a nameplate made from an old manila envelope and some rub down lettering.

Summing up
Not a military piece, but one worthy of consideration for a change of pace. As with all of Verlinden's offerings, the casting is almost flawless, and the subject matter interesting.
The "gore" which could be added to the piece, can be done so at the modellers discretion, and as for the base, well there again, how much work you add is your own choice.
I enjoyed painting this model, trying to get the most out of the muted colours was fun, and I'd like to thank both Francois Verlinden and Derek Holmes for providing the model on review here.