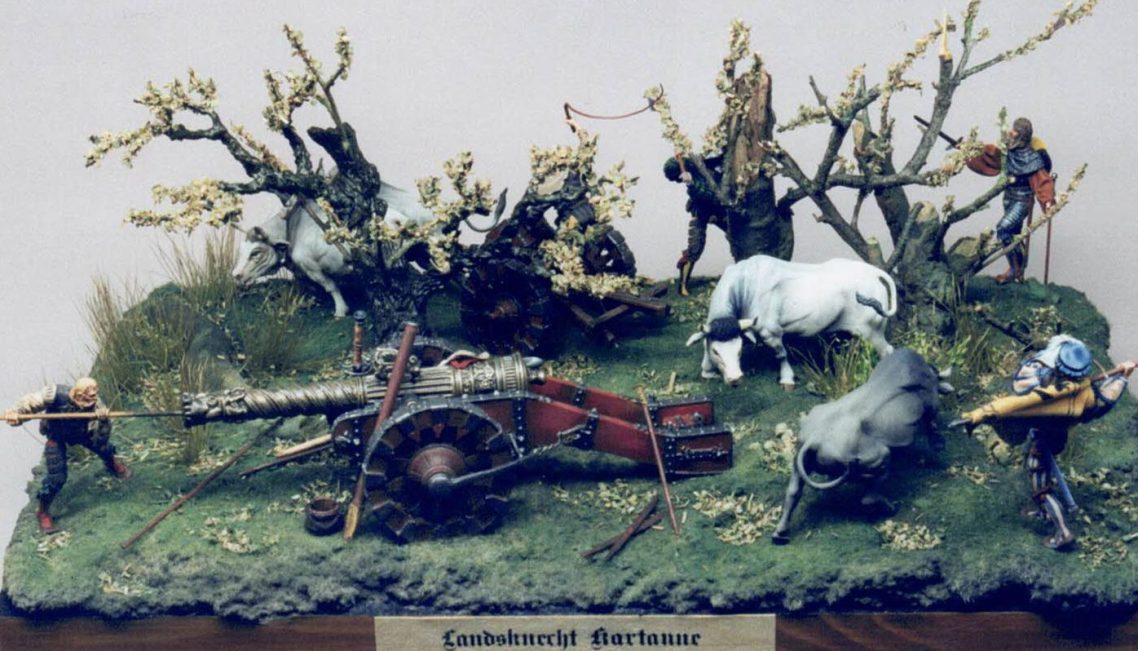
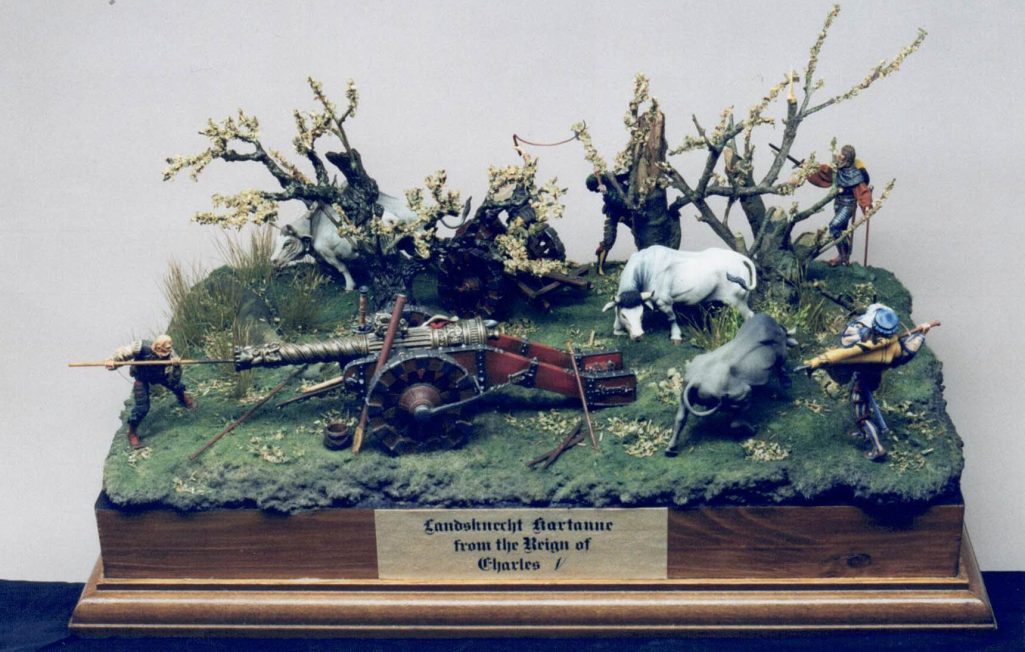
Landsknecht Cannon
54mm White Metal kit from Andrea of Spain with additional Pegaso figures
Article in Military modelling magazine in 2001
We have a tendency to think of the Landsknechts as a body of mercenaries, mainly connected with Germany in the late 15th, and first half of the 16th, centuries.
The word Landsknecht actually means “Servant of the Country” and was first used, it is thought, by Peter von Hagenbach to describe a troop of men he’d commissioned for service to Charles the Bold in 1470.
At this period in time warfare was seeing massive changes in both tactics and what troops and weapons were most effective.
The Swiss had also built their strength upon the use of pikemen, and this was so effective against mounted knights that the rest of Europe was soon to follow this lead.
The days of chivalry were coming to a close, and with the advent of the hand gun and cannon, together with the more effective use of pikes and polearms, the foot soldier was given an almost even footing with the fully armoured knight.
We have a tendency to think of the Landsknechts as a body of mercenaries, mainly connected with Germany in the late 15th, and first half of the 16th, centuries.
The word Landsknecht actually means “Servant of the Country” and was first used, it is thought, by Peter von Hagenbach to describe a troop of men he’d commissioned for service to Charles the Bold in 1470.
The days of going into battle, being captured and held for ransom, and
being wined and dined by your captors were, for the nobility, a thing of the
past.
War was becoming downright dangerous for all concerned, and as the
French knights found with the English longbow, it was now as easy to kill nobility as it was to take out a commoner.
Maximilian I ( 1459 - 1519 ) came to his throne in 1493. Through his own
marriages, not to mention those of his Son and Grandson, he managed to annex most of continental Western Europe, gaining power over the Netherlands, Hungary, Bohemia and Spain. He left this vast empire to his successor Charles V and other members of the Habsburg dynasty.
The Landsknecht army began as an imitation of the Swiss’ own forces, but
soon developed its own particular characterisation.
Many rules were drawn from the Swiss, for muster of men and how they were paid, not to mention training, arming and discipline. Recruitment seems to have been done by sending out drummers to “drum” up recruits.
They had little trouble doing
this, especially if their commanders were well known, and some of these
worthies could muster armies of 20,000 men with little or no trouble, their
names and reputation drawing in volunteers.
Pay was settled at recruitment, dependant upon whether a man had his own weapons and armour etc. Some of these armies must have presented ragged views, of peasants and ruffians ill dresses and poorly equipped, but bright eyed with the hope of pay and the promise of loot.
The newly formed army would be paid one month’s wages and gathered in a
large circle surrounding their commander - the Obrist. He would read them their rights, duties and any restrictions, not to mention any punishments which would be given for malefactors.
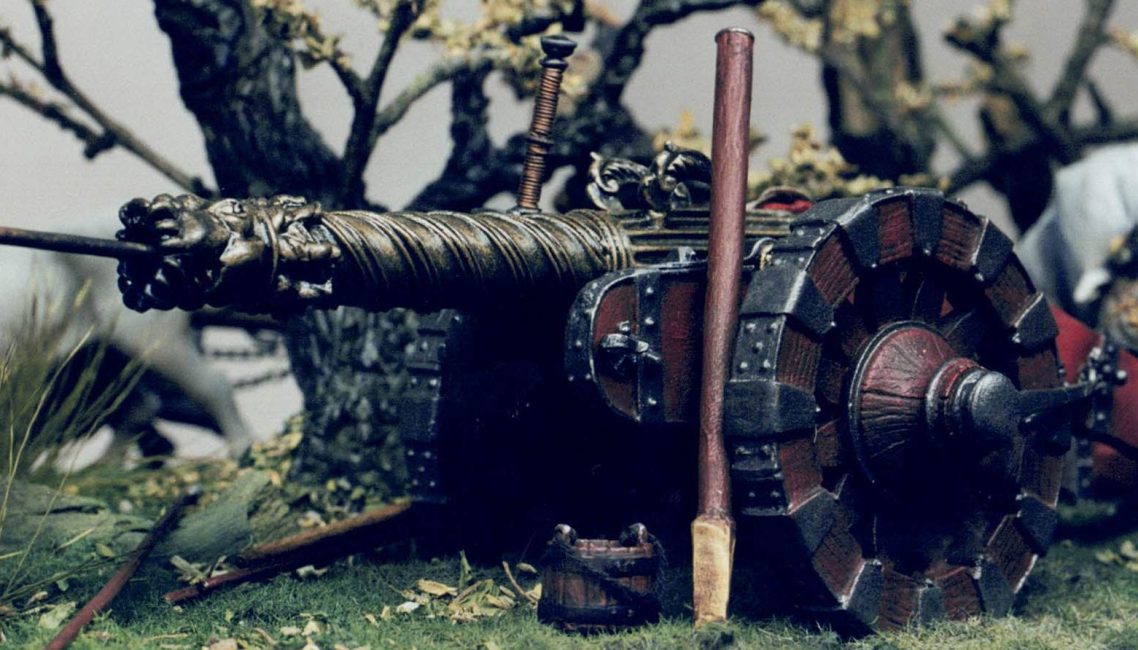
As for the artillery as seen in this model.
The use of cannon was forwarded by Maximilian himself, and in his biography - Wiess Kunig - a young prince is mentioned who made good use of artillery, outperforming more experienced master gunners of the day. The biography also records that Maximilian made greater use of artillery pieces, developing a system of ordinance that was superior to anything else fielded at that time.
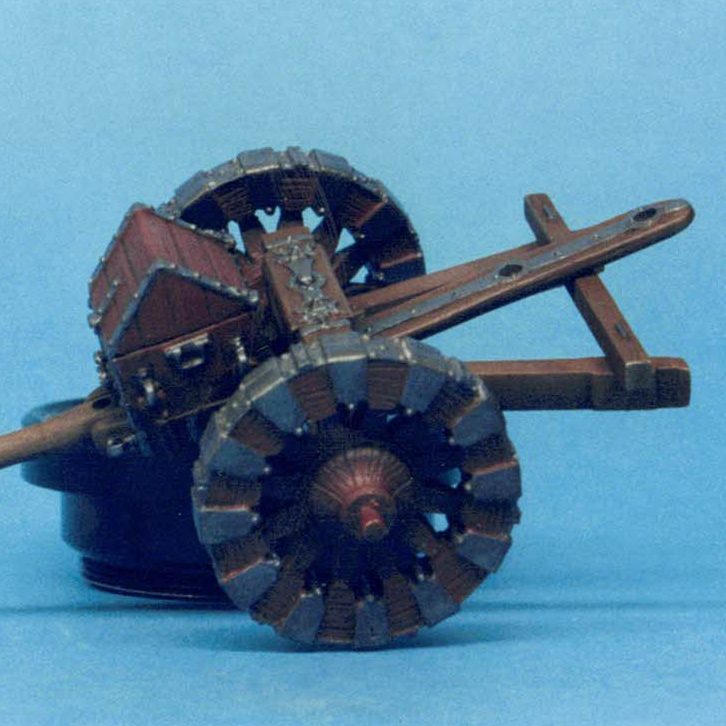
Cannon were now mounted on purpose built carriages, rather than being
transported on wagons and used in fixed “boxed” supports built to hold them steady on the ground. Trunnions were also developed, and the use of bronze barrels with the calibres bored out made the cannon lighter and more easily transportable. Iron shot of various sizes was introduced and quickly replaced the old fashioned use of stone.
Guns were split into several varieties, dependant upon barrel length, calibre and mounting, not to mention whether they were mortars or true cannon.
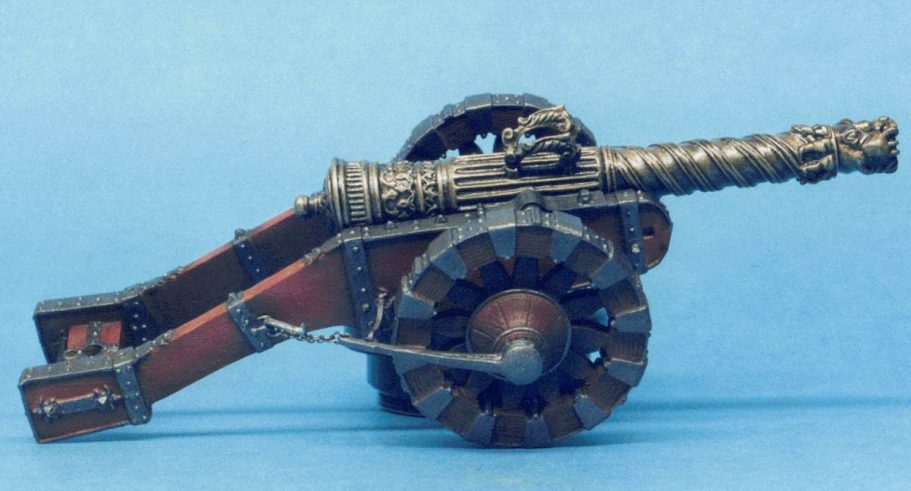
A note is made in the Osprey book that the carriages were invariably
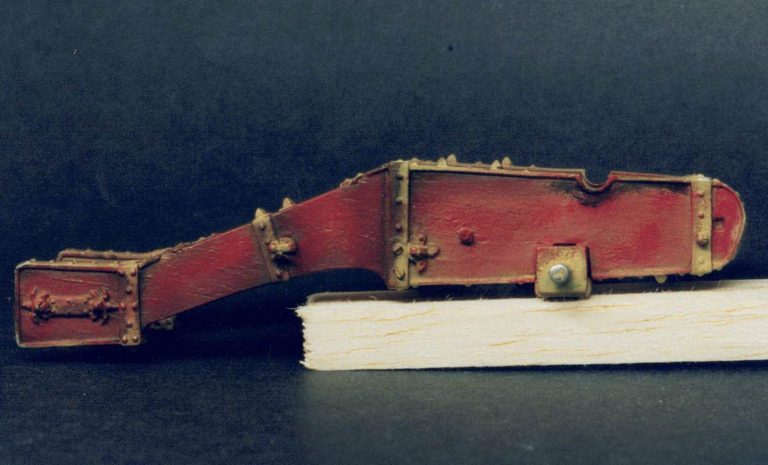
painted black with red metalwork, wheels were left in natural colours. A small box was often placed over the firing chamber to keep it dry ( Would a bag of some sort not be placed over the muzzle similar to that used on tanks and artillery pieces today ?
No mention is made of this though ). Also a pennant or flag was attached to the ( usually left hand ) trail leg showing the regimental colours.

Mention is also made of the equipment required to move the artillery
units, although oxen aren’t named, and horses seem to be listed in their
place. I find this confusing as woodcut pictures of the day clearly show oxen
being used as the motive power.
These cannon, no matter how small, still cost a lot of money to both
commission for construction and man in the field. An example of the cost of
having a single artillery piece made is given in Osprey’s book, and the
total cost comes to around 1400 florins.
The same estimate for an artillery
train of 130 pieces requires the services of 891 carters, 2675 horses, 124
master gunners, 200 loaders and 4 sappers.

The wages per month for these
would be approximately 42,839 guilders. And if they didn’t get their pay, then there was a good chance that a mutiny would begin.
War had become an expensive pastime !
Because of this massive cost, the artillery was always given first
place when it came to plunder.
The Orberster Zeugmiester, a rank equivalent to a field marshal, had sole claim to all ammunition and artillery that was still intact, not to mention all arms and armour that was to be found.
The master gunners were entitled to all powder and shot, and it was
customary to seize church bells for potential use as new barrels once melted
down.
All in all a very well organised and effective use of artillery developed
within the ranks of the Landsknechts, and they seem to have dominated warfare in Europe for quite a number of years.
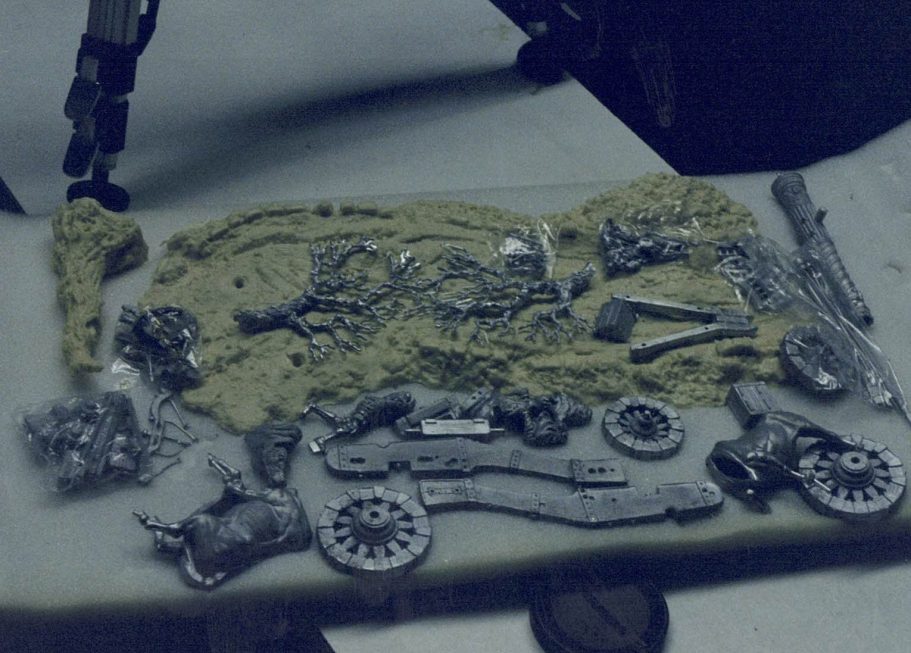
The kit bit
The box loaded with parts, contained in one of Andrea’s now familiar and colourful covers is, as with the Trebuchet model, big.
There’s quite a few pictures, taken from various angles, of a painted up example on the cover, and it whets the appetite for what’s within.
A parts list would be not only tedious, but long. I took a picture of the bits before cleaning, and as you can see there are a fair old amount of them. Over one hundred in fact.
Construction though is relatively easy, a booklet is contained with the main steps to follow, and the cannon and limber build up without any real problems.
Fit of parts is excellent, and no filler was needed on my example. The only discrepancy I came across was the number of chain links needed to construct the tensioner on the cannon outer axle / hub.
The instructions say that eleven links of the supplied chain should be used, when I found that only six are required.
I would suppose that this will depend on the size of chain supplied in the kit, yes there are two different sizes, but I was using the smallest and eleven links was still to long. Anyway, it’s a small complaint in such a good model, which as mentioned, fits together so well.
The figures need a little filler on some of the joints, mainly where the arms attach, and it’s only a smear of putty at that, again, nothing to worry about.
The kit, as supplied, comes with two oxen, but further animals can be purchased separately should you wish to. I was given two extra animals to add to the model, and this makes the whole thing, which is a big kit already, another five inches longer.
The oxen. Now here’s a few fit problems. The body halves are a bit woolly in the way they match up, and gaps will need filling.
The tails are similar, but the heads, when added will require the most filling. This latter though does allow movement for positioning slightly, although not much, but if you add the extra team of oxen, then you will need to do something to make them slightly different.
There is enough chain in the kit to link up ( sorry about the pun ) the extra two animals. However, there isn’t an extra yoke supplied, and so you have to scratch build one.
This I find surprising, considering that Andrea usually go to such great lengths to supply the modeller with everything needed. I didn’t however go to the trouble of asking about an extra yoke, but maybe a polite letter to the folk Andrea if you’re going to purchase the extra draft animals might get you a spare one ?
Get on with it.
I wanted to do something different with this model. The long slim look of a built up kit put me off somewhat, mainly due to getting the tape measure out and finding that if built like that then it wouldn’t fit in my display cabinet.
Also I’d got the three Landsknechts from Pegaso, and thought that their addition to a base would give a bit more life to an already busy little scene.
This then gave me an excuse to do a bit of minor conversion work to the figures, and also to build a diorama to set the model in, something I’ve not done for ages.
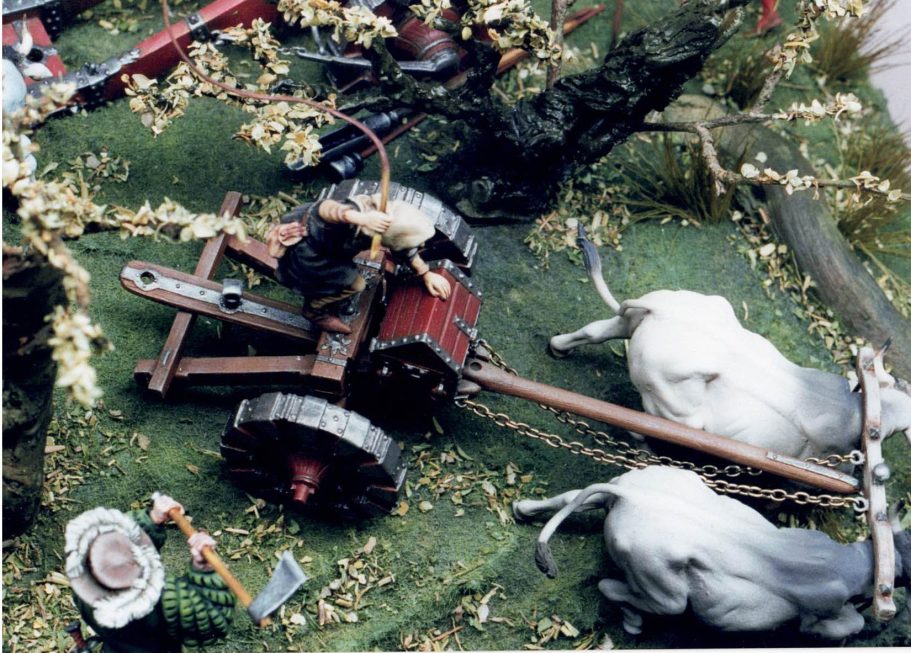
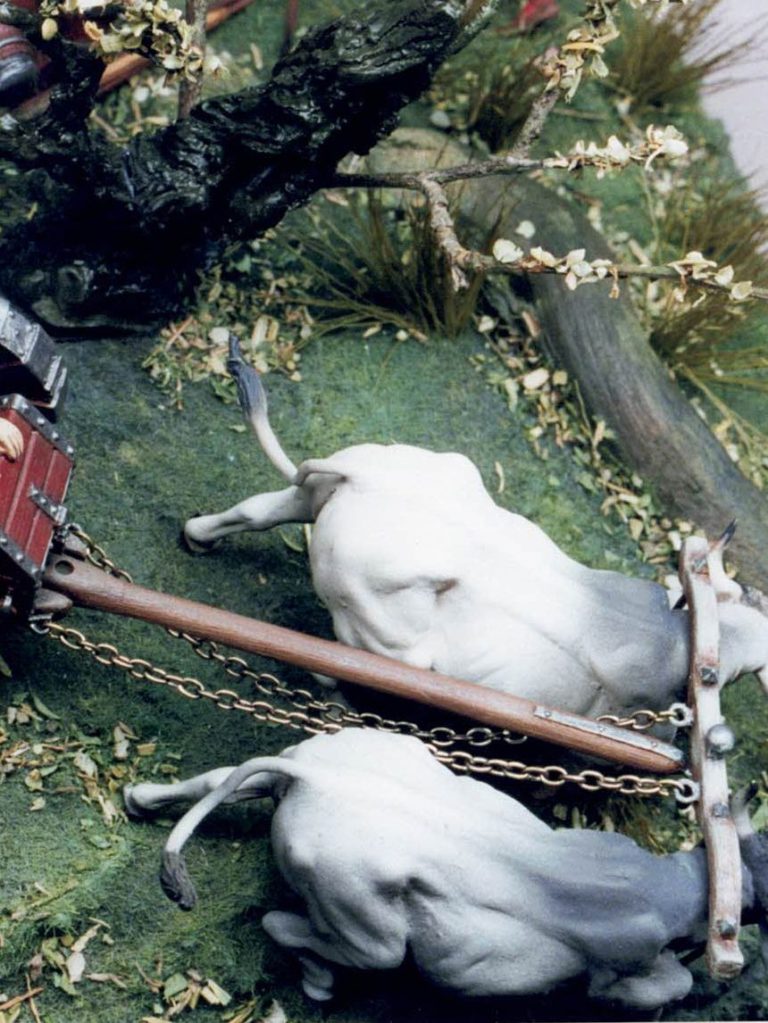
I decided to have the gun separated from the limber, the draft animals having been partially unhitched, and the “troops” going about setting up camp and cleaning the cannon. The fact that Andrea give the modeller half the stuff for this certainly helps.
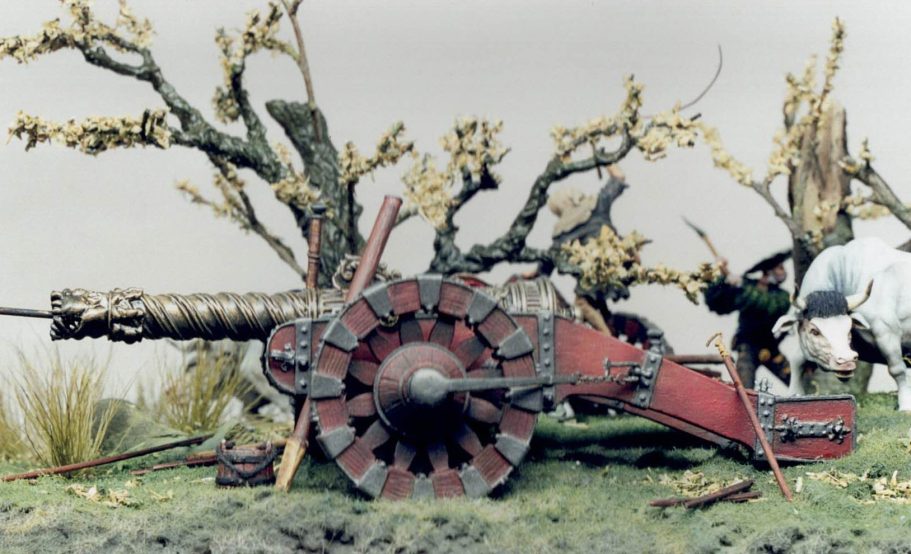
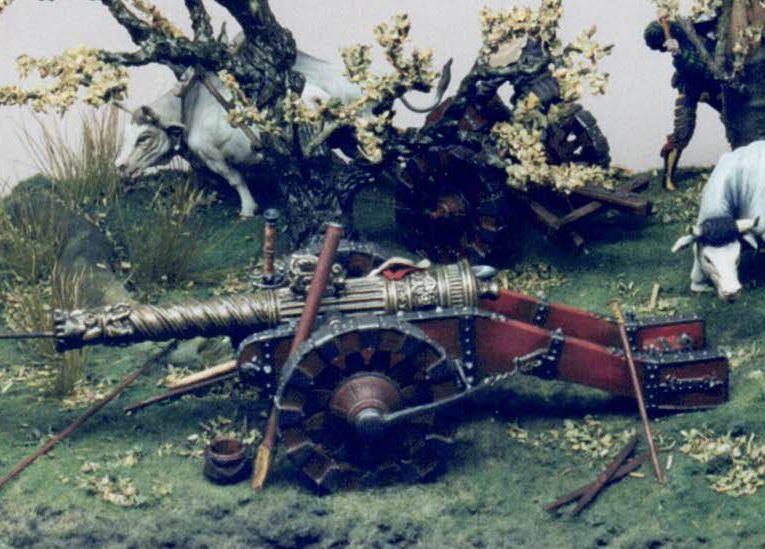
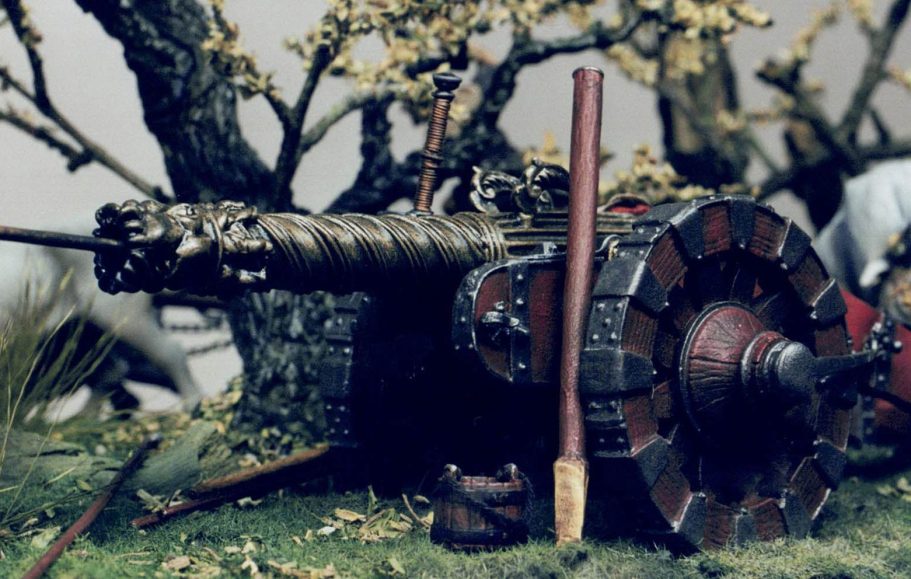
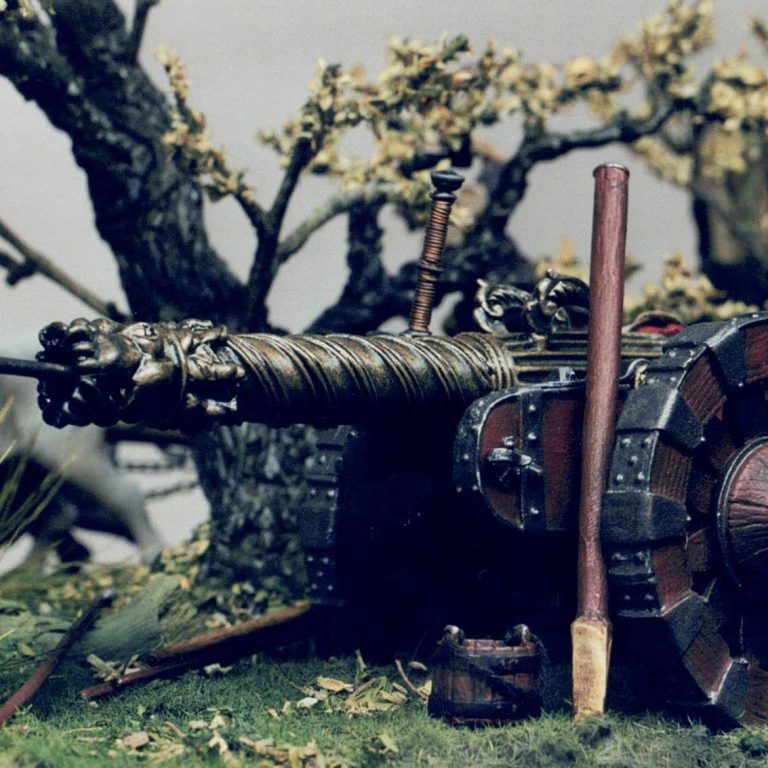
I began by building up the cannon and limber. As mentioned precious little by way of surprises here. These were painted mainly as per the instructions, which are almost directly opposed to what the Osprey book specifies. But it does look good.
I chose to continue the red of the woodwork onto the wheels as well as on the main cannon trail. I left the wheels off both cannon and limber for the painting process and also left off the cannon barrel and its trunnions too, although everything else can be added prior to painting.
I used Humbrol crimson acrylic for the woodwork, dulling the colour down with the addition of Games Workshop “Woodland Green” and also adding washes of Lamp Black oils once the acrylics had dried.
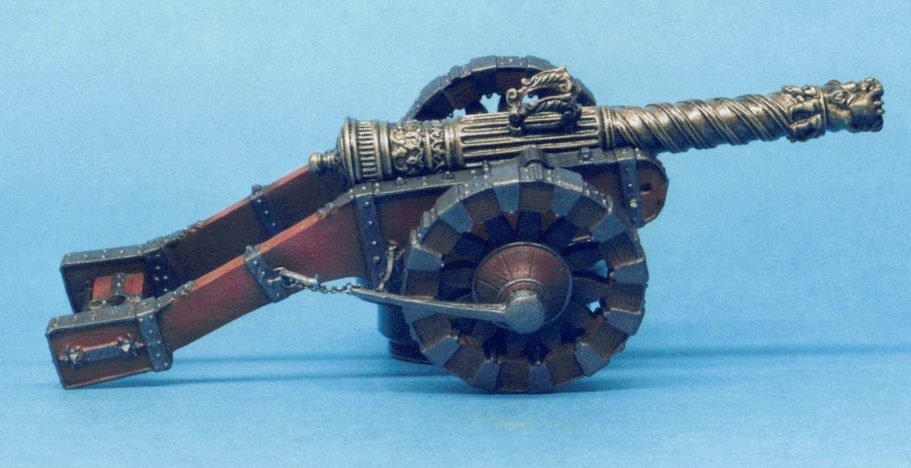
The metalwork was painted in Games workshop acrylics, adding a few spots of rust here and there, but only a few.
I get the impression from references that the cannon were well looked after, and so I tried for a fairly clean look here.
It’s surprising how robust these two parts of the model are once fully constructed. They won’t bounce if dropped mind, but the construction is certainly solid once the glue has set.
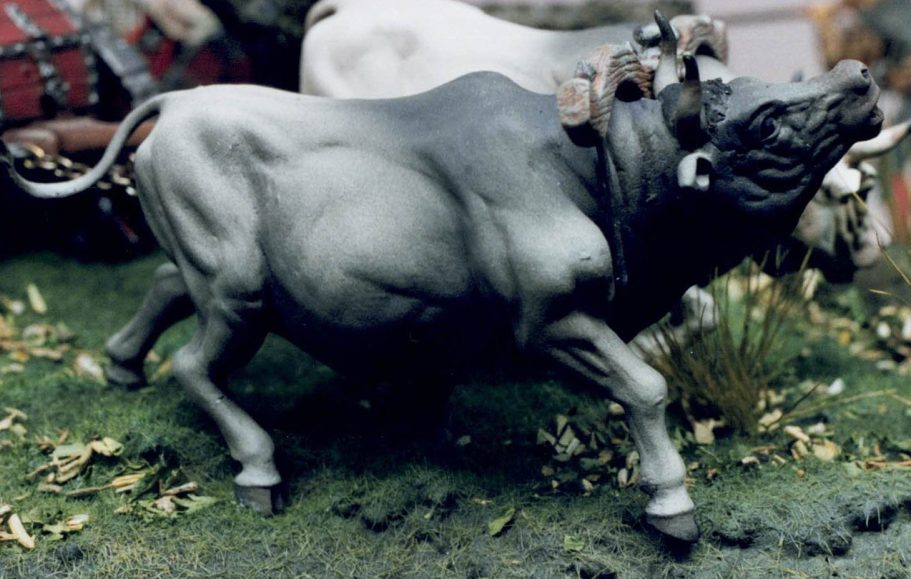
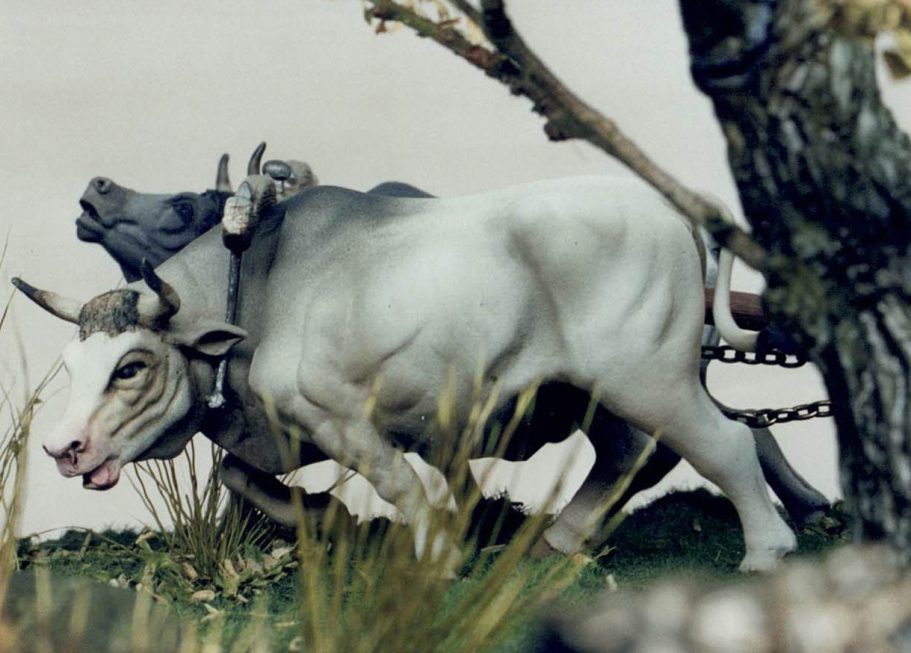
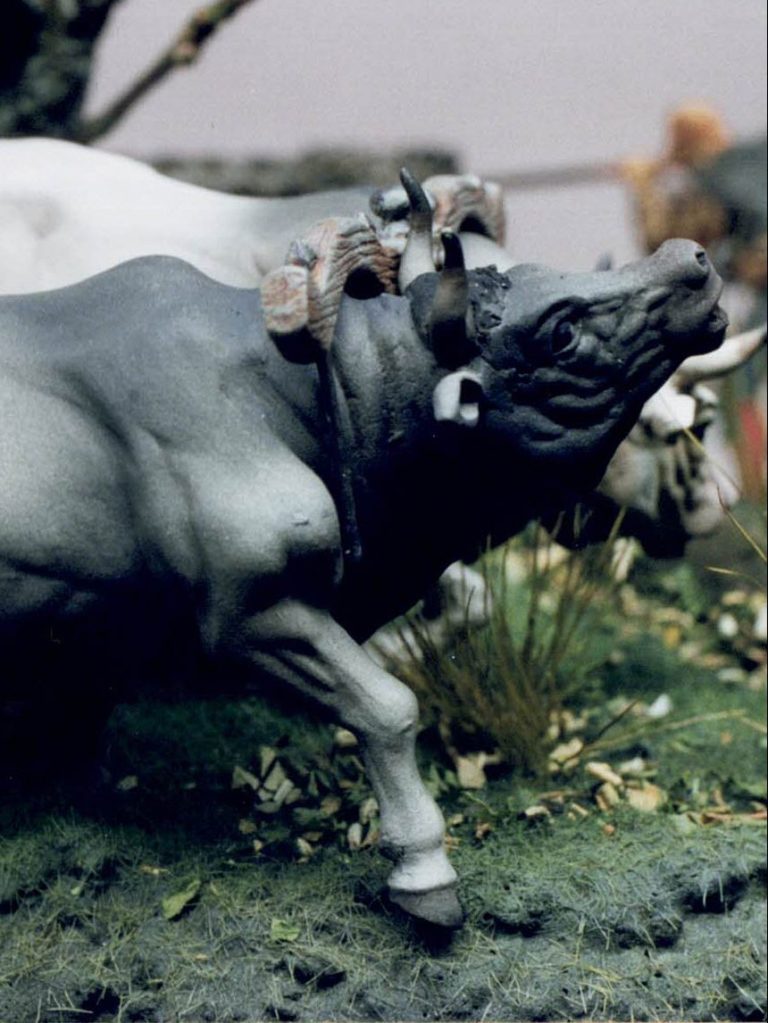
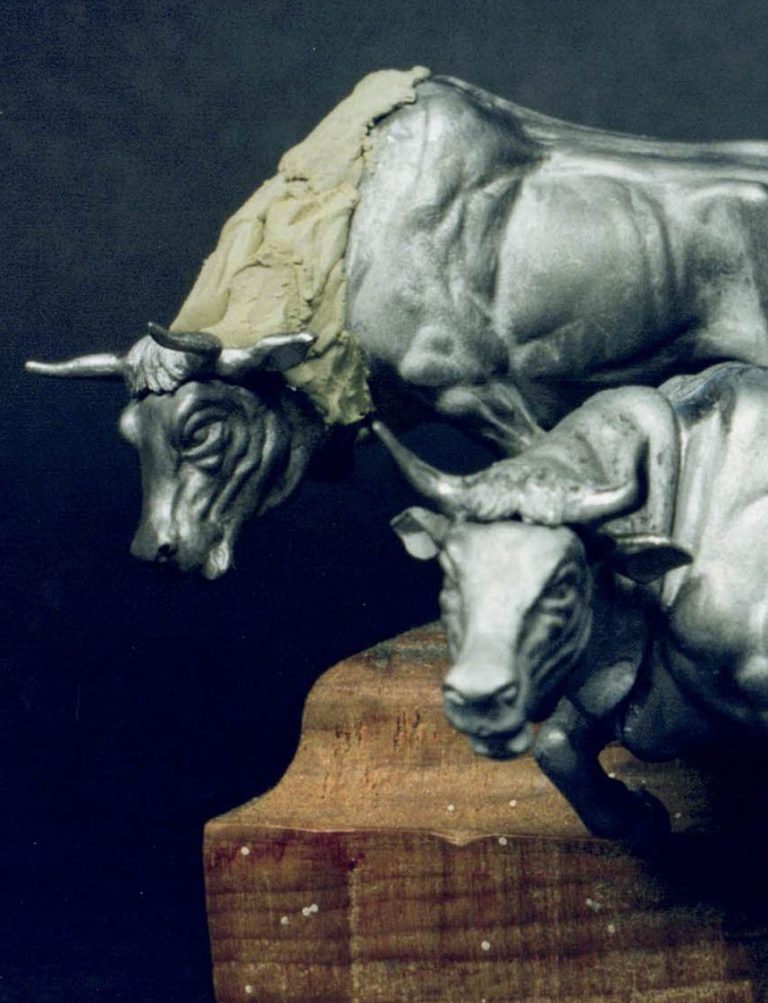
The Oxen
Next I glued and filled the draft animals. Here’s where I began with the surgery.
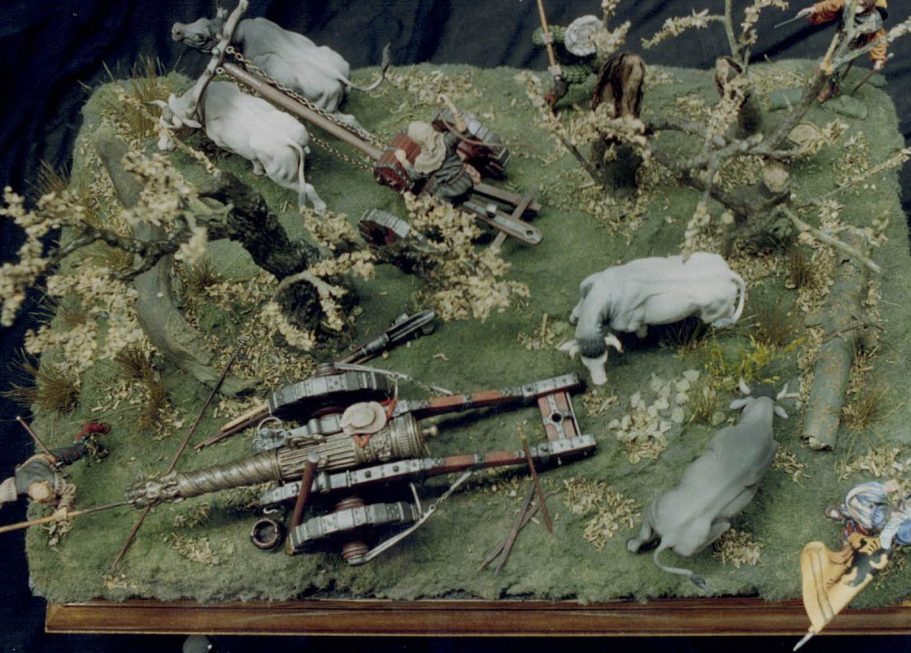
Two of the oxen were built as per the kit, these ended up being hitched up to the limber. The other two, with the diorama setting already in mind, were altered to have one cropping grass, and the other stretching to look around to it’s rear.
Admittedly, there’s not too much that the modeller can do with these animals. Their legs are too short to start making alterations without major surgery to the body in compensation, and the front leg on one of them is moulded almost completely in touch with the neck to make any change to that one limb almost impossible unless completely reconstructing it.
I’m not that confident a sculptor to do this, so contented myself with altering the head positions.
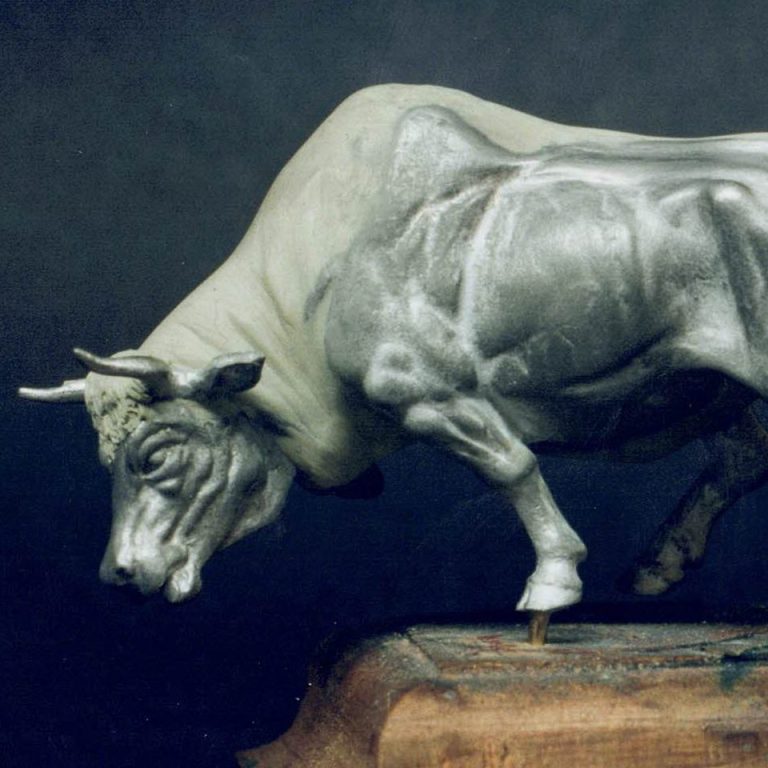
I cut off the necks of both animals, filling the bodies with Milliput and drilling into this once dry so that a wire could be inserted and the head attached on to that.
The necks were then built up, comparing them to the ones on the original animals, and trying to match them in with each other for wrinkles and folds of skin.
I also found it necessary to add detail under the tails of the animals, mainly because it the tails are animated in any way, rather than having them trailing down, then the lack of detail here is most evident. I made two animals into bulls, and left two as cows.
Once dry, I then painted them all with an airbrush, beginning with the almost black animal and working my way through lightened shades to finishing the almost white ox.
I used Humbrol enamels for this, and left them to dry for several days before returning and adding washed of diluted oil paints to pick out the details, much as the tank modellers do.
The horns, eyes and tongues were painted in oils too, using black for the eyes, a mix of Yellow Ochre and White for the main colour of the horns, adding Burnt Umber and Black at the tips, and using a mix of Alizarin Crimson and white to get the pink for the tongue.
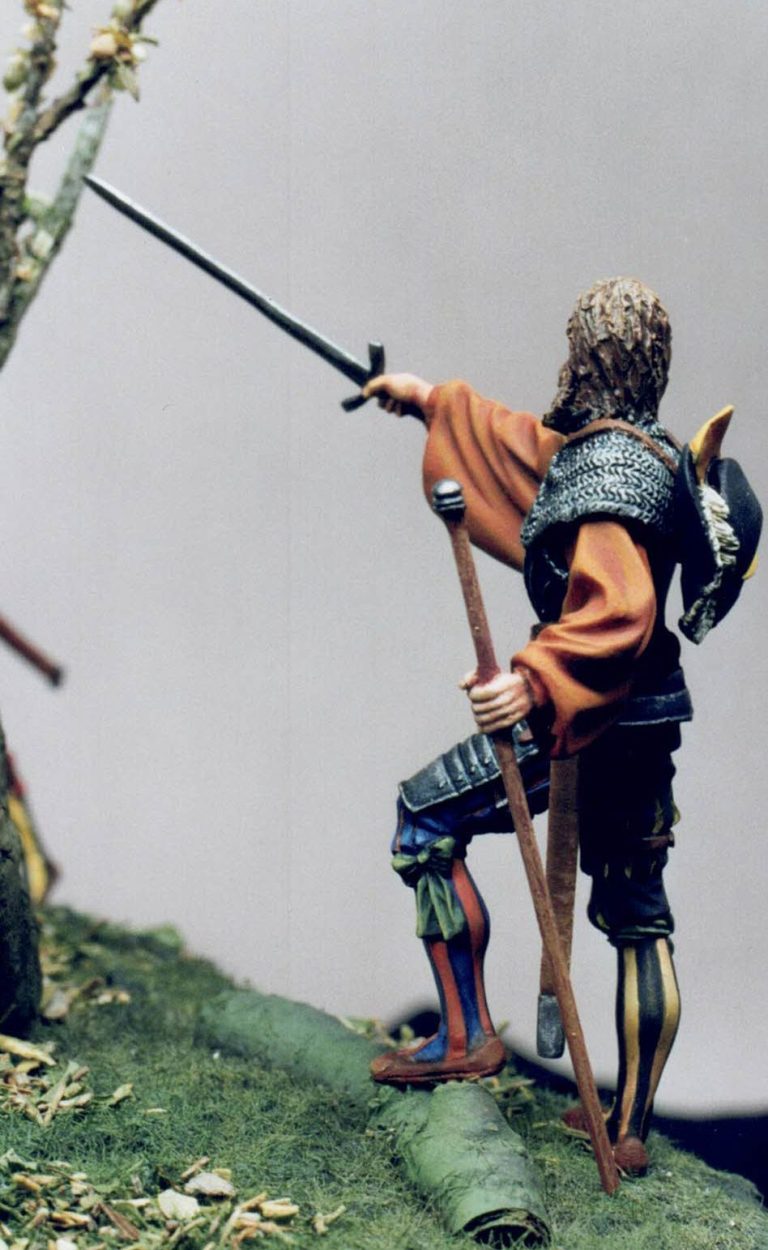
The Figures
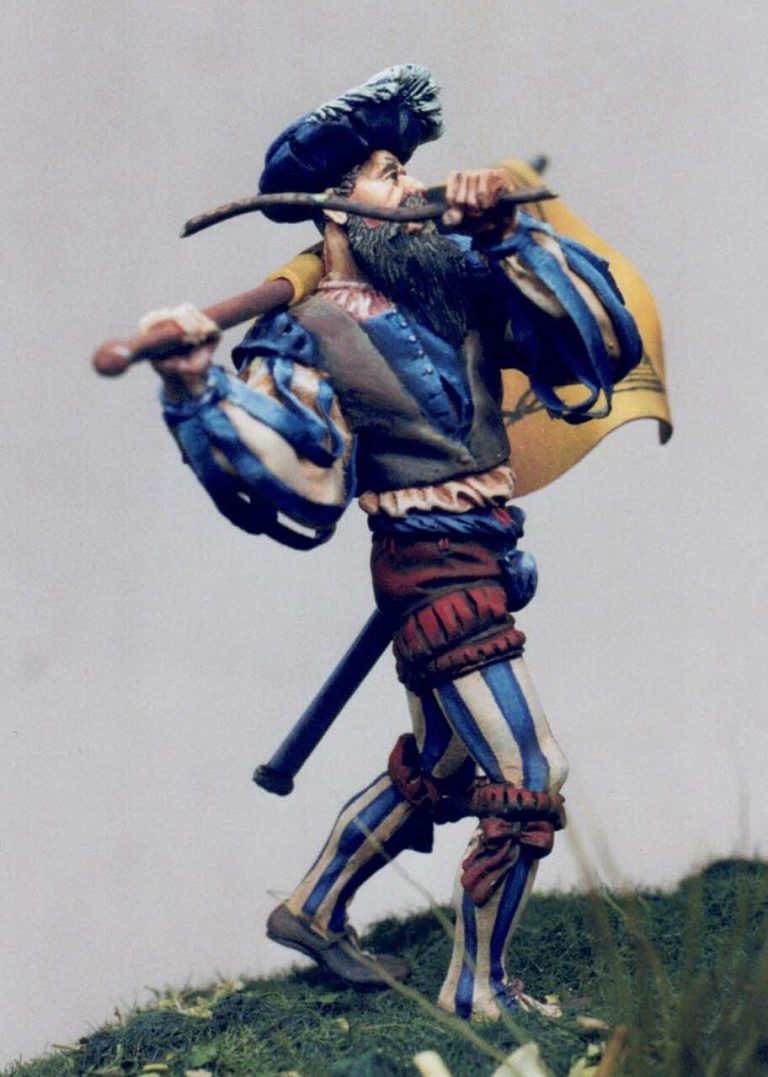
So what did I have then as my “cast of thousands”. Well there were the two figures already with the Andrea Kit. and also the Pegaso figures, two of a figure thrusting a large polearm, one swinging a double handed sword and also an officer figure.
I decided to use the driver as supplied by Andrea in his unaltered form. After all it’s functional and it’s doing the job admirably. I wasn’t too keen on the other figure in the kit. He looks O.K. painted up, but I just wasn’t to sure that I could make him fit anywhere in the scene I had planned.
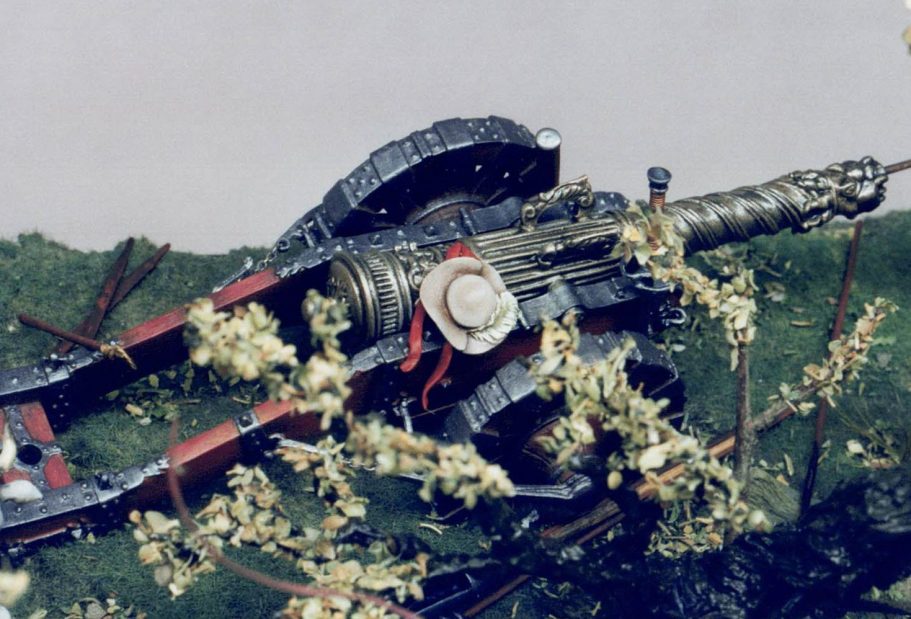
The Pegaso kits. Now here’s where the fun starts. One of the polearm wielding figures I made up unaltered, barring filling in the location hole on his back where the hat is supposed to hang. I also carved off the cloth ties that loop back over his shoulders and attach to the hat, as it wasn’t going to be there anymore.

The hat itself had new cloth strips made from Milliput, and was placed onto the cannon. The polearm was cut from the hands and a piece of brass rod substituted and hey presto, one barrel cleaner !Easy.
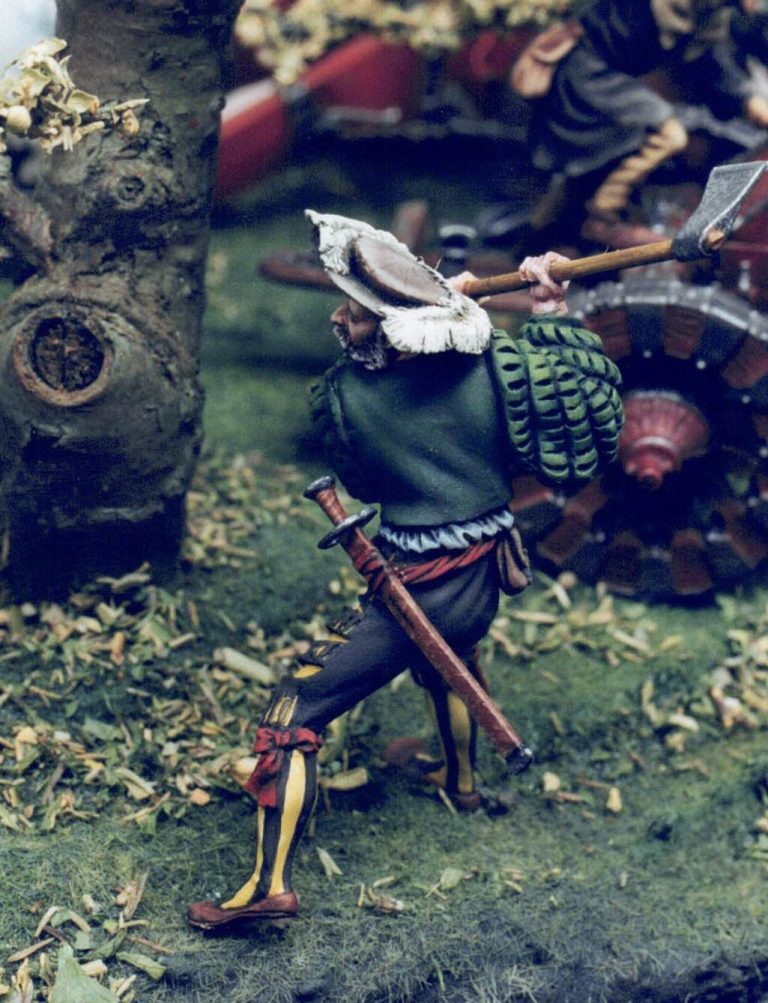
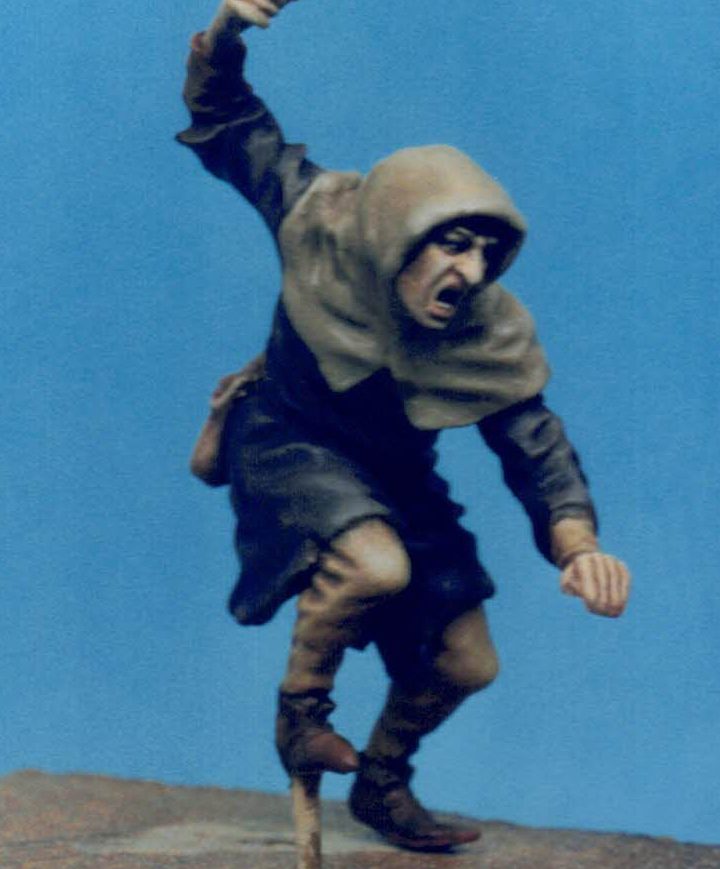
To make the second figure look different, I took the arms from the figure swinging the double handed sword, and attached these to this figure. The shoulder position altered the width spacing, so I had to cut the hands from the sword and drill them out to accept another short length of brass rod.
With a loop of plasticard, glued tight together at one end and filled with milliput I now had a chap swinging an axe, who looks quite different from the original donor figure thrusting the polearm. To make the transformation complete, I added the hat from the officer figure.
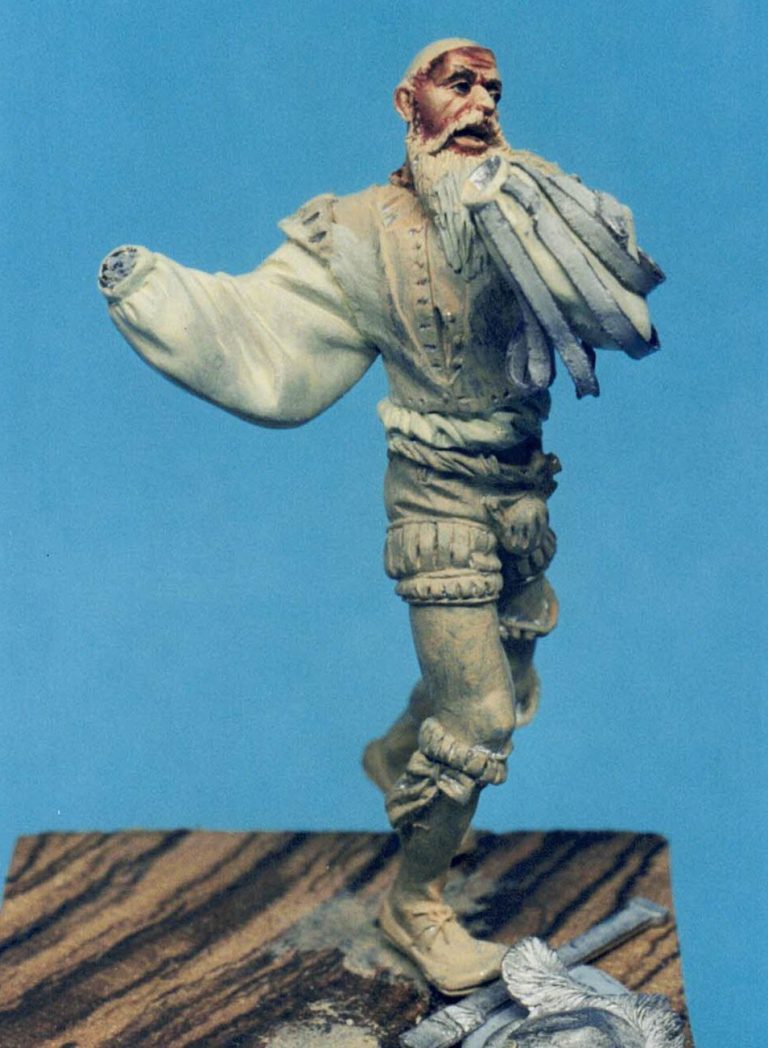
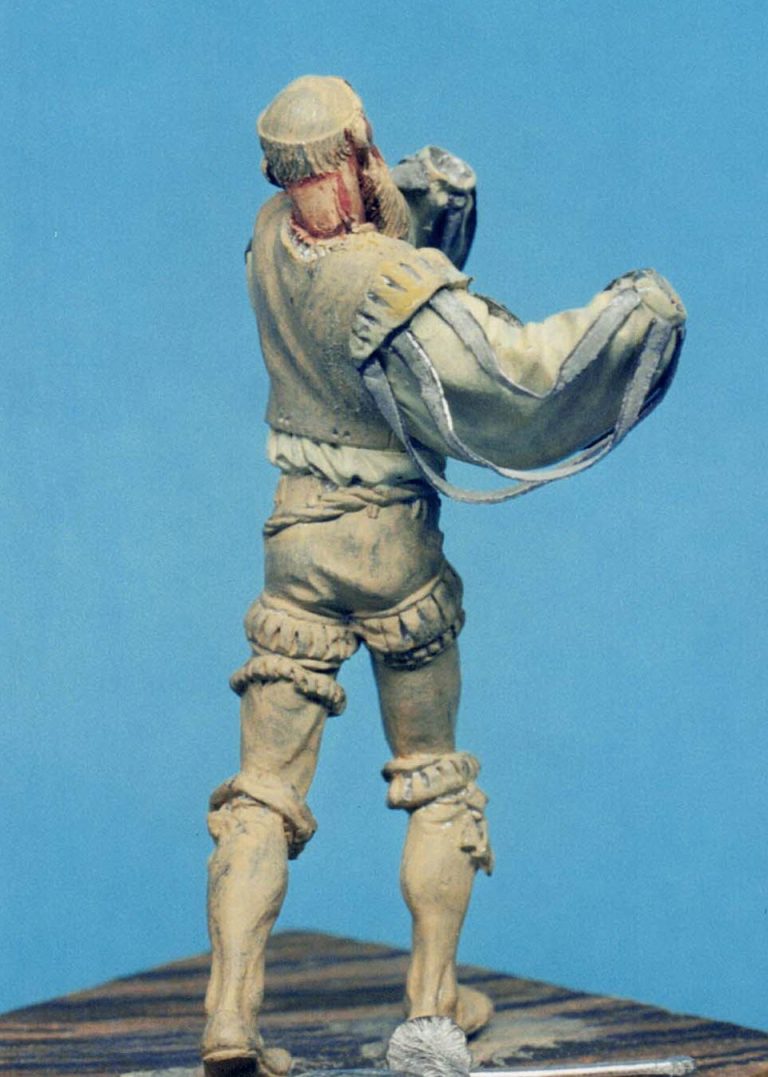
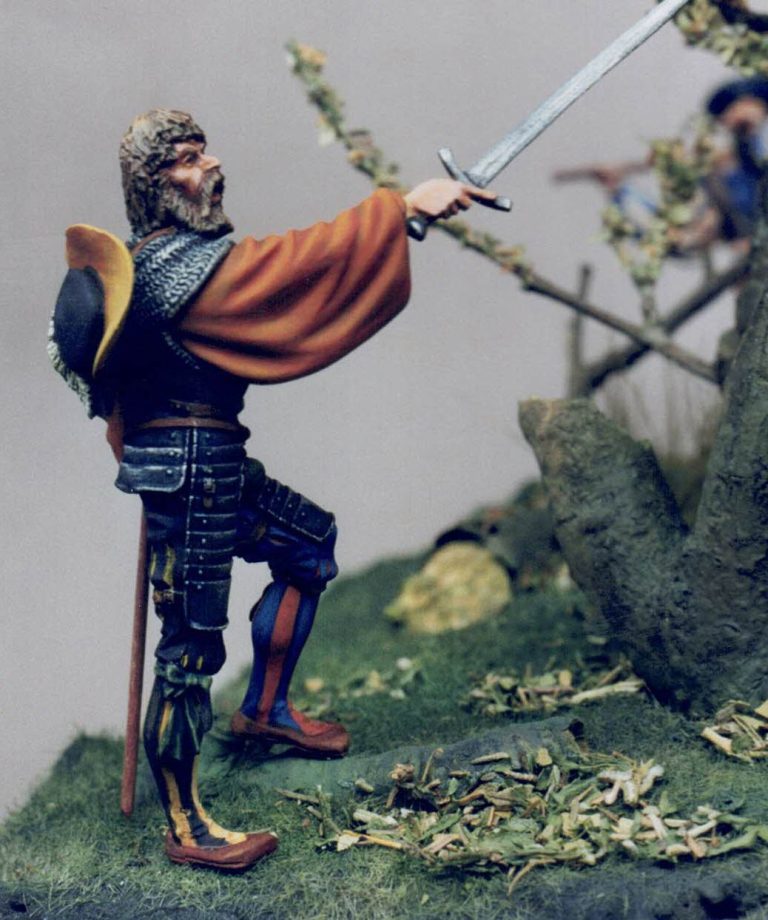
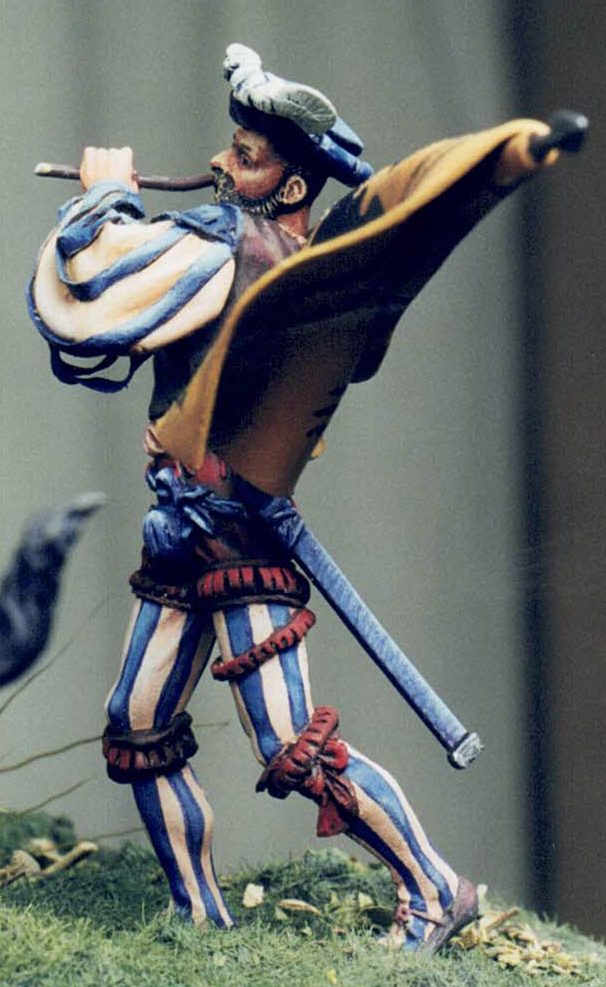
Now back to the Swordsman. I added the polearm figure’s arms, changing the way in which they attached at the shoulder.
I had envisioned a figure walking past the Oxen, swinging a stick to get the animals moving out of his way, and having him carrying a flag over one shoulder.
I used the spare set of hands I had. scratch building the flag and pole from brass rod and some rolled out Milliput. The stick is a small piece of wire.
The arm needed a bit of filling at the shoulder, and the beard needed rebuilding a bit too, but apart from that the alteration was very easy indeed.
Oh, the final idiocy on this figure was to add the strips of cloth to the arms. I decided to do this once I’d painted the figure ( hence the term “idiocy” ), and used some foil from a wine bottle fastened in place with superglue. Luckily it worked O.K. although half way through doing it I was having serious misgivings.
Having given away the officers hat, I had only one spare, and that one had been for the back of the polearm chappie. I decided to hang this on the officers back, and to add some hair to the figure.
This is the bit I’m least happy with as I was trying to do a Lee Van Quang, in that I suggested the form of the hair rather than sculpting it in minute detail. I guess Quang is safe in his profession for a little while yet !
Painting the figures.
Now for the fun. I actually did most of the painting with acrylics, mainly because I’ve not used them in a while for anything but undercoating, and so I could see if I’d still got the knack after ten years or so of painting with oils.
Rather than layering several transparent glazes over a surface with the acrylics, I prefer to undercoat an area and then once it’s fully dry, dampen it with clean water and then add a darker or lighter colour on to the wet surface, blending the paint into the undercoat below. It’s similar in effect to the layering process, but allows an even quicker application of paint.
The other method I use is to have a solid undercoat and add a block of the shadow colour over this. I then blend in lighter colours working to highlight whilst the whole thing is still wet. This can only be done on relatively small areas, but with practice it can be quite effective.
I tend to use Games Workshop colours, because like the Vallejo ones, they are formulated with the modeller in mind, having a longer drying time than tube acrylics.
I reverted back to oils for leather belts and also on the models hair, and painted the main yellow colour of the flag with oils too, mainly because of the area of this part. The Black eagle and pillar motif was done with acrylics though.
All in all the figures were fun to paint. The animation on the driver’s face is particularly good, and the sculpting of the clothing on the Pegaso figures is up to their usual quality.
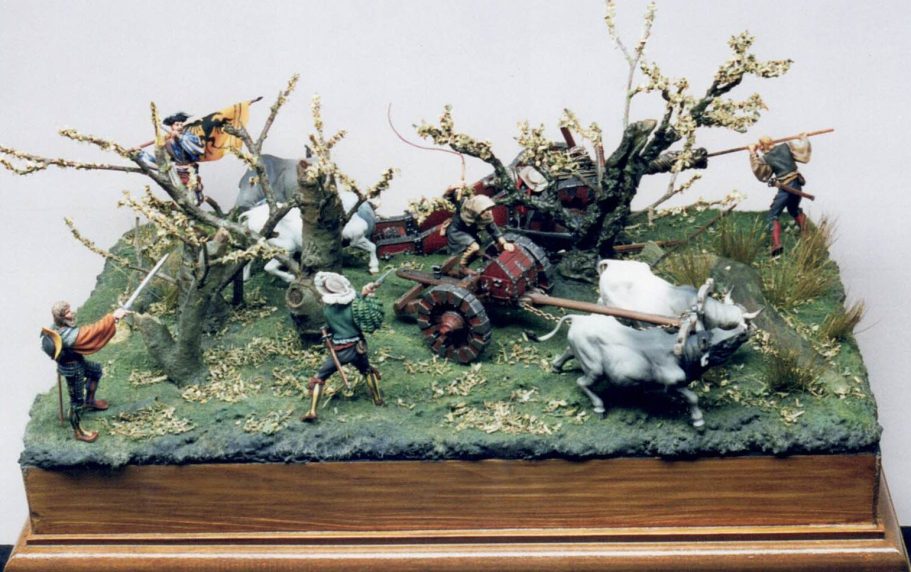
The diorama.
As mentioned previously, I wanted a different configuration from the kit set-up. I had a large wood plinth that I was going to use for an AFV ( something I’ve been getting around to for the past three years ! ), but as the kit is still in the box, I thought that I could safely scrounge the plinth for this project.
The plinth looked to be of an ideal size, approximately 9 inches wide and possibly 14 inches long. It wasn’t high enough though, and so I added a frame of 2” x 1” to it, the 1” side being used to build up the height.
I filled the hole in the centre with some blocks of polystyrene, and then varnished the sides to match in with the rest of the base.
Once that had dried, I added a nice thick coating of groundwork to the top, this being a mixture of interior wall filler, cat litter, brown poster paint and wood glue.
I embedded the tree that Andrea add in for use on the supplied groundwork, and also a couple more trees from old twigs found in the garden.
Over the top of the groundwork, whilst it was still wet, I sprinkled static grass, then put the whole lot in the airing cupboard to dry.
Ever one to try new methods, I decided to airbrush the grass, using Humbrol enamels, and starting off with a dark green and worked towards a lighter green / yellow colour. The airbrush worked well, not clogging the grass up as a brush applied layer of paint would, and also allowing the shading to show up more.
I drifted the green paint onto the tree trunks tying them in to the groundwork colours. I then added some longer grass from dyed deer hair.
Now for the trees.
I painted on wood glue to the tips of the branches of the Andrea tree, and dipped these into dried Oregano herb. This imitated leaves quite well, being roughly in scale with the figures. The branches were pinned and then glued into position.
The other trees had the branches added separately, using a mixture of fine twigs grafted into place with fine wire pins for support. Again the Oregano herb was used to supply leaves, and I decided to have some drifted leaves on the grass too.
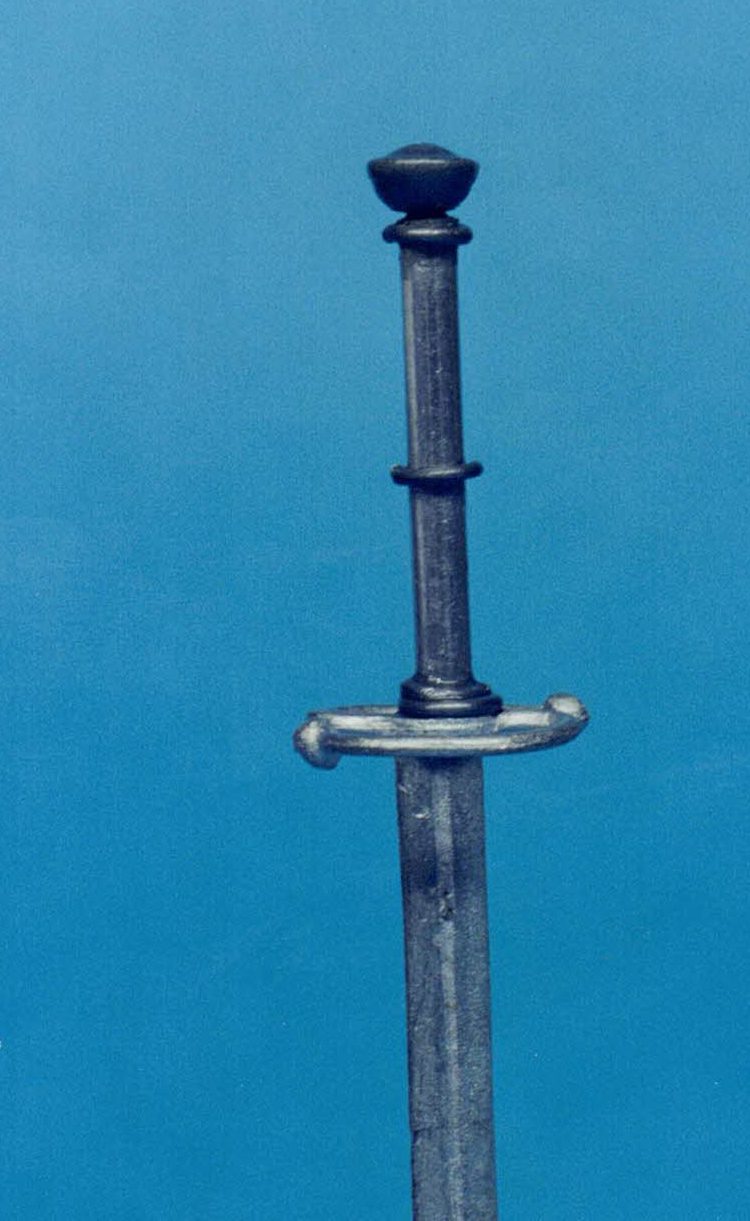
The cannon and limber were glued in place, as too were the oxen and lastly the figures and the various accoutrements supplied with the cannon. I scratch built a new hilt for the double-handed sword, propping this against the side of the cannon, along with a lot of the equipment.
Final thoughts
This was a long project. Building the model as it’s intended will keep the average modeller happy for quite some time. I reckon that it would have kept me quiet for about a month and a half, possibly two.
Converting and planning the changes more that doubled the time, and I’ve actually had the kit on or around my work bench for about four and a half months, but it’s been fun though.
The kit itself is very good indeed and certainly is comparable with the trebuchet. As I said with that kit when I reviewed it, I certainly think that the kit is worth the price tag, although at an additional twelve pounds each, I’m not too sure about the extra oxen.
With using the kit, together with a few additional figures, to create a diorama, I’m pretty pleased with the result. I do feel that the manpower is lacking, and if I come across any more 54mm Landsknechts that fit the bill, or are easily converted to fit, then I’ll probably add them into the scene. Having said that, I think I should have used a larger baseboard.
The spare oxen are a little cramped, and I’m not too happy with the position of the flag carrier, although I wanted to display the flag more than the figure really, so was tied somewhat for where he could be placed on the base.
All things considered though, I stand by my comment that these models are excellently planned by Andrea, well sculpted and moulded, and are well worth the money.
At the time of writing ( 2001 ) the base kit cost about £120.00 plus in this case the additional £40 for the Pegaso trio and the two additional oxen at £13 each, it’s not going to be affordable to the average modeller. But balance that against how much time and effort can be expended on this as a project, and the price comes a little bit more into perspective.
Thumbs up to Andrea and Pegaso, and my thanks to them for the review items.
Main references from Osprey’s “The Landsnechts” by Douglas Miller and G. A. Embleton.
We need your consent to load the translations
We use a third-party service to translate the website content that may collect data about your activity. Please review the details in the privacy policy and accept the service to view the translations.