Eve II
1/7th scale Resin kit, maker unknown
Painted in 2024
I may have mentioned it before, but I usually have several projects on the go at any one time. These are usually a variety of scales, end might include AFV’s, cars and aircraft along with the figures and occasional scratch built.
All the above that are for myself get shelved is a commission comes in, and then I lose track of paperwork, boxes etc.
I know I shouldn’t, but clearing my desk occasionally, tidying away rubbish and generally reinstating a modicum of space to actually paint drives the movement of things, then either I must’ve thrown things away, or I’ll find them at some point in the coming years.
So, having bared my soul a bit there, I come to this rather large figure that I think I started in 2019, or thereabouts, and now just at the beginning of 2025 have had to actually dust it to finally complete it and put it on a base.
To say that I’ve lost the box and any paperwork that came with it, well, you probably realise from the introduction that that’s what has happened.
The Internet is a wonderful thing, but put in “Android, Female” and the amount of images that are offered is phenomenal, not to mention of absolutely no help whatsoever in identifying this kit.
Also worth admitting to is the fact that I thought I’d finished writing articles at the time this was started, so there’s not many “in progress” pictures to accompany the article – my apologies.
However, I’ll do my best to tell you what was being done as I go along.
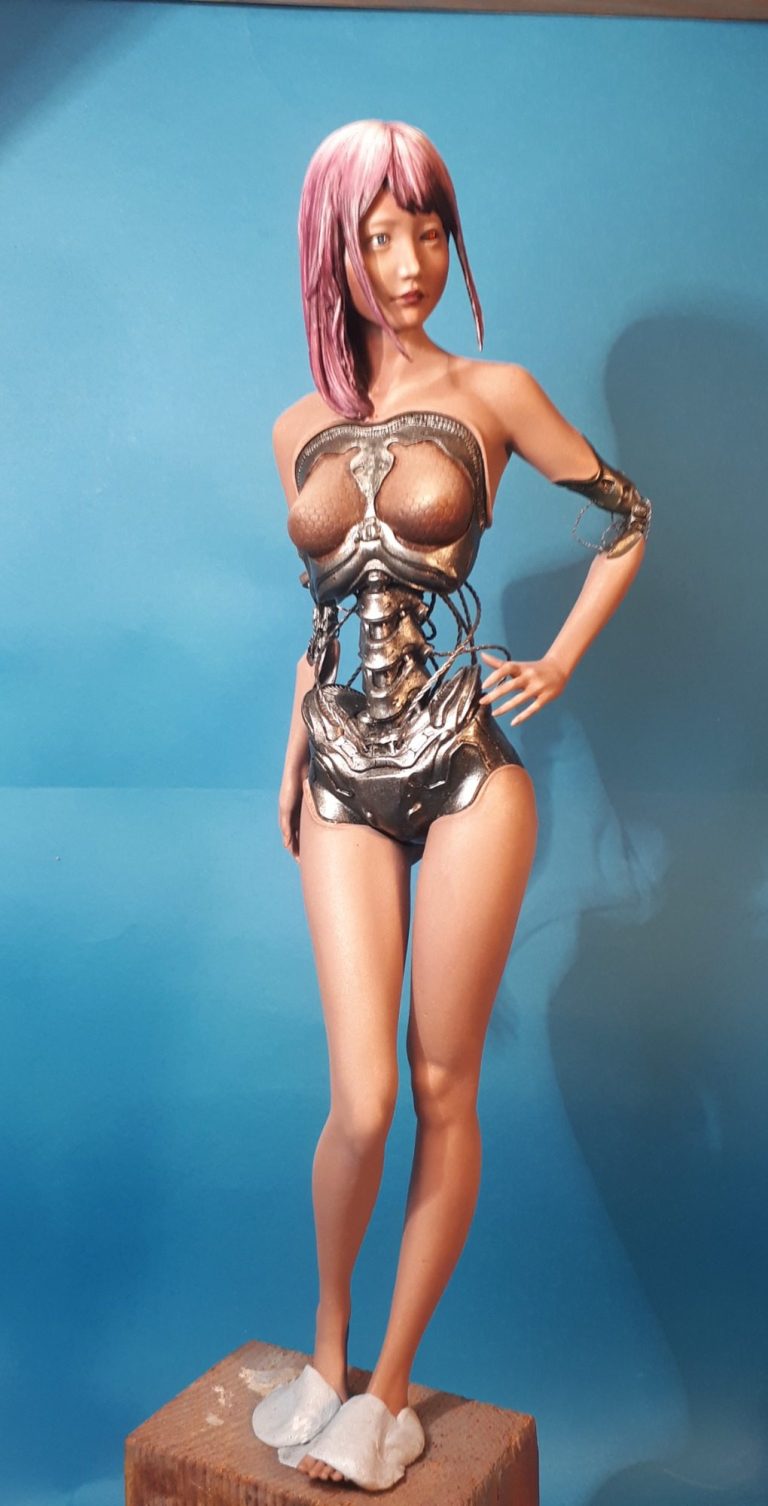
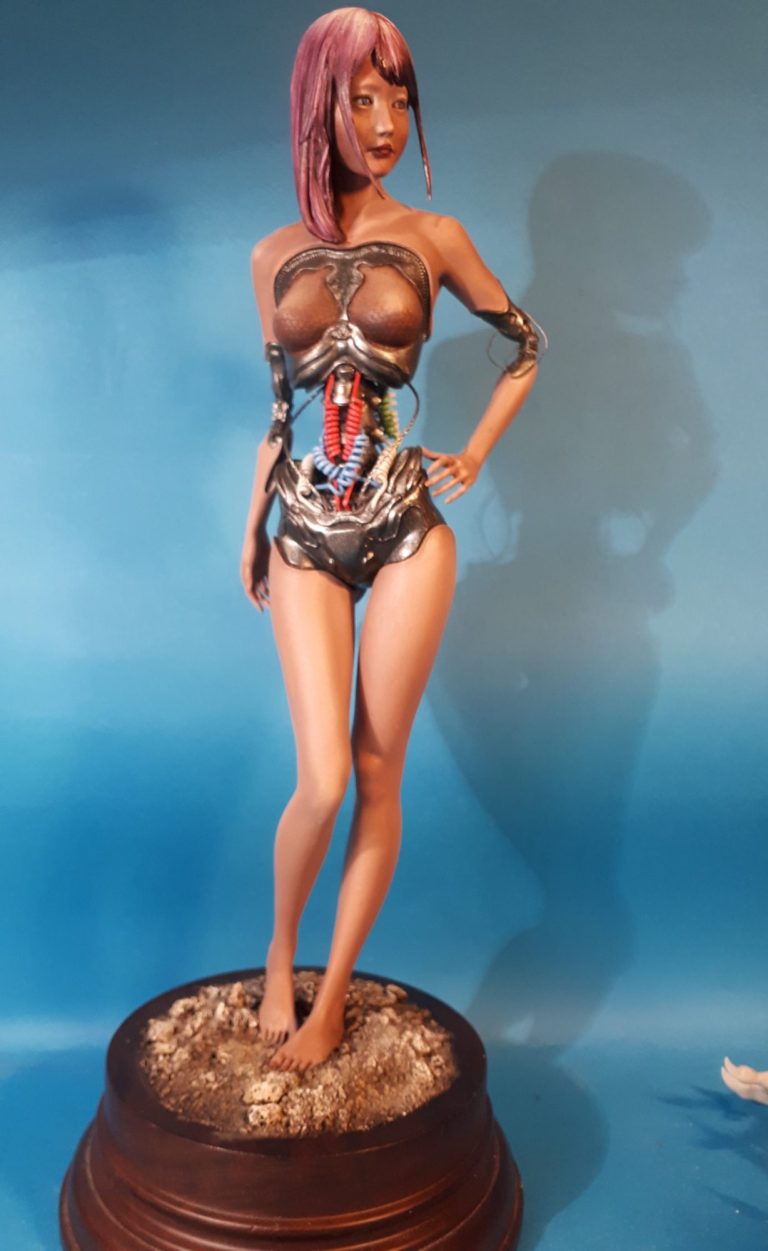
What I will say is that the casting is very good, the sculpting runs towards the Japanese Manga style, and the split up of parts echoes that too.
Talking of the way the parts are split up, there is a good logic to is, allowing the model to be assembled with no filler whatsoever, just a case of cleaning off a few mould plugs and getting on with things.
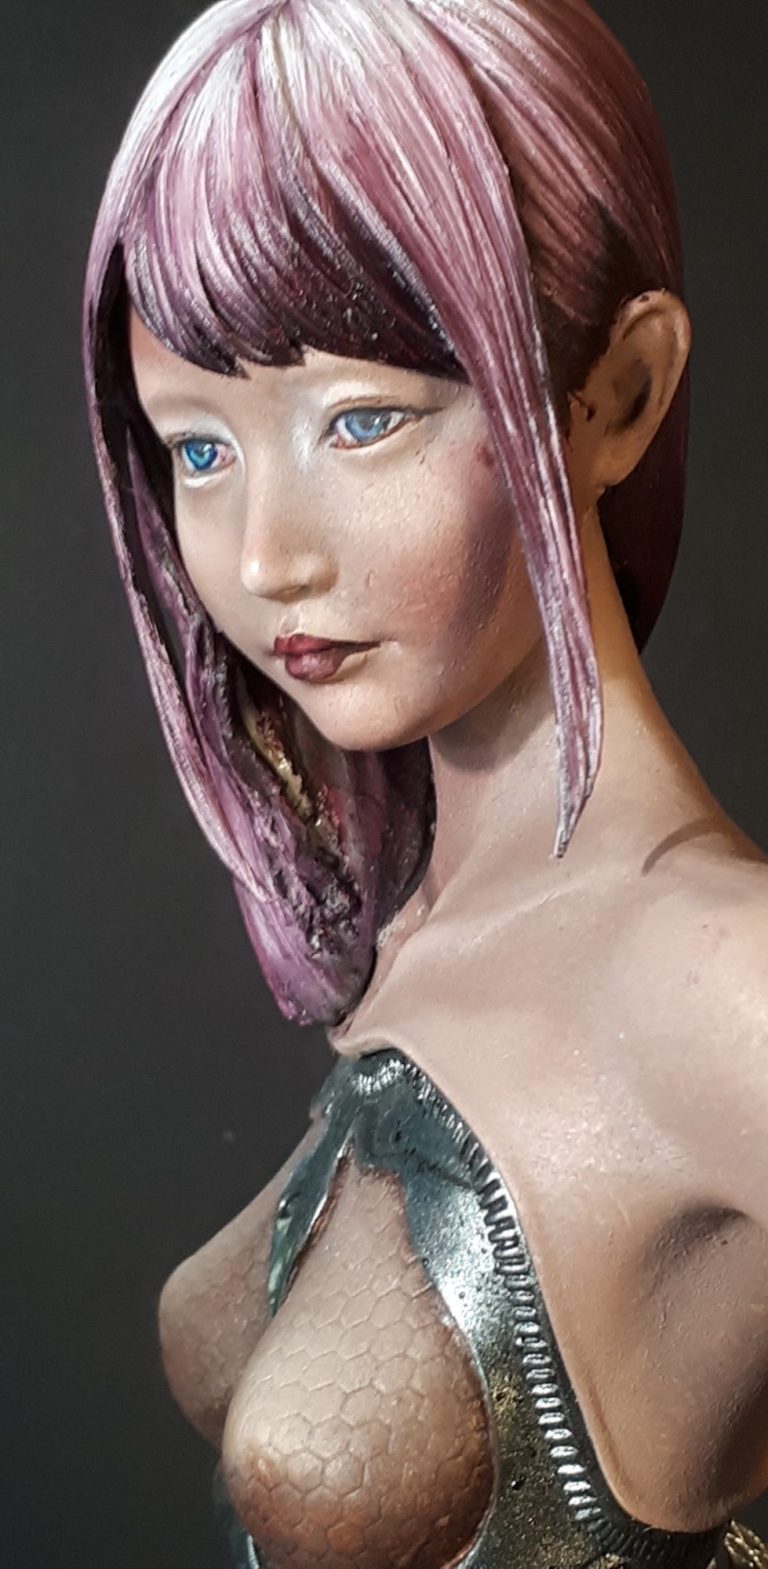
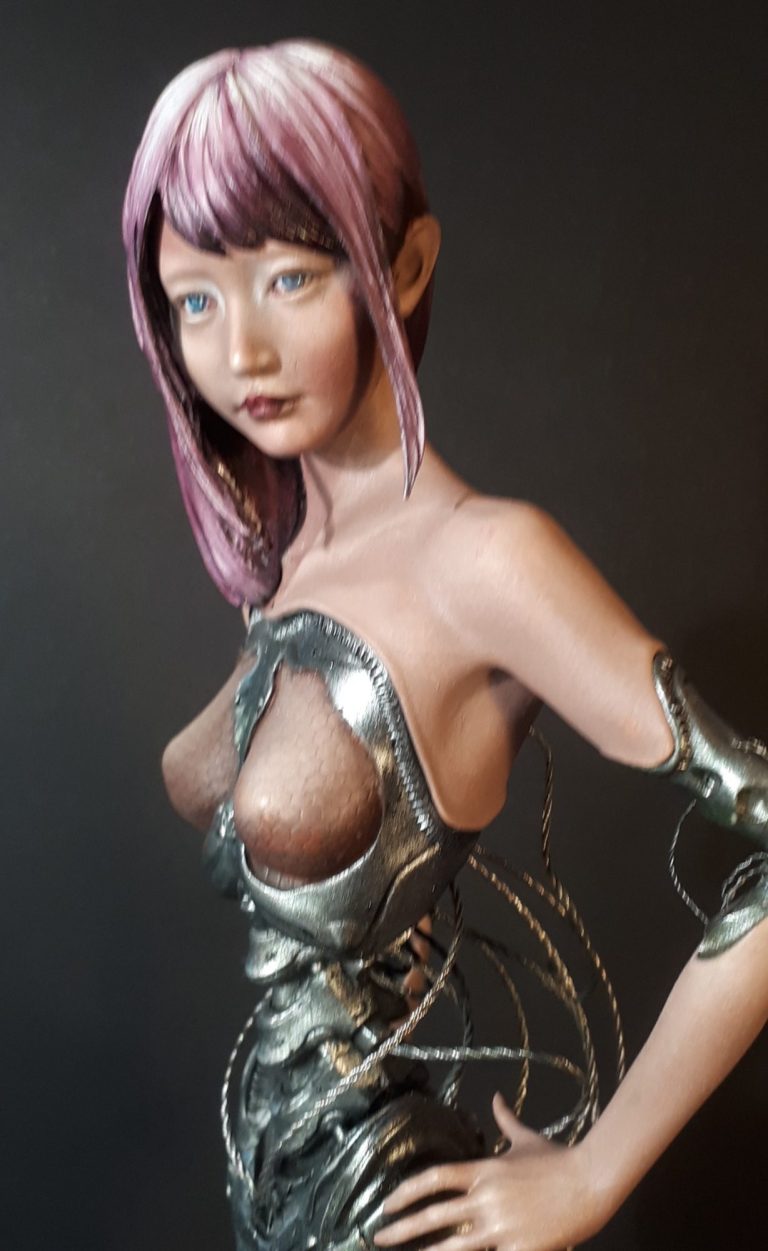
Photo #1 I’ve assembled the head onto the neck in this shot and got some paint going.
My usual mix of Mars Brown and Titanium White oils with a little bit of Alizarin Crimson added – only a touch of that, because it’s a very strong pigment –which makes the overall mix just a little bit more pink that I use for male subjects.
The mix is painted over the whole skin area and then Titanium White is added in small spots and lines to places that need to be mid-tones and a very soft brush is used to blend the white in to the colour already on the model.
As more white is added, the highlights begin to form, paying particular attention to cheekbones, nose, chin and forehead on the face, and to the shoulders and clavicle on the body.

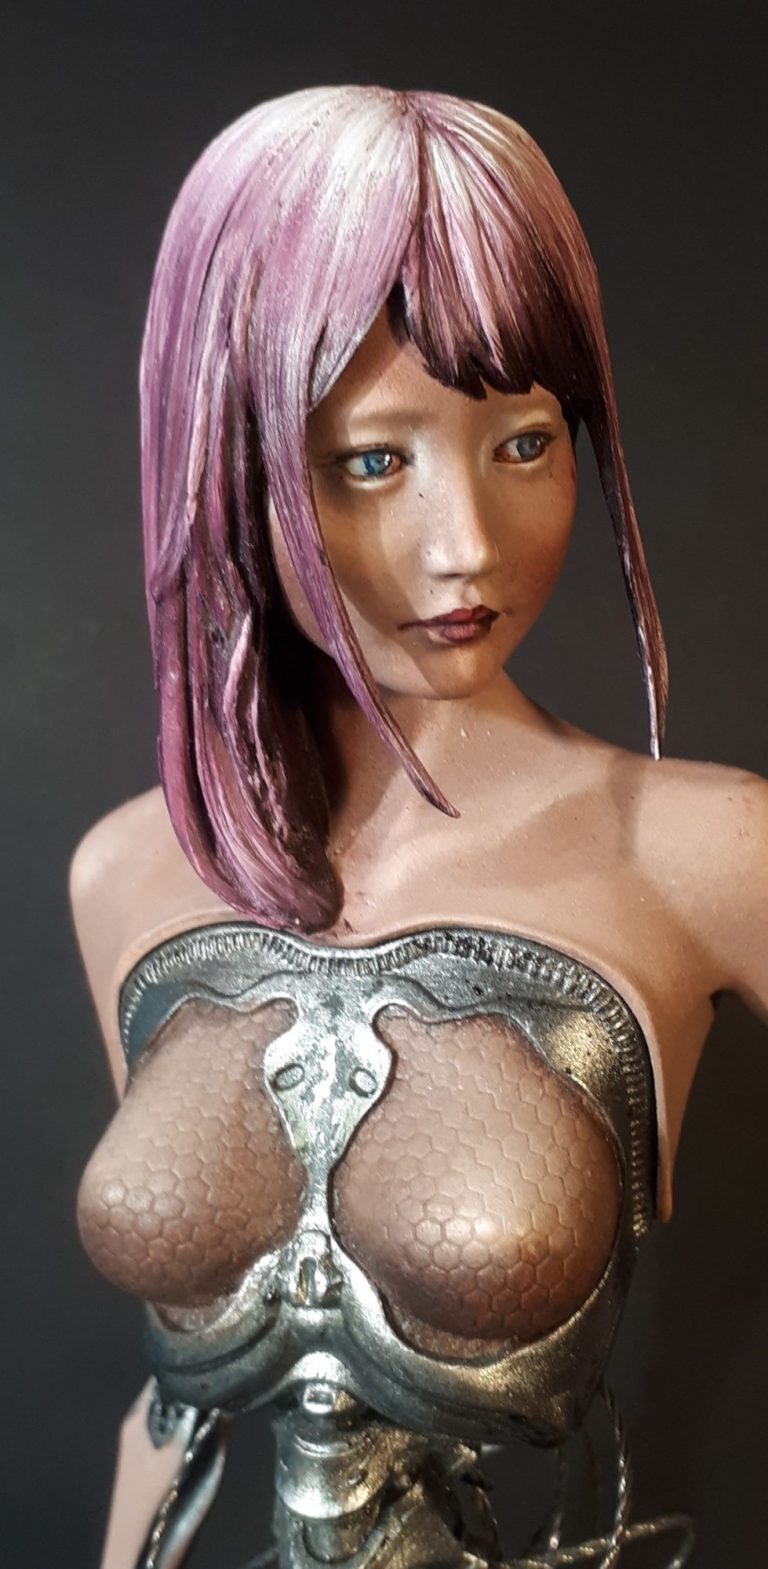
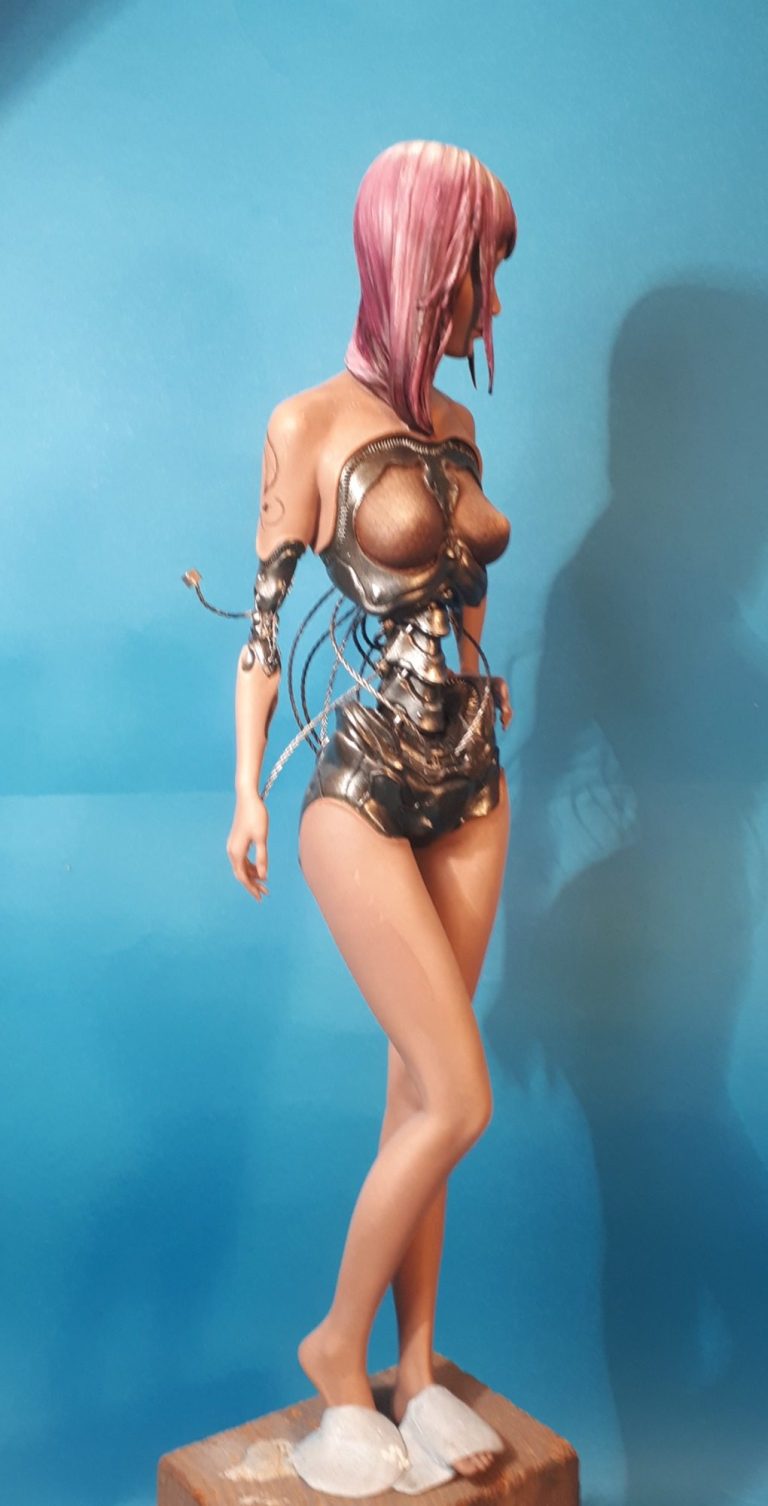
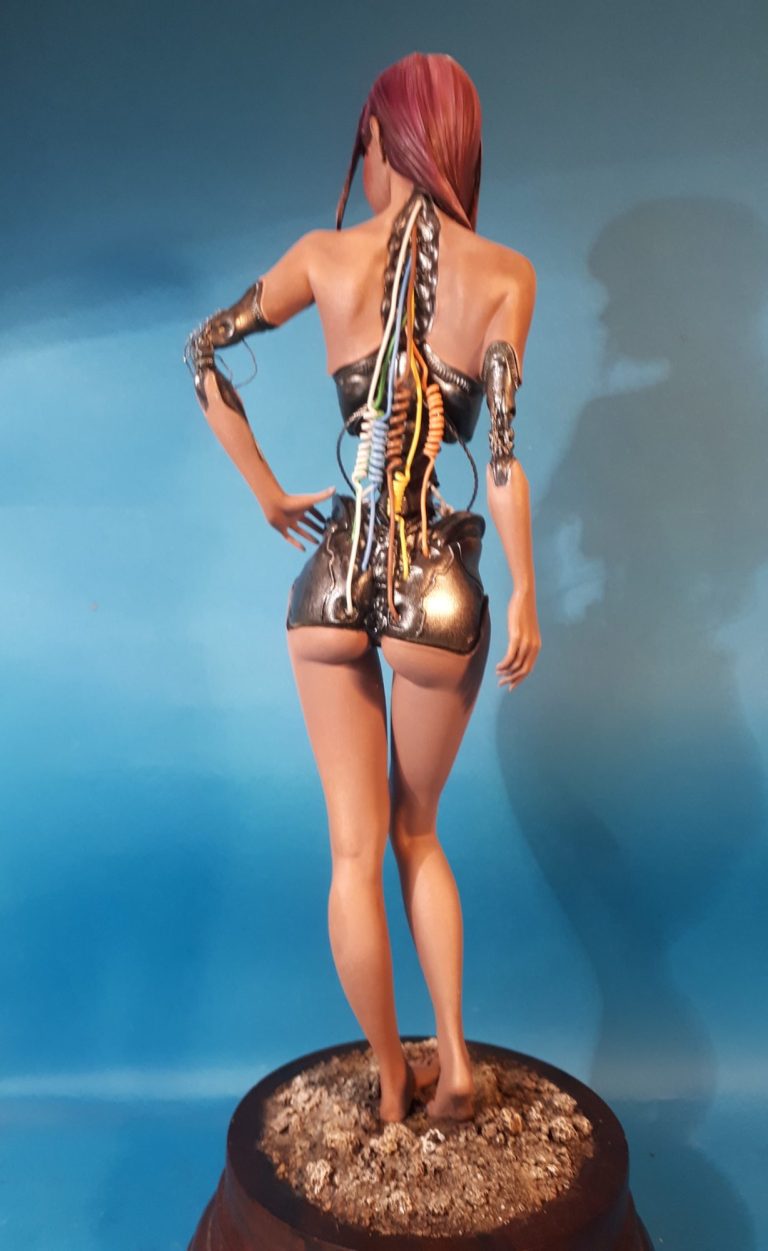
Photos #2 and #3 Show the upper body assembled. The pelvis is a separate part to the central spine that connects the upper body to the pelvis, There’s a lot of detail on these stripped back areas, and I decided to drill holes into some of the recesses to accept wires. It makes the area look a lot busier, and whilst the spine alone looks OK, I thought that having the wires in place made it look more logical in an area that would normally be covered.
I had drilled a few more holes that I left without wires, thinking that either I could add them later on, or that different connections could be made to some system that she plugs into for updates or reloads.
The metallic colours were undercoated with MP paints Black and then Darkstar metallic steel and Silver were used over the tip of that to bring out the detail.
Some small touches of Molotow Chrome were added to top off the highlights as well..
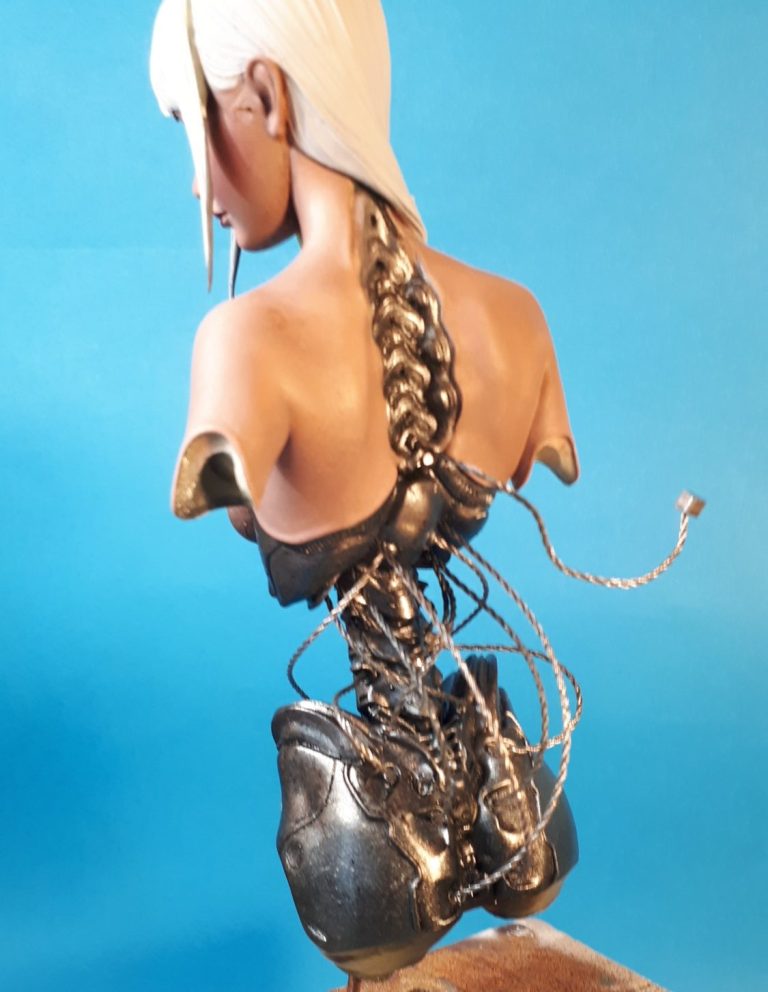
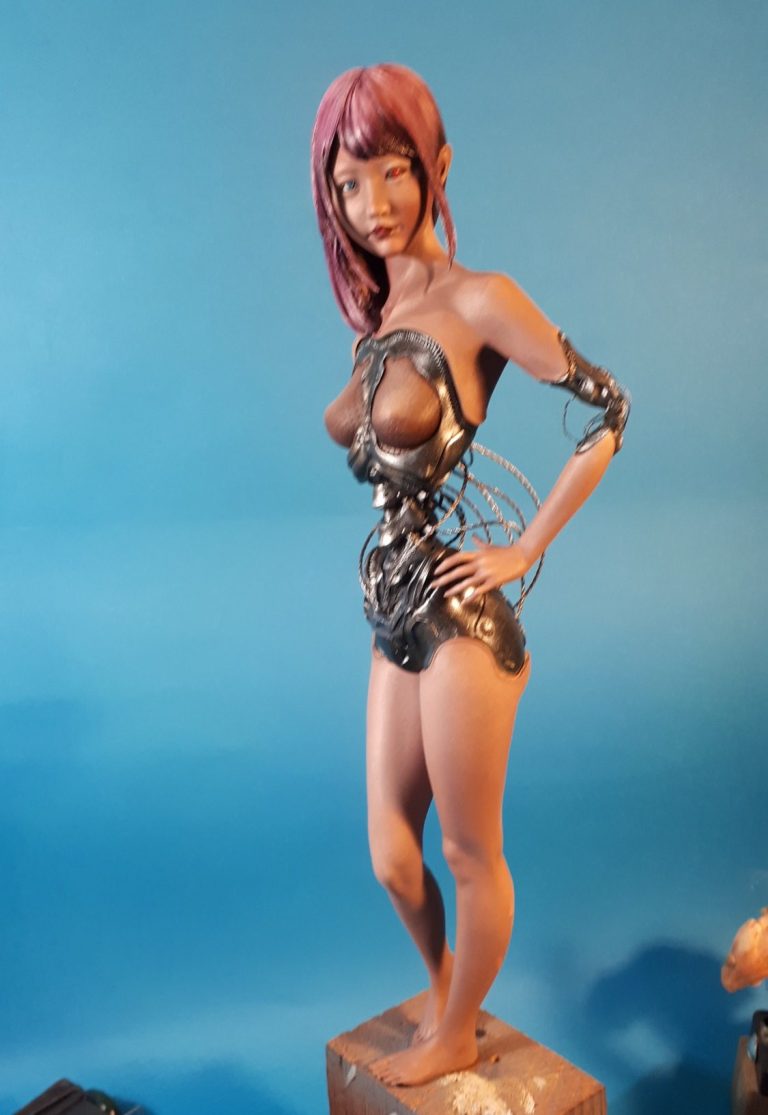
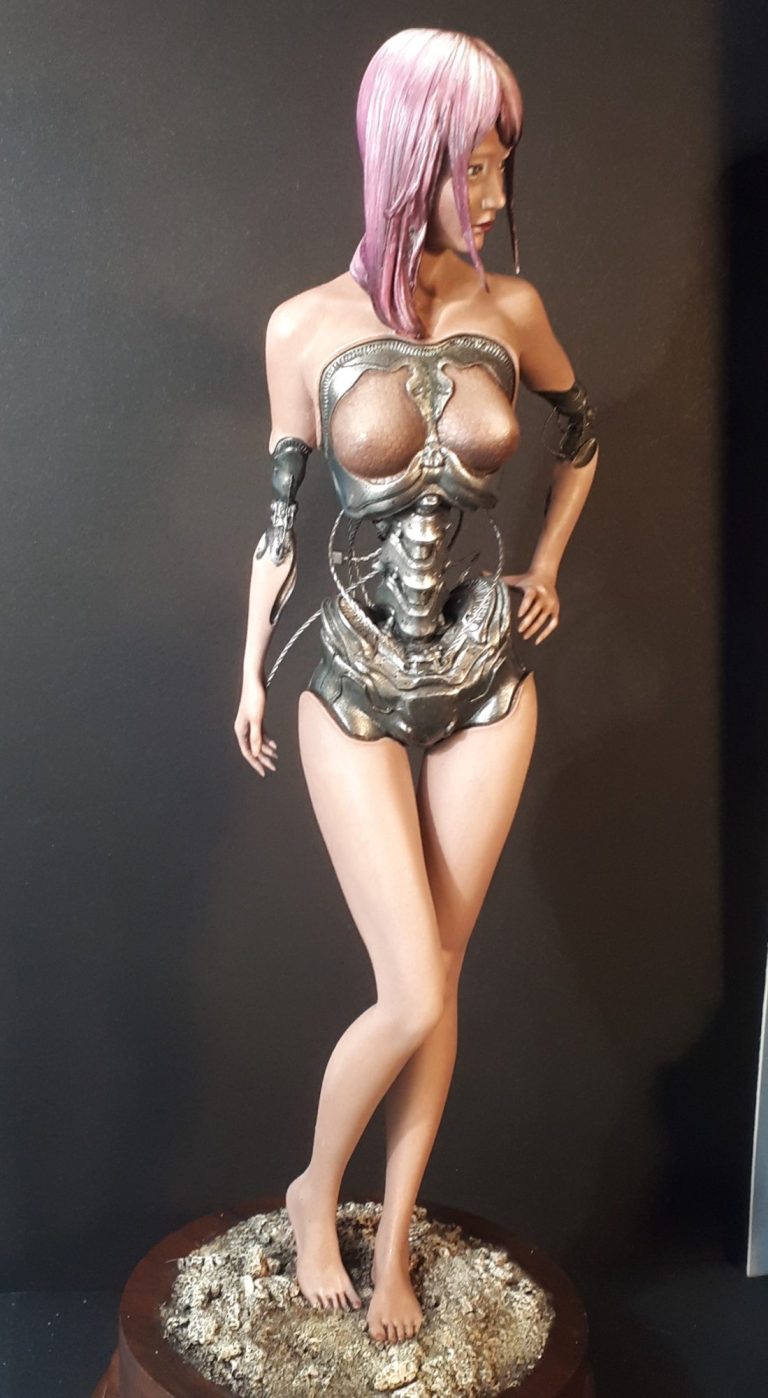
Photo #4 and I’ve added the legs to the pelvis and drilled up into the heels to accept some thick wire pins that secure her to this temporary base and that will eventually fasten into the decorative plinth that she’ll stand on.
The legs have been painted to match the rest of the skin areas, as too have the arms, which have also been fastened in place. As with the spine, I’ve added a couple of wires to the elbows, again thinking that there would be some kind of system for operating the joints and sensors etc.
The hair was painted at this point too, Purple Madder Alizarin being the starting point, with Titanium White gradually “combed” onto the hair to affect colour changes.
Photos #2 and #3 Show the upper body assembled. The pelvis is a separate part to the central spine that connects the upper body to the pelvis, There’s a lot of detail on these stripped back areas, and I decided to drill holes into some of the recesses to accept wires. It makes the area look a lot busier, and whilst the spine alone looks OK, I thought that having the wires in place made it look more logical in an area that would normally be covered.
I had drilled a few more holes that I left without wires, thinking that either I could add them later on, or that different connections could be made to some system that she plugs into for updates or reloads.
The metallic colours were undercoated with MP paints Black and then Darkstar metallic steel and Silver were used over the tip of that to bring out the detail.
Some small touches of Molotow Chrome were added to top off the highlights as well..
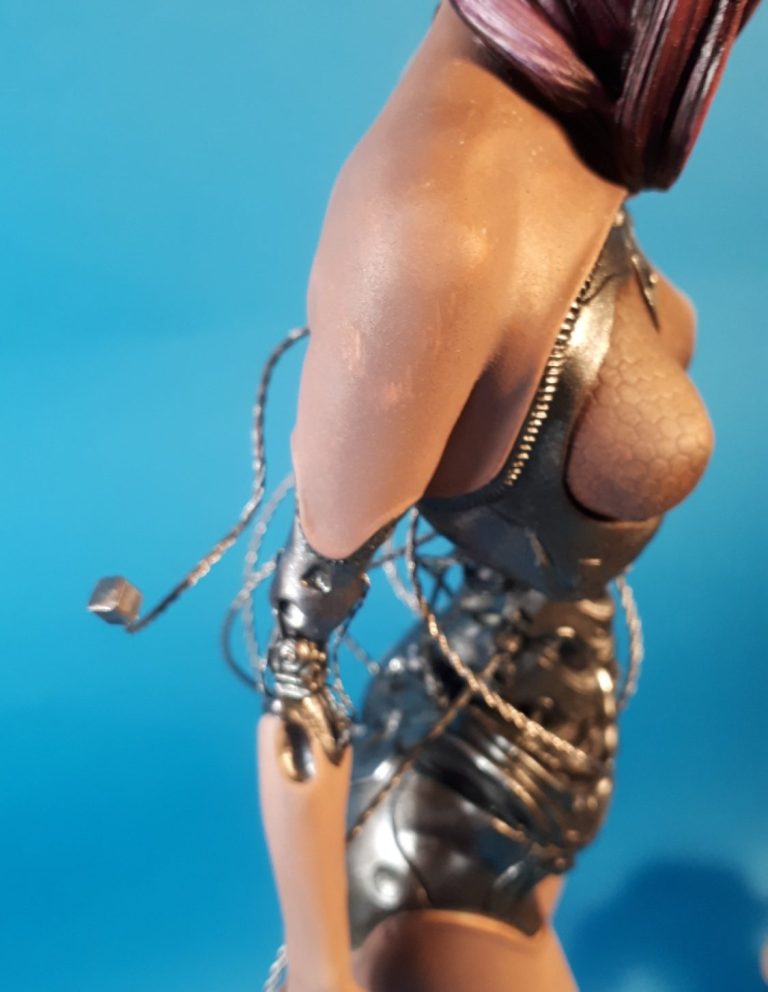
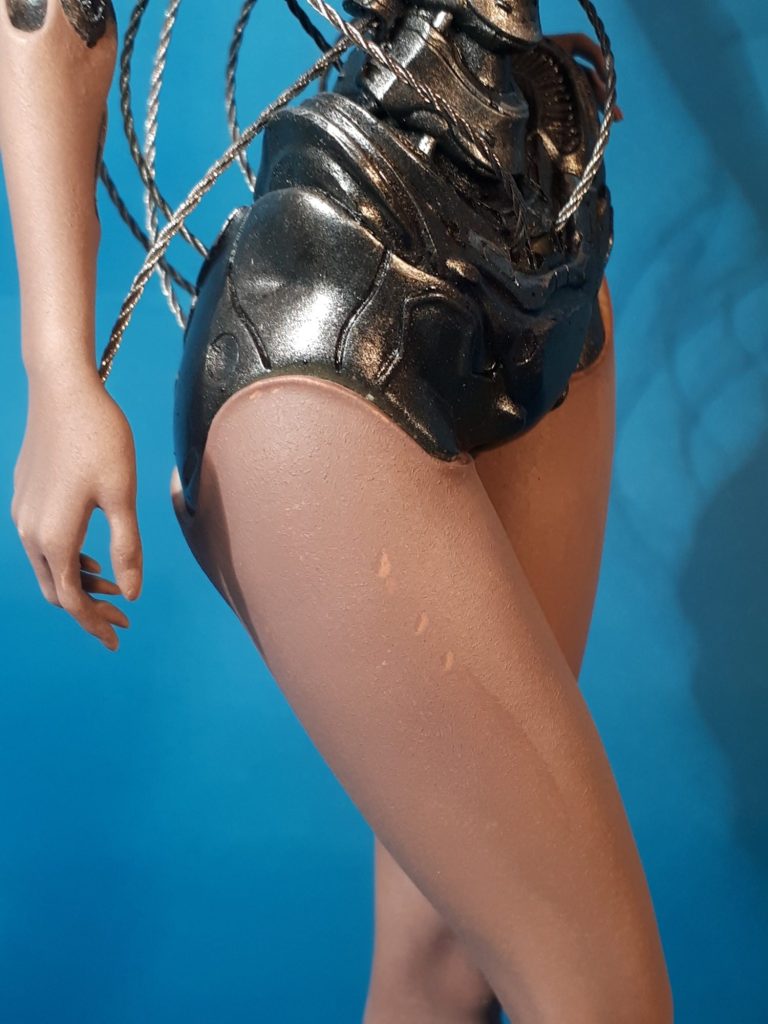
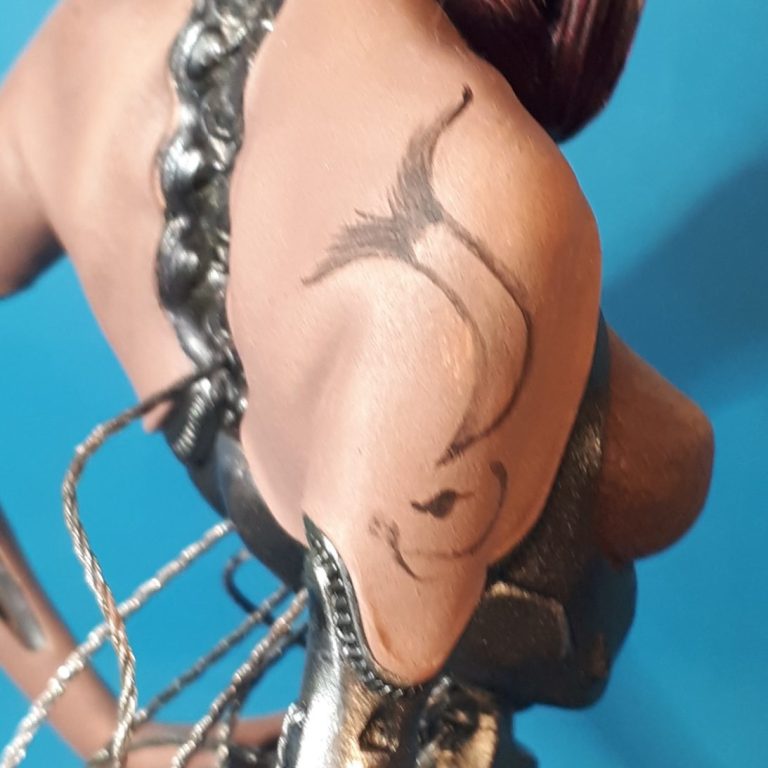
Photo #8 was one initial attempts / thought that I had to cover a particularly bad scratch, which involved painting a tattoo on her shoulder. I got this far painting a stylised Koi Carp, and again the model was put to one side whilst I did something else…..
Photos #9 and #10 Although I pinned the parts together, the height of the figure made it quite wobbly on the wood base I used as a handle, hence the lumps of Blu-tac added over her feet to hold her in place.
To try and stop damage to the paintwork already done, whenever I picked th emodel up, I wrapped her in a soft cloth. It worked for the most part, and no further damage was noticed.
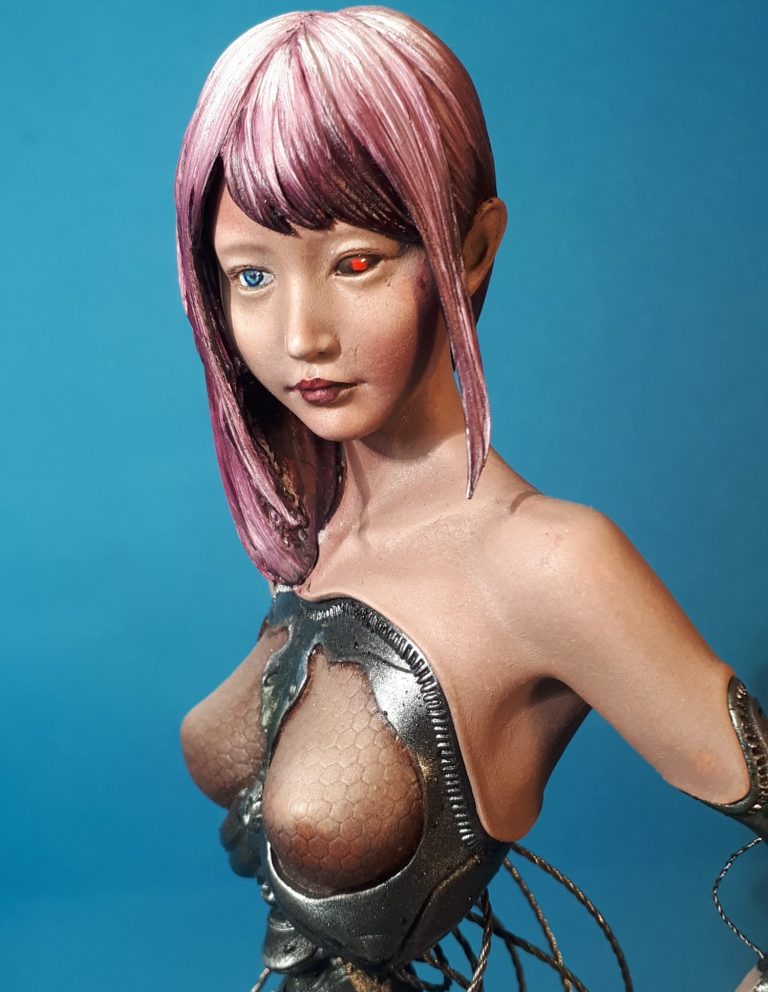
Photos #11 and 12 – I’d originally painted the left eye to look like some sort of camera or LED with a red lens.
There was a problem here in that I really didn’t like the look of it, and the more often I picked the model up to add a little here or there, the more this left eye bugged me.
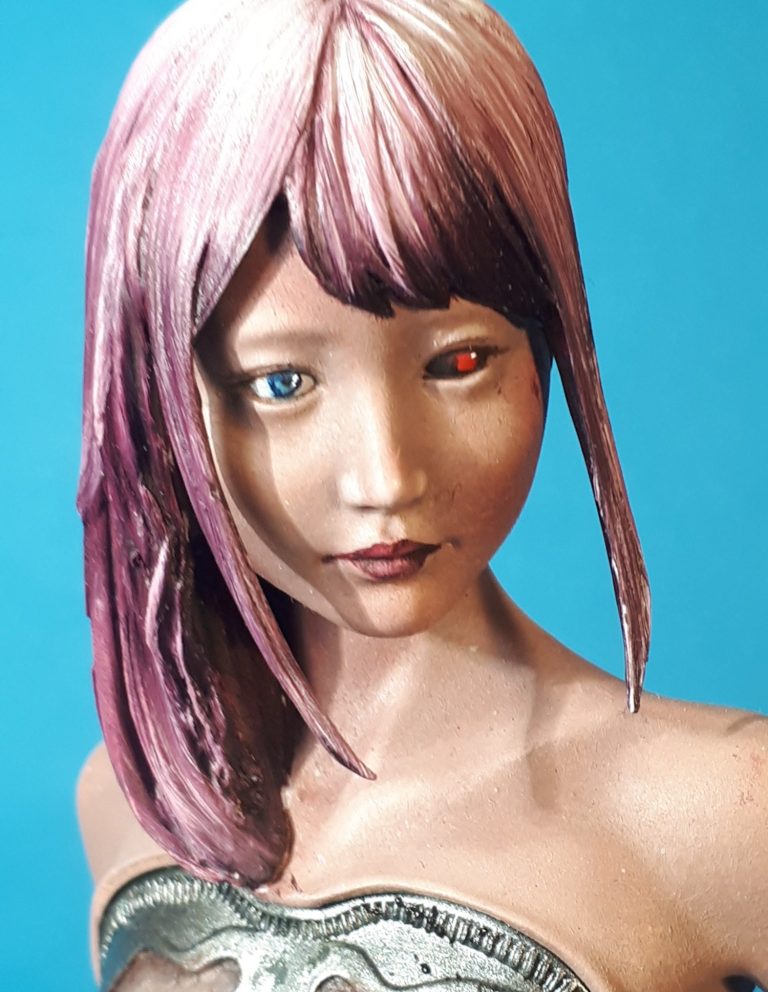
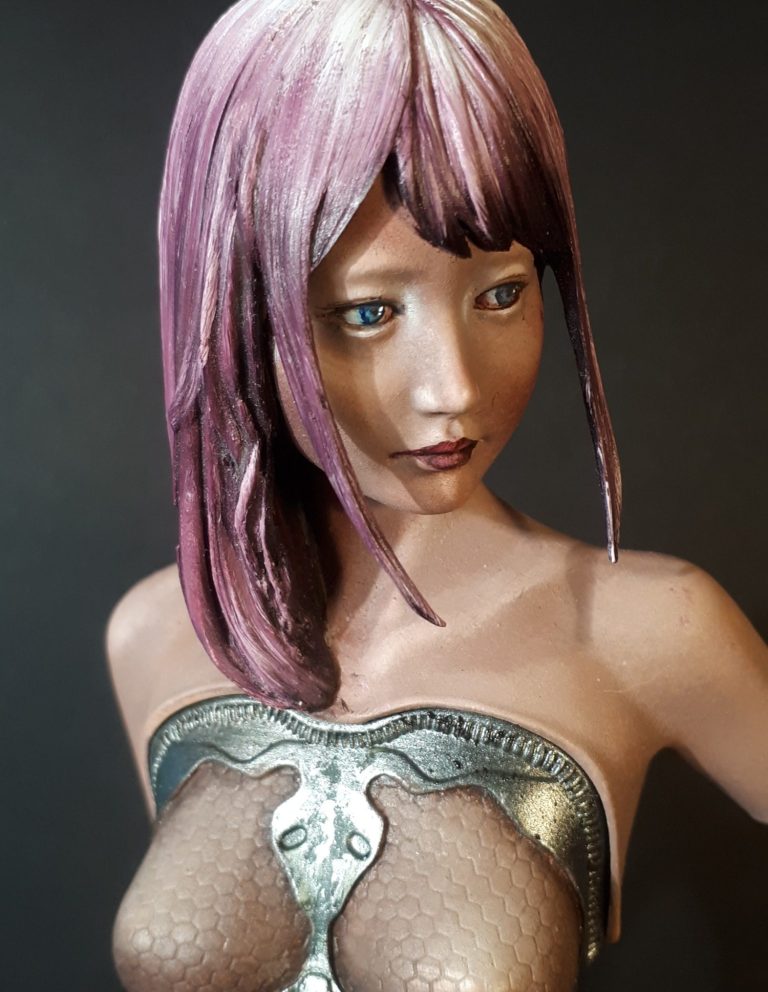
So in photo #13 I’ve repainted the left eye to match the blue of the right one, which gave her a more human appearance.
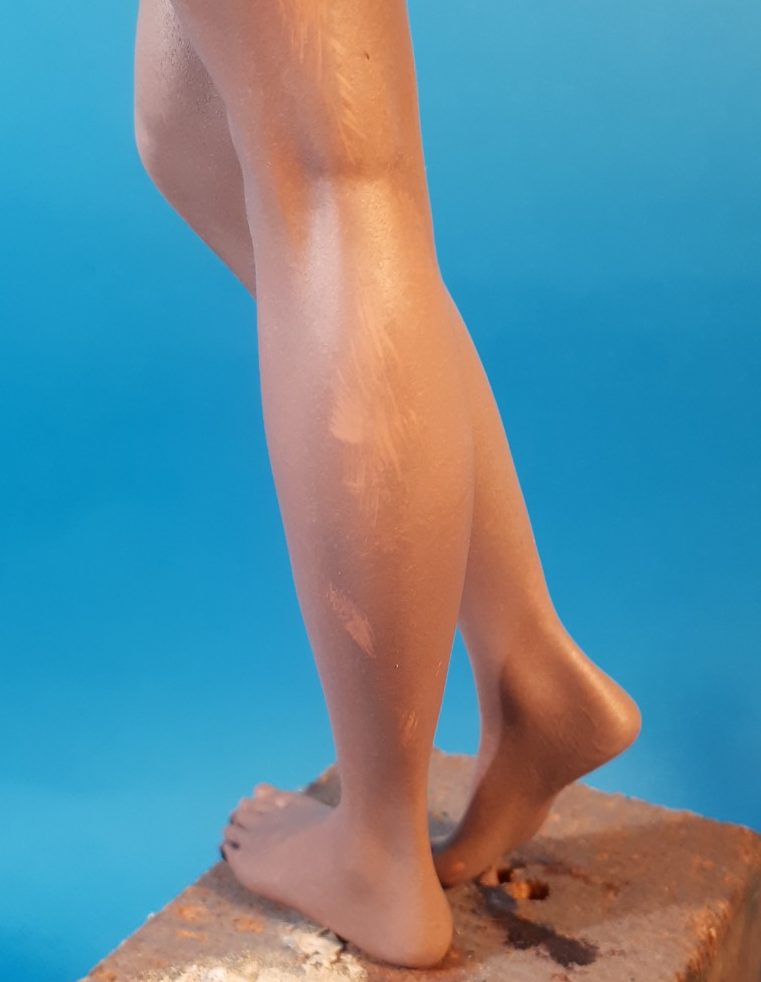
In earlier pictures I’d shown several areas that the flesh colour had been scratched or damaged in photo #14 I’ve fixed these by mixing the same flesh colour oil paint and blending it in to the rest of the leg. I used the same mix with small adjustments to the brightness, to paint over the partially drawn Koi Carp tattoo on the shoulder and fix any other faults in the skin areas.
I mentioned at the beginning of the article that I have quite a few “half started” models glaring at me from the edges of the bench, or from shelves around my painting room, and some, like this one require only a small amount of work to finish them.
I didn’t want a huge base for this piece, although I considered making some ruins as a kind of background for her to be walking past. Really, all that was needed were some rough stony groundwork for her to pose on.
To get a lot of variation in the section she’s standing on, I mixed a couple of different types of cat litter, some Chinchilla Sand along with some fine gravel.
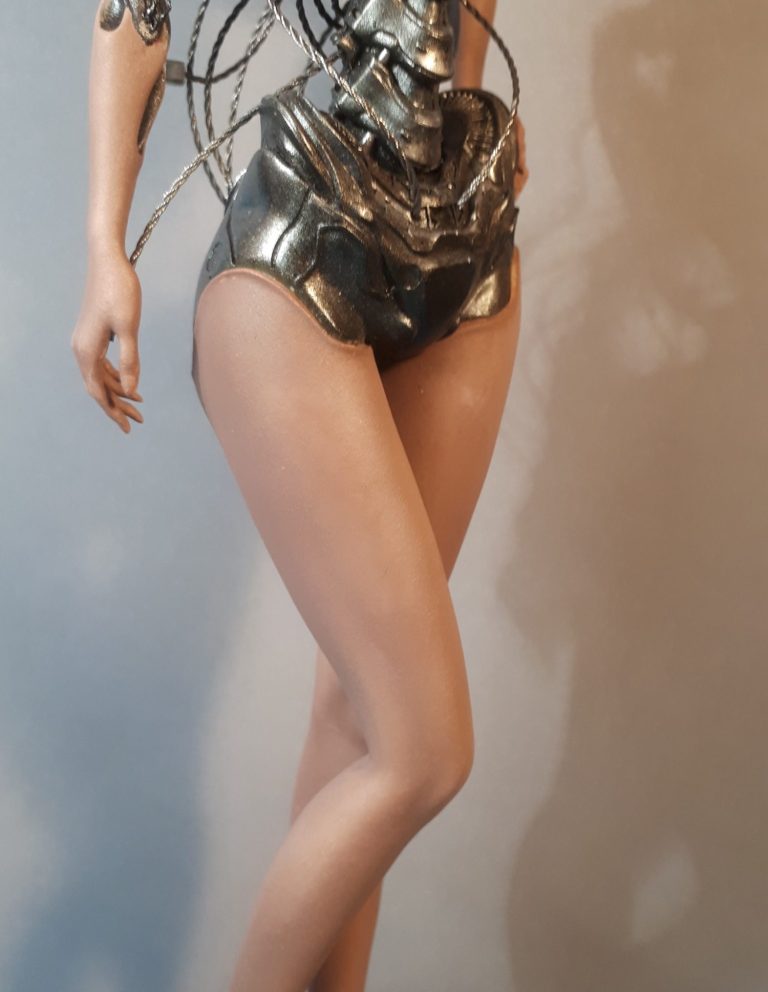
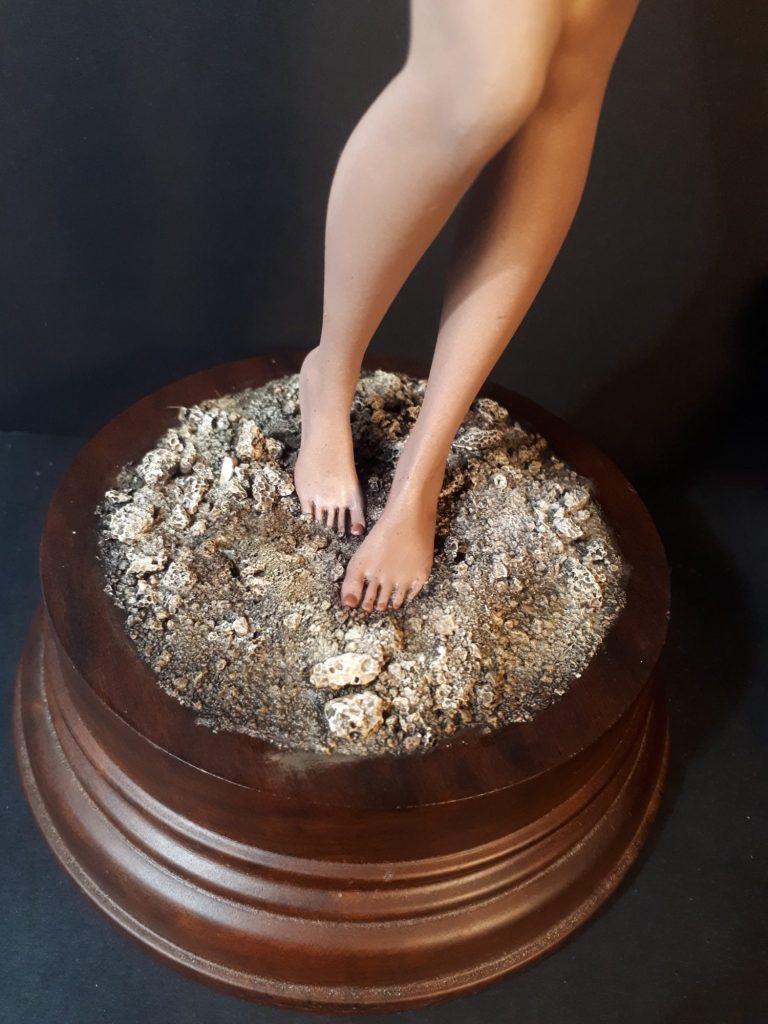
Photo #15 - The wires that I’d fastened into holes that had been drilled up through her heels and into her lower legs, were fastened into holes in the wooden plinth, and then the sandy / gravel mix spooned around her feet, fixing it in place with thin superglue.
A note here if using thing superglue to fix sand and gravel in place – please be careful with this stuff, it’s very easy to get it where it shouldn’t be, and it can give of harmful fumes that you really don’t want to breathe in.
It probably takes me an hour or so to do a base of this size, adding a few drops at a time and leaving it for five minutes or so before adding more. This allows the superglue to cure and seems to cut down on the amount of fumes given off. It’s advisable to have the window open too.
Once the groundwork is fastened in place, I added a coat of Vandyke Brown oils that were thinned quite heavily with White Spirit. Allowing half an hour or so for the cat litter to soak up a lot of the liquid and then I drybrushed on layers of Yellow Ochre and Titanium White to bring out the texture.
With all the damaged paintwork repaired and the base made I just needing a nameplate printing.
Or did I ?
Photo #16 The more I looked at her, and I’ve had plenty of time to do that, what with other projects taking precedence, I decided that I didn’t like the guitar strings that I’d used to connect different parts of the model to look like wiring.
They were too stiff and just didn’t look like they could be contained within the missing bodywork panels.
So I removed a lot of the larger ones, just leaving the shorter ones that didn’t stick out so much, then used some wire stripped out of some telecommunications cable that I’d got spare from putting a telephone extension at home.

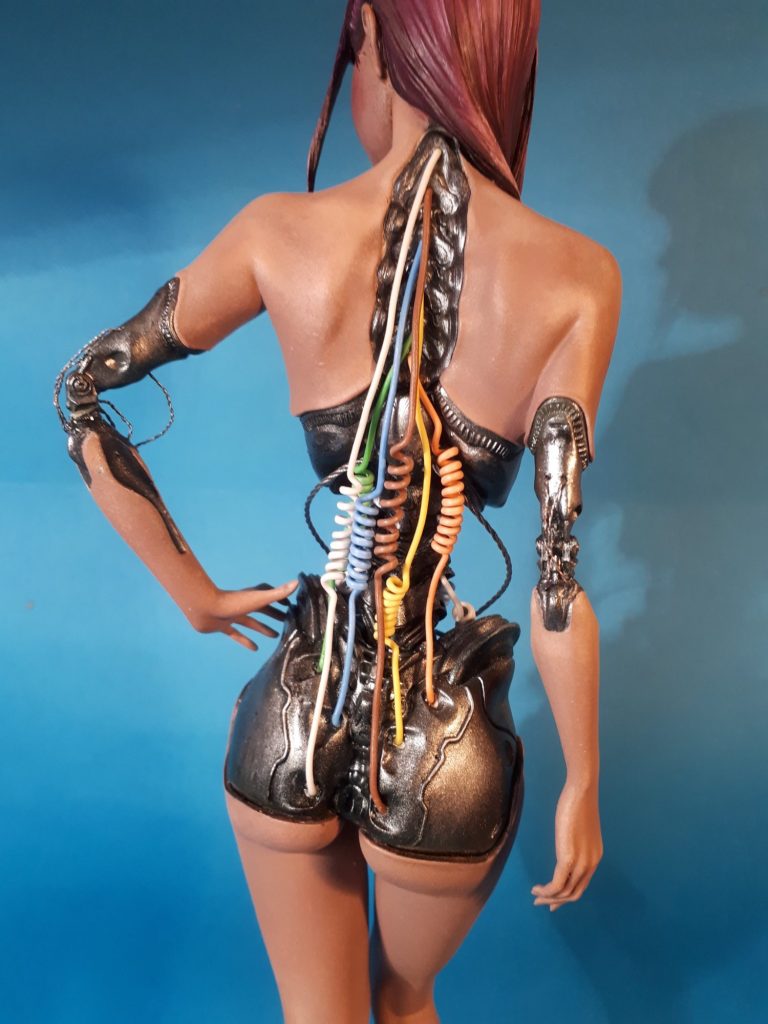
Photo #17 I left the coloured sheathing on, and coiled the single cables around the shaft of a 1mm drill bit, sliding the wire off after about six or seven turns leaving a spiral that would ( theoretically ) allow the cable to extend and then recoil as the android stretched or twisted when she moved about.
I did get a comment that they reminded someone of intestines too, which echoed my thoughts as I was adding the new wires in.
The overall silhouette then conforms to the general female shape that the panels were added to the lower torso, and now didn’t break up that shape like the original guitar strings did.
The new wires also add a little colour to the central section of the model, breaking up the metallic colouring of the larger sections.
Worth noting is that I used pairs of coloured wire for certain connections with the new wire, so that there is a logic of what signals are being passed from the spine to say the groin or bottom, and back.
The wires coming from the upper spine are different colours so that any engineer having to work on her can easily see and track signals if there is a fault to fix.
Well, that was my thinking when using the different colours at least.
So, why call her “Eve II” well, if humanity has been wiped out and all that’s left are the androids and robots, then maybe starting over is what would happen. Eve was the first woman in the Bible, so why not have this as “Mark Two”.
Well, that was my thinking anyway.
Final thoughts.
I really wish I could remember where I got this from and which company produce it. It’s a lovely figure to work on, parts fit and casting is great, although the elbow joints are quite small and are the only part of the model that could break if you’re not careful.
It’s a large model – a while since I’ve done one quite as large as this, and I think it’ll grab the eye of viewers when she goes on display at shows.
If anyone does remember who supplies this kit, then please get in touch so I can credit the company.
We need your consent to load the translations
We use a third-party service to translate the website content that may collect data about your activity. Please review the details in the privacy policy and accept the service to view the translations.