
Lizardman -
Azul'Anok
1/10th scale resin bust from 3DArtDesign
Painted in 2019
This was part of a set that was done as a Kickstarter, the set having four busts, A Samurai Zombie, A Skink Warrior, A female Demoness and this, a Lizardman.
Although I got all four, and a couple of extra ones to sell if people wanted them, the Samurai didn’t interest me at all.
I’ve painted the Skink, and am still promising myself to do the female Demoness, but for now, I’ve written about this one.
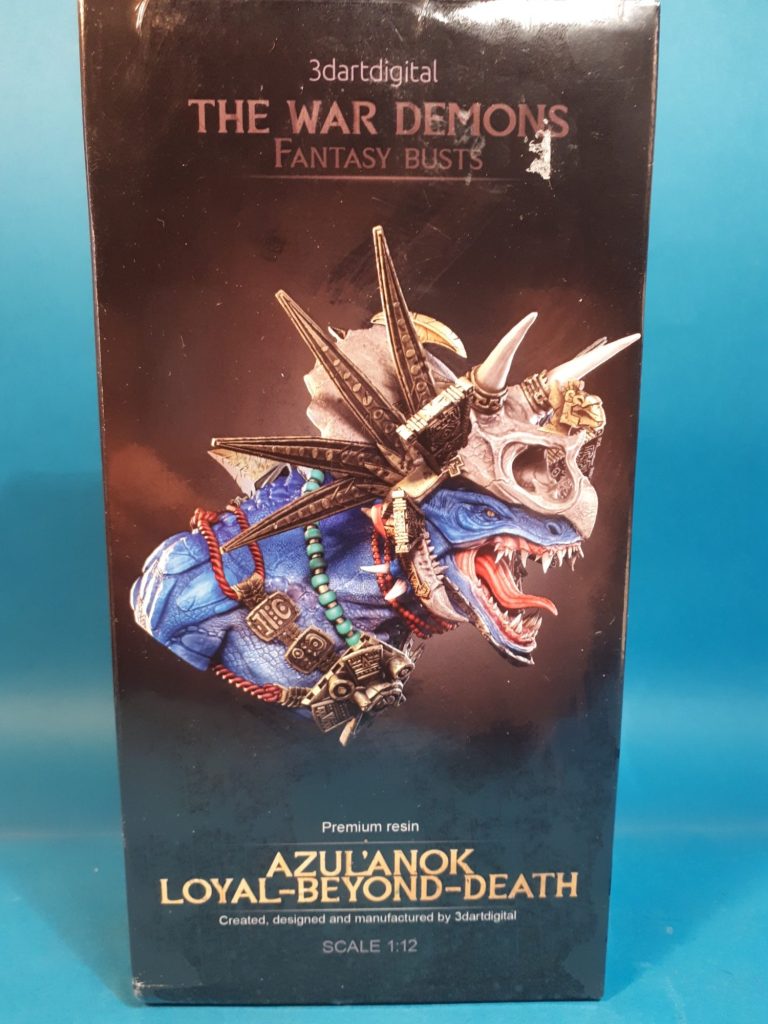
Photo #1 shows the box art, which is particularly nice, the glossy slide cover showing a painted example and the quality is backed up by what is inside the packaging.
I’ve taken a few shots of the unpainted parts – photo #2 showing all the components laid out, and there’s quite a lot for such a relatively small bust.
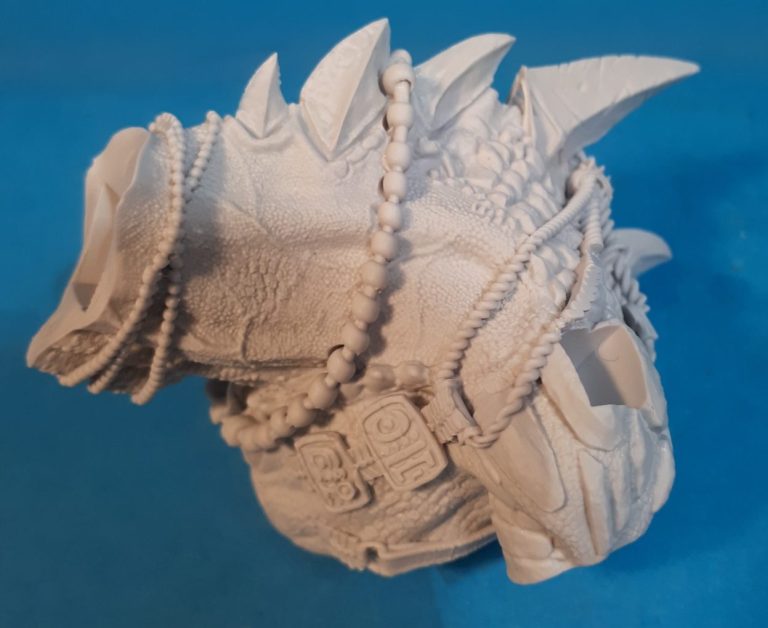
Photo #3 shows a close up of the main body casting and you can see just how much detail there is on there. At this point, before test fitting, it did cross my mind that if joints were not hidden, then replicating that detail on any filler that was necessary might cause problems.
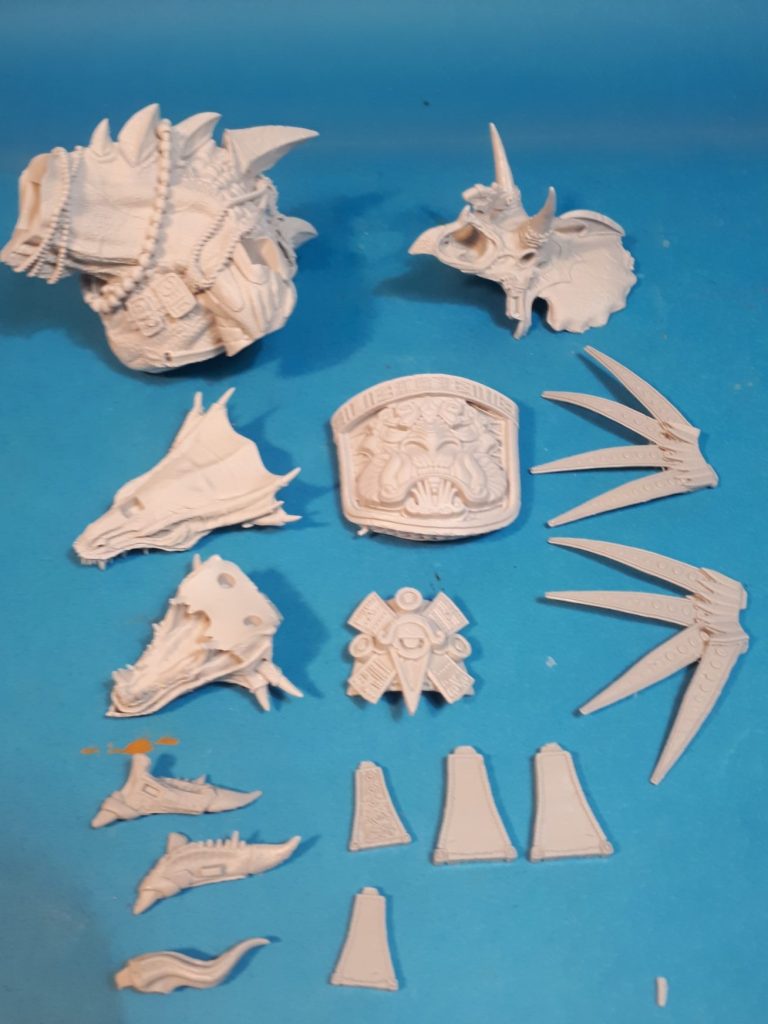
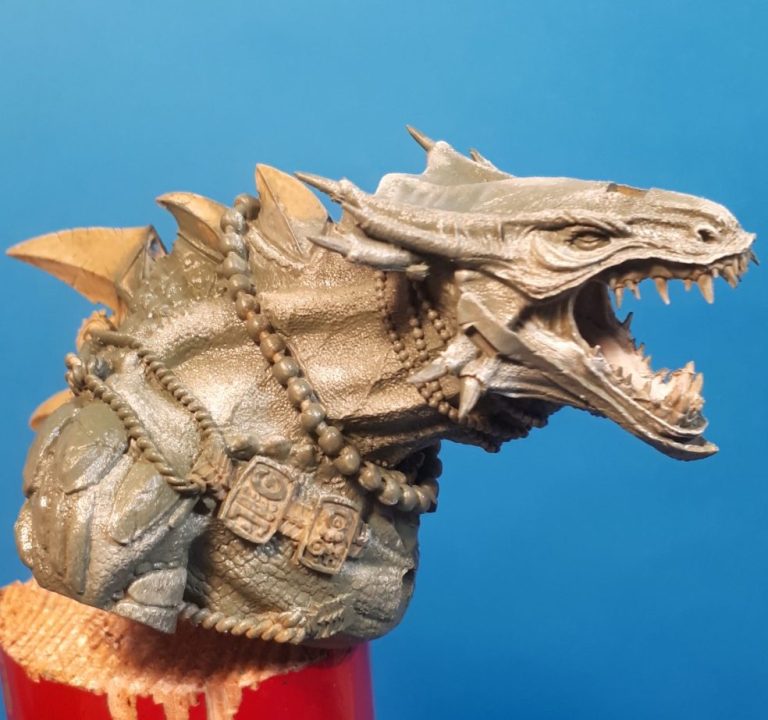
Photo #4 shows the head sections drt fitted to the body. There is a gap at the neck, but that’s just because I’ve used a blob of Blu-tac to hold them in place to take the shot. The joints were very close fitting, and any fears about having to close them up with putty were dispelled.
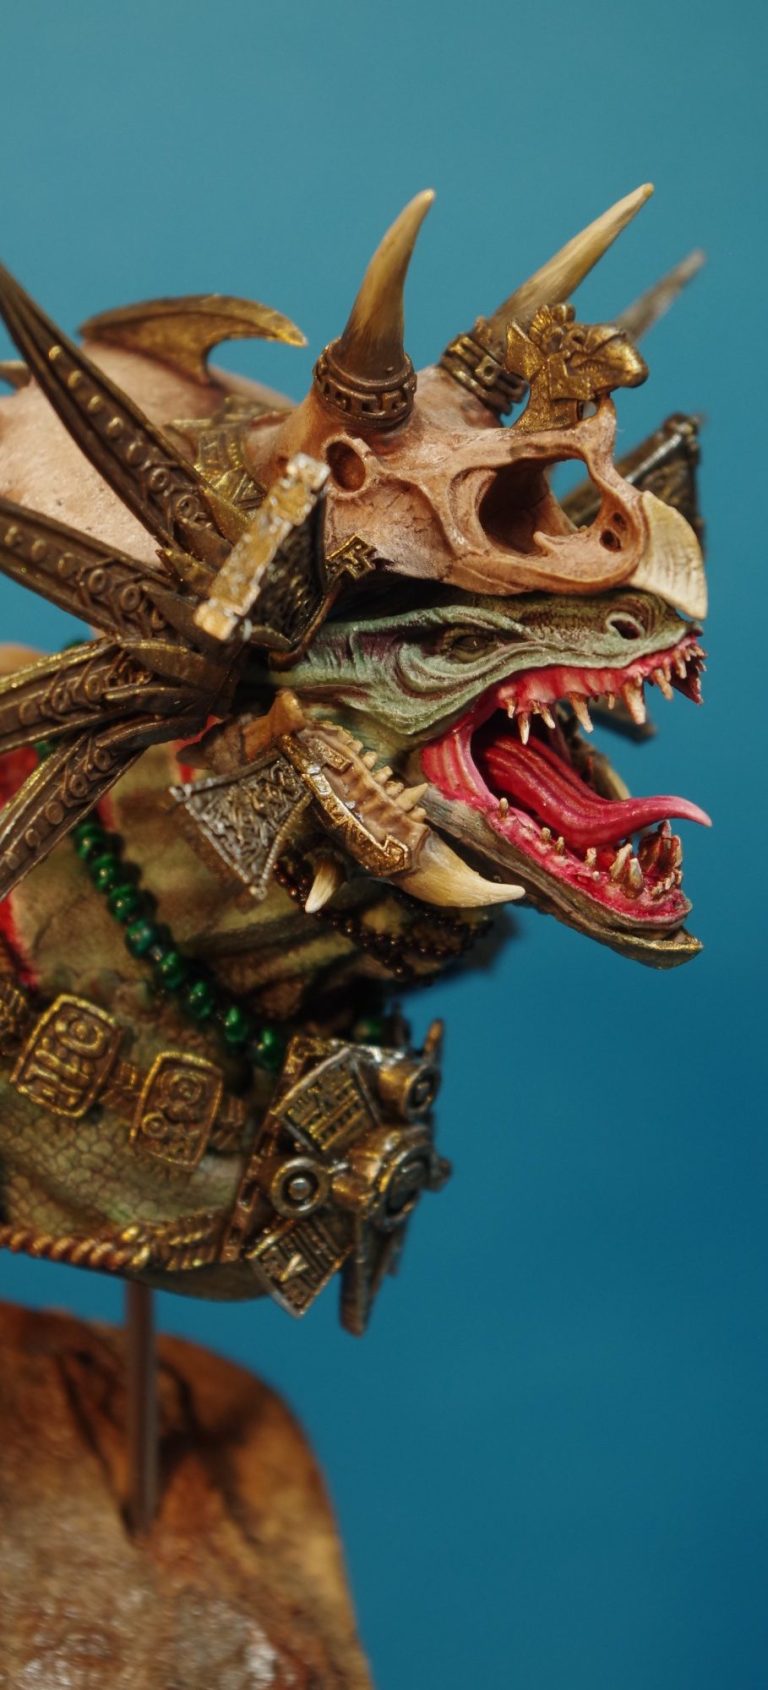
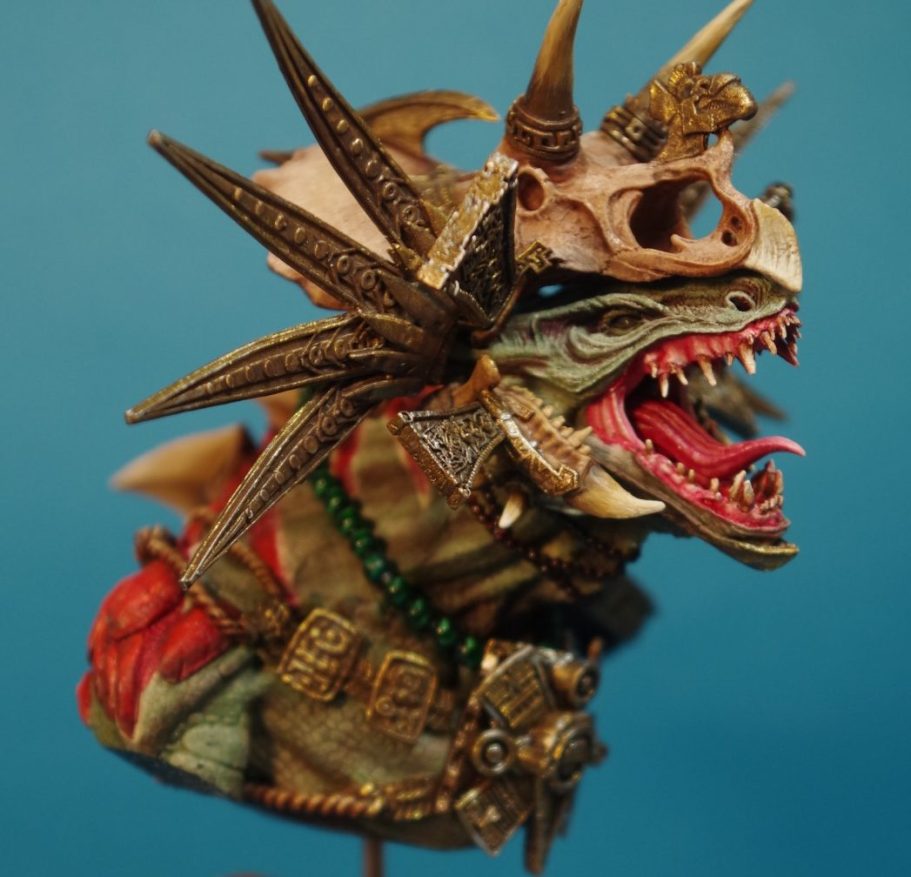
Although the box art shows a blue skin colouration, I decided on a duller green for my example, I felt hat this was a more natural colour to use, although any colour could be used really. Photo #5 shows the initial process of the main casting and head sections having been joined together and then primed to accept a coat of Olive Green oils with Titanium White being blended in to create highlights.
But it looked a bit boring.
Hmmm, what to do.
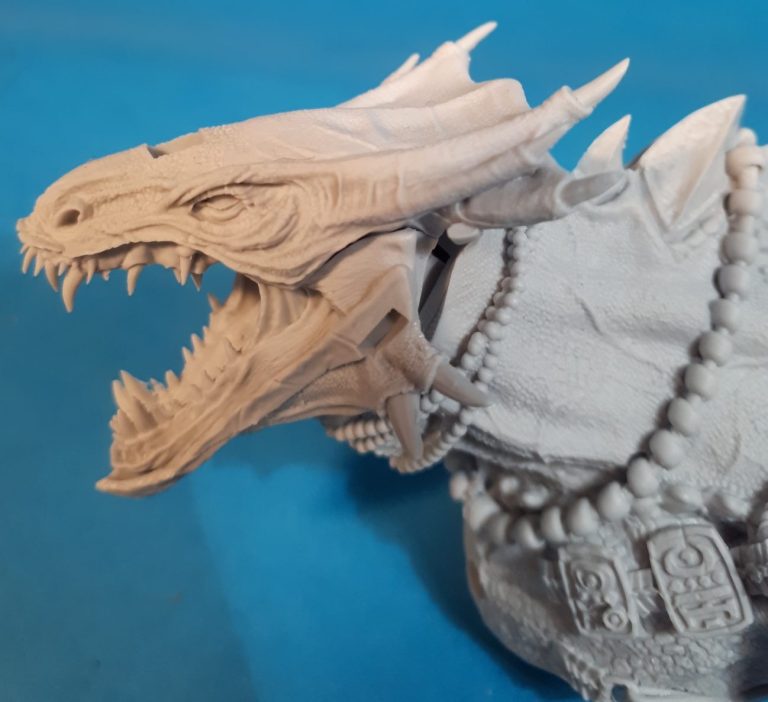
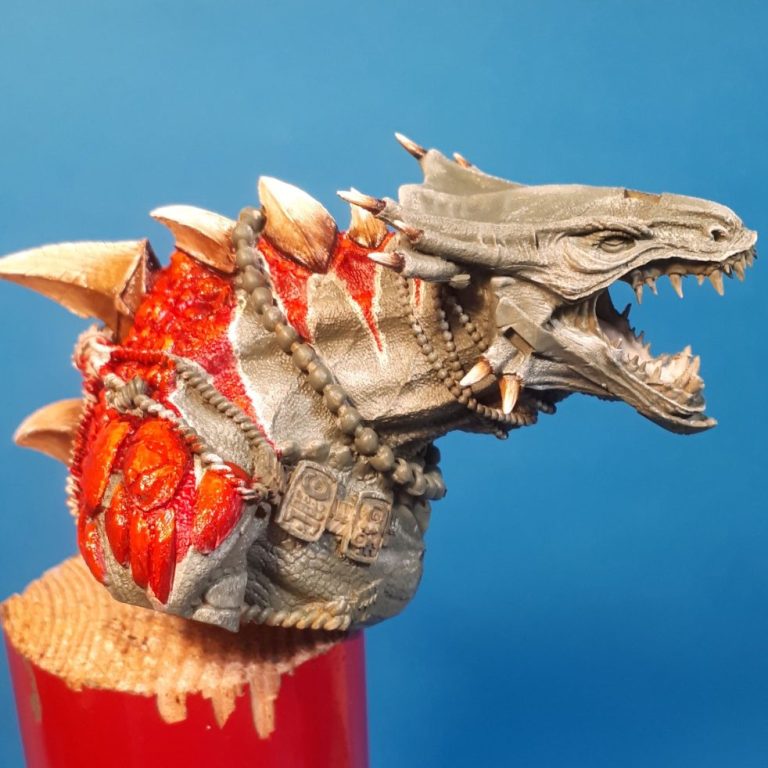
Photo #6, having looked through pictures of different types of lizards on the internet, consulted various books that had photos of lizards that I have as references, and come up with nothing much inspirational, my eyes strayed to books on dinosaurs.
Flicking through one in particular, I looked at drawings that suggested the stripes and colourations that inspired the dorsal stripes painted here, along with the bright red colouration being used on the larger shoulder scales too.
To make the red brighter, I undercoated the dorsal stripes with Skull White acrylics, and left a slim line of this as an outline for each of the red stripes.
The red was done with an initial coat of Carmine oils, then adding Scarlet, and finally just some small additions of Bright Orange. The oils are still wet in this shot, one of the problems with such colours is that they take days to dry properly, even with the heat in the drying cabinet, so for a week or so I had to work on other projects.
However, once the reds and orange had dried – photo #7 – I could add some washes of Carmine to bring out all the fine detail. I also painted a thin mix of the Olive Green onto the skin areas, as these were looking a but washed out now against the brightness of the reds.
Also in this shot I’ve painted the dorsal spines to imitate bone, They needed undercoating with some more Skull White acrylics before adding some Vandyke Brown at the base of each spine, followed by a small amount of Mars Yellow, and finally blending in some Titanium White
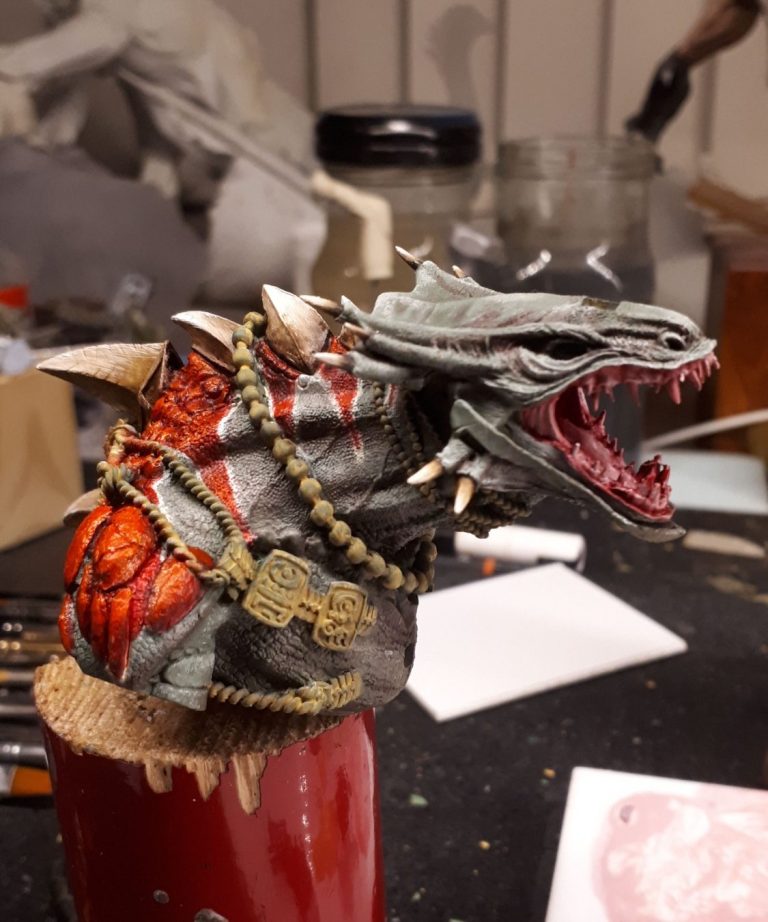
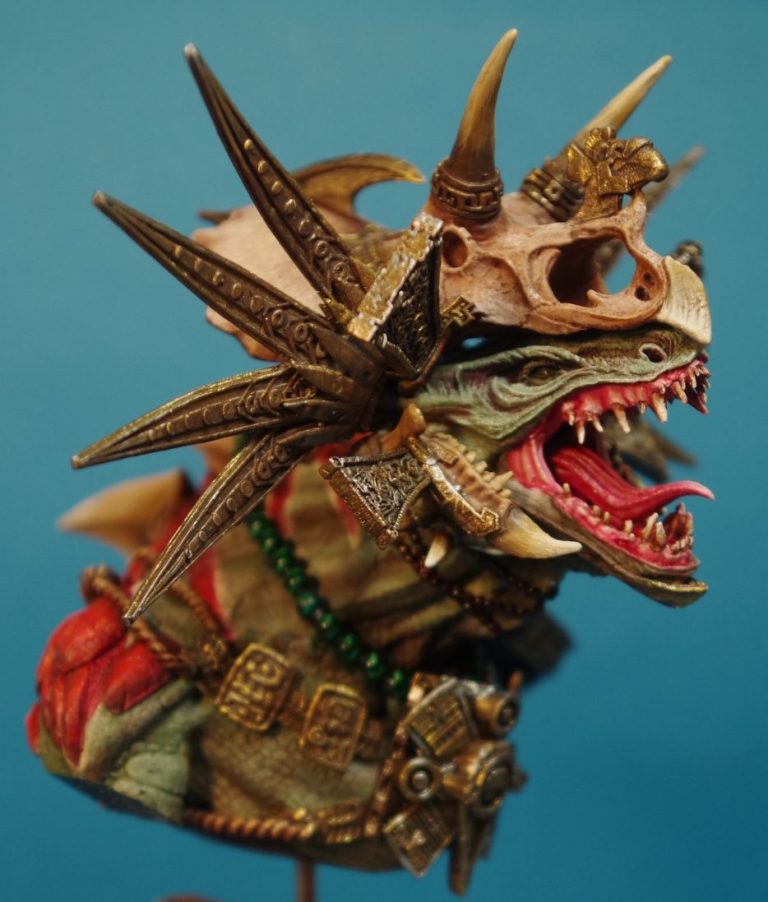
The fleshy areas within the mouth are Carmine oils with Titanium White used to bring out the details, and there’s a lot of detail to bring out too.
All of this had progressed pretty quickly, well, apart from the time waiting for the red paints to dry, but now things slowed right down as the details needed painting up.
The Triceratops skull helmet was painted to represent bone using an undercoat of Skull White, and then painting on a thin coat of Burnt Umber. Blending in Buff Titanium oils to bring up the mid-tones using a soft brush, and then moving to Titanium White for the highlights showed up a lot of surface texture, and once dry, the metal decorations were painted with Darkstar metallic paints
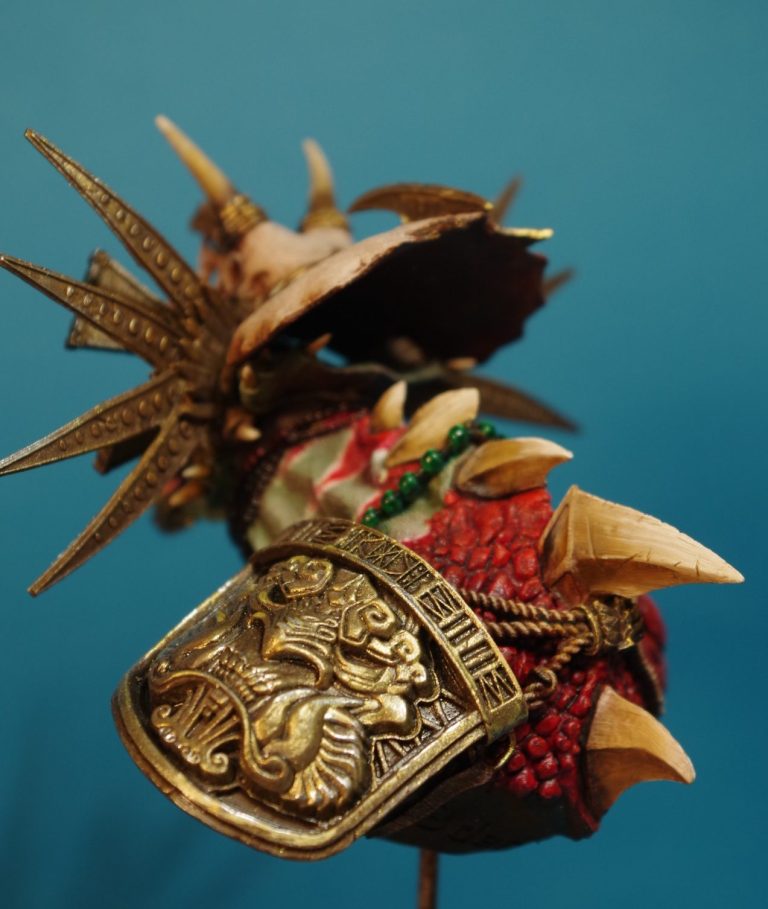
The same colours were used on all the metal decorations, adding pin washes of Burnt Umber oils to bring out the recessed detail, and adding brighter gold’s over that to add highlighting.
There’s a lot of these gold decorations to paint, the large shoulder guard in particular along with the smaller necklace plates all benefited from time and patience working to bring out the details.
Yes, drybrushing them would be simple, but actually taking a bit more time to paint the mid-tones and highlights was really worth the extra time it took to bring out the lovely designs on the different areas of the castings.
Some bright green acrylic was used to paint the necklace, adding several coats of Tamiya Clear Green ( thinned with water so it didn’t lift previous layers ) to add lustre to the individual beads.
Any rope-like sections holding the various bits of decoration or armour on were painted with Burnt Umber oils and then Buff Titanium used to highlight individual strands.

All of this was done prior to fastening the Skull helmet and the various decorative spikes in place, allowing them to dry fully before beginning to get out the glue.
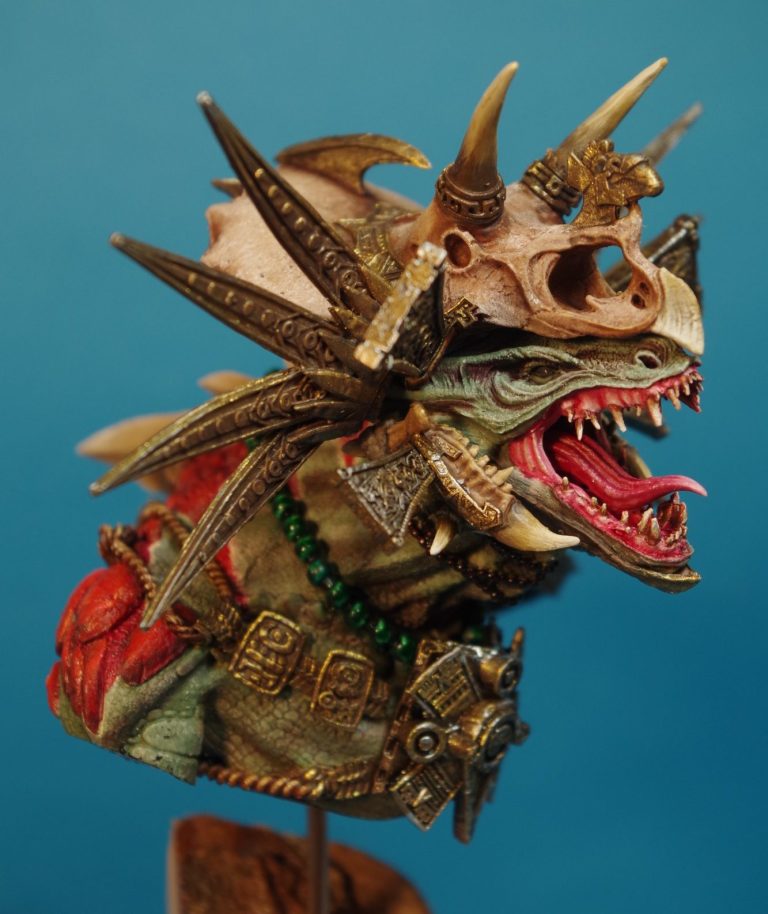
The finished shots show all these components joined together, some of it a little bit fiddly to fasten in place I admit, but I couldn’t see any other way of doing it to be honest.
Fortunately, having test fitted all the parts, they all went together really well, the only ones giving a slight problem being the eight longer spikes around the headdress, which have very small points of contact.
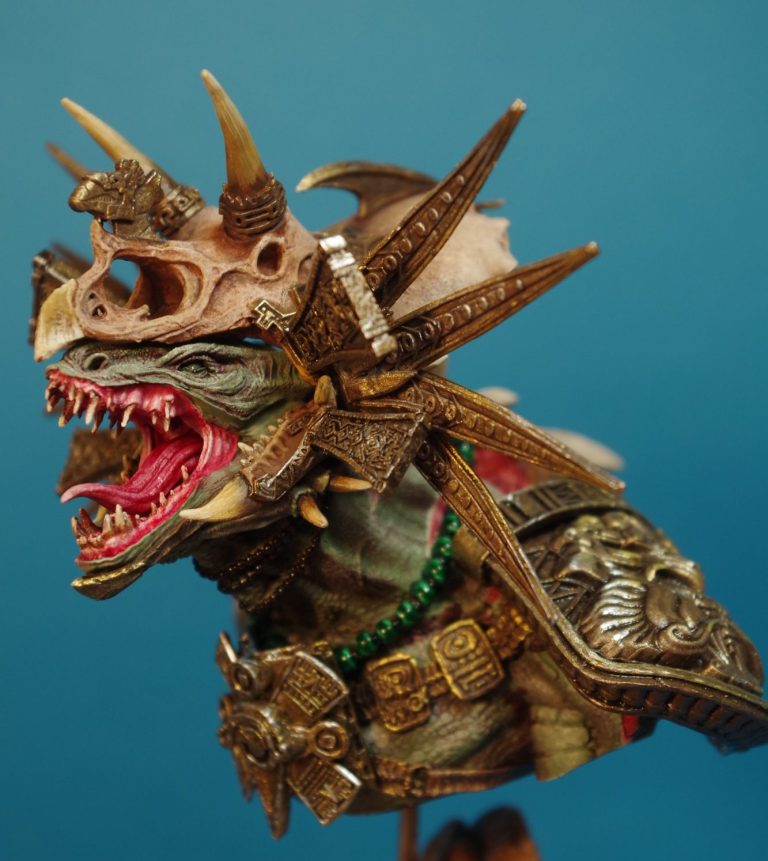
I’m not convinced that my photos do the model justice, it’s not an easy piece to take pictures of from some angles, and whilst I’ve included shots from all the usual ones, some of these seem to me at least, to be less than complimentary.
Final thoughts.
Although I like the concept and realisation of the bust, it is a bit of a curate’s egg – well for me at least.
The parts are superbly cast, and fit is spot on. The individual design of each area is cool, and although relatively small, there’s a lot of movement packed into a small space.
On the downside…. Well, it’s just too busy.
I think the problem for me is all the “sticky-out-bits” on the Triceratops skull hat, it takes so much away from the actual bust, and especially the face and mouth. It’s bloomin’ distracting, is what it is.
I have a spare casting of this, and I am so tempted to paint it differently, and not add the Triceratops Skull helmet and all those spikes, but just fill in the slot where it locates on the head and somehow extend and make logical any straps or ropes that are on the main castings and head that are there to hold it in place.
Looking back at the pictures, I think I’d also be tempted to add some damage to the large armoured shoulder plate, and even try making a simpler helmet to replace the Triceratops thing….. Hmm, there’s a lot that could be done to alter this, and I suppose it’s only limited by imagination and time.
Will I do it – well I guess it’s on the “hundred and fifty year plan”, so don’t hold off making that cuppa whilst you wait for me to get on with it.
As I say, a curate’s egg, because there is so much that is fantastic about this model, the movement and threat of the pose, the amount of fine detail on the skin, in the mouth and on all the armour etc is brilliantly reproduced, but kind of lost and overshadowed.
We need your consent to load the translations
We use a third-party service to translate the website content that may collect data about your activity. Please review the details in the privacy policy and accept the service to view the translations.