Mercedes Benz SLS AMG
Assembled and painted in 2022
I do rather like Mercedes Benz cars…. Amongst others of course, and almost all of these types of sports cars I could only dream of owning in a full sized, road-going version.
However, there’s plenty of plastic kits knocking about at far more reasonable prices, not to mention that they won’t cost an arm and a leg to run.
This is the first Fujimi kit I’ve tried building, and to be honest it’s just as well produced, well thought out and easy to assemble as a Tamiya kit.
There’s not as many parts as in a 1/35th scale plastic AFV kit, just enough to make the cockpit busy and the brake callipers and discs appear believable.
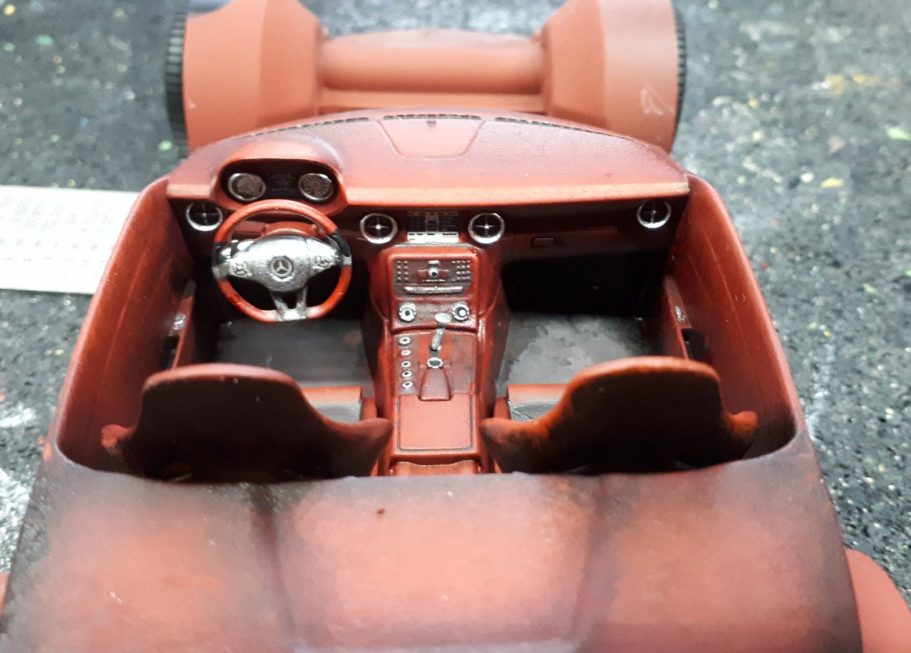
This shot shows the cockpit tub all assembled and painted up. I chose a brown leather interior, although red or black would be sensible options, I wanted something bright enough to see the details – so stayed away from the black – but not as bright as the red would have been.
The layout of the instruments is nearly the same as an AMG styled C220 I had, so could paint up the details similar to that, the seats are the more sporty “bucket” style though, but follow a similar pattern to the C220 but with a more form fitting shape to the side panels.
I am surprised that there are no decals for the mats, I know I’m being picky on this one, but the AMG floor mats are pretty distinctive, and decals would have added a little bit more accuracy to the cabin.
Whilst the design of the steering wheel looks OK, the details are a little soft and careful painting is needed to pick out the details properly.
With all that said, once the bodyshell is on, a lot of this won’t be visible to the casual observer.
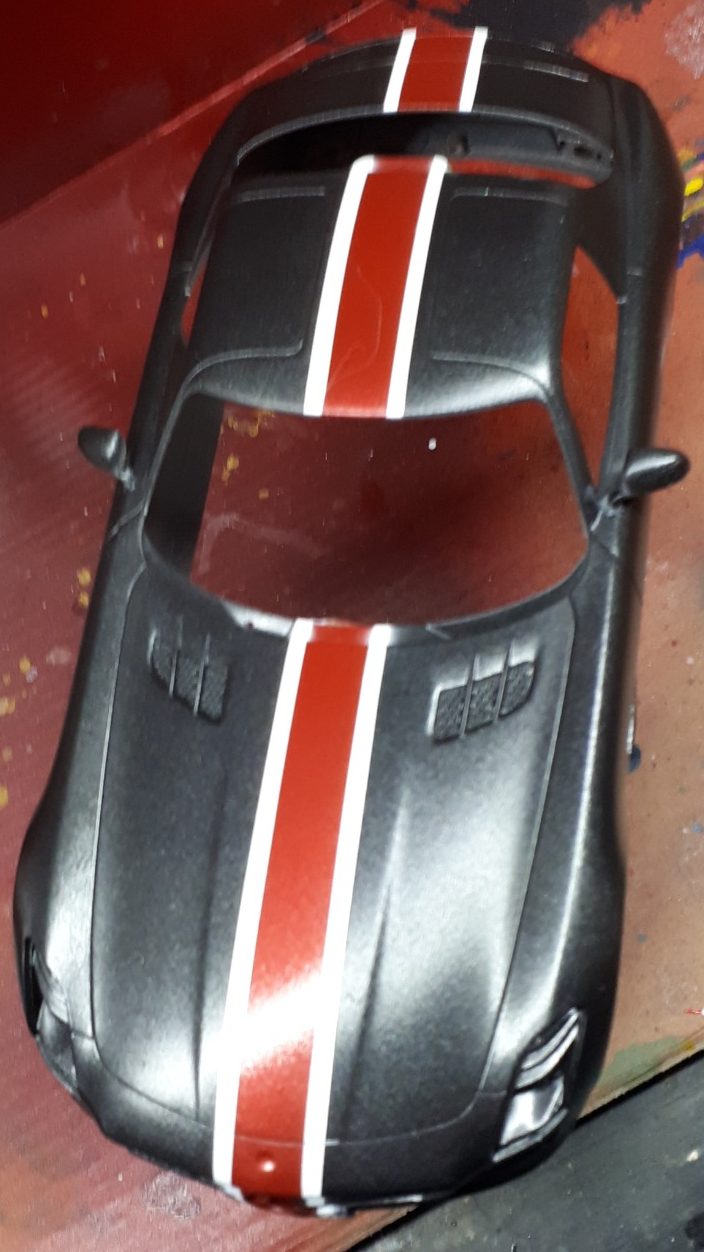
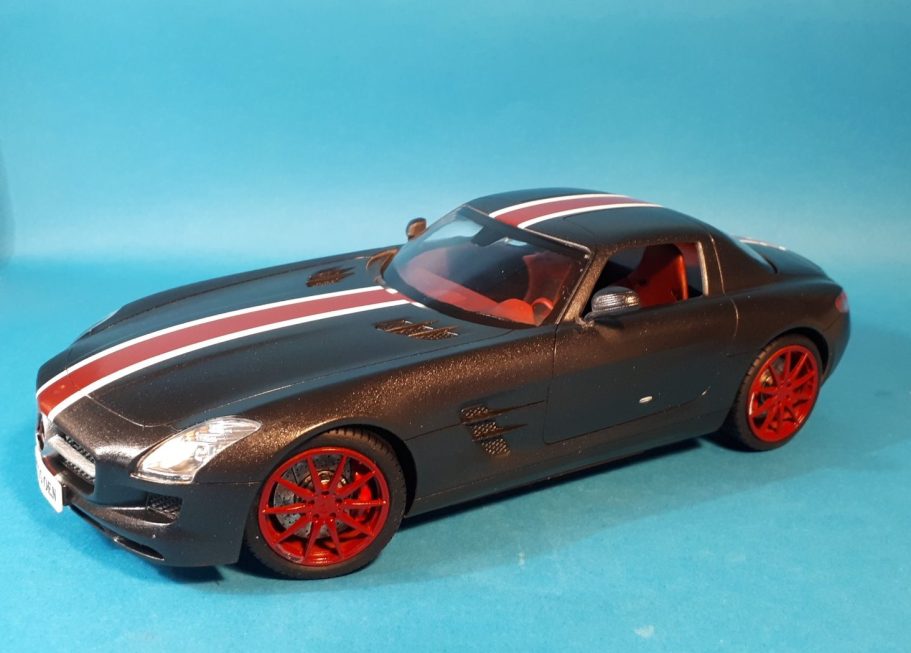
This photo shows the bodyshell after painting, masking, more painting and then varnishing have been done.
I left off any clear parts, assembling the solid colour plastic components. Primed with Halfords grey primer, then when fully dry, added Tamiya Metallic Black lacquer over the whole body using an airbrush.
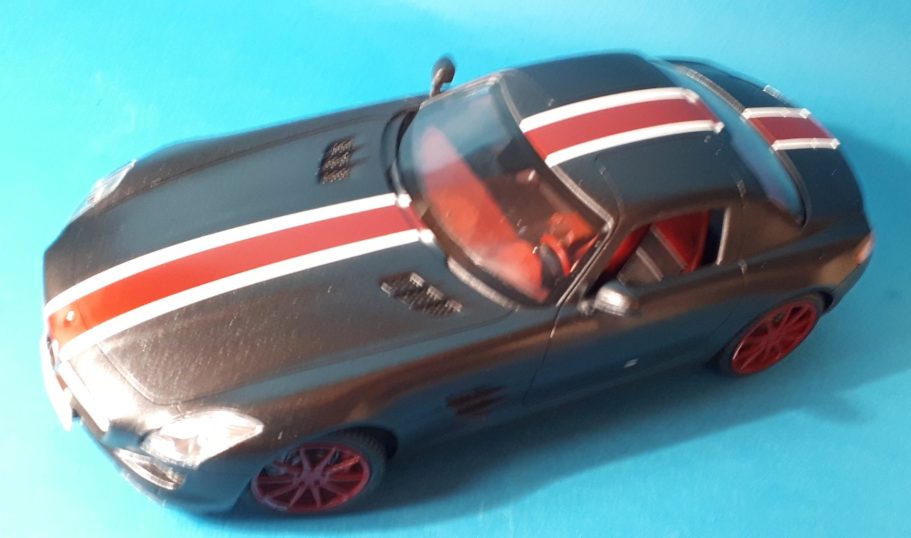
This was allowed to dry for 48 hours in a drying cupboard, before masking up to paint on the white stripe down the centre of the body.
The masking was removed after the paint had settled for about half an hour, then put back in the drying cabinet for a couple of days.
More masking, this time to allow some of the white line to remain, but with a red stripe down it’s centre.
More drying, then the bit I hate – varnishing.
I make use of Mr Hobby Gloss varnish, which up to press has been pretty good. After the disasters with the AC Cobra, I now spray the varnish into a clean plastic cup and decant it then into the airbrush. This seems to give a better and more even coverage.
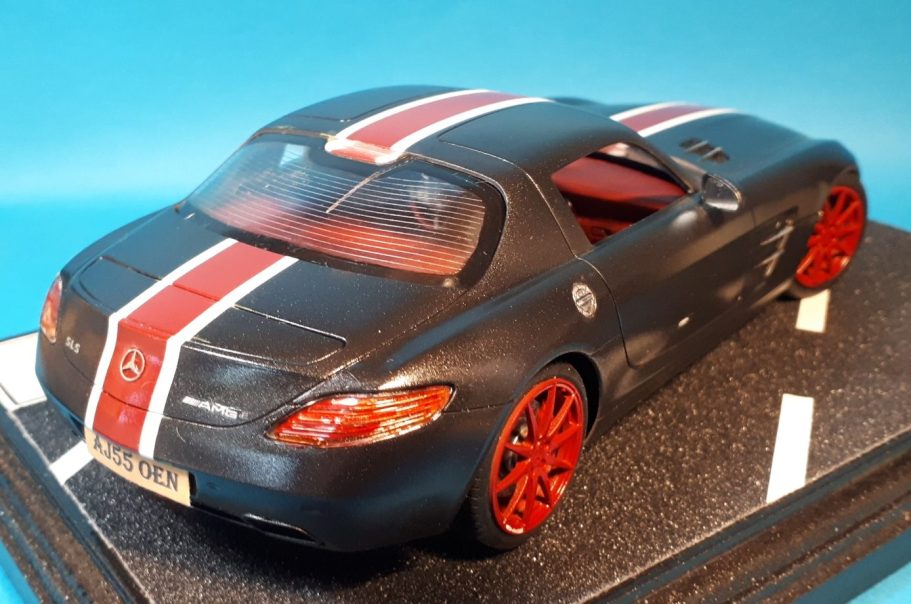
This picture shows the body shell in place and the clear parts fastened on.
Aside from varnish, my other stumbling block is the larger clear parts, I’m either too heavy handed, impatient or just plain clumsy with these components, and I’ve not assembled a car in this scale yet without either fogging one of the windows, scratching them or cracking an edge.
This was no exception, and I damaged an edge of the right hand side window with some glue.
Simple solution was to remove both side windows which then looked like the windows were rolled down, and allowed a better view inside the car – so not a bad thing really ( I’ll carry on telling myself that ).
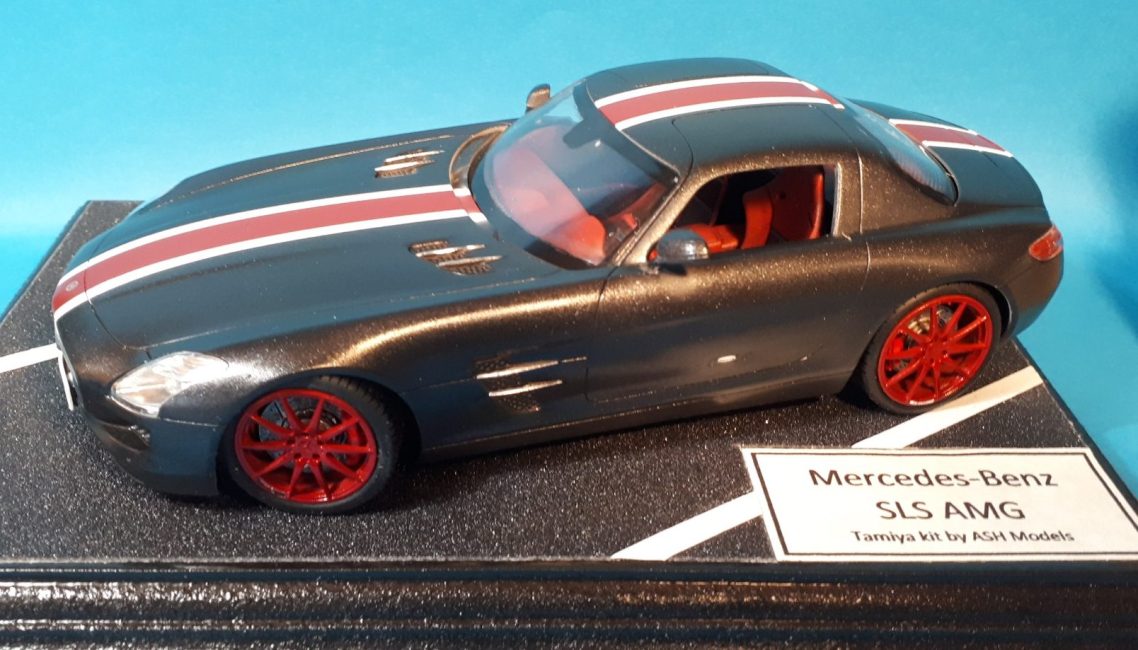
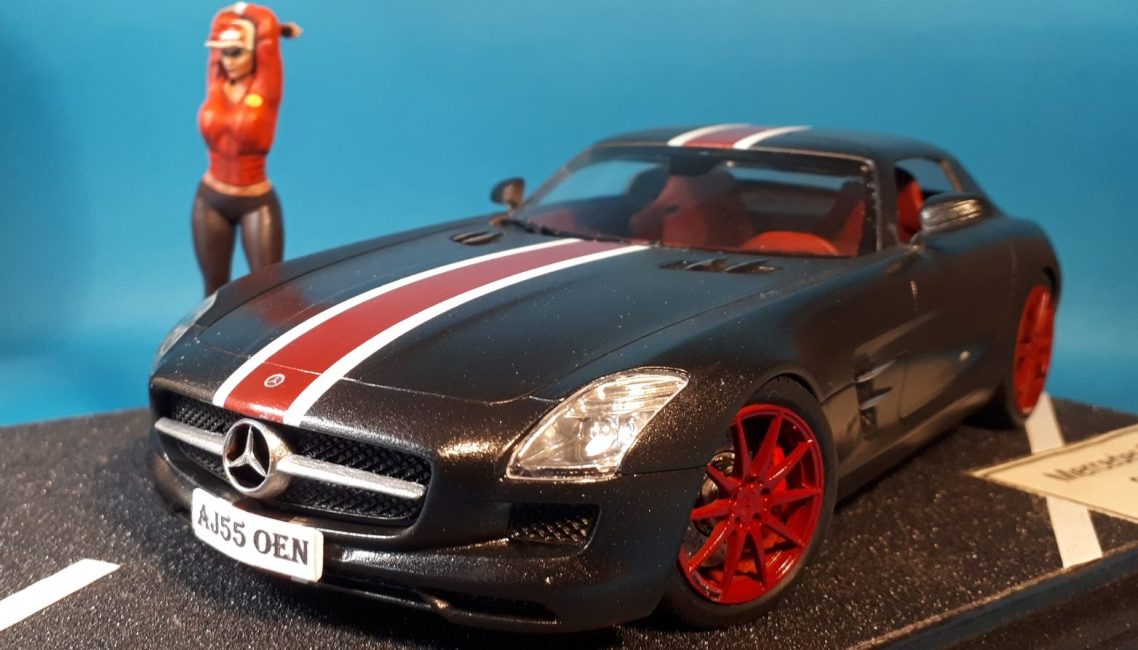
With decals added – not much to do there a Mercedes logo here and a couple of AMG logos there, and that was about it done.
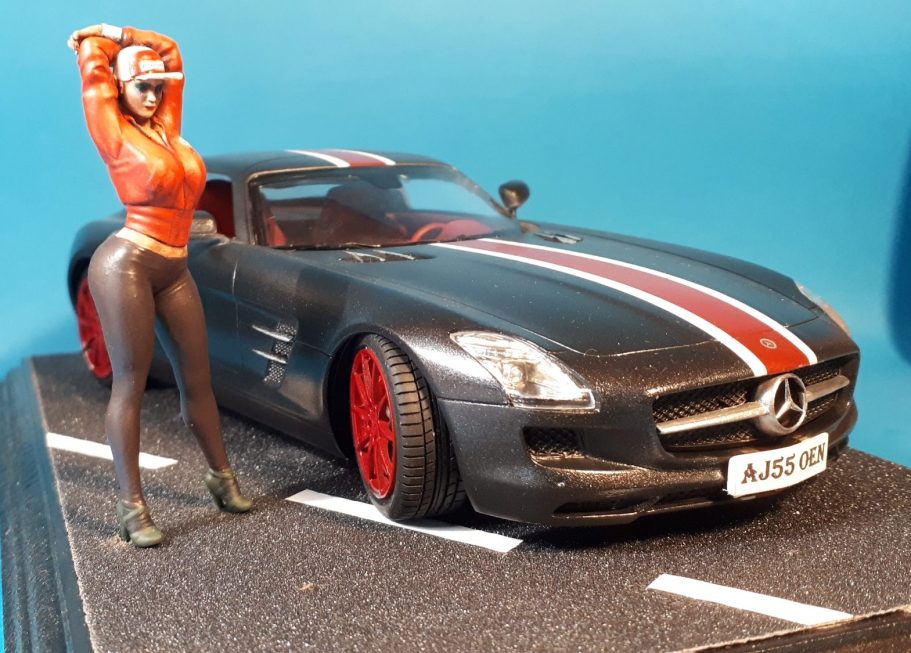
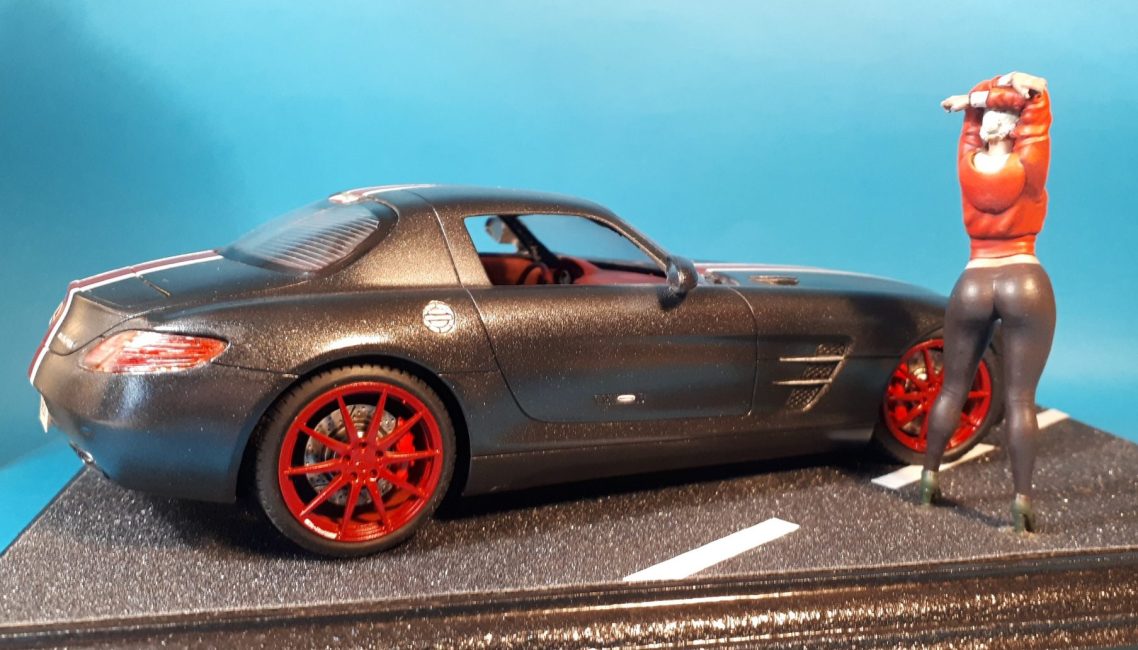
I printed out a number plate – one from one of my old cars ( well I can hope, can’t I ? ) and put the car onto an MDF base with a layer of wet and dry paper to substitute as a tarmac road surface. The likes and dashes on the road are a plastic coated masking tape…… But there was something missing.
Of course, it’s have to be a figure, and what better to have than a young lass posing by the car and a photographer taking a picture.

Sourcing two figures via Ebay of a couple of 3D printed girls – shown in this shot – I began painting them.
Ah, back in my comfort zone, painting figures.
I’ve purchased a few 3D printed figures now, from varying sources, and I’m finding that quality and materials vary quite a bit. These two are OK, but they’re not the best for great detail or ease of cleaning. There are quite a few pits to fill and small pins to remove, and the resin used is very brittle. Not only that, the pony tail hasn’t formed properly on the head of the girl that is posing for the photo, so I had to sculpt that back in.
As I say, they’re alright so long as you don’t mind a little work, and the price of them is pretty good too.
I replaced the beak of the baseball cap on the posing girl, this was to make painting her face a whole lot easier, and also to get a better shape to the bill once it was back in place.
Painting is pretty straight forward, I added some decals that were spare from a 1/43rd scale car kit.
As it was I couldn’t fit both girls on the base, well, not and get them to look like they were interacting and look like the car was going to fit into the photograph being taken, so I left the photographer off. She’ll probably appear in a future car scene.
Overall, I’m pleased with the finish on the car, it’s not perfect by a long shot, but I feel I’m progressing with a slow improvement on each new kit.
The next few cars will be aimed for display in the garage, but will then get their own bases after that.
MDF bases are available from Richard Wharton at OakwoodStudios.co.uk at a very reasonable price.
We need your consent to load the translations
We use a third-party service to translate the website content that may collect data about your activity. Please review the details in the privacy policy and accept the service to view the translations.