The Red Viggen
Hasegawa 1/72nd scale plastic kit
Assembled and painted in 2024
I’m a member of the Facebook Veteranus Auction group, and I do buy one or three kits off there, much to my wife, and possibly my Bank Manager’s distress.
This was part of a three kit lot that I really wanted for the Saab Draken in Austrian Millennium Livery, although this and the Greek F104 Starfighter were attractive second place bonuses.
Unfortunately the Starfighter decals were old, cracked and basically unserviceable, but I’ll be able to replace them with an alternative set, however this and the Draken kit were in perfect condition all round, so absolutely no complaints to be mentioned.
A bit of history behind this rather striking livery, and the airframe it’s on.
I’ve already spoken about the J35 Saab Draken, which was conceived in plans drawn up in 1949 and which was built and tested in 1955, perfected and in service with Sweden by 1959.
The Viggen is the successor to the Draken, although both airframes served together for many years simply because the Viggen was a very expensive aircraft to build.
It seems strange that design funding to make what would become the Viggen were made available as early as 1952 – if that isn’t forward thinking, then I don’t know what is !
Although around a hundred designs were considered, and what would have become the J36 series of aircraft got a long way into the design stage, it wasn’t until 1958 through to 160961 that studies into what would become the J37 Viggen took place.

The Draken had never been designed for a ground attack role, so whilst the Viggen would serve multiple purposes, attacking ground-based targets was factored in.
The Viggen’s first test flight took place in February 1967, although without fanfare, and it wasn’t until two months later that Press representatives were to see the new fighter jet in flight.
Flight testing continued through 1968 to 1970 and the first aircraft were delivered into service with the Swedish Air Force in 1971.
Regarding paint schemes, which really is what I meant to talk about here, the initial Viggen’s colouration was a green / brown “forest” camouflage patters, with hard edges to the different colours so that the aircraft could be hidden when on the ground.

However, by 1982 the Swedish Air Force believed that with advances in detection technology, any kind of ground-based camouflage had become redundant, and so aircraft were repainted in a neutral, low visibility grey colour that is designed to hide the aircraft when in flight.
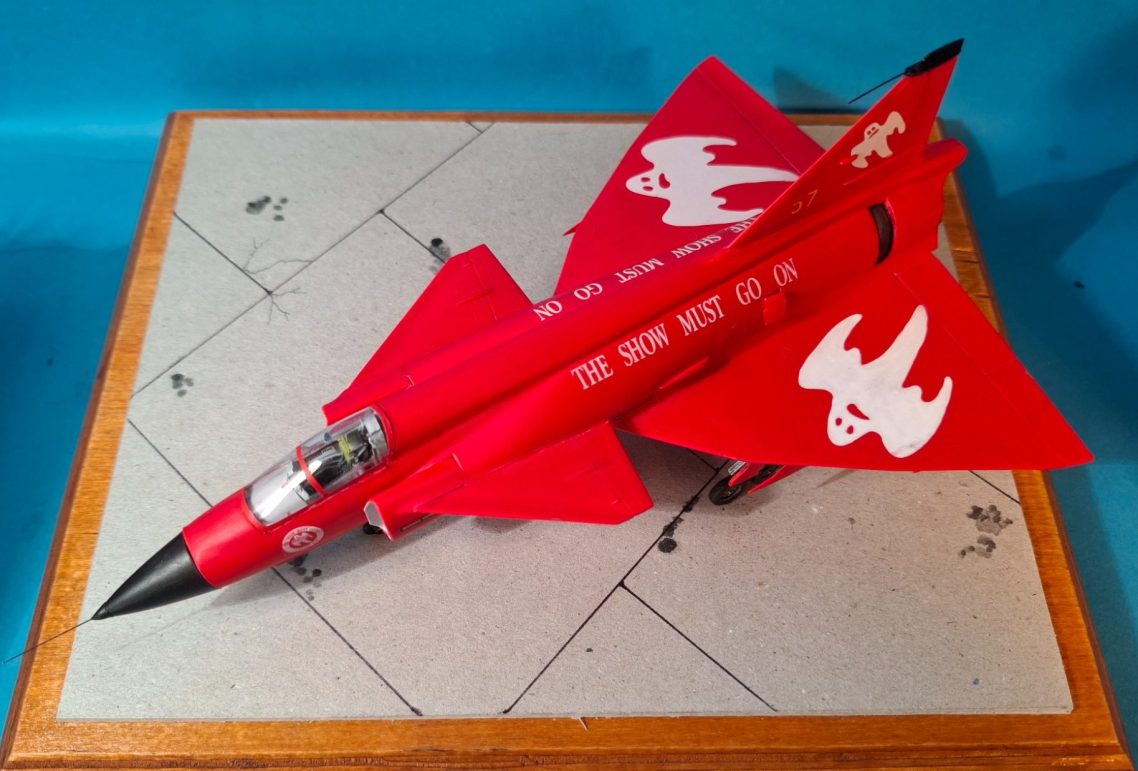
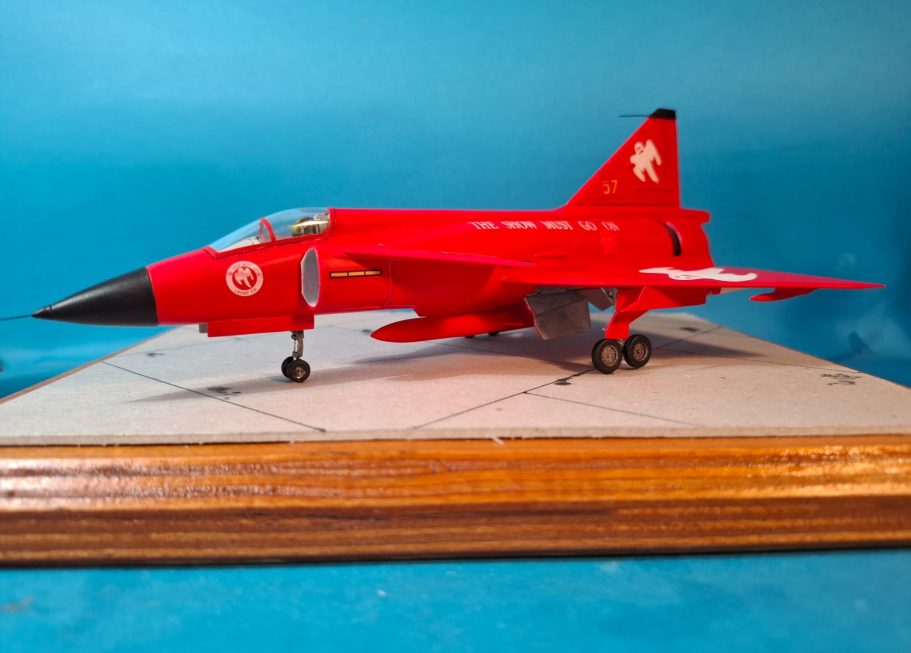
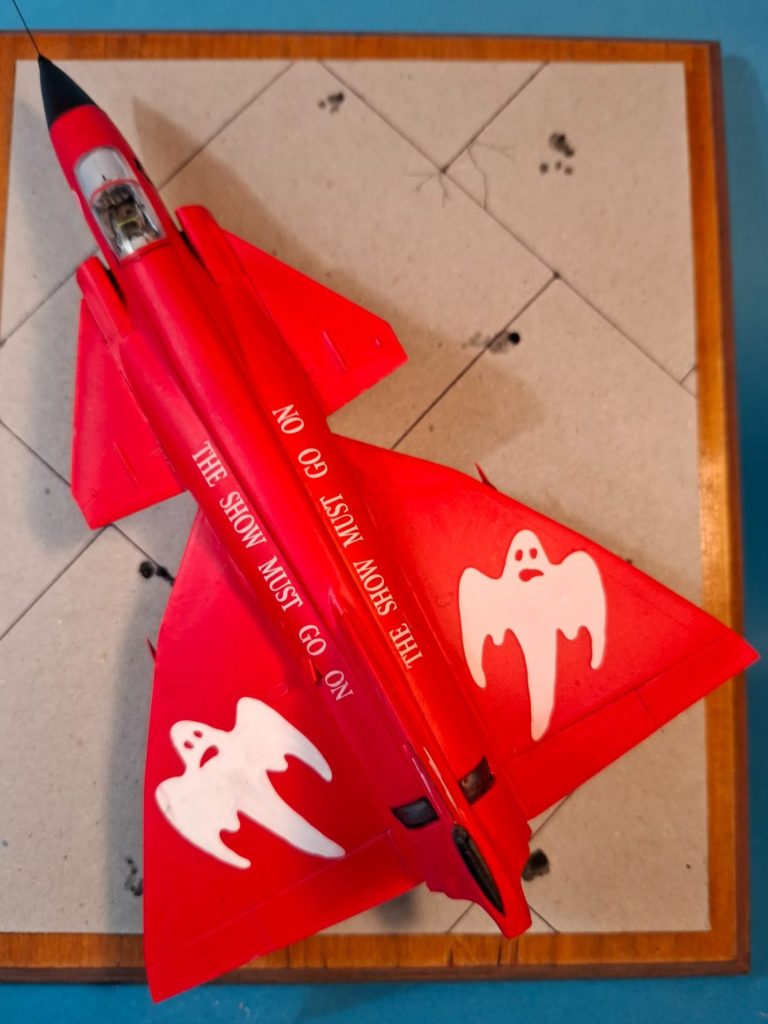
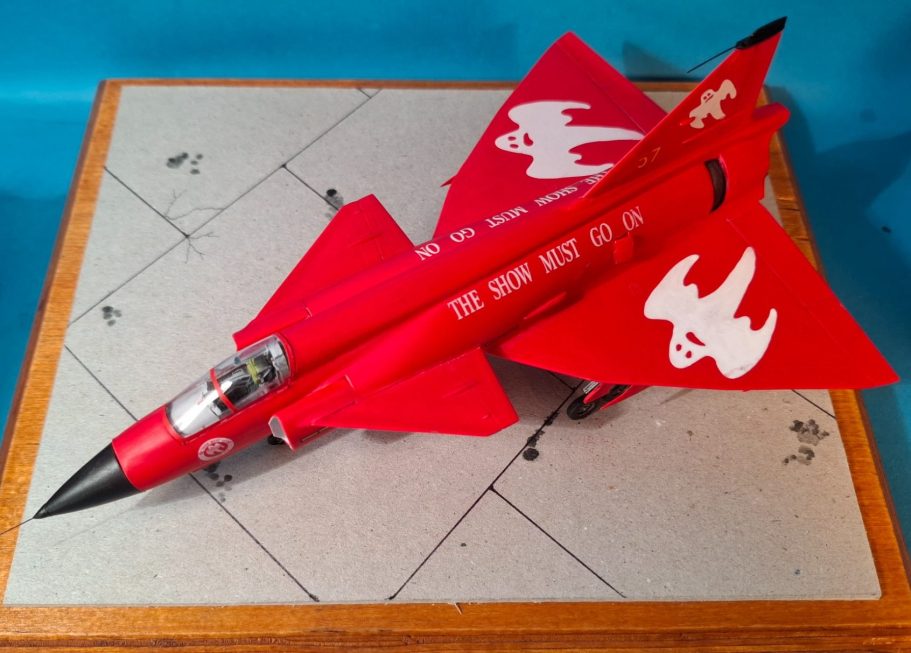
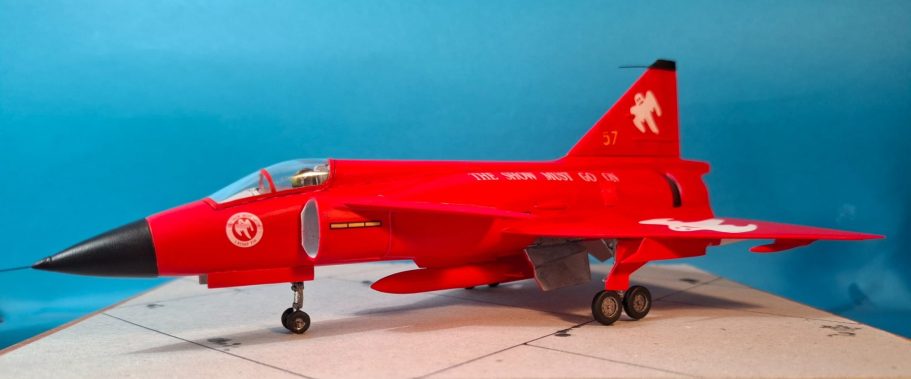
The Red Viggen scheme was applied to mark the disbandment of the aircraft from 1st Squadron of the Swedish Airforce in April of 2000, with the Saab Gripen then taking over duties. The Red Draken number 57 is preserved in Malmo at the Teknikens Och Sjofartens Hus.
The model
Photo #1 shows the box art, it’s a superb shot of a real aircraft, and promises good things inside.
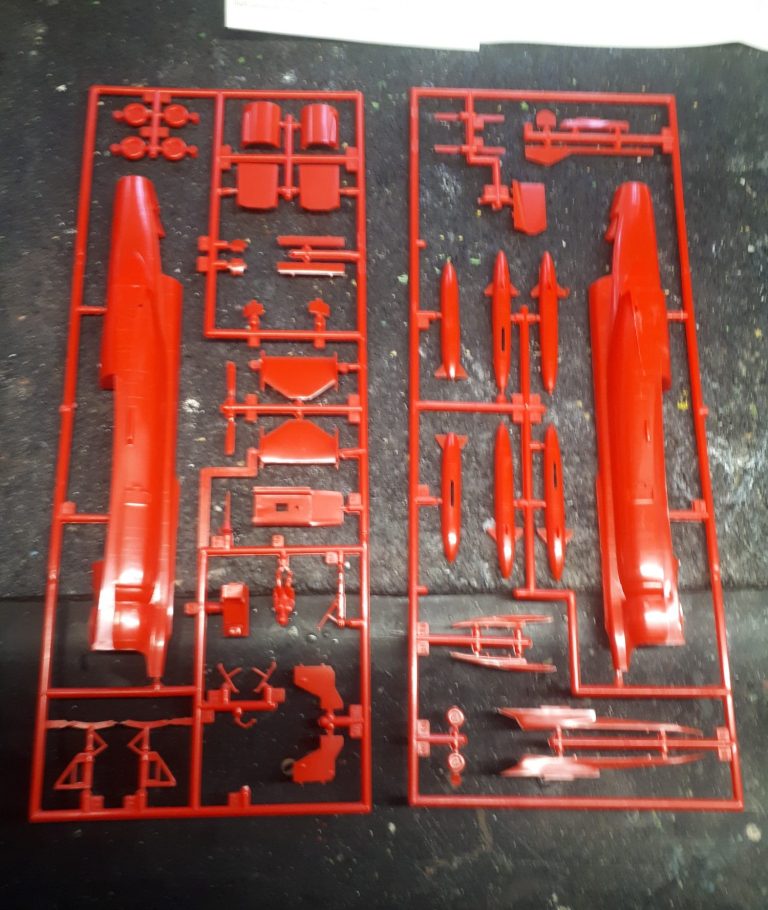
Photos #2 and #3 show the sprues of components, helpfully moulded in red plastic, and fairly cleanly done. There’s another sprue with the clear canopy on, moulded as a single part, but I guess you could take a fine razor saw to it which would allow the canopy to be opened up.
One thing I was a little upset about was the discovery that the panel lines are raised up, rather than recessed.
The control surfaces have recessed lines, but all body and wings have raised lines, and this made me think that this is an old tooling of the Viggen, and wonder if perhaps it’s been borrowed from the old Airfix kit.
I don’t rate myself as an expert aircraft modeller, so there’s no way that I was going to sand all the panel lines off and rescribe them, I’ll leave that to better fellows than I.
I’d hoped for more from Hasegawa after doing several of their kits in the past, Let’s just say I was disappointed, and leave it at that.

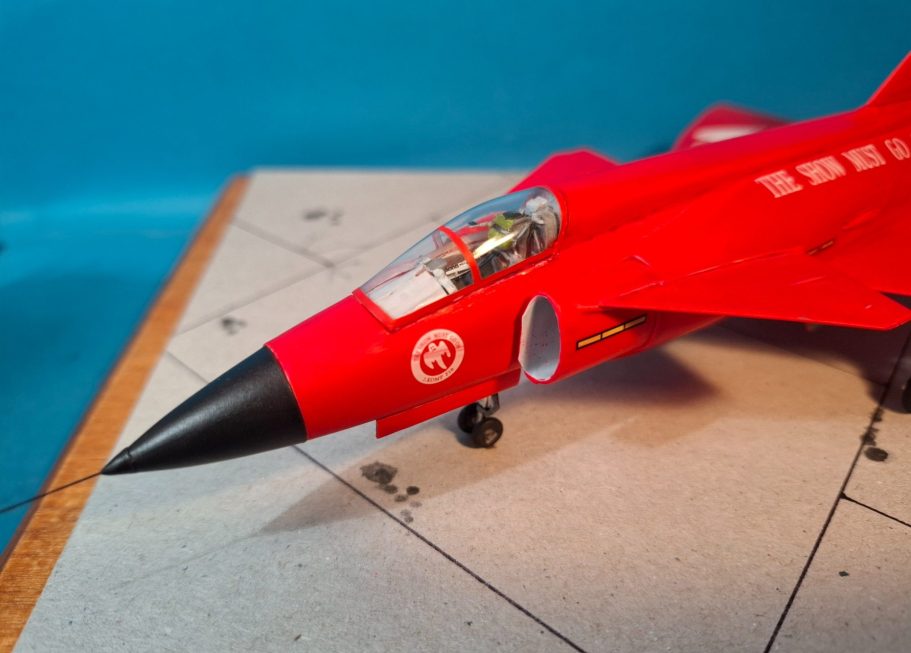
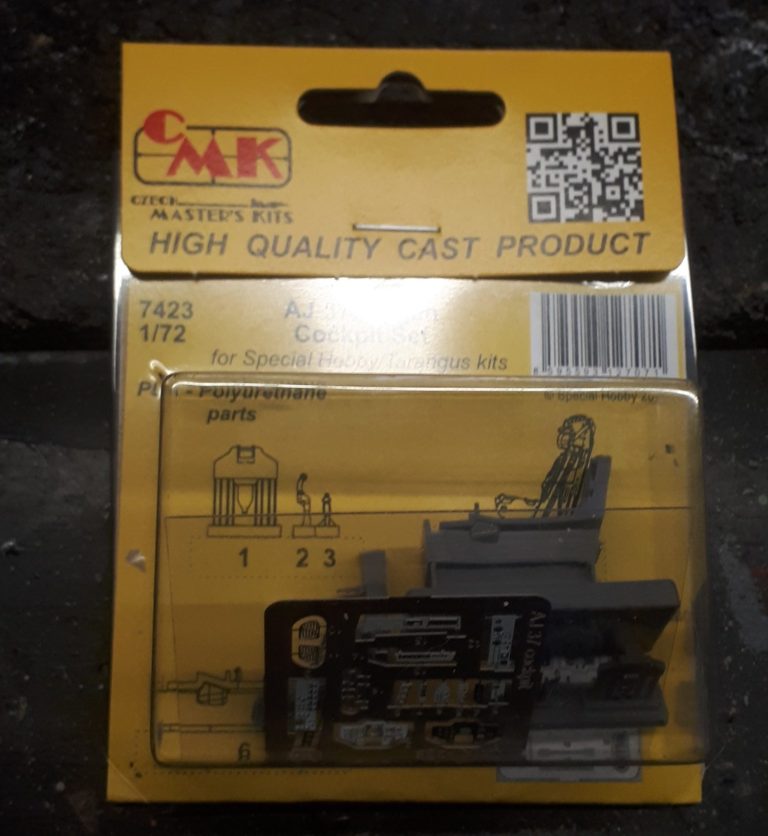
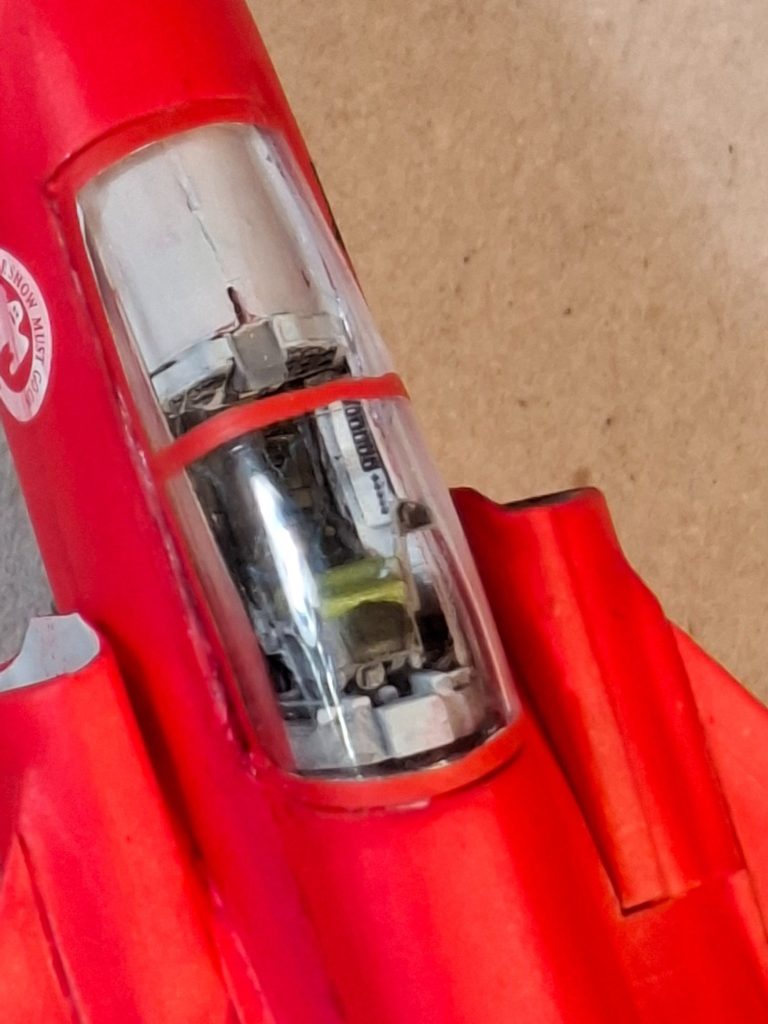
Photo #4, I’d already purchased the CMK resin upgrade to replace the cockpit, and I shall sing the praised of their product here.
There’s some large mould plugs to saw off, but the quality of casting of the resin parts is superb, the etch fret – which is coloured I might add – is even better than the resin parts ( if that’s possible ! ) and I can highly recommend getting this if you’re doing this or any 1/72nd scale Saab Viggen.
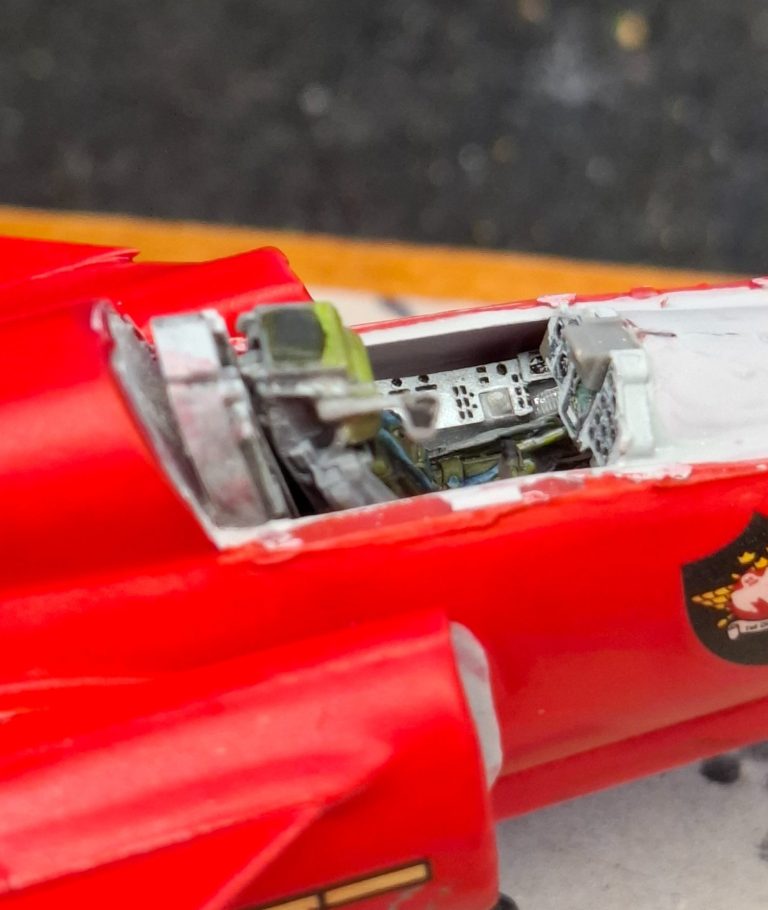
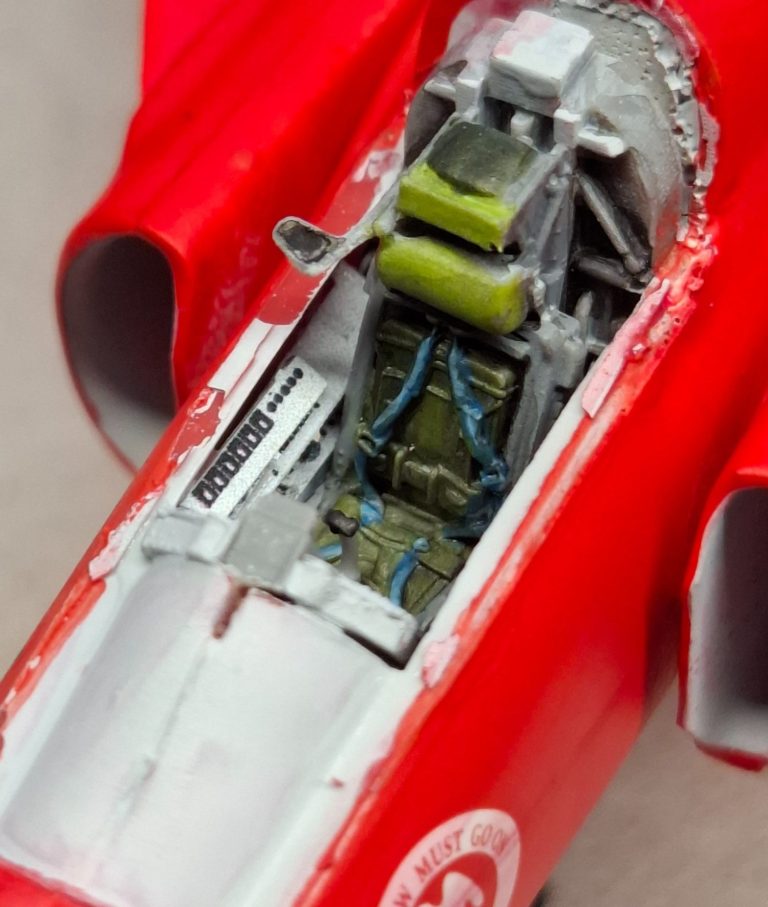
Photos #5 and #6 show the cockpit having been assembled and painted and then fastened in place.
There’s a little surgery necessary to thin down the underneath of the cockpit to allow the inverted tub of the front wheel housing to fit, I ended up removing part of the roof of the wheel bay, rather than risk losing some of the floor of the cockpit, and whist I was fastening both sections into the fuselage, I added some small fishing weights into the front section where the radar equipment would be housed on the real aircraft – don’t want a “tail sitter”.
The other thing I’ll note in these shots is the very untidy grey paint around the cockpit edge. I should have neatened this up, and regretted not doing that later one.
Having referred to the Sabb Viggen “Walk Around” book by…… I noticed that the inside the intakes was a pale grey, I added this after the red of the fuselage was painted, but it’s visible in these shots.
Painting it Red
This to be honest, should have been so simple, but impatience and possibly the very cold weather joined up to give me a less than pleasing finish.
I’d masked the cockpit off with some tissue paper, and having drilled a hole into the flat nose section ( it’d be covered by the nose cone later ) inserted a thick piece of sprue to be used as a holder while I painted the aircraft.
If you want a bright red, then the best primer is a pure white – one such from good old Halfords Auto range was to hand, so the whole airframe was given a couple of light dustings of that, and the kit put to one side for an hour to dry.
For the red, I was going to use a Tamiya Gloss Red through the airbrush, but whilst finding the white primer, I noticed a Tamiya spray can of red, and thought “that’ll save me cleaning the airbrush, I’ll use that”
So I did,
At this point I found that the Tamiya Spray cans seem like a good idea, but don’t seem to cover quite as well as I’d like, and maybe because I was trying very hard not to have paint pool or run on the model, I still, after two light coats, had areas of the white primer showing through.
Frustrating, to say the least…..
A third coat was added prior to applying the decals.
The Hasegawa decal sheet covers two liveries of the Viggen, although having got hold of this kit, I can’t think why someone would want to do either a silver or a camouflaged version, rather than the red scheme.
On eBay this kit seems to command a high price, whereas the more common silver version is quite a wedge cheaper.
However, two possible liveries, and I chose to represent the Red Viggen, as per the box art.
The decals go on very well, and I’m pretty sure that it was something I did that caused the “ghost” on the upper face of the left wing to dry with a lot of cracks in it, with the red of the airframe showing through.
I haven’t a clue why this happened, as all the other decals went on without a hitch, but it meant that I had to apply several thin coats of white acrylic over the top of the decal to hide the cracks.
To balance out the slight differences in sheen on the decals, red airframe colour and the white of the repainted decal, I sprayed on three very thin coats of Mr Models Matt Varnish.
The wheel bays were painted with a pale grey, as too were the undercarriage struts and wheel hubs. A wash of Sepia oils was added over this to bring out the moulded details, although it’ll hardly be noticed on the finished model.
I used Molotow Chrome Ink to paint in the chrome of the lower undercarriage arms and painted the tyres with a very dark grey acrylic.
I’d drilled into two of the rear wheels and one of the front wheels to add pins that would help secure the aircraft to it’s base, and used an acupuncture needle for the pitot tube on the nose cone, glueing that in place and then painting it and the nose cone black.
The exhaust was painted with a couple of different metallic silver colours, then washed with Carmine oil paint mixed with a lot of White Spirit.
I know, you’re shocked, why would I use Carmine rather than say a very dark brown or even black as a wash for the exhaust.
The simple answer is that the eye is fooled by the colour used, and making a wash with the Carmine helps bind the colour of the exhaust to the airframe colouration, where the black or dark brown would cases too much of a separation in such a small scale model as this.
I gave the whole airframe a thin was of the Carmine oils in an attempt to add some detail to the raised panel lines, although it had to be rather restrained – this after all is a “show” aircraft, not something that is used regularly, so grime and paint damage will be very minimal.
The base
Worth a line or two of text in that it’s very simple to make.
The “concrete” runway section is the thick card backing to an A4 notepad – one that has a distinct rough look to it with lots of flecks of different coloured fibres in it.
Add some lines with a very fine black marker and a ruler, drip on some heavily thinned Sepia oils to represent oil leaks, and fasten it with double sided tape to a wood plinth – simple
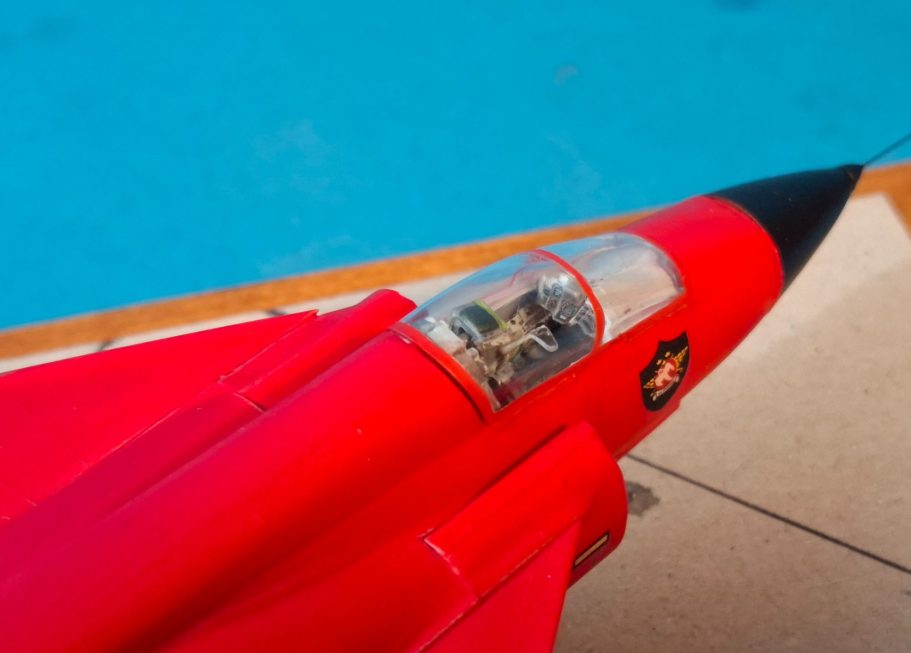
The canopy was added last of all, and it’s in the close –up shots that you can see a slight gap, some unevenness to the glue and a couple of bits of the pale grey creeping around the outer edges – disappointing, but my fault.
Final thoughts
Fit of parts isn’t horrendous, but could be better, although the moulding of the components I very good.
I think I was disheartened by the raised panel lines and initial fit of the fuselage, and let this colour my overall view of the kit. It may be possible for someone who is a lot more practiced than I am ( and with a lot more time on their hands ) to sand off the lines and rescribe them, but whether that is worth the time and effort I wouldn’t like to say.
I’ve since found a 1/48th scale offering from Special Hobby in this livery, which is supposed to be better than the old Airfix / Revell tooling, so I may have a go at that one soon.
I chose not to weather the model this time, thinking that an aircraft that was used for aerial displays would be pretty clean, although I did add a wash overall of Carmine oils thinned heavily with White Spirit.
Even with my misgivings regarding the kit itself, it’s still a striking model, and I’ll most likely take it out to a few shows when I’m displaying. It’s nowhere near good enough to be put in competition, but as a test run for a very bright colour scheme, I’m pretty happy with the results.
If you want a Sabb Viggen in this livery, then this Hasegawa offering is an OK kit that could do with a bit of work. I’m not aware of a kit in this scale with recessed panel lines, but there may well be one.
Even so, it’s not a cheap kit – the last one I saw on eBay was asking for around £50.
That said, Special Hobby have a couple of Viggen kits in 1/72nd, and maybe they have recessed panel lines, and a replacement set of decals could be sourced to add to a red airframe.
We need your consent to load the translations
We use a third-party service to translate the website content that may collect data about your activity. Please review the details in the privacy policy and accept the service to view the translations.