Spanish Freedom Fighter
The fourth resin kit in a series from RP Models
Painted in 2024
During the early 1800’2+s, as Napoleon conducted his campaign to annex Spain and Portugal, there appeared a force of armed people fighting to protect their homes and land via any means necessary.
Armed with whatever weapons they could lay their hands on, their strength was the ability to fade away into nothingness with the approach of Napoleon’s military forces, only returning when the threat had moved on.
Although more of an irritant to the invaders, they were effective in tying up much larger forces of troops, and whilst the damage they did with ambushes and from sniping from the sidelines, their affect on morale was very real.
By 1812 it was noted that there were as many as twenty-two known bands of Guerrilla groups, with as many as thirty eight thousand members split amongst them.
The make-up of these groups was mainly civilians, conscripted to defend their homes and communities, and with their concentrated attacks on rear echelons and supply lines, the effect of small groups on Napoleon’s army was quite profound.
Napoleon even commented that the actions of the Guerrillas “nearly killed him”
The Spanish and Portuguese groups welcomed any able bodied man into their groups, even better if they had some kind of firearm, even if it was only a rifle for hunting game.
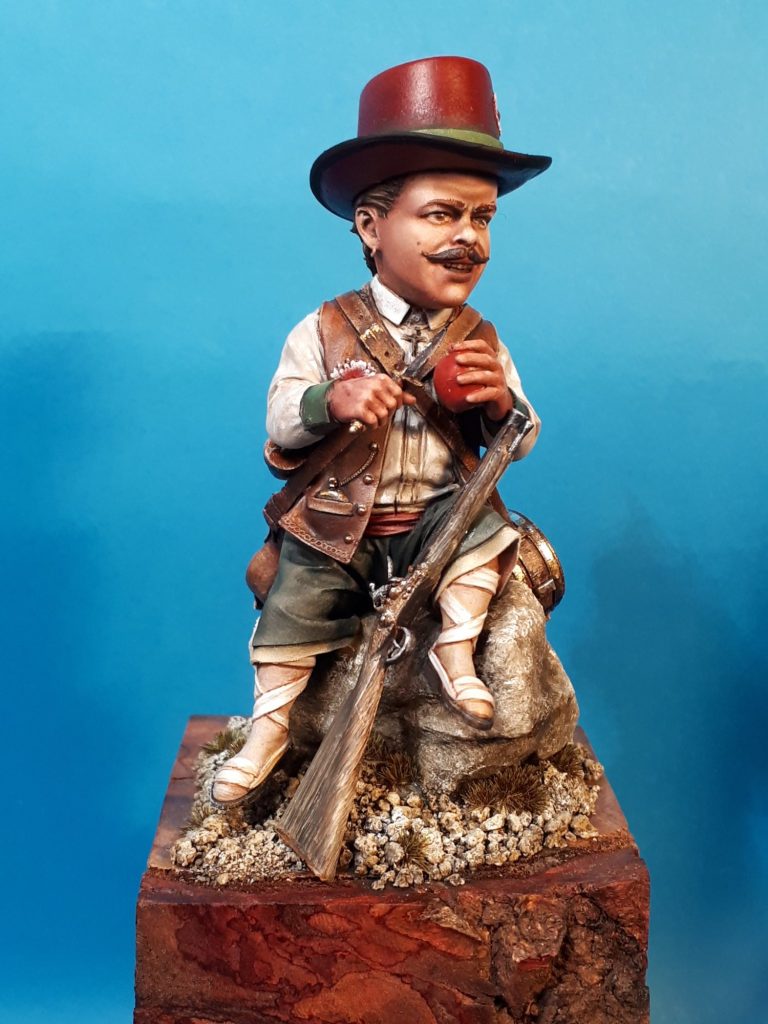
In the case of this model, he is part of a five figure group that can be displayed as a group, or singly is one figure in particular sparks your interest.
The model
I got this as a test shot from Hugo at RP Models along with several other miniatures that I’d ordered from the fantasy range – all of them superb by the way.
Hugo mentioned his son’s involvement in the making of this figure, and that kind of drove me to get it painted – I like to encourage younger members of our hobby, and it was in my mind that if the painting turned out OK, then I’d give it to Hugo’s son when I next met up with Hugo – SMC 2024 seemed likely.
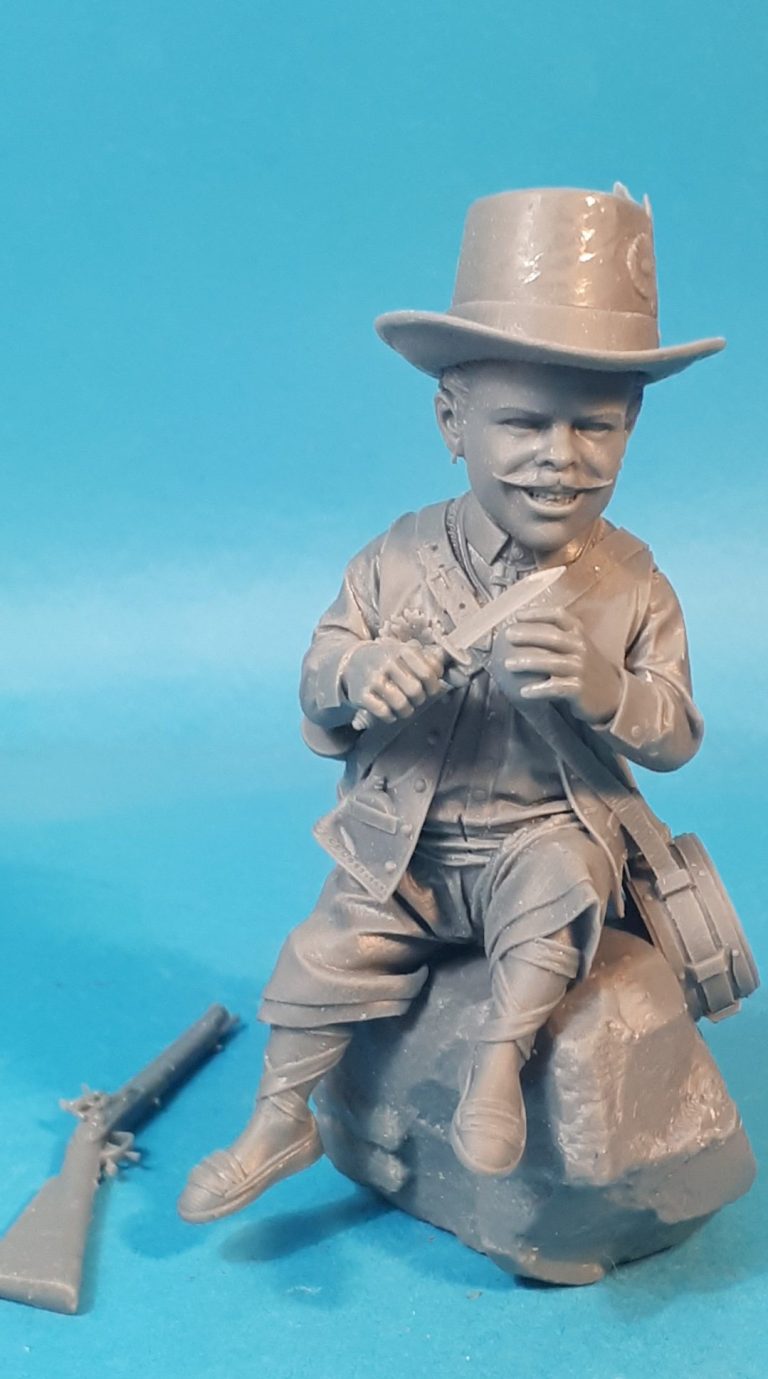
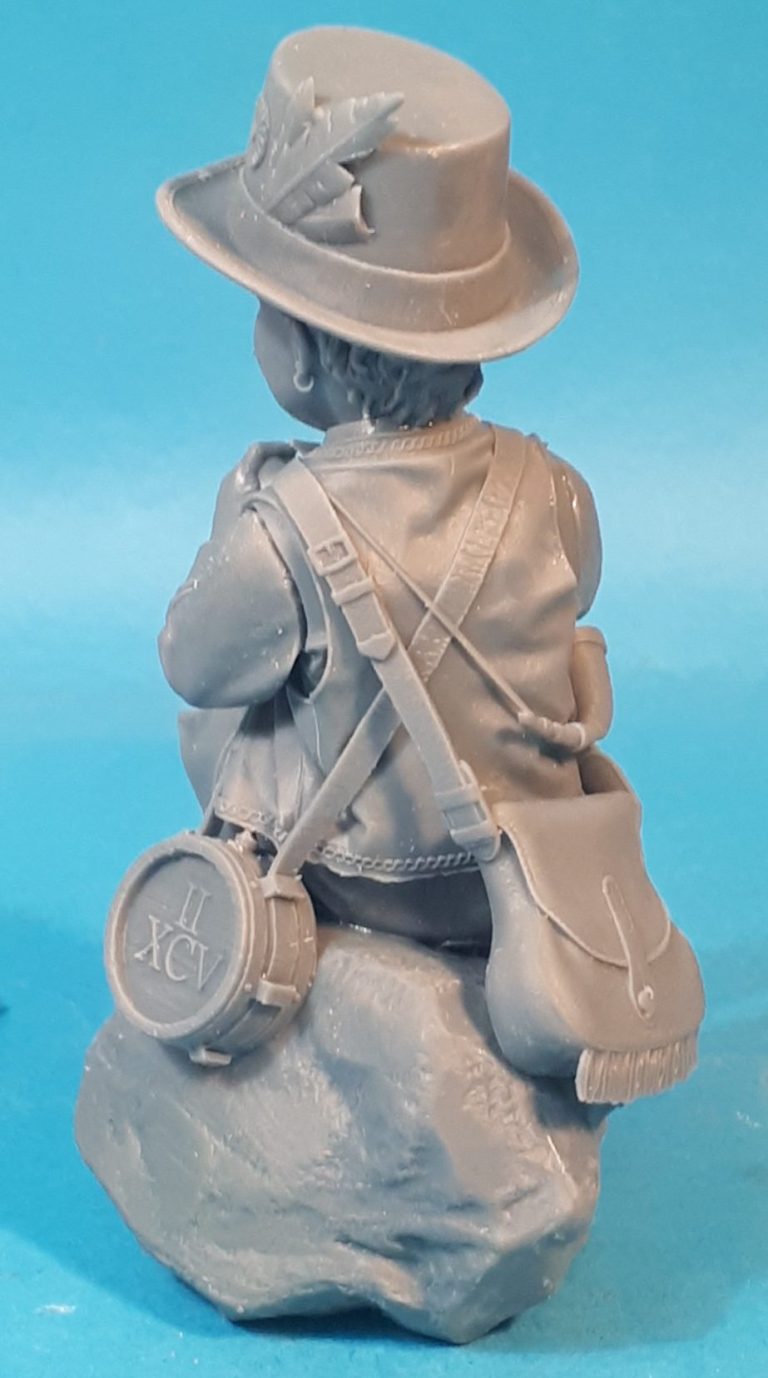
As for the figure, it’s a lovely little 3D print, the temporarily assembled parts being shown in photos #1 and #2.
There are a couple of drain holes in the rock that he’s sitting on, as the print is hollow, but these won’t need filling as they won’t be seen once the model is fastened to a plinth.
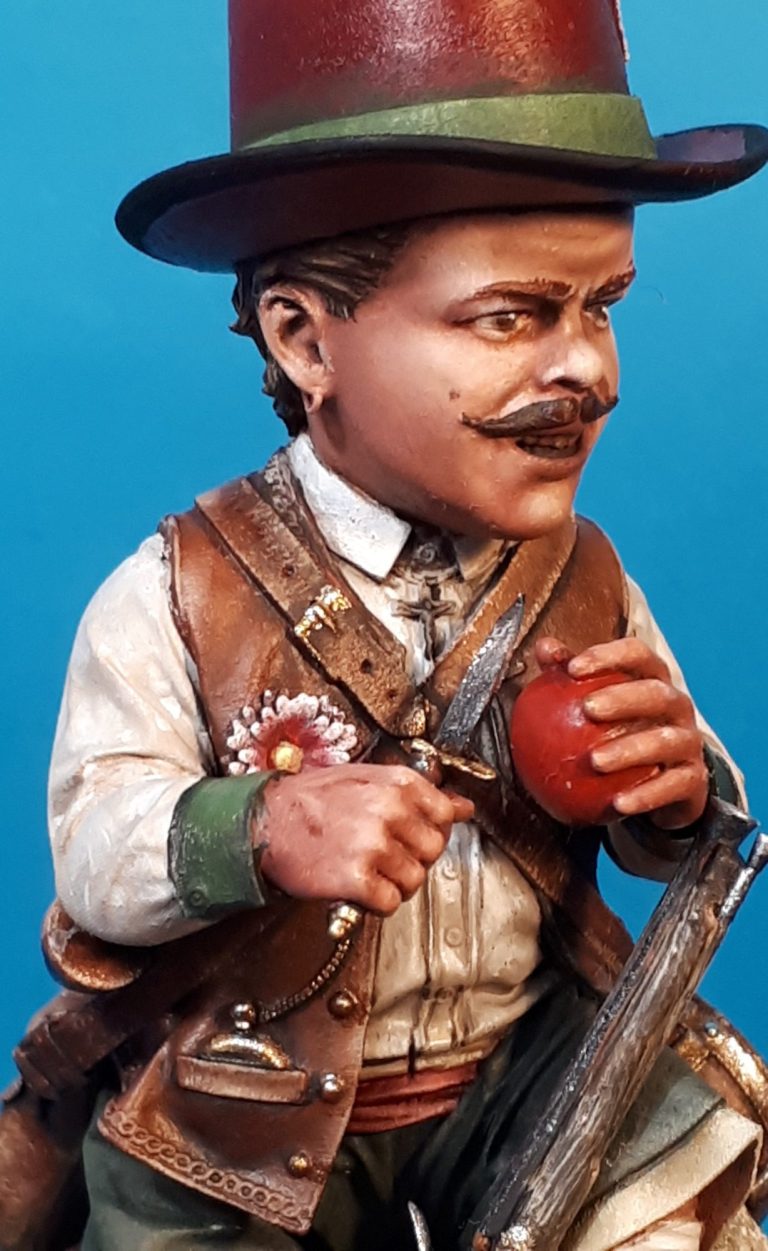
The level of detail is superb, with only the arms and the rifle being separate pieces. There’s little or no cleaning to be done either, and the only problems I had were due to my own ham-fistedness, managing to break off the tip of a feather on his hat and also losing the blade of the knife that he’s holding in his right hand.
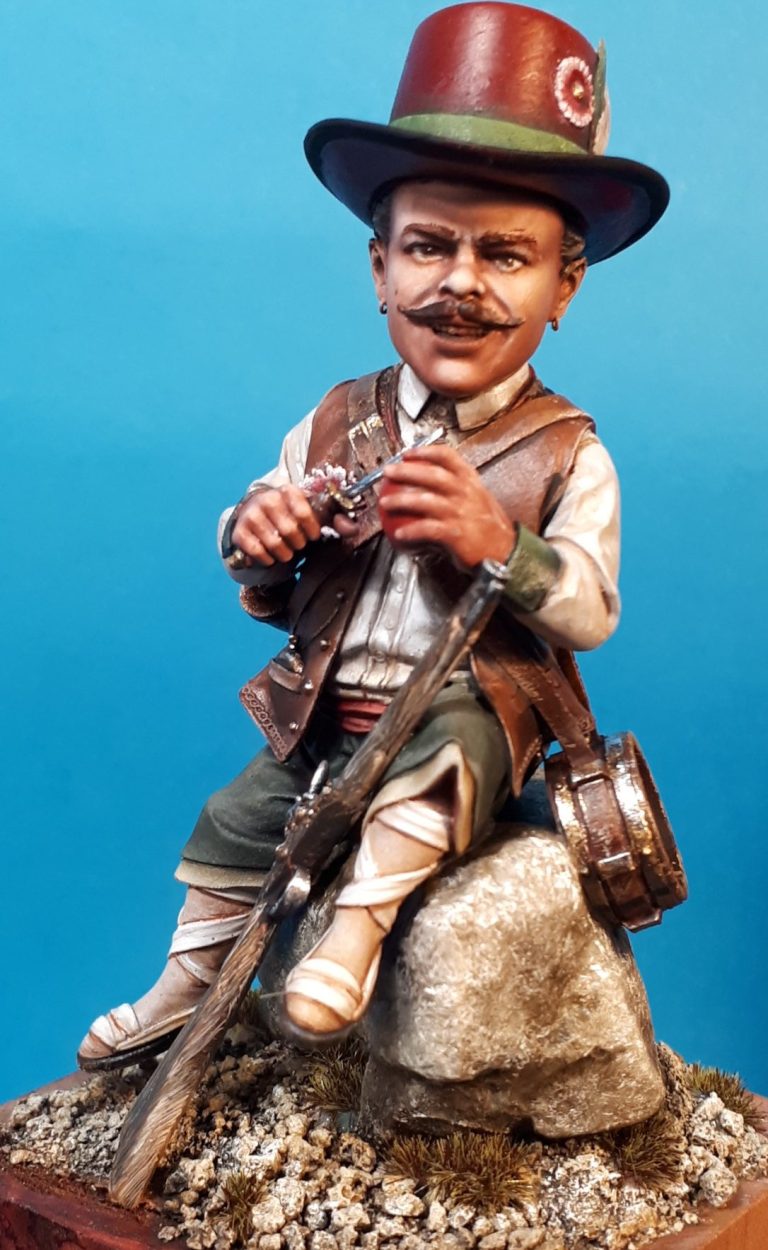
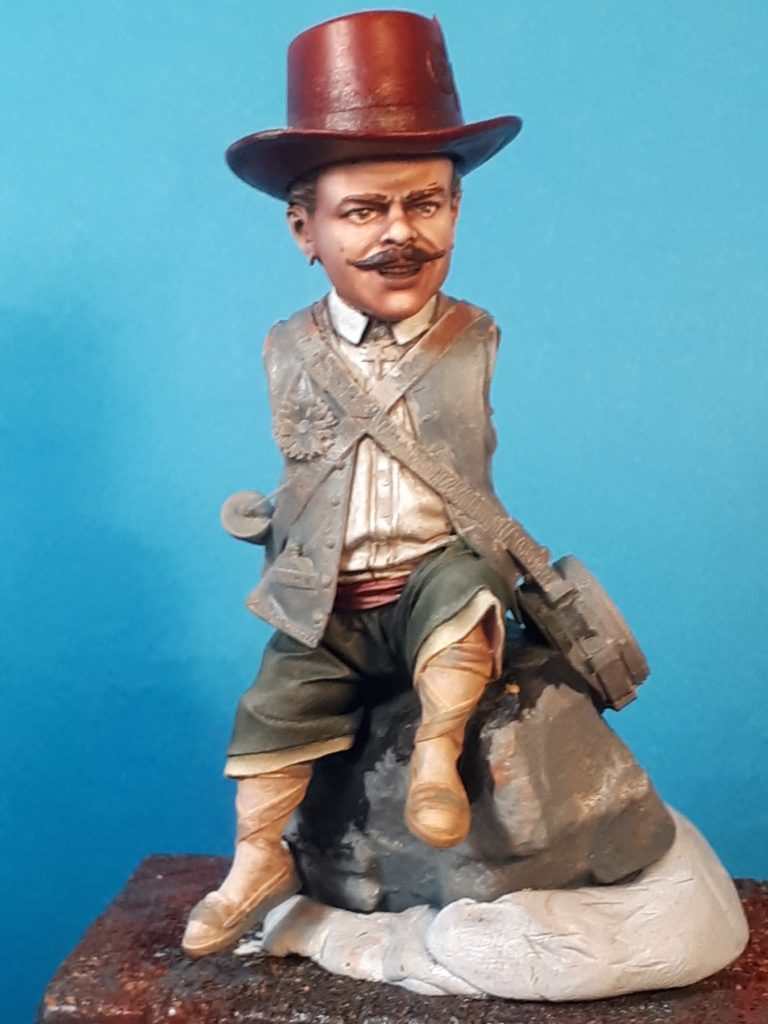
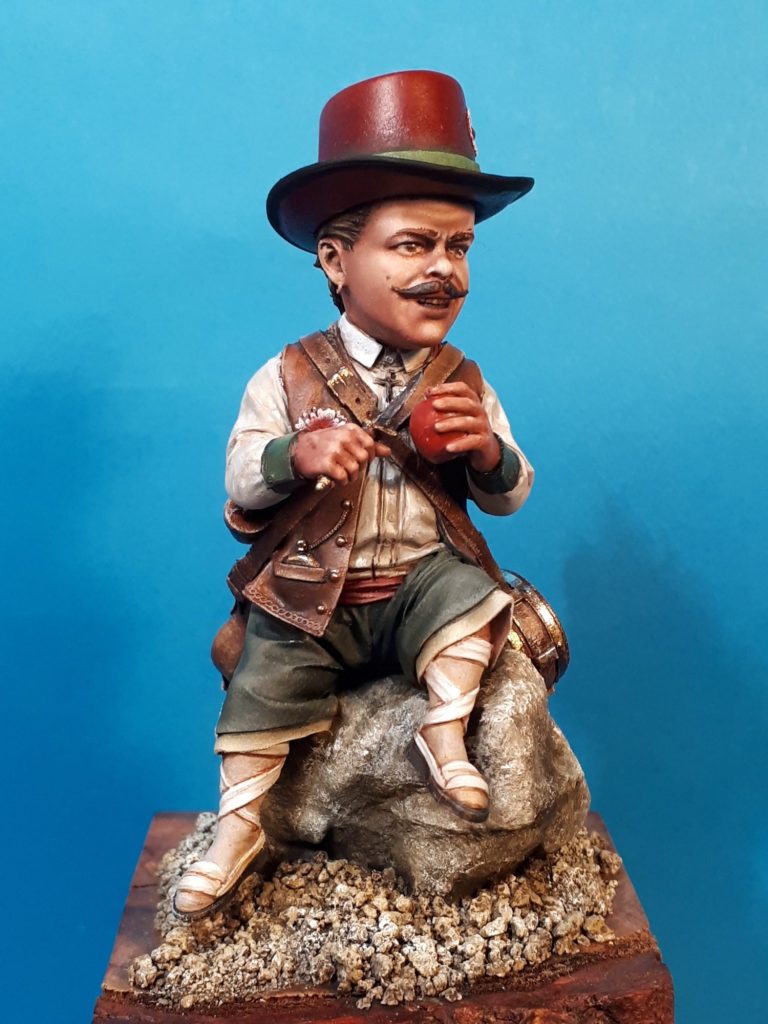
In photo #3 I’ve got quite a way along with the painting, the face is a joy to paint, and I really do think I’ve seen this fellow before- in a film, or pictured somewhere….. It’s still bugging me !
The hat has been painted too, with a Brown Madder oil and then adding Carmine and some Scarlet to build up the mid-tones and highlights.
The shirt is painted in acrylics, using a yellow/grey mix to begin with, and gradually lightening it with some white. Once the initial coat has established a solid colour, the following payers are heavily watered down and although attention is paid to where highlights would form, an amount of random creep is allowed to give a kind of pattern to the cloth.
The trousers are done in oils, again beginning with a dark green and adding lighter colours to build up highlights.
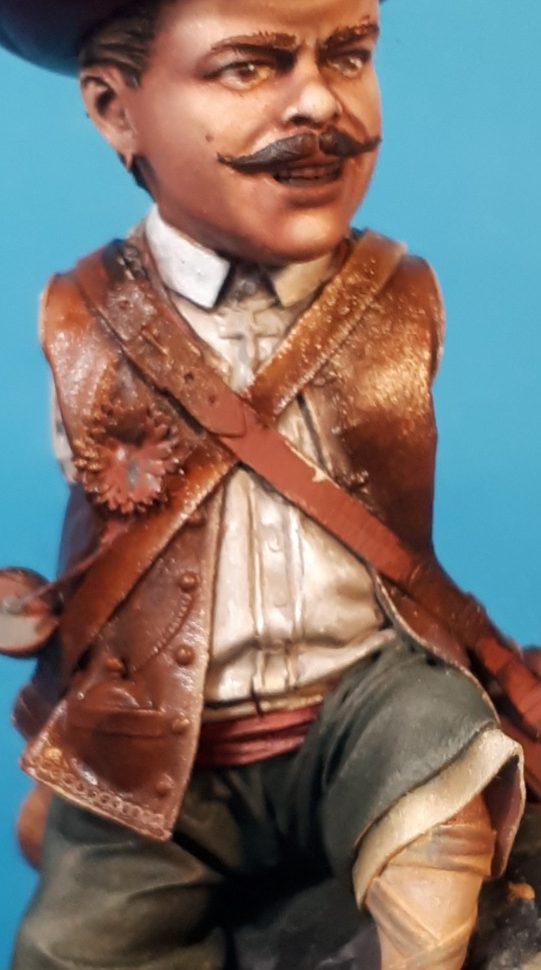
In photos #4 and #5 I’ve begun painting the leather areas. All these were undercoated with a mid-brown acrylic, then using various mixes of Vandyke Brown, Mars Brown, Venetian Red, Mars Yellow, Buff Titanium and Titanium White oils, I built up the various textured and wear on the leather waistcoat, belts and pouches.
The reason these areas look so shiny is that the paint is still wet when the photos were taken, a night in the drying cabinet would matt them down of course.
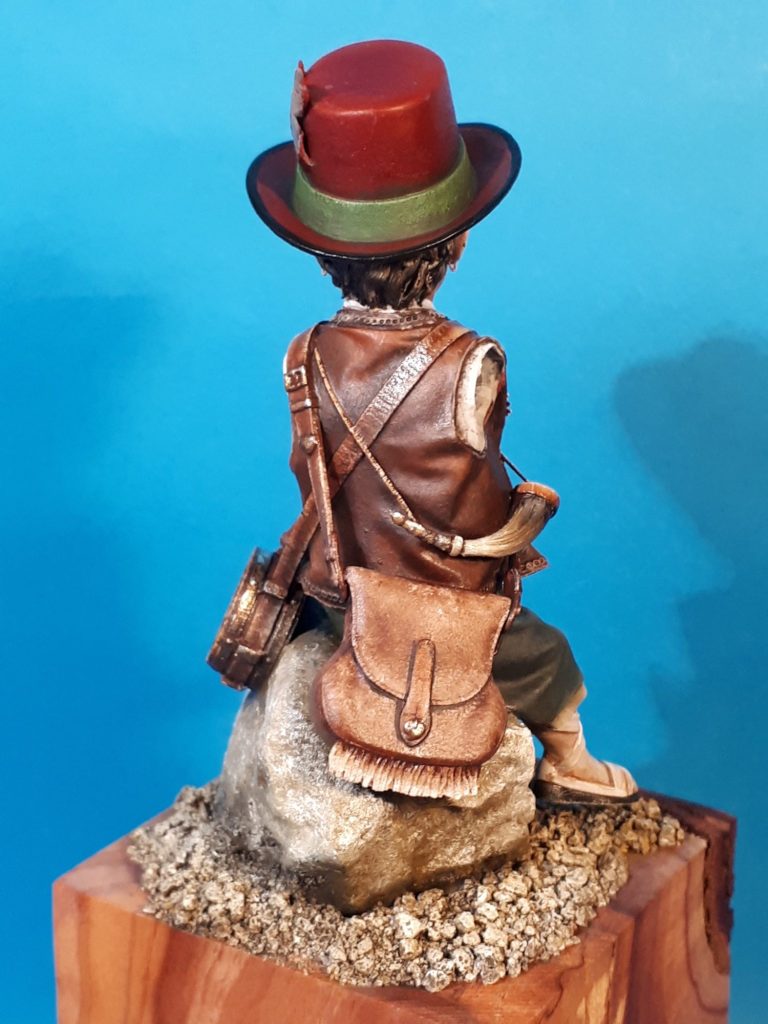
In photo #6 the figure is really starting to come together, the details of the rosette and the small drinking flask have been painted in, along with the green hatband too.
The socks and bindings have been added, using pale acrylic colours, and the small detail of the red sash at the waist painted in.
I was trying to keep to a relatively limited palette, using reds, browns and green for the clothing, matching areas like the hat band and the trousers, the waist sash and the hat, and then the earth colouration of the leather and wood accoutrements allowing him to blend in to his surroundings when he would be on patrol.
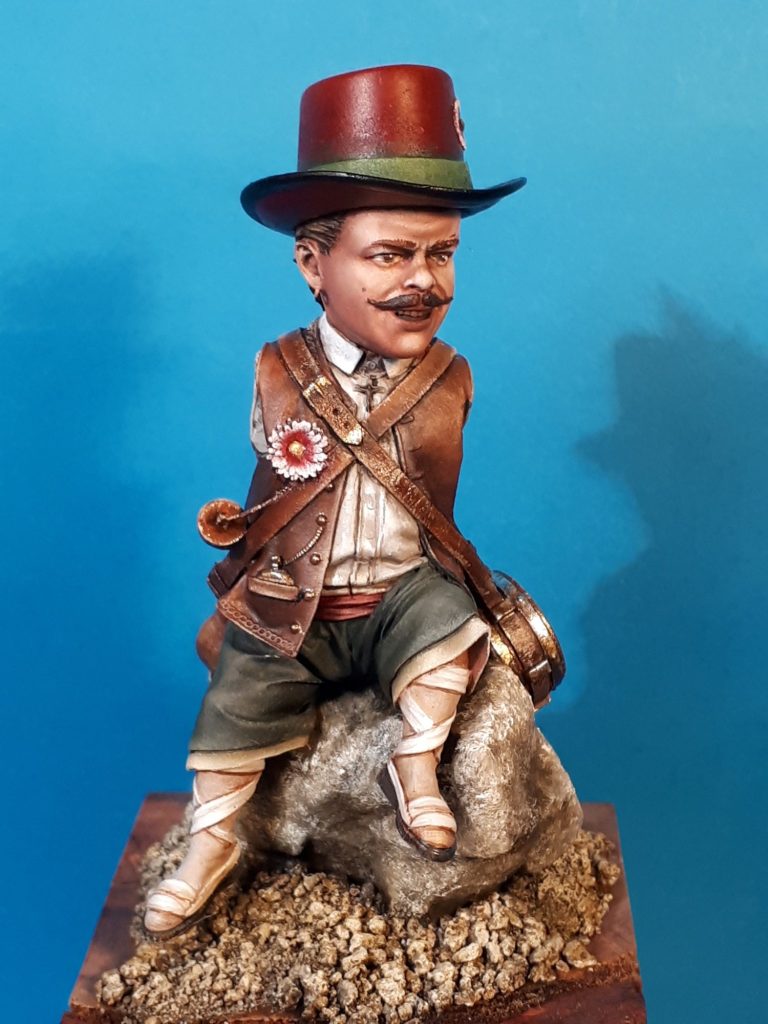
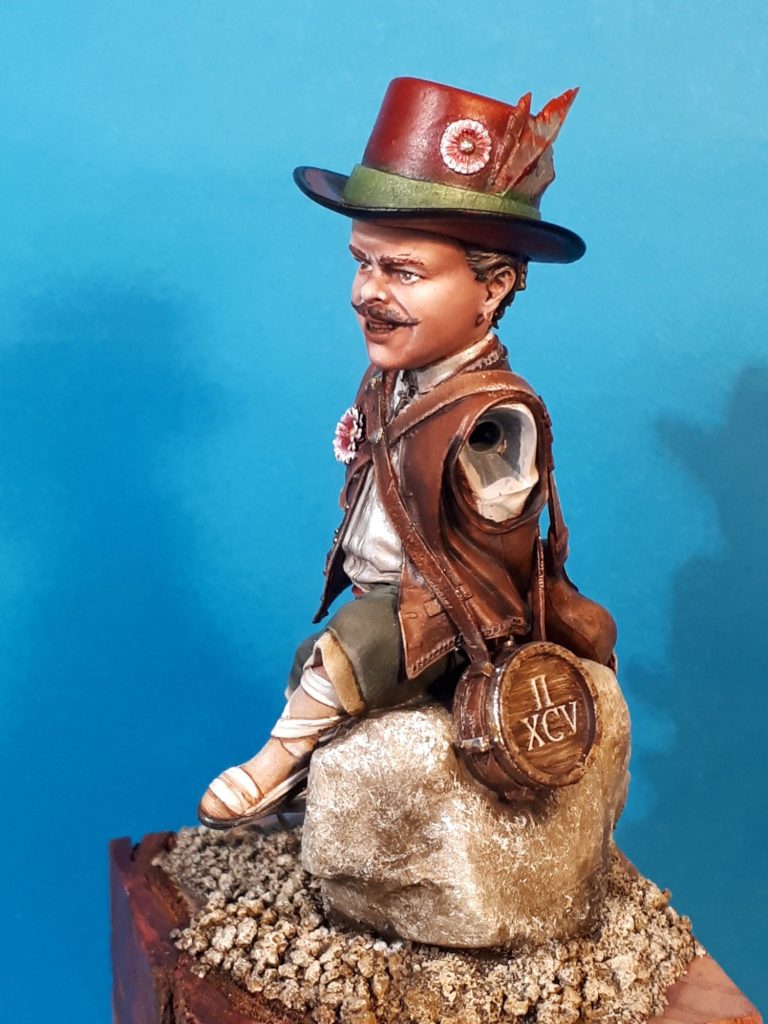
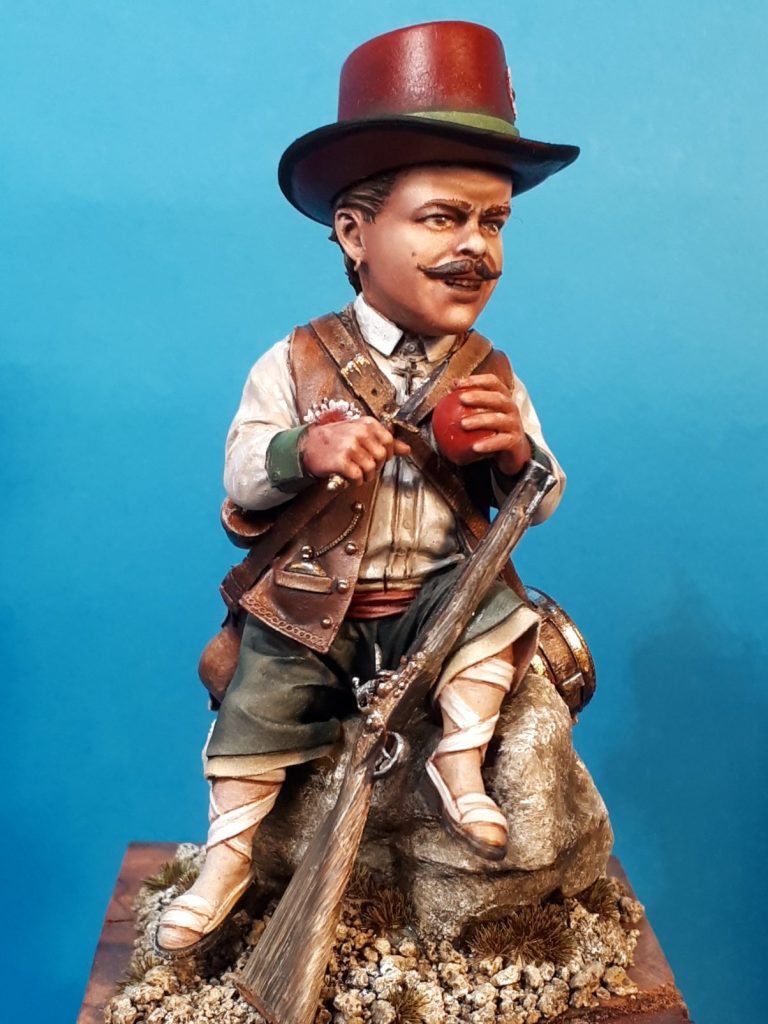
Photo #7 sows a side view, allowing the water flask to be seen, some nice wood details to paint in here along with the writing and Roman Numerals, which are raised just enough to ease their painting.
Having broken the feather on his hat, I replaced that with a small section of plasticard, blending this in with a wipe of putty.
I’ve also added groundwork at this point, using a mix of Chinchilla Bathing Sand and CT litter. It’s held in place by carefully dribbling small amounts of Superglue onto it, although you have to be very careful of the fumes that are emitted.
That and the rock were painted with oils and the flatter surface of the rock was treated with a stiff bristled brush, not quite allowing the paint to blend fully, which then gave a definite texture to the surface.
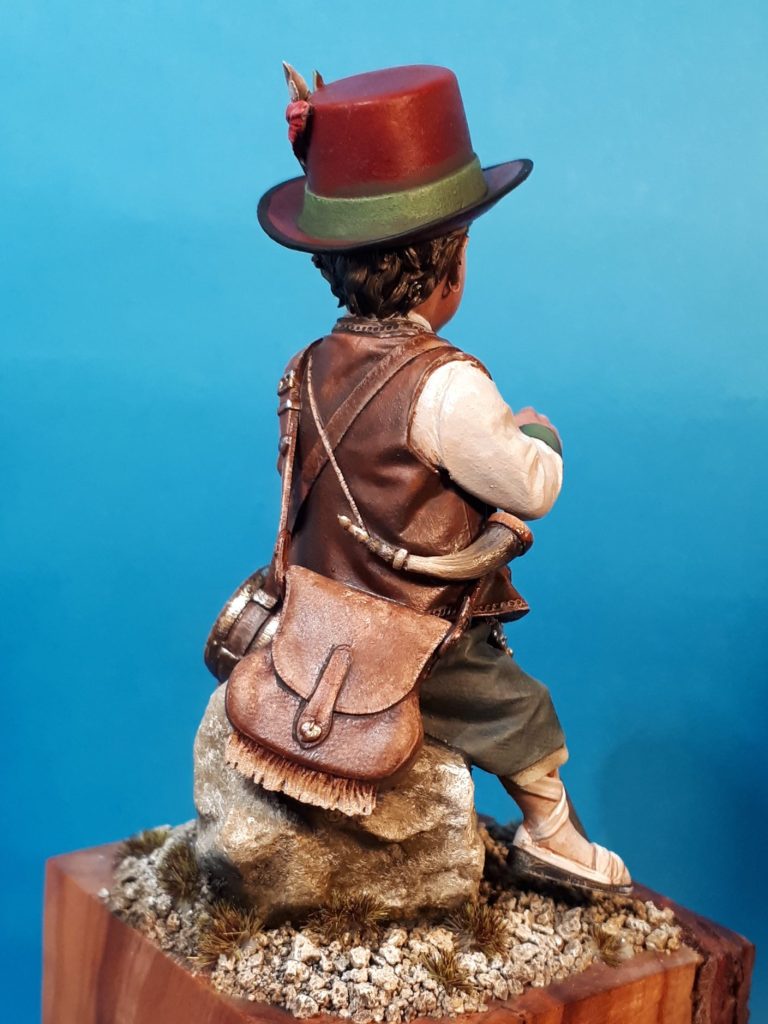
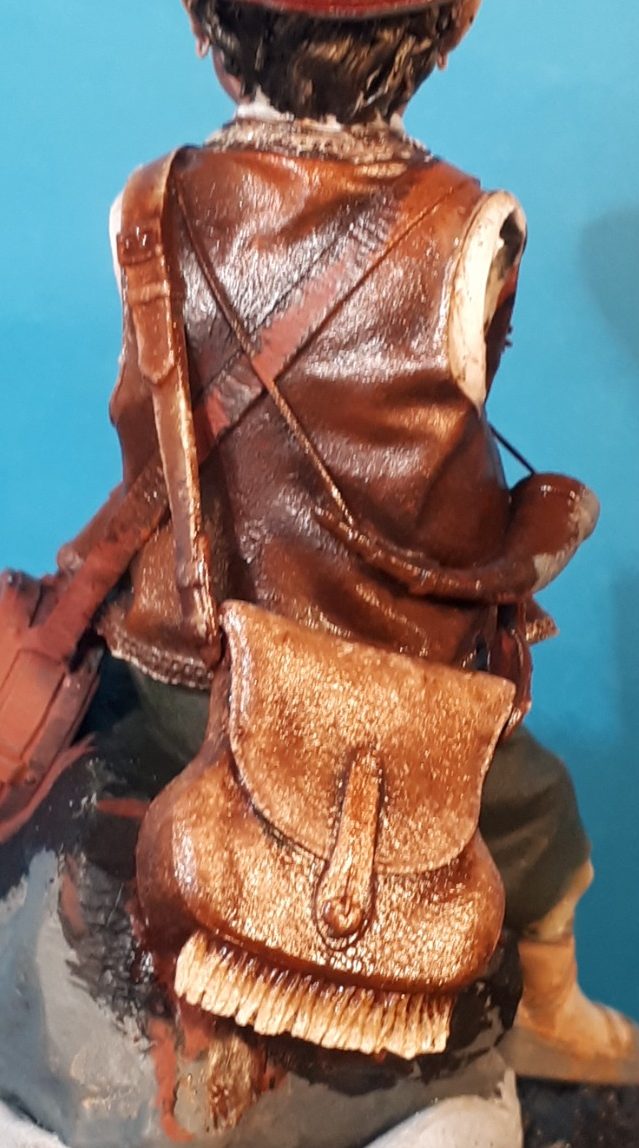
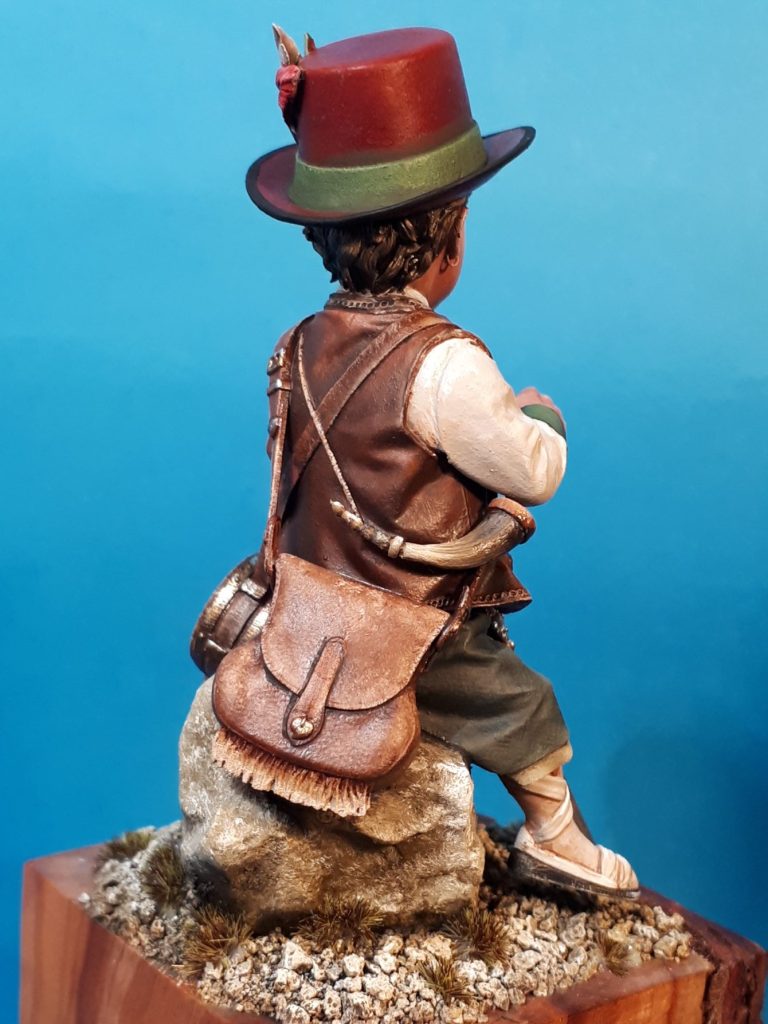
Photo #8 returns to the back of the figure and now that the oils have had chance to dry, they don’t look anywhere near as glossy.
I’ve used some more Vandyke Brown, thinned with White Spirit to make it a lot more liquid, and then painted this around the flap of the bread bag and around seams on the gillet, straps and the bread bag to enhance the shadows and aid the separation of parts.
Whilst not really all that visible, I’ve added some Bronze metallic acrylic to the buckles and also some Steel acrylic to the water bottle, both colours from the Darkstar range.
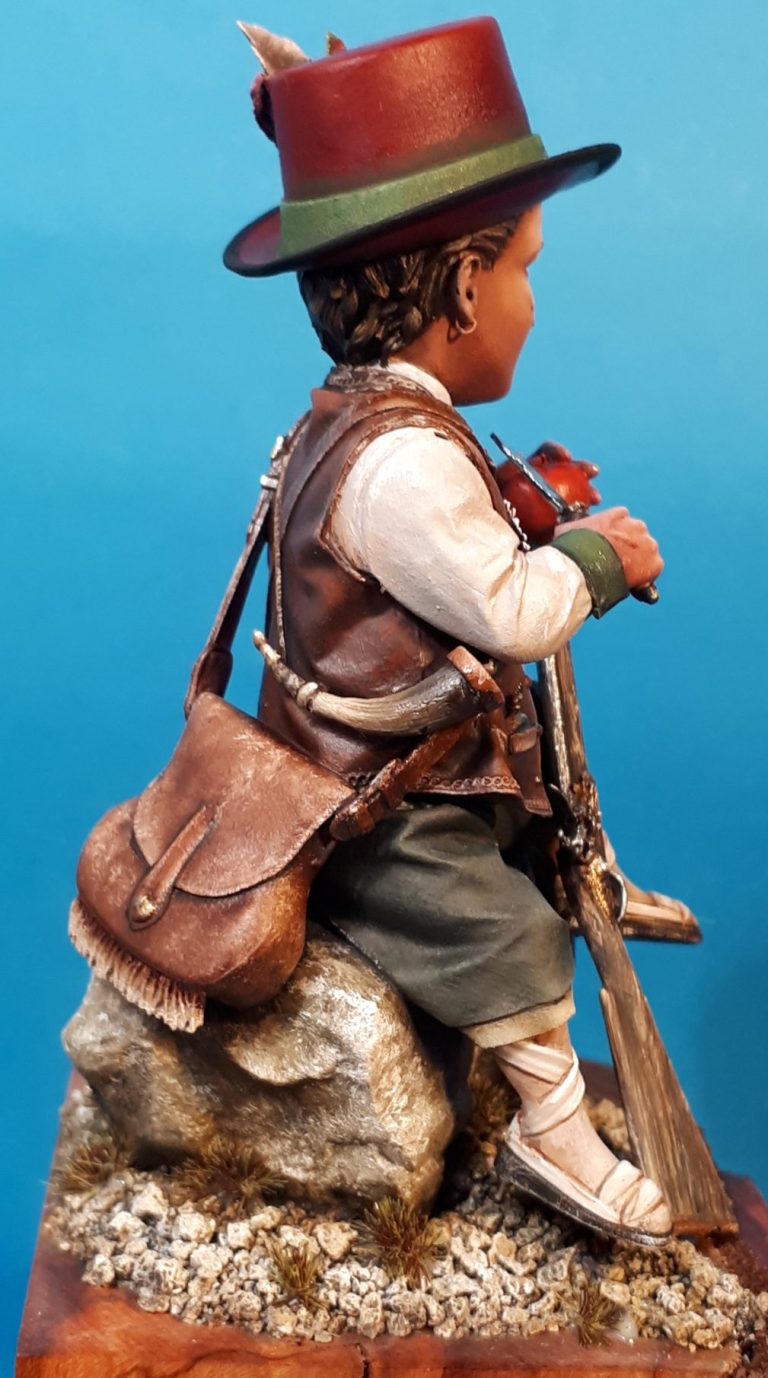
I’d left the arms off the main casting while I got the painting done, and having added wire handles to the arms, painted them separately to match the shirt, and giving them green cuffs to match the trousers and hat band.
In photo #9 I’ve glued them in place, the broken knife blade being replaced with a small piece of plasticard.
The flintlock – shown added in photo #10 – was also painted as a separate item prior to adding it to the base.
Again, it’s a lovely bit of detailed printing, and I painted it to look old and well-used, the wood of the shoulder stock being painted with Vandyke Brown, Mars Yellow and Titanium White oils using an old brush that the bristles were splitting on, and these then allowed a woodgrain effect to be painted on by dragging the brush along the length of the wood areas of the flintlock.
Finished shots and final thoughts.
‘tis a lovely little figure, and it’s one of those models that really helps the painter.
3D printing seems to be more and more prevalent, whether the actual finished product is printed, or it’s a case of producing a “master sculpture” that can then be put into moulds and resin copies made in the traditional way.
At SMC this year ( 2024 ) there were a lot more 3D pieces available compared to last year, and in some cases the 3D prints were a lot cheaper than traditionally processed kits.
The printing on this one is flawless, and whoever designed the files originally to produce it did a really good job.
I’ve several pieces now in the grey army from RP models – yes, I should get some paint on them, but I can say that for kits from a lot of companies, can’t I ?
Looking through these RP kits, it’s safe to say that the production quality is very high, presentation matches that, and Hugo is very good at getting things shipped out to his customers.
Having said that, in the UK Steve Kirtley ( SK Miniatures ) stocks a lot of the RP range, and can save you a bit on shipping charges if you’re in the UK too – or visit his stand at models shows and cut out the postage costs completely.
I like the balance in the RP range too, there’s a host of fantasy pieces relating to Egyptian Gods, and Norse Myth, coupled with historical subjects too.
This piece – to my mind – bridges the gap somewhat. Yes it is primarily an historical piece, based on real conflict during the first two decades of the 19th century, but without any change at all, it could easily be turned into a fantasy piece…… Changing the rifle into an edged weapon or even some kind of laser would move it much further into fantasy or sc I-fi.

So a kit with many, many options, lots of possible research regarding the Peninsular War in Portugal and Spain, and just one of those pieces that perhaps makes you think back to the film “Time Bandits”
Highly recommended.
We need your consent to load the translations
We use a third-party service to translate the website content that may collect data about your activity. Please review the details in the privacy policy and accept the service to view the translations.