Mig 29 A
1/32nd scale kit from Trumpeter
Assembled and painted in 2024
“If only I had more time !”
Probably most modellers get to a point where they make the above exclamation because they have so many ideas, or see things that enthuse them, or buy kits that they promise themselves that they’ll paint…..
I know I have begun saying it, because the ideas and kits are stacking up.
At SMC 2024 I wandered around the competition room in awe of the models on display.
Not just figures, but all the different classes, and one that stuck in my memory was the nose end of an aircraft.
Fast forward a couple of months, and an auction site was offering some very interesting Manga / Macross kits of various aircraft….. A few of which I bought.
I was attracted to them because some of them seemed to be based on existent aircraft, but with some redesign to take them across to fantasy.
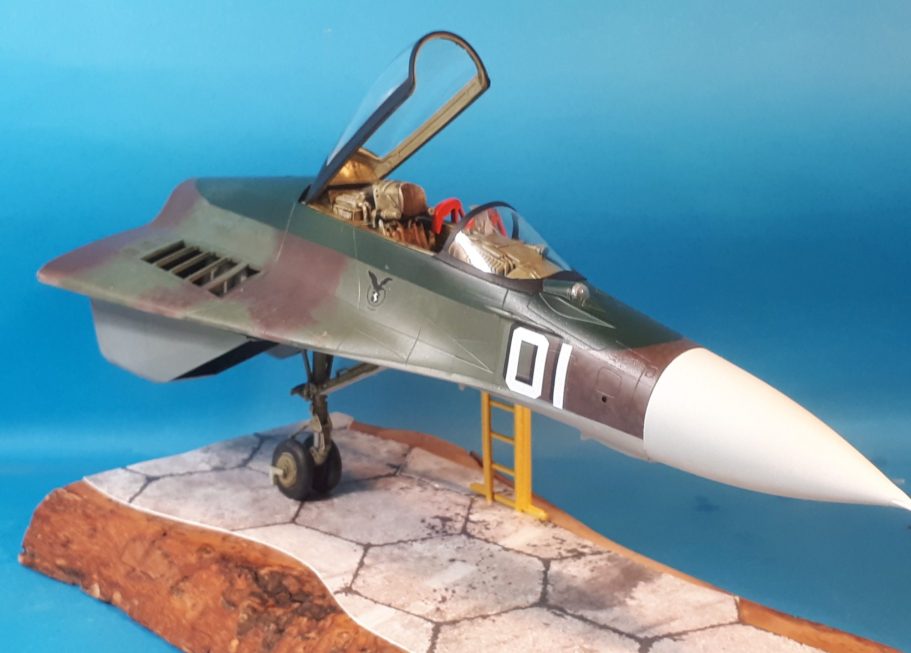
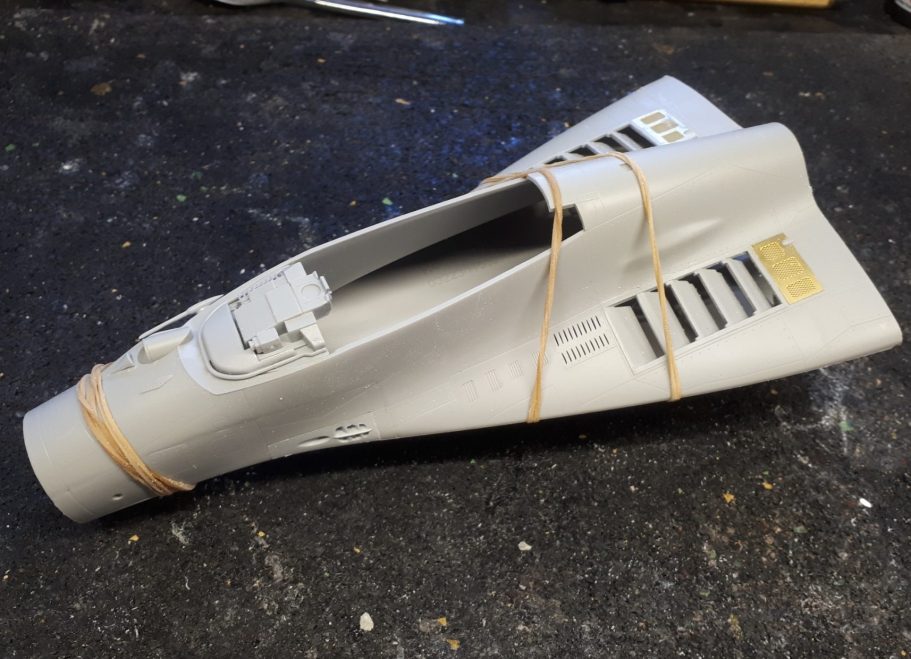
A search on eBay showed me a few more types that were available, and then in amongst the listings was this 1/20th scale nose section of an aircraft shown in photo #1
Hmm, looks a cool idea, but I didn’t have any figures that scale that could be put with it, and the description made it sound a little “toy-like”.
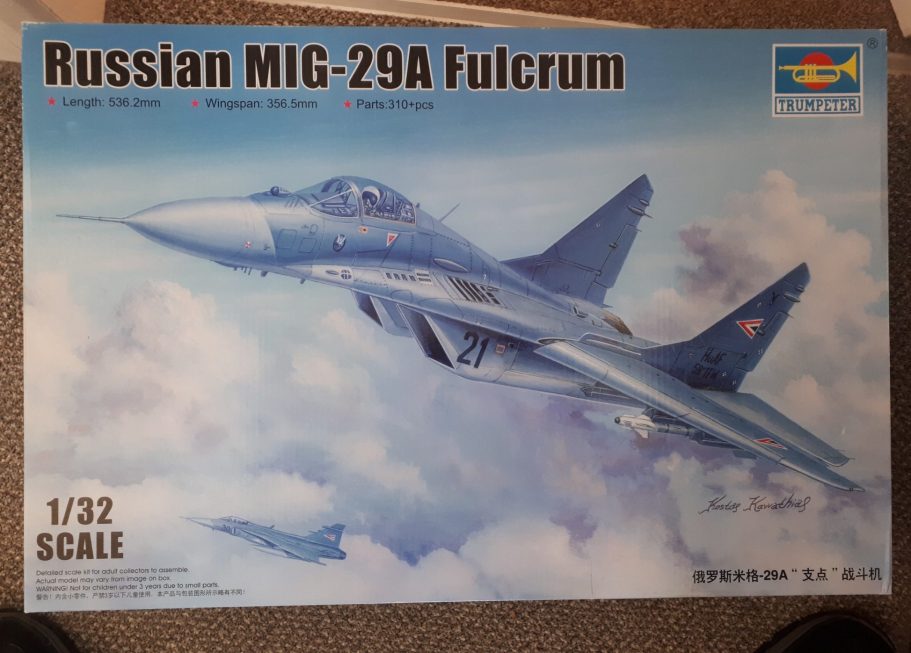
But fear not, I can think laterally ( OK, maybe only occasionally ) and I’d already got the Trumpeter Mig 29A in the stash – photo #2
I wonder……. ?
It’s the mechanics of it that gave me pause.
Would it be possible to support the front end of a 1/32nd scale aircraft on just one piece of undercarriage.
Was it worth trying ?
Could it even be done without showing any extra support in an obvious manner ?
I needed to dry assemble the main parts of the fuselage and decide where the cut-off line would be, and where the front leg was in relation to the rest of the front end…..
OK, after a bit of pondering I decided it was worth a try.
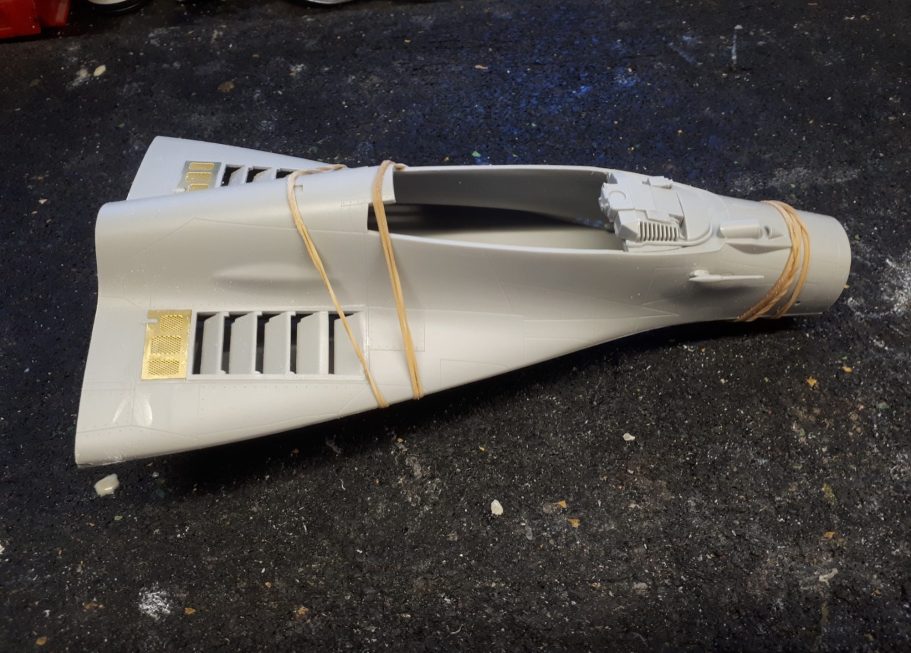
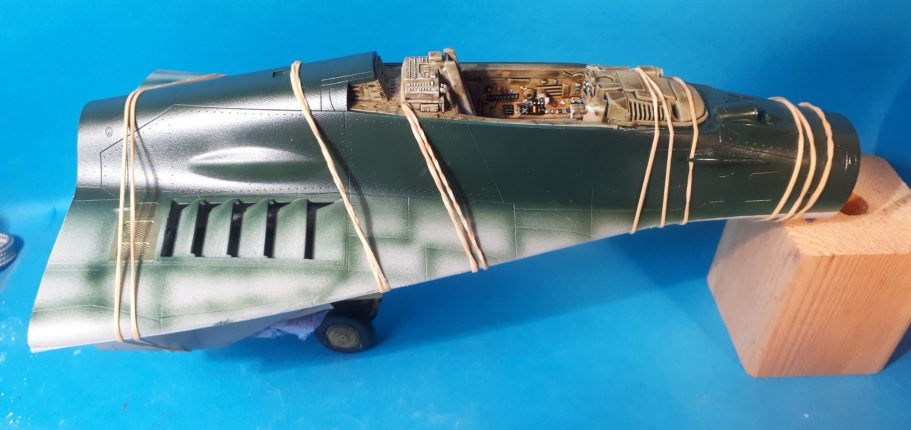
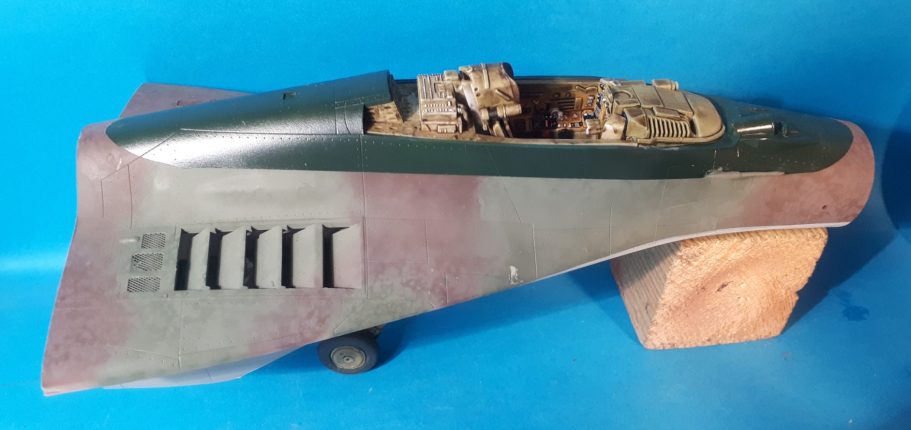
Photos #3 and #4 shows the front end of the model having been fastened together with rubber bands and then the back two thirds of the fuselage cut away with a razor saw.
It was a delicate job, getting a straight line, once I’d found a reasonable place to section the model.
I’d had to select which parts to assemble to the upper and lower main components, and whilst I’d put the cockpit together, I’ll leave off paying that attention for the moment.
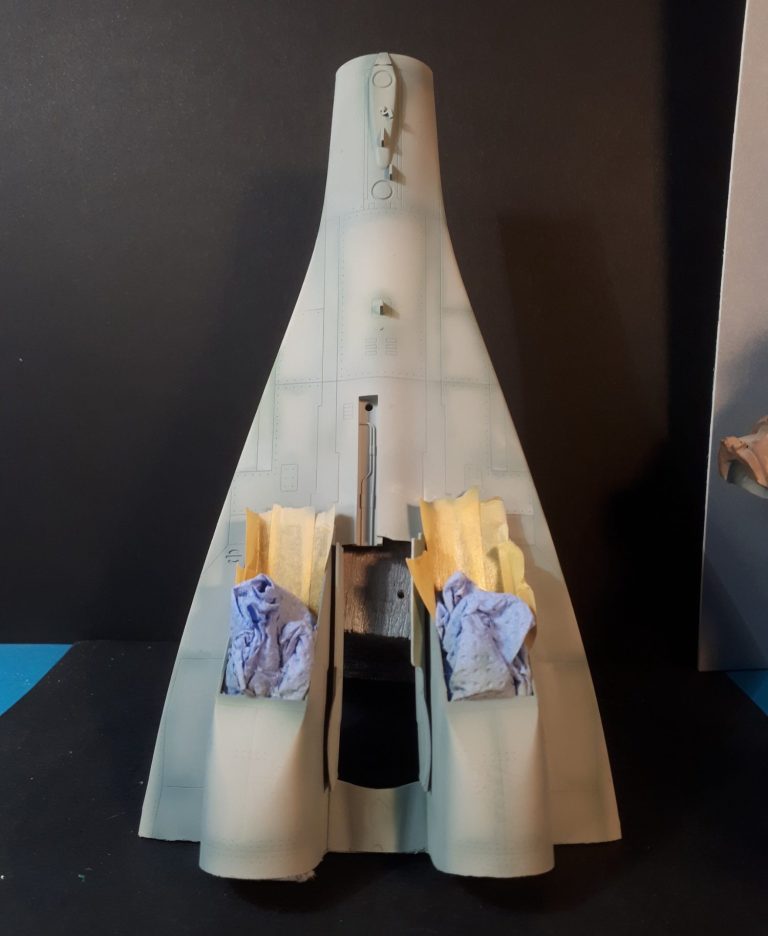
Photo #5 It occurred to me that maybe I could paint the upper an lower components separately, and so I added a dark grey colour to the panel lines through an airbrush, followed by a pale grey to the underside. I masked the intakes because I’d already painted them with the dark grey, fading to black towards the deeper sections at the back.
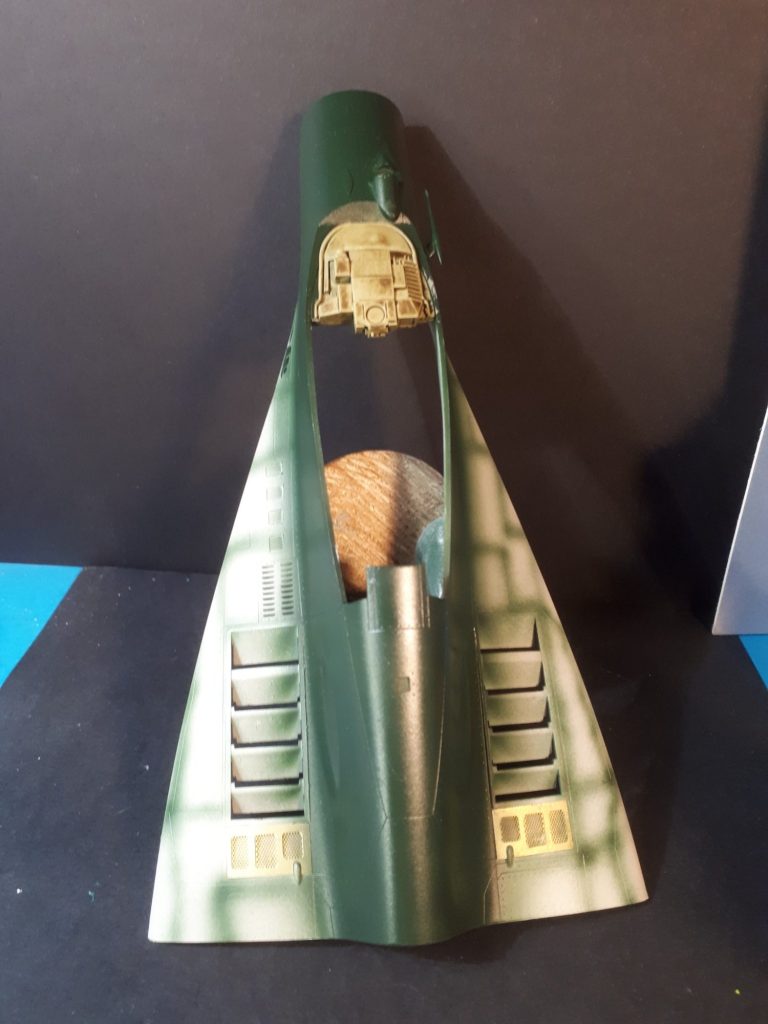
Photo #6 shows the upper section, with a dark green sprayed on around the central section and the same colour used to mark out the panel lines.
I thought that I’d join the upper and lower parts up at this stage, but that would also mean that I’d need to add the cockpit between them at this point too.
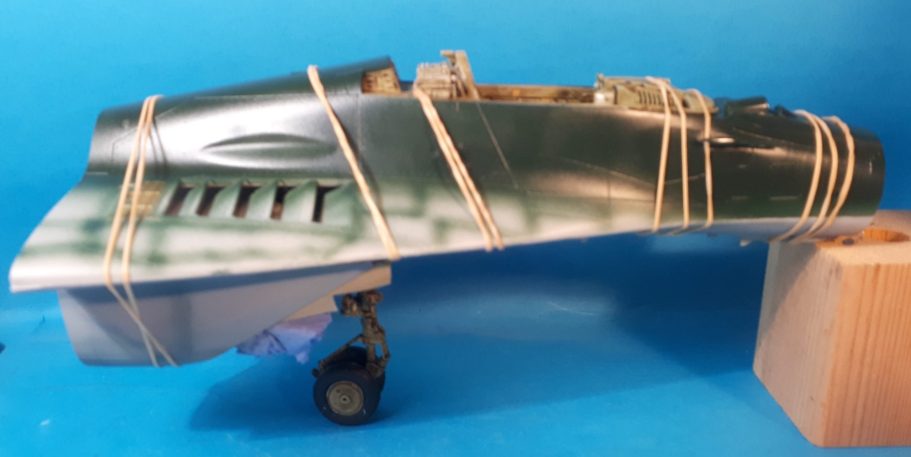
Photos #7 and #8 and the glue has been added, along with some rubber bands again, this time to hold things together whilst the glue cured.
I’ve temporarily put the single wheel strut in place, although it’s not been fastened there yet.
The nose is balanced on a small block of wood, so see that it’ll look like when the model is finished.
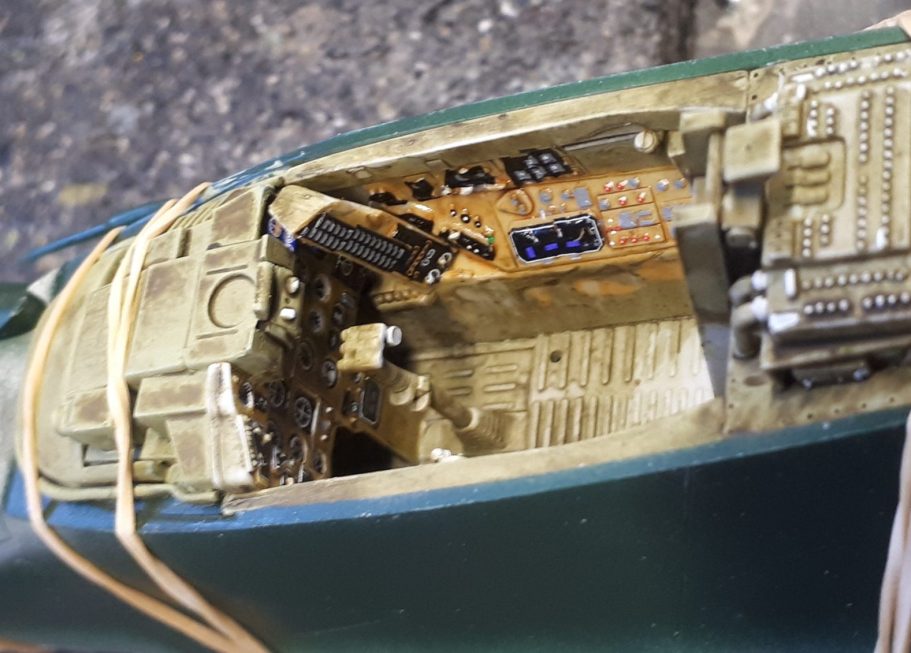
Photos #9, #10 and #11 - the cockpit. The kit is very detailed, and the cockpit has plenty of parts to make it look busy. The decal sheet offers a lot of small transfers for the different sections of the instrument panels,
At this point there is the HUD has yet to be added, there’s photo etch and clear parts involved, and I thought them too delicate to add at this stage.
I’ve also left the ejection seat out at this point, simply to allow a clearer view for the camera.
The cockpit has been painted with a mid green acrylic, then I’ve used Burnt Umber oils, thinned heavily with White Spirit to wash over the detail and allow the paint to settle into the recesses.
Once this was fully dry, the decals were added and smaller details were painted in that the decal sheet didn’t supply.
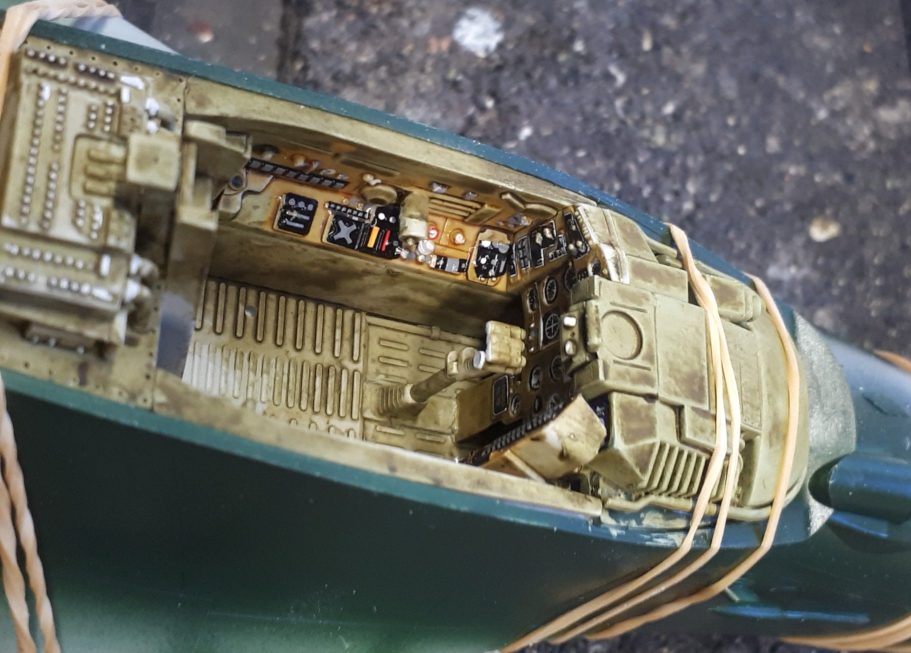
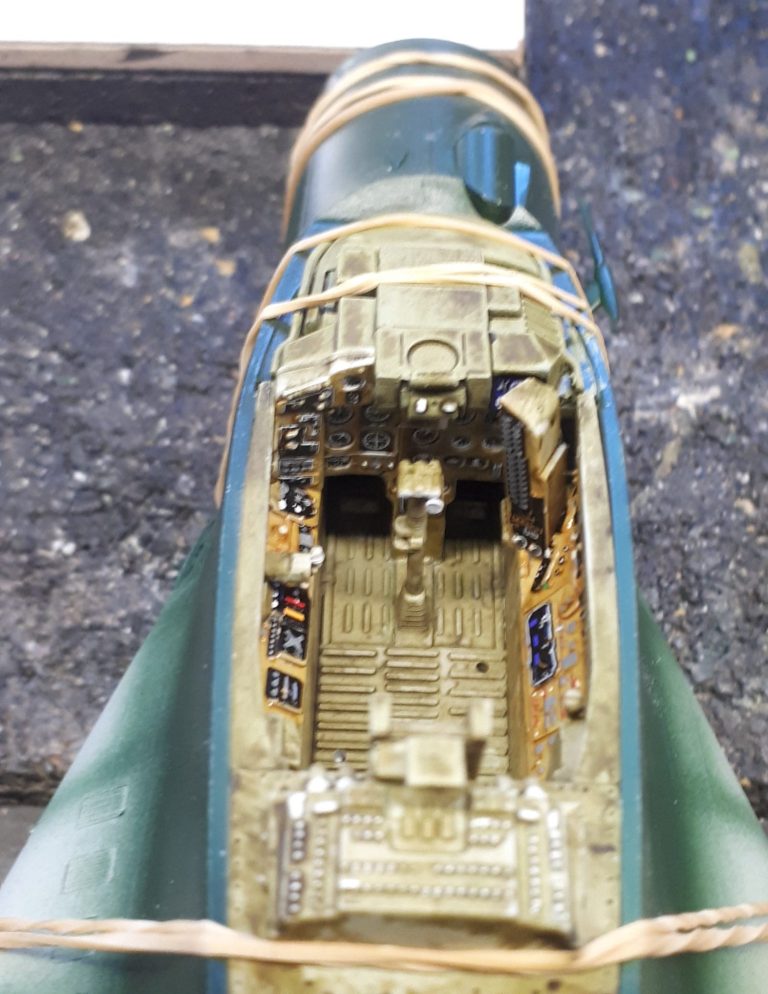
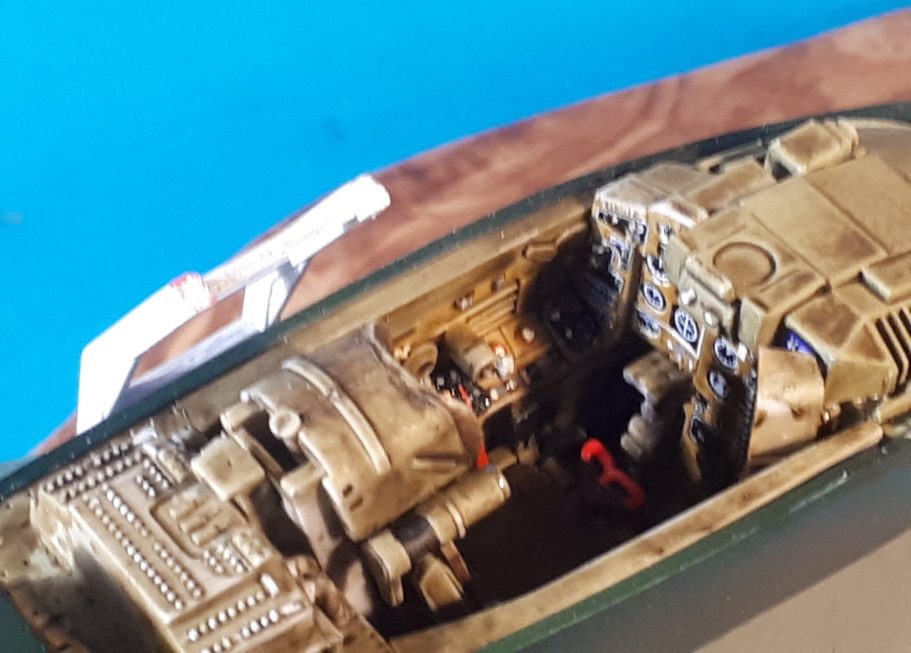
Photo #12 is a bit blurred, but shows the ejection seat having been added to fill up the cockpit a bit.
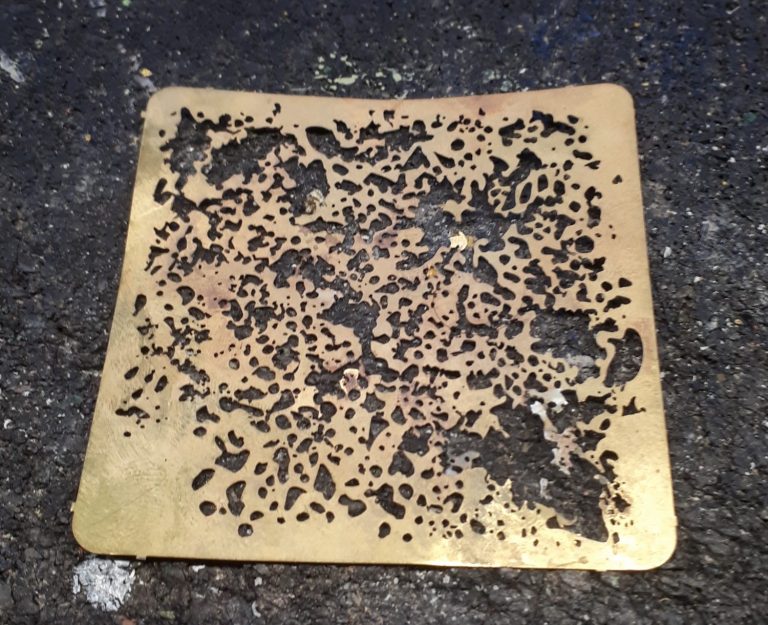
I’ve mentioned the use of the masks to make things look grubby and dusty – shown in photo #13 – in a few of the articles I’ve posted here about AFV’s and I suppose they can be used on aircraft as well.
Certainly in this case I thought I’d give it a go.
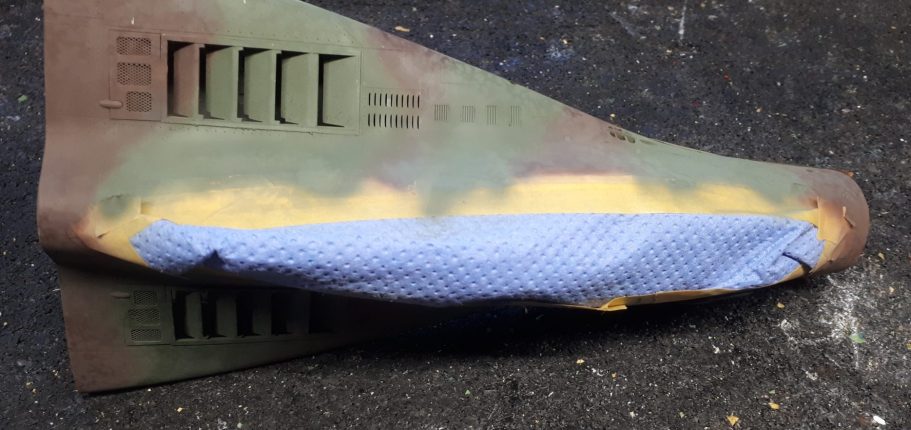
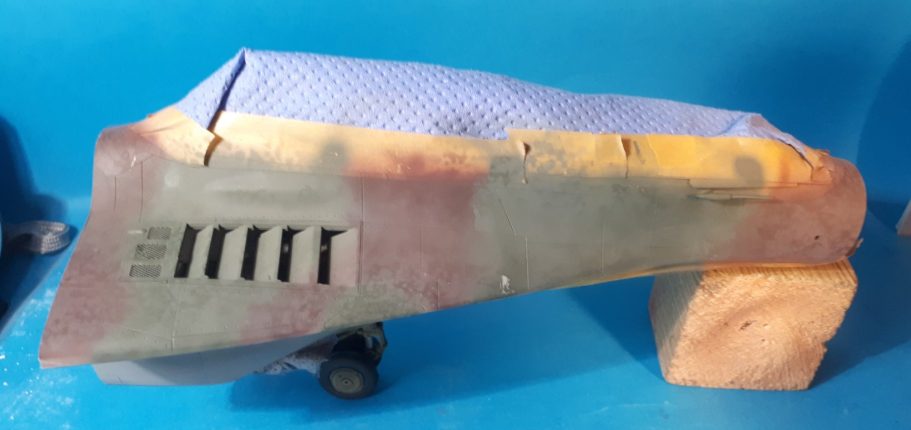
Photos #14 and #15 show how I’ve masked off the cockpit and some of the green that I’d painted down the central upper section using Tamiya Masking Tape and some kitchen paper, then got to work spraying a brown and green camouflage pattern on the upper surfaces – Tamiya Nato Brown and Mid Green.
This in turn was weathered with Tamiya Deck Tan through the aforementioned weathering mask.
Photos #7 and #8 and the glue has been added, along with some rubber bands again, this time to hold things together whilst the glue cured.
I’ve temporarily put the single wheel strut in place, although it’s not been fastened there yet.
The nose is balanced on a small block of wood, so see that it’ll look like when the model is finished.
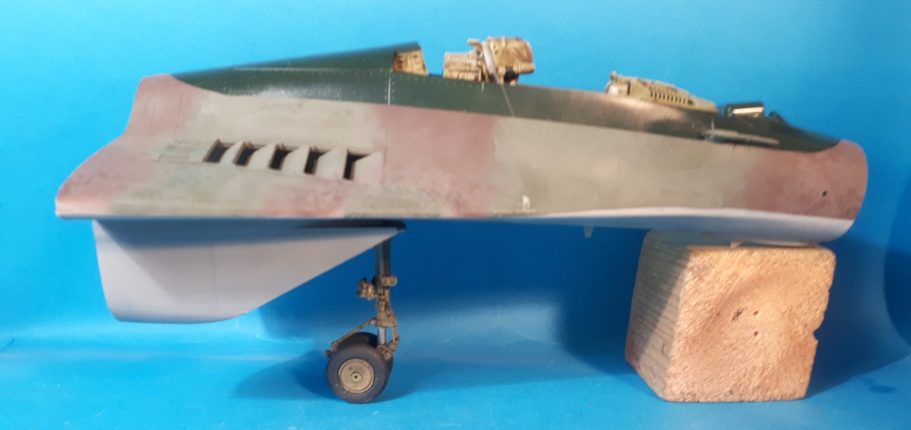
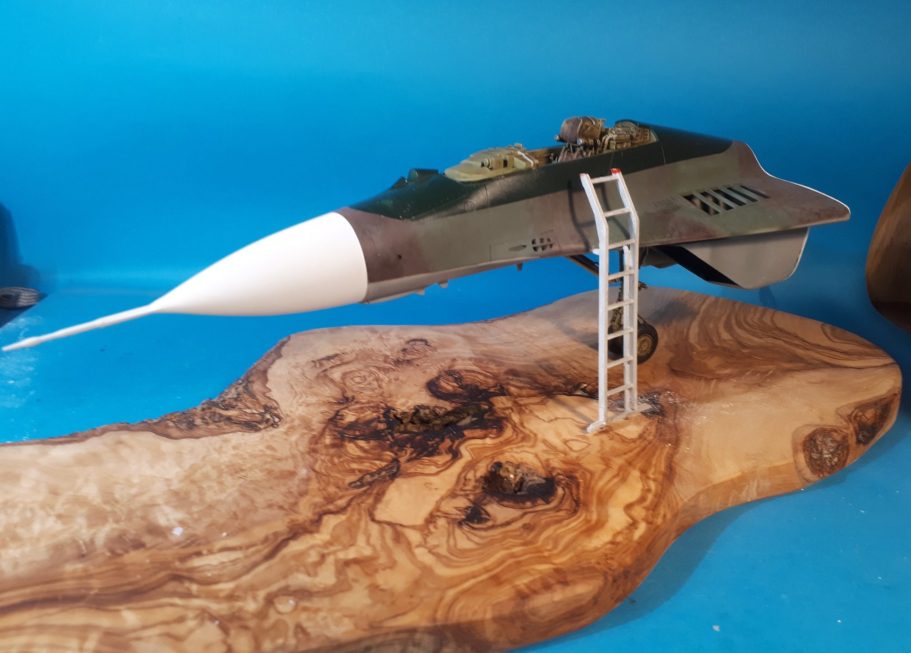
Photo #18 and now for the theory to be tested out.
The kit comes with an access ladder that hooks onto the side of the cockpit edge. I thought that by adding a fairly substantial piece of wire to the side of it, allowing for a short piece of the wire to fasten into the base, and the other end into the side of the aircraft, then this would help to support the model in it’s shortened state.
This shot shows that.
I’d planned this early on and added a fair sized lump of Magic Sculpt putty inside the fuselage prior to the upper and lower halves being jointed, having calculated roughly where the pin would be situated.
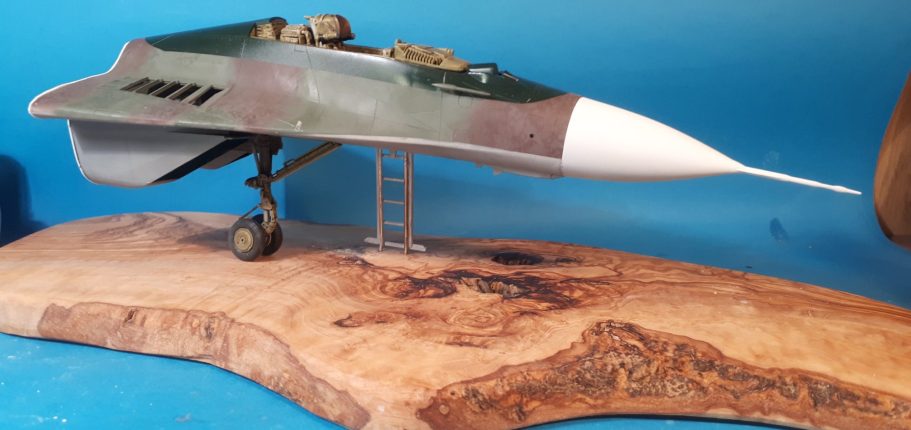
Photos #19 and #20 show more views at this point. I haven’t yet drilled into the wheels, but two pins would be added – one into the base of each tyre / wheel which would further anchor the model to the base.
A second wire was added to the ladder on the opposite side, although this would not fasten into the aircraft, it would however fasten into the wood base.
The nose has been sprayed white and glued in place at this point too.
I wanted to know the overall length of the model for the size of wood plinth that I’d need, this one being sourced from TK Max whose kitchen section has some very nice serving platters and chopping boards in various types of wood, this one being a rather nice piece of Olive wood.
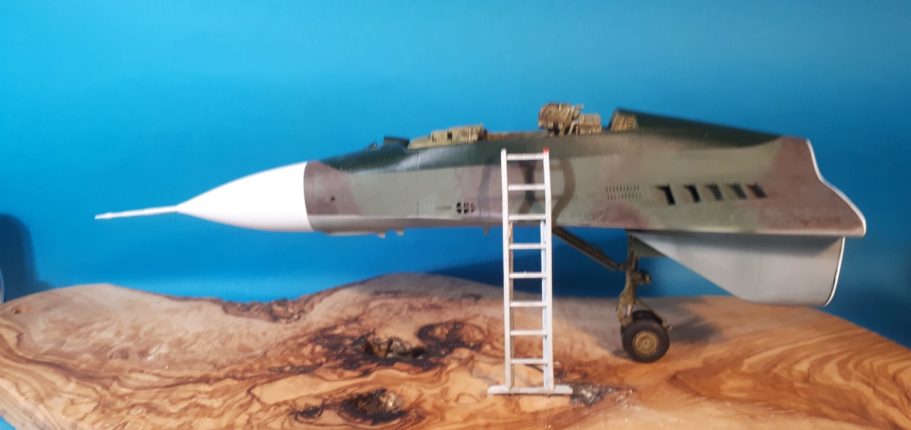
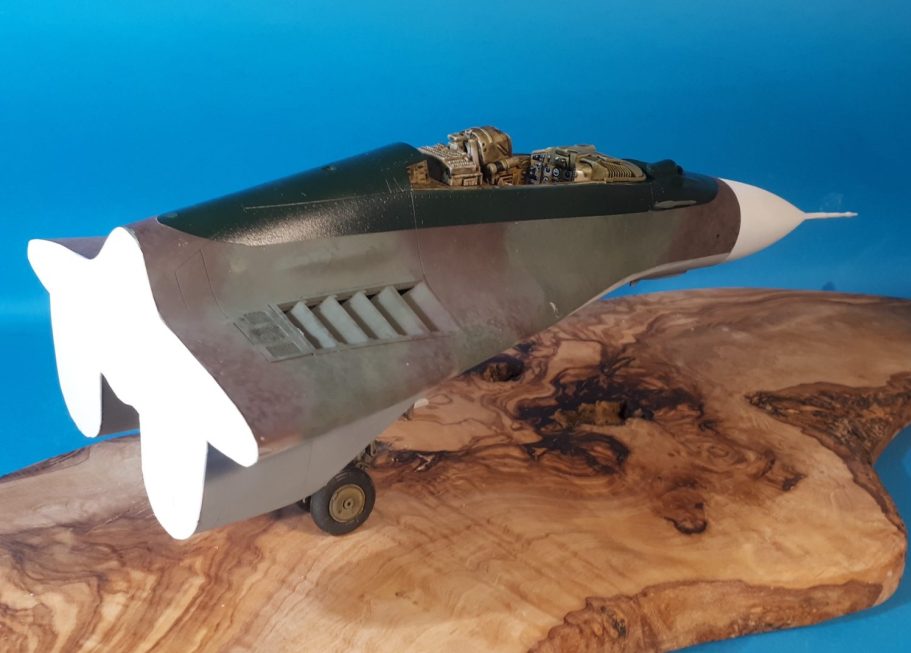
Photo #21 shows the back of the model, with a flat section of plasticard cut to shape and glued in place. I put the model onto the plasticard and drew around it – very high tech – cut the shape out and fastened it in place, leaving the model sitting on it’s rear overnight to allow the glue to cure.
Some fine trimming was needed as I’d intentionally cut the plasticard slightly too large to give me a little “wiggle room” for fitting it in place.
I should have done this part prior to painting, but hey-ho, a little bit more brown, green and grey through the airbrush didn’t cost too much time and effort, and disguised the edge of the plasticard sufficiently well.
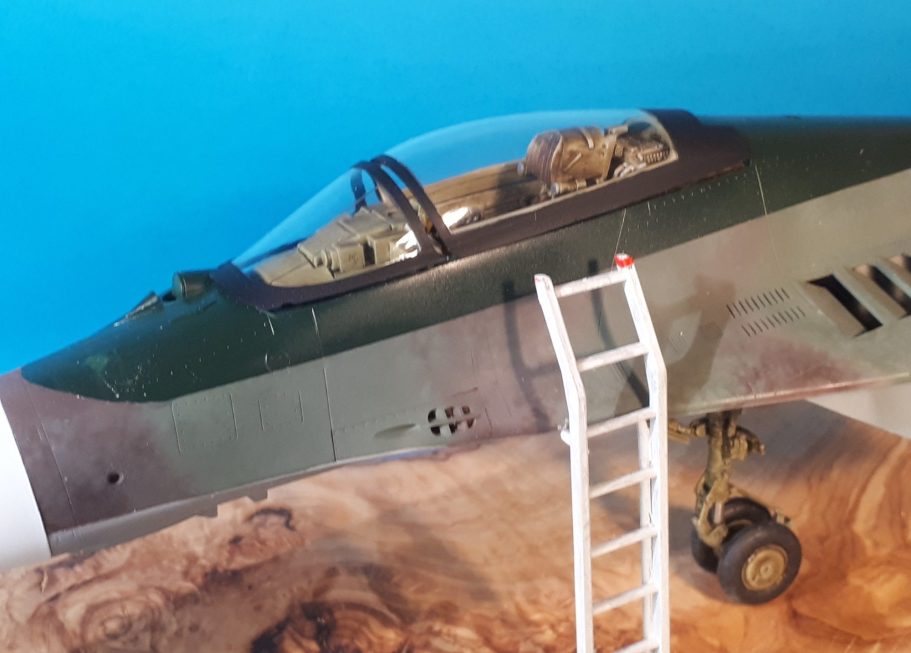
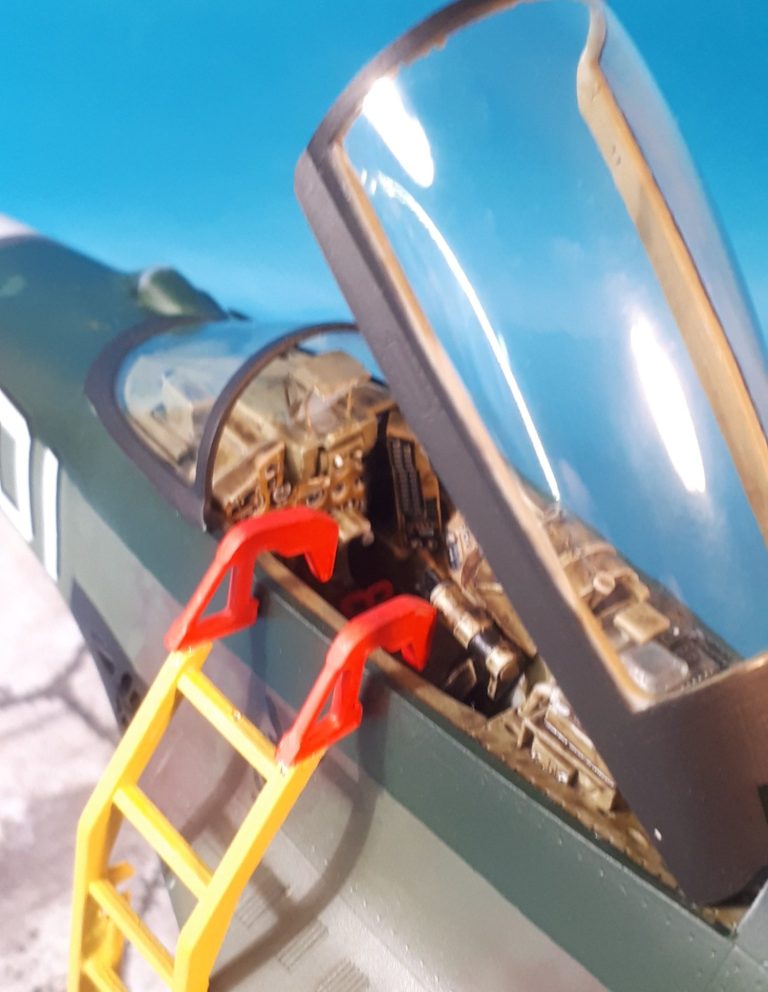
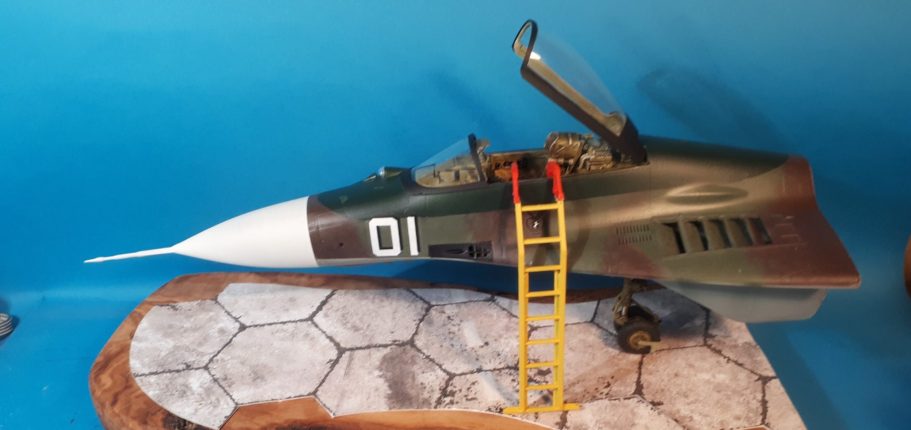
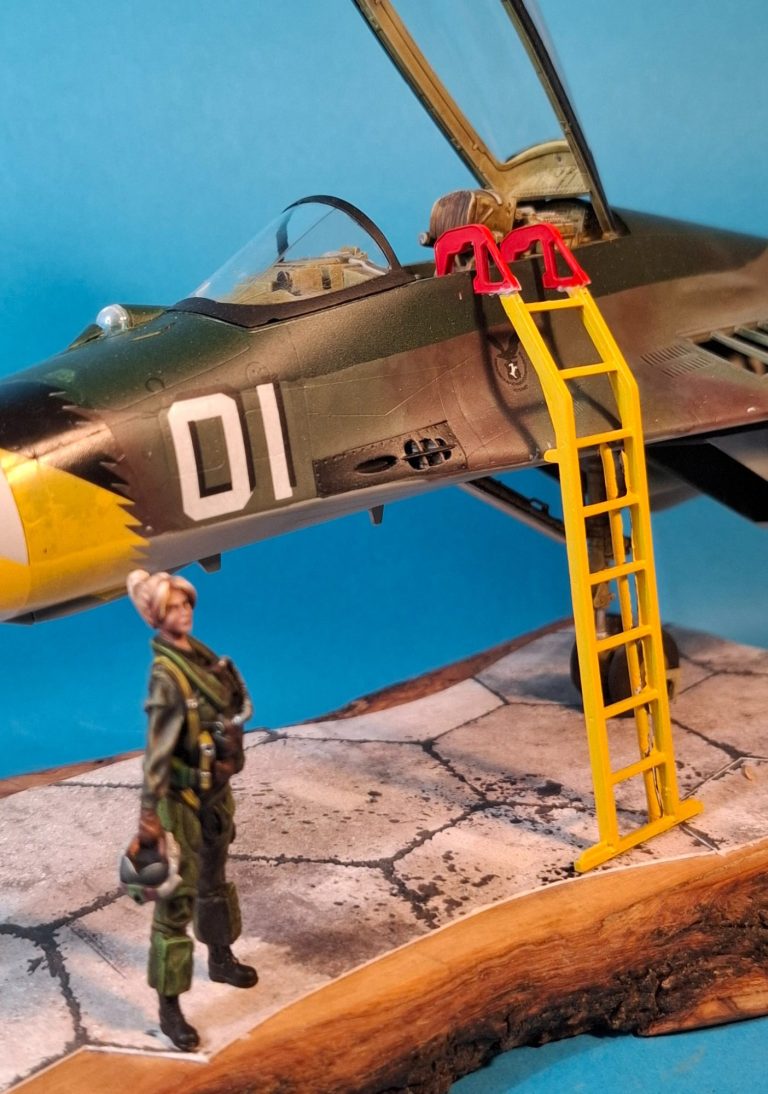
Photo #22 shows the ladder in position. The upper ends will be added once the ladder is glued in place, but before that, I need to paint the ladder yellow and the upper sections red.
I’ve balanced the glazing in place at this point too, just to see how it looks, although the rear section of the canopy will be fastened in an open position.
To balance out the paint finish on the fuselage I’ve sprayed a couple of light coats of Mr Model Matt Varnish, which knocked back the gloss effect of the green central section.
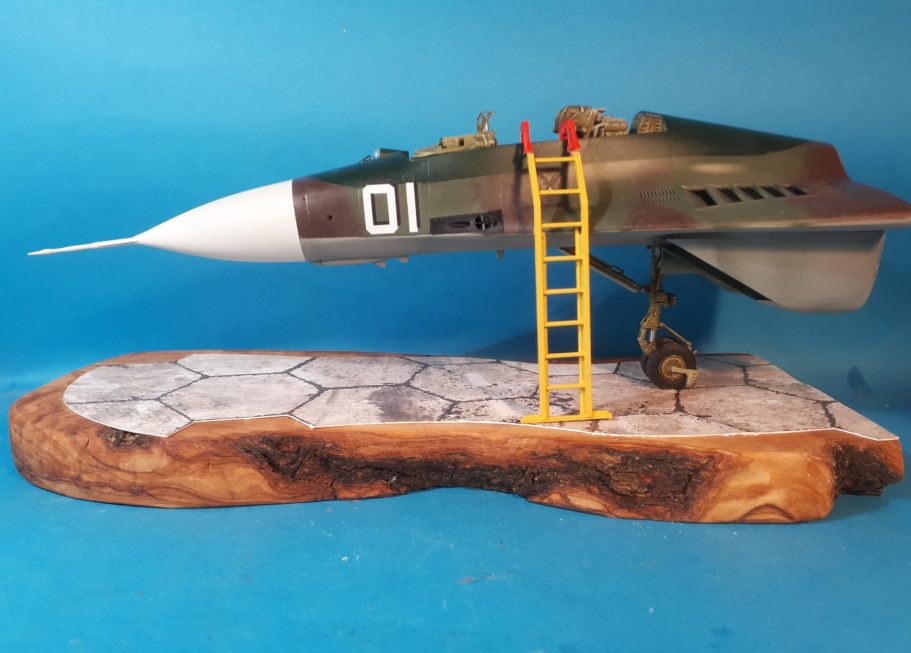
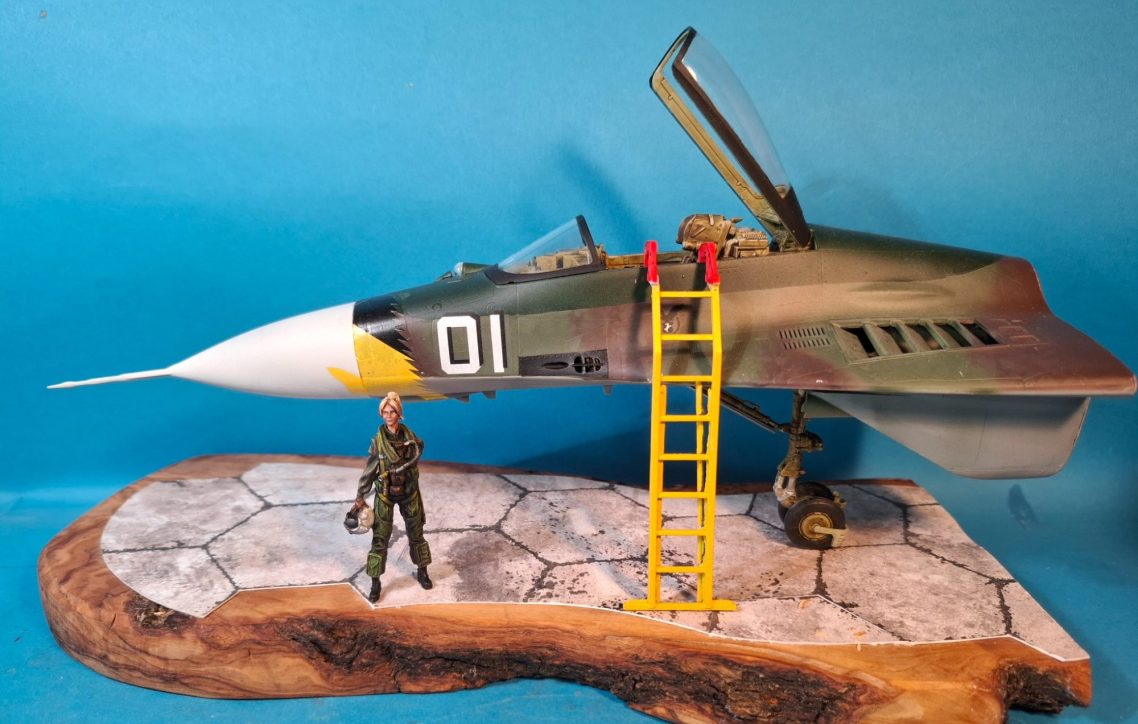
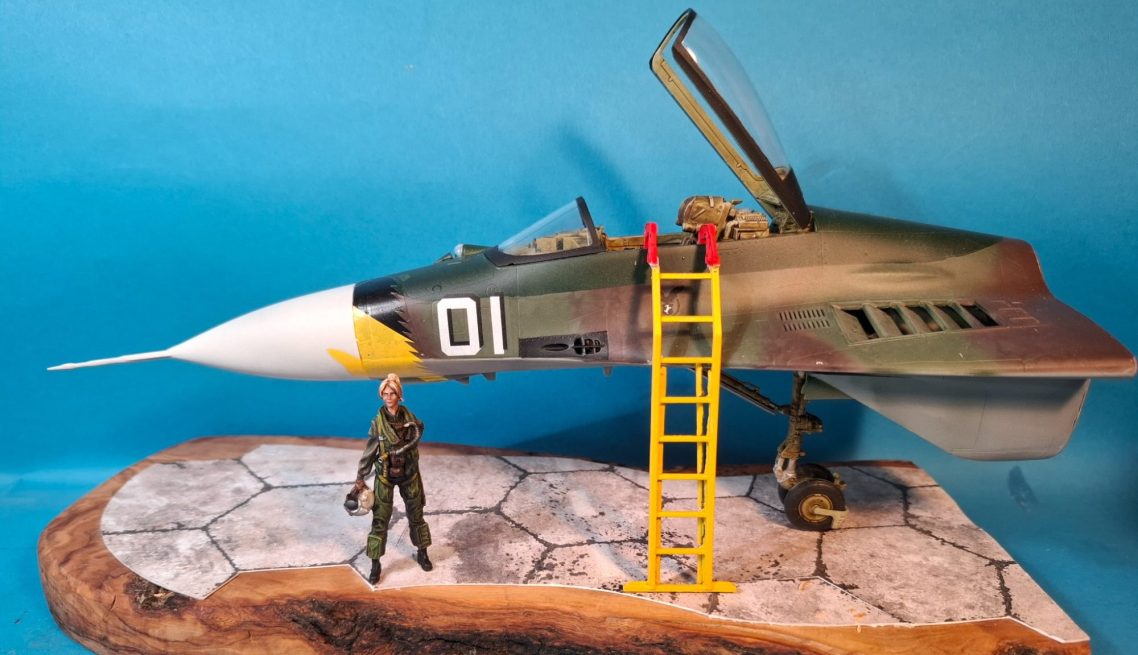
Photo #23 and some decals have been added here. There’s still some to be added yet, but I was more interested in seeing if the model would balance with the two pins into the wheels and the other two pins in the ladder.
I was most impressed to find that not only did it work, there was no wobble when I moved the model about.
The other things I’ve done at this point is trim off the back end of the plinth to match the shape of the back of the model, and also add some hexagonal paving from a pre-printed set I got off eBay.
It’s 1/48th scale, but who would be able to tell. It’s pre-weathered and looks fine.
The pins on the sides of the ladder can be seen, but appear to belong, simply because they re at both inner sides. I think if I’d just added the one on the right to support the airframe, then it would have been noticed more.

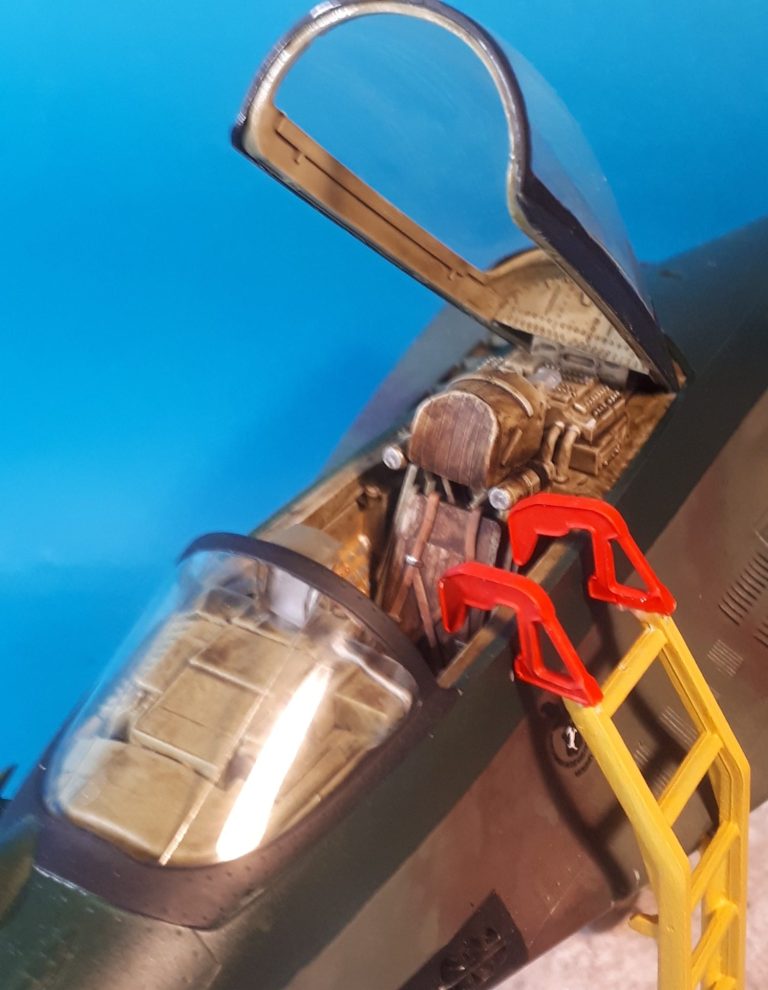
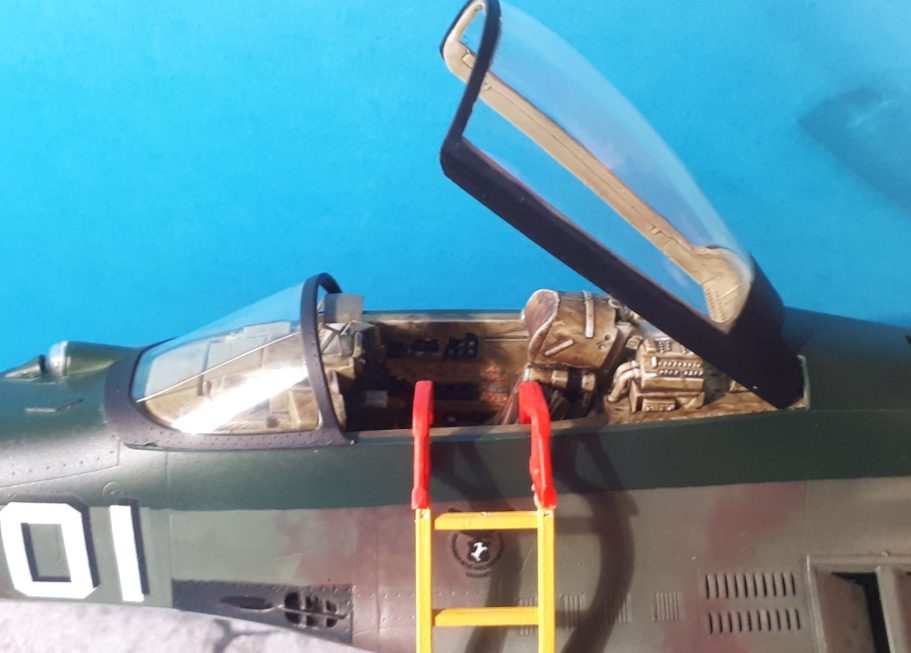
Photo #24 is where I get a little nervous. I’m still not really comfortable working with clear parts, although at this scale they’re nicely in scale for thickness and on newer kits like this, they’re very clear.
I’ve added the main canopy here, fastening it in it’s open position, and have added a few other smaller clear parts too.
Photo #25 and the front screen has been glued in place to complete construction.
It figures.
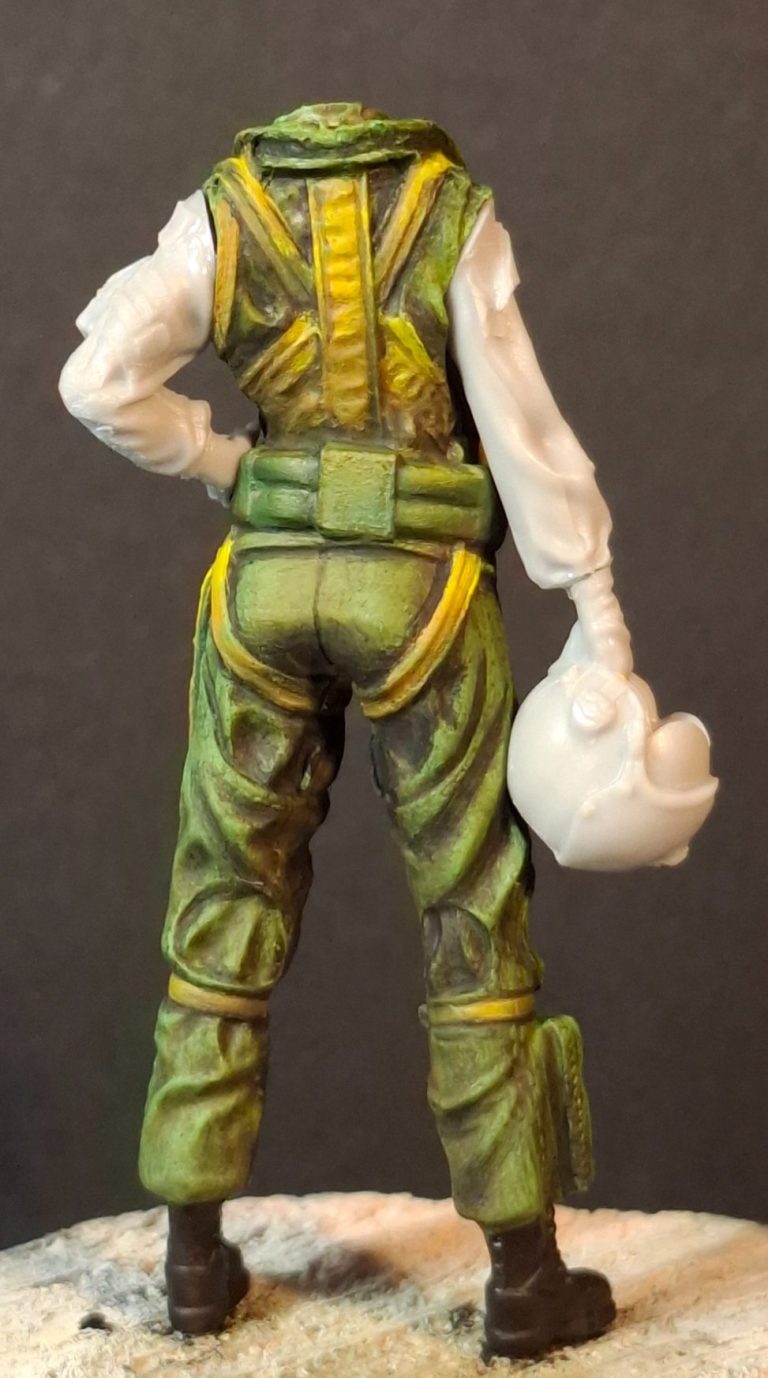
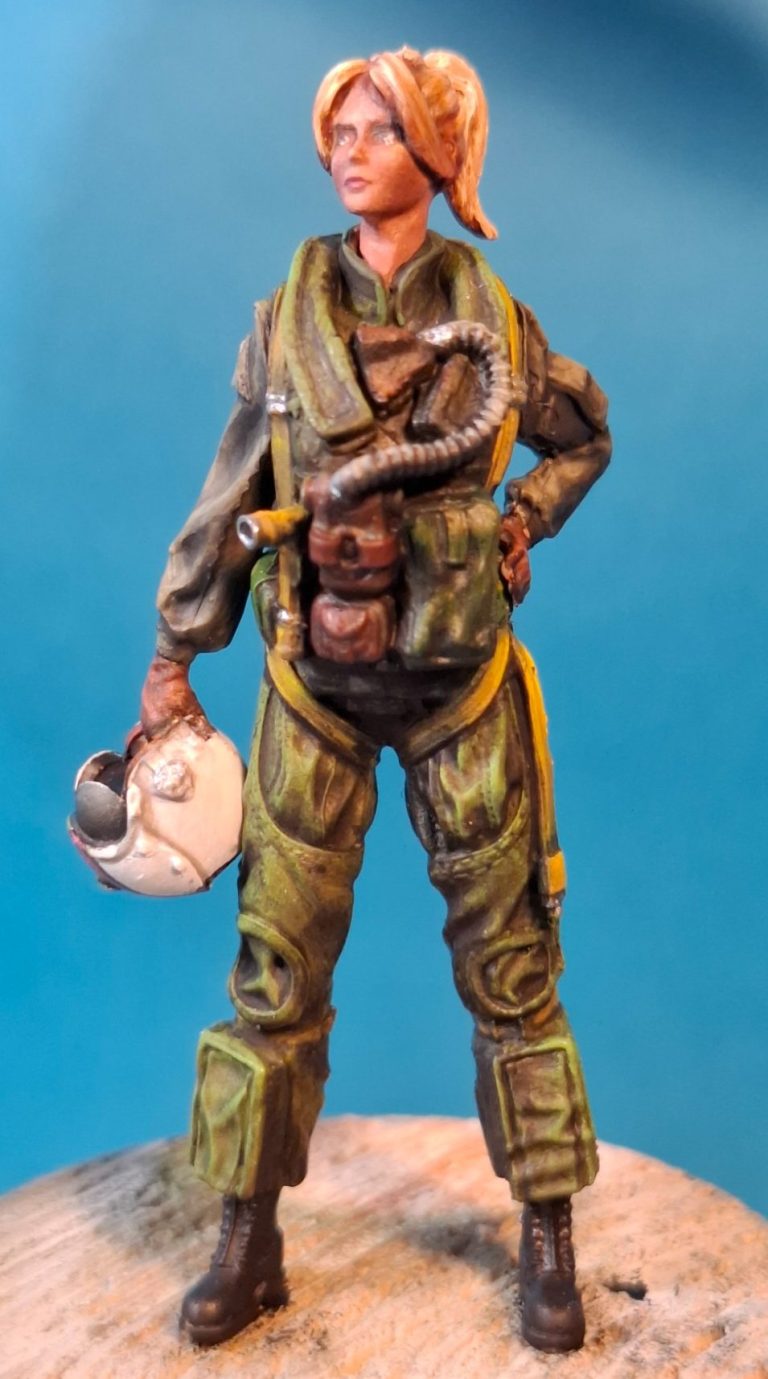
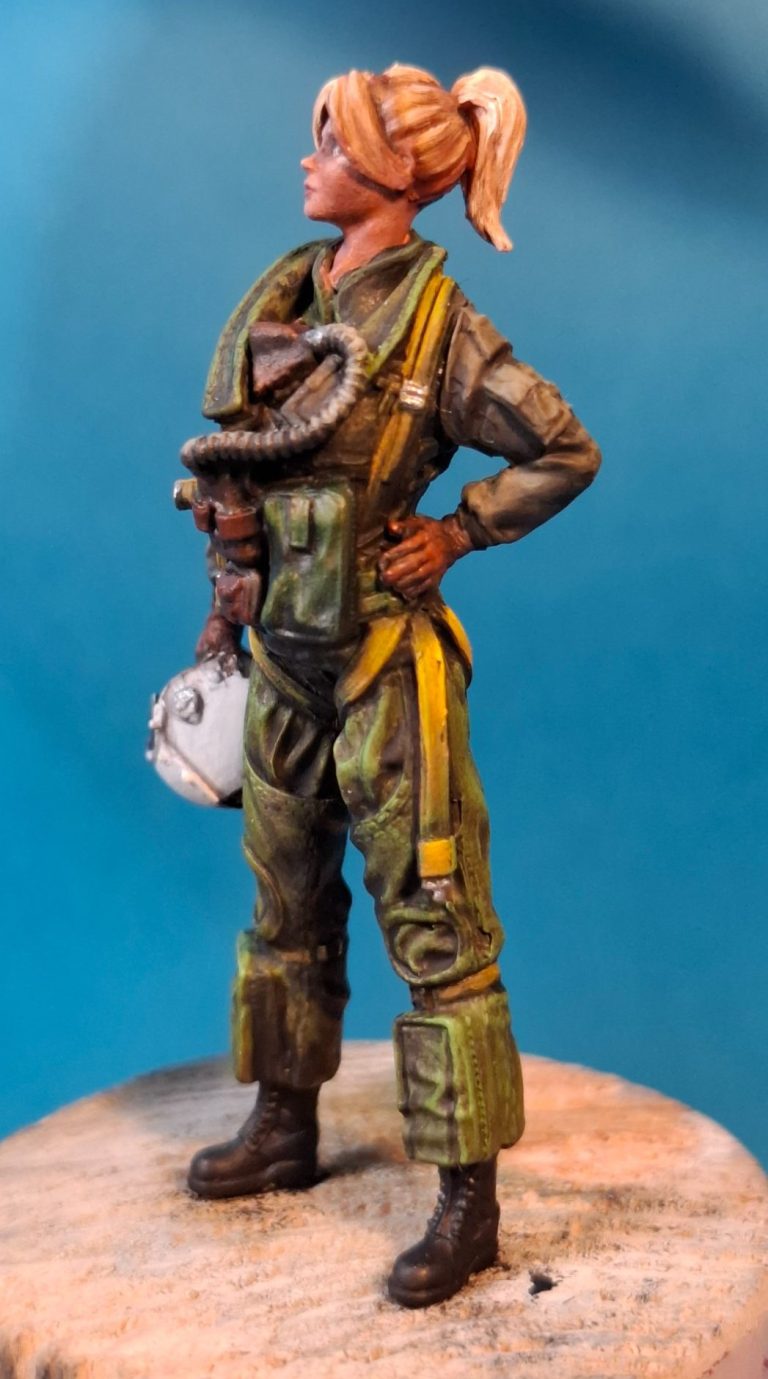
I’ve got a couple of figures to go with this model, sourced from olgapover (1866) on eBay. I decided to used the standing figure shown here ( the other is posed stepping off the access ladder into the cockpit and will be used for another project ) .
I used a lot of greens on the flight suit, with some yellow for the straps and black for the boots.
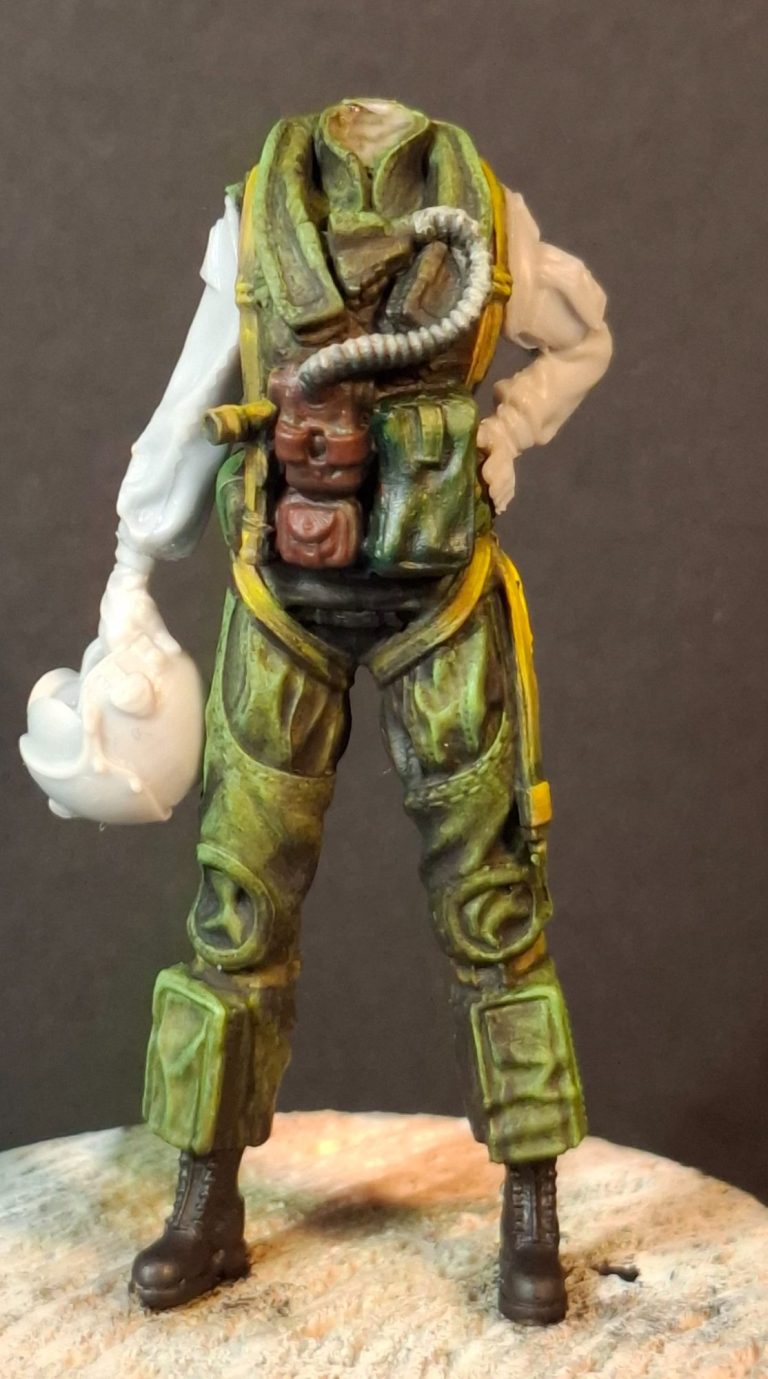
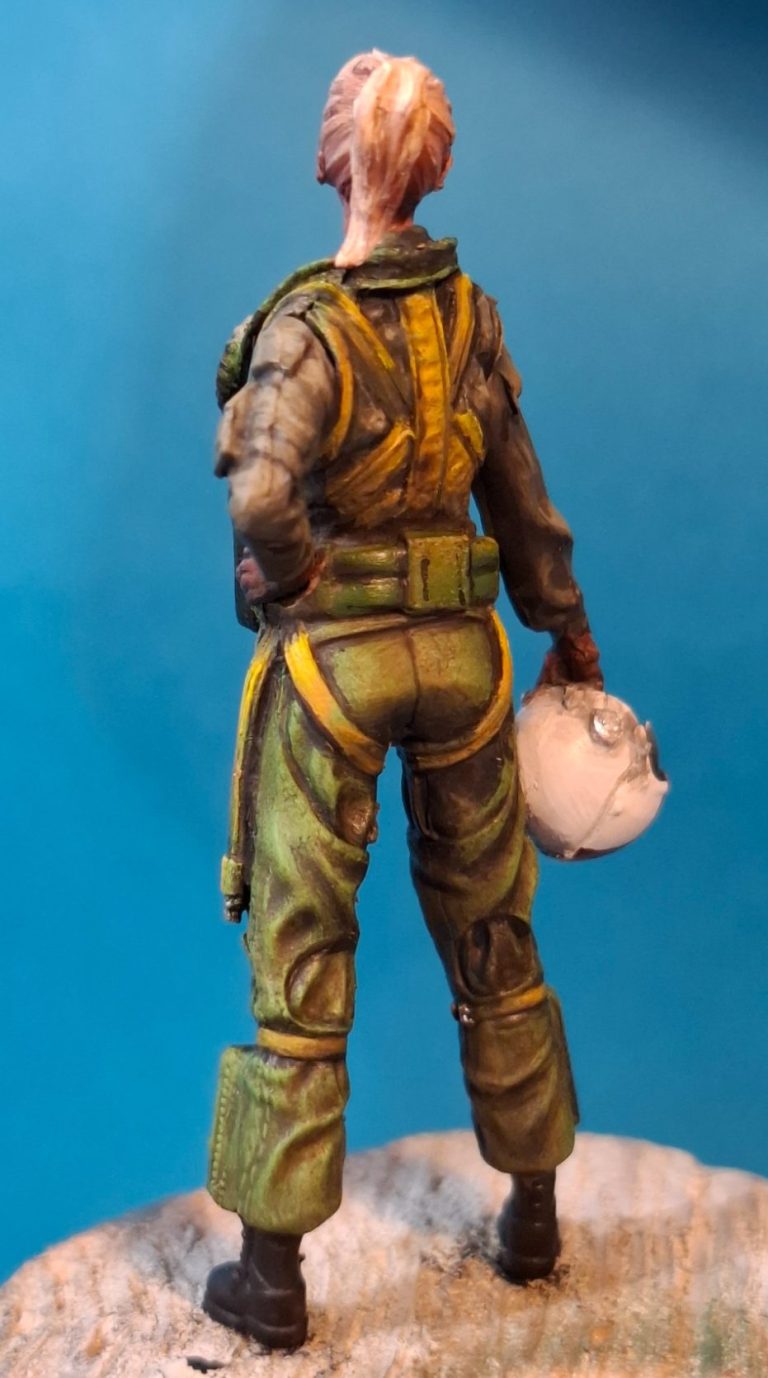
It’s a nice little figure to paint, lots of detail and a decent face that helps the modeller get a decent look to the figure.
The arms and head are separate parts, and I painted the body and legs prior to adding them as they would make painting difficult if added before the clothing is completed.
There’s nothing out of the ordinary in the paint method itself, although I did use a fine brush and some very dark green oils to pick out the details on the clothing.
Other than that, pretty standard stuff, and the fact that the figure is so well sculpted and printed helps the painter a great deal.
Final thoughts.
As a test bed for whether this would work, I’m really pleased with the result. The model balances firmly in place, and although the construction is a lot more involved than on models in smaller scales, the kit assembles easily.
The only hardship was self-inflicted, in that I had to change around some of the sequences to allow for what I wanted to end up with.
I’m not too pleased with the camo finish though. I think I should have gone for something a little more interesting and leaning towards fantasy. Like the aircraft in photo #1
There’s also more weathering I could add to the underside if I was to have a “do over” of something similar in the future.
“What’s happening to the parts not used ?” you ask.
Well, there’s some nicely detailed engine parts that could be pressed into service on a fantasy vehicle, and I already have ideas for that.
But look, we’re back to that initial statement – “If only I had more time !”
Strange, but true.