Abaddon
Forgeworld 1/16th scale Cold Cast Porcelain figure
Painted in 2001
This is the second offering from Forgeworld that I’ve had the chance to paint, and again it’s one that I’d thoroughly recommend as an addition to anyone’s fantasy collection.
There’s quite a lot of components in the kit too, certainly a lot more than I was expecting, a lot of them making up small details or possibly optional bits.
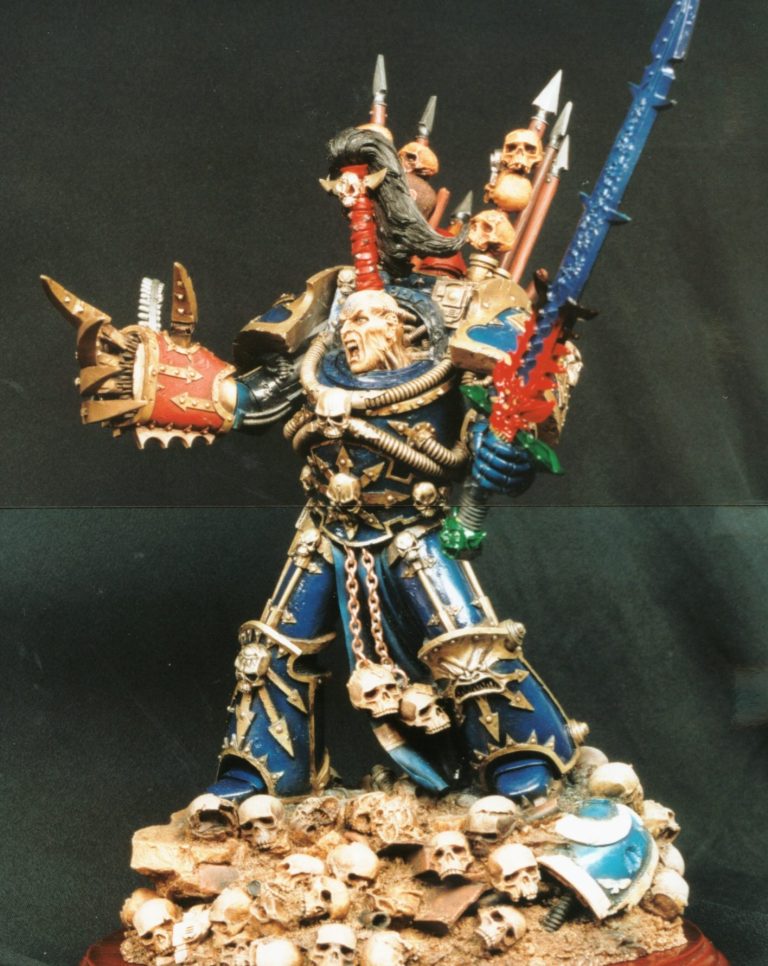
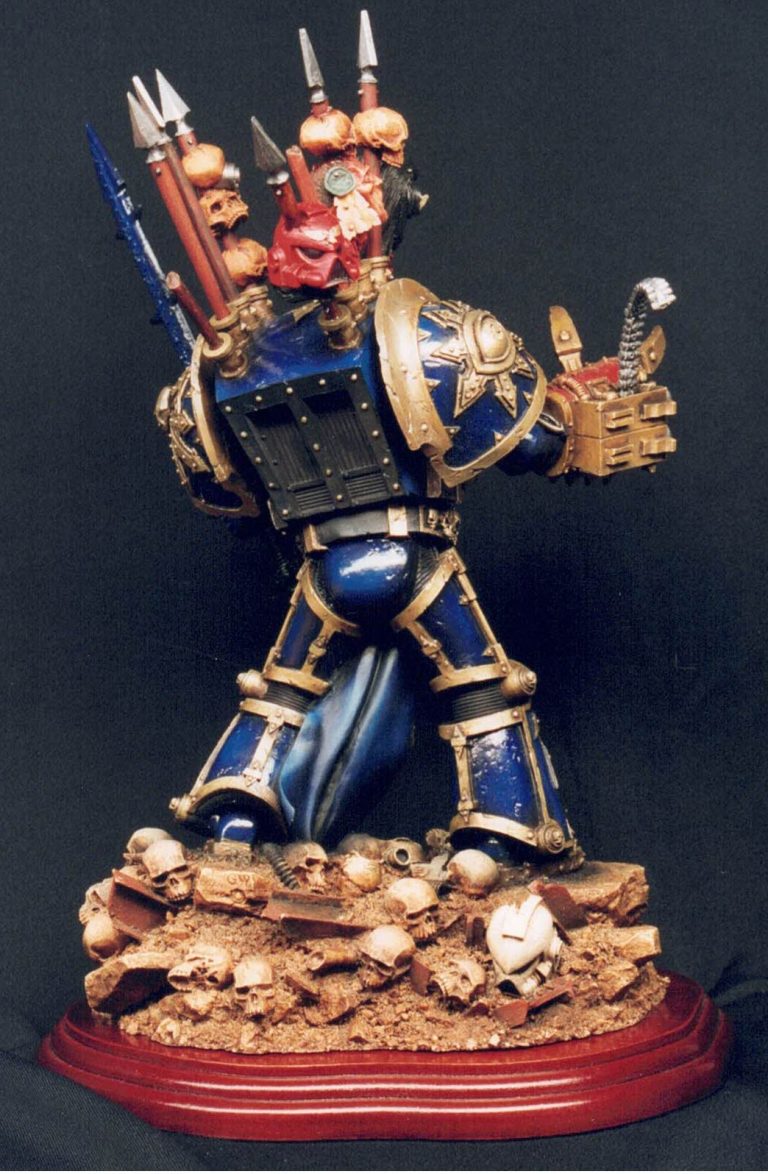
The base is very detailed too, a lot of time and attention can be spent on this area alone, the whole model being a three dimensional rendition of a White Dwarf magazine cover ( also pictured with the model.
Although this is a fantasy piece, so painting options should by rights be pretty open to the modeller, as Games Workshop’s 40K Imperium develops, more characters are added and named, and in this case there is a definite and intended connection to one such character. So I guess there isn’t much variety to choose from regarding the colours to be used, only a case of how much they can be safely varied from the future “history” laid down by 40K writers and game module controls.
There may however be a small amount of latitude to colour interpretation ( dark or light ) and how much weathering or damage the model can be depicted with.
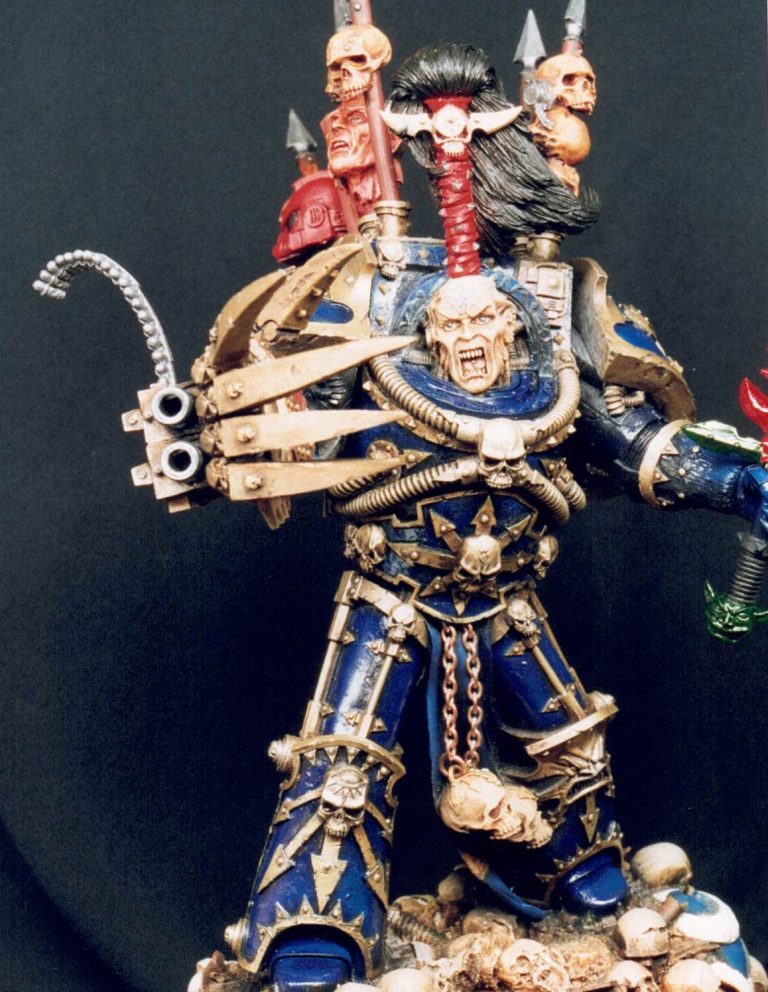
I chose to stick pretty much to the colours used in the White Dwarf magazine cover art, making for a mix of either blue or gold on most of the surfaces.
The model is cast in a “cold cast” resin, making it very dense, although rather brittle. Also, superglue and epoxy glues do not seem to work as well as they do on white metal or the more common resins in use by the modelling industry.
Before I do start with the painting, I have a whinge to put forth.
This model is touted as being around 250mm or 300mm tall ( I can’t remember which, and if you’re used to dealing with military figure kits – Verlinden for example – then if the kit is advertised as 120mm, that’s roughly what you get, within 5mm or so.
So I was a bit shocked when the actual figure in this kit, from head to toe, only measures around 180mm, yes, it’s a lot taller overall, if you add in the depth of the base with all it’s skulls and those trophy spikes, but I was expecting more.....
OK Soapbox kicked away, I’ll accept what I’ve got and be pleased with all the detail.
With a price tag of £150 ( bought in 2001 ), it might put a lot of people off buying it, plus it’s a huge leap from painting 28mm figures to getting to grips with a giant like this, but those will be the issues that each individual will have to wrestle with.
One very nice touch, and one only very rarely encountered, is the inclusion of a very nice wooden base to match the size and contour of the groundwork.
So, to construction.
One thing I’ve already pointed out is the reluctance of glues to work properly on the parts. I drilled all of the larger bits to accept strengthening wires, and in the process encountered just how brittle the resin is – a lot more than usual actually.

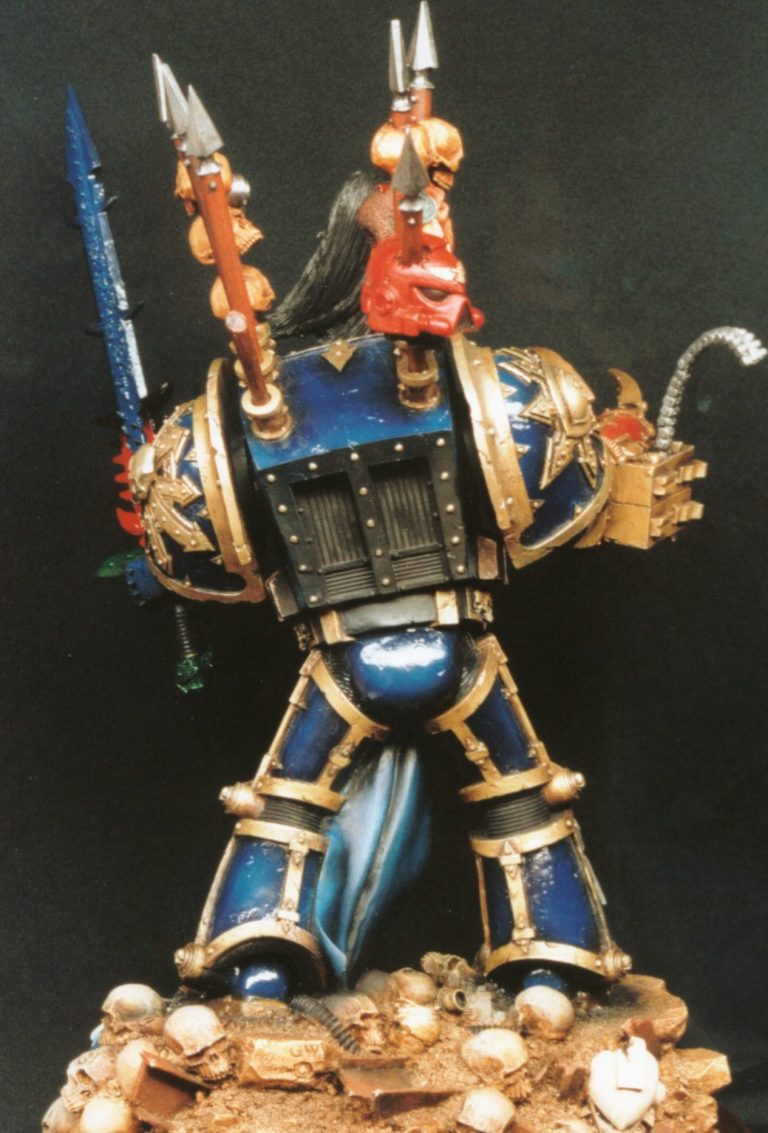
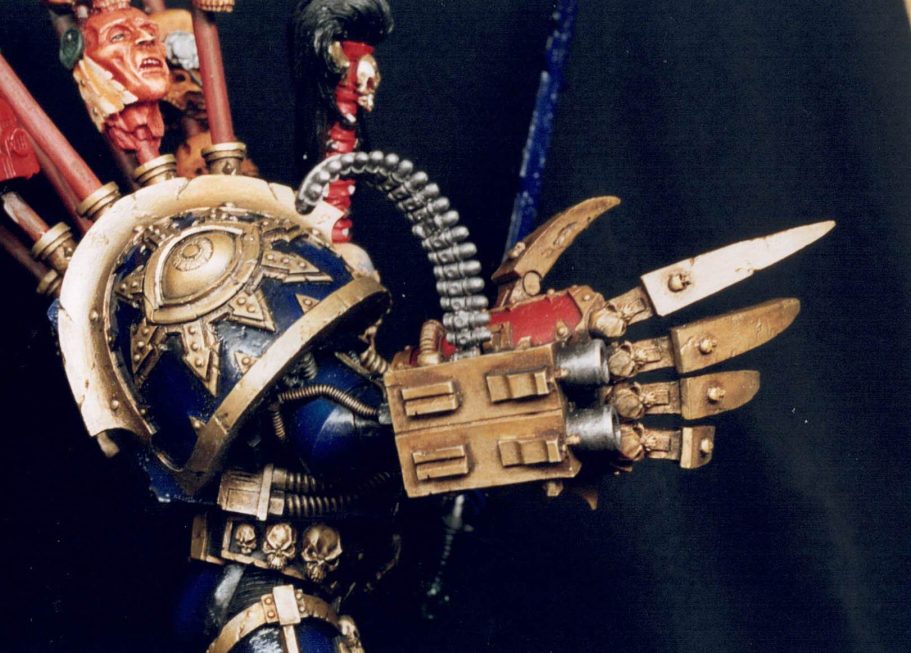
The belt of ammunition curving out of the side of the bolter was awkward in this way and ended up in three parts before getting it to go back together in one line..
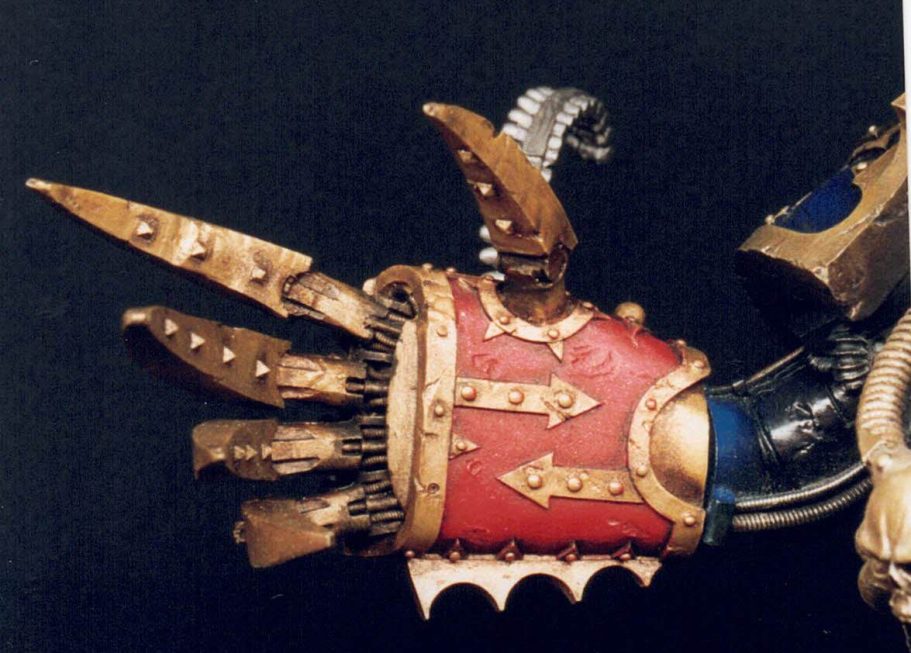
The power claws suffer from the same delicacy, all things to watch as the parts are handled repeatedly through the painting process.
A plus is the split of parts, allowing the modeller to paint them individually, and then fasten things together once the paints have been added.
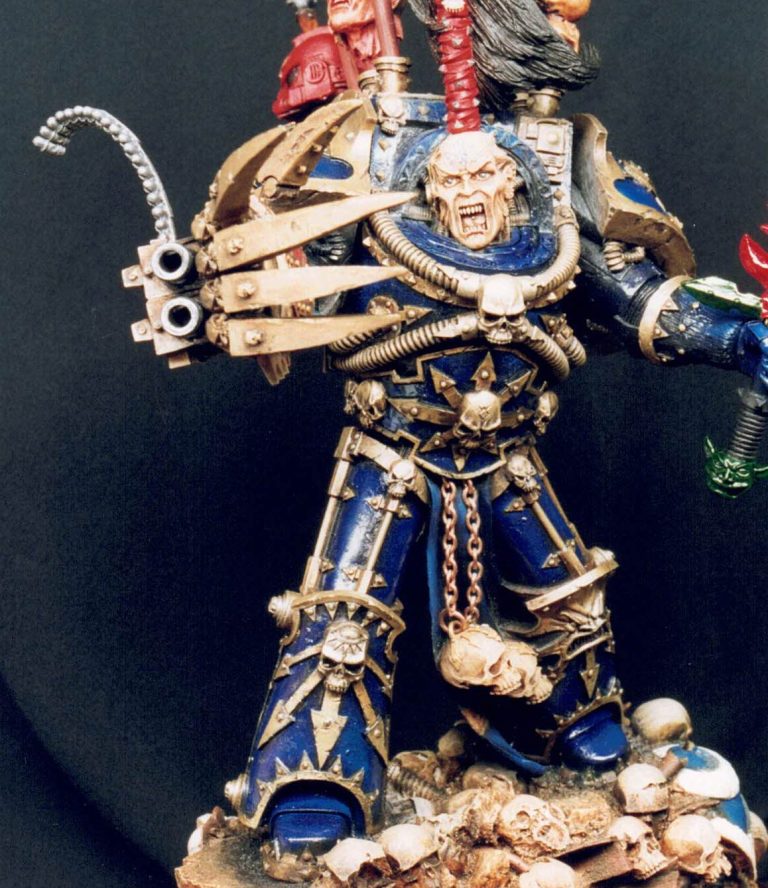
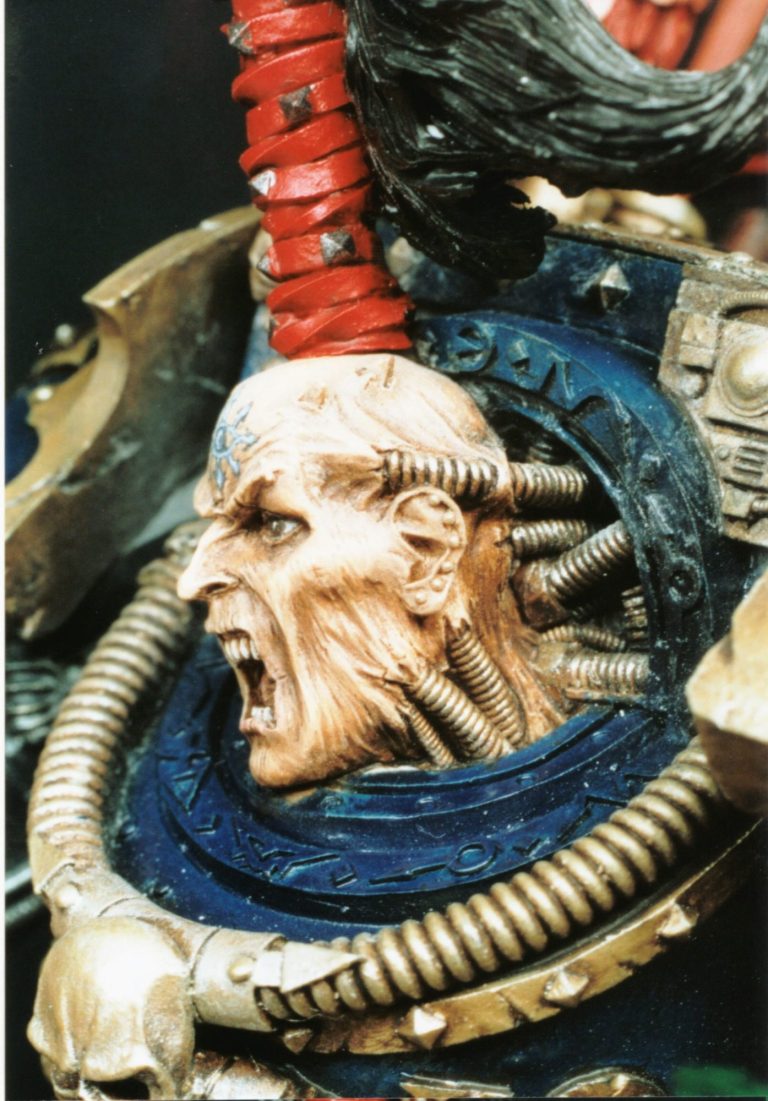
I used my usual oil paint mix of Burnt Sienna / Yellow Ochre / Titanium White over an undercoat of GW Sunburnt Flesh, adding more of the darker colours to work in the shadows and working up to almor the armour I used a lot of acrylics. The blue areas are a mix of Chaos Black and Moody Blue, with highlights of Moody blue and then the same colour with a very small amount of Skull White added. The darkest acrylic colour was painted on over all the blue areas, using two or three coats to build up a solid colour. The mid tones and highlights were added with the paint heavily thinned down with water, and layer upon layer built up to gradually form the change to a lighter colour.
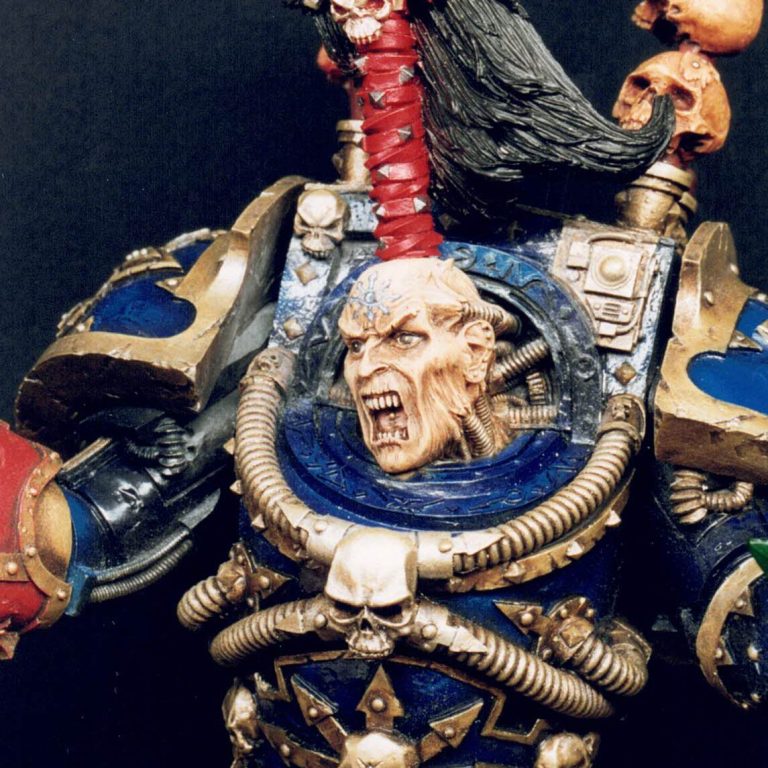
For the gold, several layers of GW Shining Gold was painted on, again to build up a solid ground colour, then Burnt Umber oils were used as a thinned down wash to emphasise the shadows.
Details, details.
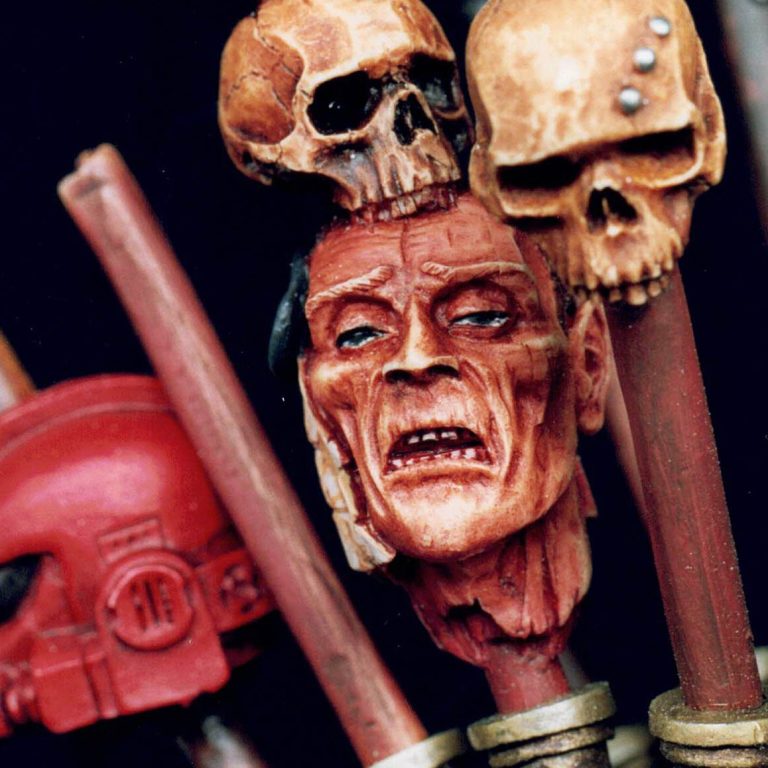
It’s really only when you study artwork like that used on the front cover that inspired this figure, that you begin to realize the many details that the artist drawing and painting the picture has added. Whilst the individual spikes of the trophy rack can be changed about to the modellers taste, the painting of what’s hung on them really should be done in a similar manner to the cover art.
So lots of red, which contrasts well with the blue and gold already painted on.
The base, as mentioned, has lots of detail, and to begin painting that I gave the whole thing a couple of coats of Orc Brown. Having let this dry thoroughly I painted on a layer of Burnt Umber oils, having thinned the oil paint down a little with some White Spirit to allow it to be worked into the details easily.
The Burnt Umber serves two purposes, one is to act as a starter layer for the bone areas of all those skulls, and secondly to get a dark colour into all the recesses so there’s no glaringly bright white spots showing from the bare unpainted resin.

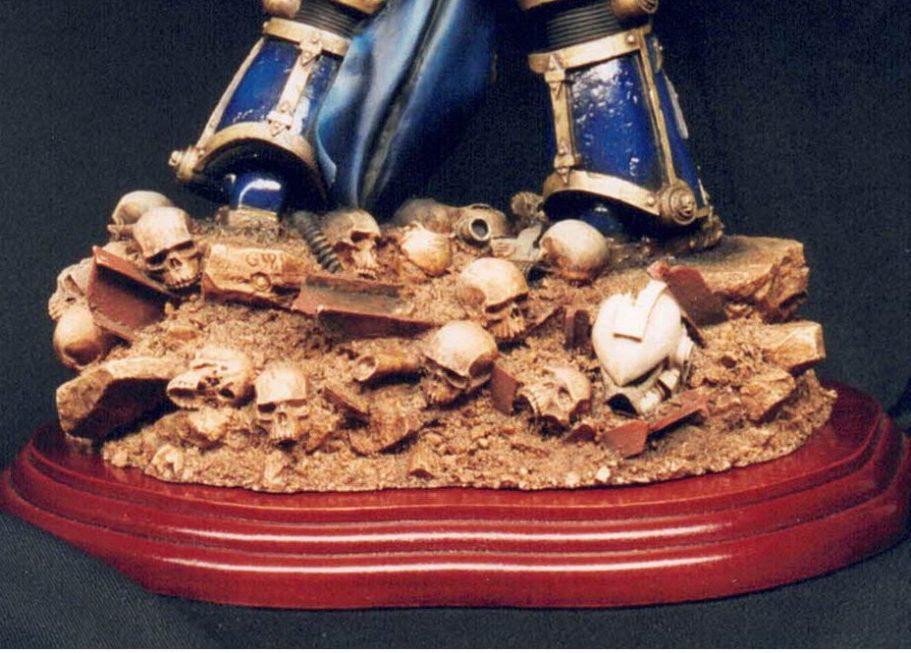
Having painted on the Burnt Umber, I used a soft cloth ( an old T shirt ) to wipe and dab away most of the brown colour from the details of the base. This began the process of adding highlights, and by brushing on a mix of Yellow Ochre and Titanium White, I could build up the mid tones and highlights.
The trick is to keep wiping the brush on a soft cloth to remove any of the darker paint it’s picked up from the model, before recharging it with the lighter paint and returning to all those skulls.
There are a lot of other details to paint in on the groundwork, these were done once the bone colours had dried thoroughly.
Final thoughts.
It’s a superb kit, let down a little by it having been cast in this strange and brittle “cold cast” resin, and the big price tag.
On the flip side, it is a superb kit that will make a very eye-catching centrepiece to any display. Plus that high price tag will probably mean that there won’t be very many of these knocking around.
"Is it worth the money ?" you ask.
To be honest I have to say yes, very much so, not least because this could keep the painter happy for quite some time.
Details, there’s so much it would be difficult to describe them all to you here, but I’m sure you’ll get the gist of them if you study the photos.
So yes, a very nice addition to a collection.