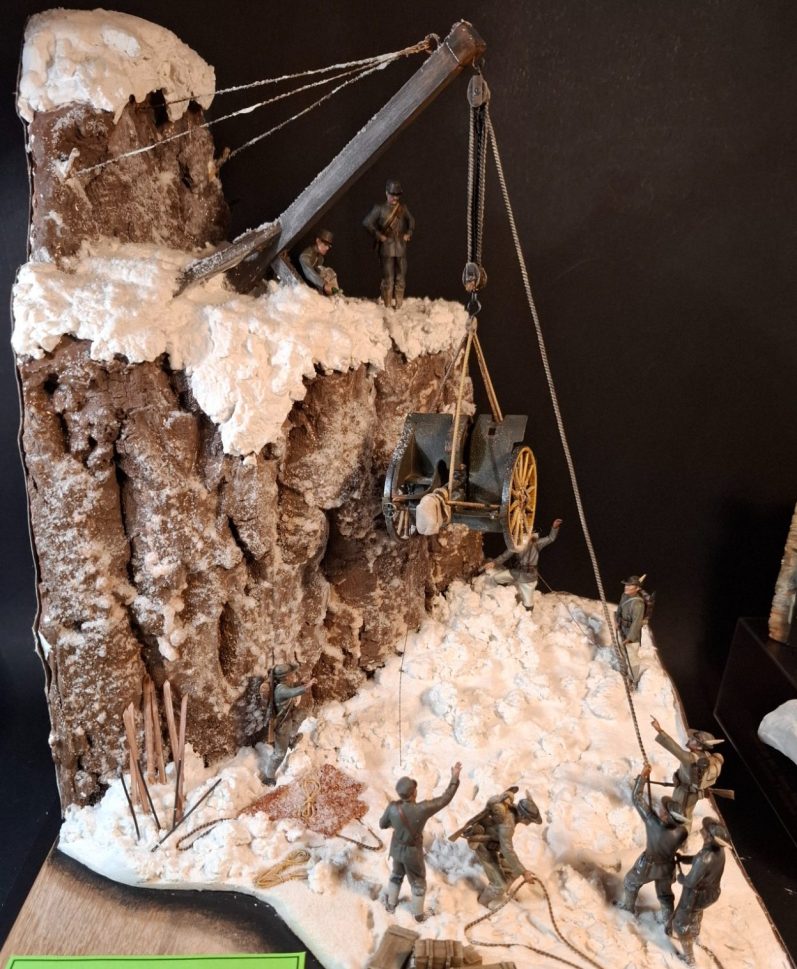
Italian 75mm Cannon and Crew in an Alpine setting
Part 2
1/35th scale 3D printed kit from Art Station
Assembled and painted in 2025
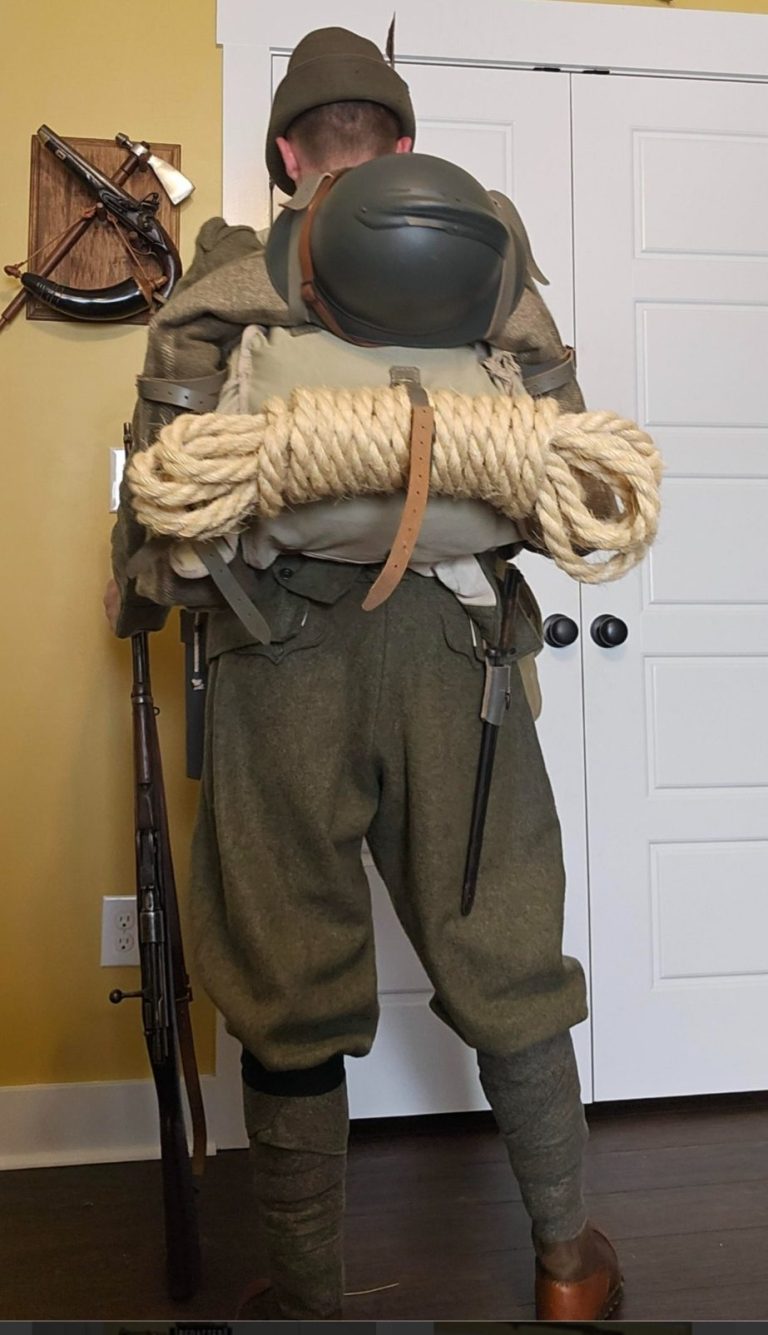
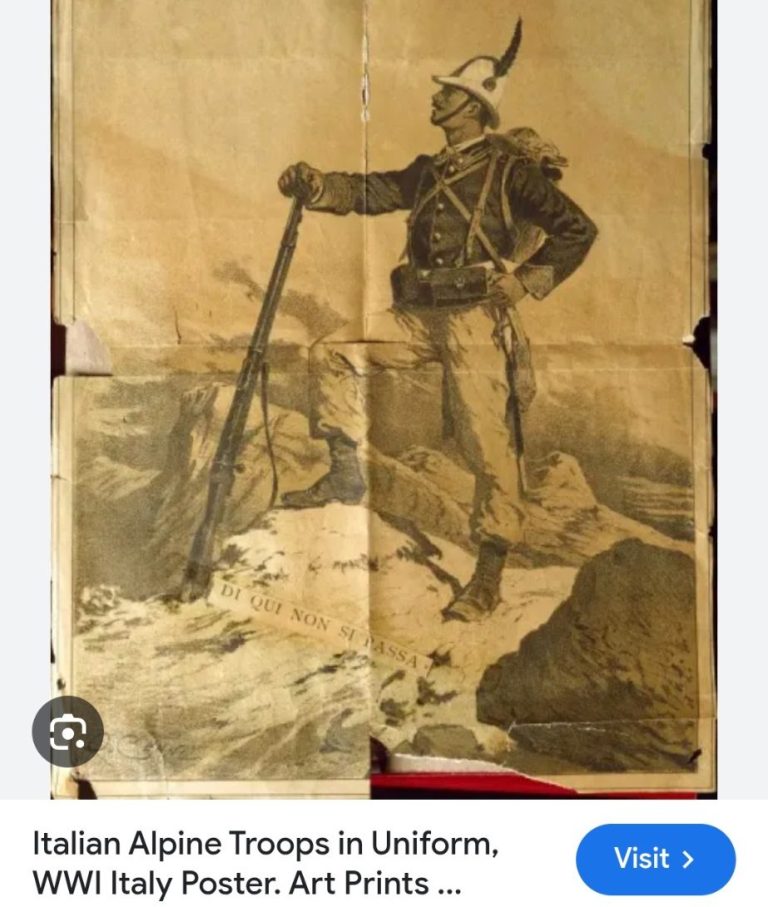
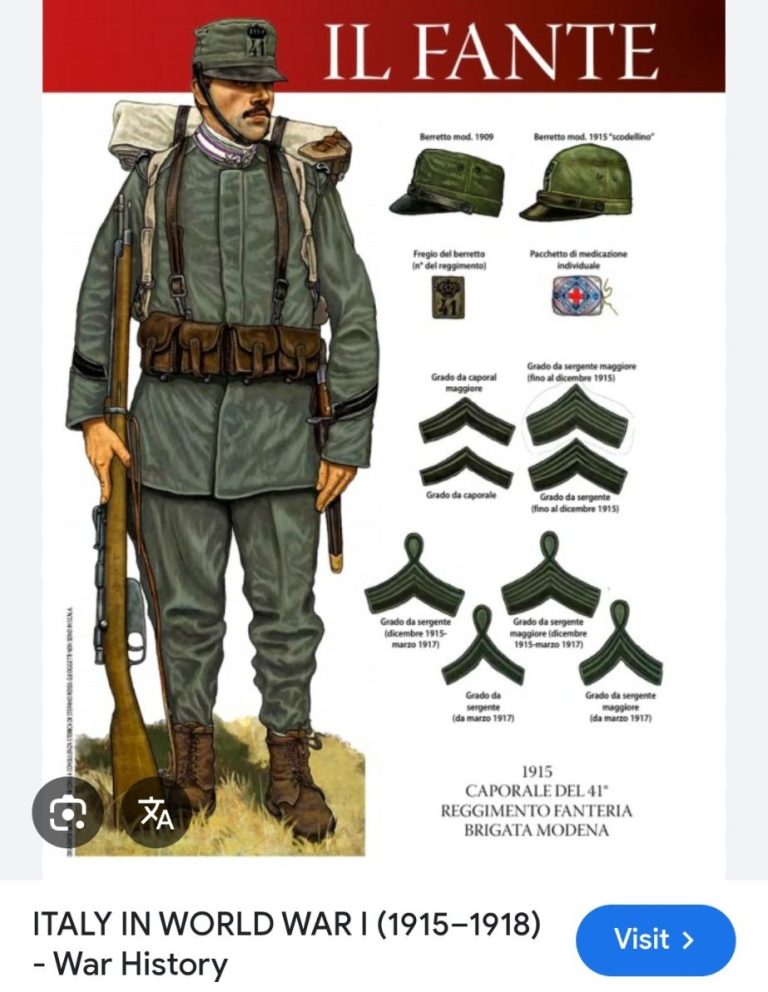
Photos #23, #24 and #25 show some of my reference material.
The first two give good colour reference, and although the last of these shots is monochrome, it does indicate that trousers might have been a pale cream or white.
I considered this to be important, as it would allow for a bit of variation on one or two of the eleven figures, breaking up the grey / green a little bit.
I’m not going to go through all the painting, I’ll just highlight one or two points that I feel are worth a note or two.
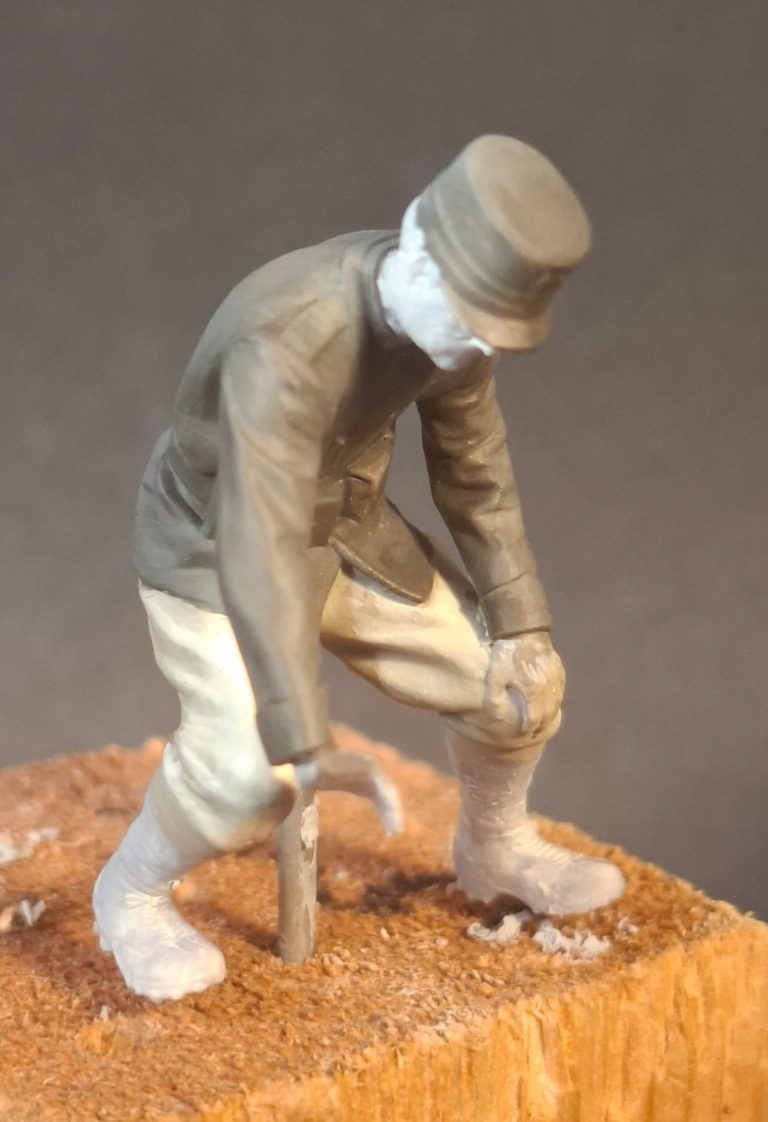
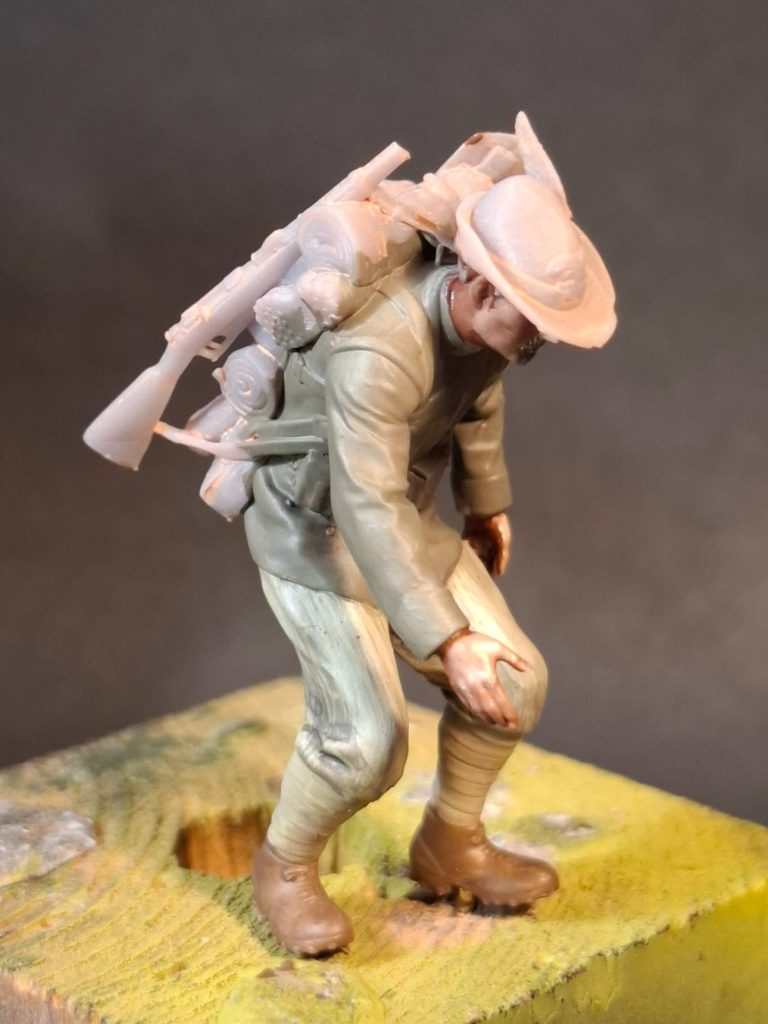
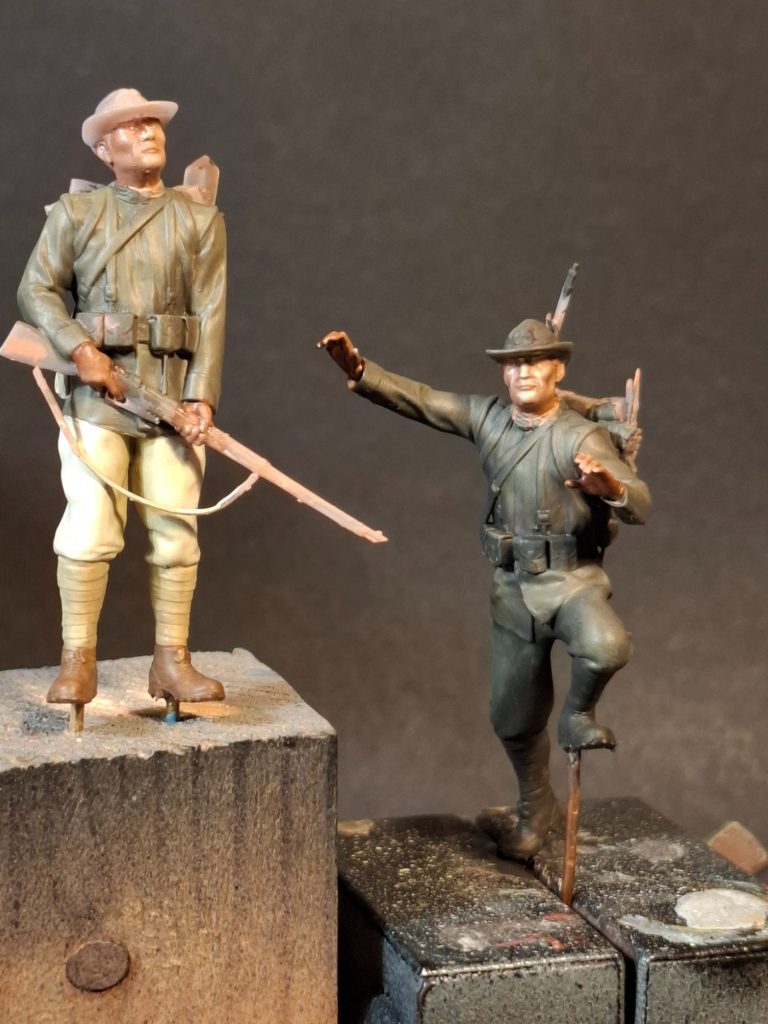
Photos #26 and #27 show the first figure to be tackled, and only really show the pale trousers and green hat and jacket in the first shot, while the details have been added in the second picture.
All painted in acrylics, and accentuating the point that I no longer begin by painting the flesh areas.
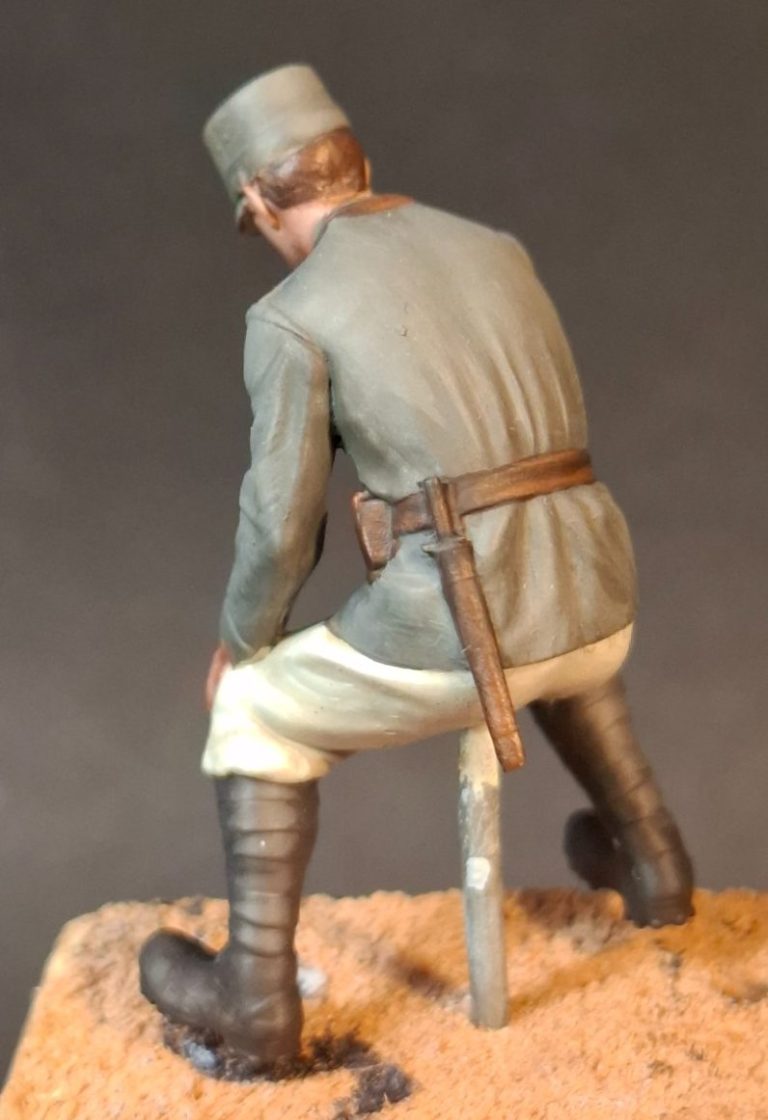
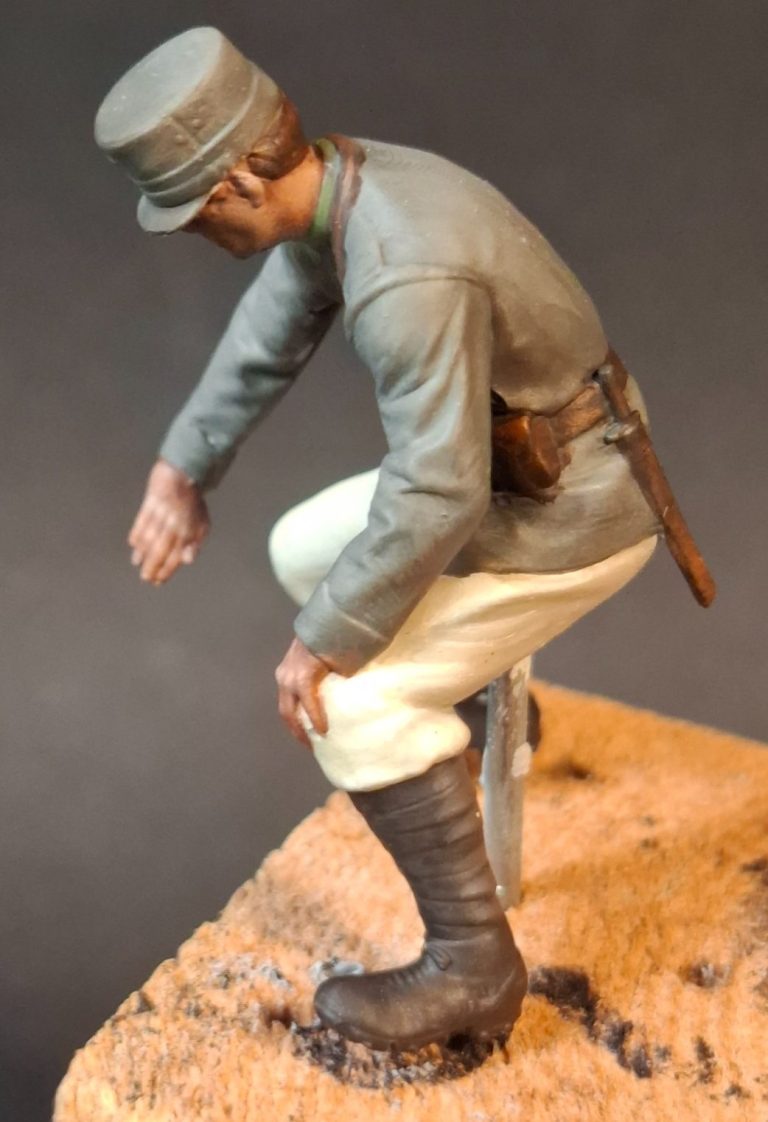
Photos #28 and #29 show the completed figure, and look at the detail on those hands.
No, I don’t mean my painting, the printed details are pretty flippin’ good and encourage the painter to add a few details like the veins on the back of the hand.
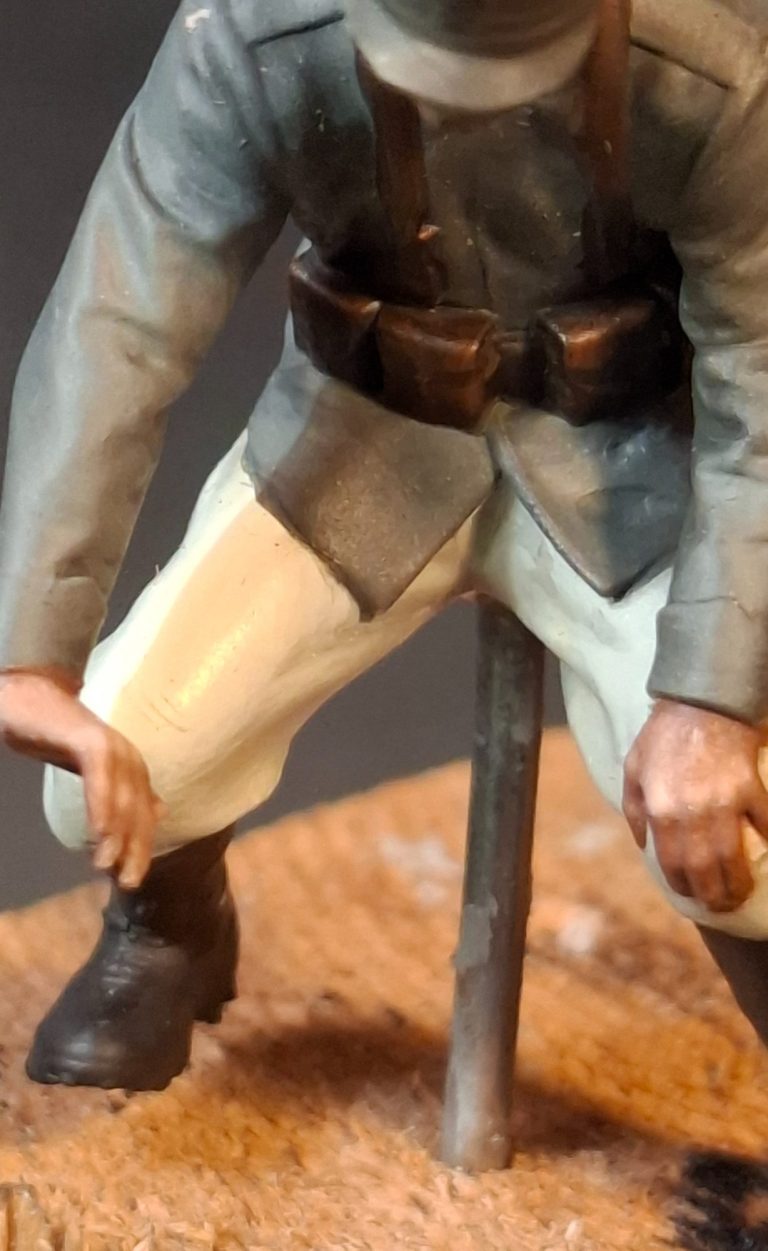
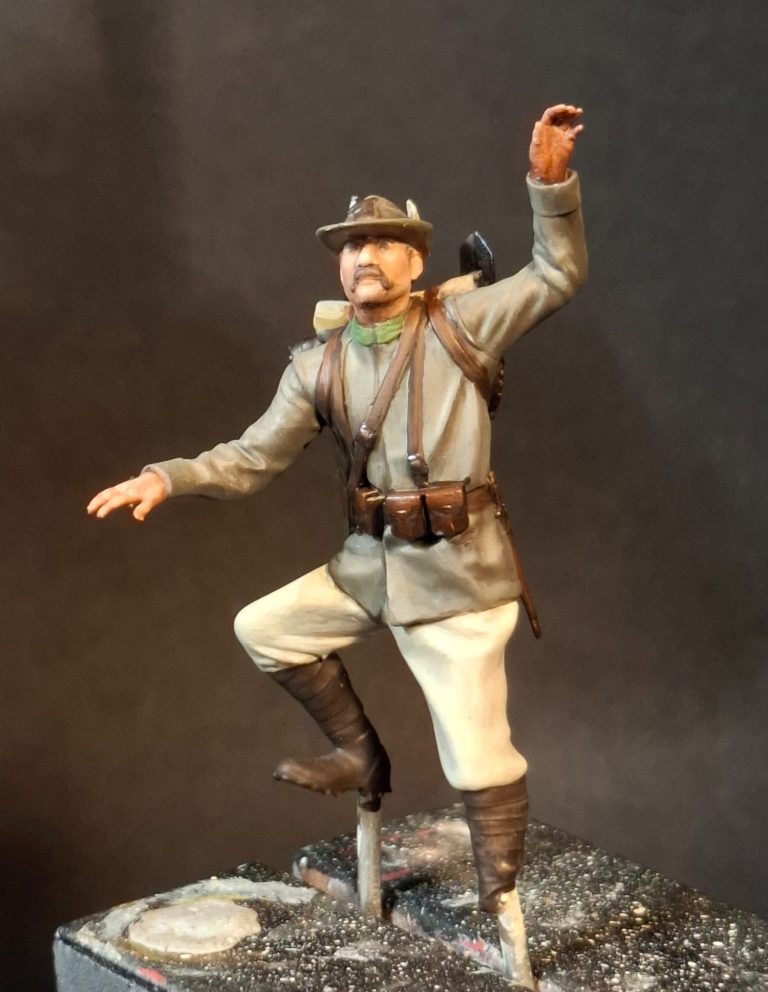
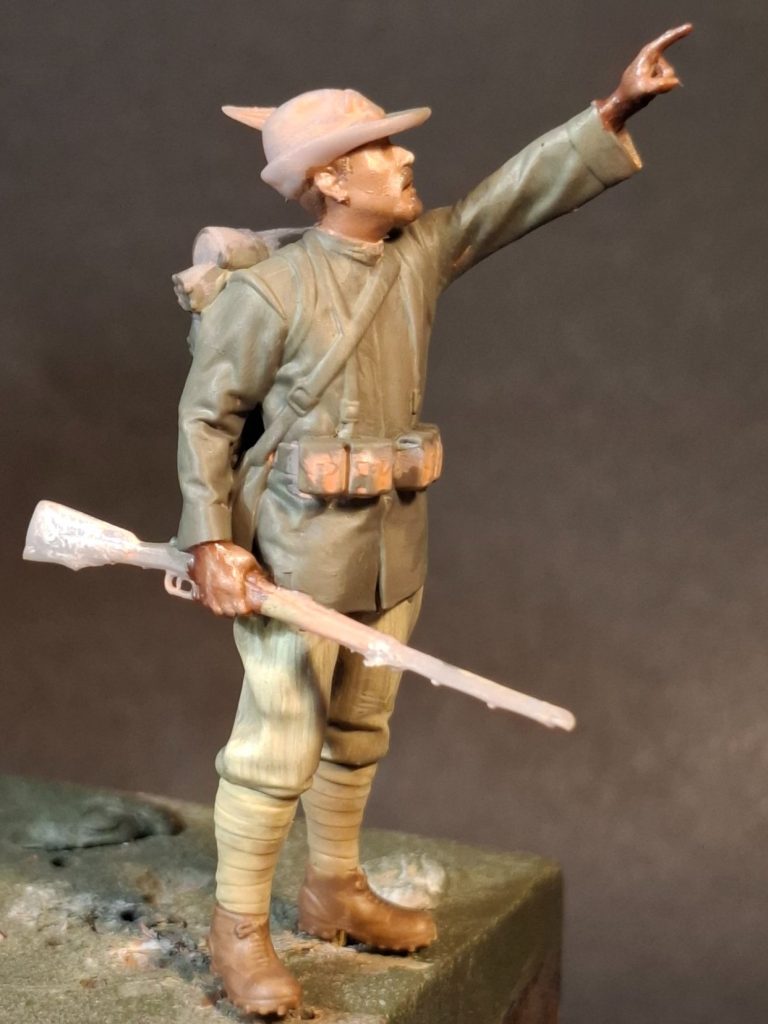
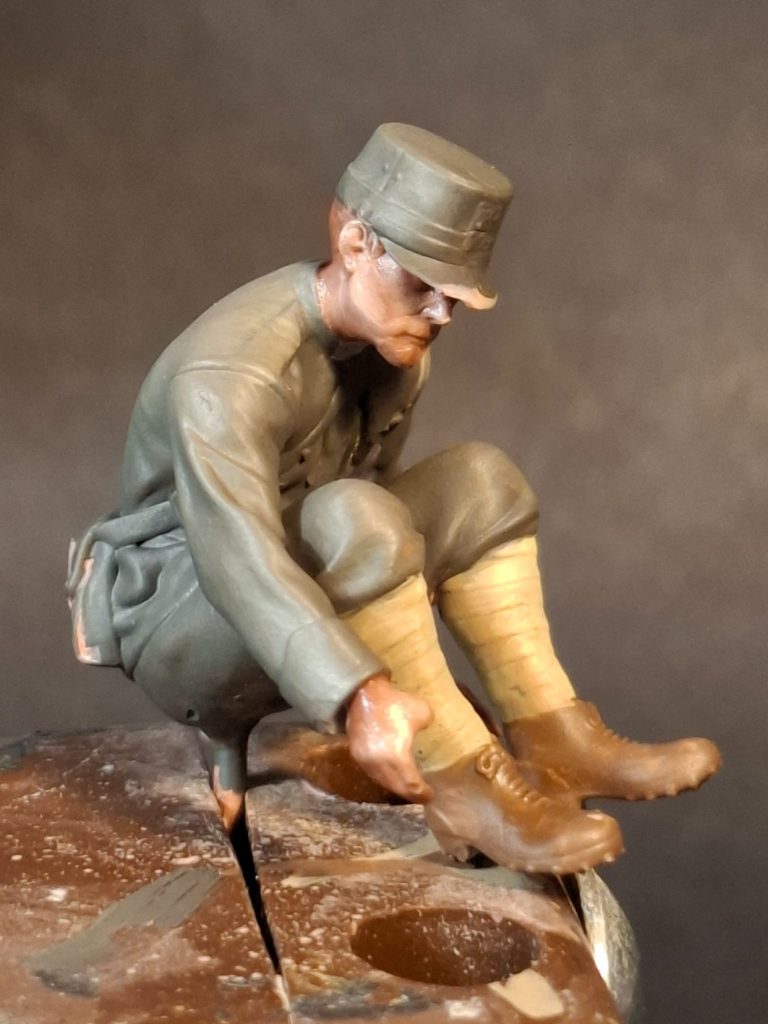
Photo #30 and the second figure is begun, and again the uniform is painted first, white trousers and green jacket with slightly different mixes of acrylics, with the details being added in oils afterwards – see photos #31 and #32.
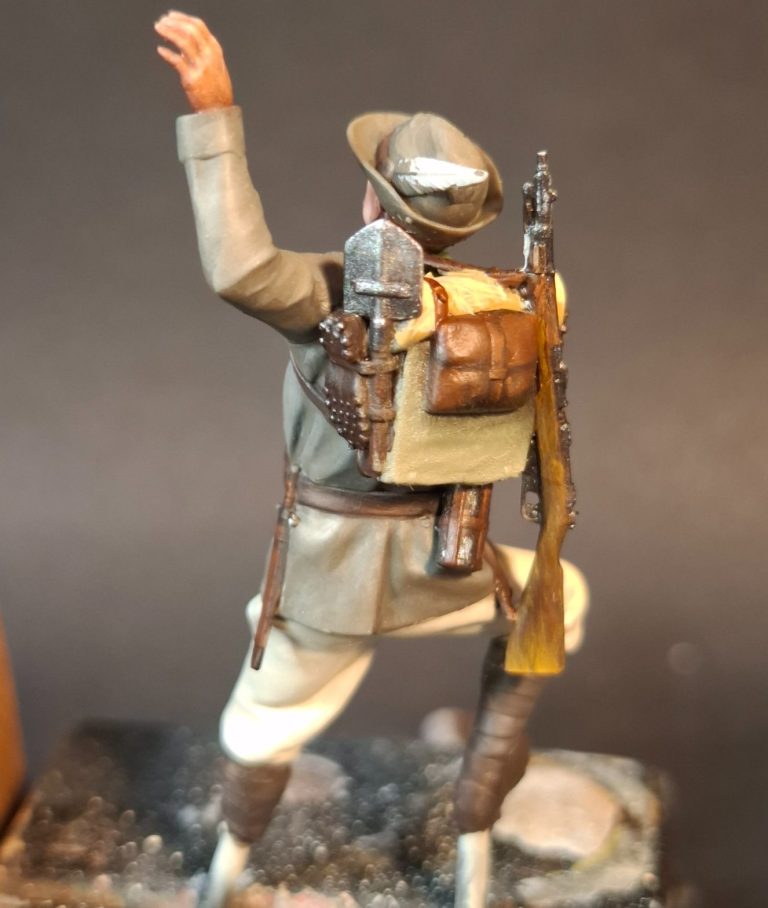

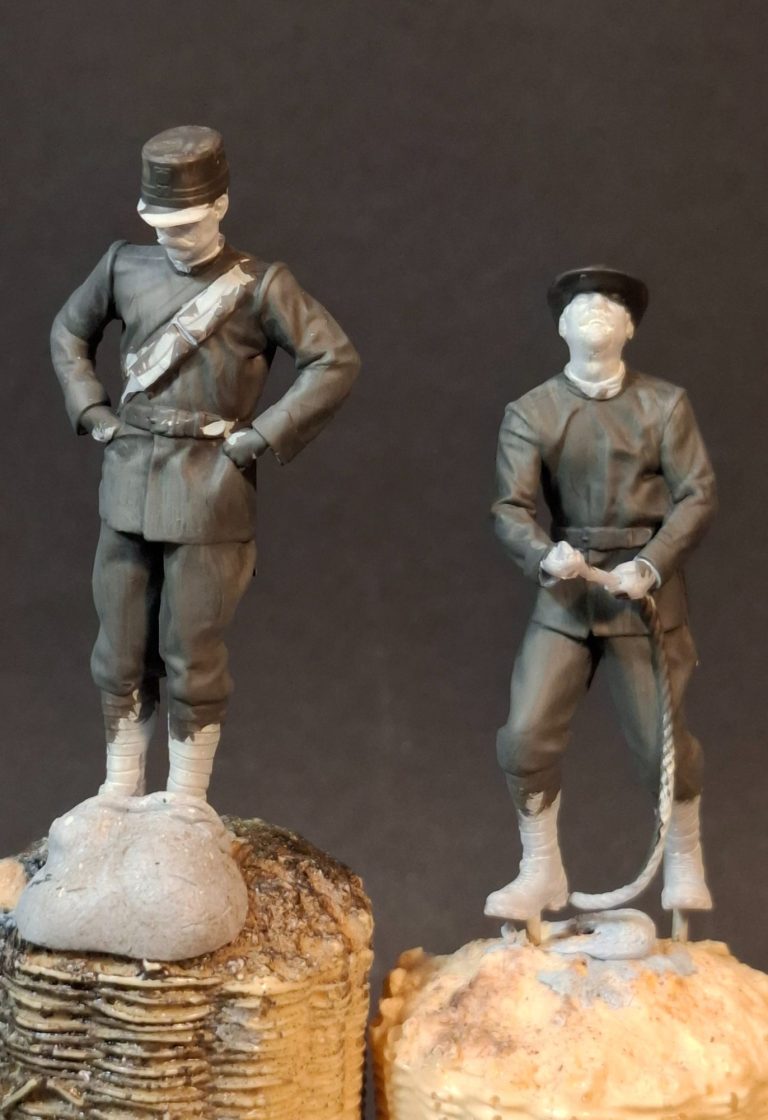
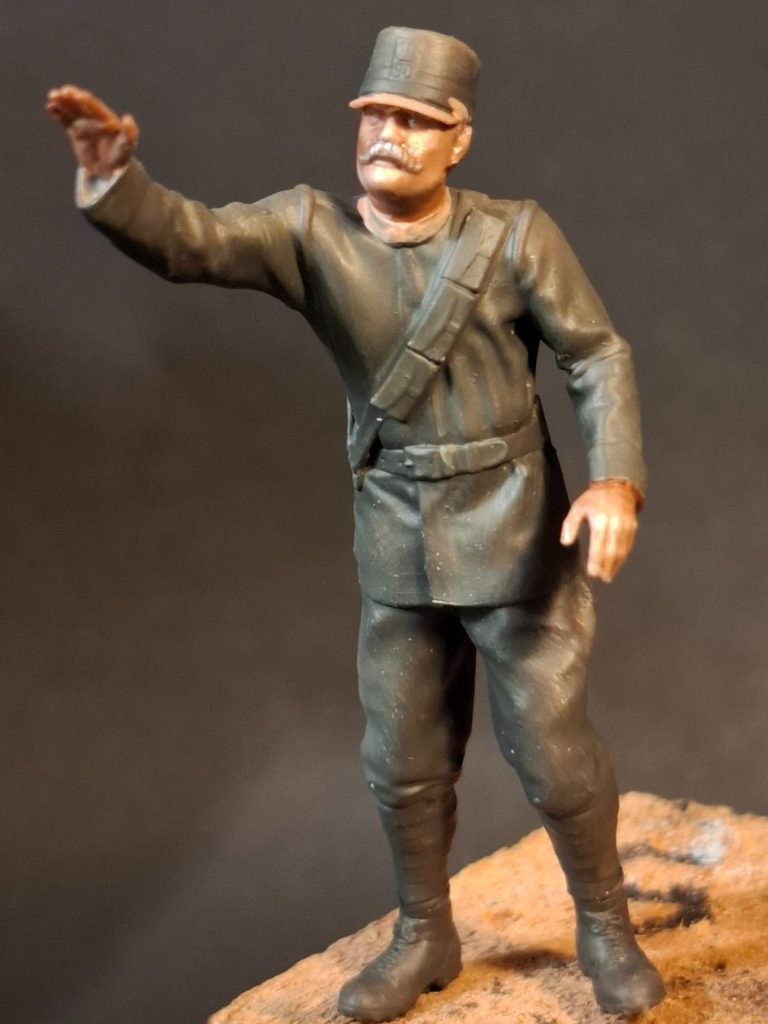
Photo #33 shows the process beginning again on two more of the eleven figures involved in the diorama, this time with the uniforms being grey / green throughout.
Again acrylics are used here, first adding two coats of a dark grey / green mix, allowing each coat to dry, then adding a further coat of the same colour, but thinned with an equal amount of water and painted on in a thin covering. Whilst this layer is still wet, I added small amounts of MP paints Cream colour to the mix, blending this in to the wet paint on the models, keeping this lighter colour to the areas that would be mid-tones, and then adding a little more of the Cream colour to the mix of paint on the palette, and building up highlights on the model, again whilst the initial coat of paint was still damp.
The technique requires speed to get the blending smooth before the paint dries on the model, but the results can be rewarding and give a very fast way of painting larger areas because of the acrylic paint’s fast drying time.
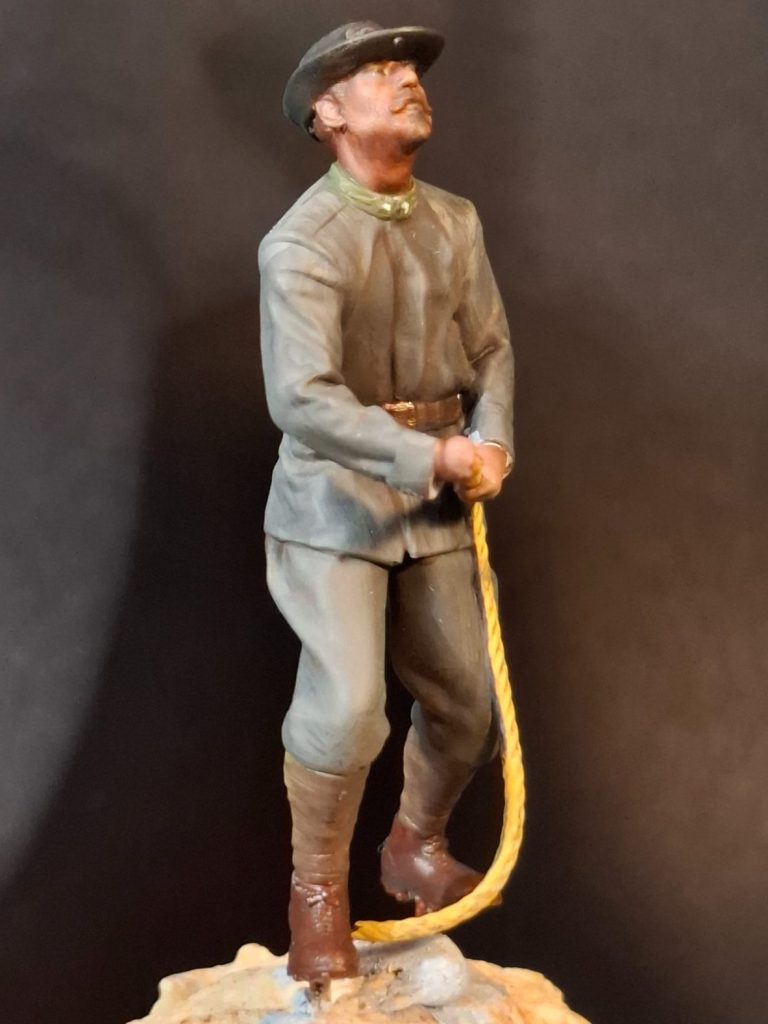
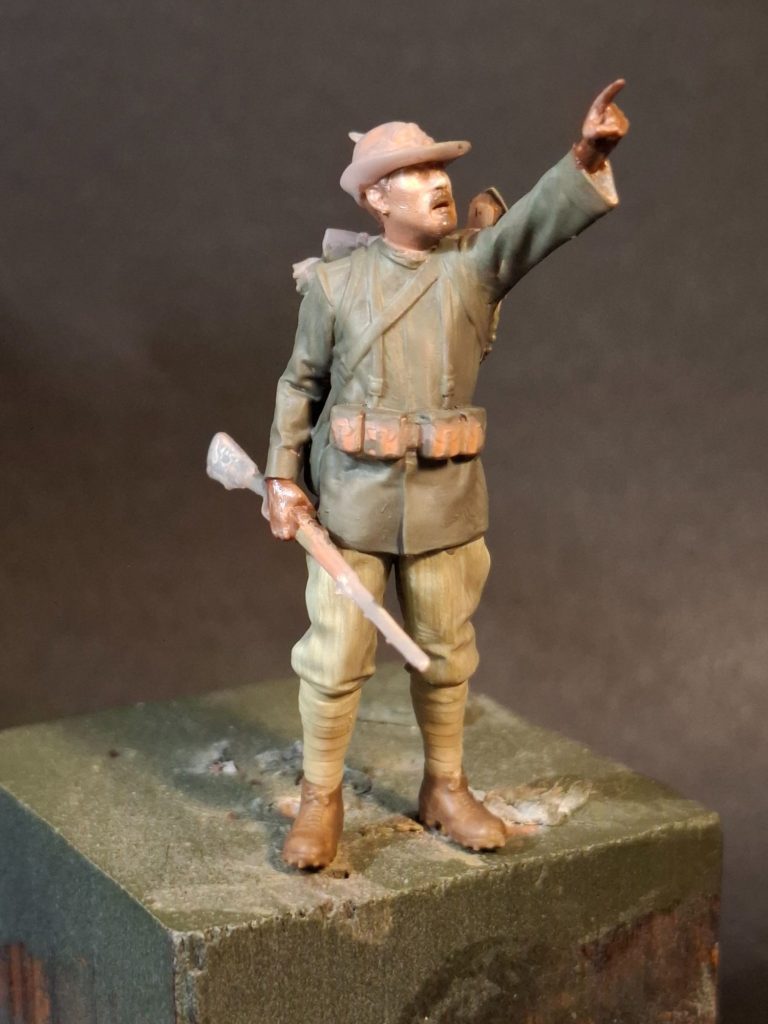
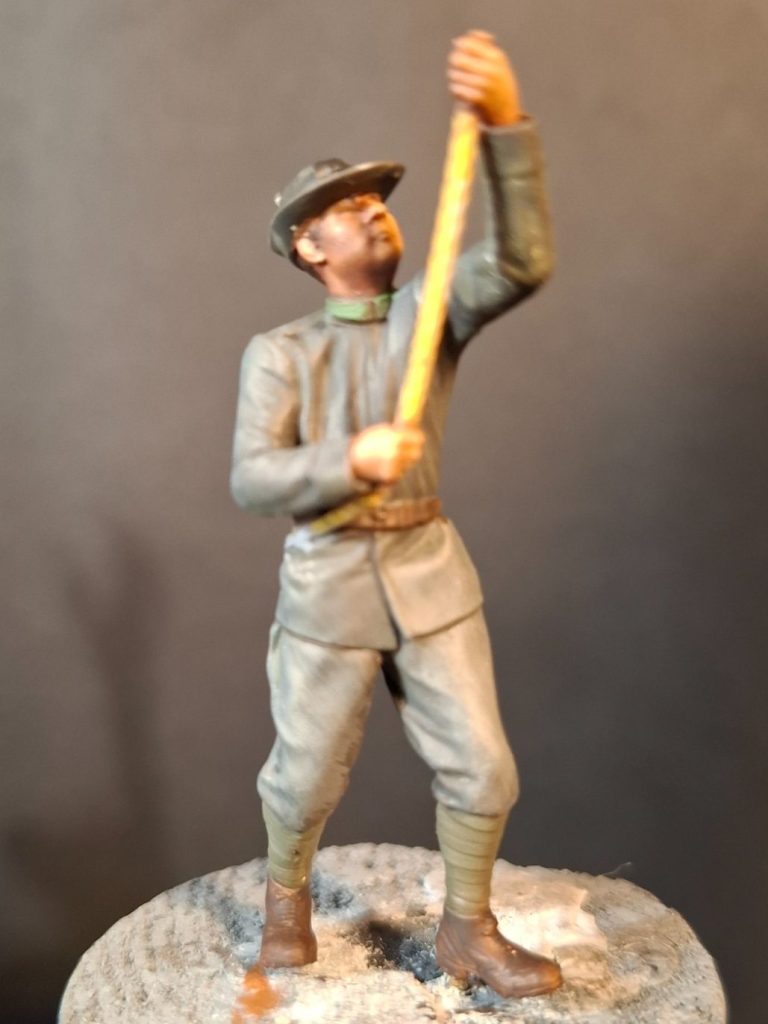
Photos #34 through to #41.
Here I’m working my way through all the figure’s uniforms, added all the details of the items they’re carrying, painting on the insignia on their hats, although this is black and barely visible, and given two or three of them rank markings on the sleeve cuffs of their jackets.
Eleven figures, it took a while, and the reference showing the pale coloured trousers was, to my mind, a bit of a god-send, simply because it allowed for some variation to the uniforms.
The only real problem that I encountered was that the resin used for the 3D printing was very brittle and when drilling into the feet to add pins to allow the figures to be mounted on temporary painting handles, a couple of the feet snapped at the ankles.
Normally this would be a problem, but as I was planning on some deep snow areas on the diorama, I could hide one of two of the figures lacking feet by having them stand in the deeper sections.
With this kind of diorama, there needs to be a certain order in which the components of the scene are fastened into place.
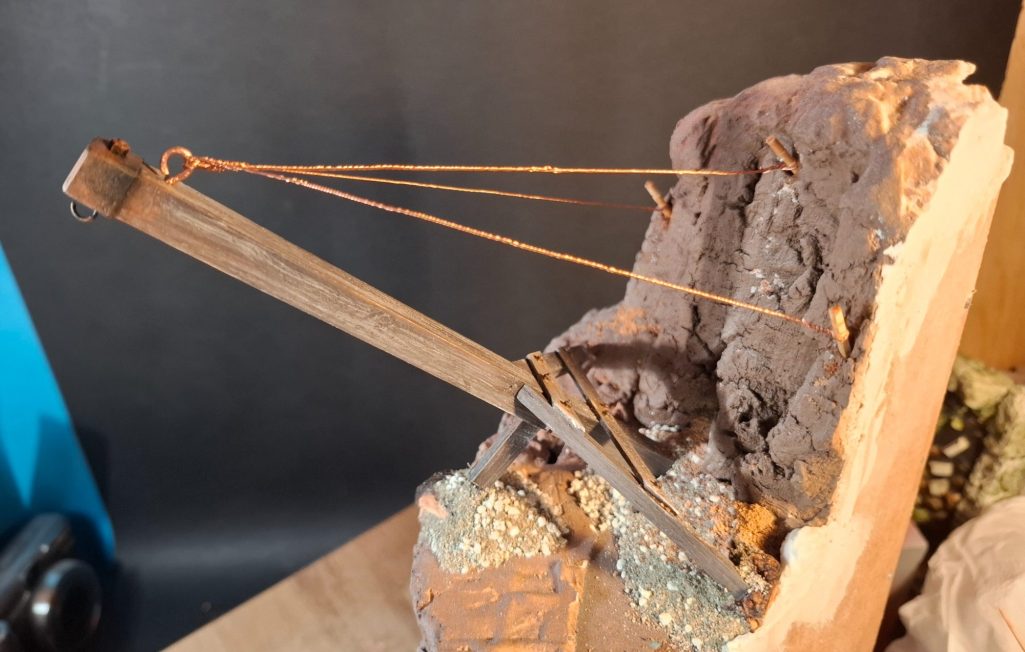
I’d put a bit of thought into this, and began with the crane jib – photo #42 – using some sand groundwork mix and superglue to securely fasten the jib supports in place on the ledge, allowing space for where the cannon would be rolled off the cliff to begin it’d decent.
I’d added a loop of copper wire to the end of the jib, and in this shot you can see the support wires that are fastened to that and extend to pitons that would have been hammered into the cliff face above the crane.
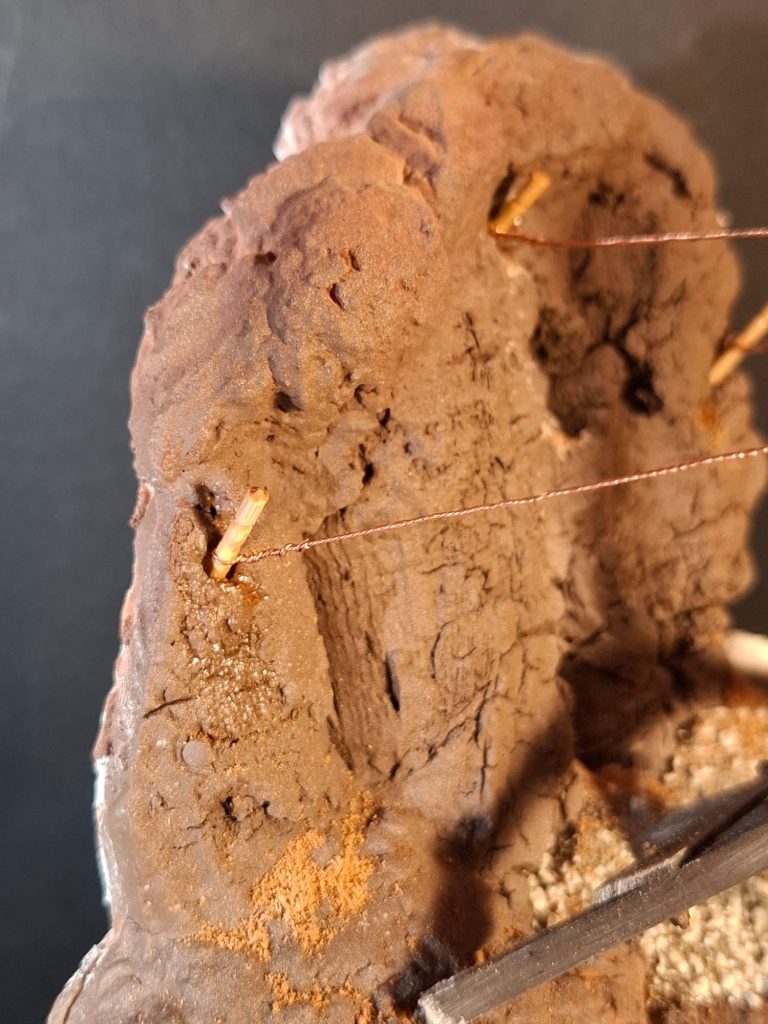
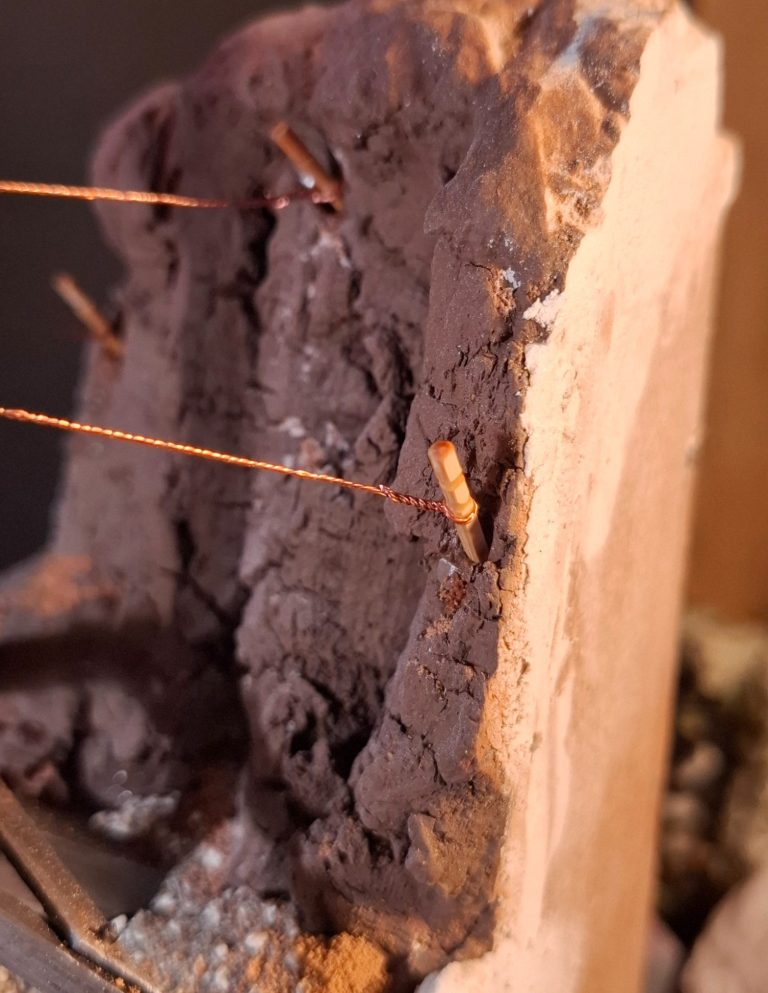
Photos #43 and #44 show a close up of the pitons, which were made from the upper tips of cocktail sticks and pushed into holes drilled into the cork bark.
Getting all three wires taut was a bit of a fiddle, but with a bit of patience and a little blaspheming, it got the wires secured.
Photo #45 is a close up of the loop of wire at the end of the jib, the wires being made from stripped electrical flex, twisting two pieces together so they look like thin rope.
Also in this shot, note the rusted state of the metal block at the tip of the jib, a bit of metallic Steel paint from Darkstar acrylics, and some Light red oils stippled onto it once the acrylic had dried.
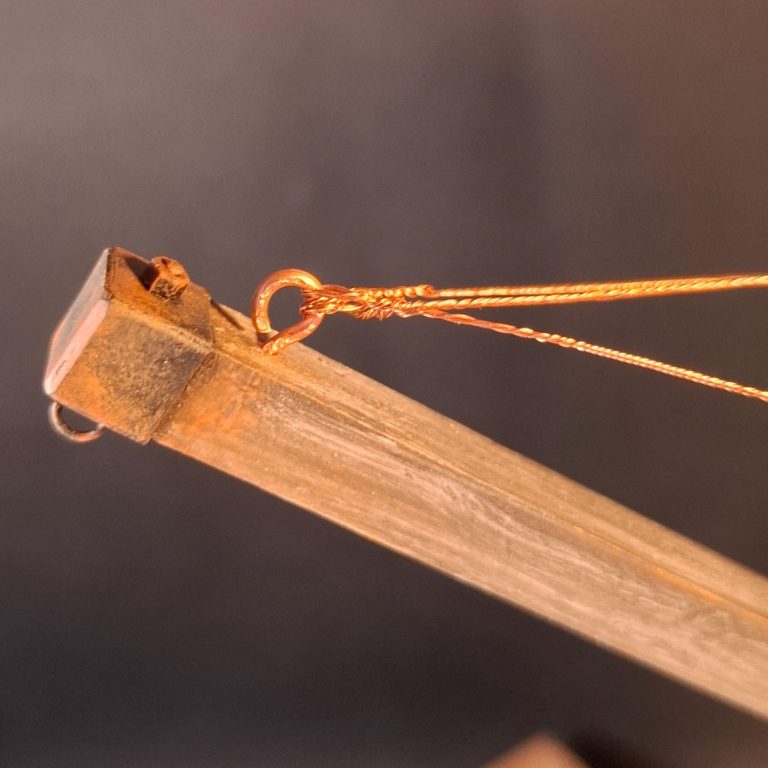
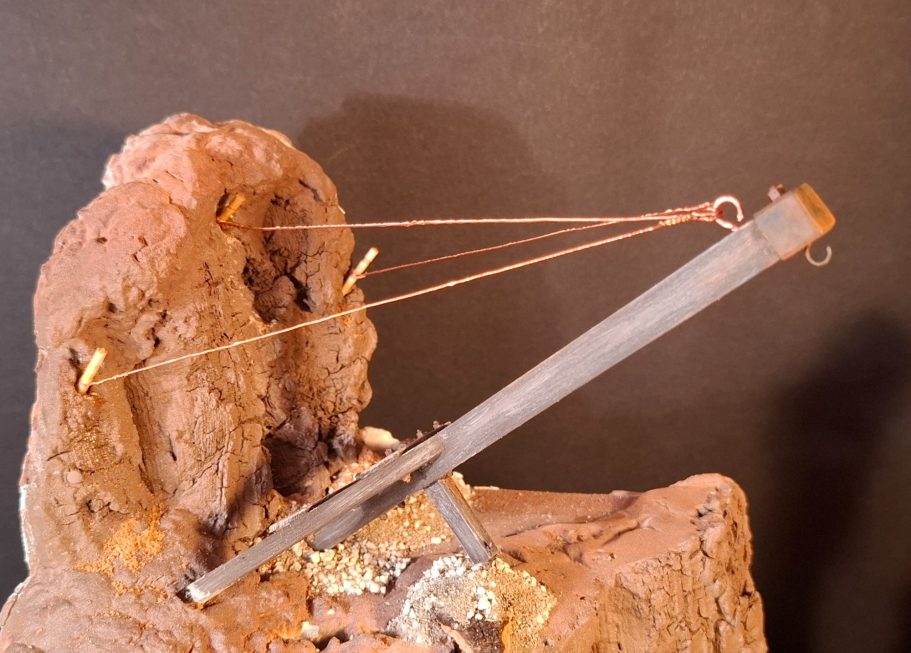
Photo #46, the jib in place, wires and pitons fastened, and ready for some snow and ice effects to be added.
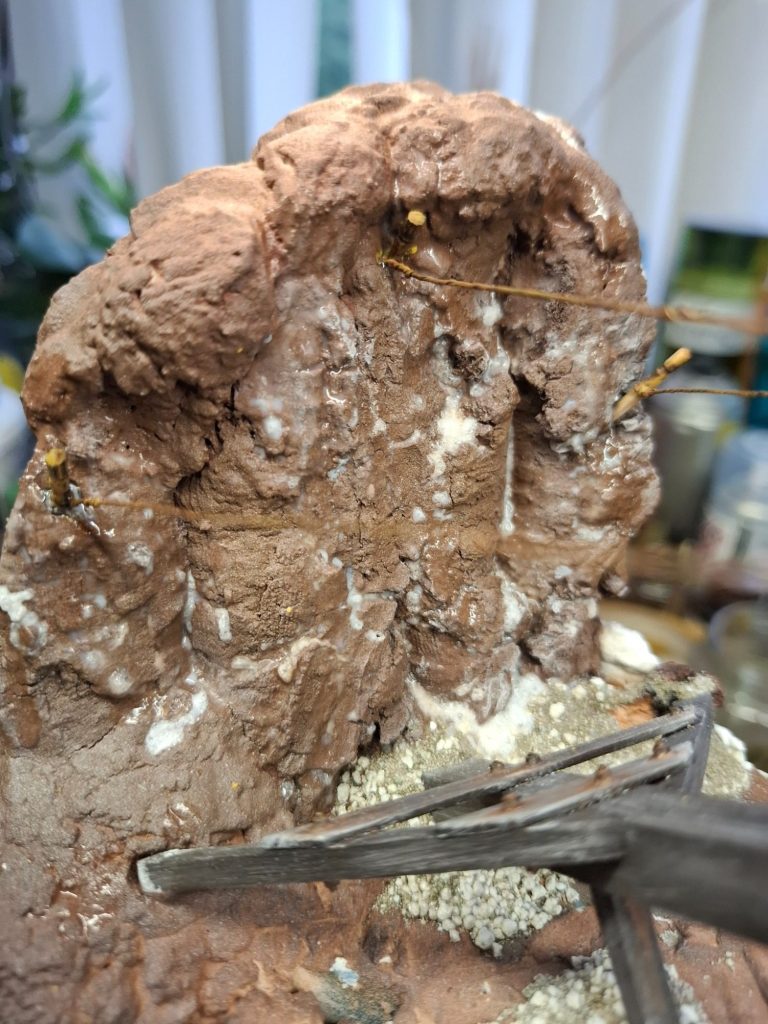
Photo #47 shows the ice – which is in fact very watery Superglue, dribbled down the cliff face and before it has chance to cure, I sprayed it with accelerator.
This causes the glue to dry very quickly and with a shiny, white finish, which appears exactly like snow-melt that has refrozen as temperatures drop.
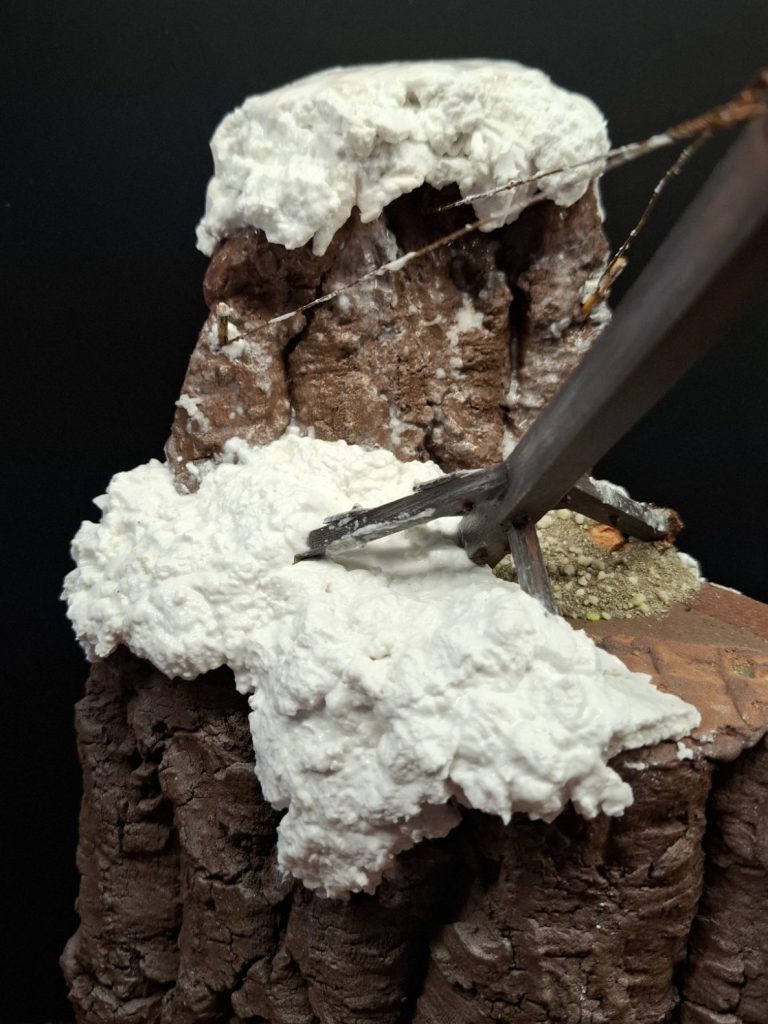
Photo #48. and for the snow I used the ready mixed wall filler, picking this out of the tub with a small trowel – actually a metal mixing spatula for oil paint – and allowing the filler to almost tear as it’s separated from the mass in the tub. This tearing action gives a rough surface texture which looks like snow that has melted enough to fall from a higher point on the cliff and drop to a resting place below.
The topmost part of the cliff has the same filler used for the snow, but I added a little water from a spray bottle and smoothed the upper surface.
At this point I only added snow to the parts of the diorama that I was sure wouldn’t have figures.
Lorem ipsum dolor sit amet, consectetur adipiscing elit. Nulla euismod condimentum felis vitae efficitur. Sed vel dictum quam, at blandit leo.
Lorem ipsum dolor sit amet, consectetur adipiscing elit. Nulla euismod condimentum felis vitae efficitur. Sed vel dictum quam, at blandit leo.
Lorem ipsum dolor sit amet, consectetur adipiscing elit. Nulla euismod condimentum felis vitae efficitur. Sed vel dictum quam, at blandit leo.
Lorem ipsum dolor sit amet, consectetur adipiscing elit. Nulla euismod condimentum felis vitae efficitur. Sed vel dictum quam, at blandit leo.
Lorem ipsum dolor sit amet, consectetur adipiscing elit. Nulla euismod condimentum felis vitae efficitur. Sed vel dictum quam, at blandit leo.
Lorem ipsum dolor sit amet, consectetur adipiscing elit. Nulla euismod condimentum felis vitae efficitur. Sed vel dictum quam, at blandit leo.
Lorem ipsum dolor sit amet, consectetur adipiscing elit. Nulla euismod condimentum felis vitae efficitur. Sed vel dictum quam, at blandit leo.
Lorem ipsum dolor sit amet, consectetur adipiscing elit. Nulla euismod condimentum felis vitae efficitur. Sed vel dictum quam, at blandit leo.
Lorem ipsum dolor sit amet, consectetur adipiscing elit. Nulla euismod condimentum felis vitae efficitur. Sed vel dictum quam, at blandit leo.
Lorem ipsum dolor sit amet, consectetur adipiscing elit. Nulla euismod condimentum felis vitae efficitur. Sed vel dictum quam, at blandit leo.
Lorem ipsum dolor sit amet, consectetur adipiscing elit. Nulla euismod condimentum felis vitae efficitur. Sed vel dictum quam, at blandit leo.
Lorem ipsum dolor sit amet, consectetur adipiscing elit. Nulla euismod condimentum felis vitae efficitur. Sed vel dictum quam, at blandit leo.
Lorem ipsum dolor sit amet, consectetur adipiscing elit. Nulla euismod condimentum felis vitae efficitur. Sed vel dictum quam, at blandit leo.
Lorem ipsum dolor sit amet, consectetur adipiscing elit. Nulla euismod condimentum felis vitae efficitur. Sed vel dictum quam, at blandit leo.
Lorem ipsum dolor sit amet, consectetur adipiscing elit. Nulla euismod condimentum felis vitae efficitur. Sed vel dictum quam, at blandit leo.
Lorem ipsum dolor sit amet, consectetur adipiscing elit. Nulla euismod condimentum felis vitae efficitur. Sed vel dictum quam, at blandit leo.

Lorem ipsum dolor sit amet, consectetur adipiscing elit. Nulla euismod condimentum felis vitae efficitur. Sed vel dictum quam, at blandit leo.