Space Marine II
120mm Resin Kit from Forgeworld
Painted in 2001
So, camouflaged, eh ?
Well, I’d painted the red one as a commission, and although it kind of stuck to the accepted colour schemes for Space Marines at that time, I did feel that the ideas of bright colours on a battlefield – whilst Napoleonic times made use of them – it seemed a little like “Sitting ducks in a shooting gallery” to me.
Even with alien worlds having different and possibly colourful terrain, I thought that a colour scheme with some sort of camouflage might be in order.
So, clean-up of parts is pretty straight-forward, joining them is a little more difficult as some types of superglue don’t seem to grab the resin properly, but pinning joints helps a lot, and painting, well, that was down to an airbrush.
As this is an identical kit to the one I painted in red, again there are quite a few extra parts that allow for different weapons to be used.
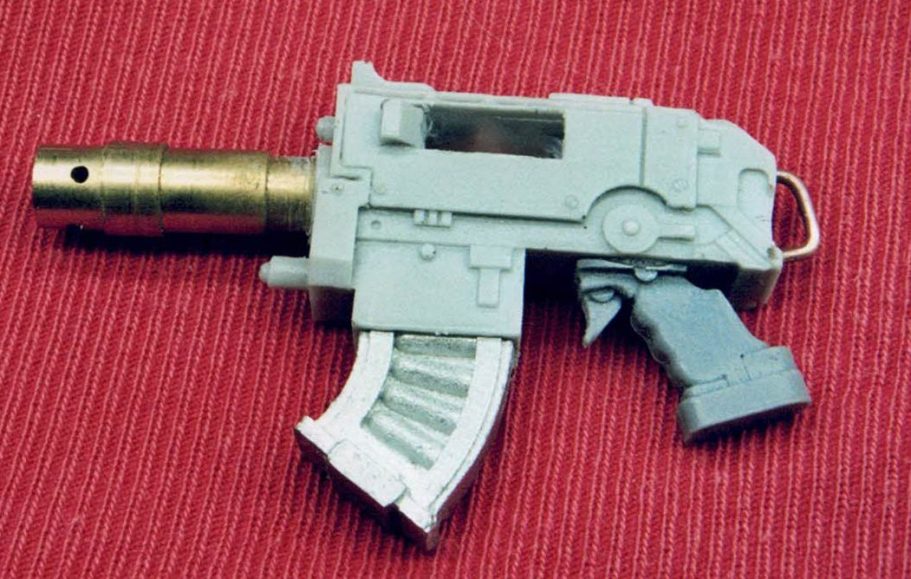
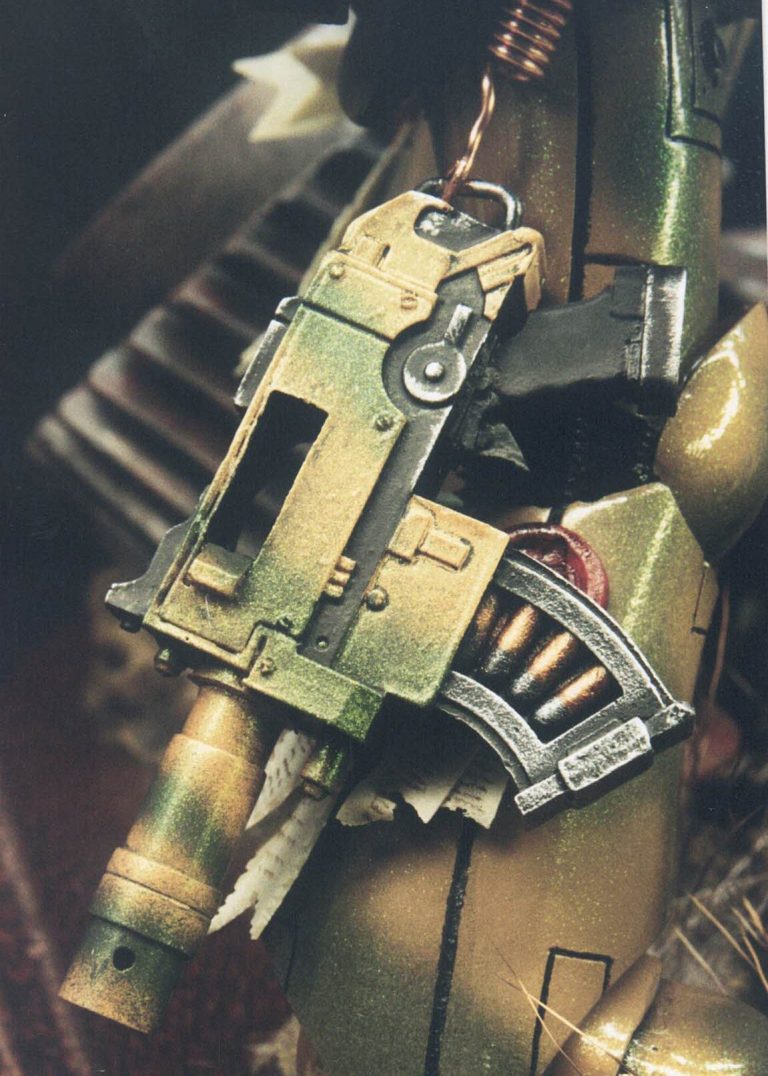
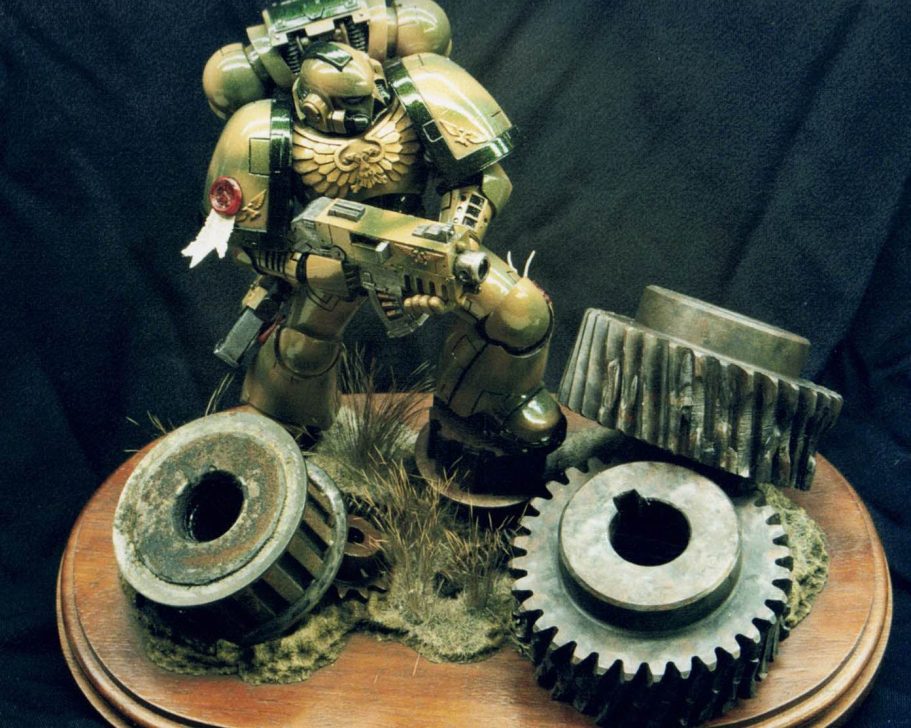
I thought I’d convert, or at least “improve” the guns, and the additions of brass barrels can be seen in photo #1
With the smaller hand bolter I’ve added a new barrel using various diameters of brass tube slipped one over the other and a wire handle at the back to lift the gun when suspended at his side.
Photo #2 shows the beginning of the painting process, the use of an old paintbrush pushed down the barrel as a handle, and then the bolter sprayed with a white primer followed by Tamiya Desert Sand.
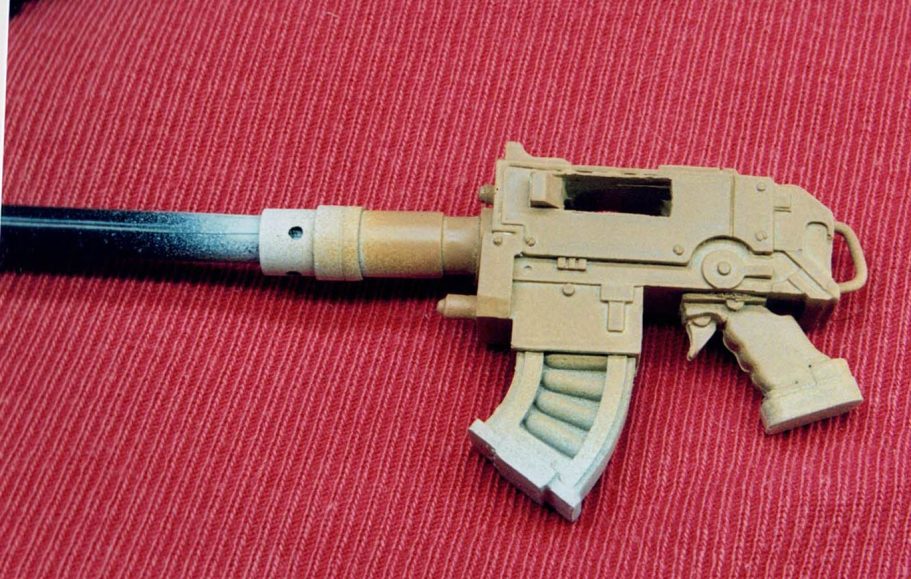
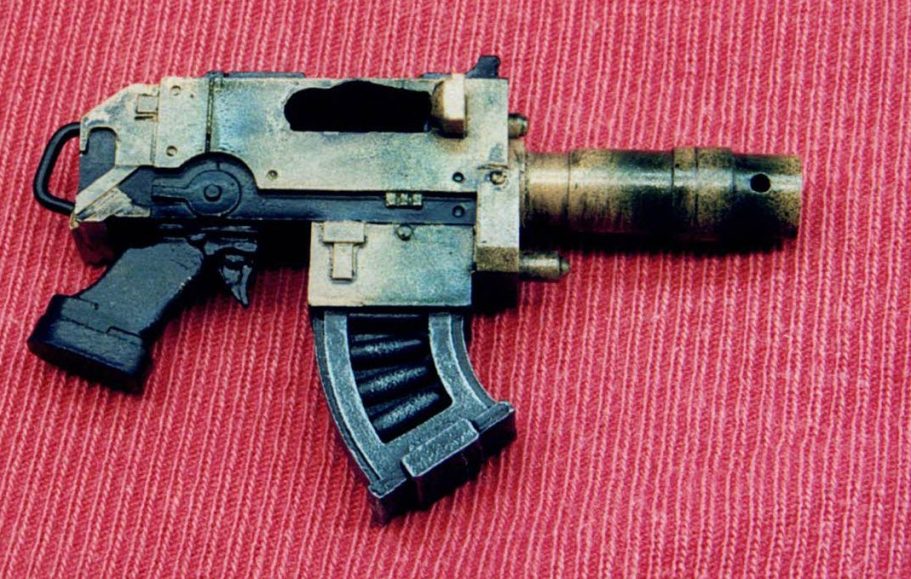
Photo #3 shows the painting finished, thin stripes of Nato Green and Black, both from the Tamiya paint range and applied by airbrush, with metallic colours lightly drybrushed over the magazine and GW Chaos Black acrylics applied to the handle, trigger and lower body.
So really that set the colour scheme for the rest of the figure.
After priming the parts, and I stuck with the idea of keeping most of the parts separate and drilling them out to accept wire handles, I could start replicating the colour scheme I’d sprayed on the bolter.
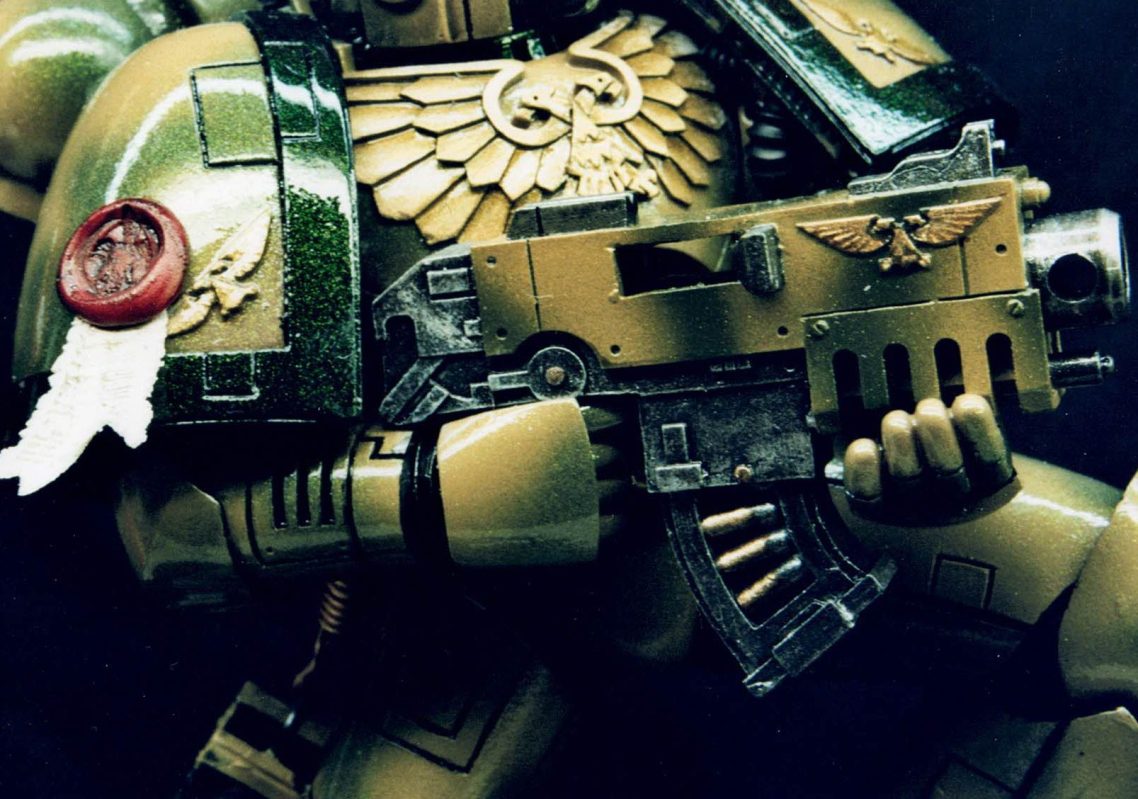
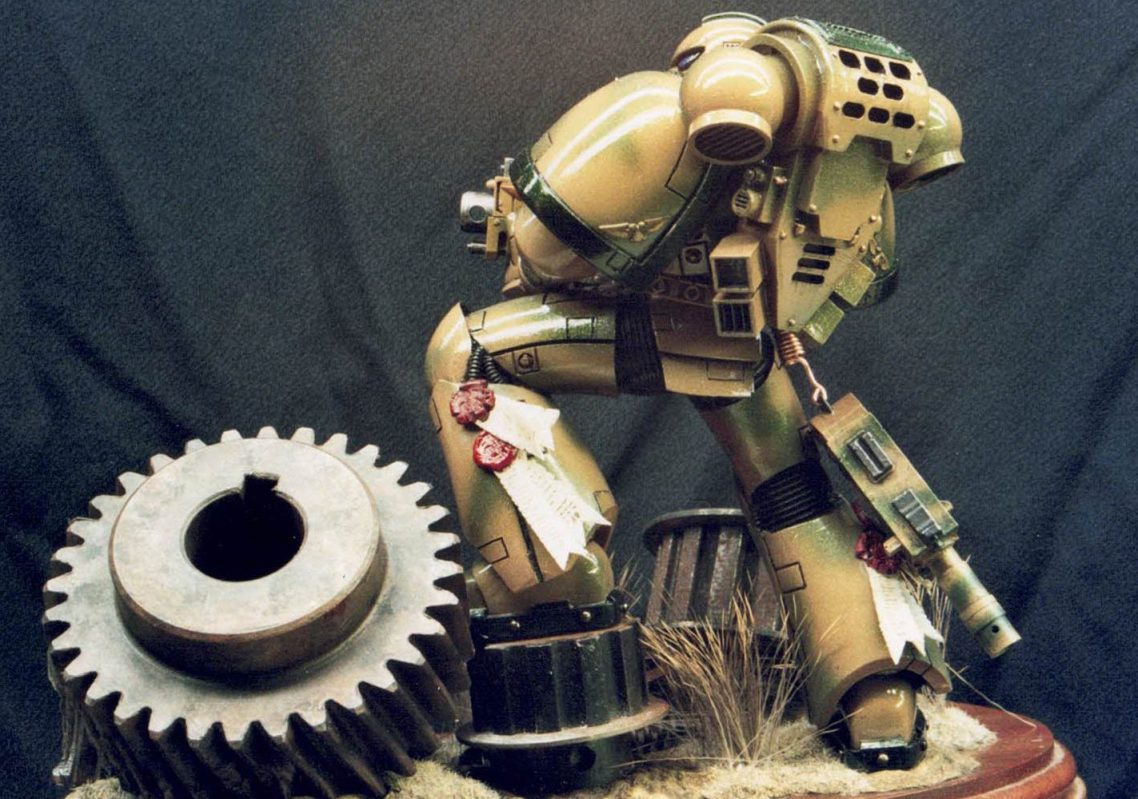
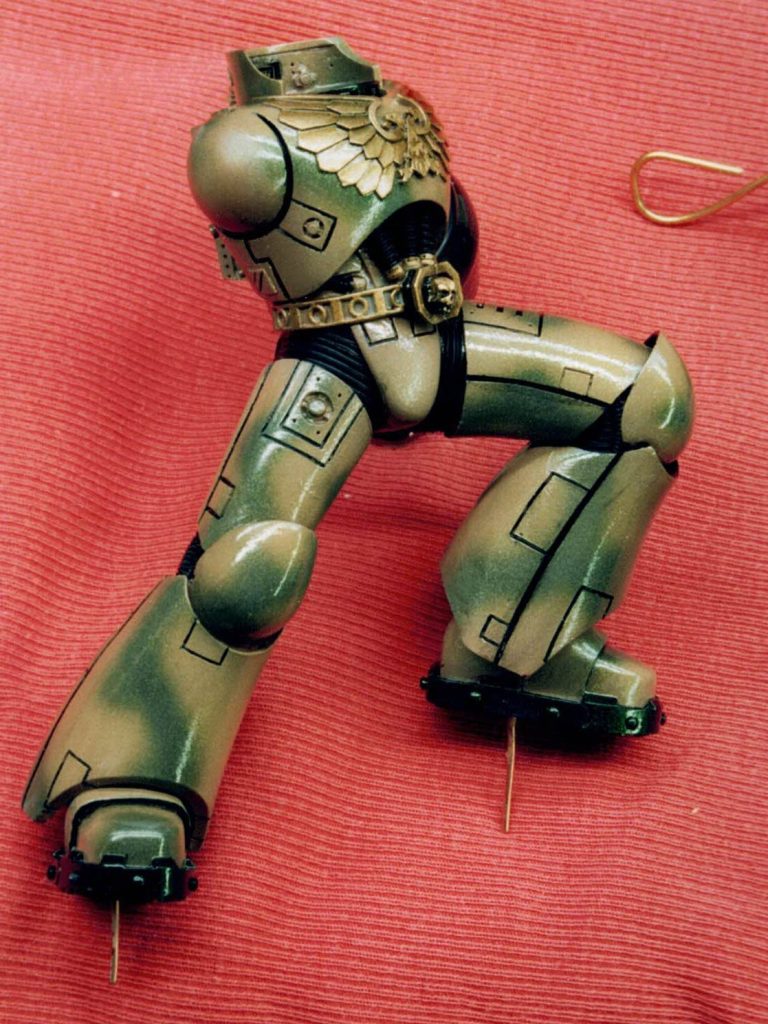
Photo #4 shows the main casting having been completed, the bands of colour are broader than on the bolter, it stays “in scale” with the size of the different panels.
I gloss coated the whole thing too, and used a heavily thinned Mars Black oil paint to add panel lines.
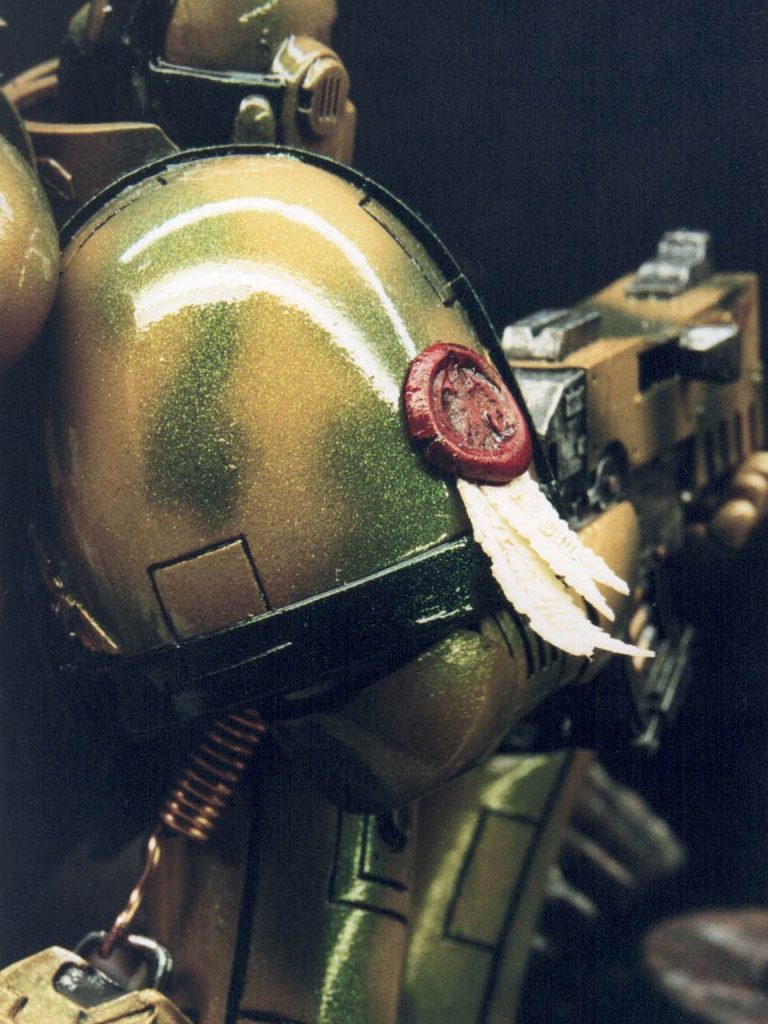
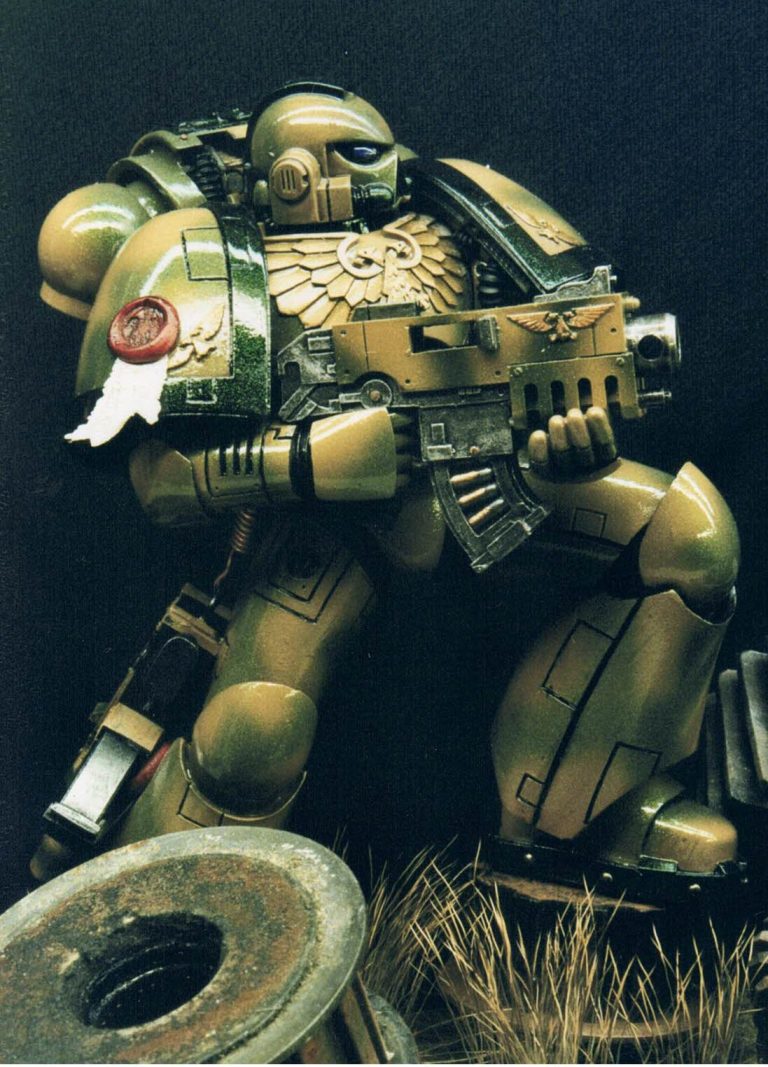
Details like the Imperial Eagle and the belt buckle were painted with GW Shining Gold and once fully dry a wash of Burnt Umber oils were added, removing the excess paint with a soft cloth from the edges and raised detail.
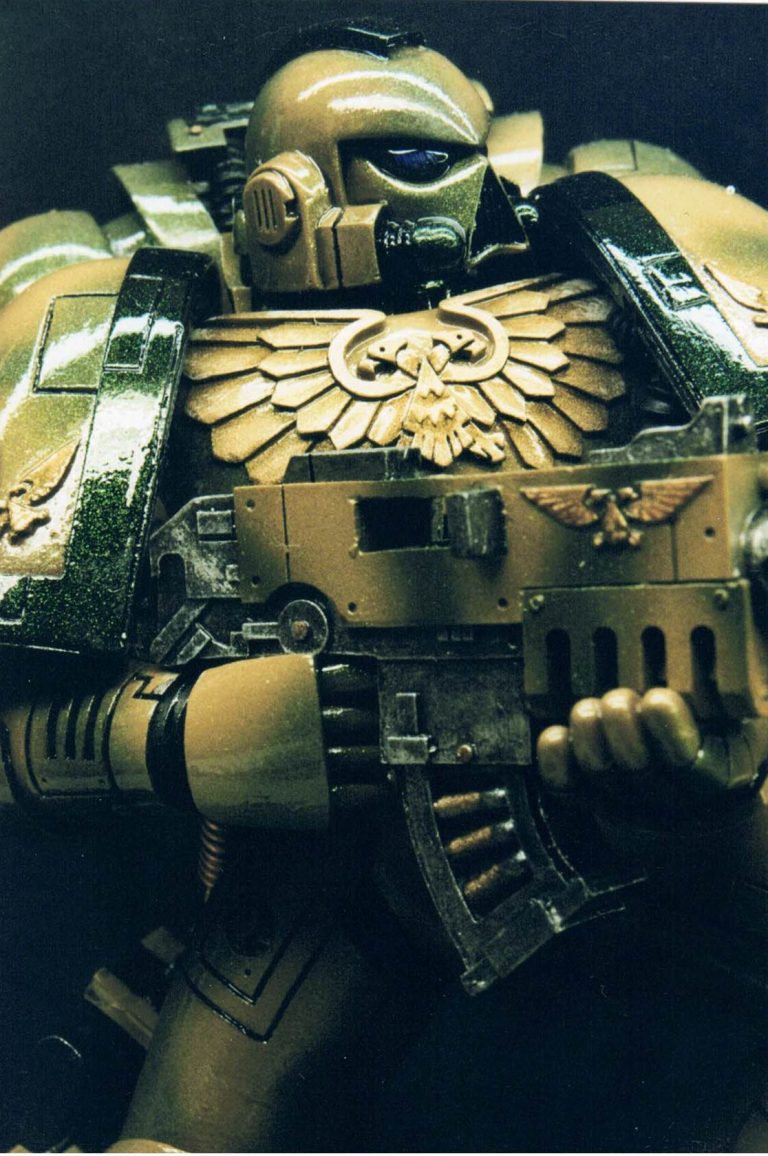
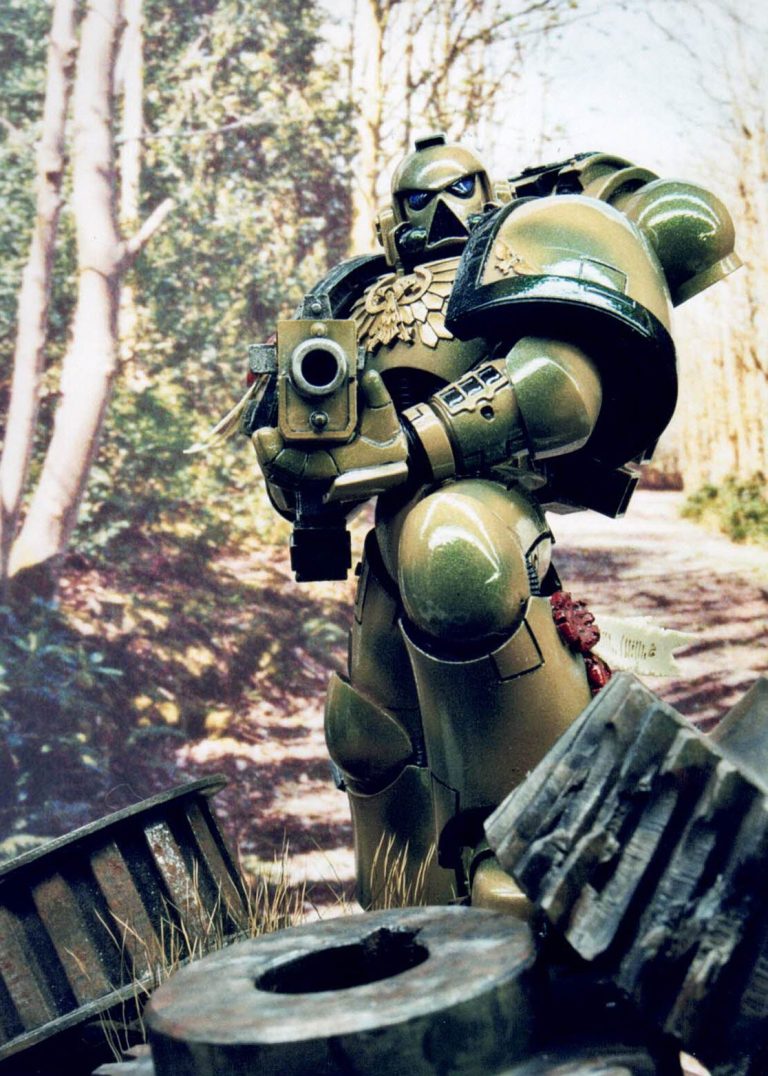
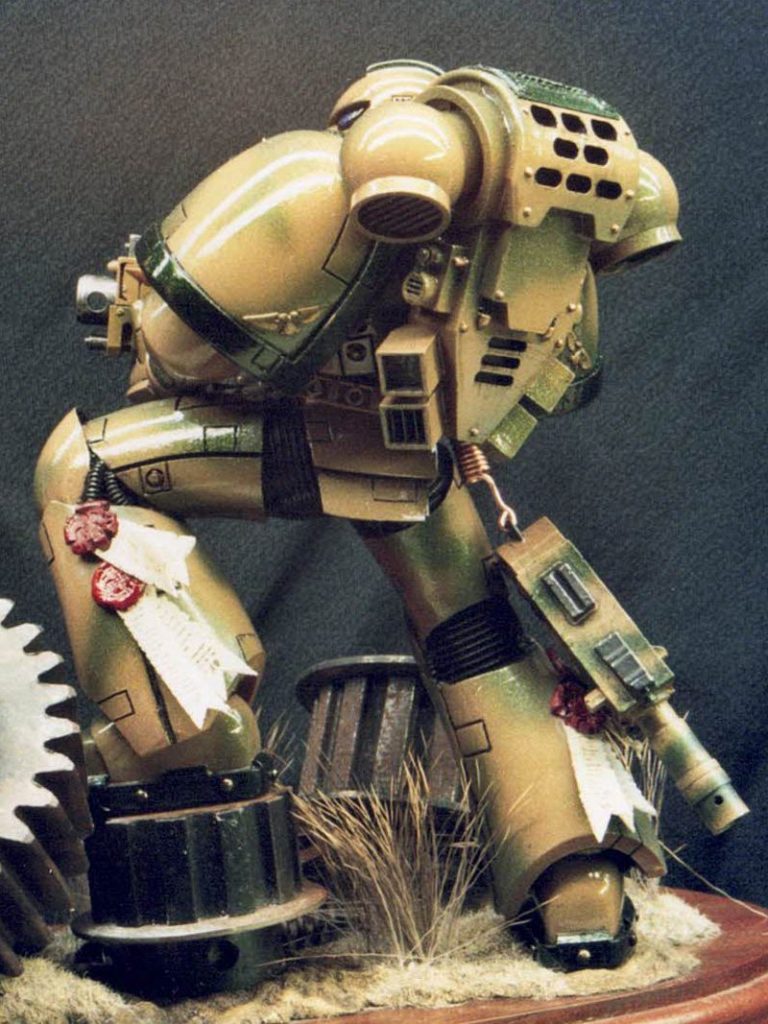
The finished pictures show the completed marine, I painted some areas like the edges of the shoulderpads with GW Chaos Black, and although when done it looked great, it still lacked something to make it stand out – OK an oxymoron there, paint it with a camo pattern and want it to stand out ( Ya idiot Hopwood ! )
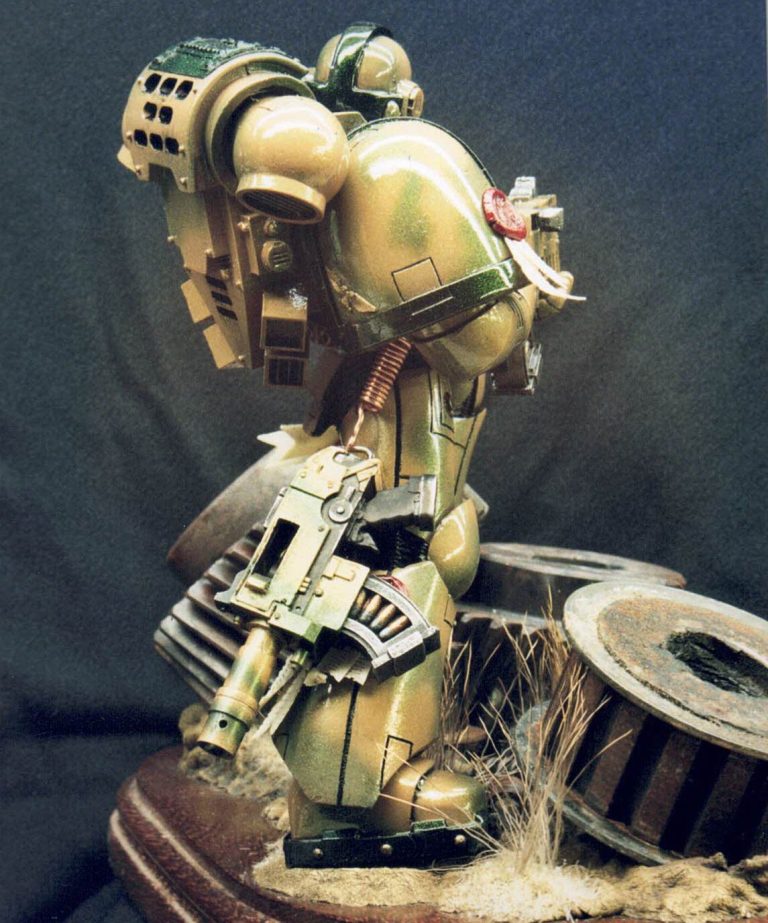
I just happened to find some Sparkly Mica suspension in an old bottle whilst searching through the drawer full of metallic paints, and applied this over the whole model with the airbrush.
Whilst the effect can’t be seen in the photos – which as you turn the model, different areas catch the light and reflect small flashes of light off the mica particles – the presence of the mica can be seen in photo #5 on the black edges of the shoulder pads.
The base
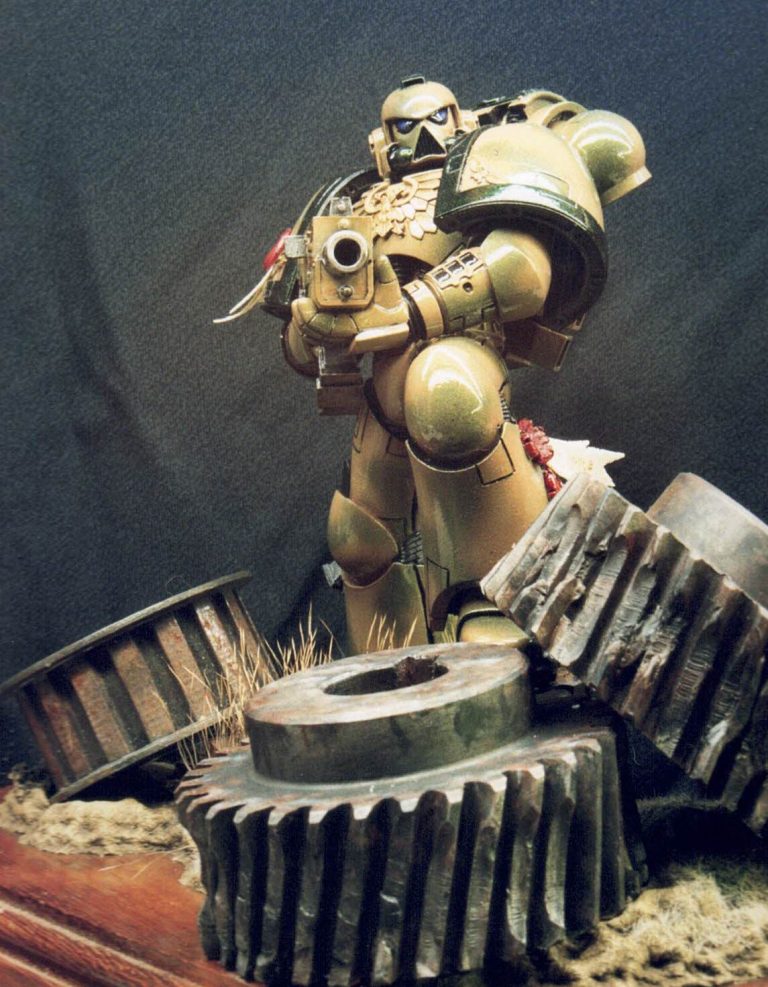
Whilst the base supplied with the model is OK ( No it isn’t, the cogs look like, and possibly are, cut out with mother’s cookie cutters ), I had access to some old, damaged cogs from our works engineering department.
Asking nicely, I managed to secure a few large cog wheels, proper ones, machined accurately and looking a heck of a lot more like “blasted apart” sections of some large war machine.
These came with their own problem, that of being both heavy and not exactly easy to drill holes in to.
I settled for embedding them into some Milliput “groundwork” adding epoxy glue to help secure them in place.
I wanted to use both bolters that were supplied, so the smaller one is fastened to his belt with a coiled wire – easy to grab if needed when caught short on ammo with the larger bolter.
I chose not to use the bare head that is supplied with the kit, I wasn’t particularly keen on the “dolly the sheep” sculpt, plus why would you wear all that armour and have your head unprotected. Makes me think of the people riding a motorbike wearing only shorts and a T-Shirt when the weather’s hot – wear leathers, or get the flamin’ bus !
Final thoughts
It’s a lovely model, nicely posed, well moulded, and I cannot think why the sales department at Forgeworld would think it a great idea to stop producing the large scale range of models that they took the time and trouble to design, sculpt and mould.
Yes, they were expensive, and yes, you’d have to create a separate game to be able to use them in any kind of battle.
Oh, think of the 54mm Inquisitor game, expanded to 120mm with a character led system of rules, using half a dozen ( or less ) actual models. Incidental or satellite characters could be card cut outs, counters or anything else made to temporarily represent satellite or minor characters.
I wonder if that’s be of interest ?……
Anyhow, Forgeworld stopped producing these large scale kits ( Ya boo sucks ! ) so we’re left with ones that we mortgaged the house and sold our firstborn children to afford, or combing the internet sales platforms and selling body parts to try and get them now.
I do feel that GW and Forgeworld missed a trick there, but I’m just a model painter, so what do I know ?
It’s still a lovely kit, as are all of the range that I’ve been lucky enough to get hold of.