Norman Knight
90mm White Metal kit from White Models
Painted in 1997
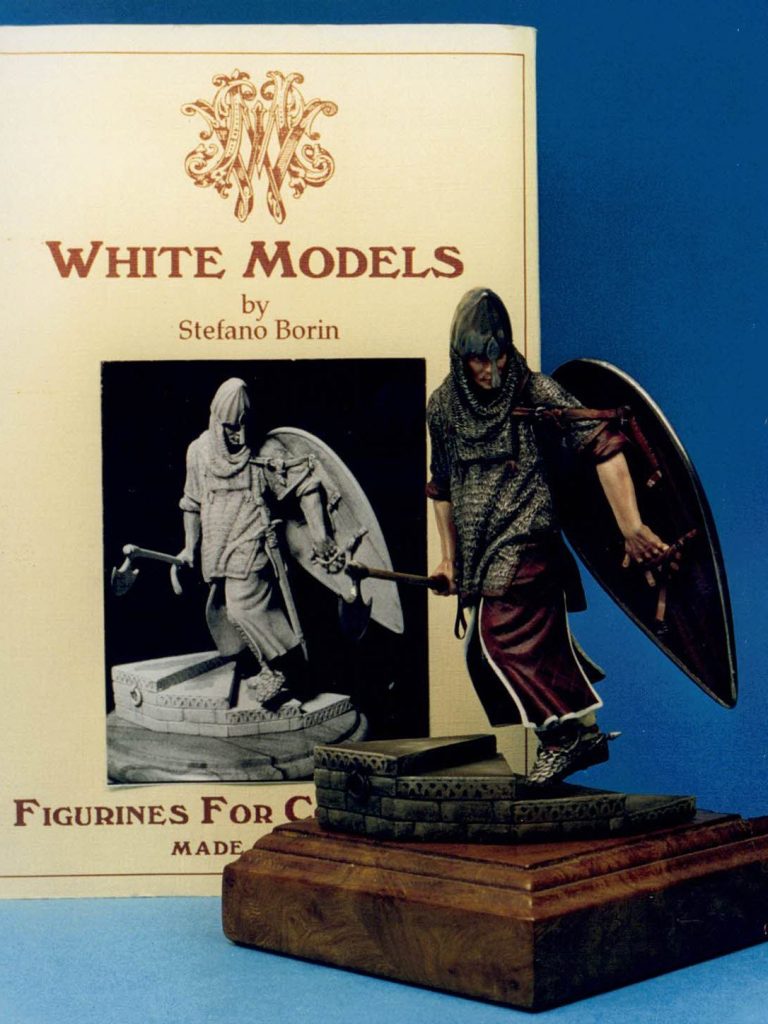
The range of kits produced by White Models is quite eclectic, spanning Roman Gladiators to Medieval Sergeants, Mamluke’s and even a Half Armoured Samurai.
Having bought an painted three of Stefano Borin’s offerings, I can say that they are very good kits, and presentation, sculpting and casting is of very high quality.
I’d seen this kit advertised in Military Modelling magazine, and liked the animation of the piece, which in fairness, for the times, was quite extraordinary. Verlinden for one were still producing figures that looked like shop store mannequins, and even Pegaso’s offerings appeared quite staid and static.
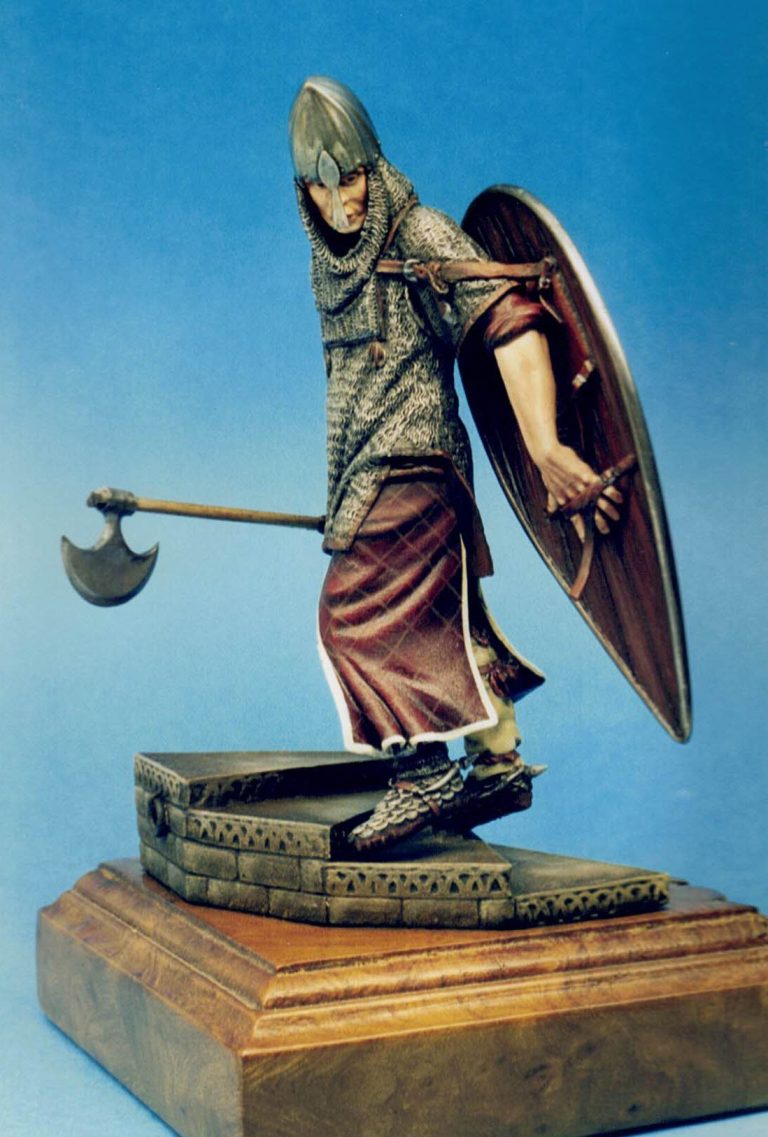
This figure was running up steps, twisting to see a pursuer perhaps, and seeking out a good place to turn and attack ?
The box art and the completed figure are shown in photo #1,

with the unpainted parts separated and spread out in photo #2.
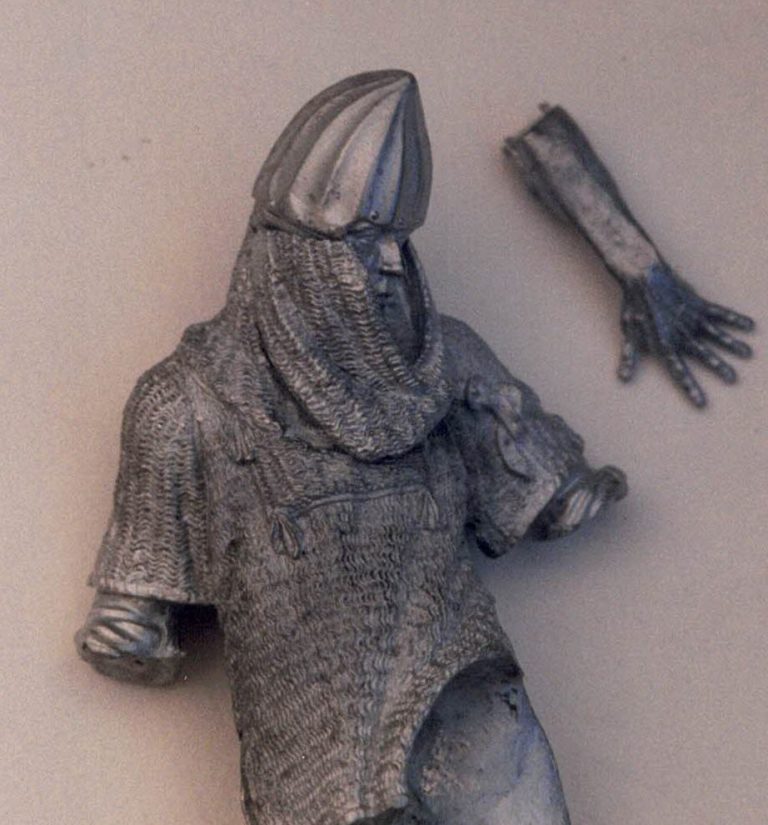
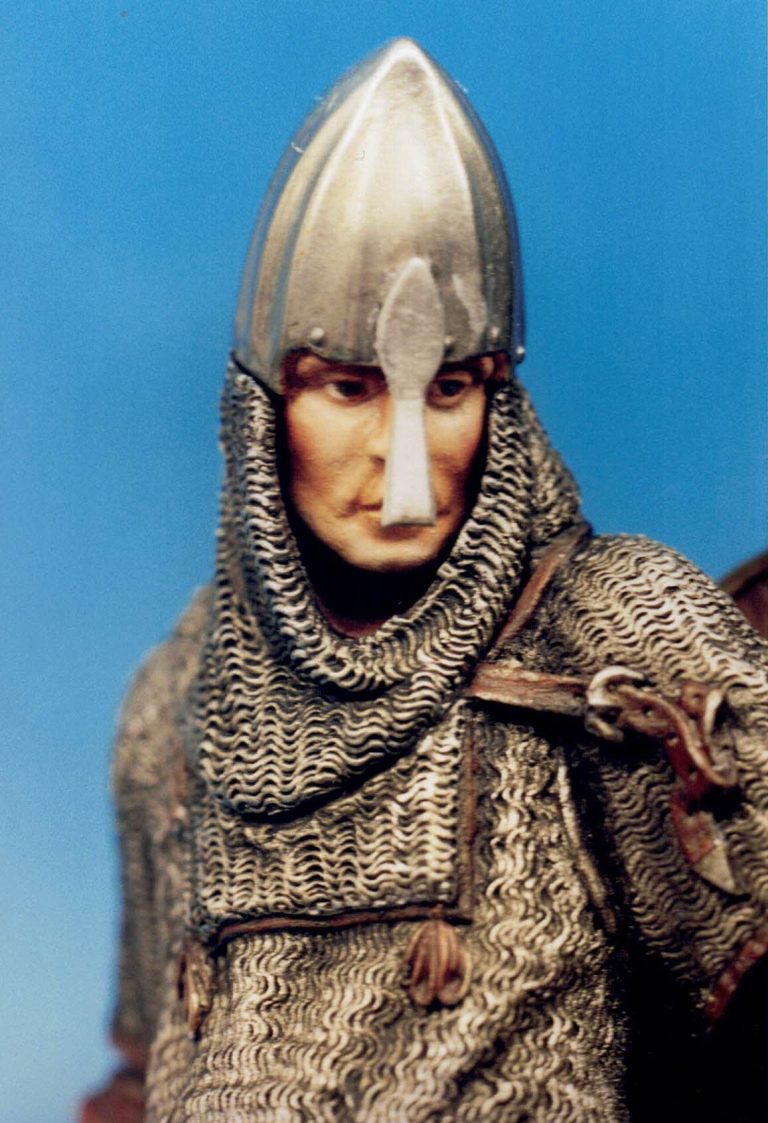
A close-up of the upper body and the left hand is shown in photo #3 and the very fine sculpted detail can be seen in this shot, the sculpting on the knuckles and the forming of the mail being of particularly fine work.
A few “problems” that I see with this kit.
The main one being the depth of the stair treads. These are too shallow to give the figure enough headroom when they return in a full spiral above him. Each step would need to be at least twice as deep, preferably three times as deep, to form the staircase properly, although maybe I’m being picky here.
The steps do go round in the correct spiral though, for any defensive building that is, allowing a fighter retreating up them the advantage if he’s right handed, and an enemy coming from below would be at a disadvantage with a weapon held in the right hand.
The second problem is the contact area for the feet. It’s very small and doesn’t allow a pin to be fastened up into the leg.
Not a problem if you’re just putting the finished model in a display cabinet, but if you’re thinking of taking him out with you to shows, that tiny joint is going to be put under a lot of pressure from a relatively heavy figure.
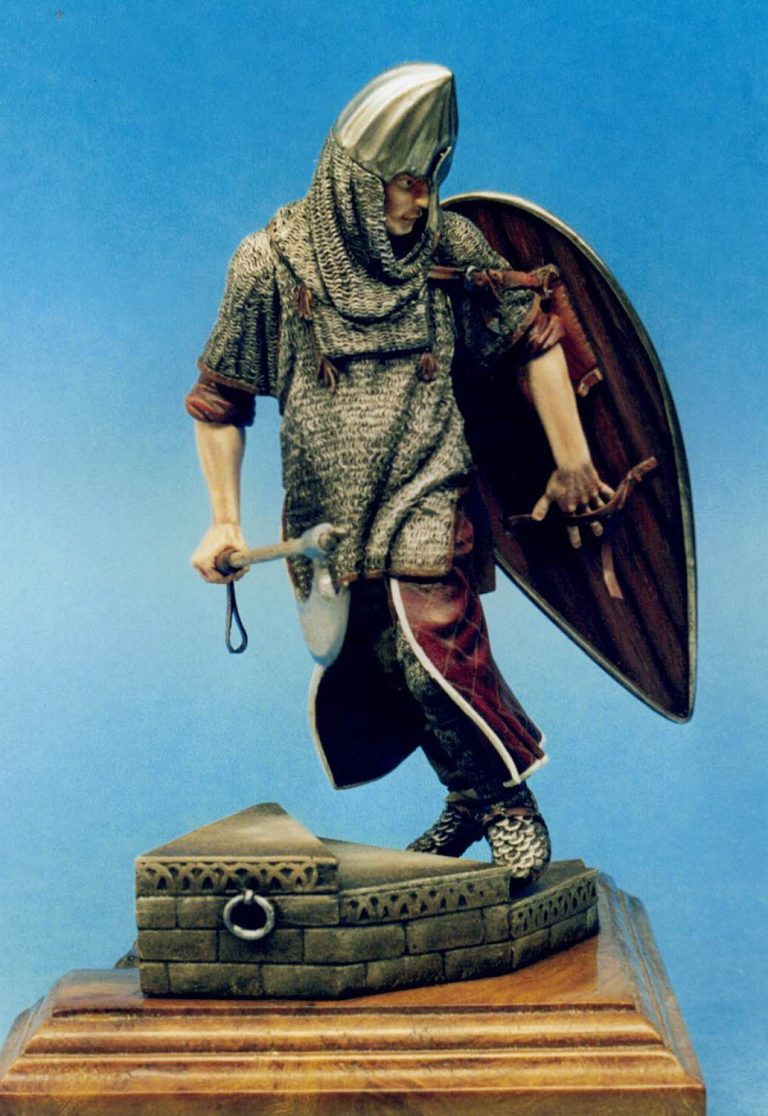
Photo #4 shows the figure almost finished.
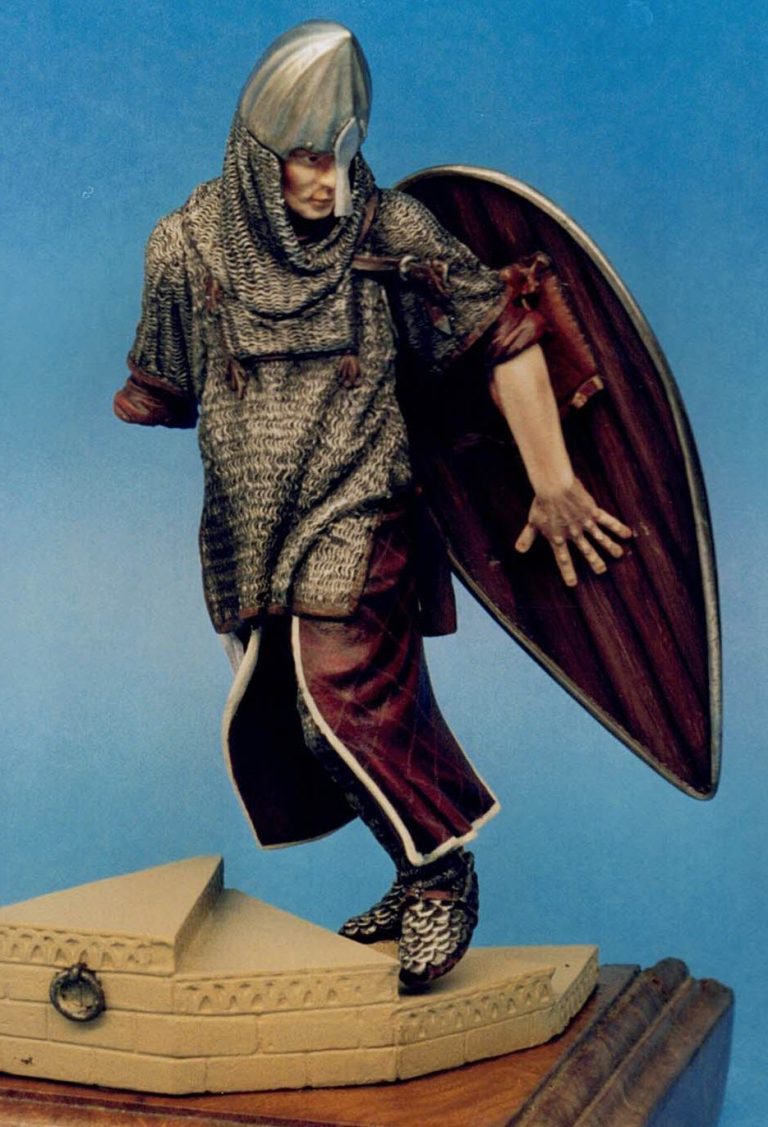
I’d stuck with a limited palette here, opting for the obvious silver’s for the metal areas and a burgundy colour for the clothing and with only a slight difference for the wood of the shield.
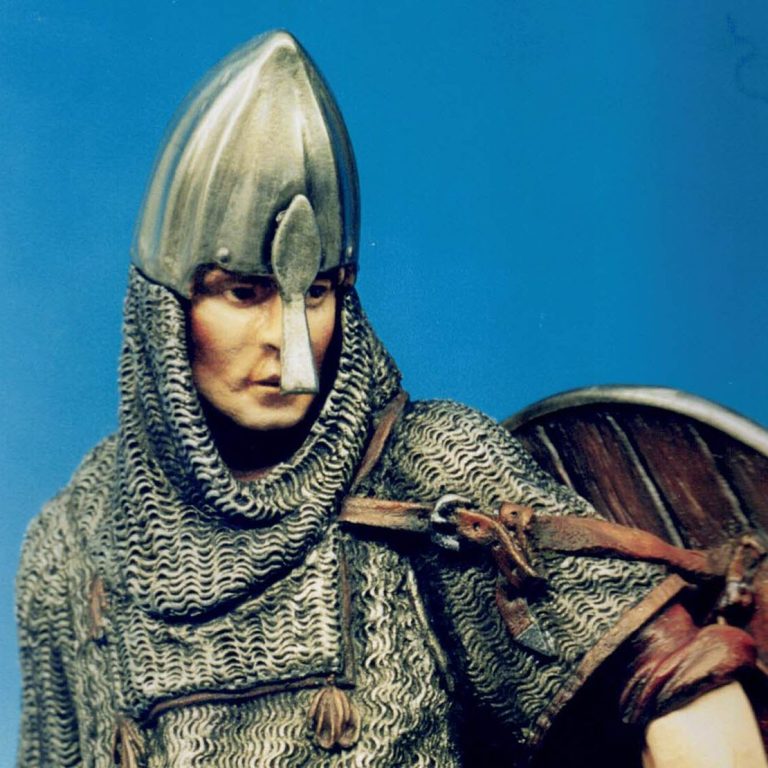
The face is a little bit bland, there is little or no expression on it for the painter to work with, but again, looking at the other kits I have from this range, none of them have much more than a passive, relaxed appearance.
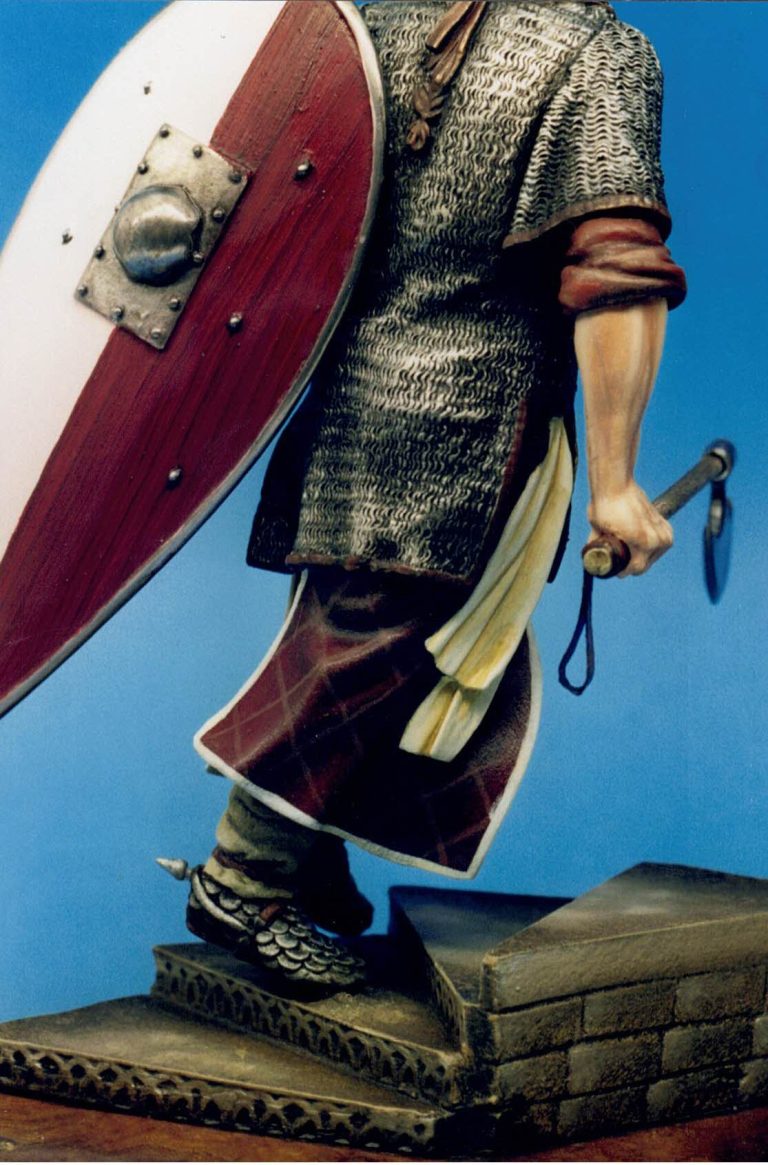
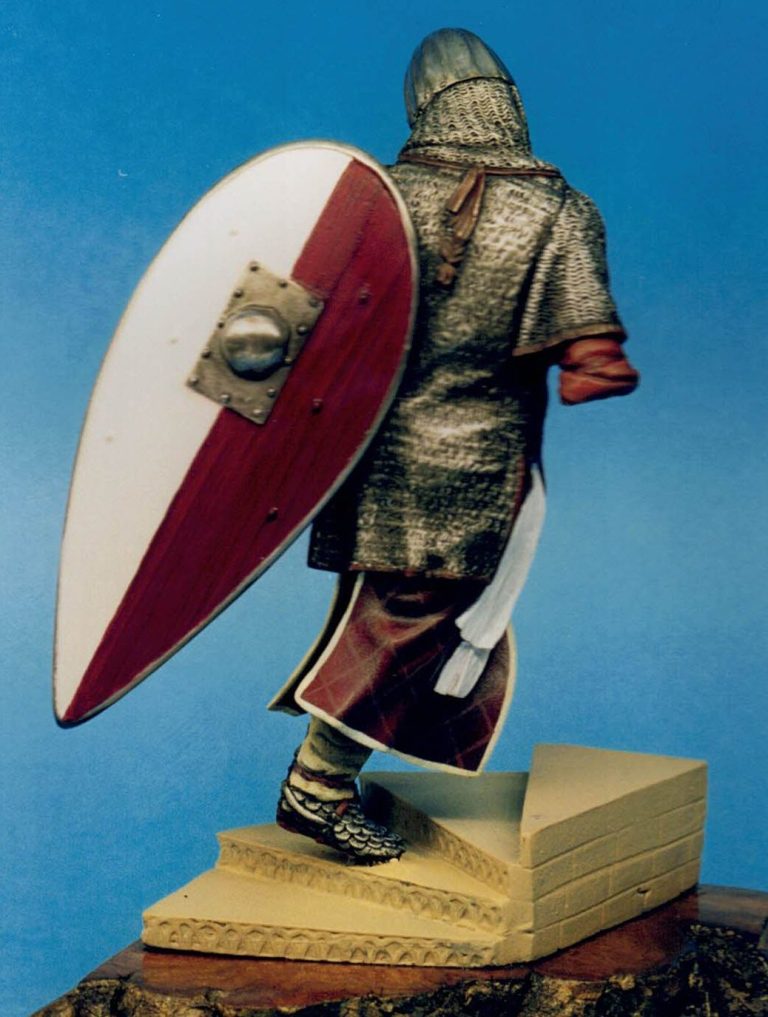
Photo #5 shows the back of the figure at the same stage, the mail texture is really fine, and you need to be careful on how much paint is added without filling in the recessed detail.
I painted a fine lined pattern onto the surcoat, which can just about be seen in this shot, fine lines of Yellow Ochre added over the red/brown once it had dried, and a white border added around the edge.
Photo #6 and the right arm has been attached. I cut off the shaft of the axe and drilled into the handle and the axe head so that I could replace the shaft with a cocktail stick – the wood grain when given a coat of Burnt Umber oils ( then wiped off with a soft cloth ) is far finer than I could paint in 1997 – and then it was fastened in place with some small drops of superglue.
A note here, add the paint to the wood prior to any glue. The glue will show up if added before the paint as areas that the paint cannot soak into.
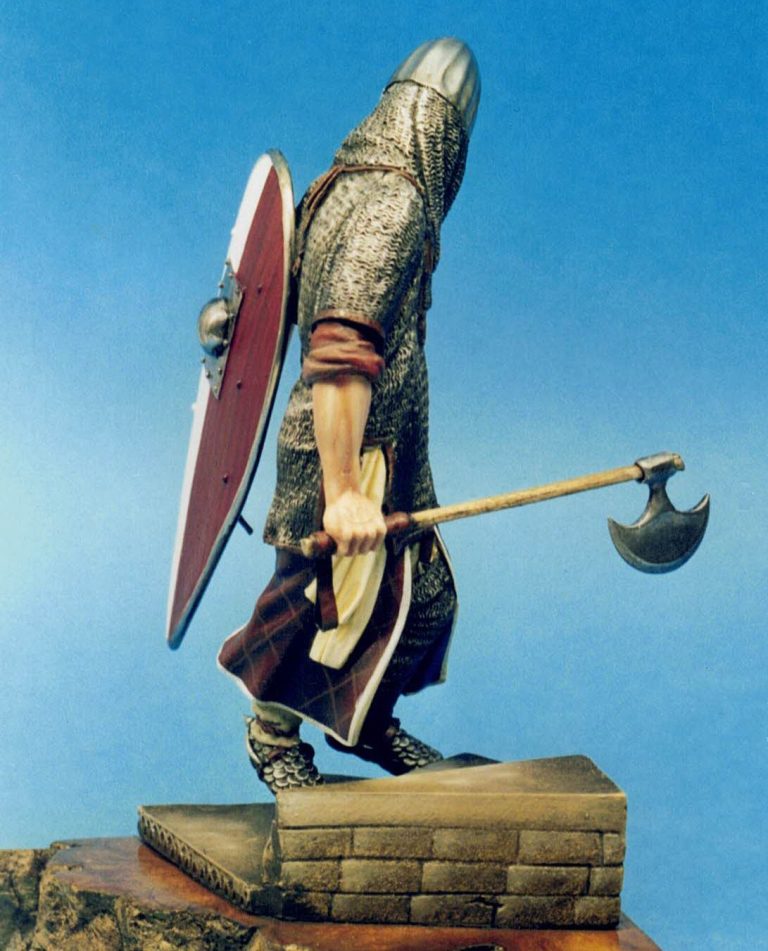
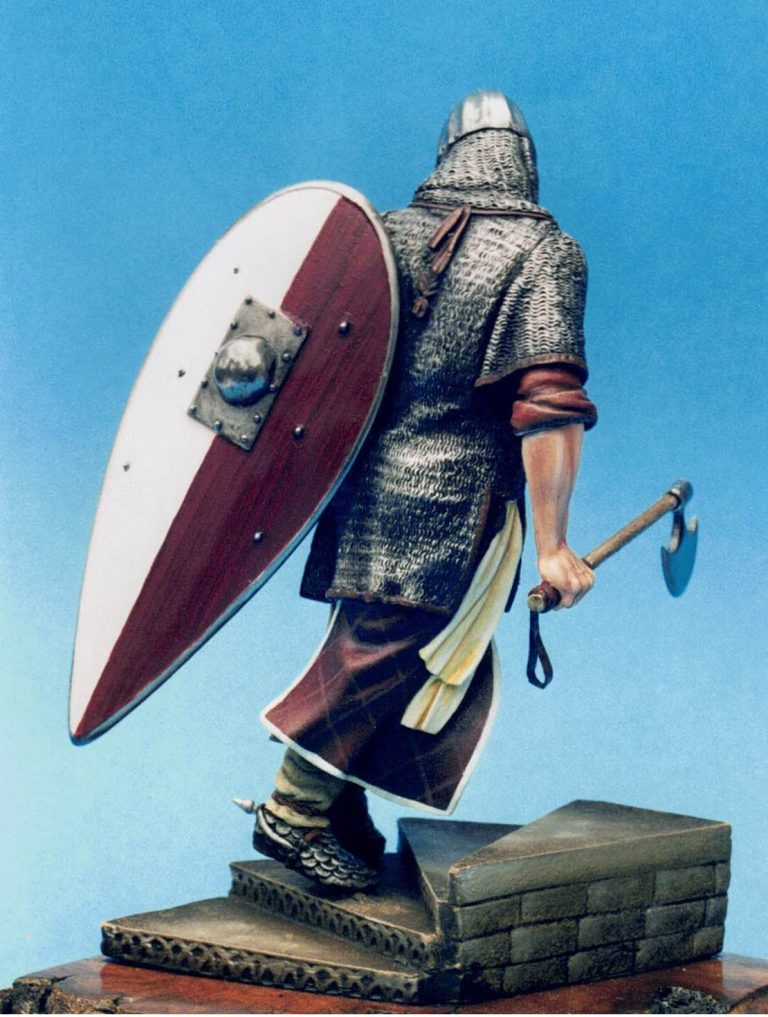
Photo #7 and a look at the back of the figure. The slight woodgrain effect on the burgundy area of the shield can be seen here – simply a case of leaving brush marks in the paint whilst using a sweeping, downward motion to finish the area.
To get a straight line definition between the white and the burgundy areas, I painted the whole shield with white acrylics, allowing this plenty of time to dry fully, and then I used a length of Tamiya Masking Tape, making sure that it was securely pressed into the edges of the shield boss.
Then the burgundy colour oils were applied and the masking tape carefully removed.
Photo #8shows a front view again, in the last two shots along with this one, the steps have been painted – a sand colour acrylic undercoat with Burnt Umber oils applied over the top of it. The oil paint is used without any thinner, then a coarse weave cloth is used to gradually dab off the excess paint.
Why specify a “coarse weave” cloth ?
Well different cloth weaves will leave different marks in the paint that remains on the area, and the coarse weave in this case leaves a pitted stone effect.
I added some Buff Titanium and some Titanium White oils, stippled on with a coarse brush, but only to areas that would wear or have regular footfalls on them.
The metal ring embedded in the side had been painted with metallic acrylics prior to the oil paints being added.
Final thoughts
Whilst the contact area between the foot and the step in minimal and could prove problematical to transporting this model anywhere, it can’t be denied that this is a lovely piece.
Although my painting of it isn’t up to what I could produce today, there are still areas that I like – the pattern on the surcoat and the wood effects on the shield – I’m still on the lookout for another one of these to have a second shot at painting.
Stefano Borin has sculpted for a couple of other Italian figure producers, and whilst some of the White Model range can look a little forced in their stance, the movement and detailed sculpting cannot be denied.
I’d suggest that almost all of the figures Mr Borin has produced are worthy of consideration if the subject is one you like, and if you’re lucky enough to spot them second-hand, then even better.
This one, even though it’s getting on for thirty year’s old, is still ( to my mind ) highly recommended.