WWI Warbike
A complete fabrication of history, but there we are
Converted and painted in 2021
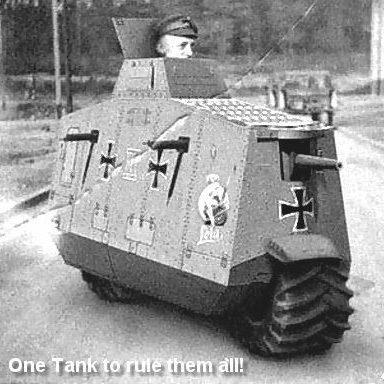
The premise behind this was simple in the extreme, that being an obviously ”photoshopped” picture that was sent to me from a friend ( Paul Dobson ) – see photo #1, and a question – can I make that ?
Having identified the basis for the vehicle as a German First World War tank, the A7V I just needed to work out what scale model to use as the vehicle compared to the figure that would stand next to it to give it scale.
The solution seemed to be mixing a 1/16th scale figure with a 1/35 scale tank, albeit the latter needing major surgery.
The first thing to do was source the tank, a cheap one preferably. There are one or two kits out there, but I only needed the upper hull of the vehicle, so spending £40 on a full kit seemed a bit of a waste. After looking on Ebay, I found what I suppose to be a wargame model, ready built and for £18.95 including postage from a chap with the handle “flagbearer101” from Drum and Flag, which I take it is a shop . Delivered on time, well packed and as a bonus, fastened together with small screws that allowed me to take it apart easily.
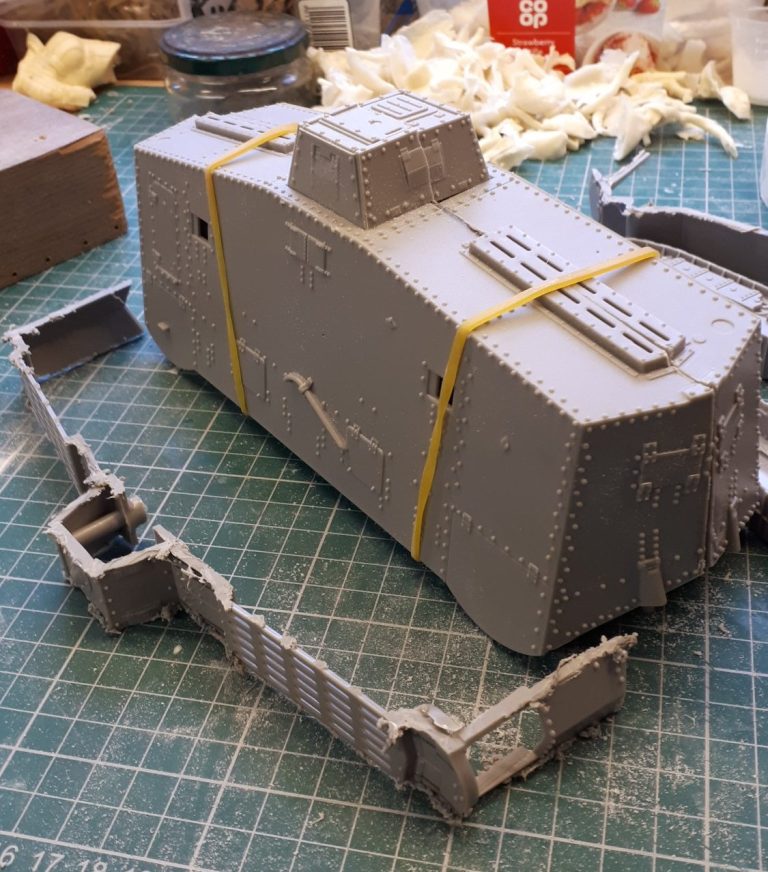
Photo 2 shows the effects of a small saw along with the section removed down the centre of the vehicle.
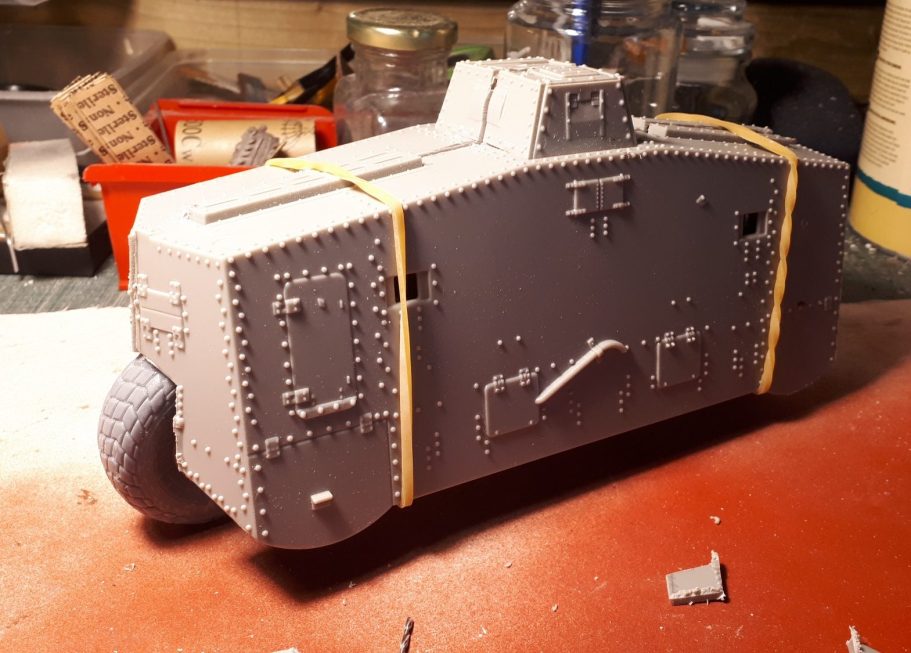
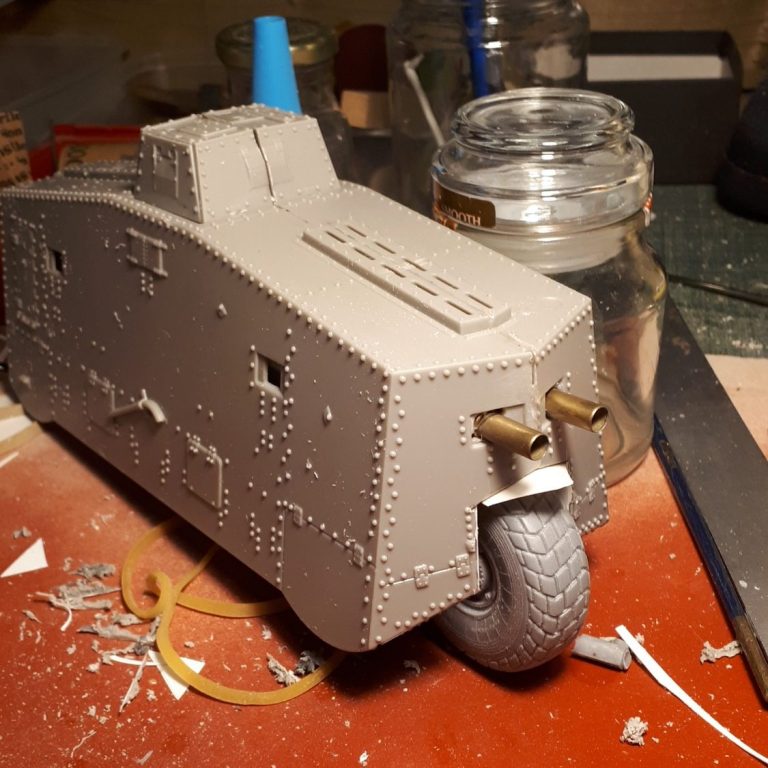
Further surgery was necessary to make the housings for the wheels, these being resin castings I took from a Takom South African Rhino SPG kit – see photo #3.
In photo #4 things are taking shape, the wheel housings have been lined with plasticard and two exhaust pipes added from .22 bullet shells ( because we all have those lying around the place !
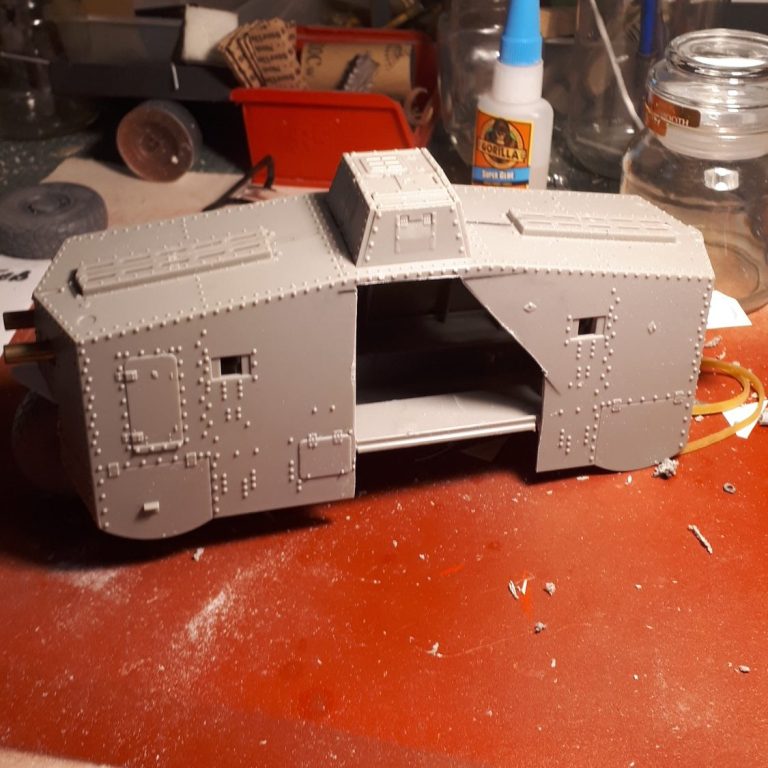
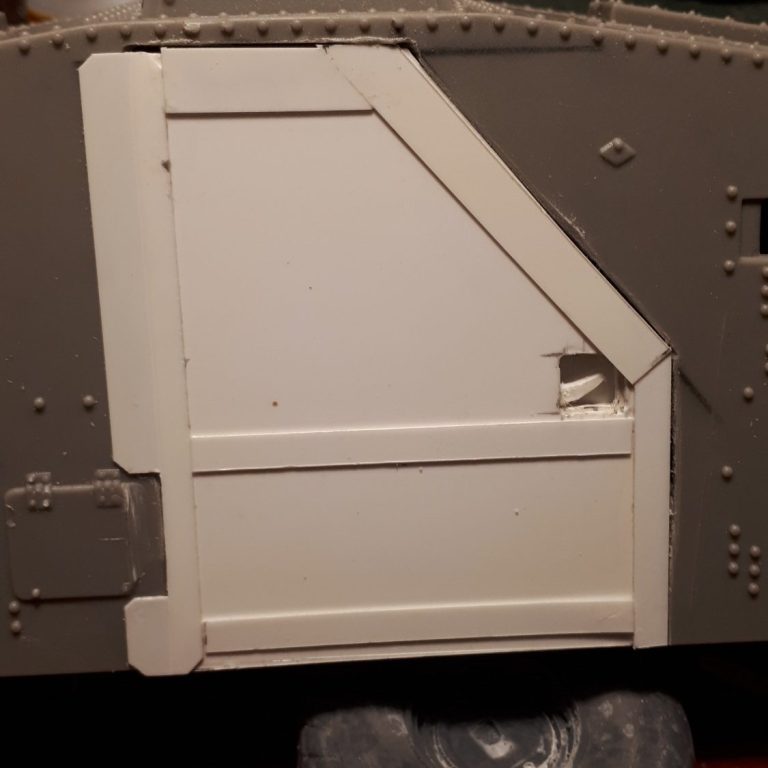
As the driver ( rider ? ) would need a point of entry / exit, I thought I’d add a door , and the cut-out for this appears in photo #5.
The replacement door was made from more plasticard, and a very basic door catch / handle made within that – see photo #6.
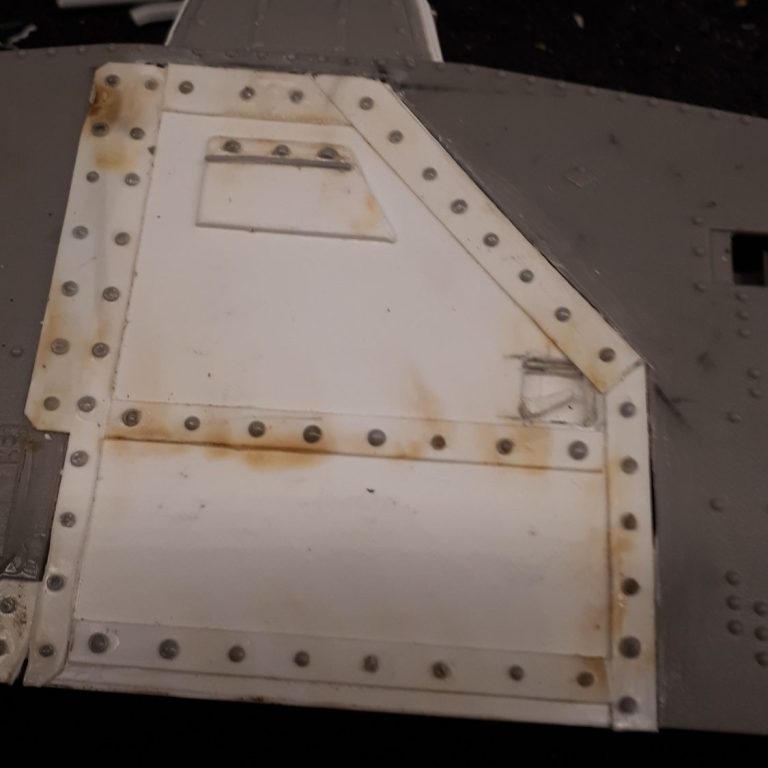
In photo #7 I’ve added rivets to the door. These are simply holed drilled into the plastic, some stretched sprue added into the holes and about 4 or 5mm of the sprue left protruding above the surface of the plasticard.
Why is the nice white plasticard looking a little burnt Adrian ?
Well, if you very carefully ( with supervision if necessary ) apply a naked flame close to the tips of the stretched sprue, it melts, folds back on itself into a blob and forms what appear to be the heads of round headed rivets. You could of course use an after-market set, but I find this quicker and cheaper. But you have to be careful – so please take care if you’re going to try this method out.
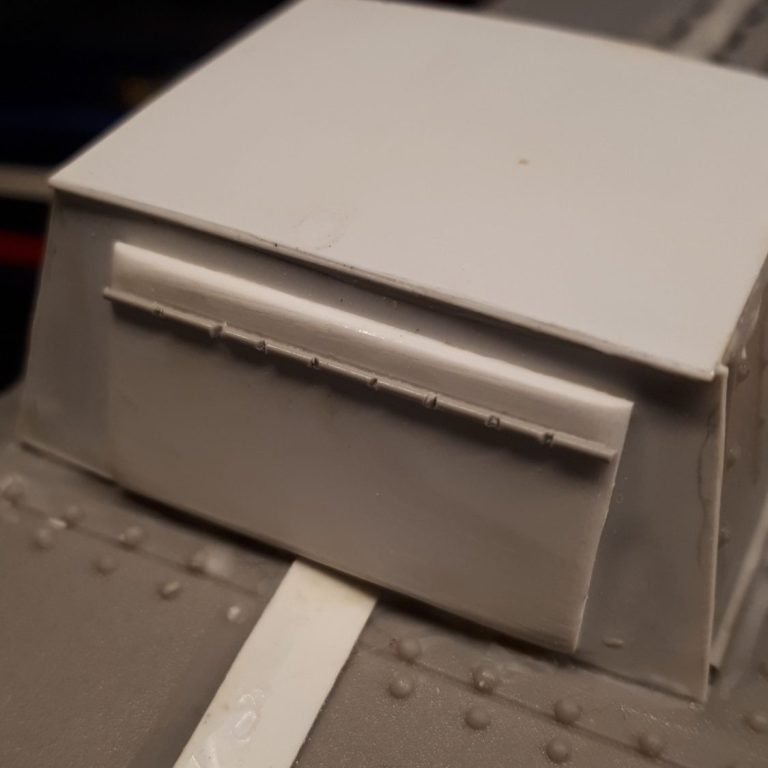
The top hatch / vision ports looked too small, so I decided to face these off with more plasticard – see photo #8 - adding a strand of stretched sprue to a groove I’d made about 2mm from the top.
Once glued in place, small cuts were made in the sprue to make it appear as though it’s a hinge and that the lower part of the plasticard facing could be lifted by the occupant to improve visibility of his or her surroundings.
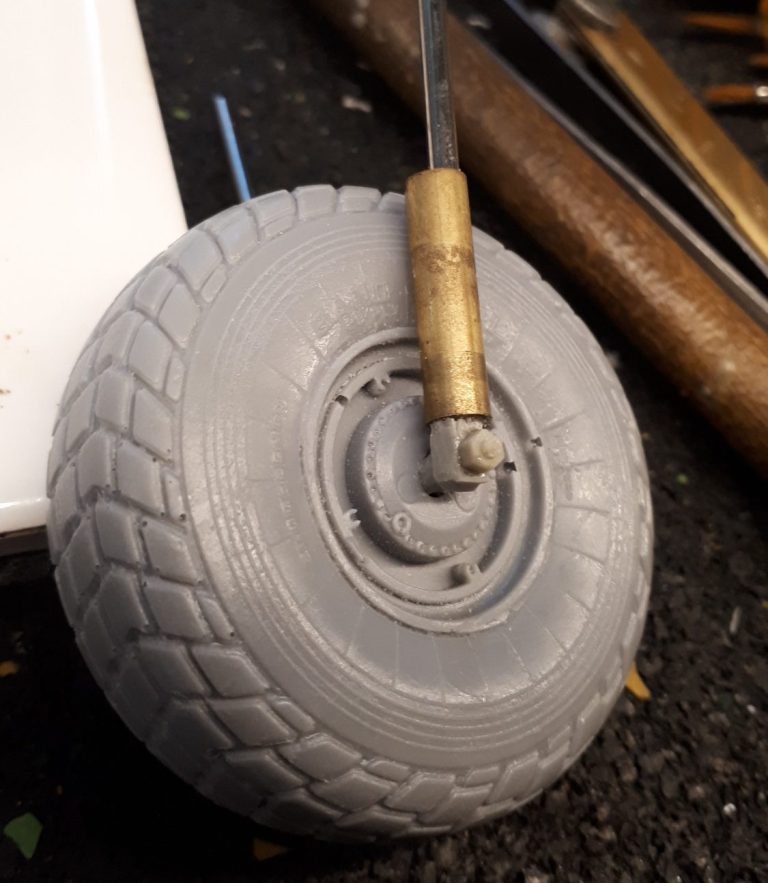
Back to those wheels. The rear wheel didn’t need much adding to it other than an axle ( known in the modelling trade as a thick piece of wire ), howeverfor the front wheel I’d need something a little more complex. I wanted the wheel turned to one side a little, as it’s make the model loads more interesting......honest, but that meant that a simple wire shaft would not look right.
The solution was a squared off “U” shaped piece of wire to support the wheel, making armoured shock absorbers ( Ok perhaps they’re springs with an armoured shield,you can decide on that one ) from some brass tube slipped over the wire, and a small lump of Magic Sculpt putty at the outer hub, shaped into a squared off axle end, with a nut and bolt head made from more putty and the excellent Green Stuff World mould set. All of that shown in photo #9
Now here’s where I admit cheating.... I only did one side !
OK, I actually made both sides, but it wouldn’t fit in the wheel housing properly, so I had to take one side off, so not exactly cheating, but as you can’t see the side I removed, we can all sleep at night pretending that it’s there. I thank you.
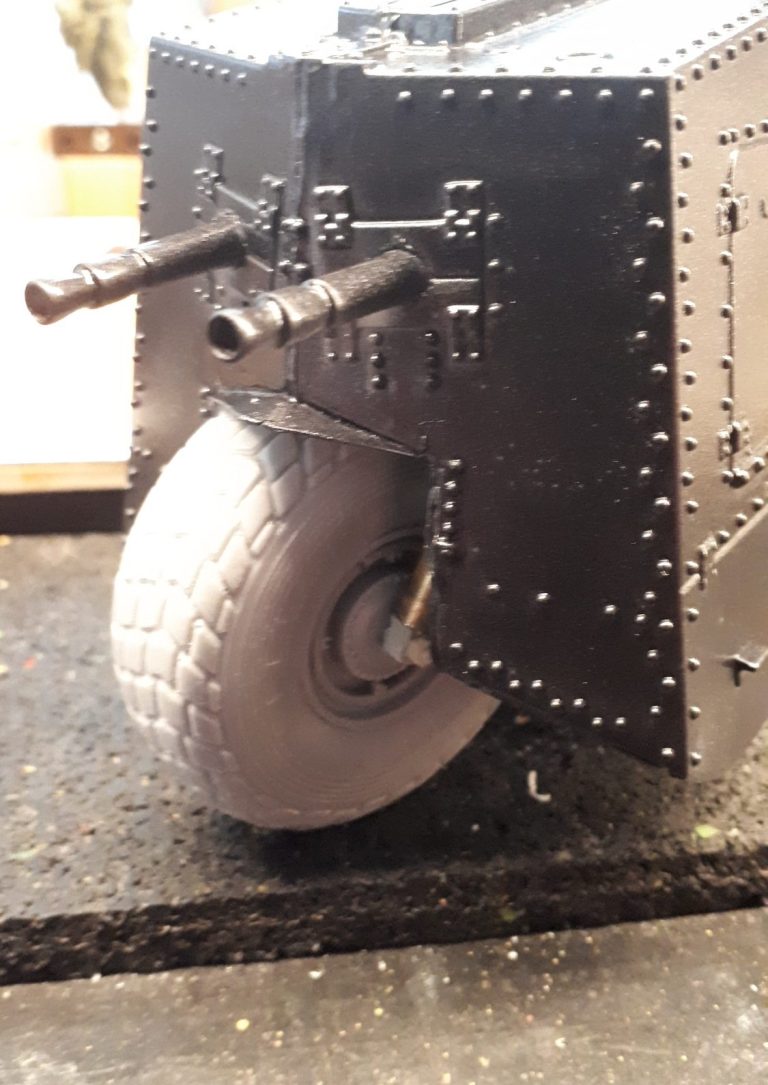
The completed wheel is in position - shown in photo #10 - along with two machinegun barrels. Here was another problem, where do you get gun barrel tips for machine guns in 1/16th scale.
Having made a few 1/35 scale tanks recently, the options for replacement bits is brilliant. But in 1/16th scale, not a chance. You can get full Maxim guns on a stand, but the price is a bit prohibitive if you just want the business ends and are going to bin the rest.
So I resorted to cleaning up some more sprue from a kit and very carefully turned it on a model-making lathe to get the basic shape of gun barrel tips.
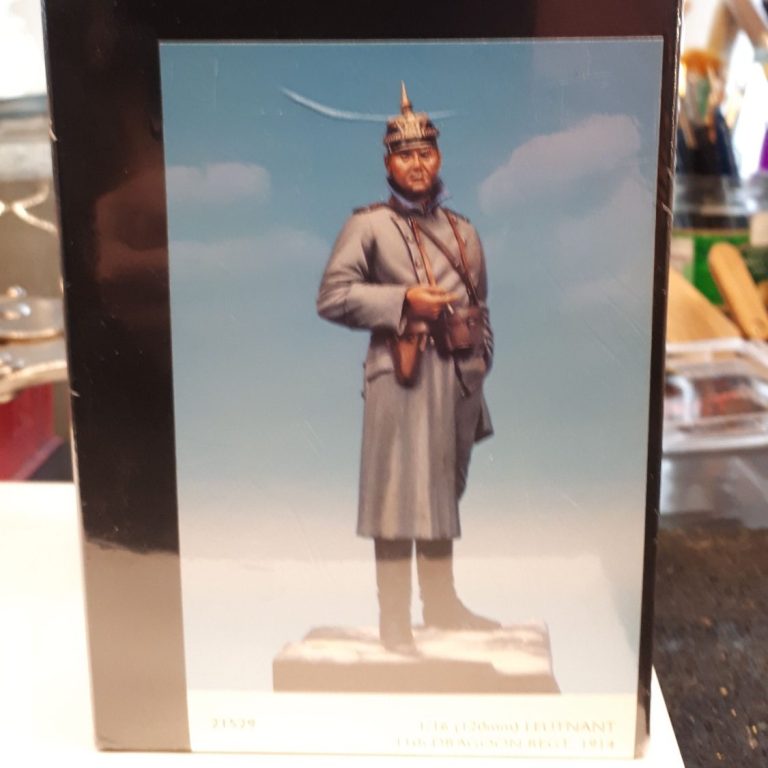
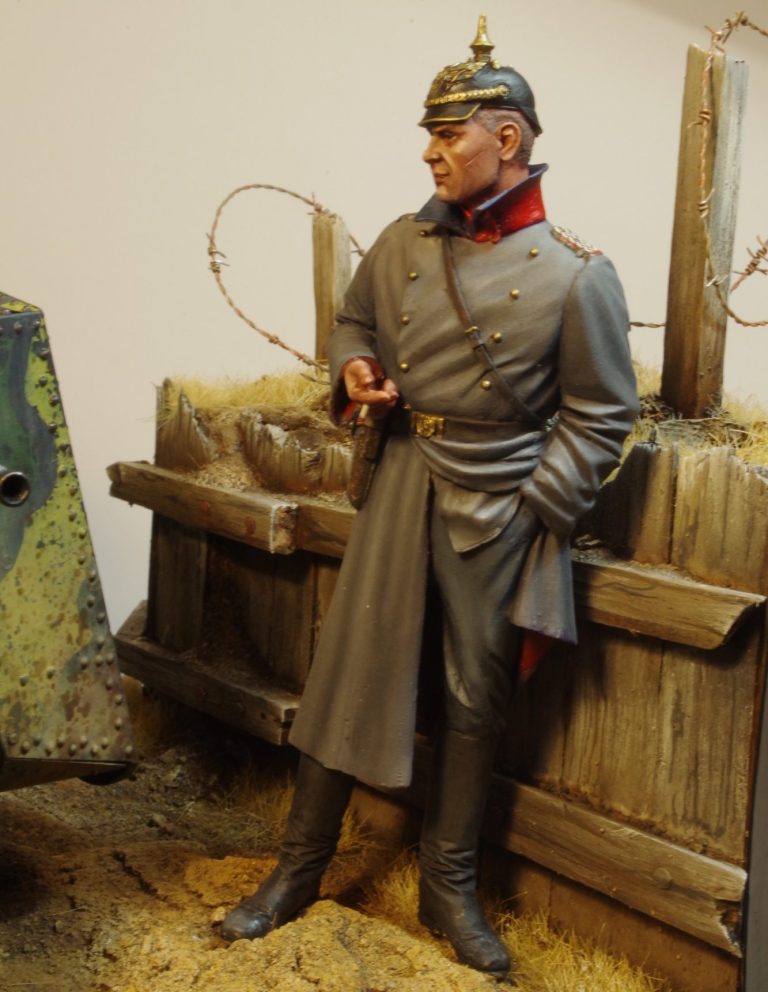
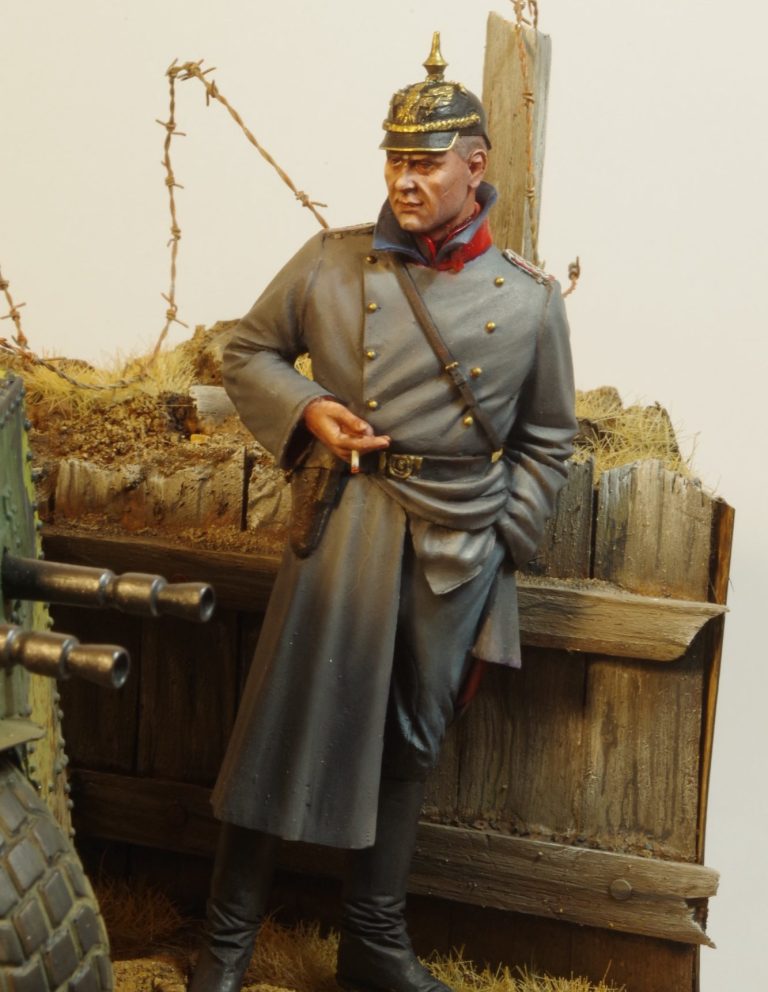
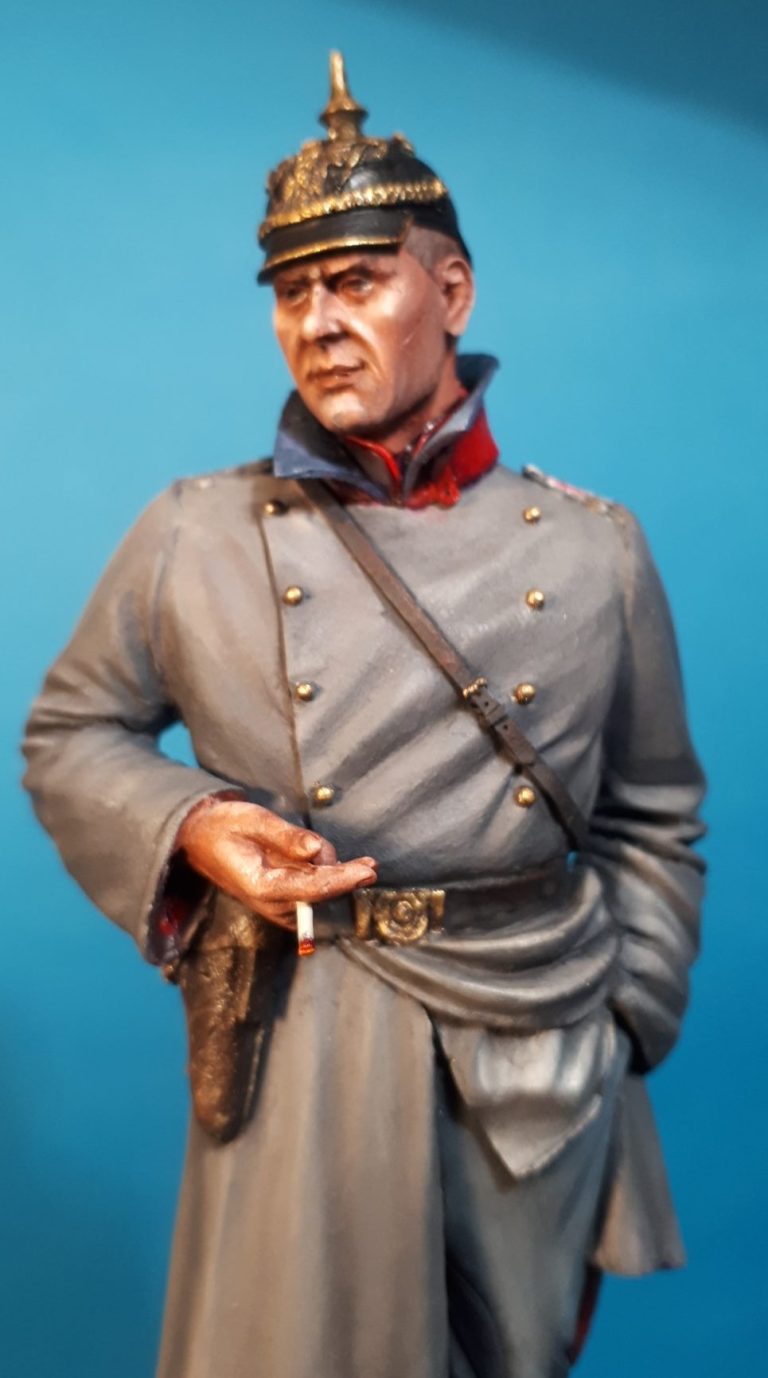
Now I’d better mention the figure. This is a very old one from a now defunct company called Kirin. It’s a German Officer from the First World War period, but looks a little bit Steampunk, well enough to not seem out of place next to the vehicle. It gave me an excuse to paint him, as I’d been searching for more than 20 years for this kit. My thanks to Bowbow123 on Ebay for putting said original figure up for auction.
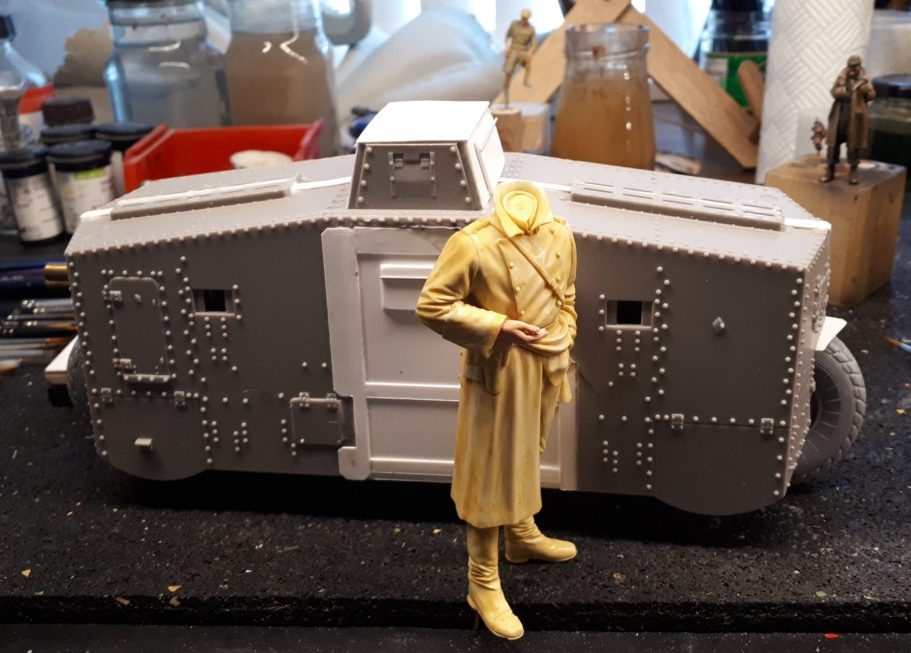
I suppose I should have spoken about this picture earlier – photo #12 – as it was necessary to check that both figure and bike “worked” scale-wise. I thought they weren’t far off when I took this shot.
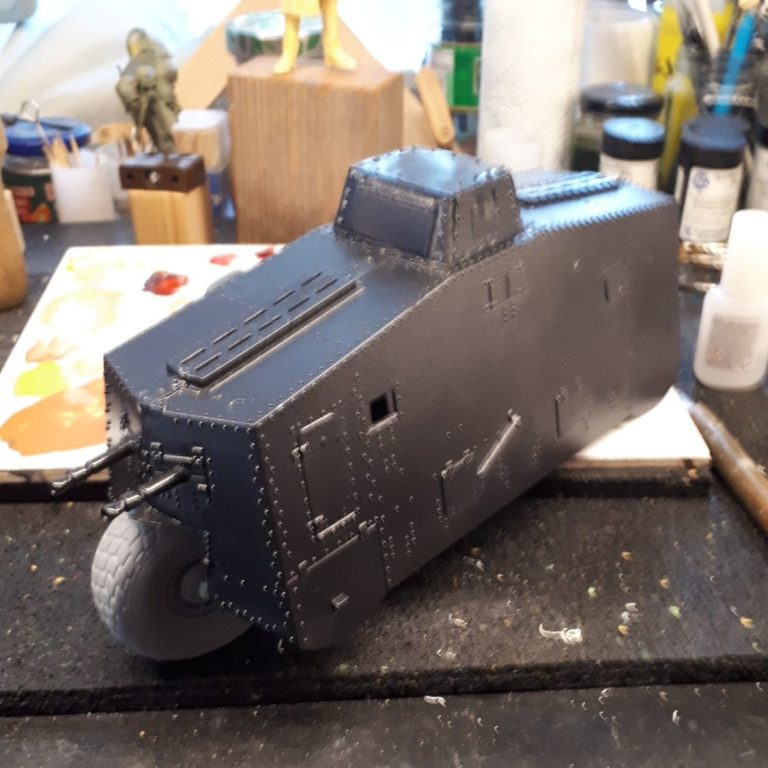
Painting the bike was basically an exercise in AFV painting. A primer / undercoat of a dark steel colour ( photo #13 ),
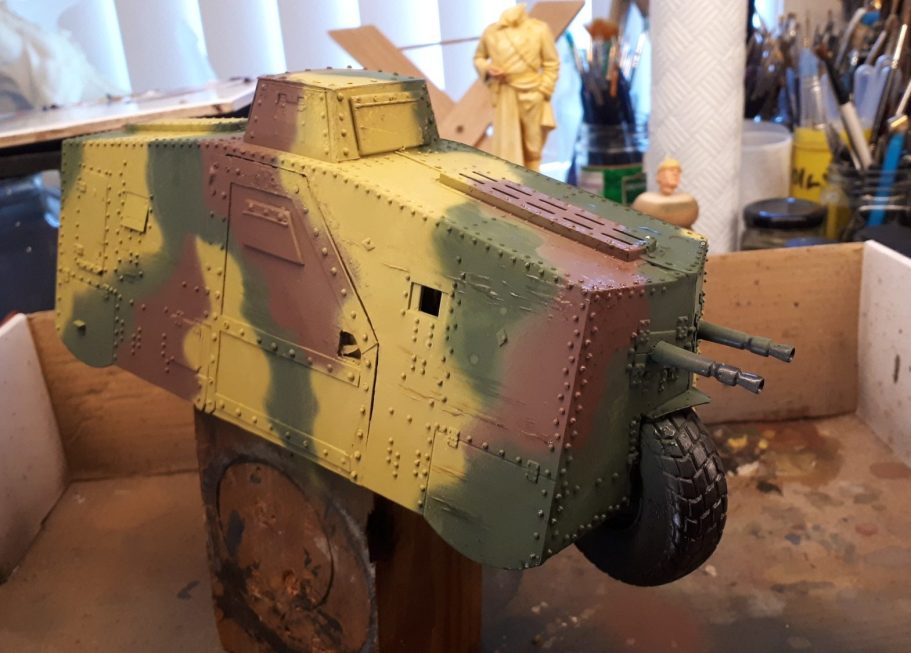
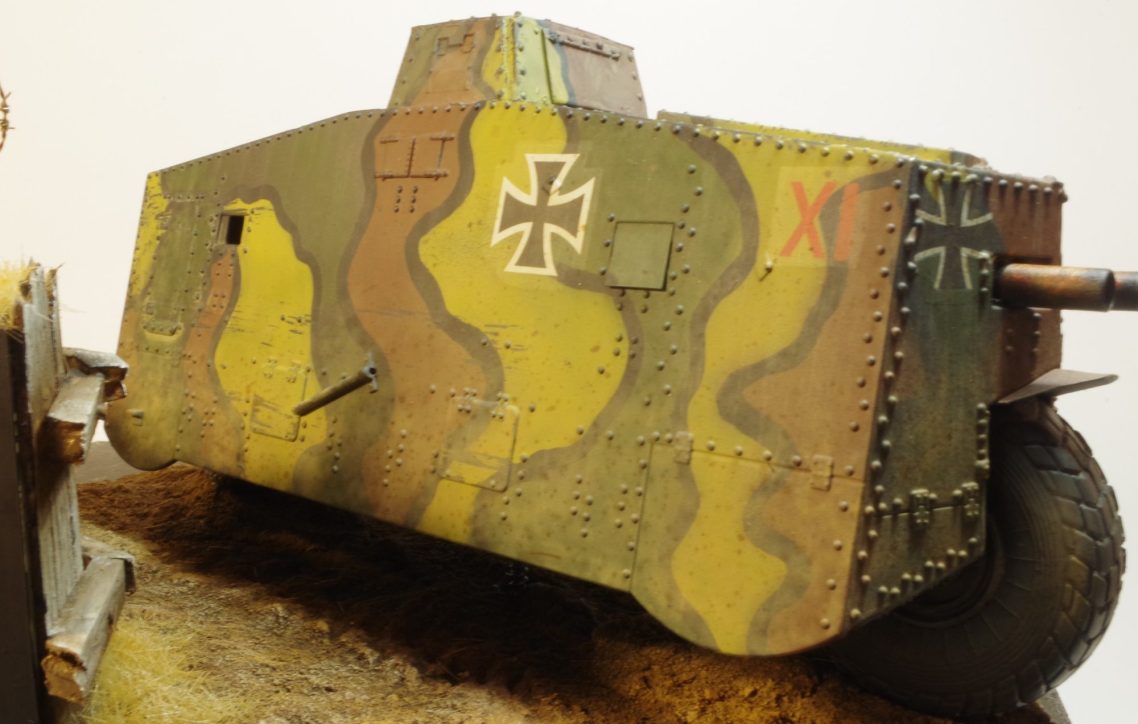
followed by a First World War inspired three colour camouflage scheme. I used a torn piece of card as a makeshift mask to give an almost hard edge to the camo, and used Tamiya colours through an airbrush – photo #14.
Ha, ha, but I wanted paint damage – scratches and chips etc.
To make this quick and easy in the main, I stippled Marmite ( yes, Marmite ) onto the model with a sponge, adding some longer scuffs with it along the sides and concentrating where there would logically be wear and tear on the paintwork.
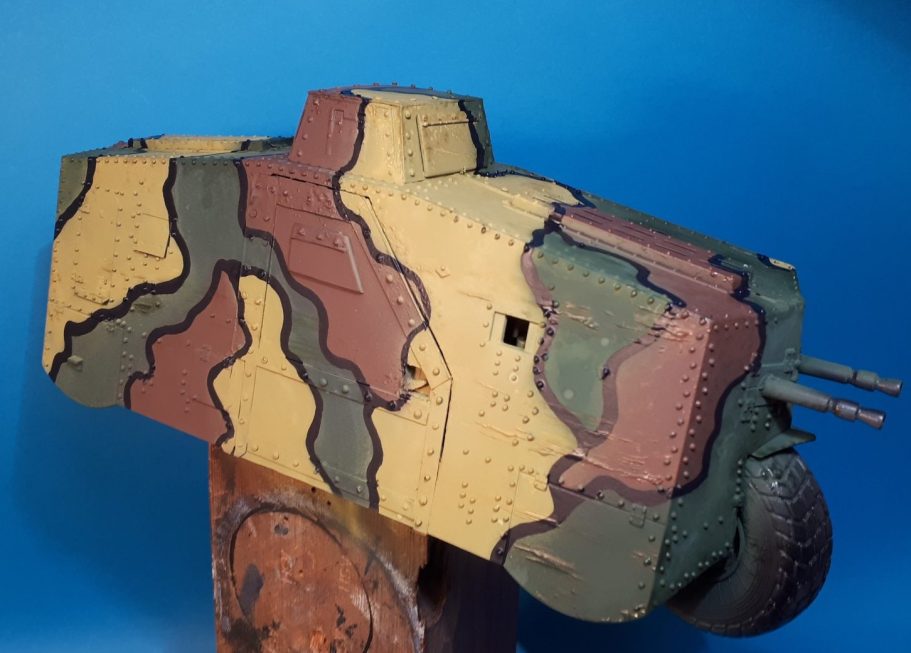
The marmite acts as a barrier to prevent the paint sticking to the model, so having added the black outlines with a brush loaded with more acrylic paint ( Games Workshop Chaos Black – see photo #15 ), and allowing it all to dry for an hour or two, I used a soft brush and some soap to wash the whole model.
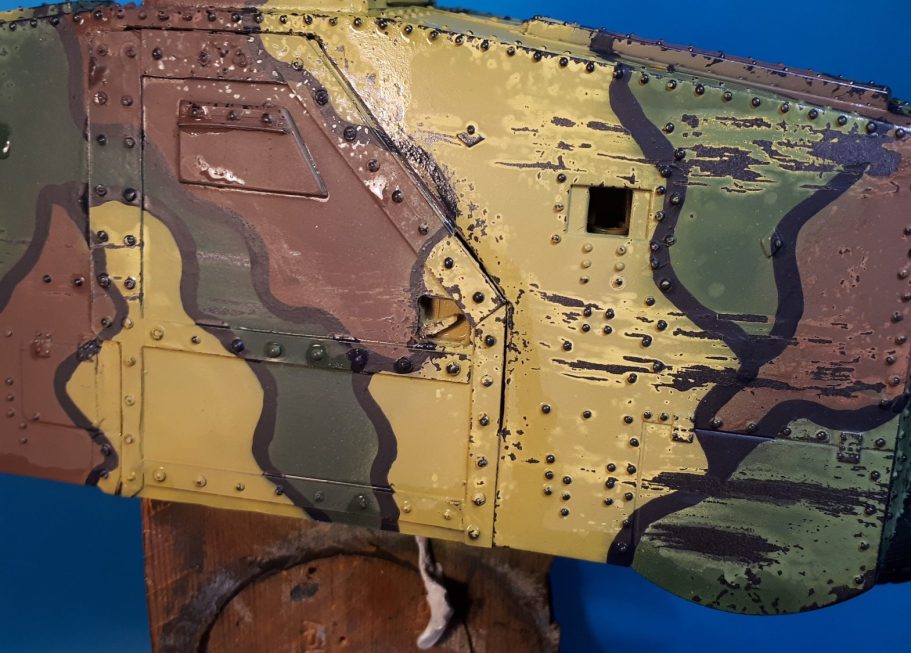
The results can be seen in photo #16, The Marmite stops the paint sticking, the action of the soft brush and soap break the surface of the paint and take away the Marmite too leaving scratches, scuffs and chips in the upper layers of paint. The dark steel colour is left visible as a result and is the beginning of a process of adding lighter colours of silver to make the damage appear more three dimensional.
As I was doing this, my thoughts turned to how the rider would get out and actually leave the bike, it’s not like he could exit and kick a stand down on one side, and he’s unlikely to be able to pick it up if it falls over. So I propose a lever system that would deploy a side stand on both sides, swinging down from beneath the vehicle when operated by the rider who would still be inside. The basics of this are shown in photo #17,
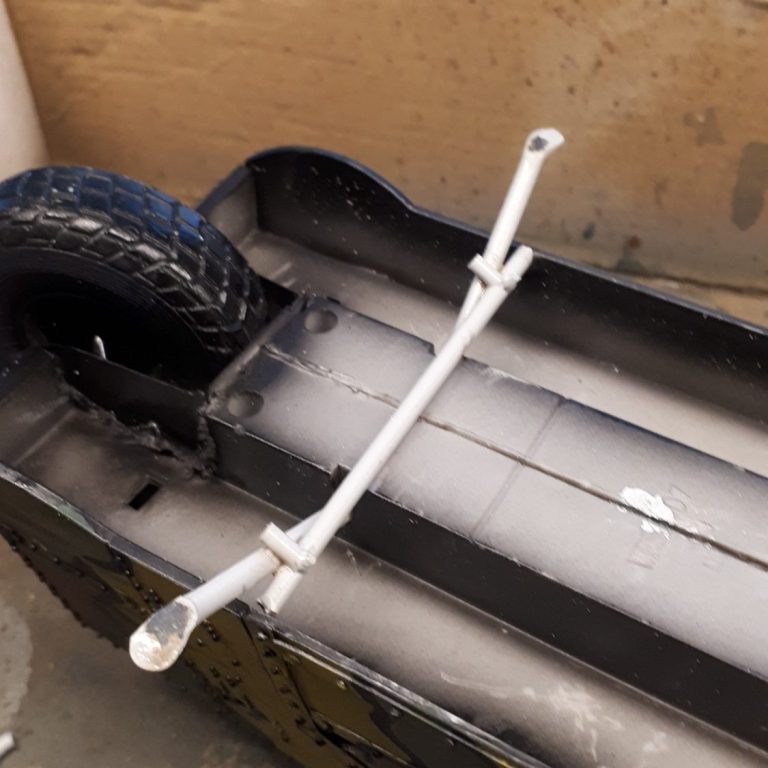
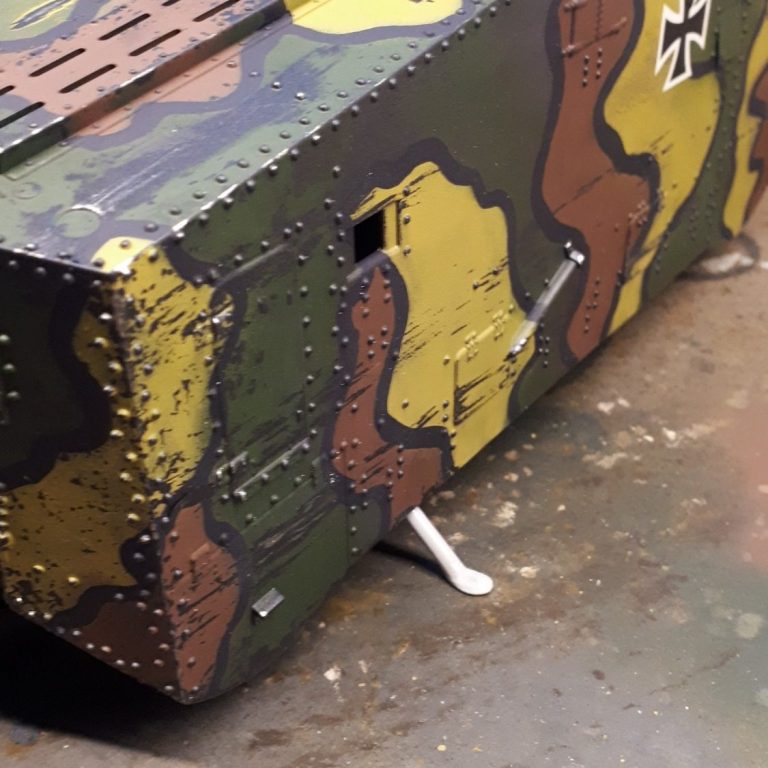
and how it looks when the bike is the right way up is shown in photo #18.
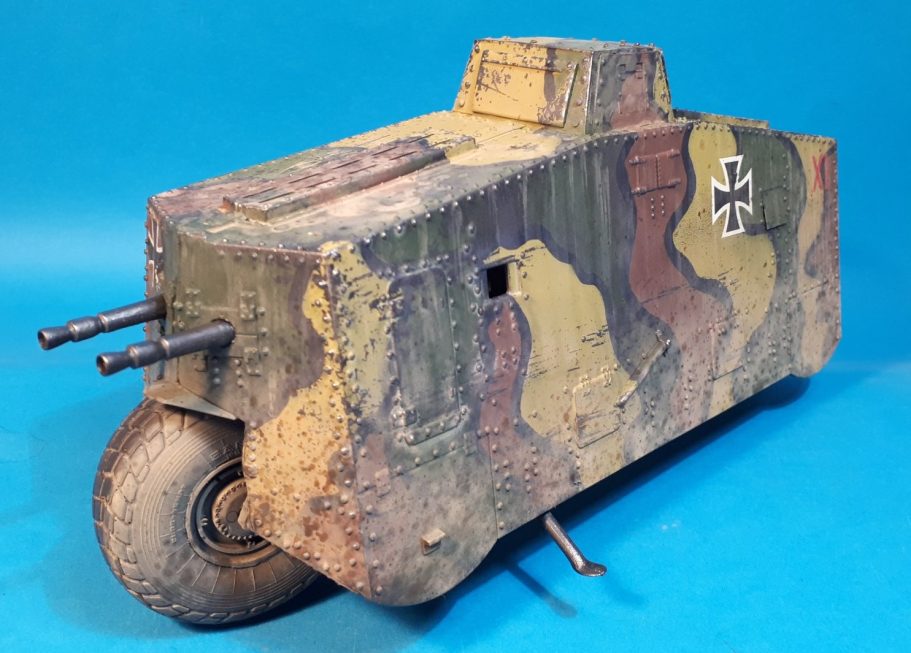
Decals were added at this point, taken from an Emhar tank kit with Sol and Set solutions used to soften them and allow them to form over the rivet head details.
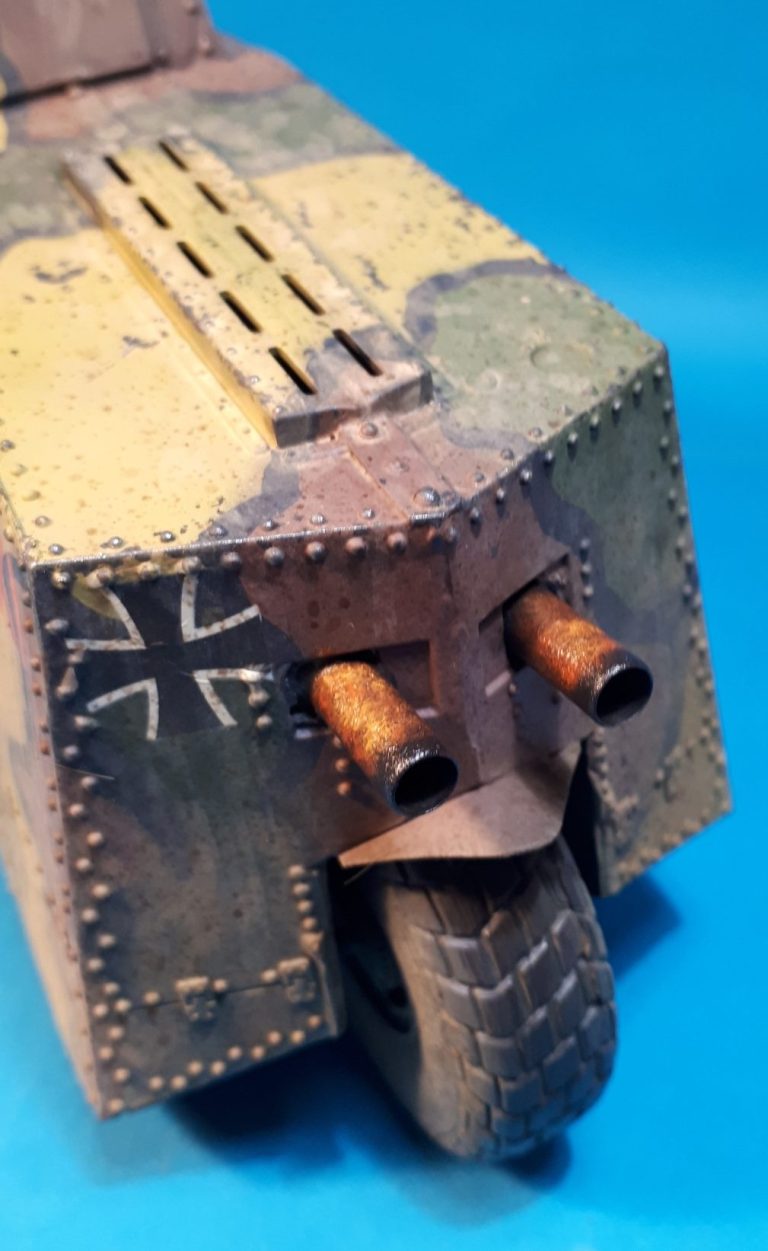
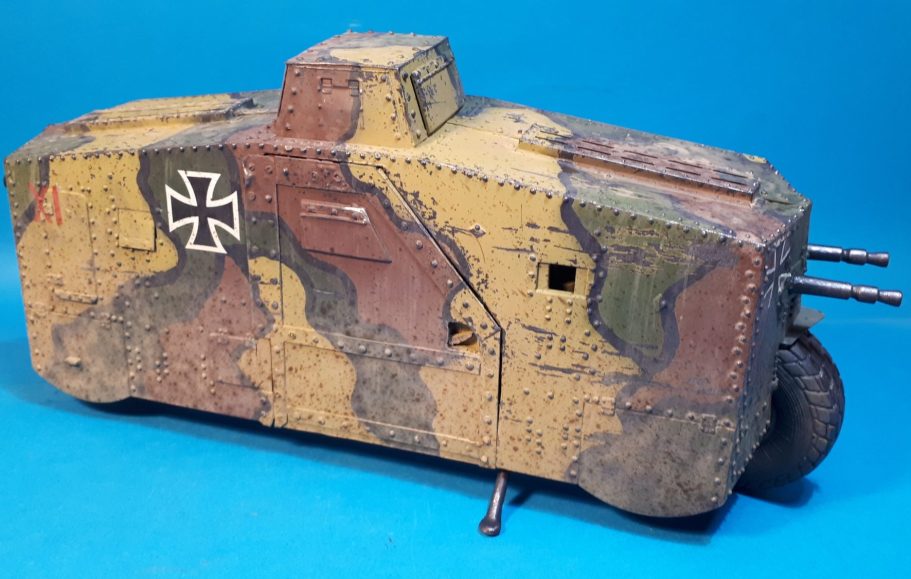
Photos #19, 20 and #21 show the bike finished with some dust sprayed over the lower half to give some age and weathering.
Streaking was also added to make the bike look used or possibly abused by it’s wartime actions.
Back to the figure. Having trimmed off the mould plugs and any casting marks, then glued most of the parts together I could start painting.
Photo #22 shows the main areas started, the several articles of grey clothing ware all painted a slightly different colour so that they looked separate. I used a mix of Prussian Blue, Mars Black and Buff Titanium oils for this, altering the mix as necessary for each area and adding highlights and shadows.
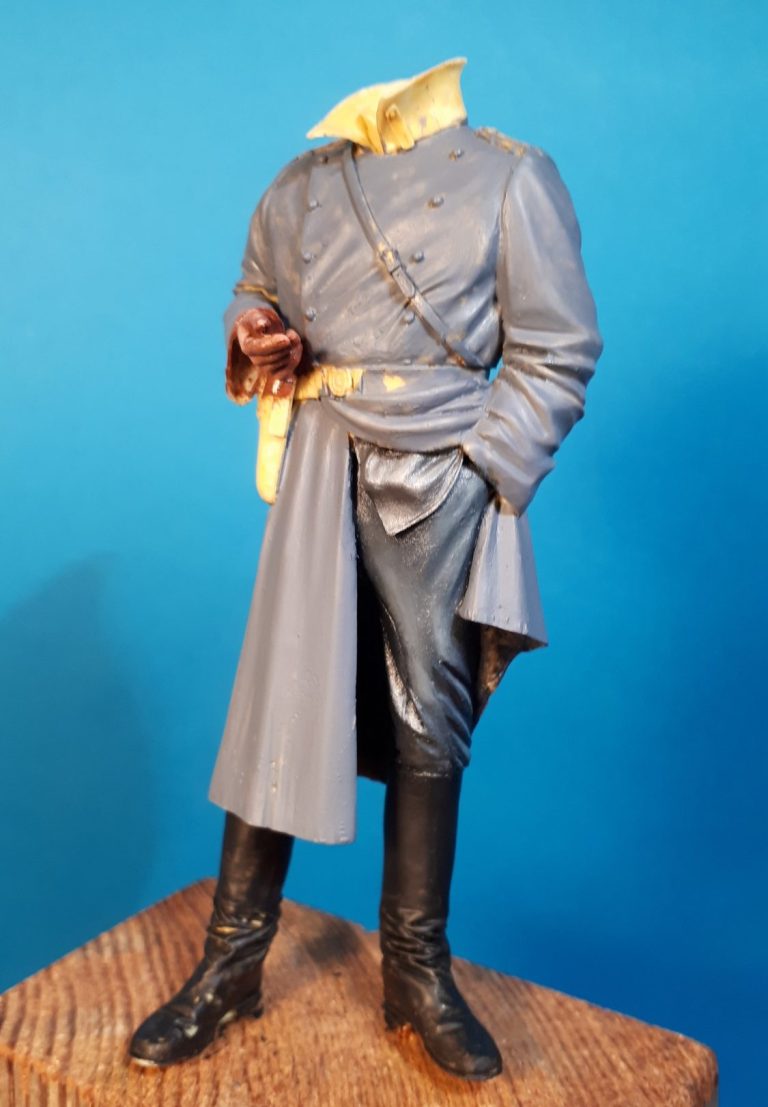
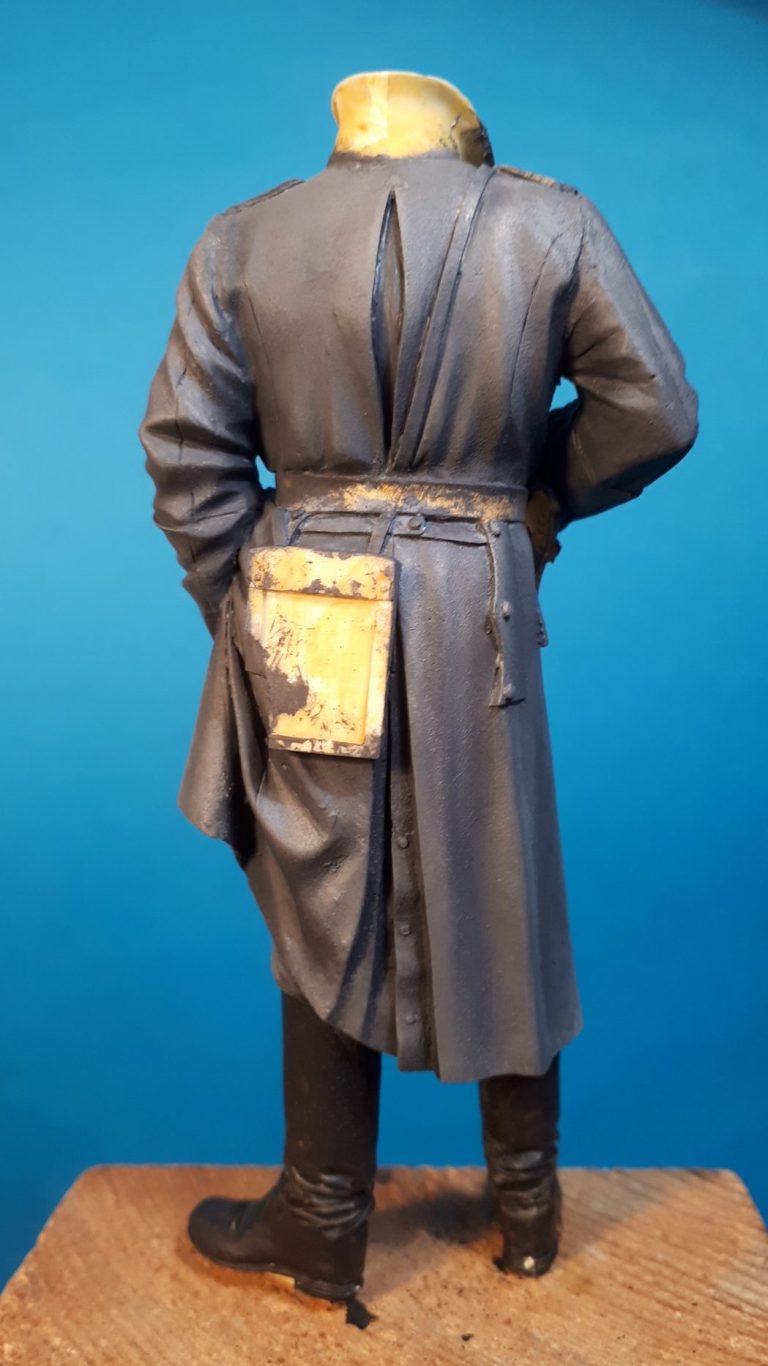
This can be seen better in photo #23 where I’ve completed the left half of the jacket, with the right half still in undercoat.
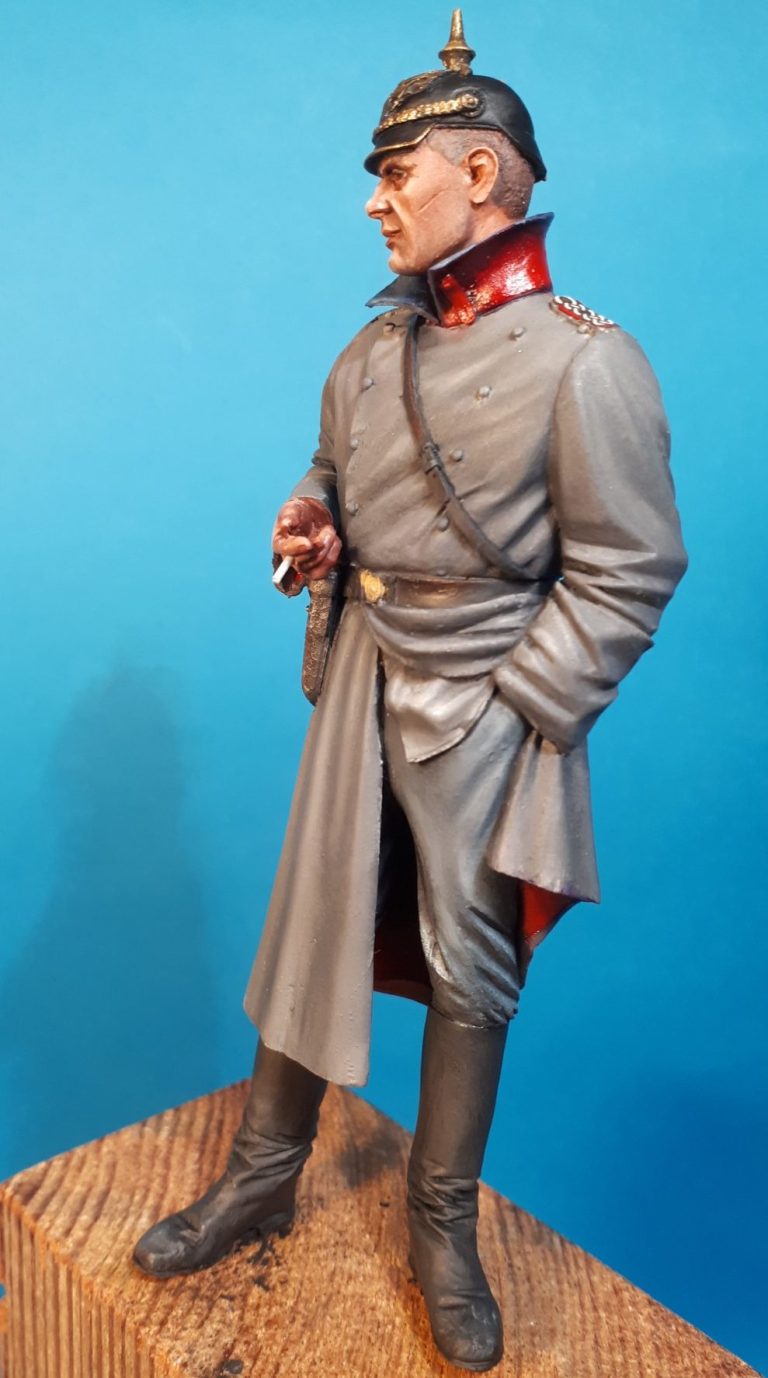
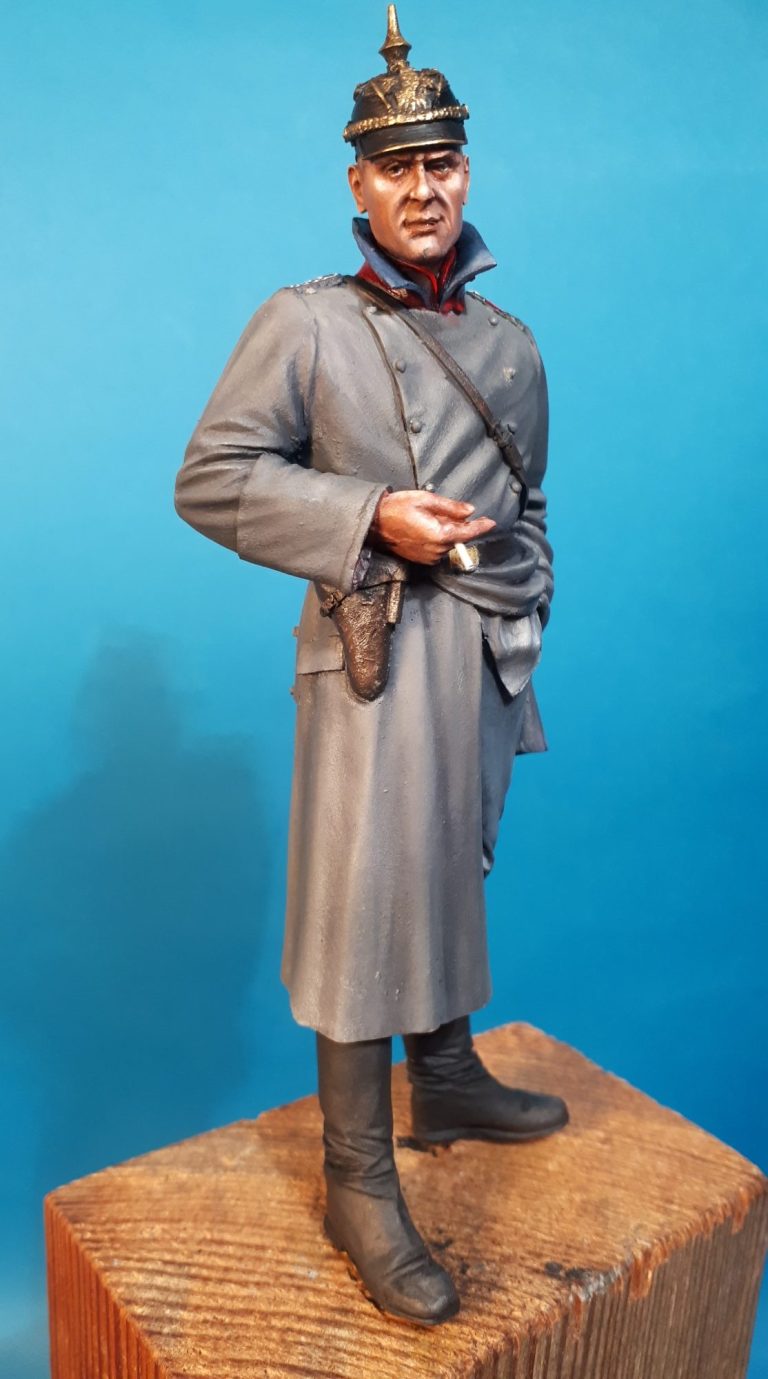
Some details have been added in photos #24, #25 and #26 – the holstered pistol painted to resemble worn leather and the flesh areas painted – both again in oils. The Picklehaube has been painted in acrylics with final coats of Tamiya Smoke lacquer to add the glossy shine.
To tie the model in to the base and also with the bike, I’ve added pastel dust to the boots and lower areas of the clothing.
The main focus is of course the rider and his bike, so I wanted the base to be pretty simple.
I roughed out some groundwork using thick Kingspan insulation foam to build up an area at the back which would be covered at the front with some balsa wood and with debris and fine sand on the top. The figure and bike are tested for position in photo #27
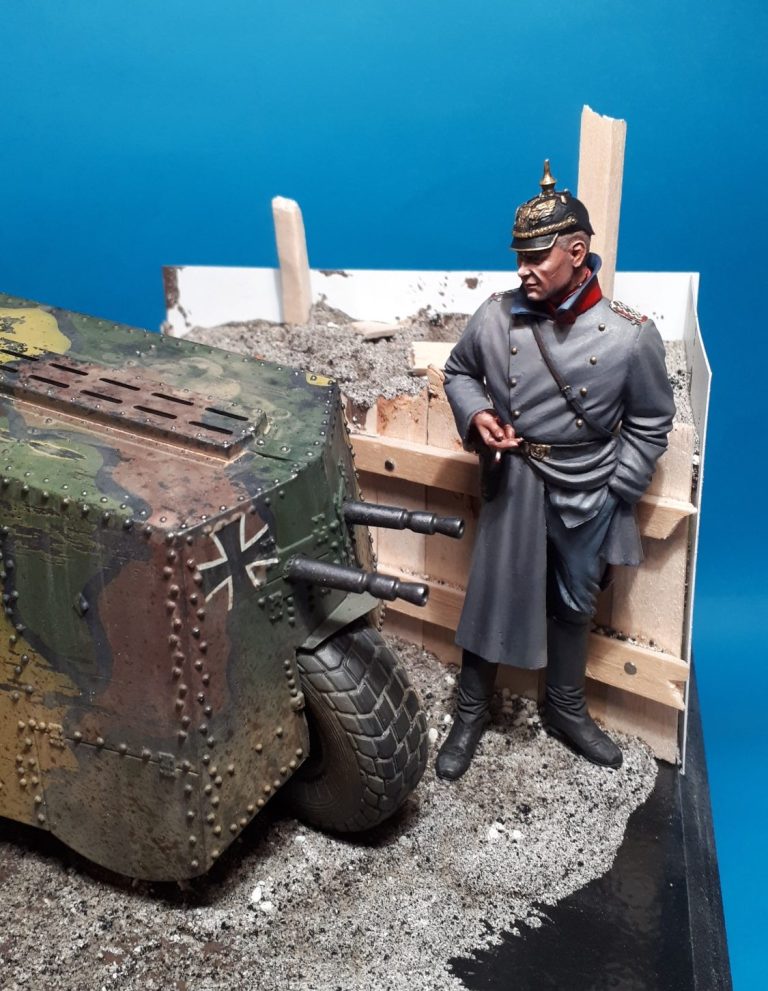
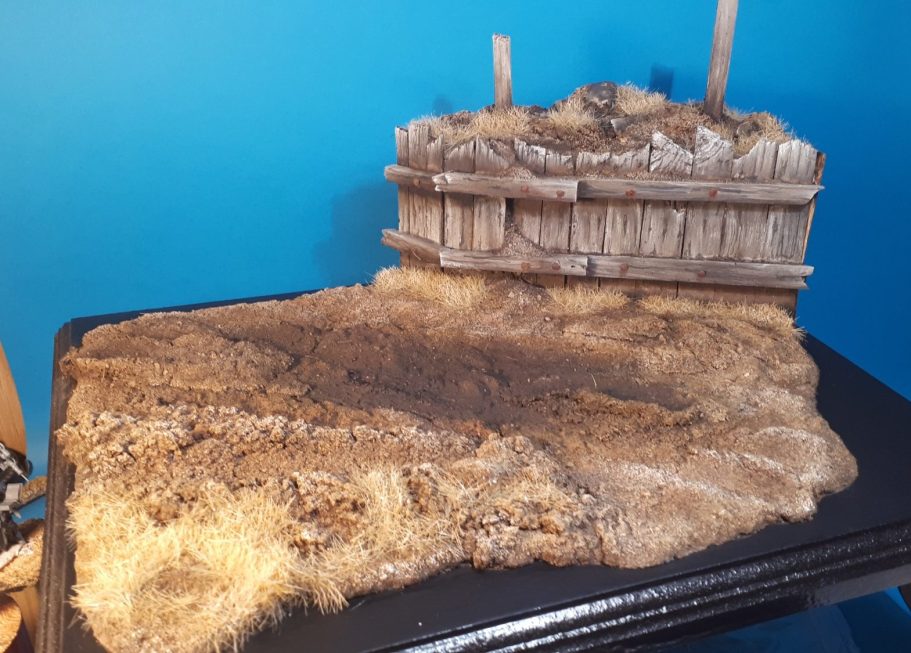
and with the base painted up in photo #28.
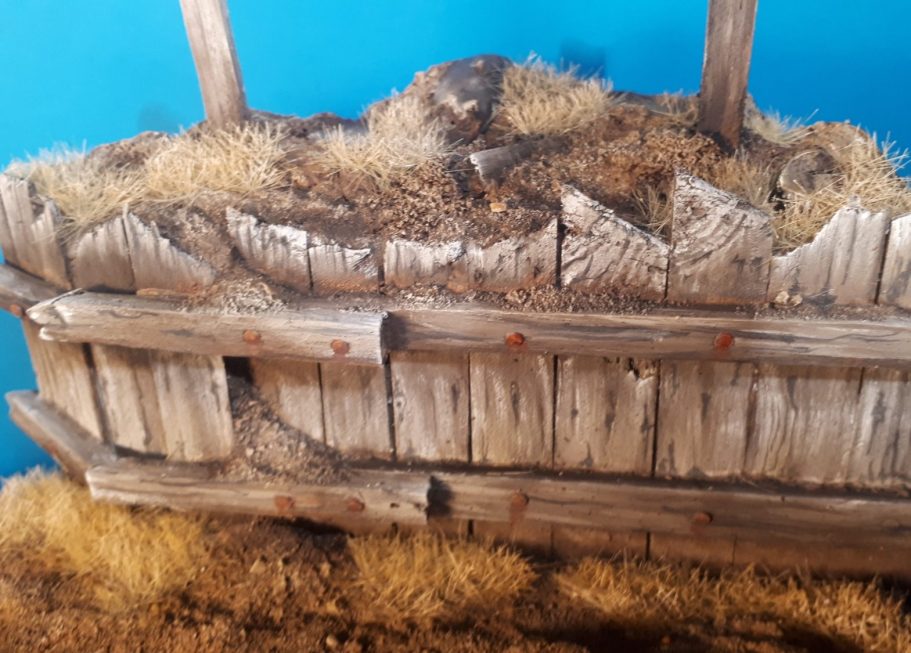
The groundwork is a mix of Wilkinson’s wall filler, mixed with cheap acrylic paint, a little cat litter ( unused of course ) and fine stones.
This provides a nice lumpy textured gloop to spread over the horizontal areas of the base, the woodwork having been added beforehand.
Whilst the filler mix is still wet I sprinkle over a mix of Chinchilla sand ( Small pet bathing sand available from Pets at Home ) mixed with more unused cat litter. Once dry this is all painted with various earth colours and some static grass added – photo #28, with a close up of the wood in photo #29
The only thing missing of course is barbed wire. Now I know there is plenty of etch brass wire on the market, but I prefer to make my own – the need for self mutilation cannot be ruled out here when I think about it.
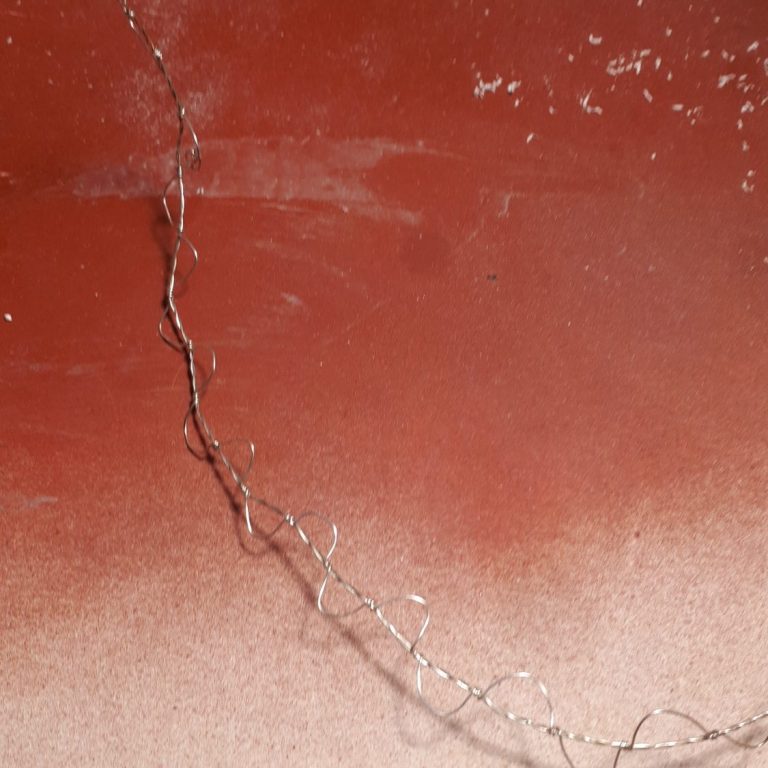
So, to make barbed wire. Get two long lengths of fine wire, silver in colour preferably, but copper will do. Fasten them into a vice of chuck of a drill and slowly twist them together. Remove them from their fastening and using a new length of the same diameter wire, add this to the twisted wire by doing two and a half turns of the single strand around the twisted ones, then a loop ( in this case about 8-10mm ) before returning to do another two and a half turns of the single wire around the twisted pair. Continue doing this down the length of the twisted wires to end up with something looking like photo #30.
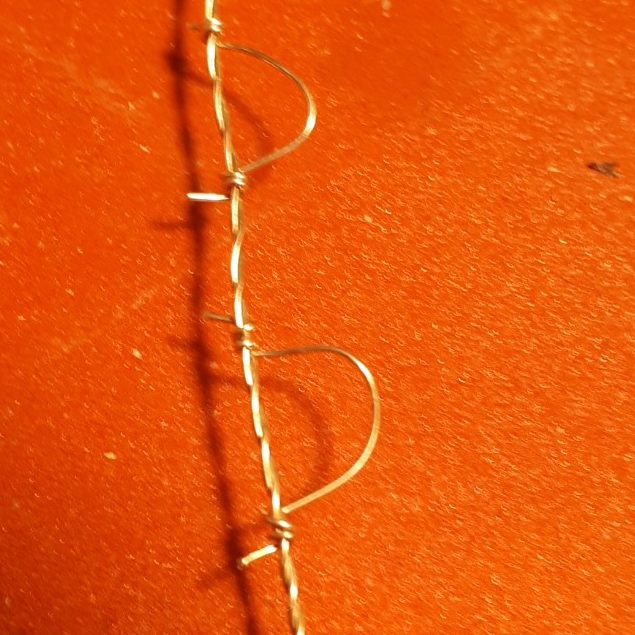
Photo #31 shows how I’ve cut and removed the loops on one side, leaving about 2mm of the wire protruding from the twisted wires.,
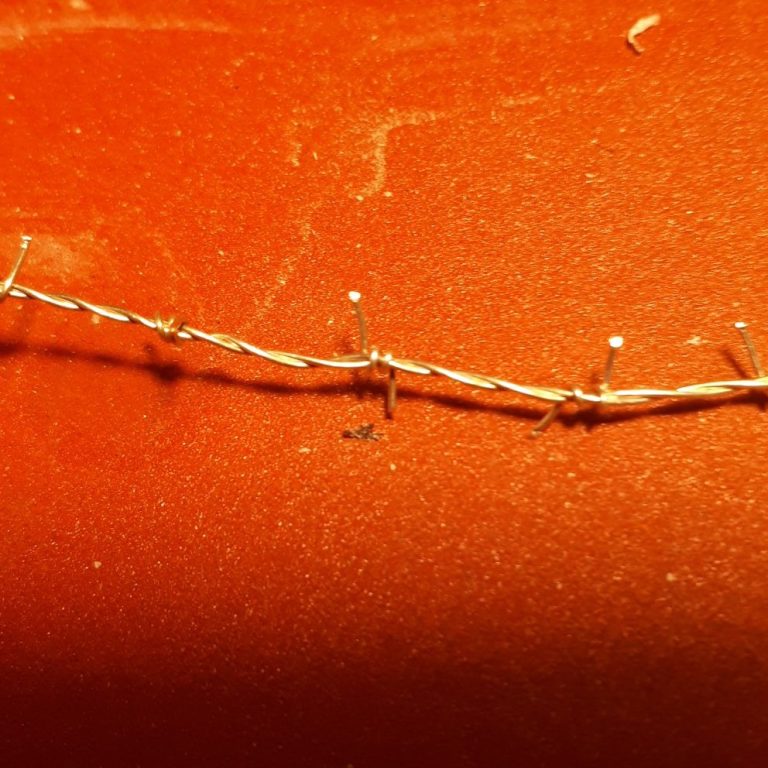
by doing this to the other side as well ( photo #32 ) you get real barbed wire in miniature. To fasten the barbs in place a spot of superglue on each barb works wonders.
Once painted and fastened in place – photo #33 – it looks good enough for our purposes. I’d better warn you though, it works just as well as the real thing, so be careful after cutting the loops off as the barbs are sharp.
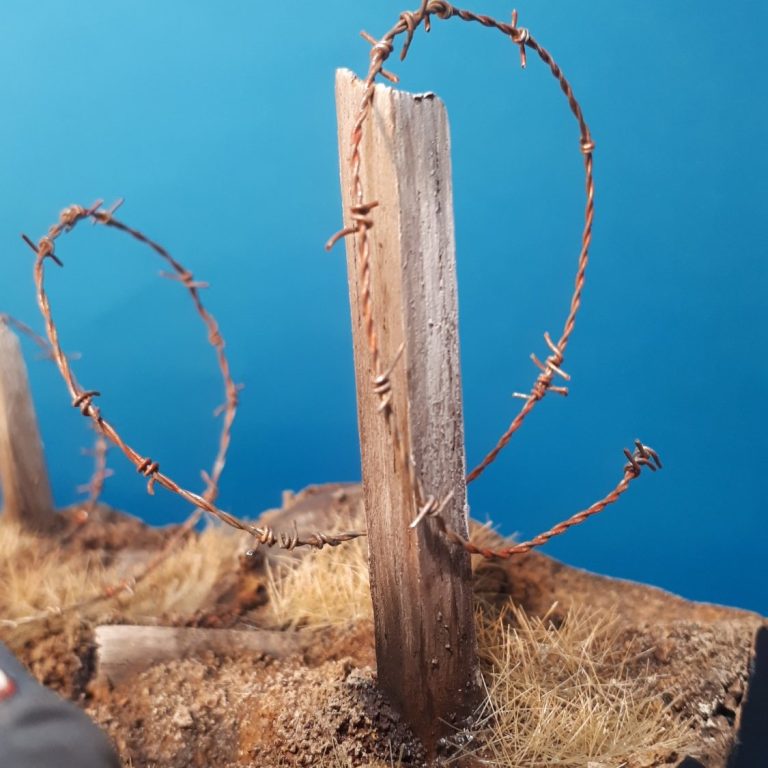
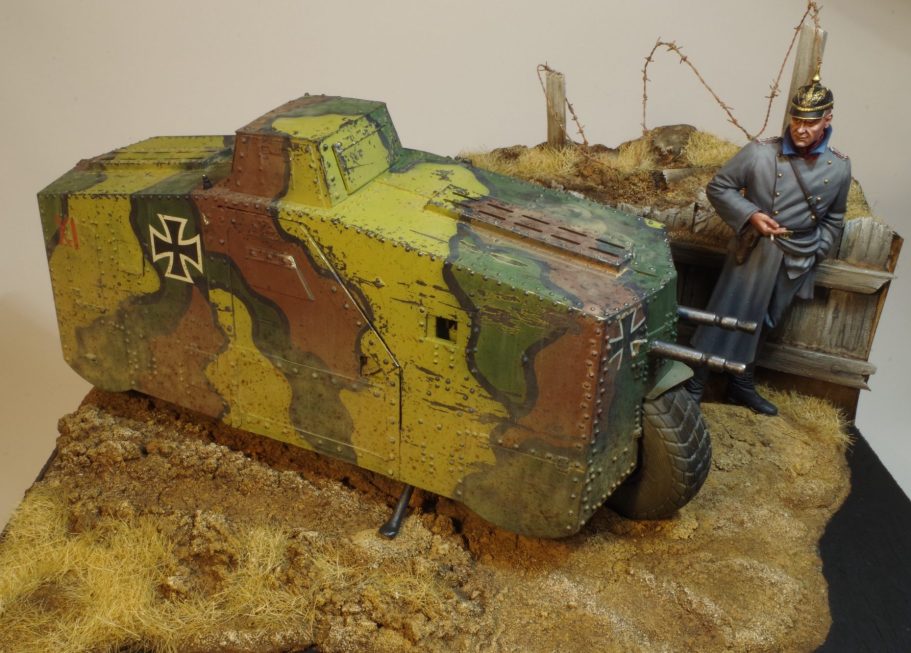
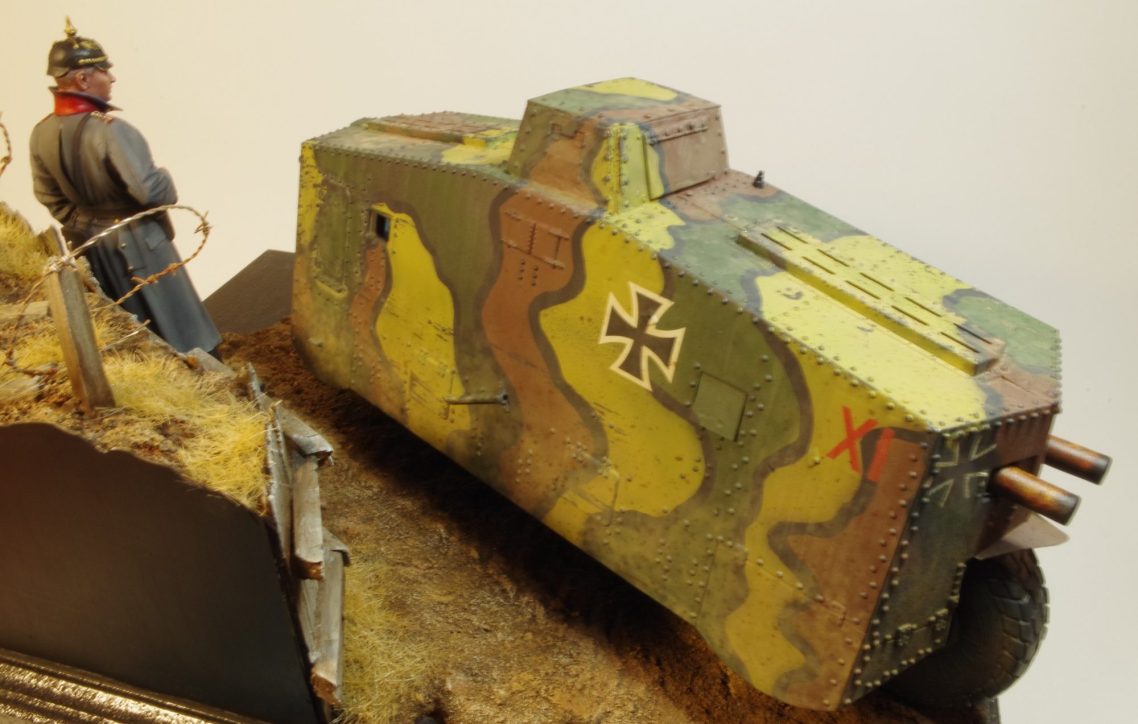
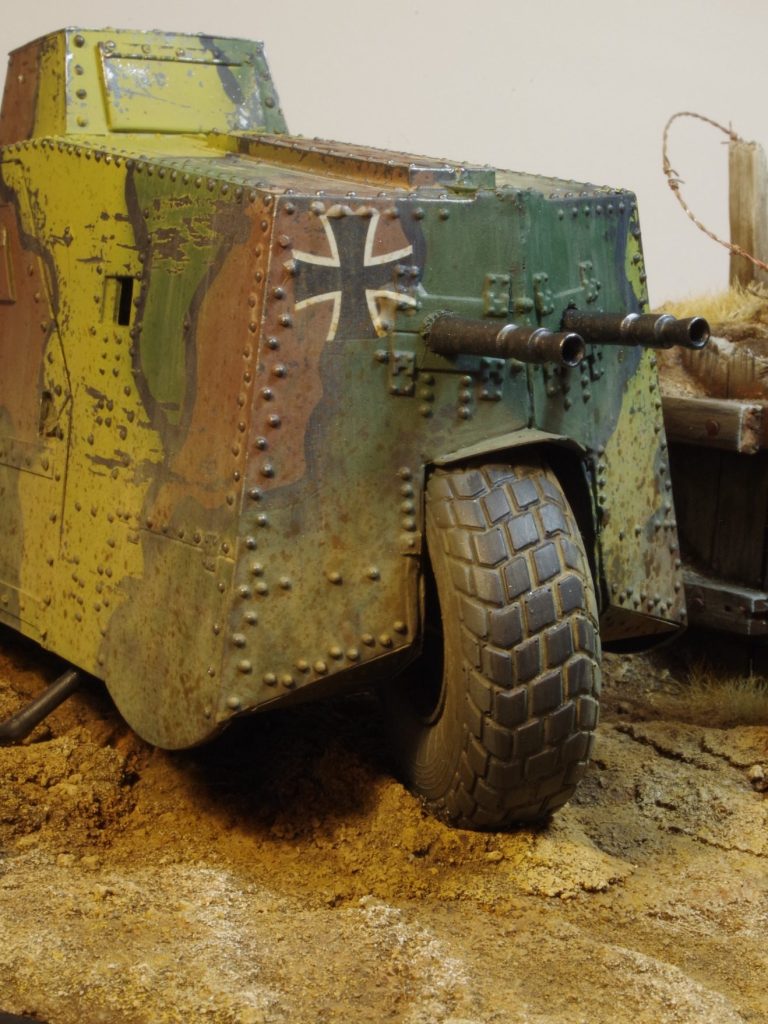
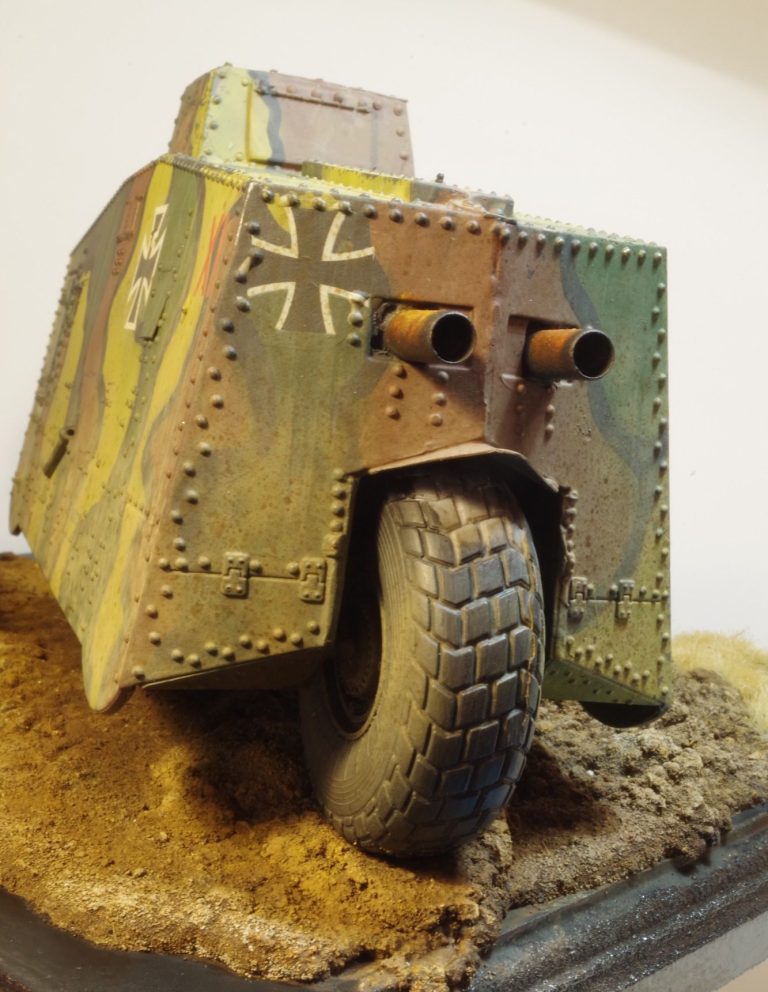
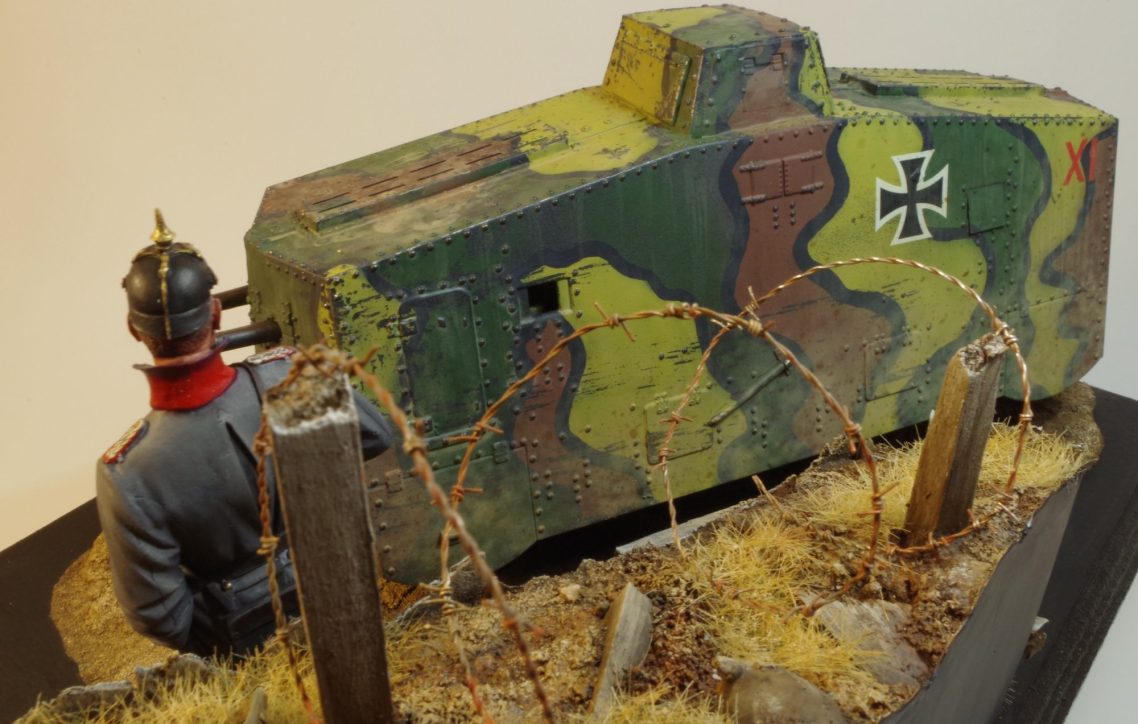
All that’s left is for me to let you look at the final shots of the finished piece, not exactly like the original photoshop image, but close enough for me to be content and a bit of fun with the building of the bike.