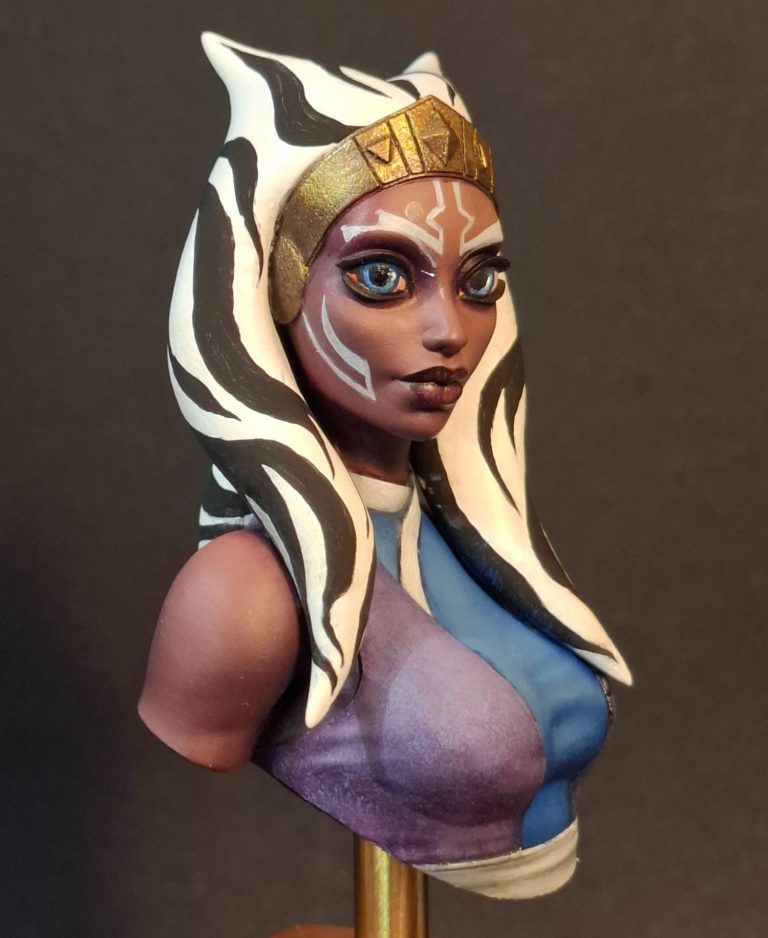
Togruta Girl
1/9th scale STL 3D Print file from Minichix Studios
Painted in 2026
Whilst I’m a fan of Star Wars I can’t say that I follow all ( OK any in fact ) of the offshoot stories that Disney are cashing in on.
I didn’t think the Mandalorian was particularly fantastic – Maybe I was missing something – and the Obi Was and Darth Maul series both seemed a bit forced and in some cases childish.
I much prefer live action over animation, I admit, and still rate Rogue One as the best film in the Star Wars series.
But, it doesn’t stop me liking the characters, and when Marta Slusarska sculpted several busts from different inspirational sources, there were a couple that I really liked.
The two being her iteration of Ahsoka shown here, and also a more historical mythological character – Medusa ( which will, if I get time, appear in her own article hereabouts ).
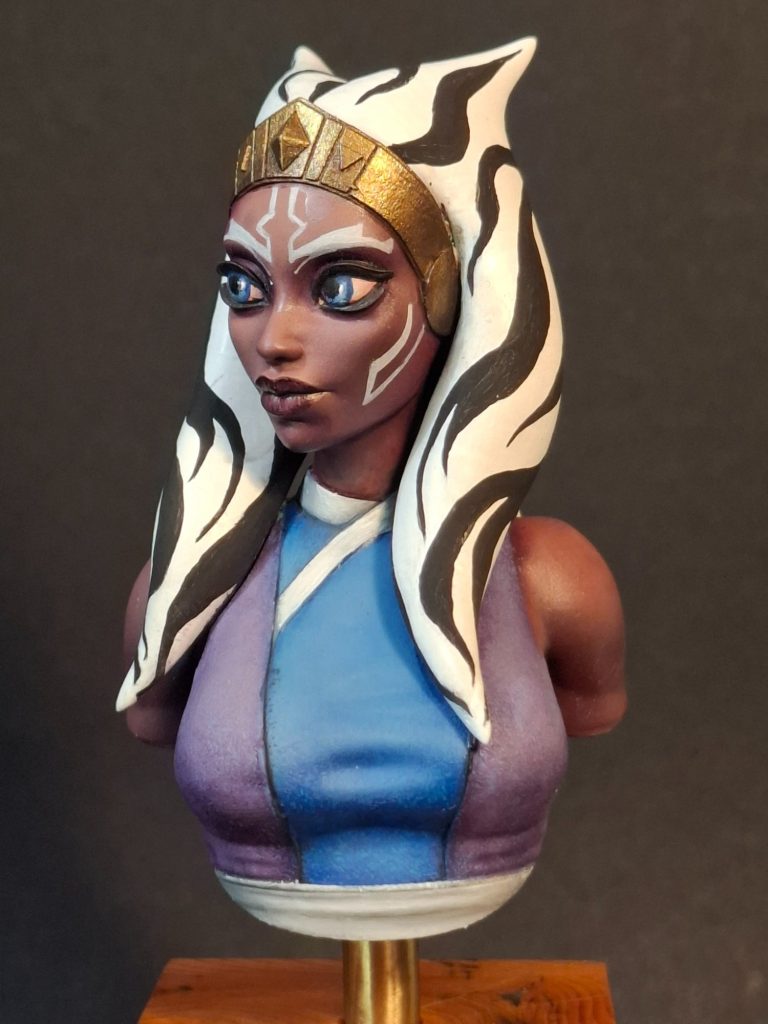
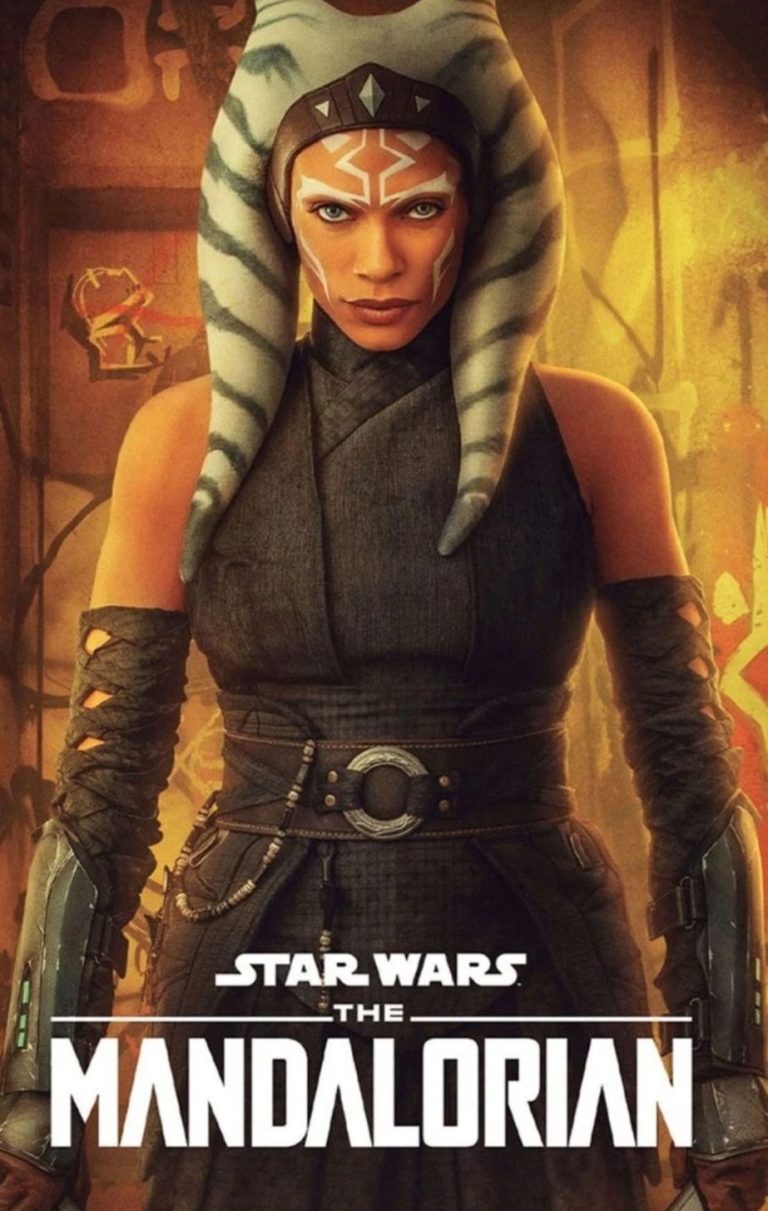
Photo #1 is a photo of the character Disney seem to have settled on, a pleasant enough orange skin colour, but on further delving into Google for pictures, the race that she comes from – the Togruta - is a little like humans in that there is a lot of variation in skin pigmentation.
In fact I understate the differences, because there are green, purple, grey and red variations along with the Orange of Ahsoka.
Is this skin colour or make-up I ask ?
Well, with the additional markings – usually in white – which again could be skin pigment, tattoos or again make-up, it opens up a whole plethora of choices for the painter.
I chose purple, because I’d have to mix the colour if I wanted to use an airbrush, and that alone might provide some fun.
So the kit from Minichix….. Mostly available as an STL file that you can print, but Marta kindly supplied me with an actual kit, because I’m a Luddite and haven’t got a 3d printer.
The model comes in three parts, the upper body, along with a separate head, and the “hair” tentacle things as a third section.
Very positive location when assembled, a few minor printer pips to clean off, and no filler necessary.
My biggest problem, and as usual of my own making, was to stop painting long enough to take a picture.
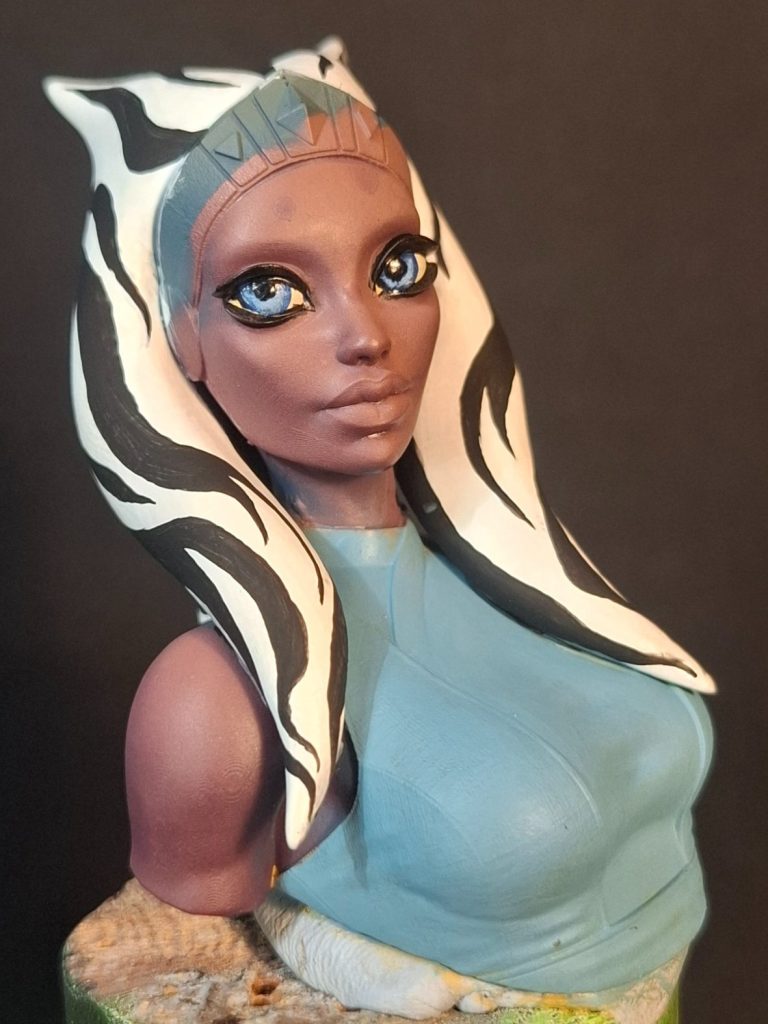
Hence photo #2 has rocketed on, with the face airbrushed with a mix of Tamiya Blue and Scarlet acrylics through an airbrush, lightening the colour with some Deck Tan to form up mid-tones and highlights, the hair / tentacles painted acrylic white and then the black patterns added in oils.
OK I made that sound easy.
Yes, it’s a fairly simple pattern, but getting one side to be a mirror reflection of the other is somewhat troublesome, although using Mars Black oils over the white makes the actual painting easier, in that it only needs one coat, and edges can be refined, then any staining on the white can be covered with more acrylic once the black paint has dried fully.
A fine brush, mark in the edge lines first and a lot of patience, and you’ll get there.
At this stage the clothing is just undercoated, and I’ve made no attempt at shading the hair tentacle things either.
The right iris needs sorting out, but that’s probably going to be the last thing on the list, It’s a touch too high on the pupil.
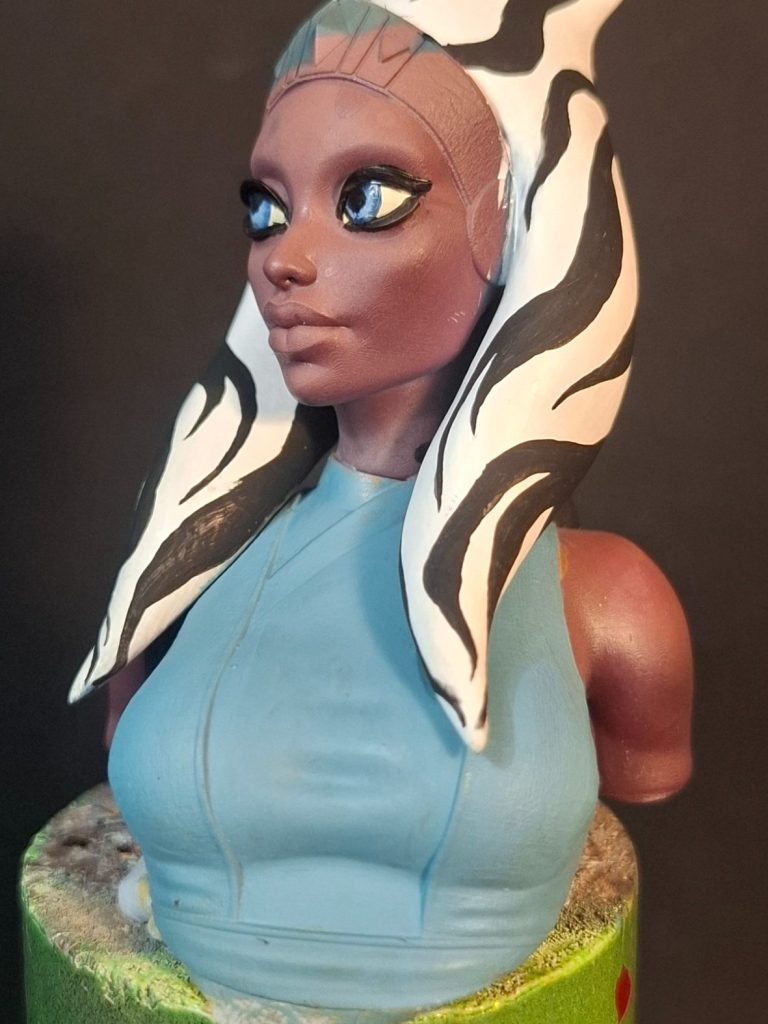
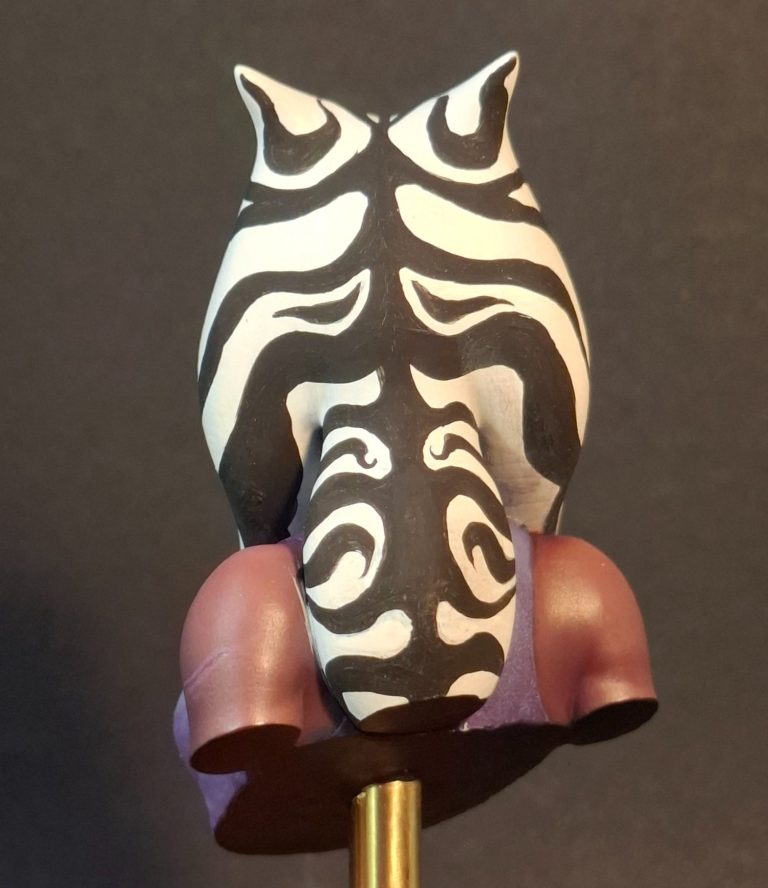
Photos #3, #4 and #5 give an all round view at this stage, and the tricky part was getting a balanced pattern on the hair tentacle things.
I couldn’t find a good back view of Ashoka, and as this isn’t really meant to be her anyway, it doesn’t much matter about it matching her patterns.
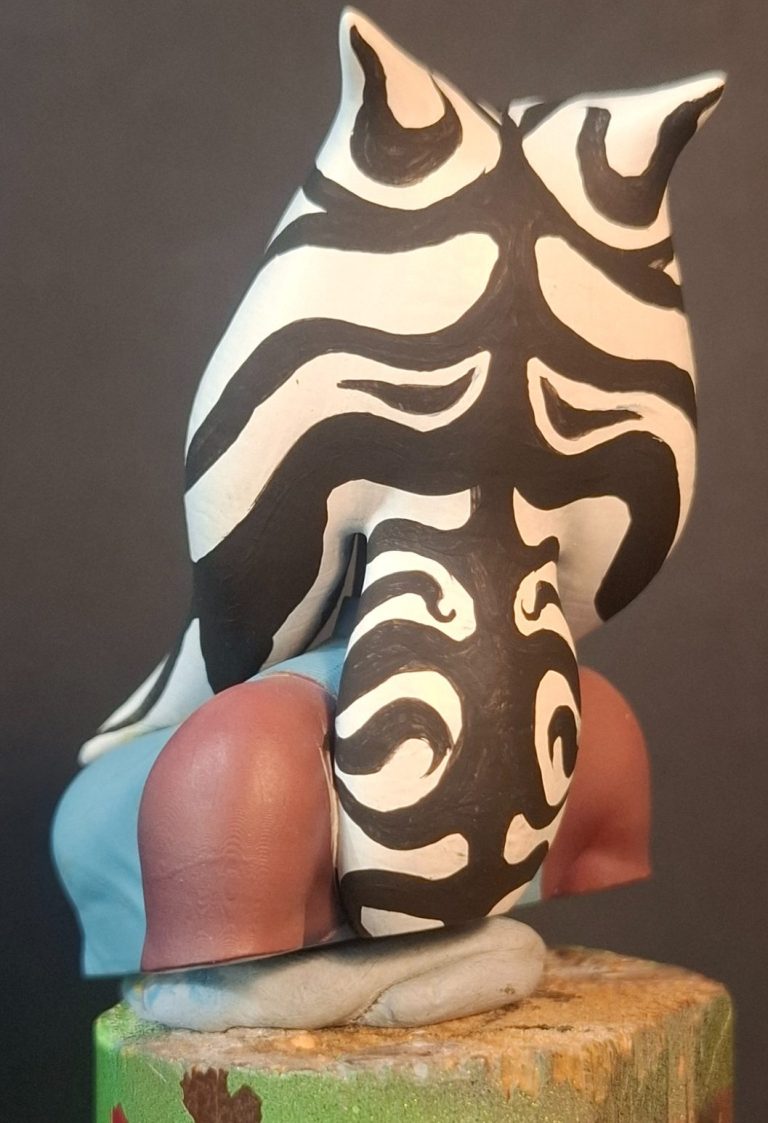
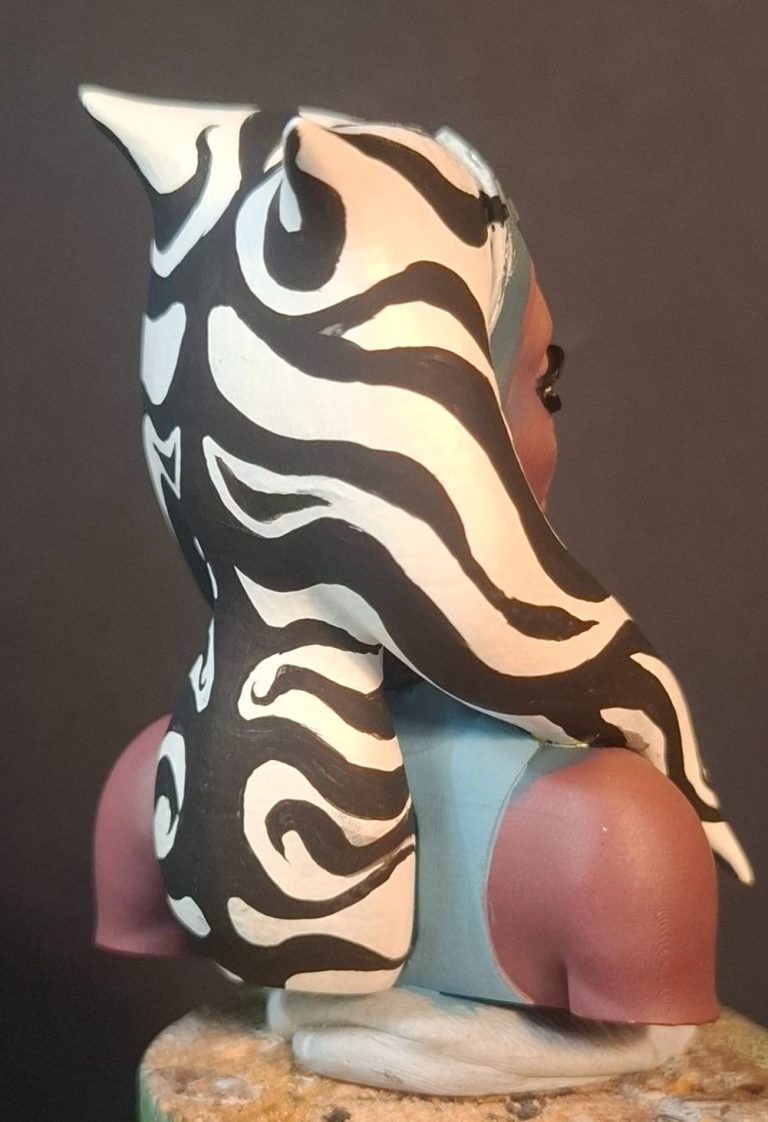
Photo #6 and I’ve begun painting the tunic, oil colours – Purple mixed with some Buff Titanium for the outer sections and Phthalo Blue mixed with some more of the Buff Titanium for the inner panel. The Buff Titanium adds density to the blue and purple, and whilst minor amounts were added to produce the shadows. The highlights are built up with larger additions of the Buff colour.
And it looks messy at the moment. That’s because there is a dividing band across her upper chest and neck that so fat I’ve ignored so far.
The lips are done with Purple Madder Alizarin to give a different hue to the face.
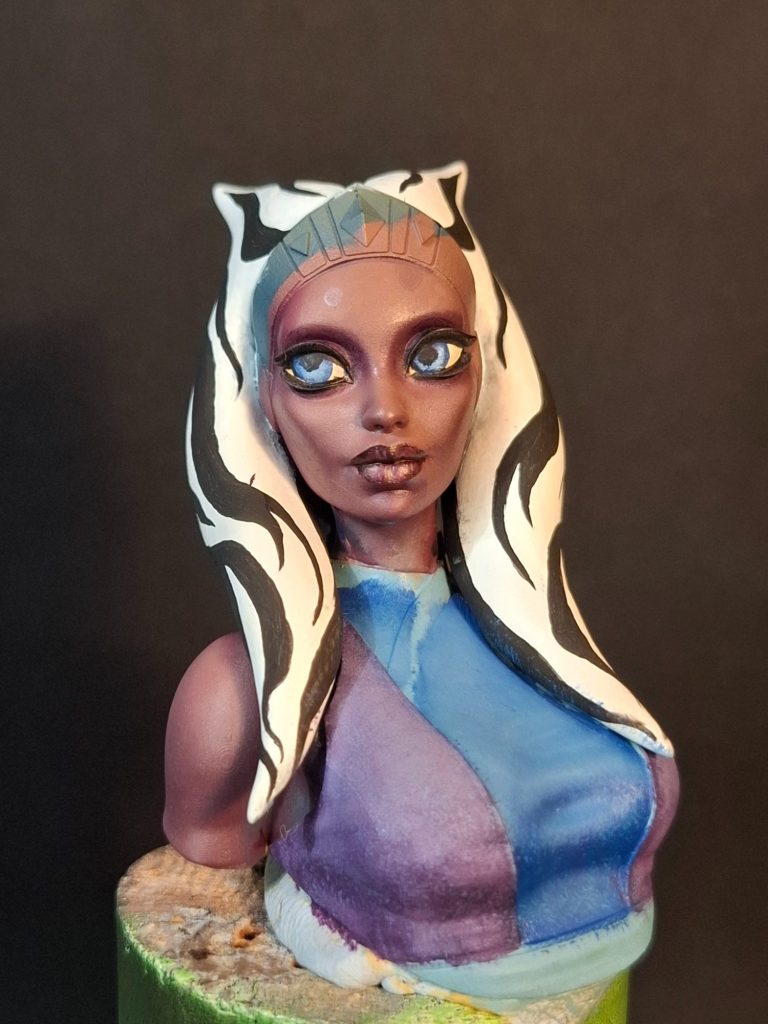
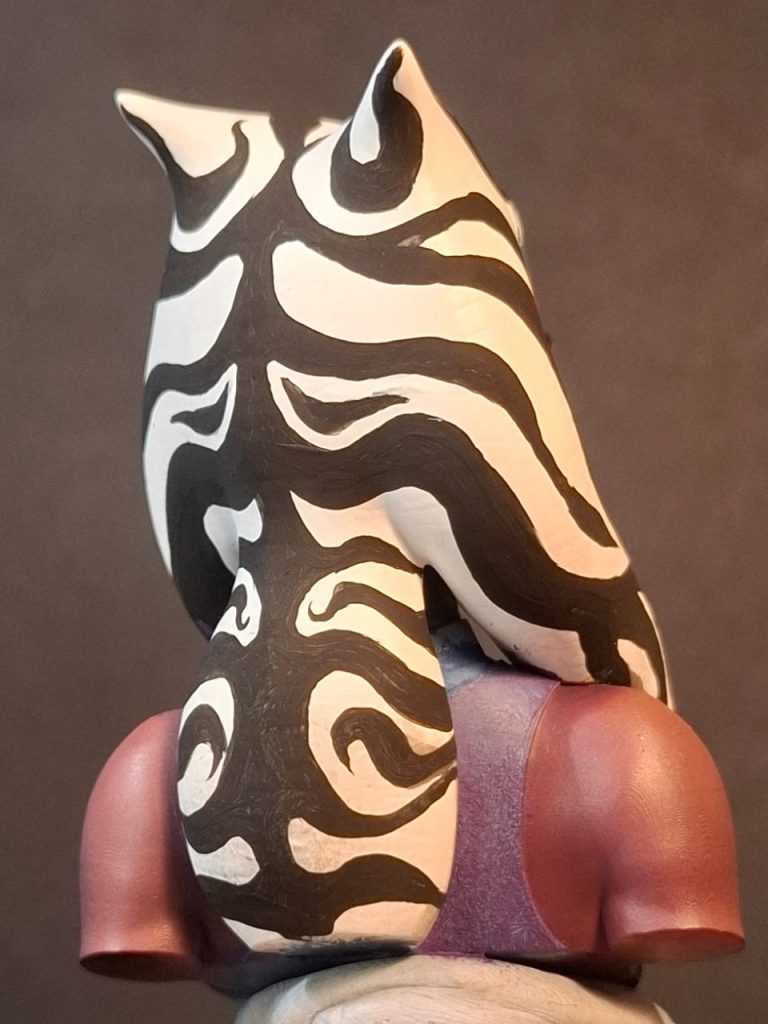
Photo #7. There’s a small amount of the tunic visible under the sides of the hair tentacles, and if painted fully assembled – which for once I did – then it’s a bit of a beggar to get at with a brush. The collar also poses similar problems, so in hindsight; paint the head etc without the hair tentacles section added.
Photo #8, and back to a shot of the front with the pale grey edging band of the tunic painted.
Again, the edges look a little rough at the moment, these will be refined later once the oil paints are fully dry.
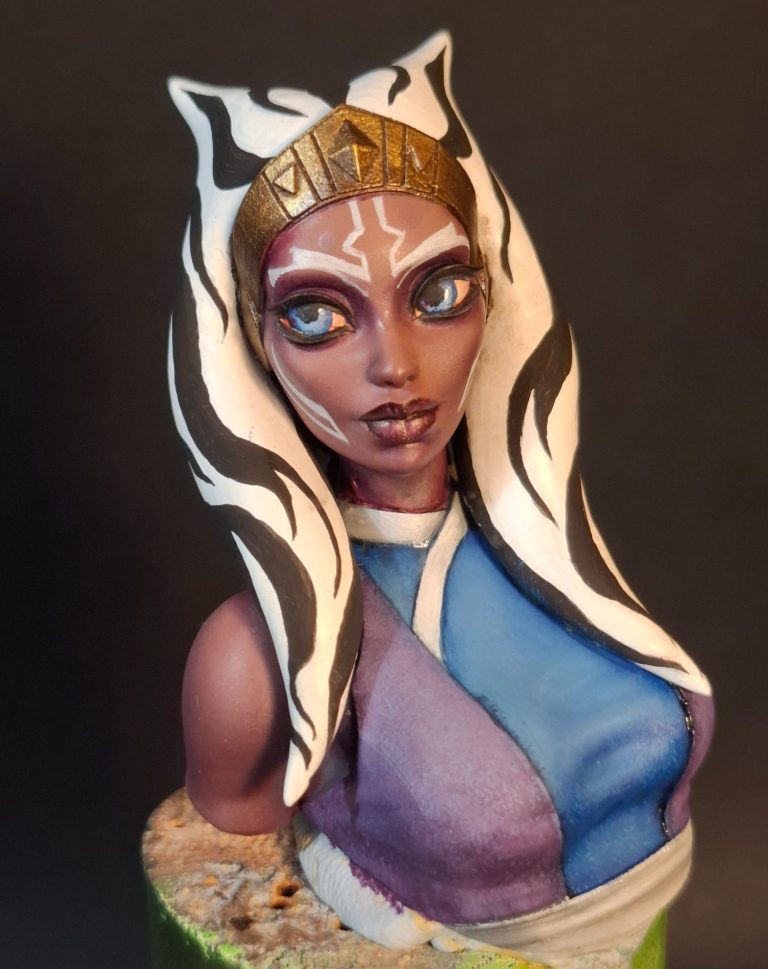
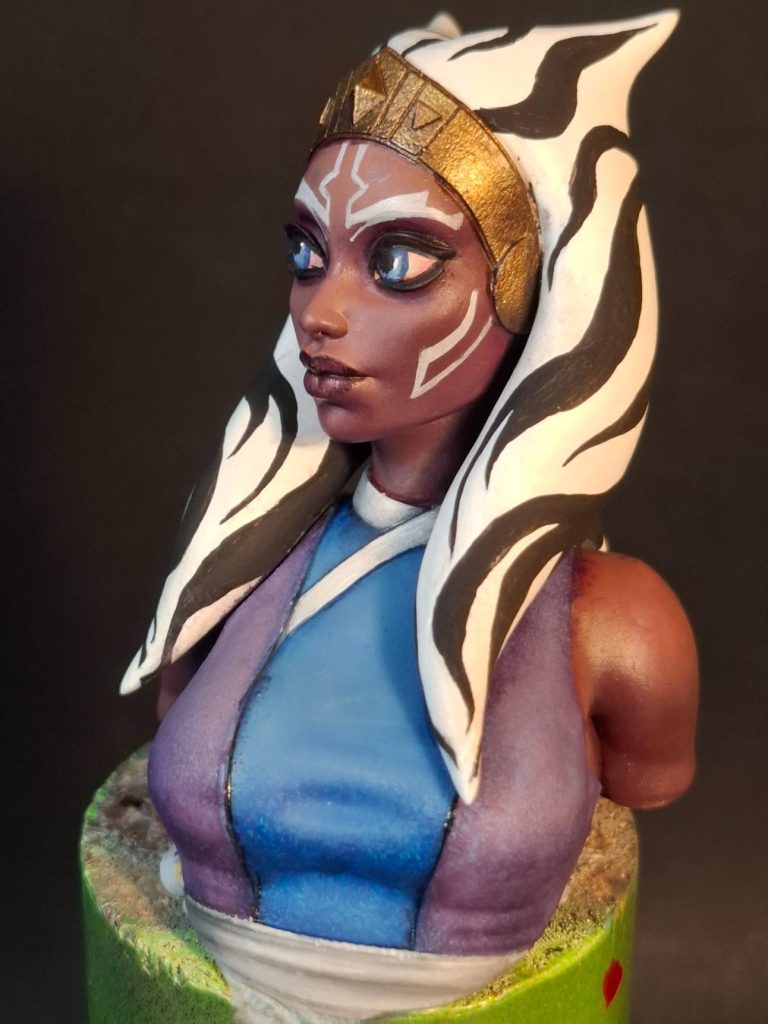
Photo #9 and I’ve added a dark edging to the separations of the clothing, this time using the Phthalo Blue with a little spot of Mars Black added, and a very thin mix of Carmine Oils added to the corners of the eyes, leaching this out with a brush dampened with White Spirit.
The Tiara has been painted with Darkstar metallic acrylics, I’ve used bronze as a starting point, adding some Antique Gold and then a little Bright Gold to build up mid-tones and highlights, and once fully dry, a thin wash of Burnt Umber.
Photo #10, and I’ve noticed a “Blow” mark on her left arm. This is where I’ve got too much paint on the area from the airbrush and the pressurised air coming through the brush has caused the paint to form up in a slight wave, drying to leave this mark in its wake.
The only way to correct it is to strip and repaint the area, or, as I’ll do in this case, make it look like a scar of some type.
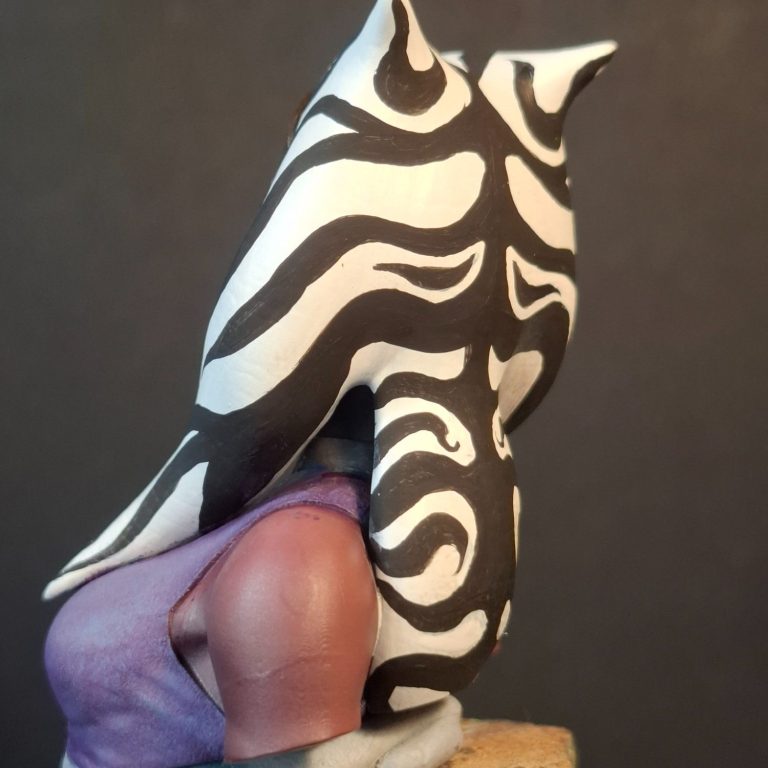
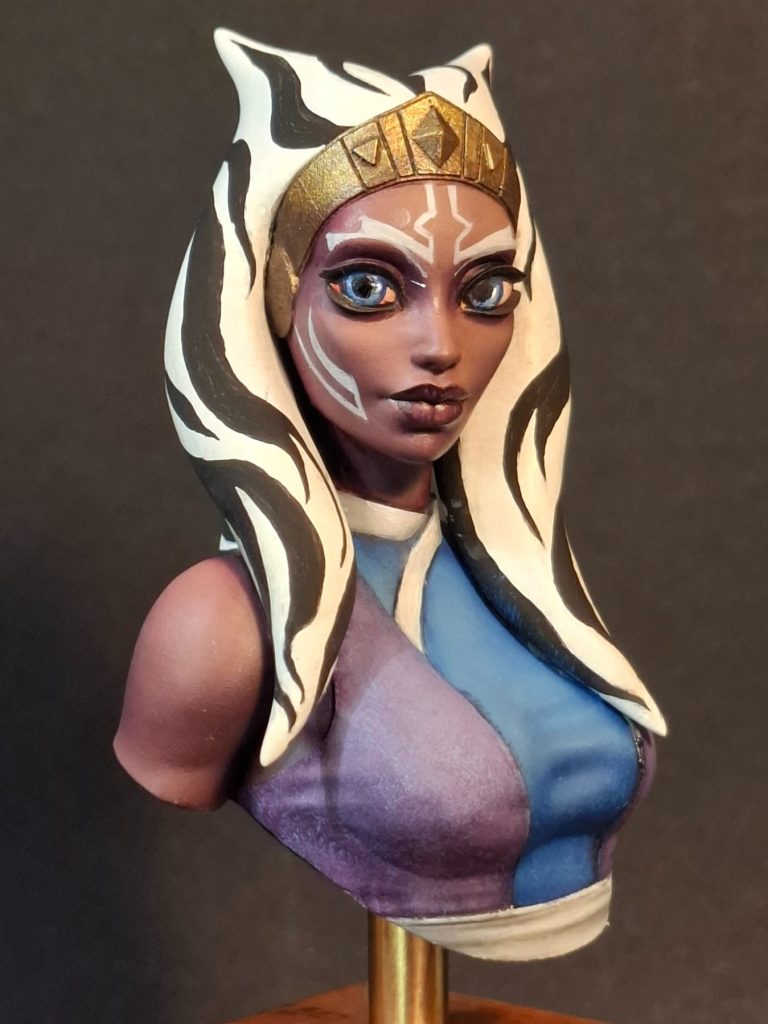
Final thoughts, final pictures.
I do like the Minichix range, they’re quirky, bordering on cartoonish, in fact a little bit Manga with the enlarged eyes.
Marta has been assembling kits for many years, moving on to sculpting with putty and now using a computer to 3D model subjects. A transition that shows dedication to her art, and a lot of dexterity with physical manipulation of real world materials moving on to work with the virtual reality of a computer.
I personally think this is to her advantage, in that she knows how kits should fit together, and where breaks or splits in a model should be to make construction and filling very easy, with little or no need for the latter.
The subjects she’s chosen to produce presently cover a small range of kits, but with a wide scope of subjects.
The fact that the range is marketed to sell STL files makes life even simpler and a lot cheaper for the modeller – well, so long as you’ve got access to a printer, although I’m not sure if she will provide ready printed pieces too, but perhaps if she gets enough requests for physical kits to be sent to customers, then it’s something she may consider.
As for this particular kit, well, I’ve already said it fits together well, it’s as easy or as complicated to paint as you choose to make it, and to be honest, it’s quite a joy to be able to experiment with different skin colouration – even though I stepped away from the Ashoka character.
Highly recommended.
Lorem ipsum dolor sit amet, consectetur adipiscing elit. Nulla euismod condimentum felis vitae efficitur. Sed vel dictum quam, at blandit leo.
Lorem ipsum dolor sit amet, consectetur adipiscing elit. Nulla euismod condimentum felis vitae efficitur. Sed vel dictum quam, at blandit leo.
Lorem ipsum dolor sit amet, consectetur adipiscing elit. Nulla euismod condimentum felis vitae efficitur. Sed vel dictum quam, at blandit leo.
Lorem ipsum dolor sit amet, consectetur adipiscing elit. Nulla euismod condimentum felis vitae efficitur. Sed vel dictum quam, at blandit leo.
Lorem ipsum dolor sit amet, consectetur adipiscing elit. Nulla euismod condimentum felis vitae efficitur. Sed vel dictum quam, at blandit leo.