Oil and water do mix
Using water based ( Alkyd ) oils
Painted 2001
This is just a short article for information purposes, mainly to give you all a bit of information about water soluble oil paints which have been available for some time now.
I get the impression, having talked to a fair number of model painters, both expert and moderately experienced, that we're a bunch of "stick in the muds" sometimes. Basically we find it hard to change our ways, especially if our ways have been established over any amount of time. Modellers who are just starting out, in the main, seem to be more open to trying new things, especially when demonstrations show what can be acheived.
Don't get me wrong. I'm not saying we can't accept change. Just that we sometimes resist things a little more than perhaps we should. I'm certainly guilty of this,
I'll admit.
The biggest problem for most of us is cash flow. Although I like to think of myself as innovative ( big word to make me sound cleverer than I am ), and I like trying different methods and mediums, I still balk at going out and spending any amount of money on something new, just on the off-chance that it might be better than something I'm already using, unless of course someone has already tried it and can demonstrate that said item gives a good return.
Recently I had the chance to try some water soluble oil paints, care of a good friend, and thought that maybe it was worth writing a short comparison article about them and normal oils.
The theory
For a start, if you've read any of my previous articles. I rate oil paint very highly. Acrylics and enamels are good, and I do make use of them, but I still tend to finish off most things, particularly flesh tones, with oil paint.
Water soluble oil paint isn't a new thing. It's been available for several years now, but I've not heard of anyone using it. The basic idea seems to be of an oil paint that can be thinned with water, allowing the artist to wash his brushes out in water too. This then negates the use of spirit based solvents for both thinning the paint and washing implements after use.
The oils I got a chance of using are made by Max Grumbacher, and are primarily directed at artists who don't want to work with some of the harsh petroleum based solvents that are normally used with conventional oil paints.
The friend I borrowed these of doesn't like the smell of oil paints, nor that of white spirit or turpentine. Use of these oils should in theory remove their need, and any hazards that their presence on the modellers workbench may cause..
I was mainly interested in what these "new" oils were capable of, and how they comapared to those I already had. I thought the best way to test this was to actually paint a model, rather than doing the colour tests that Graham Dixey has shown us in the past. Not to say that his method doesn't have merit, just that I'm an impatient soul, and prefer hands on comparisons.
After all if something looks alright on a model, then I deem it as useful.
Up for the test
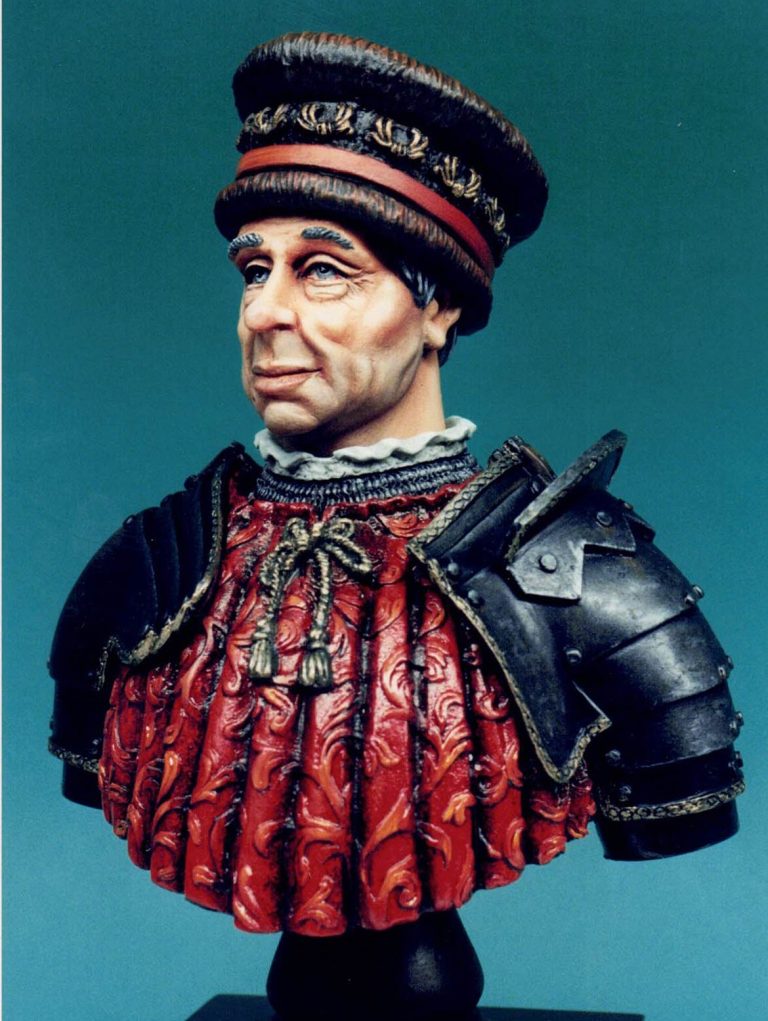
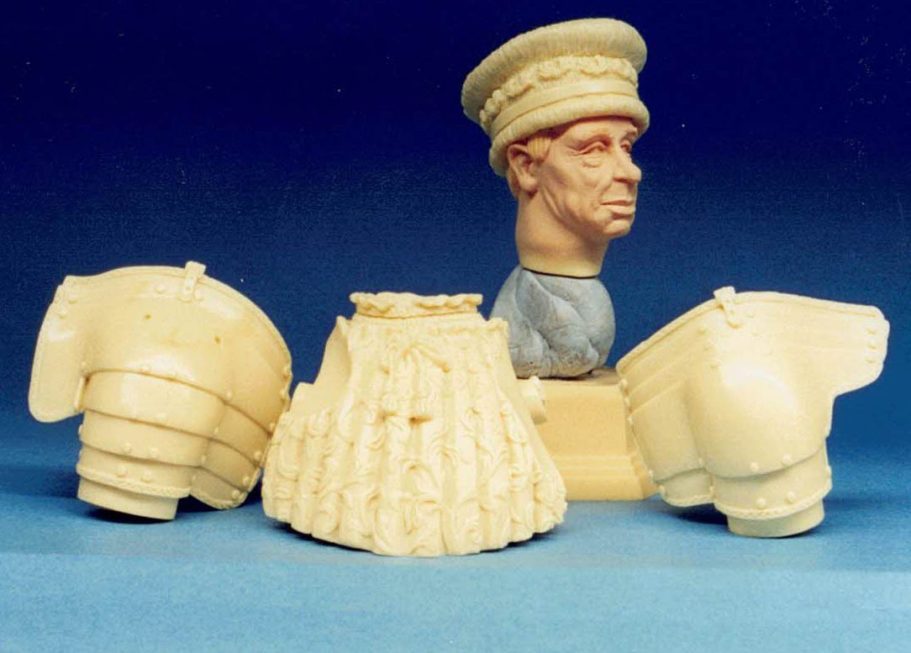
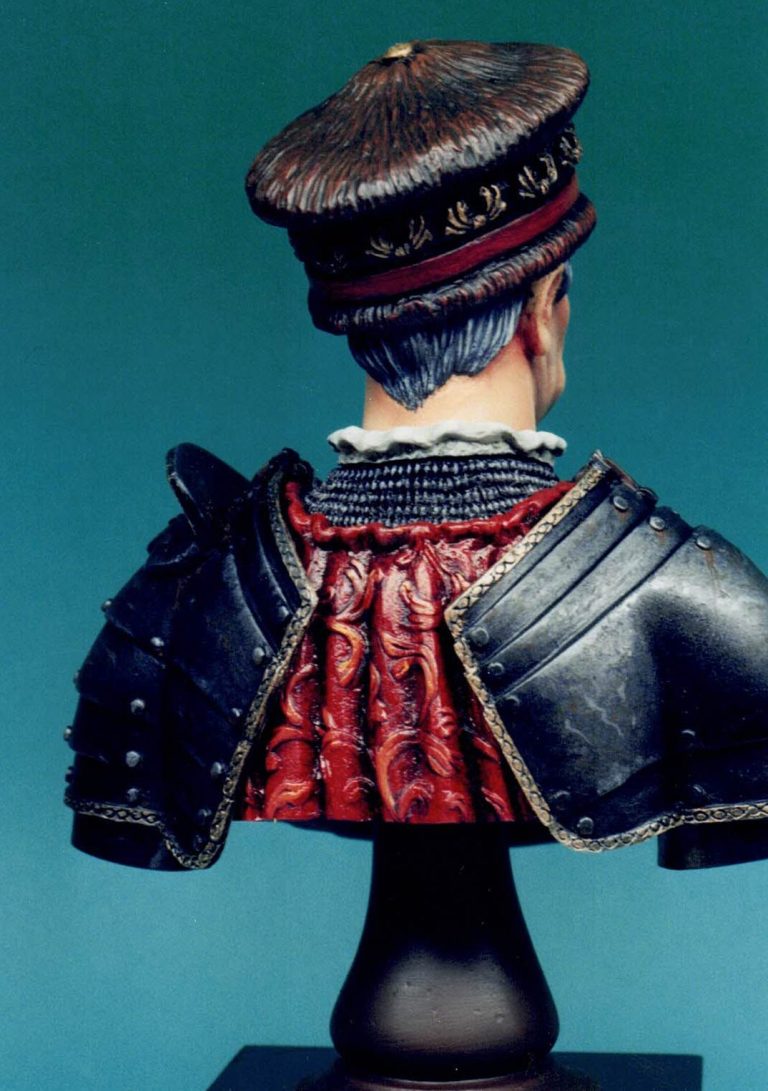
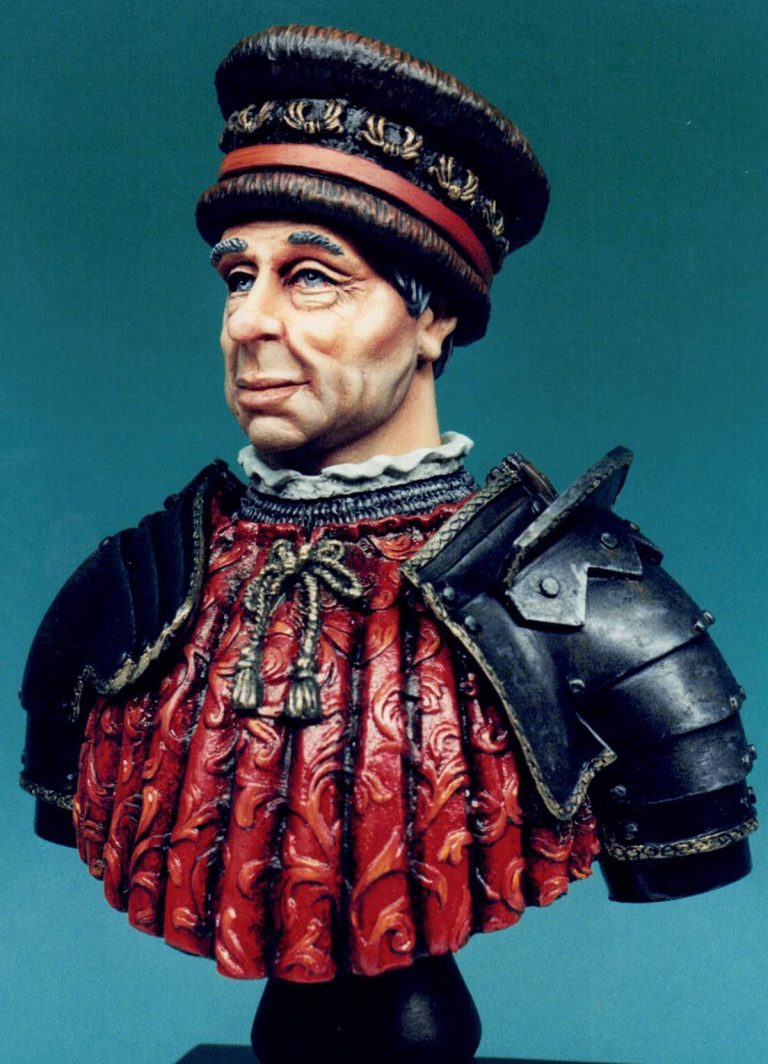
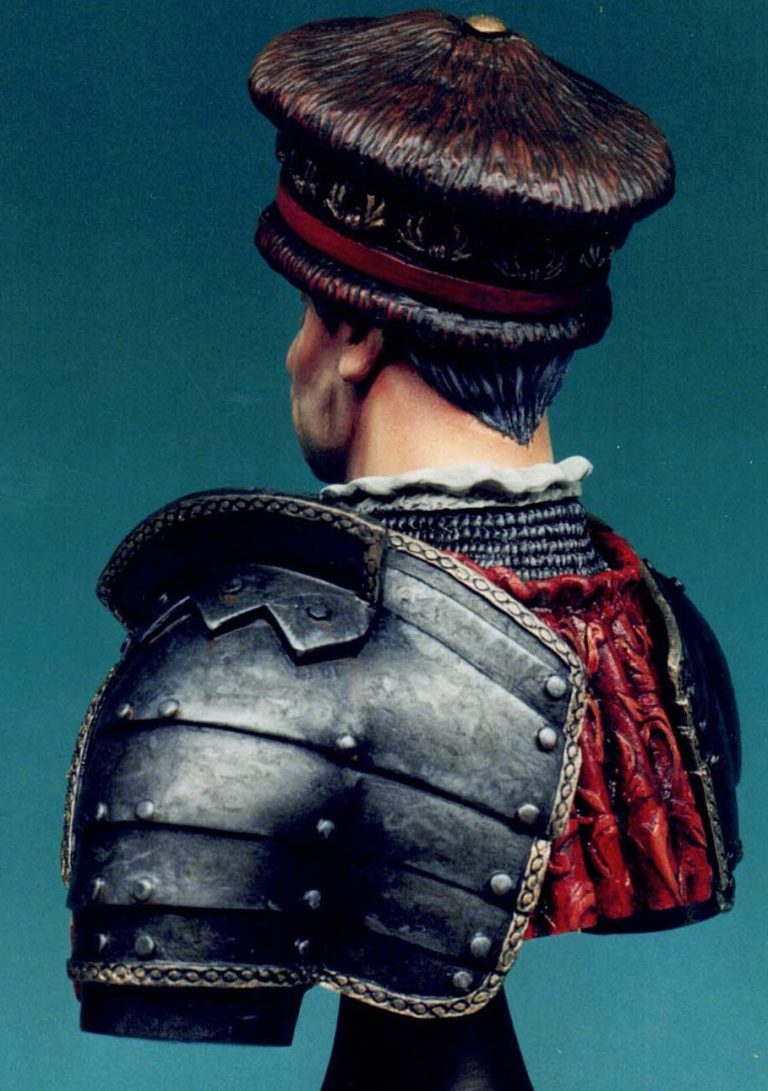
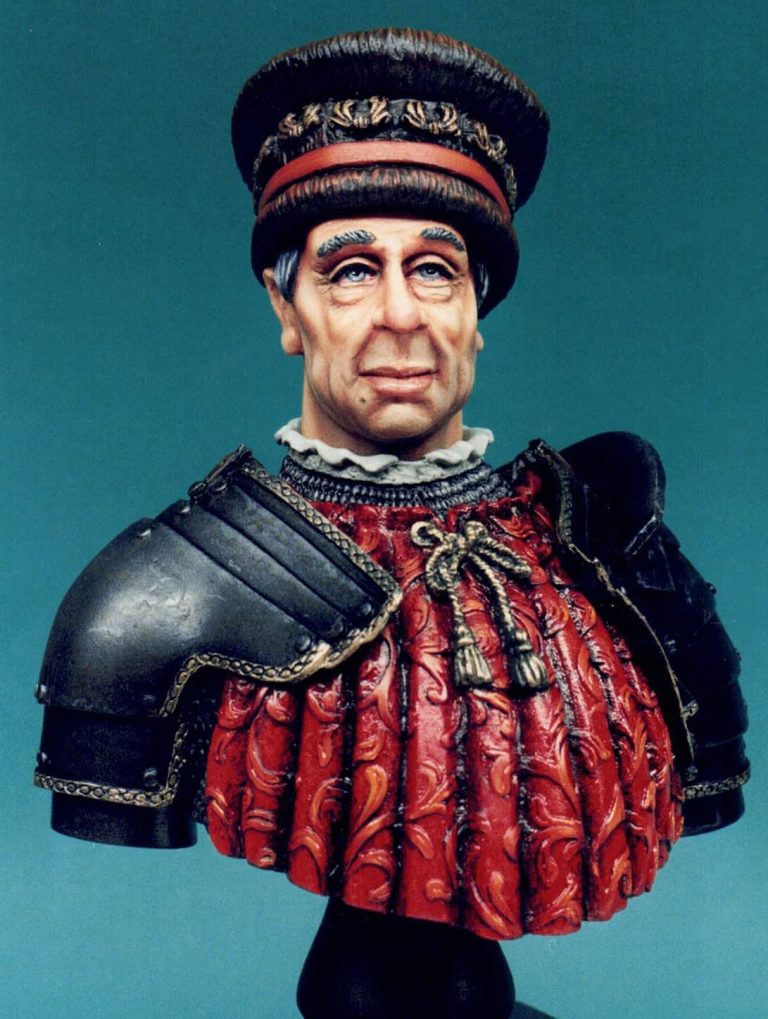
For the model, I've used a bust from United Empire miniatures. . The Bust in question here is Sir John Hawkwood. As is usual for me, I left the model in its kit form for the painting process, only joining the pieces to test fit them at the cleaning stage, and then using glue only when all the bits had been painted.
Starting up
I began with the usual preparation of the kit, cleaning where necessary and undercoating with acrylics, no problems there. Now for the oils.
I'd been given fourteen tubes of colour, covering the basic spectrum of six colours ( two reds - one purple biased - Alizarin Crimson, the other orange biased - Cadmium red. Two blues, one green biased - Cerulean Blue and one purple biased - Idanthrone Blue. Two yellows, one green biased Nickel Titane Yellow, and one orange biased Cadmium Yellow Deep ). There were also two browns - burnt umber and sienna, golden ochre, a Mars Black, a Titanium White and a flesh tint. The two extra colours to make up the fourteen were Cobalt Turquoise and Viridian.
Using this basic selection of colours should theoretically allow the artist to blend a vast range of colour mixes, and although I'm more interested in the performance of the water based properties of the paint, the colour selection provided here certainly caused no limitations.
I began with the theory of using the colours as though they were my normal oil paints, or as far as I could, given the colours provided. The only initial difference being that I'd try using water instead of White Spirit to thin them and wash off the brushes.
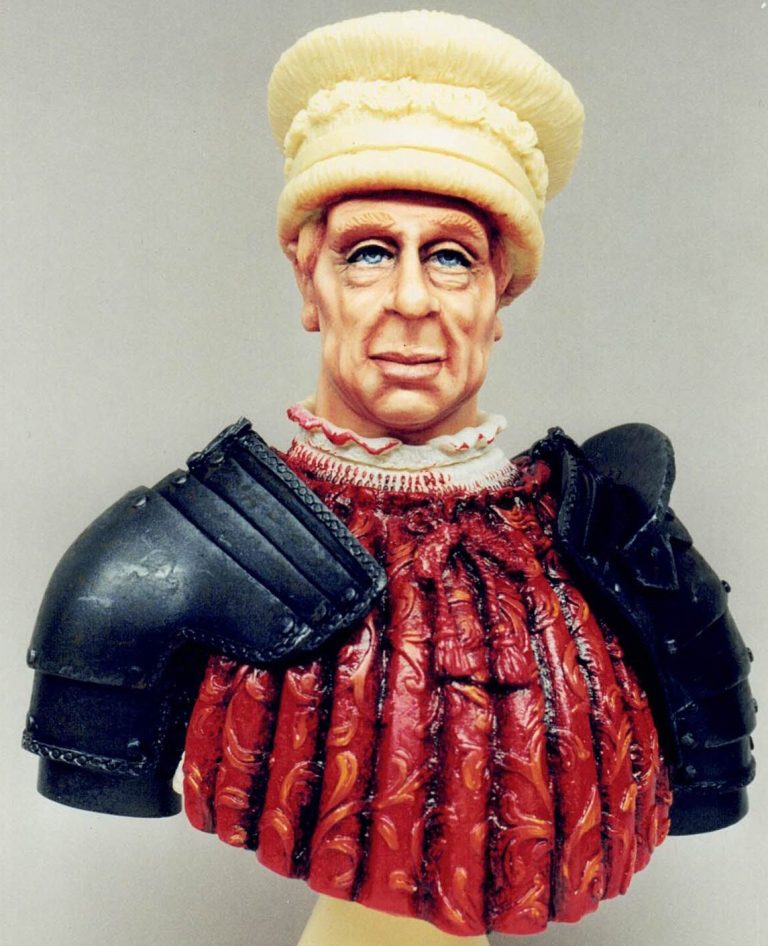
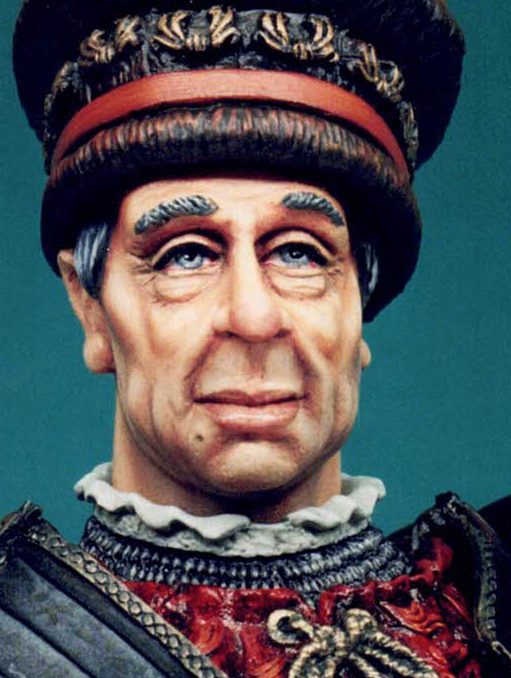
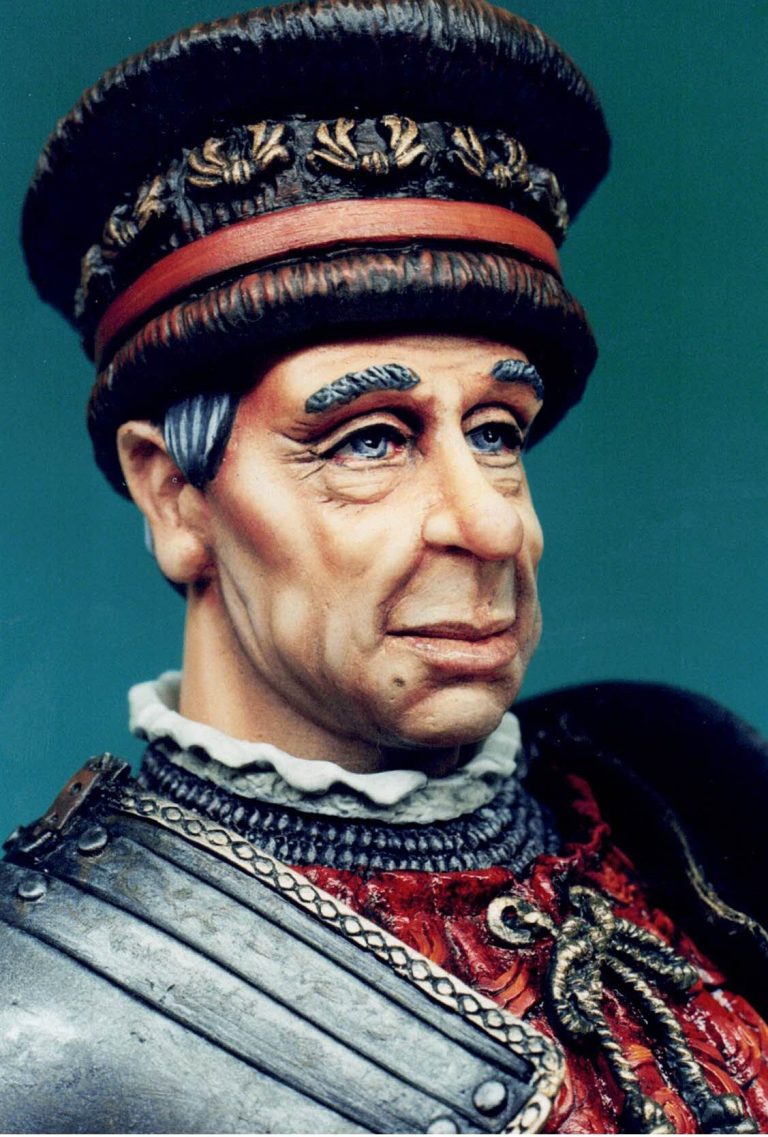
I began by mixing the flesh colour. The Flesh Tint provided was, as is my Windsor and Newton oil paint, too pink, and I mixed in some of the Golden Ochre and Titanium White to make it more realistic.
Here I met my first glitch. The paint was fairly thick and tacky, almost like white glue had been added to the mix and then left to thicken for an hour.
I added water to thin the paint a little, and was happier with the consistency.
A couple of notes here. First of all, the water and paint resisted mixing at first, and I initially thought that maybe I'd picked up the wrong paint tube somewhere. After a little perseverance though the two fluids did begin to combine, but as a comparison I added some White Spirit to a second batch, and this seemed to provide a more pleasing mix than the water had. The spirit breaking the paint down more easily. But I was determined to give the water a bash, and so used that to thinly cover the acrylic undercoat.
I used the same method as on the Beauchamps bust in the Figures Special, shading with Burnt Sienna for initial shadows, deepening these with Burnt Umber.
No problem here using the paints straight from the tube. The paint doesn't seem to be quite as heavily pigmented as it's oil equivalent, perhaps the carrier medium that allows the use of both spirit and water as a thinner is the culprit here, but there was no real problem encountered with the product.
I found that my method needed adjusting, as I don't usually thin the paints when I'm using oils in this manner, I found that my initial coat of the base flesh mix was too thin, allowing the undercoat to show through too much. I stripped off the first attempt, adding less water to thin the flesh mix, and then went through the method of adding the shadows again. The highlights were added with Titanium White, again the paint has less density than its comparable oil paint, but it worked fine all the same.
The surcoat called for reds to be used, and after undercoating with Humbrol acrylic Crimson, I added a thin layer of the Alizarin Crimson. Here again I encountered problems with the consistency of the paint, again it was found to be of a glue-like quality. Again a small amount of water was added, and it was then much easier to deal with.
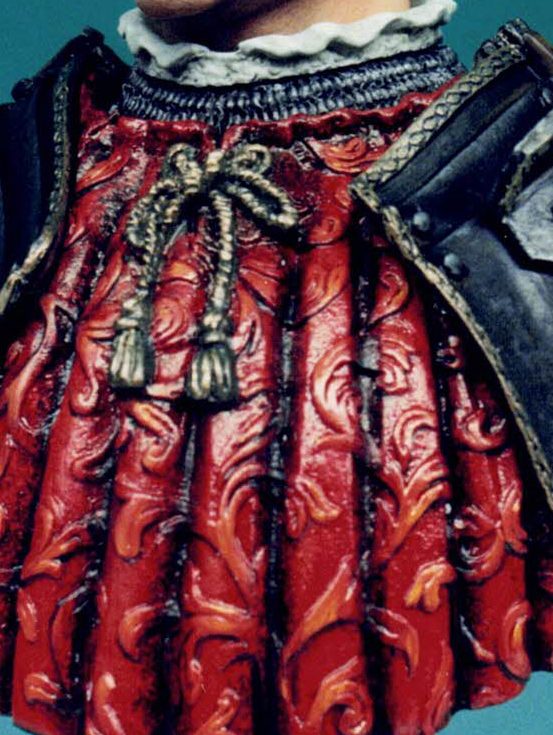
To shade I decided to use the Viridian, blending this into the armpit areas but leaving the pattern detail until later. Highlighting was built up by first using the Cadmium Red, and then furthering the high spots by additions of Cadmium Yellow Deep. This was mainly added to the pattern detail, giving it a flame-like appearance.
To make the pattern pop out a little bit more, I outlined it with a mix of the Viridian and Alizarin Crimson once the paint on the surcoat had fully dried. This mix was thinned with spirits to get it to flow better.
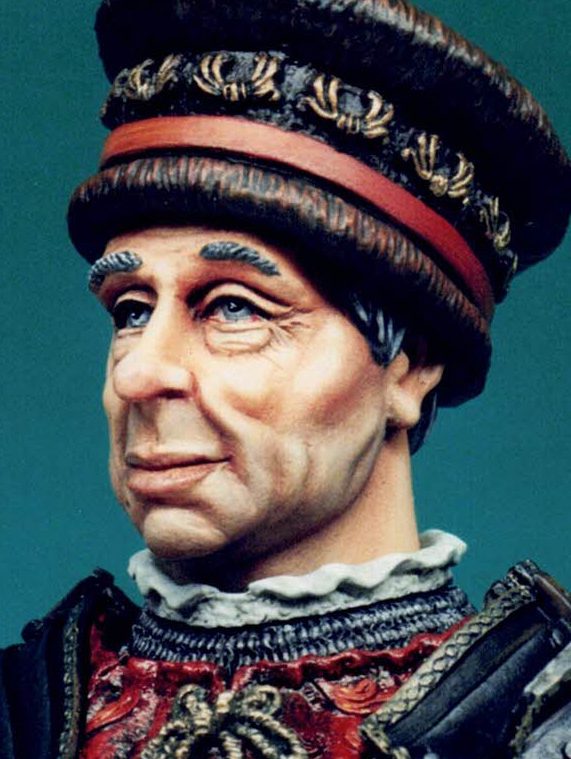
Just to give the brown colours a try I decided to paint the fur of the hat. I used Burnt Umber over an undercoat of Games Workshop "Swamp Brown" ( back to those lovely names again ! ), adding highlights of Burnt Sienna, and some of the Cadmium Yellow Deep as a final touch to brighten it up.
Now for the drying.
Not being an adventurous soul, nor possessing a crock pot, I'm still drying my models on a metal shelf above a radiator. The models are covered with old "Tupperware" boxes to keep out any dust, and I usually find that brown and most mixed greens colours will dry within a full day, reds and flesh within three days, and blues yellows and purples ( sometimes reds too ) I find take longer, and usually need a week.
The paints on test here though took a lot longer. The flesh was still tacky after a week, and the reds were tacky - like a badly mixed Humbrol gloss paint - after a week and a half, as too were the browns.
What was I doing wrong?
After reading the paperwork that my friend had enclosed with the paints, I found that the drying times could vary from those of comparably coloured oil paints, and so this must be what was causing the difference.
Now this probably won't cause many folk a problem, unless you suffer terminal impatience - like me - but one thing I did find was that the heat that usually matts the normal oils down had no effect whatsoever on these new paints. The red on the surcoat remained a remarkably robust gloss, a shine like this would be heart-warming on skirting boards or the front door.
On model clothing, no, no good at all. Having my usual success with matt varnishes, I managed to get a satin finish which I'm not at all satisfied with. A matt varnish that does what it says on the tin please anyone !
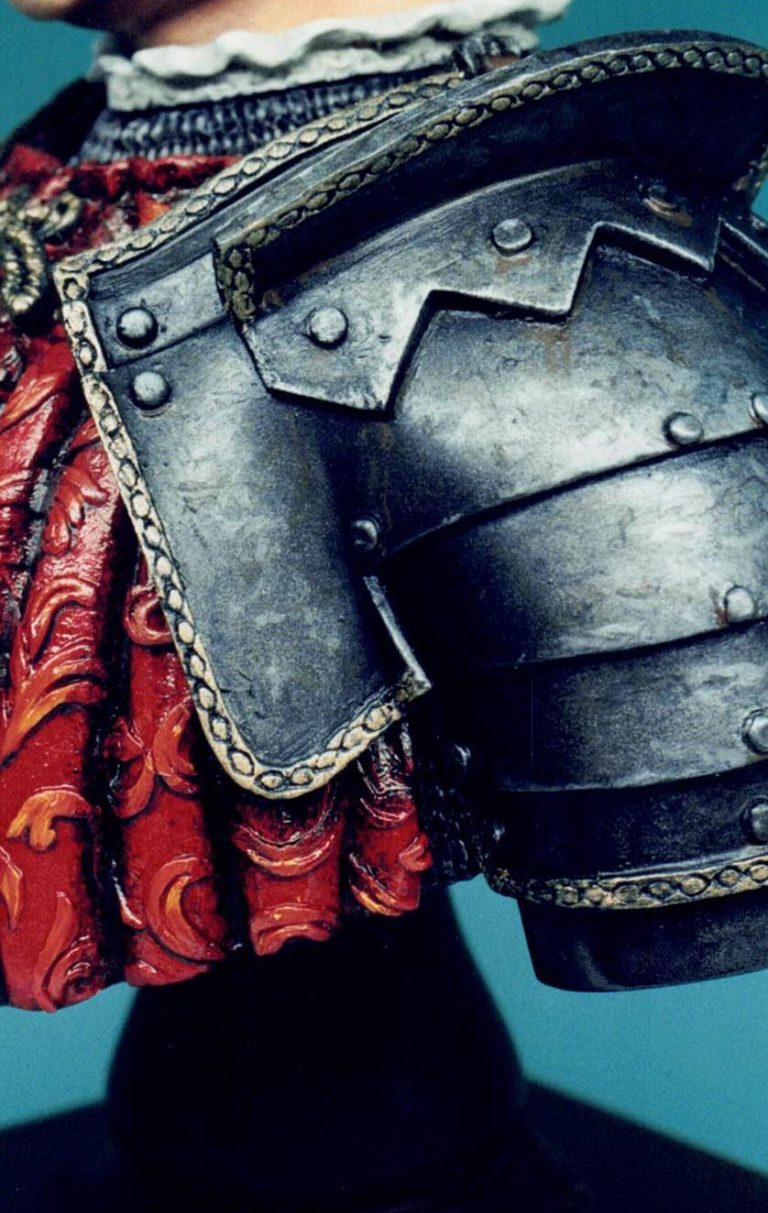
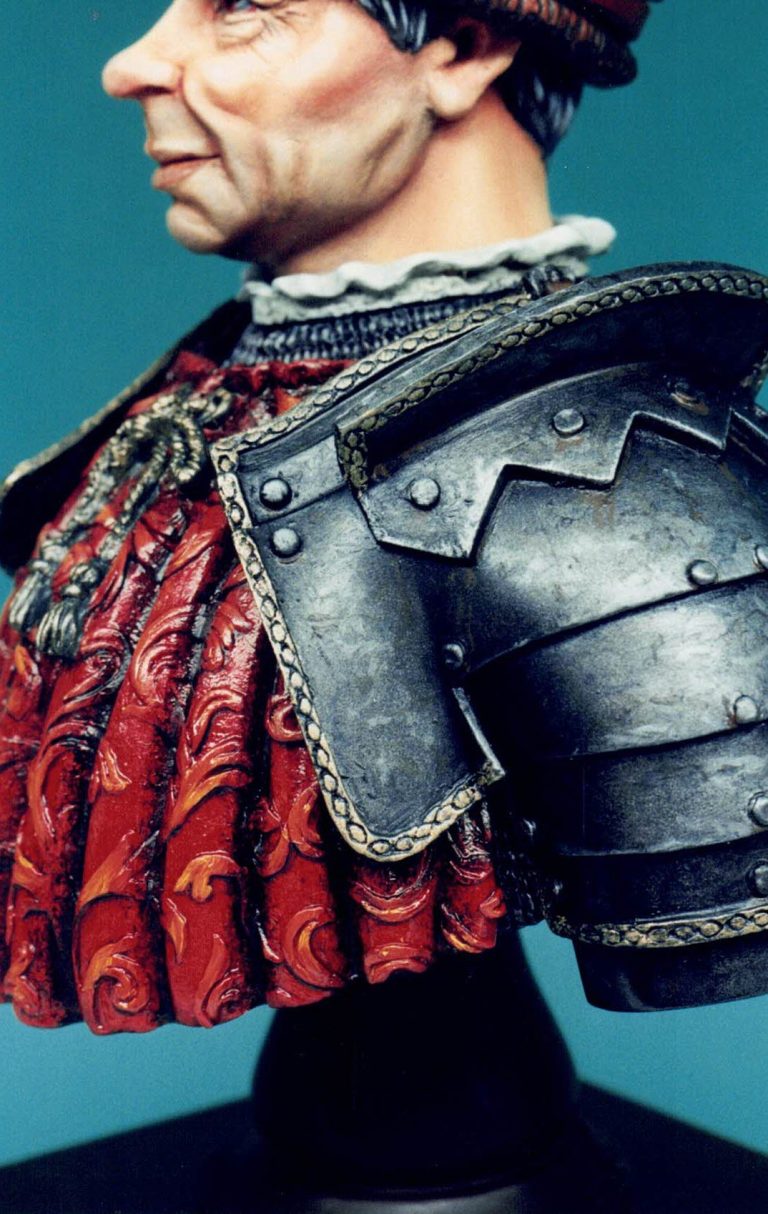
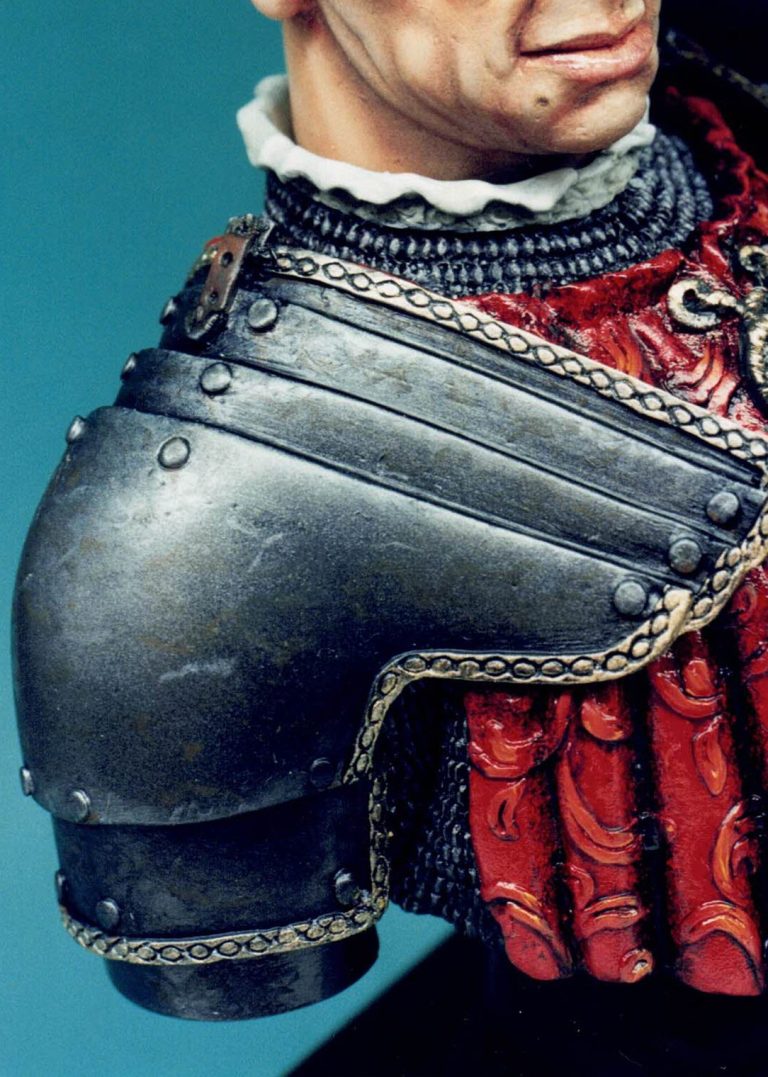
I lowered myself to discussions with the airbrush for the armour on the shoulder plates, using the excellent Testors paints made especially for airbrushes. Over this a couple of thin coats of Tamiya Smoke acrylic, and then back to the new paints for some arty shading.
Now I've been told that Sir Hawkwood here was of the White Company, noted for their nice and shiny armour. Unfortunately we have Sir John here in his second best suit, which is slightly less than mirror-like. I've been discussing armour condition on and off for the last couple of years with a few fellows who are far more knowledgeable than I, and they seem to agree that highly polished armour, even if it was possible to achieve, would soon lose its polished appearance.
A shower of rain would begin the rusting process very quickly, especially if the armour was then brought indoors to a moderately heated room, and the polishing agents used - fine sand etc, would at best leave lots of very small scratches. Not to mention the armour having an etched and stained look at best from the heat and metal working processes that it was put through during its construction.
Anyway, I decided to give the armour a patina, and admittedly went a bit overboard in Sir John's case. Here's how it was done though, just in case you'd like to get it wrong too !
I began by applying a wash of Burnt Umber to the whole of the armour.
Yes, I had problems with the paint, and dipped into the White Spirit to get the paint to thin and flow enough. One interesting thing is that having begun to thin with water, I could then add the spirit and not have the paint go all gooey and messy. It mixed up just fine using both water and spirit – surprised even me !
Having applied the Umber, I dabbed most of it off using a soft cloth, and then added squiggles of Idanthrone blue ( I'd mixed in and equal amount of black to produce a type of Paynes Grey here in truth ) also adding some silver ink scratches, and some more of the Burnt Umber in squiggles too. Once I was happy with this I added some judicious amounts of Burnt Sienna for rust stains, and then left this all to dry.
Now this was interesting, the paint dried quicker with the spirit being added in, and was dry in a comparable time to conventional oil paints. Also, but this could be due to the colours used, the paint dried matt - Typical on a metal surface that would normally require a gloss or at least satin finish.
I completed the bust using the Grumbacher oils as much as possible, the gold button and bits of silver here and there had by default to be done with enamels, but the non-metallic areas were all completed with the Grumbacher's paint, allowed it to fully dry, and then the finished components fastened together with superglue.
Conclusions
Well the paints were better than I'd thought. I've also painted one of the Pheonix Phollies girls with the same paints, mainly to see how the flesh paint would do over a larger expanse of model, and it seemed to do just fine.
I've got reservations about the use of water for thinning, mainly as it is better with spirits, and that sort of defeats the object somewhat.
The glossy drying of certain colours is awkward for us who still don't possess a pleasing matt varnish, and the drying time as mentioned could be frustrating to some.
That's the down side. Now the good things.
If you've got children who are wanting to have a go at painting, then at least they can now have a go without necessarily being exposed to strong solvents. This too goes for people who's skin, eyes or breathing can be irritated by those same substances.
The clean-up of brushes is also eased with a bit of soapy water, and use of a jar of water with half a dozen drops of detergent in does make the thinning of the paints easier. I discovered this after I'd finished the bust, so haven't made out that I'm all that clever by adding this in during the painting - honest or what ?
The paints are directed I feel at students and picture artists, the idea that you can do oil painting "in the field" as water colour practitioners have done for so many years is the main thrust of these paints.
There's nothing stopping us using them, and if you've already got a full complement of oil paints in your palette, then it's pleasing to know that these new paints will mix with conventional oils with no problems being caused. In fact the advertising literature says that up to 30 % conventional oils can be mixed with these paints and the resultant colour will still be water soluble - I tried it and it seemed to work too. Although higher percentage mixes will require thnning with solvents such as White Spirit, this also being used to clean the brushes too.
The pigment is suppose to be between student and artist quality, and this I was concerned about. Having thinned the paints quite heavily on a white tile palette, the pigment seems to be on a par certainly with Winsor and Newton artist quality, which most of us find acceptable enough.
I think the only real sticking point is price. Most of us are shocked if we have to fork out more than a fiver for a tube of paint, although some colours can be a lot more expensive than that. This range seem to be between five and nine pounds fifty for a 37ml tube.
It's not that much considering how many models you'll probably get painted from even the most commonly used colours, but buying several colours at a time may be beyond most of us.
Availability may be another point to consider, and below is the address that was on the literature that came with the paints. My thanks to Michael Harrop for lending me the paints, which whilst they haven't made me rush out and buy a set for myself, have at least convinced me that there is an option to the conventional, and as he terms them "Smelly old oils"
Max Grumbacher oil Colour. Blundell Harling Ltd ( Art and Craft Division ),Regulus Works, Lynch Lane, Weymouth, Dorset. DT4 9DW. U.K.