The Plucker
90mm resin kit from Terrible Kids Stuff
Painted in 2023
If you’re a fan of the dark fantasy artwork from the artist Brom, then you might well recognise this as a three-dimensional take on one of his pictures – the Plucker.
Although not in any way violent, the image does have some very dark connotations, the idea being that the character likes to extract and collect eyes.
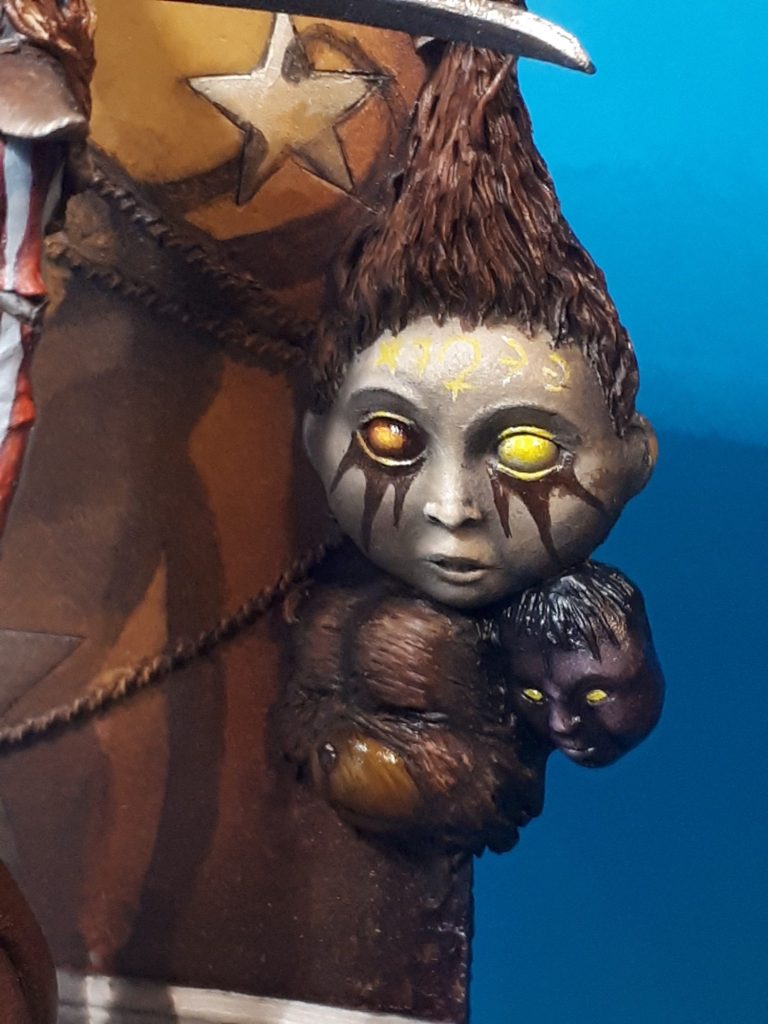
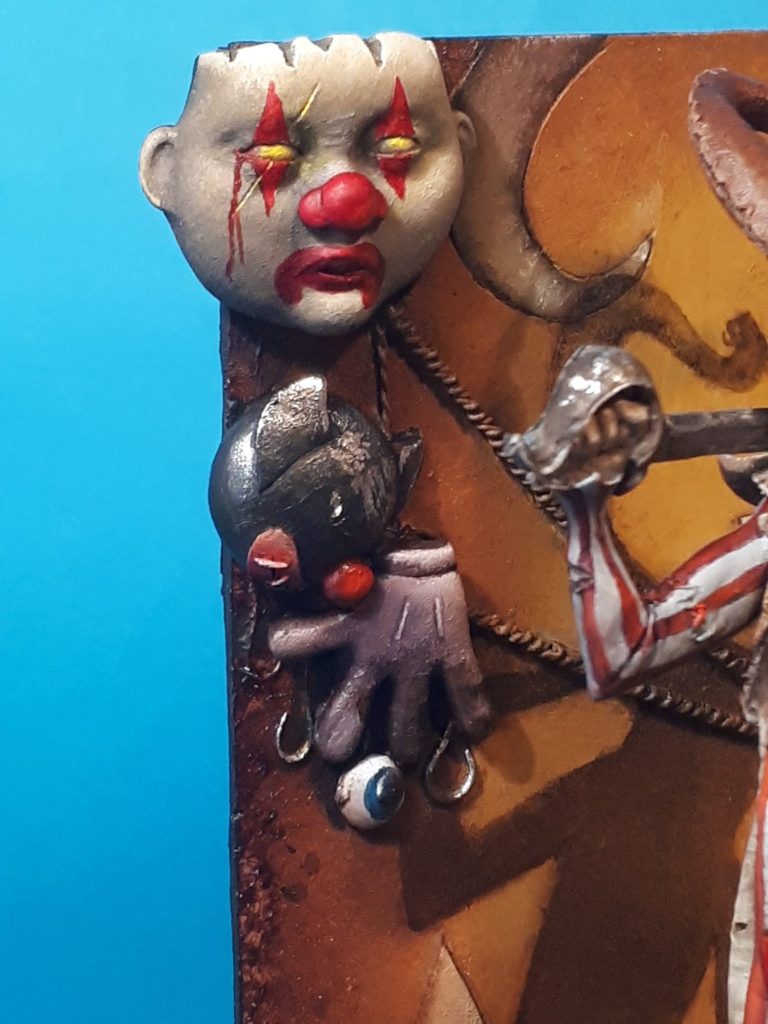
Terrible Kids Stuff got the rights to produce a couple of Brom’s images in 3D, and did a really good job of filling in the blank areas.
Unfortunately they stopped trading some time ago, so if you want one of these kits, and they were numbered, limited editions even when they were in production, then you’ll either be lucky to find them for sale second hand, and even then, may have to have deep pockets.

I was very lucky to pay ( what I thought ) was a very reasonable price from a friend – Dave Maddox – and I assured him that it would be painted and not kept to be resold.
This then is the process I went through to try and do a great kit justice.
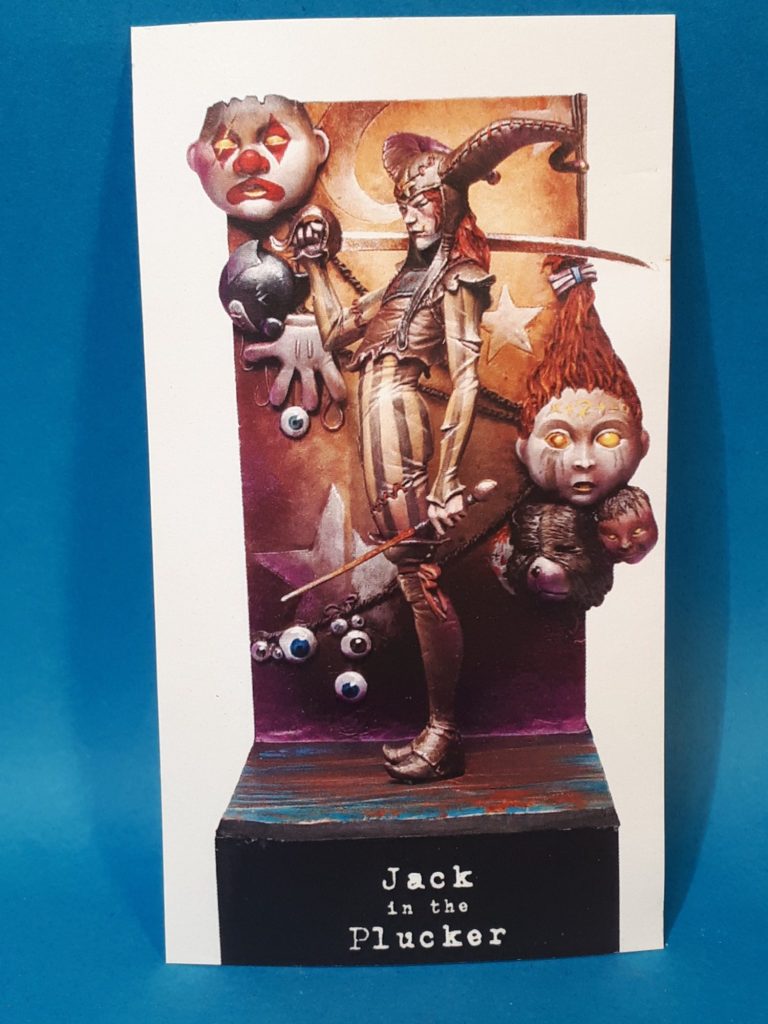
Photo #1 shows the box at that comes with the kit – it’s a painted model and gives you a good idea of how it should be painted if you’re to follow Brom’s artwork.
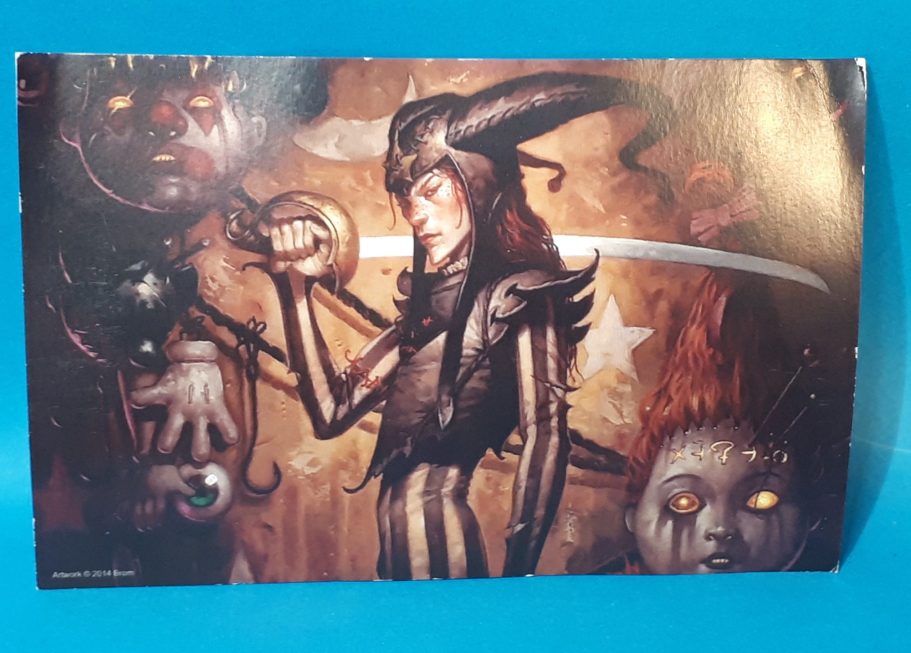
Photo #2, and also included in the box with the kit is a postcard sized print of the actual artwork, which if you have Brom’s books, is also in his first of the two currently in print.
I didn’t take a shot of the components, simply because I was too eager ( there’s a rarity ) to get on with the painting. Needless to say, there is a small amount of clean-up, and whilst the sabre is as excellent as the rest of the kit, the thin resin of the rapier is very bent and I decided to replace it with an acupuncture needle – nice and sharp and plucky.
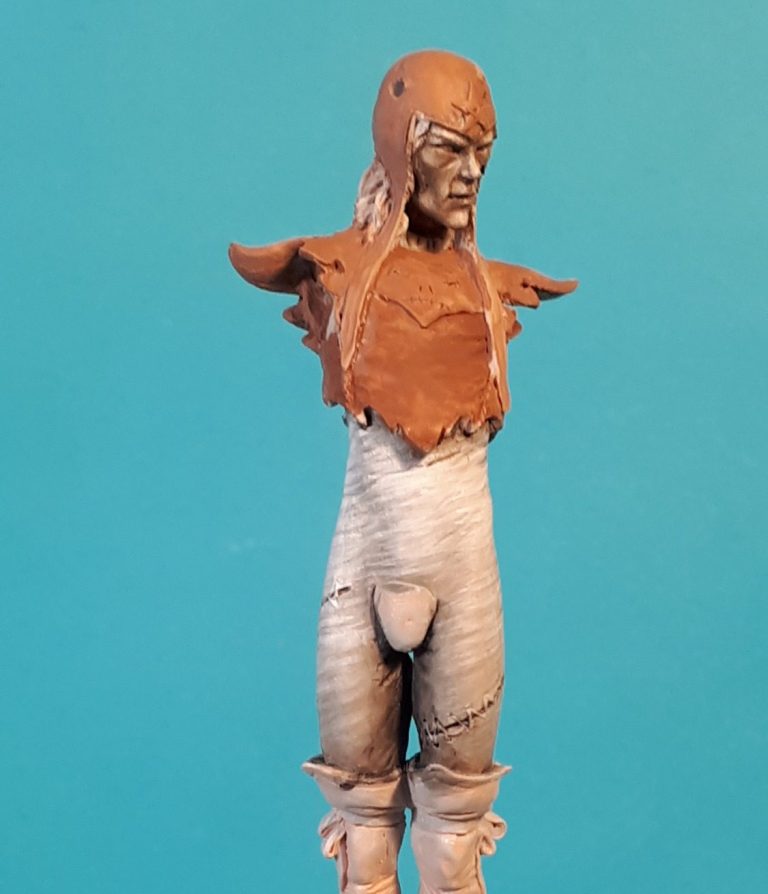
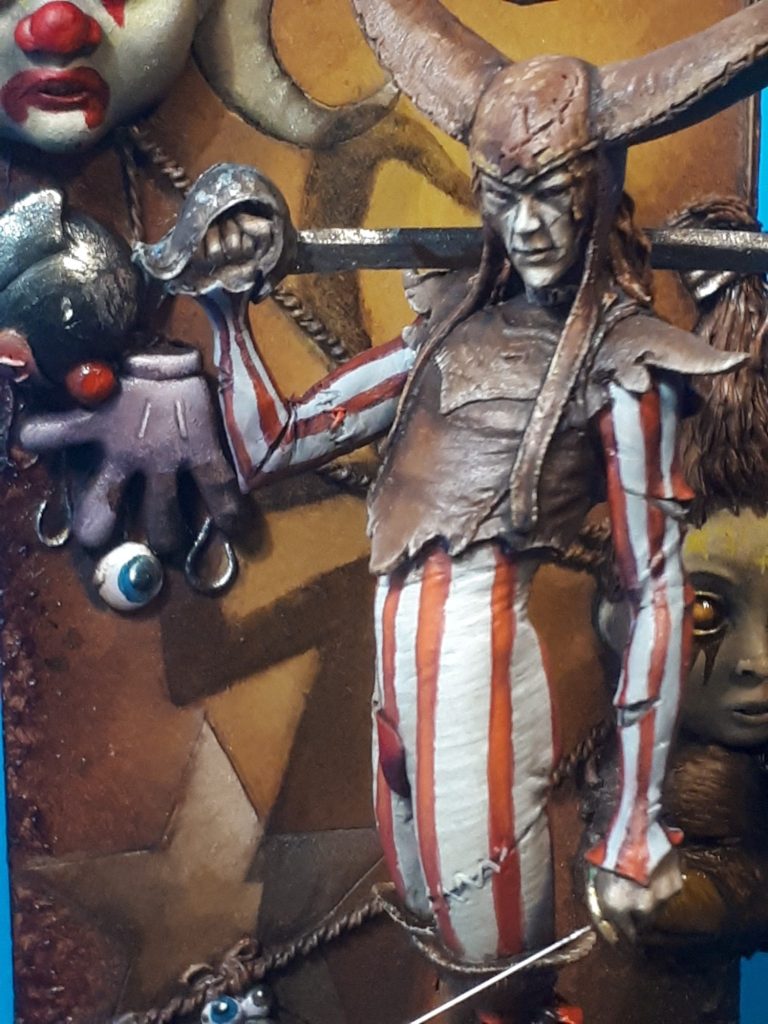
Photo #3 and I’ve begun the painting of the main casting. The arms are separate, as too are the large horns on his headgear, but the main casting shown here comes as one part.
I’ve painted the trousers at this point with a variety of pale grey acrylics, working up to pure white, adding thin layers to build up from the shadow colour through mid-tones and on th highlights.
The face is done too, I used my usual mix of Mars Brown and Titanium White oils, but added to that a fair lump of Olive Green to give an unhealthy pallor to the overall tone. With the shadow colour mixed from those three colours, it was then a case of using Titanium White to build up lighter areas, blending the paint on the model whilst it was wet.
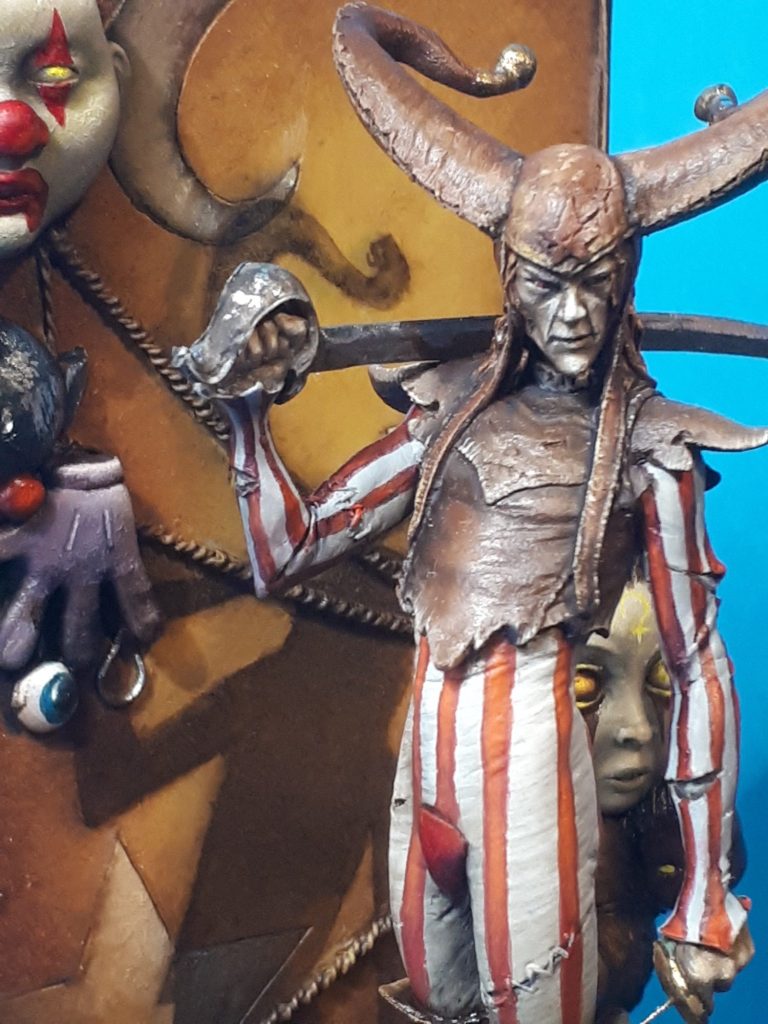
Photo #4 and the leather areas that were undercoated in brown acrylics in the last shot have been painted in with oils. I use a lot of different colours to do this, beginning with Vandyke Brown, which is very dark, but not a particularly strong pigment, which then allows me to blend in Mars Brown, which is a bit denser and creates decent mid-tones. I follow this with Venetian Red, which is a rust colour, and then add scratches and wear with Mars Yellow and Buff Titanium along the edges or where scratches would naturally occur on an old, well-worn piece of clothing.
Whilst the original artwork has brown stripes on the trousers, I wanted to have then a little brighter, and so chose to paint mine with a relatively light red. These were given a thin line of darker red on their outer edges to make them stand out.
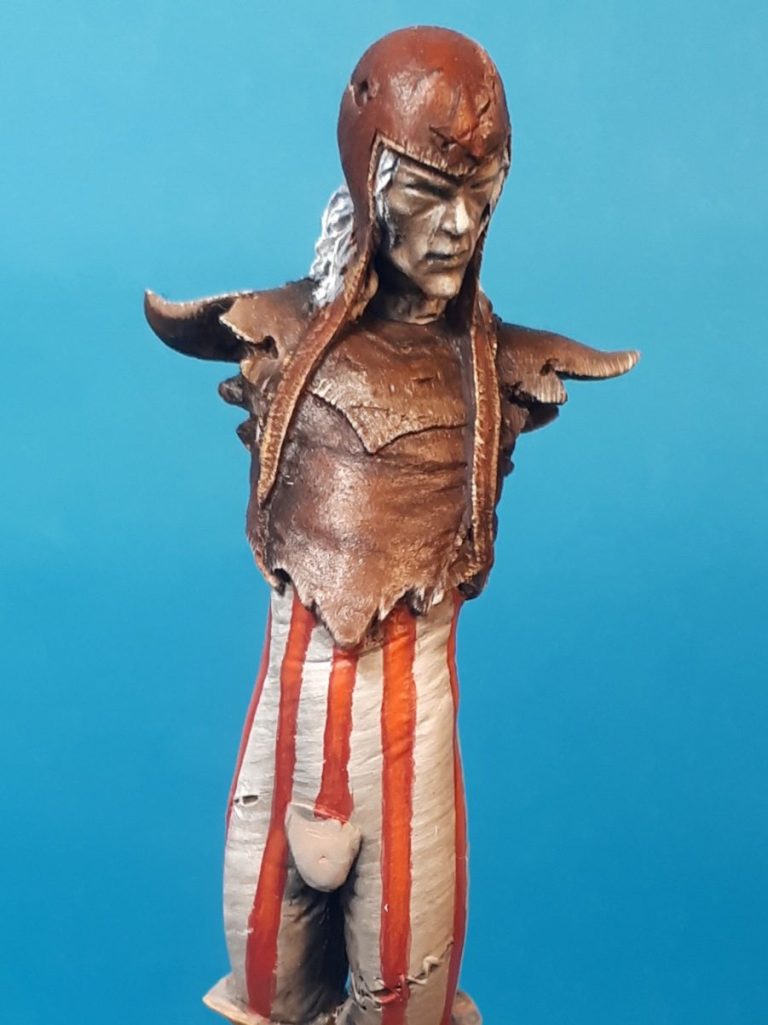
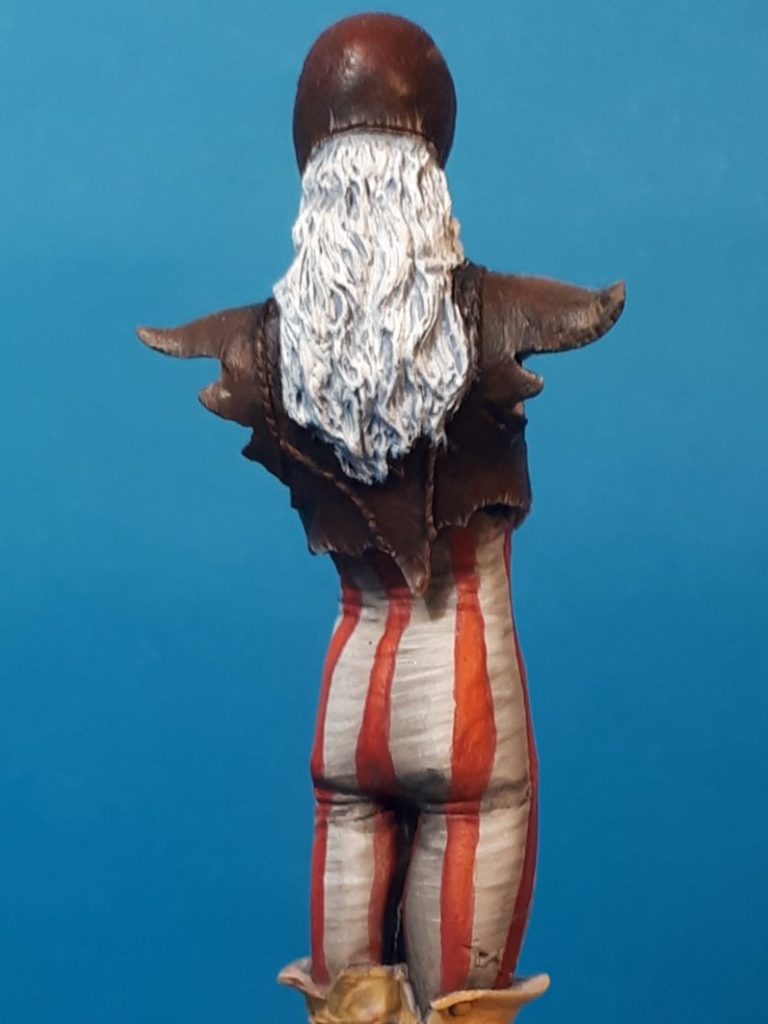
Photo #5 shows the back of the model at almost the same stage. Here though I’ve undercoated the hair with several thin coats of white acrylic, and added some thin washes of Vandyke Brown oils to the shadow areas of the trousers – under his bum and between his legs in particular, and along the bottom edge of the trousers as they go into his boots.
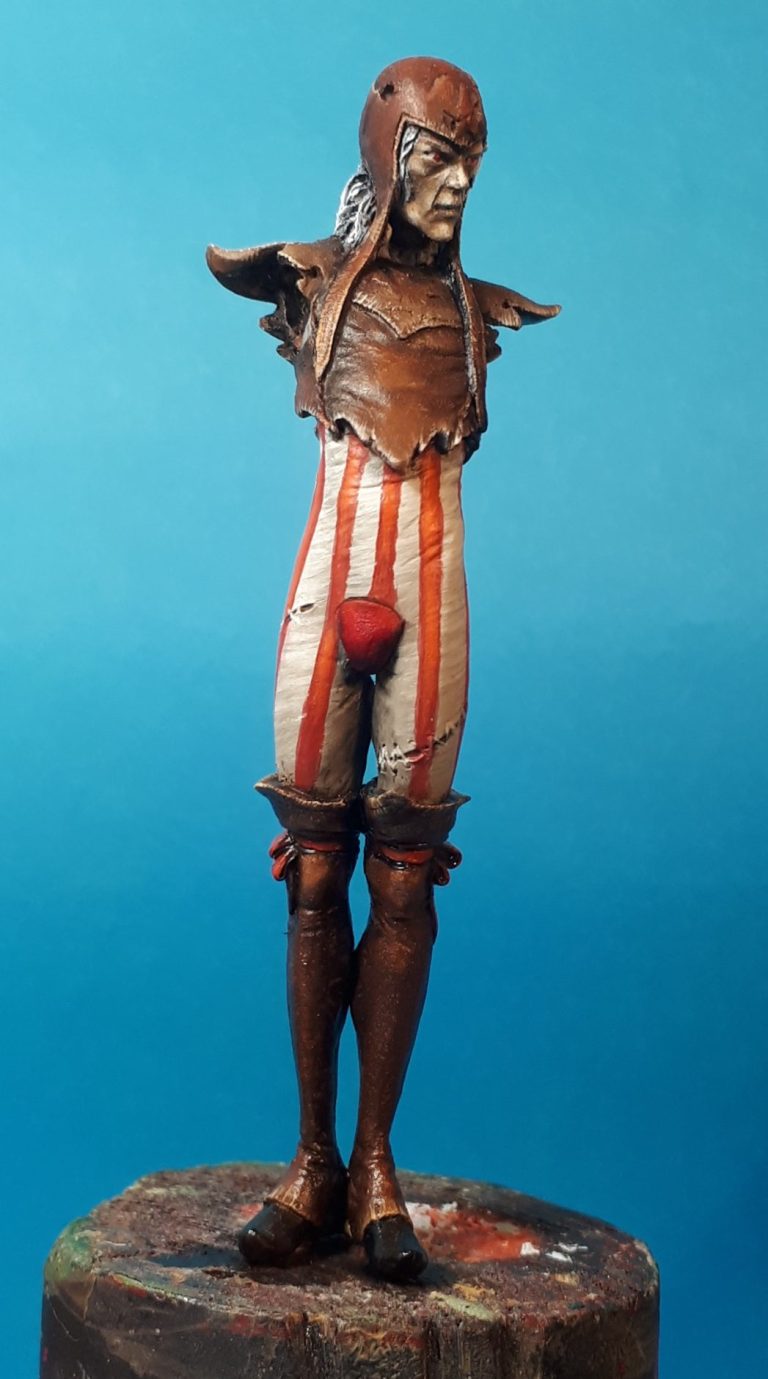
Photo #6 and the boots have now been painted in the same way as the waistcoat, and the codpiece painted a bright red to match the stripes on his trousers.
The hair has been given a couple of thin washes of a dark grey to initialise the shadows that will be present once the ginger colouration is painted onto that area.
Photo #7 and a slight change to the viewing angle, there’s a few tears in his trousers, each of which will need the repair stitching painting in and the actual tears given a deeper colour to show that they have a depth to them.

Photo #8 and it’s coming down to the smaller details and refinements now. The ribbons holding the boots up have been painted in red. They appear shiny at the moment, because the oil paint is still wet when this picture was taken, but with a little warmth in the drying cabinet overnight, they’ll dry matt.
Small amounts of Vandyke Brown oils are used to refine the deeper shadows, placing the paint underneath each fold, and also using the same colour to add deeper cracks and scratches on the leather areas.
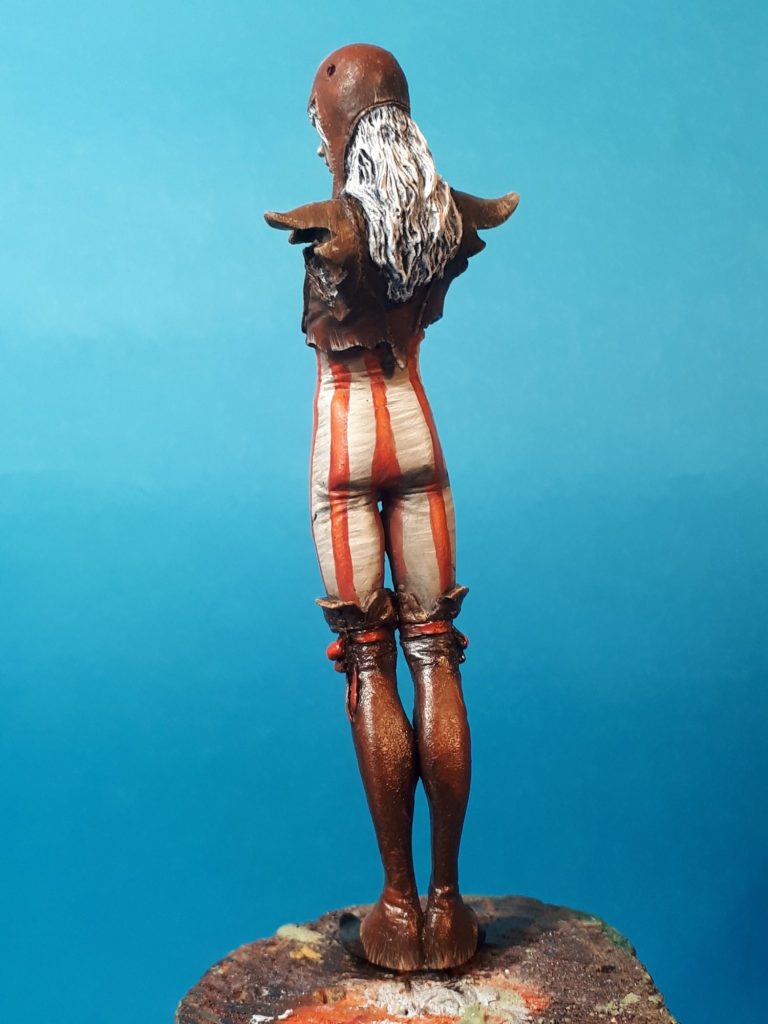
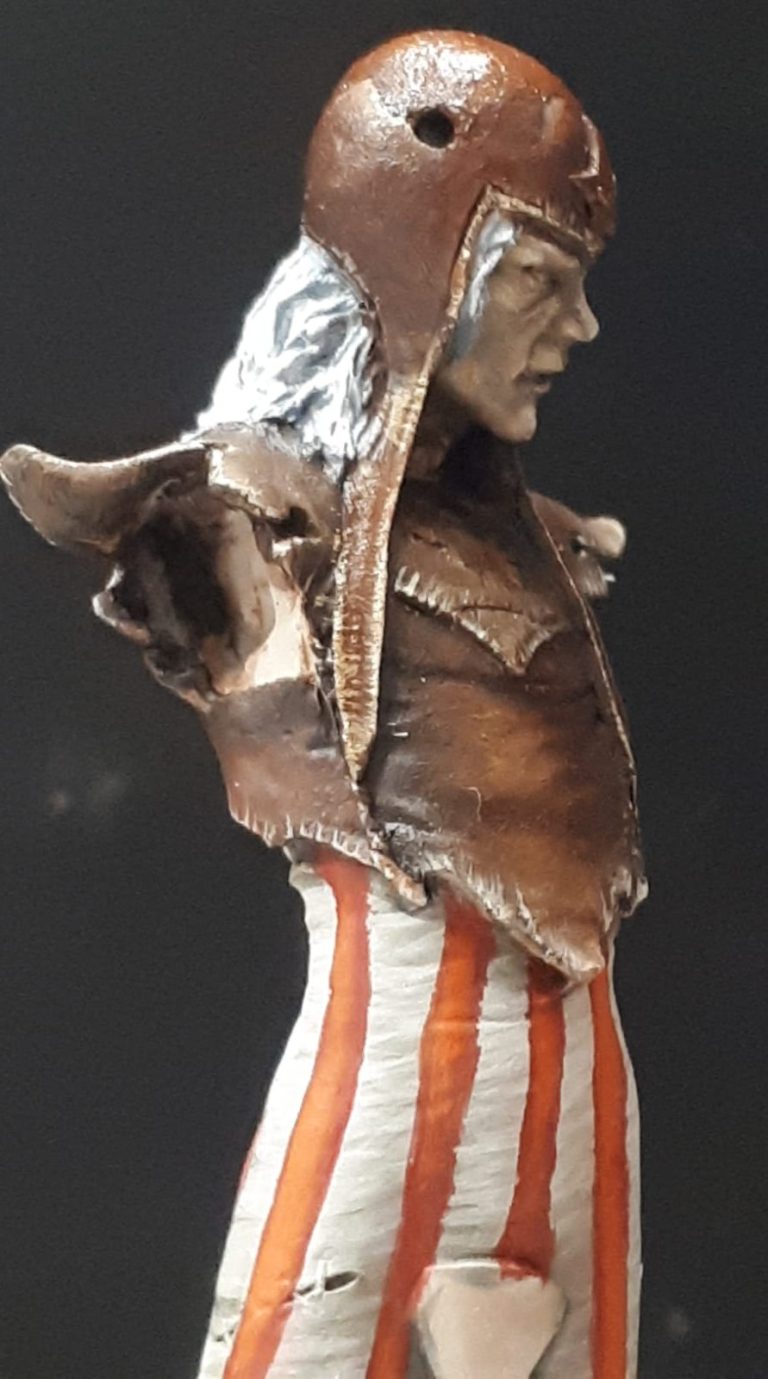
Photo #9 those deeper scratches on the leather can be seen a little better in this picture, and a seam line has been added around the edge of the hat and down its flaps.
Photo #10 and the arms have been painted to match the trousers and the weapons added. The advantage of the acupuncture needle is not simply that it is very thin, it’s also very bendy, allowing it to be touched ( albeit accidentally I hope ) and “ping” back straight.
The same needles are excellent for aerials one AFV’s and for nose cone probes on jet aircraft.
Back to this shot though, and I’ve added the two horns to the hat, they’ll be painted on the model, rather than as separate parts so that I get the highlights and shadows in the right places.
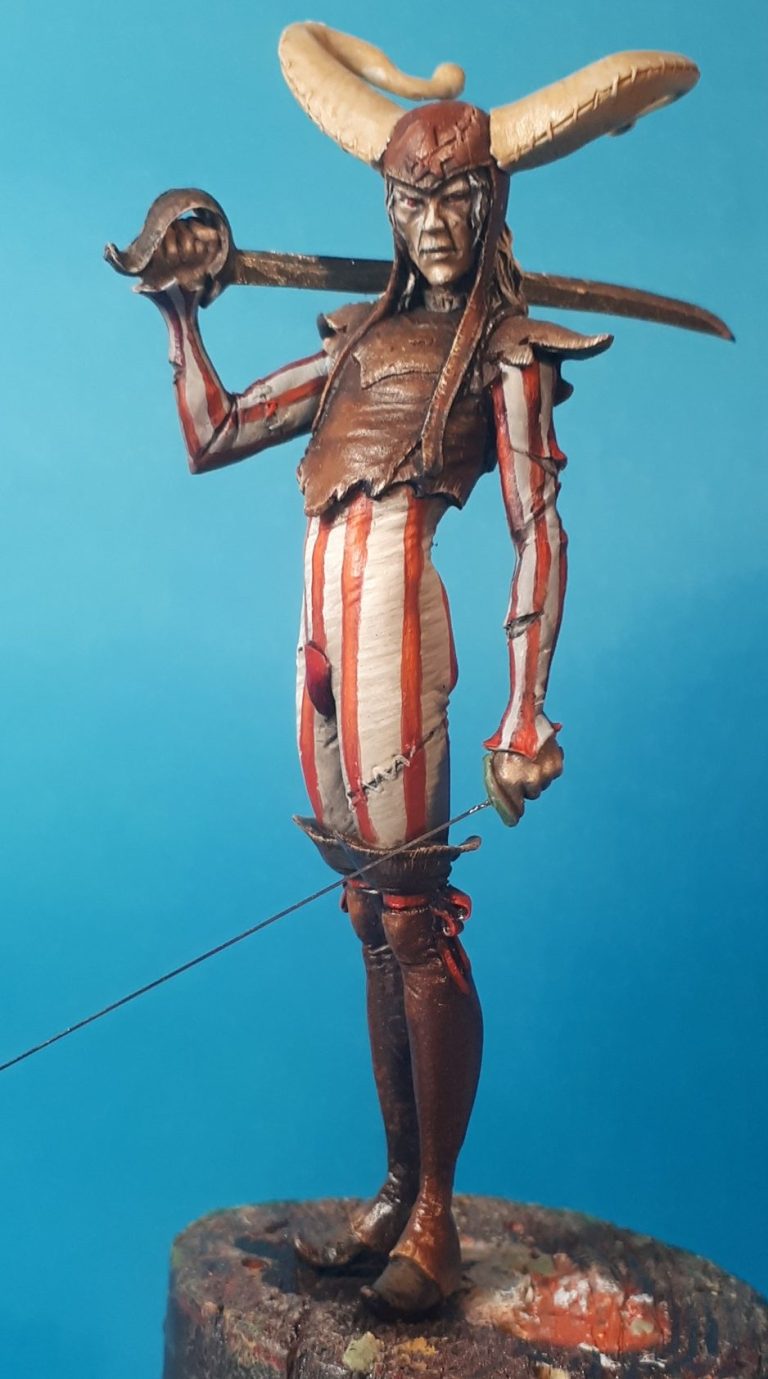
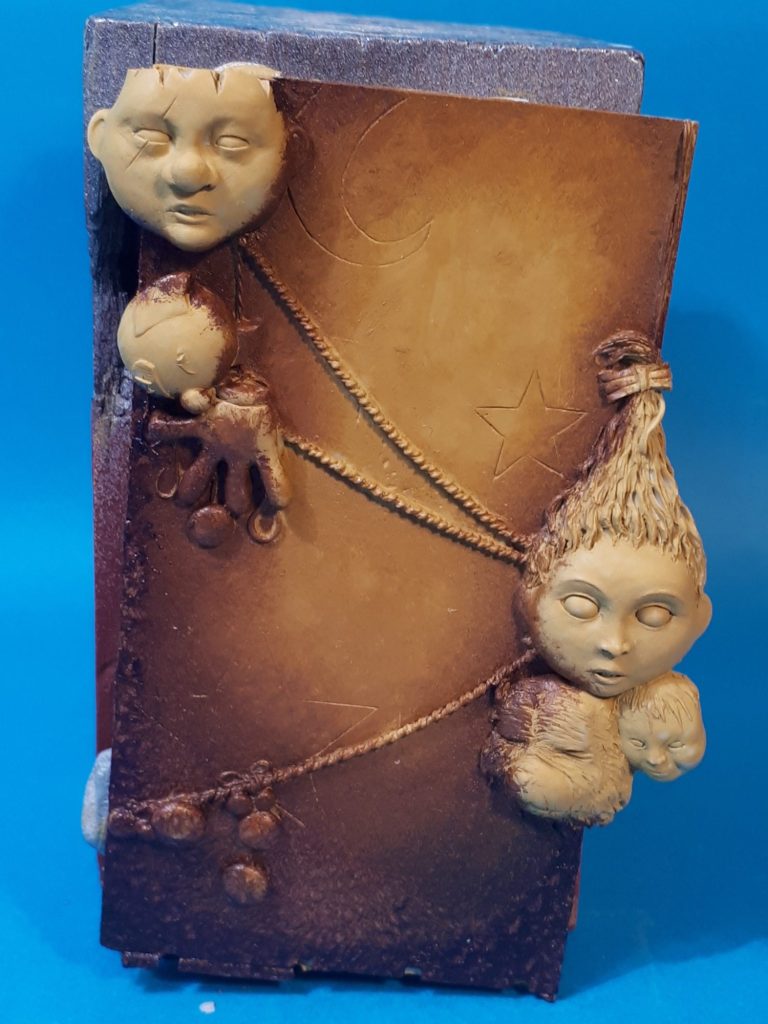
Photo #11. As I tend to paint in longer sessions, it’s all to tempting to try and paint too much of a model at once, sometimes ( in the past ) I’ve ruined an area I’ve painted an hour or two earlier, whilst adding to a different area of the same piece.
To prevent this happening, I try and complete one section of a model, put it aside to dry ( well out of reach I might add ) and move onto either a different component of the same model, or a completely different piece.
So I usually have several models on the go at once, and in this case could move on to the background.
This was the beginning of this section getting some colour, having primed and undercoated with a sand colour acrylic, then added Vandyke Brown around the sides and bottom of the background, and built up mid-tones and highlights with Mars Yellow and some Buff Titanium
Photo #12 and I’ve undercoated the details a second time, using a mix of Isopropyl Alcohol and White acrylic, then a couple more coats of the acrylic, but mixed with some water.
Then jthe different parts are painted to look like the original artwork, the deathly pallor being more greys than flesh tones, and the metallic areas being built up from the excellent Darkstar range of acrylics.

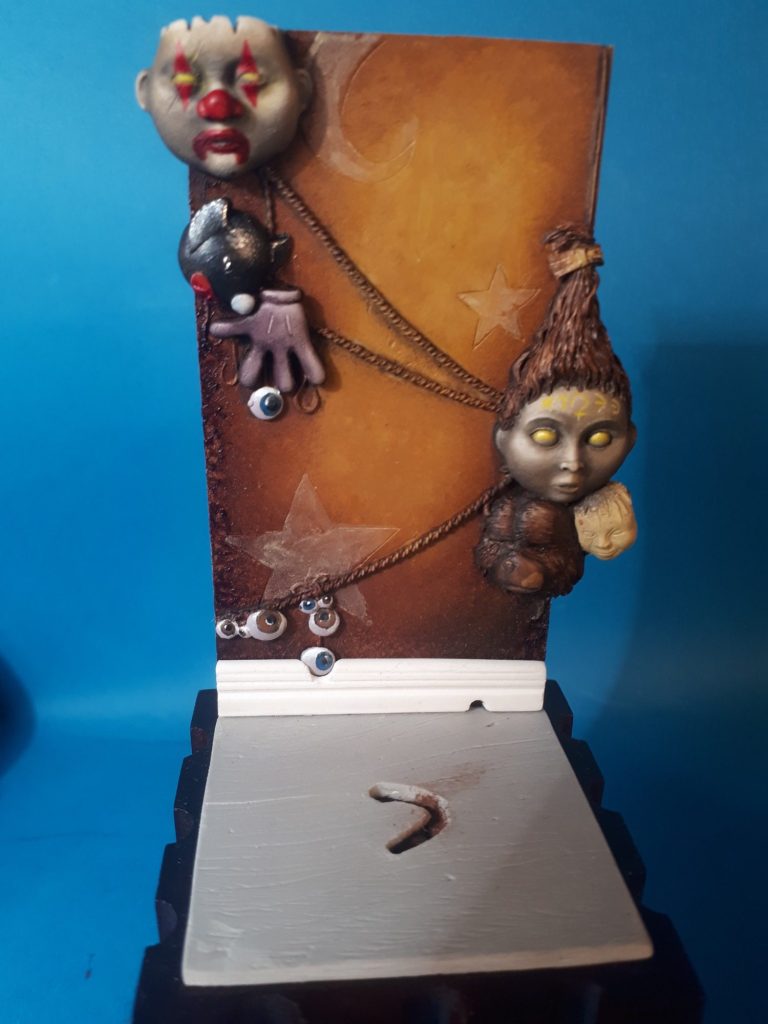
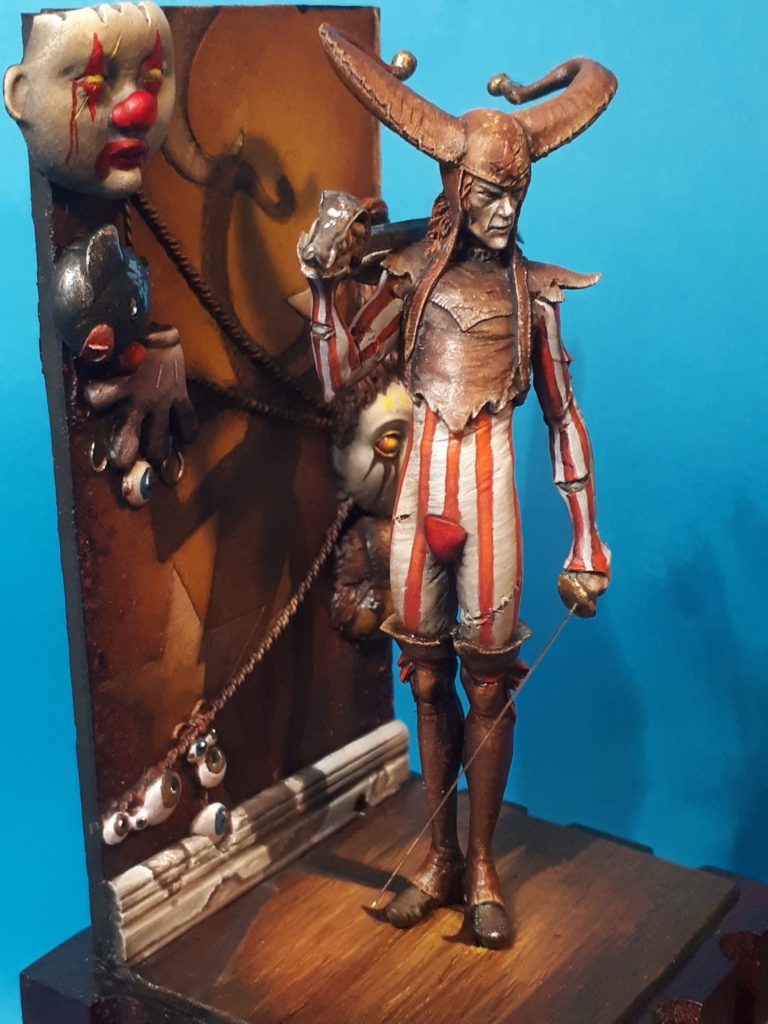
Photo #13 and whilst there is a section of resin provided for the floor – with a restrained woodgrain effect sculpted in, I thought I’d add my own little touch with a skirting-board along the bottom edge, and what skirting-board would be complete without a mouse hole along it’s length somewhere.
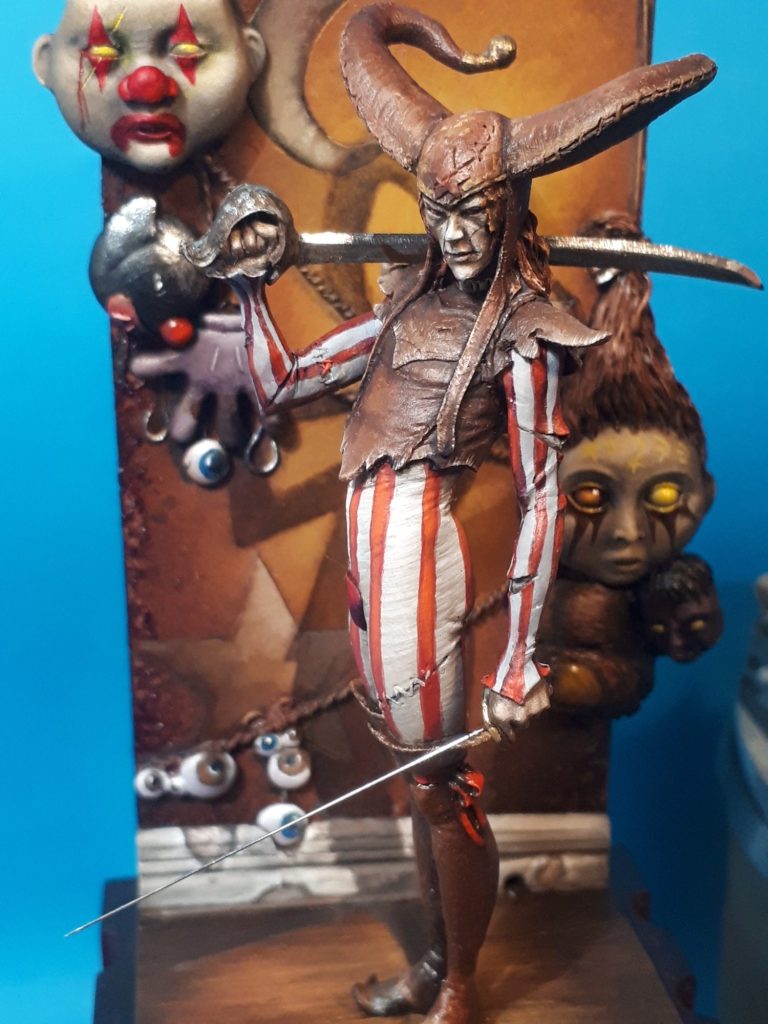
Photo #14 and the completed figure is tested for fit on the base, with a nice plinth I picked up from one of Ian Fainges friends whilst I was in Australia some time back.
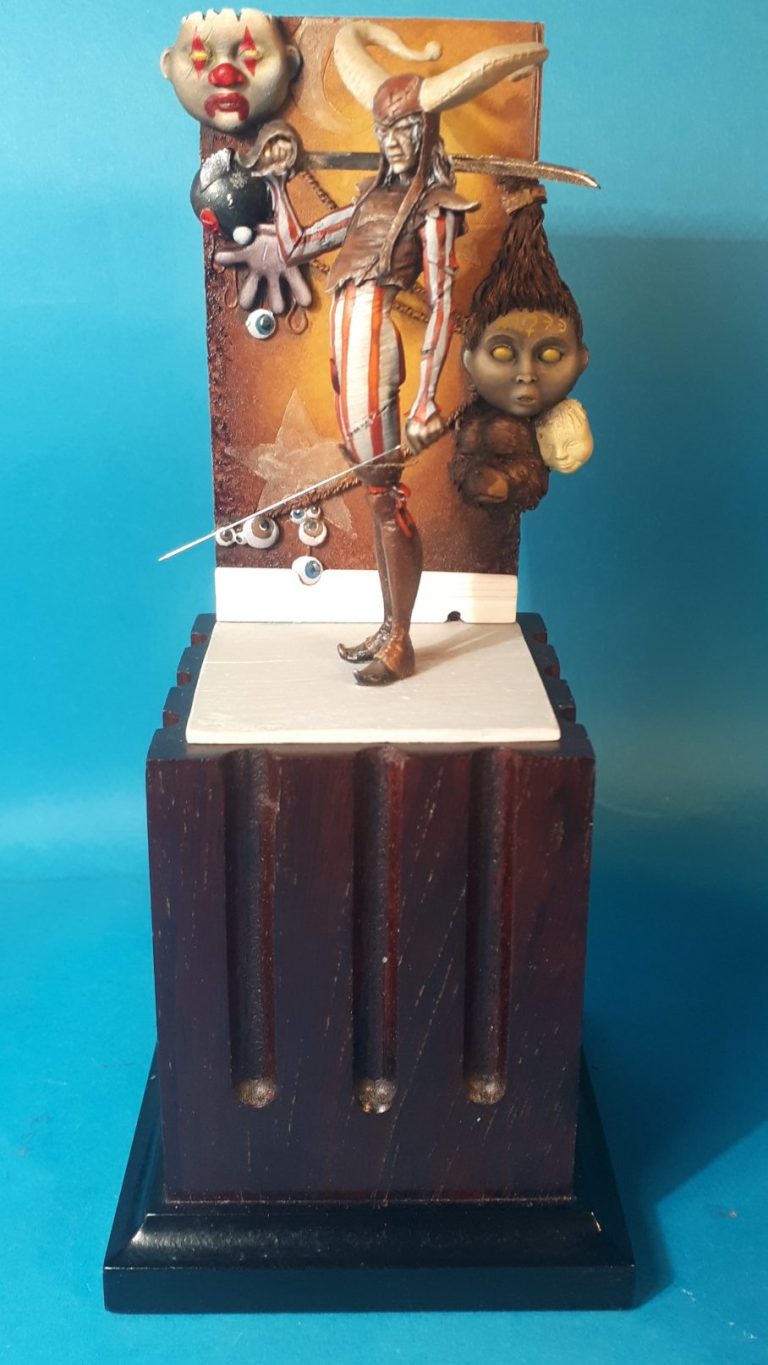
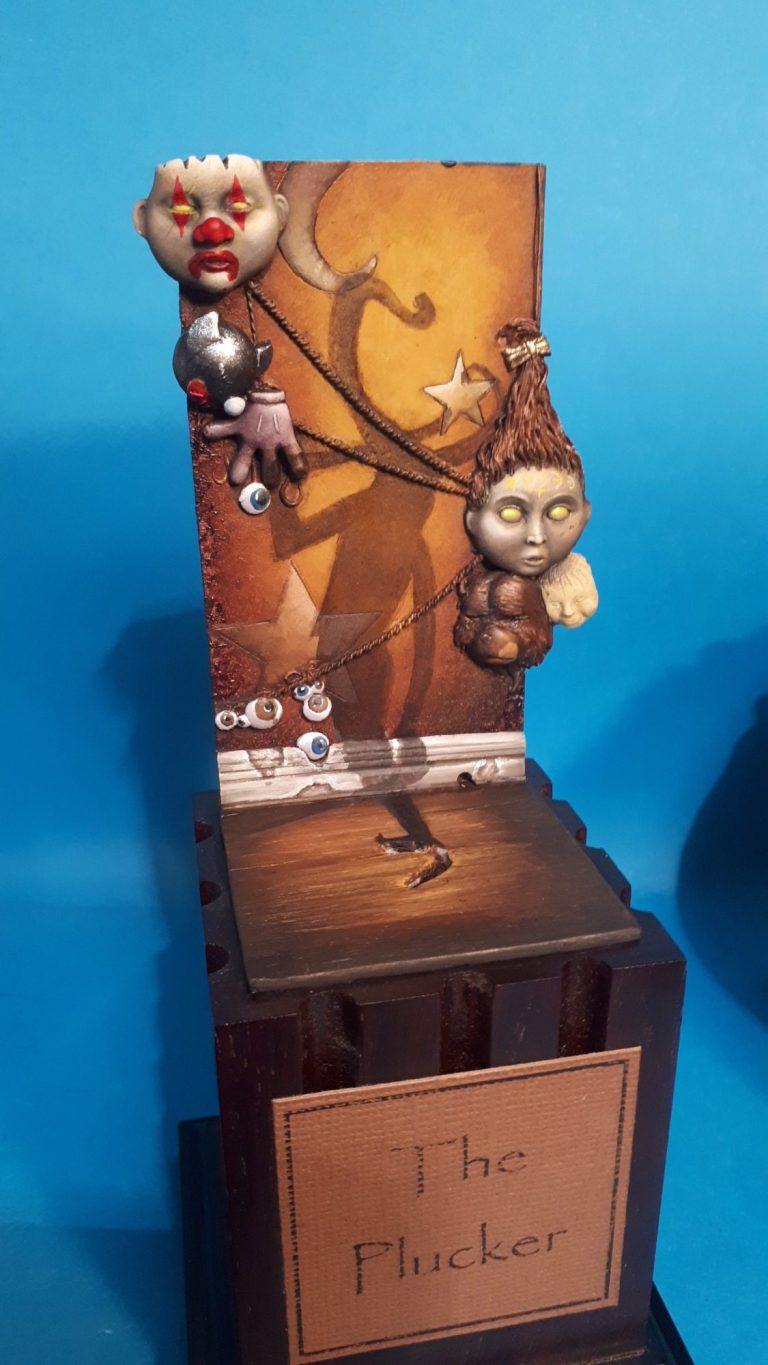
Photo #15, and a cast shadow has been painted on. To get it absolutely right I set the model in front of a bright light, and painted where the actual shadow fell on the floor and wall.
The floorboards are highlighted only where the light would fall as if a spotlight were shining on him, almost like he’s on a stage.
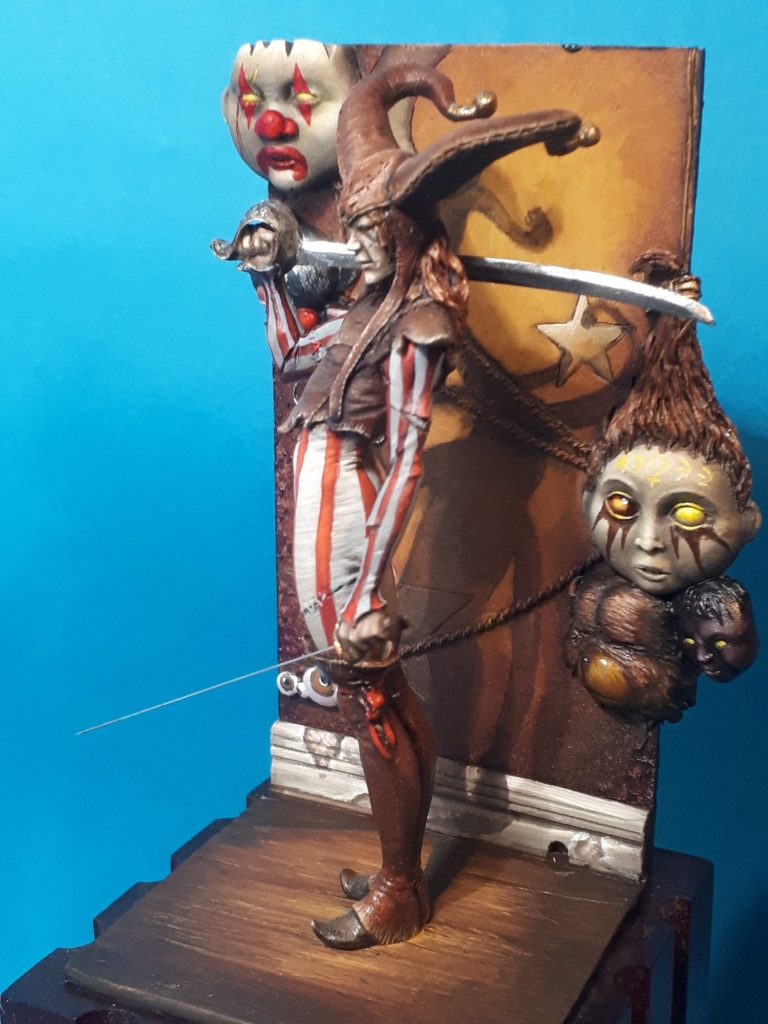
Photo #16 and a front-on view of the scene. The decorations on the back have all been painted now, and the very strange shape that the shadow forms as it travels across the floor and up the wall can be seen.
In the finished shots, the figure is in place and the shadow looks very natural, in fact most people don’t notice it as a painted on shadow, supposing that it’s just a bright light causing it to be cast….. But we know different.
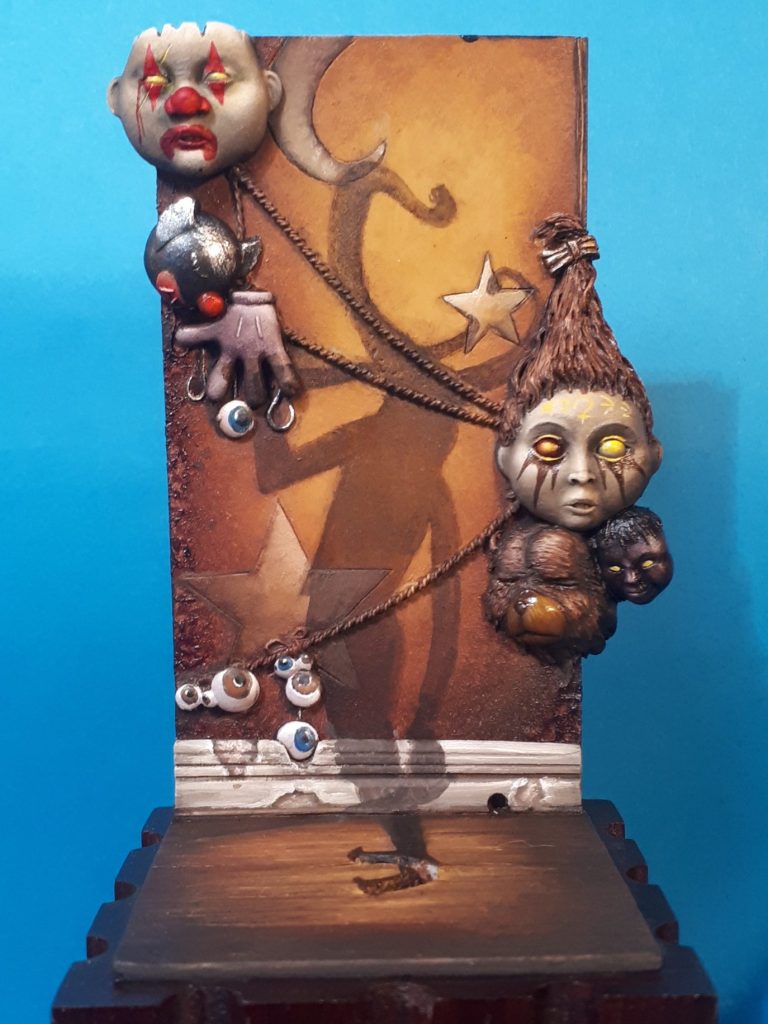
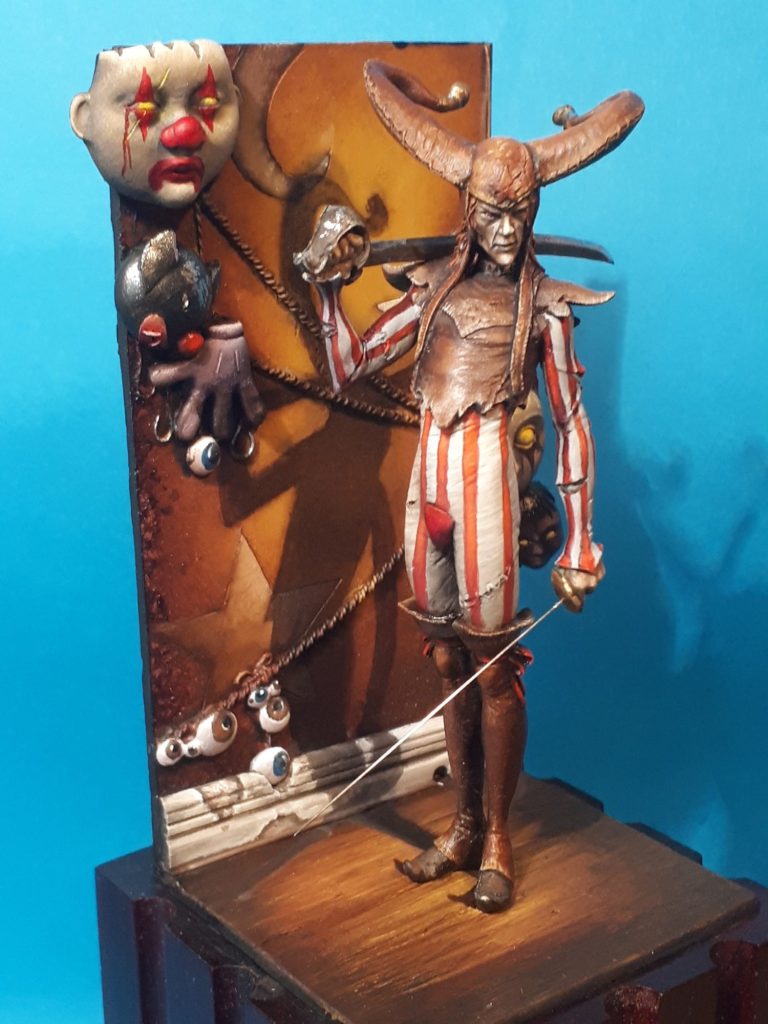
Photo #17 In fact, you can see where the real shadow is being cast on the blue background to the right in this shot, with it extending behind his feet on the floorboards behind him.
Final thoughts.
This is one of my favourite models that I’ve done recently. It just seemed to flow when I was working on it. In fact it was painted over the course of three years, finishing it in 2023, but that was because other projects took precedence, and that’s the only reason he stayed on the sidelines most of the time.
I’ve three other TKS kits in the Grey army, and I should really extract a digit and get them started, because this was a delight to do, and just put a smile on my face.
The kits is highly recommended, if you are lucky enough to find one for sale, and having looked at the components in the other kits I have from TKS, I’d hazard that you’re likely to be pleased with any of them.