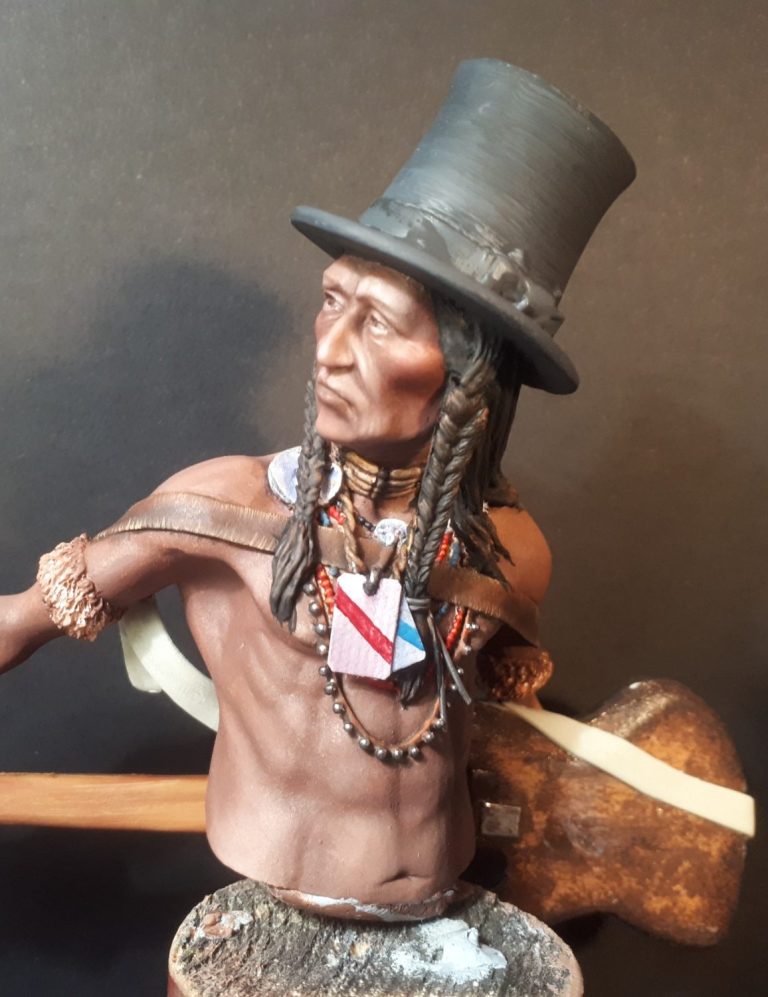
The Bassist
Conversion of a 1/9th scale resin kit from Harton Miniatures
Painted in 2025

This is an old kit, but I think it’s still available through SK Miniatures or Carl Reid – the sculptor.
Carl’s done a decent sized range of Native American subjects – including Magua from the film “Last of the Mohecans.” All of them are good sculpts, and there’s a lot of research gone into the clothing and background of each piece with a focus that seems to indicate that Carl has a passion for these subjects.
So, a nicely sculpted, decently moulded offering, why convert it….
Some might see it as a habit of mine with regard to Carl’s offerings – I did add legs to the Magua and Pawnee busts many years ago, but this was a little different in that someone – Mike Genner – went and said “this one just needs a guitar, doesn’t he ?”
And it all went from there.
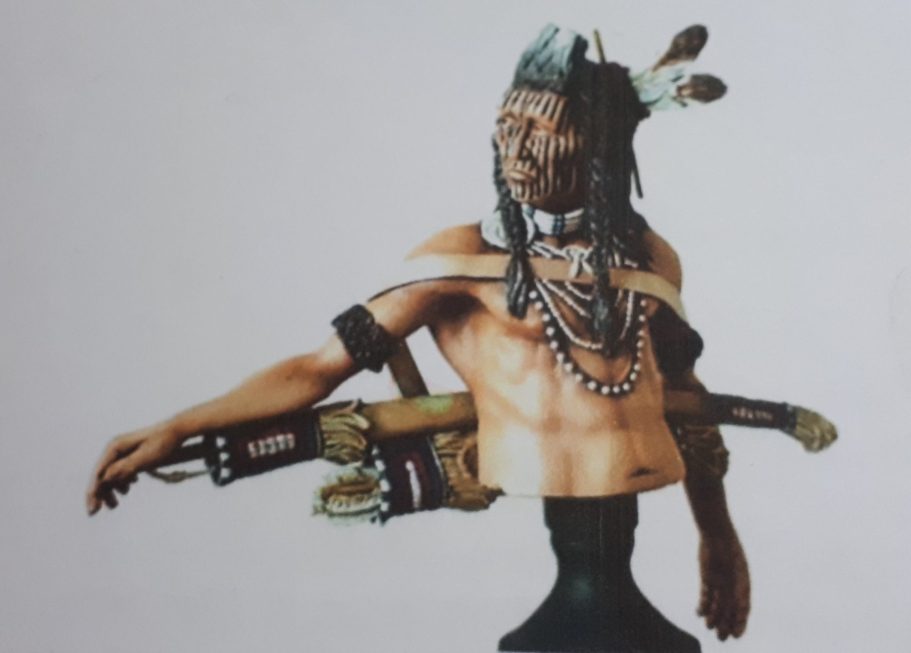
Photo #1 shows the box art as a comparison to what evolves from it.
I didn’t actually have one of these in the Grey Army, but found one on eBay that just happened to be there at the right time.
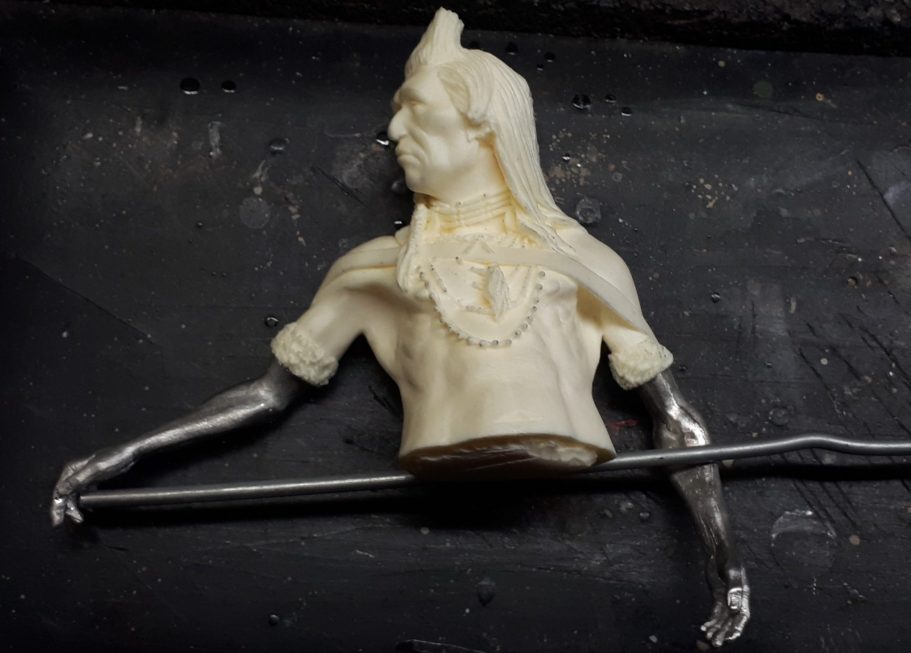
Photo #2 shows the main resin casting joined to the white metal arms with a wire used as a size guide and to see how much space I had to play with on the figure’s back for a straight object to be inserted there.
There was just enough, but some surgery would be necessary.
Whilst a guitar can take many forms, the solemn face seemed to point to a bassist - you know, the guy who isn’t as showy as the lead, not anywhere near as noisy as the singer, and wonders if the drummer can actually keep time. Generally he looks like he’s putting up with their antics because he has to.

So I needed a template and some good references images to work from.
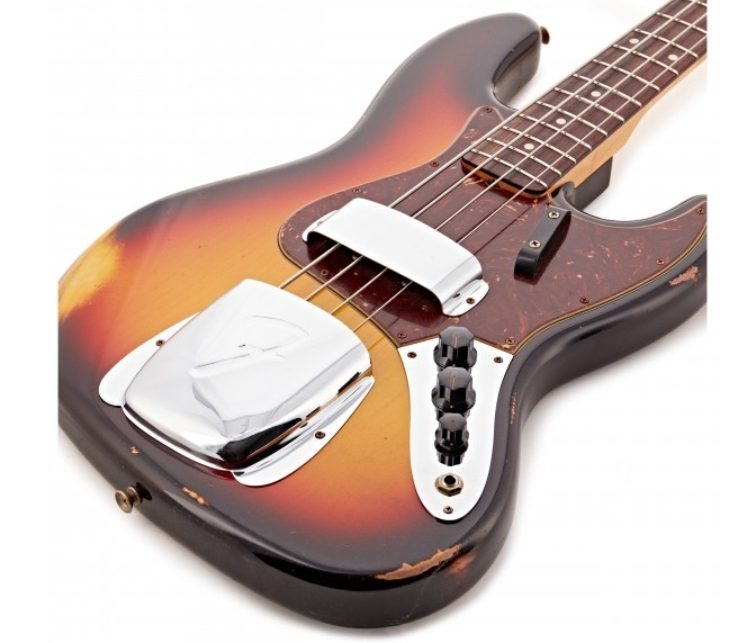
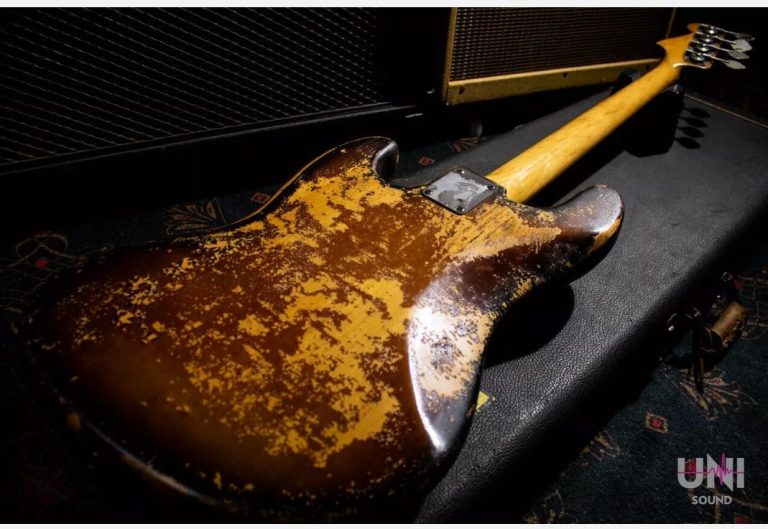
Photo #3 - Ebay had a 1964 Fender Jazz Bass for sale, and the pictures were very useful for reference ( see those at the end of the article ). I printed one off that would be to scale so that I could make a template, sticking it with double sided tape to a piece of foam-board that mimicked the thickness that the scratch-built item would eventually be.
Just for information a Jazz Base guitar differs from a standard Bass most noticeable by it’s slimmer and sometimes longer neck.
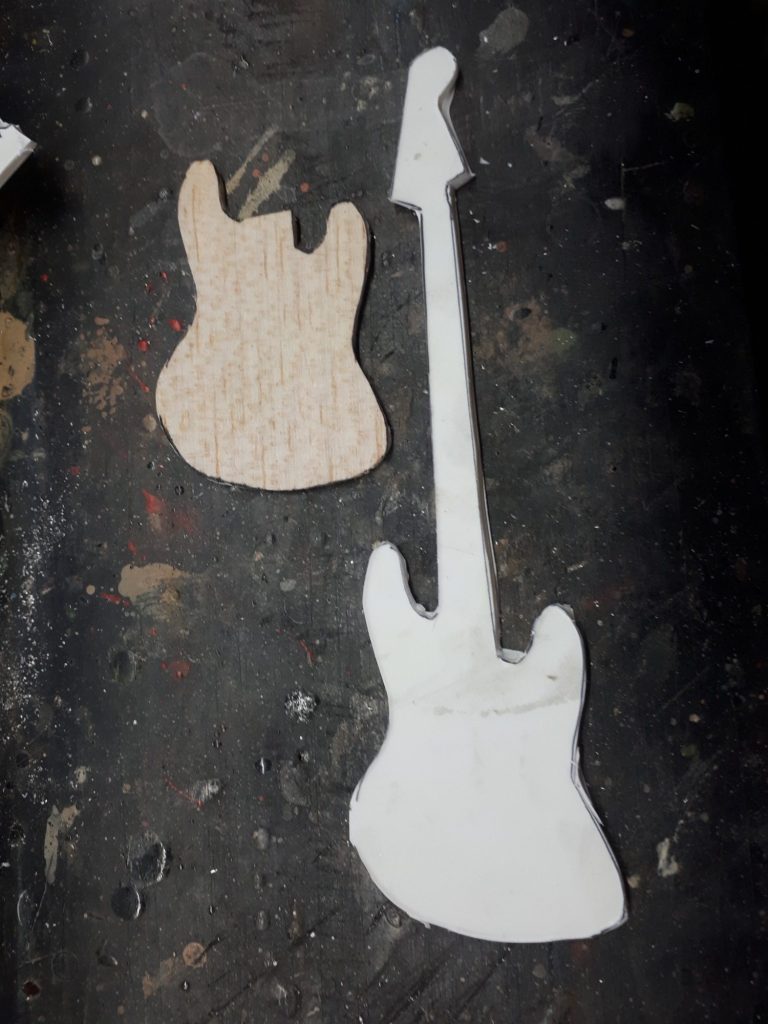
Photo #4 and the building begins with a piece of balsa wood cut out to form the back of the body of the guitar.
The grain detail will aid in the worn look, and the balsa can be sanded into shape very easily. The back of the print / foam-board template is shown on the right.
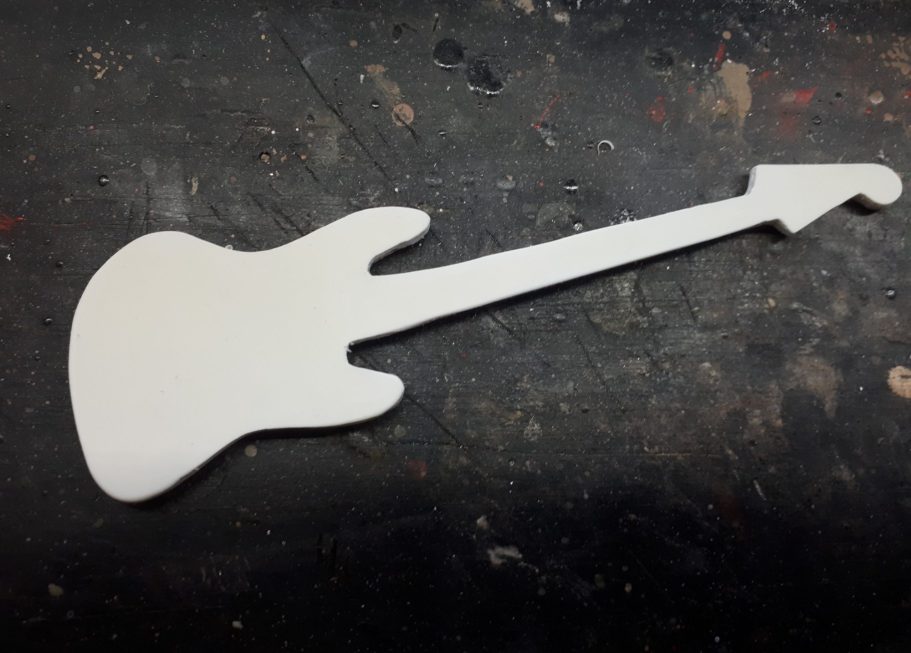
Photo #5. For the front of the guitar I used a 3mm thick piece of plasticard as a base to add everything else onto, and the shape is shown, still needing a little refinement, in this shot.
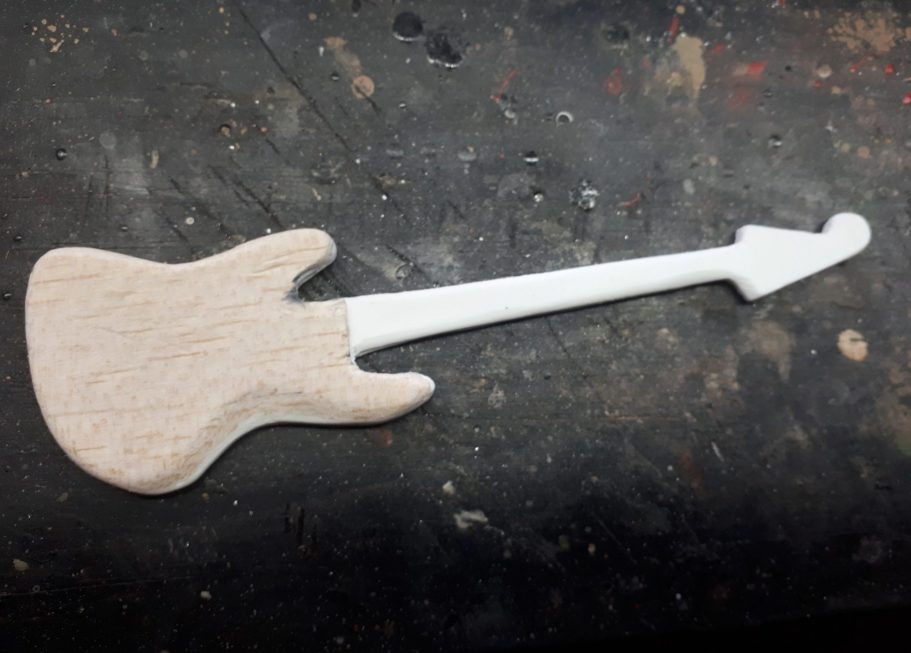
Photo #6 shows the balsa back joined to the plasticard, superglue having been used to fasten the two differing materials together.
The neck of the guitar has been rounded off a little on this side with some fine grit abrasive paper.
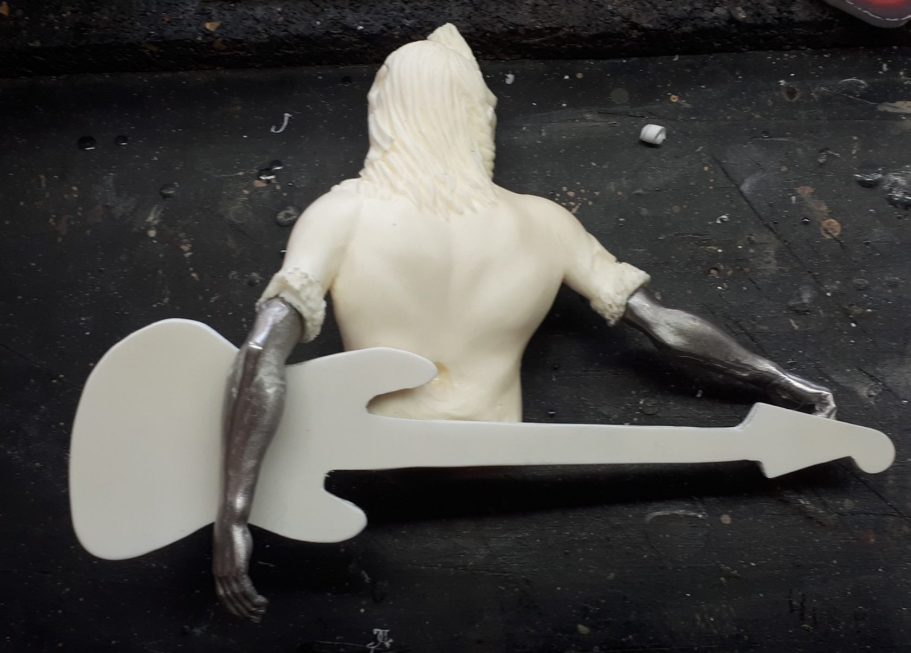
Photo 7 – and look it fits !
OK actually there was an amount of scraping and filing work done to the left arm, and some surgery to his lower back on that side to allow the guitar to sit in place, but it worked, and that’s all that mattered.
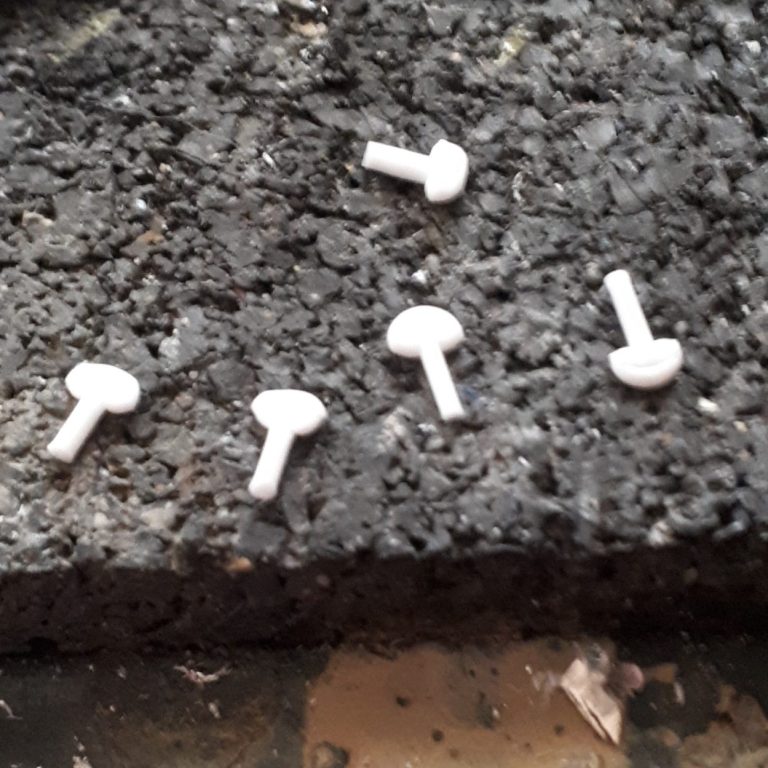
Photo #8 and now for some work on the details. The tuning pegs were made from some stretched sprue, offering the flame up again to the sprue so that a half bead formed trying to get away from the heat, which whilst still soft was squeezed between the jaws of some pliers to get the flat peg head – five made, so I had one as a spare.
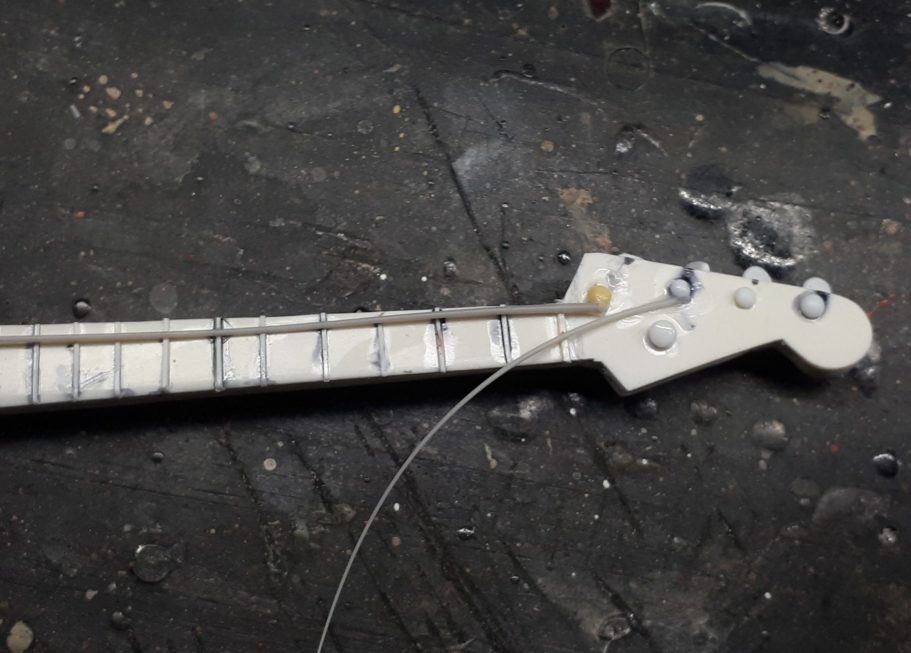
Photo #9 starting at the headstock of the guitar to string it I used stretched sprue ( a mistake, but I’ll come back to that ) to form the strings, noting that the top one is the thickest, and gradually using thinner sprue for the three strings below it.
I’d already added the frets to the front of the neck, again using pieces of stretched sprue for this and trimming the edges once the glue had dried.
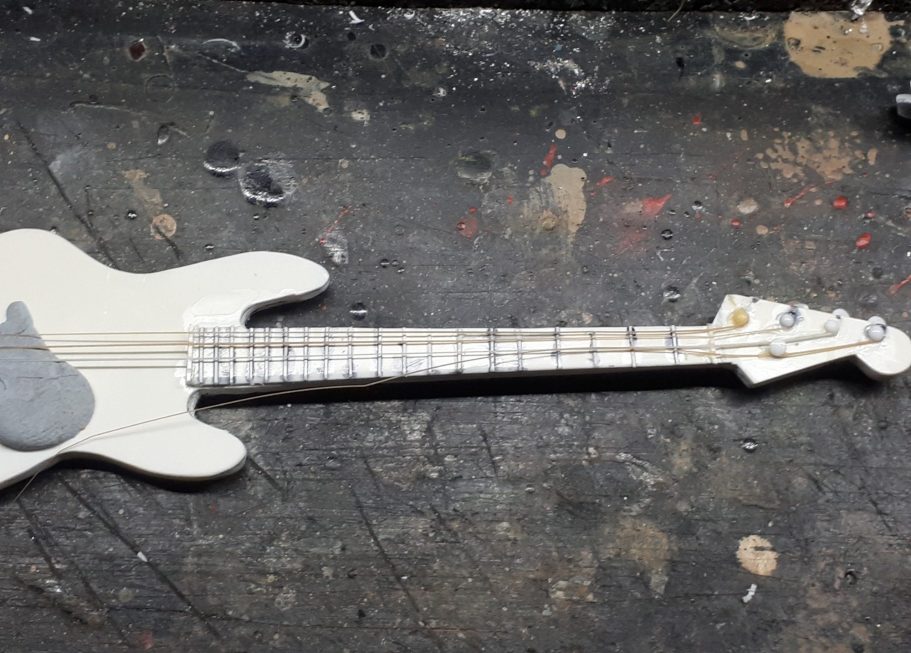
Photo #10 and the last string being added, the tension of each string being held with a lump of Blu-tac on the body of the guitar.
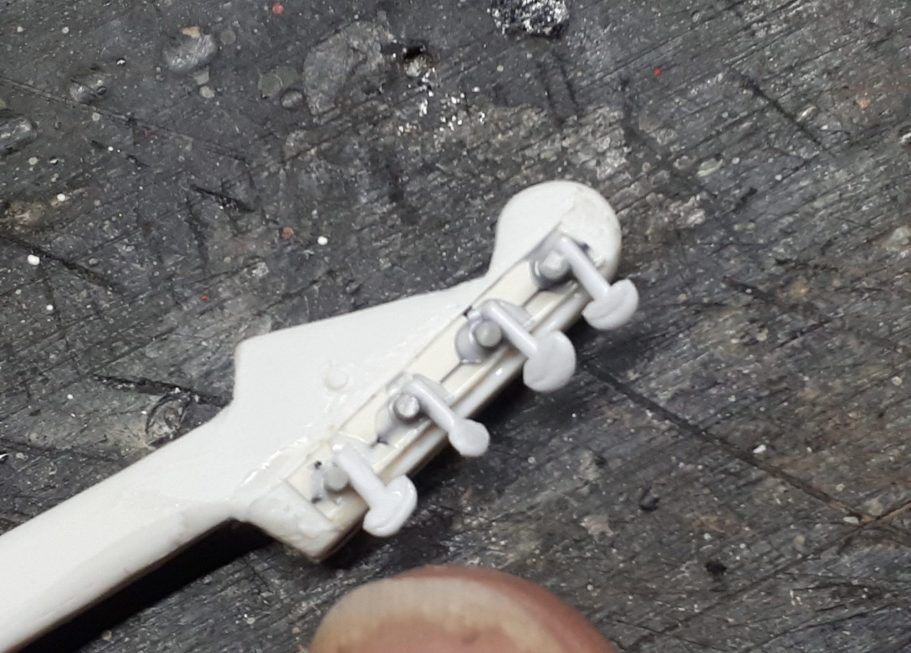
Photo #11 and the plate and screws were added to the back of the headstock, along with the tuning pegs.
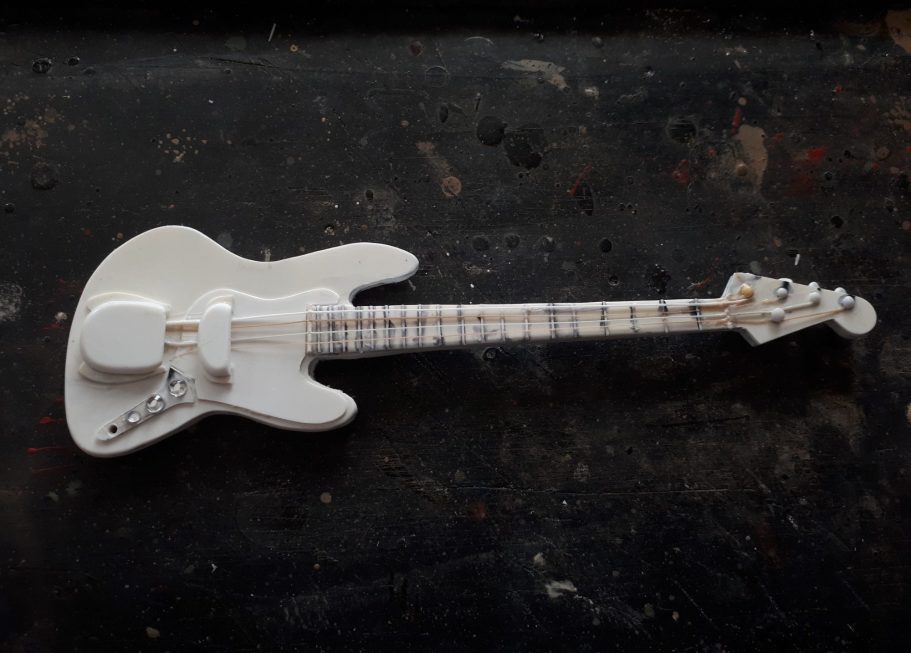
Photo #12 and the guitar is complete and ready for painting. The different sections have been added to the body from plasticard and stretched sprue, and those pesky strings keep looking saggy and not at all under tension. I restrung the bottom three strings shortly after this picture was taken.
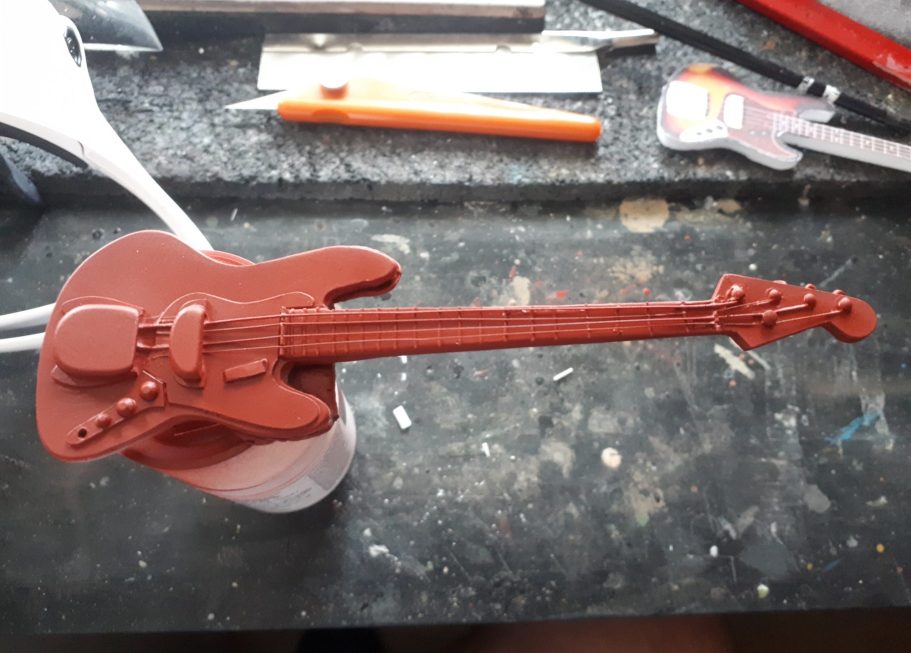
Photo #13 - I primed the guitar front with some Halfords Red Lead Primer; the back needed a different treatment though.
At this point it looked pretty good, although the short length of the finest string needed replacing as it goes into the bridge where the strings are moored.
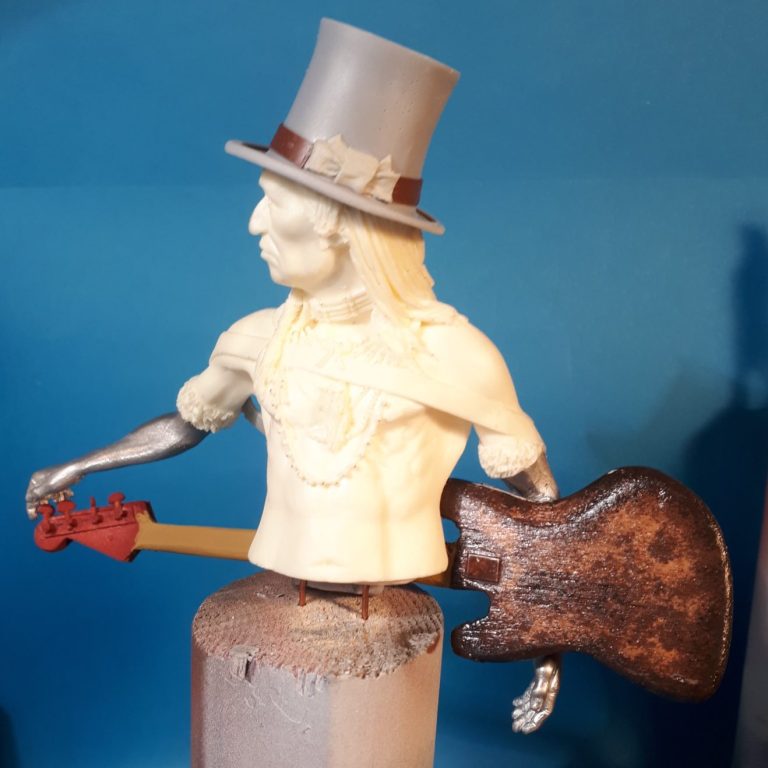
Photo #14 shows the back of the guitar almost finished, the effect I was attempting was one depicting a lot of use so a patchy brown varnish that had rubbed and been scratched off.
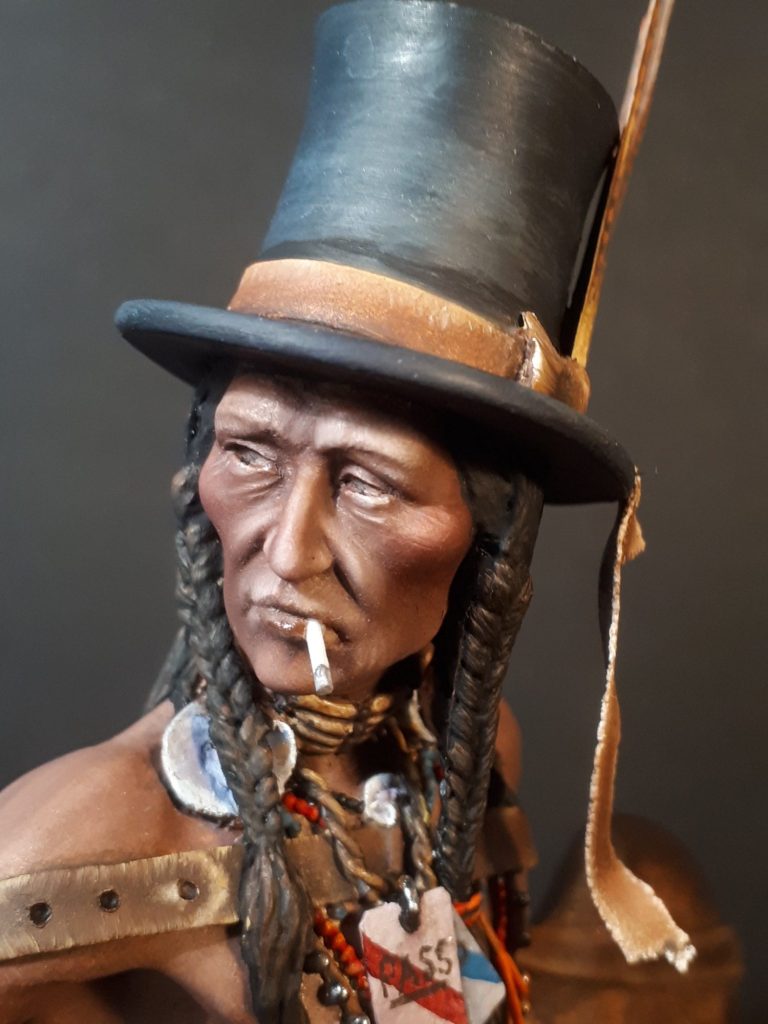
I had to file some of the left forearm away and slice off a small amount of the lower back to get the guitar to sit in place, and whilst I was in a “hack and slay” mood, I removed the top of the head and replaced it with a top hat from the Dracula “Young Man” that is in the Bash Models range.
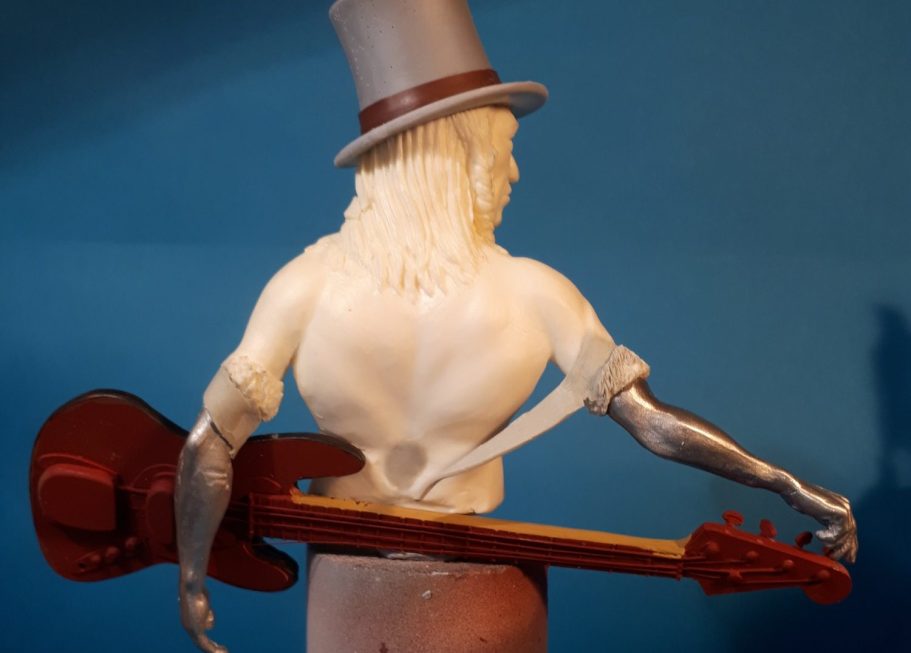
Photo #15 is a view of the back at the same point as photo #14. The strap made from Magic Sculpt that is descending from the back of the right arm is totally wrong and would be removed later and the hatband has been thickened with a strip of Electricians Tape cut to size.
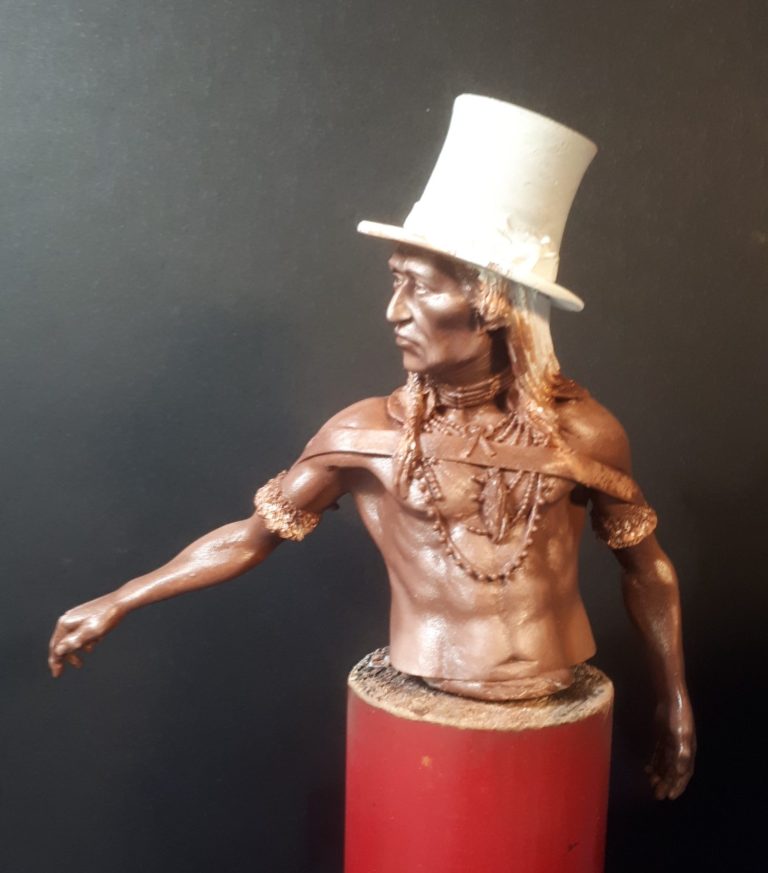
Photo #16 and at some point I’d have to stop messing about with the guitar and stuff and add some paint to the figure.
Here he is still coated in wet oil paint, with a darkened version of my usual mix of Mars Brown and Titanium White, this time with a little bit of Vandyke Brown and a spot of Carmine added to the initial shadow mix. As per usual, mid-tones and highlights are blended in with a soft brush and Titanium White oils.
Photo #17. When painting the figure I noticed that some of the beads were damaged or missing – it’s an old kit that these areas are very delicate, so with shipping back and forth, these may well have become damaged.
Whatever the case, they needed replacing, or the areas disguising.
I made small beads of Magic Sculpt to replace some of the larger beads, but also added a twisted “braid” of soft lead wire and attached two rectangles with rounded off corners to make into back-stage passes. These hid a lot of the missing beads that I couldn’t replace.
I’ve painted the cross-belt at this stage too, although I’d have to colourmatch the putty additions that would be added later to attach the guitar to the figure.
All the beads were painted using acrylics too, and the hat was primed with white acrylic.
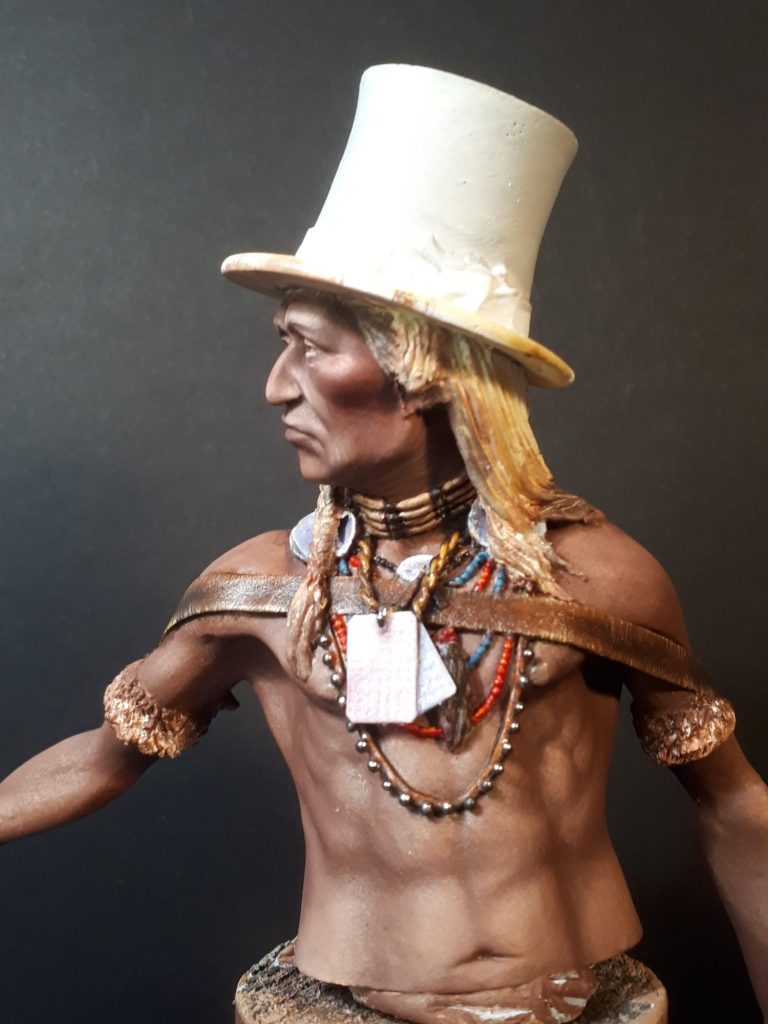
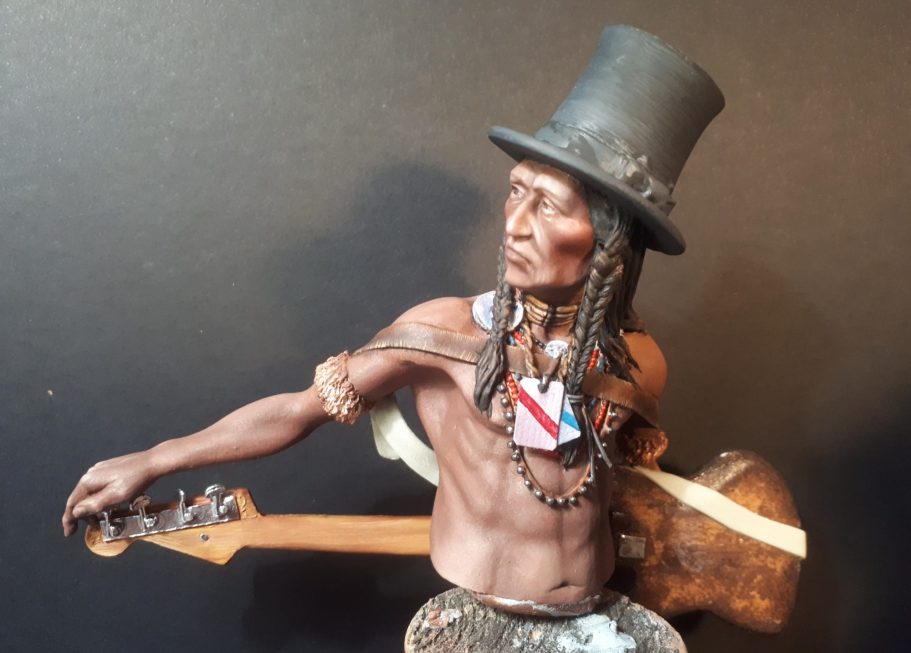
Photo #18 and another big step forward.
The guitar has been painted in full now, although you can only see the pale woodgrain of the neck and the Molotow chrome that’s been added to the tuning pegs and their plate along with the small plate on the body.
I managed to put my thumb on this prior to it drying properly, and it looks wonderfully scuffed and worn with that happy accident.
I’ve added the additional sections of belt to hold the guitar, although they’ve not been painted yet.
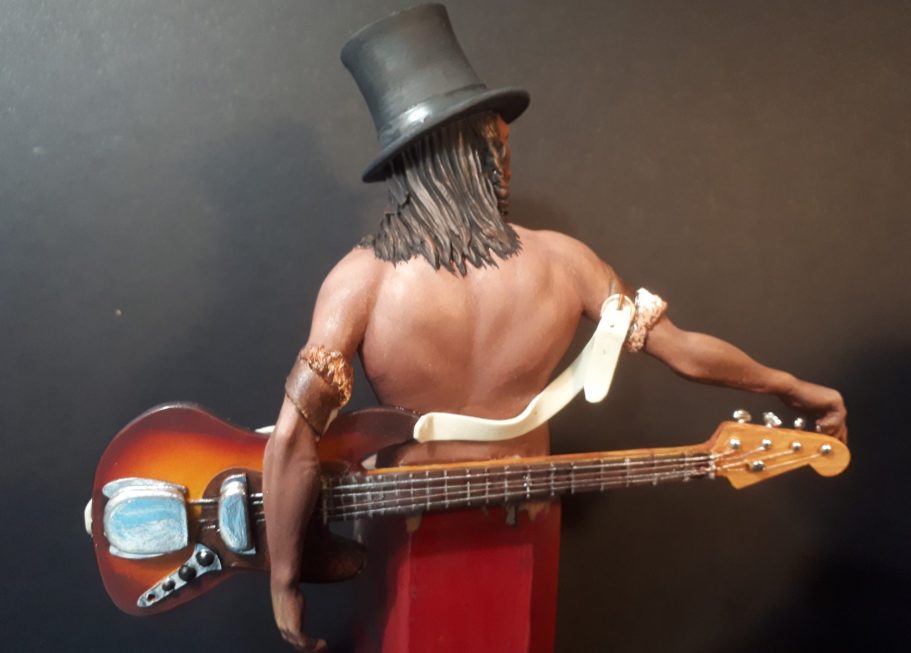
Photo #19 shows the front of the guitar with the new sections of strap added. Once cured, I’d drill through the ends and add “buttons” formed from stretched sprue to act as the fasteners fro the guitar strap.
I made a simple belt buckle this is on the right upper arm and not particularly visible in this shot.
The guitar body was painted with an airbrush for the main areas of brown through to yellow, the scratch plate - which is mainly hidden behind the left forearm - was painted with oils to get a burr-wood effect and the metal areas were treated with Molotow Chrome.
Before fastening it in position I replaced the lower two strings ( again ! ) with very fine wire. I really was tired of the stretched sprue bending and looking slack.
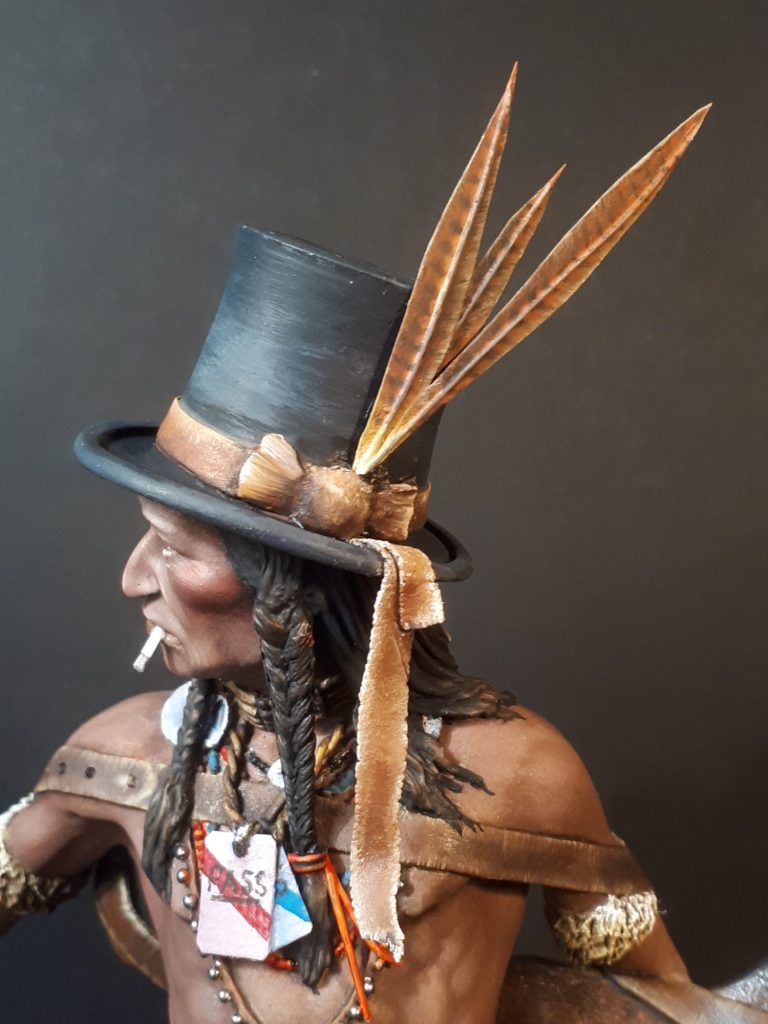
Photo #20. To finish off, the hat was painted in a worn looking dark grey with a dusty kind of finish, three Pheasant feathers were made from pieces of plasticard cut to shape and the central quill fashioned from a piece of stretched sprue.
A couple of additional lengths of putty were added to the side of the hat brim to look like the ends of the hatband descending from the bow, and the tie around the left hand hair plait was replaced with some soft lead wire and painted red.
What Bass player would be complete without a cigarette hanging at half mast from his lips… Another section of stretched sprue cut to size and added to a small hole drilled between the lips. The end painted red, followed by a layer of black and then grey, the first two colours being left as thin lines and the grey being the ash at the end of the cigarette.
Photo #21 What had occurred to me was that the guitar strap is way too long for when he actually swings it around to play, so at the bottom left of this shot, on the belt I’ve painted a worn section where he shortens the belt.
I’d painted the backstage passes with some off white and added diagonal stripes of red and blue, and with those dried I could paint on the word pass.
The backs would have relative information etc on them when security turned them over to inspect them.

I’ve included shots #22, #23 and #24 because they’re the references I used for making and painting the guitar – I’m sure someone, somewhere might be interested in what I based that part of the model on.
Final thoughts.
Thanks to Mike Genner for the idea, he has mentioned that he likes the finished piece, and apologies to Carl Reid for butchering another one of his kits.
As for me, I’m pretty pleased with the finished thing. It took a while to complete, but it made me do a bit of problem-solving and adding the details especially the smaller, less obvious ones was enjoyable.
It’s worth me mentioning again that Harton Miniatures range of busts, all sculpted by Carl Reid are really nice offerings to add to a collection of Native American studies.

I admit to the habit of altering them, but please don’t think this is because I feel that they are lacking, but rather that they enthuse me into adding more to them, which to be honest doesn’t happen with any other range of kits that I’ve painted.
The attention to detail across the range os very high and although there is sometimes a bit of cleaning up to do, it’s worth the effort.
It’s unusual, particularly nowadays ( 2025 ) to get kits that are multimedia, but don’t be put off. The use of metal or resin for the parts is logical, and both replicate the details of the original sculpt perfectly.
So, highly recommended range, don’t be put off by my butchery.