Spektrs - Infinity Sniper
28mm white metal figure from Infinity Corvus Belli
Painted in 2009
This is the very first of the Infinity figures I painted, probably one of the first few I bought, although I can’t recall where I got it from, all I do know is that I’d discovered a different supplier of figures in this scale, and they weren’t from Games Workshop.
What’s so different about the Infinity range ?
Two things stand out for me.
One is the dynamic posing. Sometimes it looks strained, but most of the time it gives a sense of either movement or tension that is lacking in most other ranges of figures.
Second is that the female figures actually have reasonably nice faces and they don’t look like fellas with bumps stuck to their chest and given a bit longer hair.
One thing I do like doing is altering the barrels on the guns supplied by this manufacturer. There’s nothing wrong with the armaments as supplied, but it just adds a bit of personalisation to the figures, making them my own.
But let’s start at the beginning.
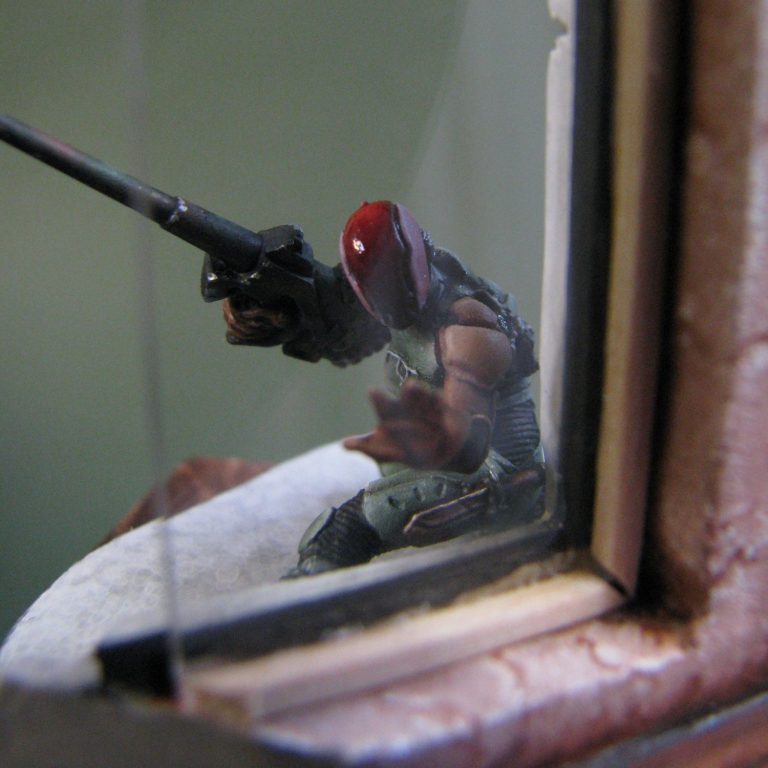
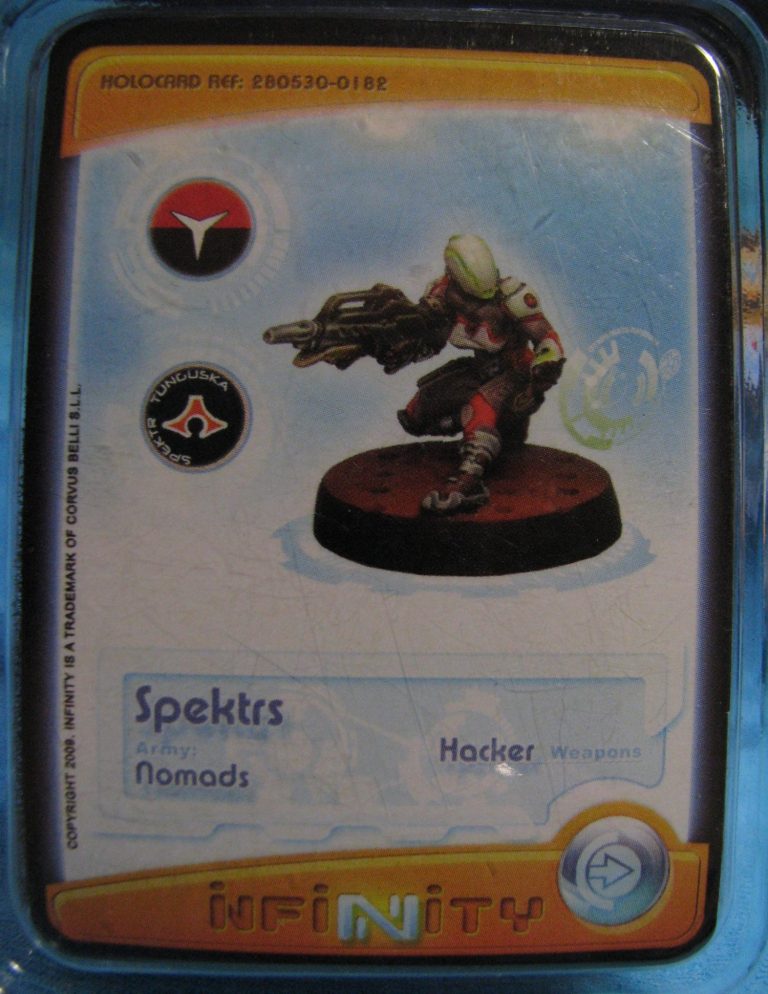
Photo #1 shows the box art, a nicely painted example of what is inside the blister pack.
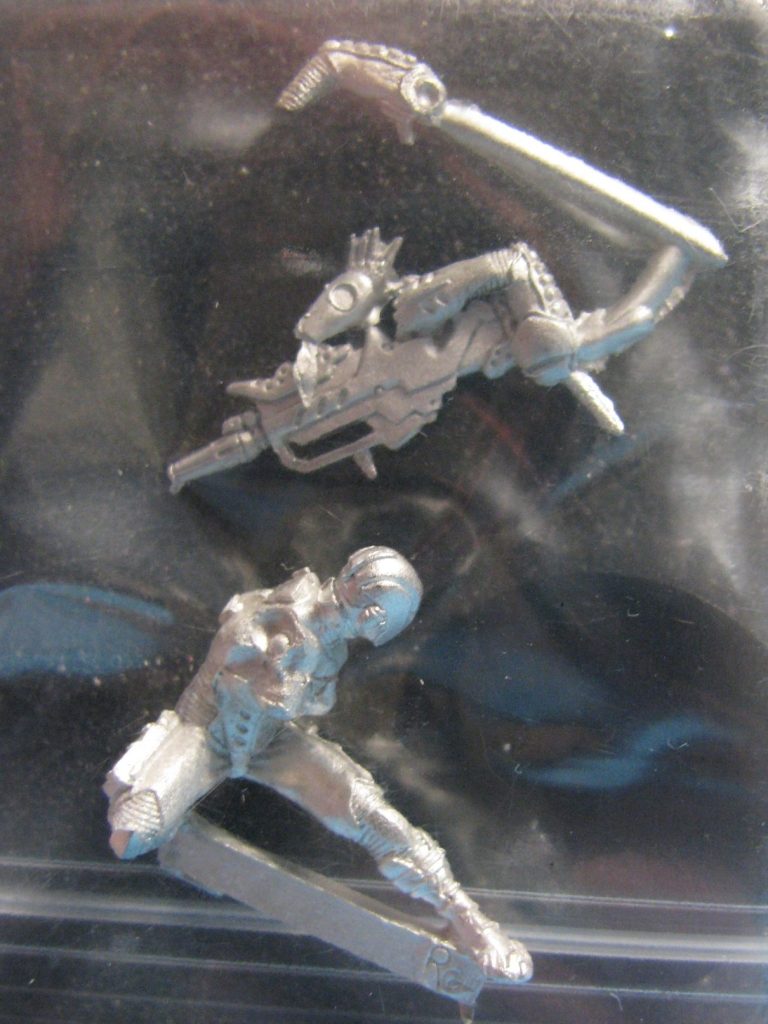
Photo #2 shows the White Metal parts, the arms being separate components which adds further to the dynamic positioning, and allows for a little more personalisation by simply swivelling the arm position at the shoulder joint.
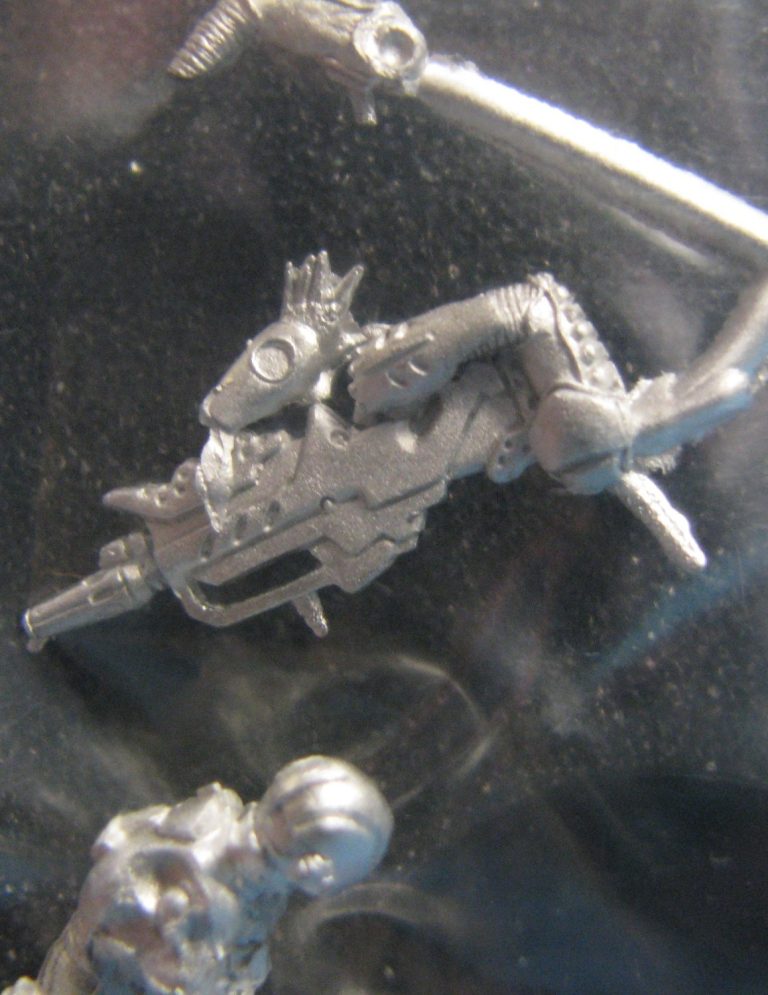
Photo #3 shows a close-up of the laser rifle. Considering the size of the castings, there’s not a lot of clean-up to be done on the bits.
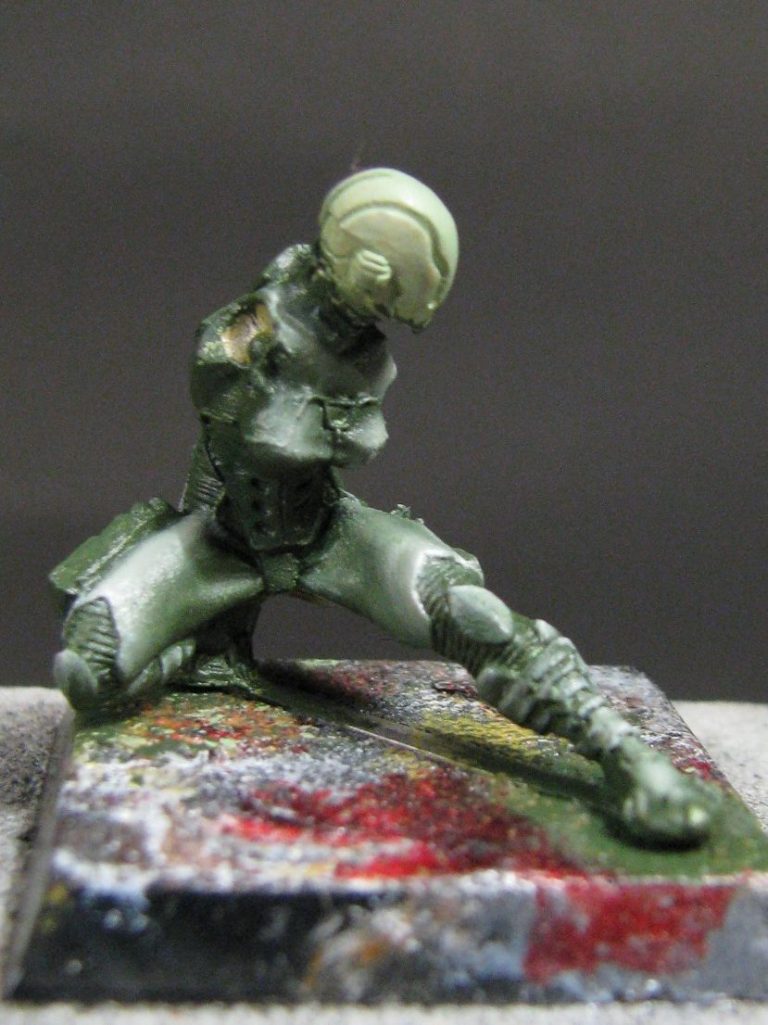
Photo #4 and painting begins.
I prime with a white acrylic mixed with a lot of Isopropyl Alcohol. I find that the alcohol cuts through any mould agent left on the castings after being washed with some soapy water, and gets a decent grip on the surface of the components for further layers of paint to cover.
Here I’ve added two or three more layers of the White acrylic, and then painted on some Olive Green oils allowing the white acrylic to show through in places where I wanted mid-tones and highlights.
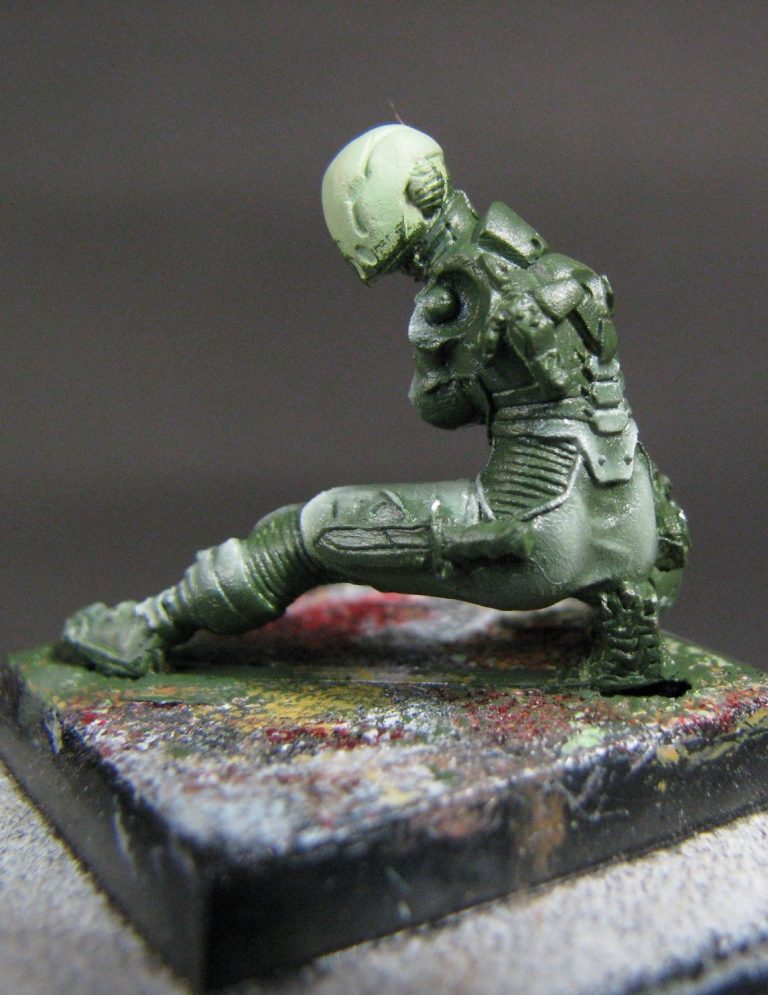
Photo #5 and the back of the model, showing where I’ve now begun adding Titanium White oils to the green and blending the two colours together.
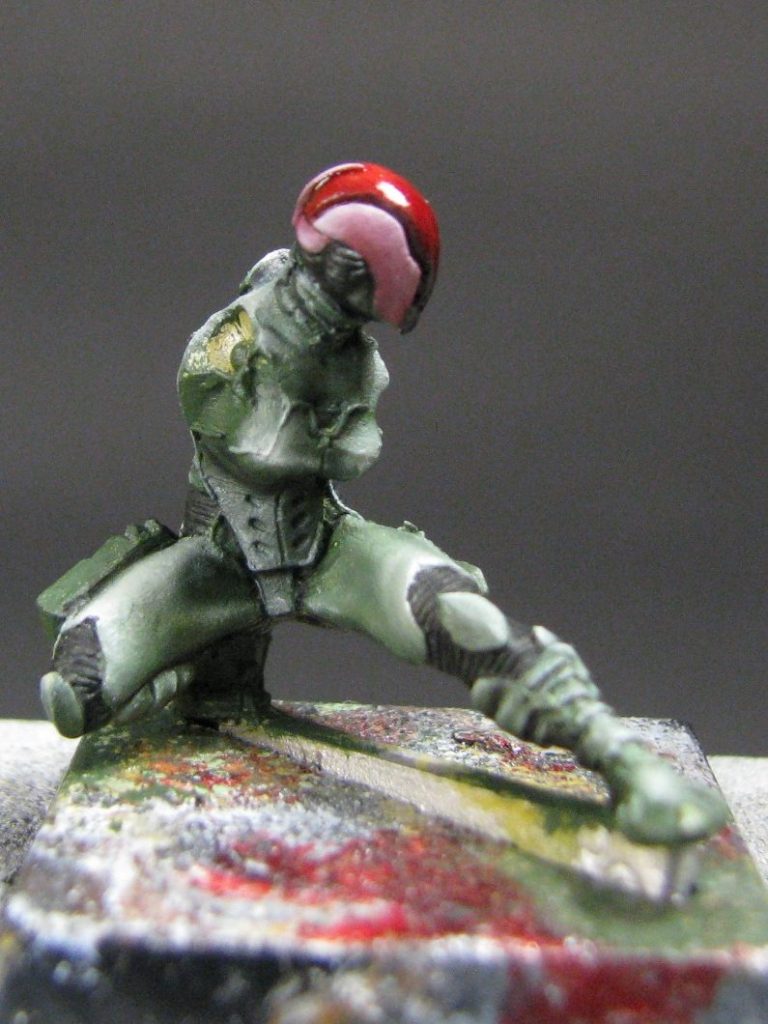
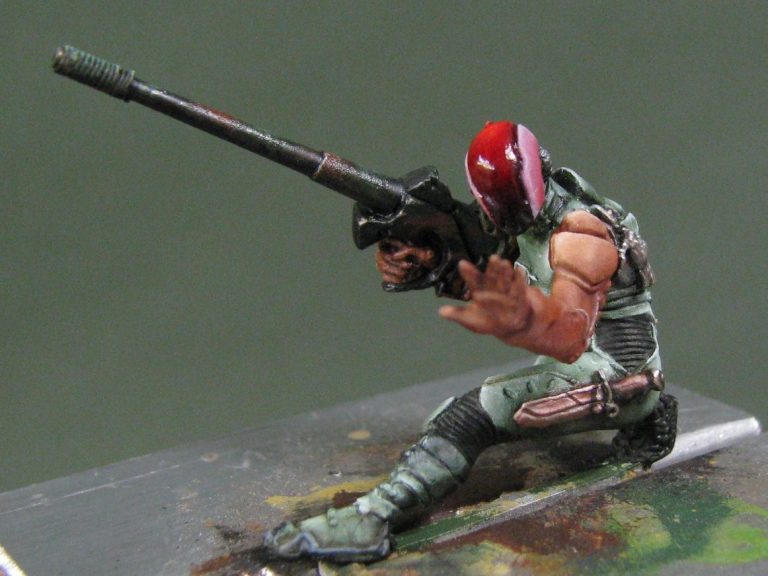
Photo #6 and once the green areas were completely dry I could add some colour to the helmet. In this case some pale pink ( Alizarin Crimson oil mixed with Titanium White over a solid white acrylic undercoat ), then some Crimson acrylics on the central band of the helmet coated with several layers of Tamiya Clear Red lacquer to give a high shine.
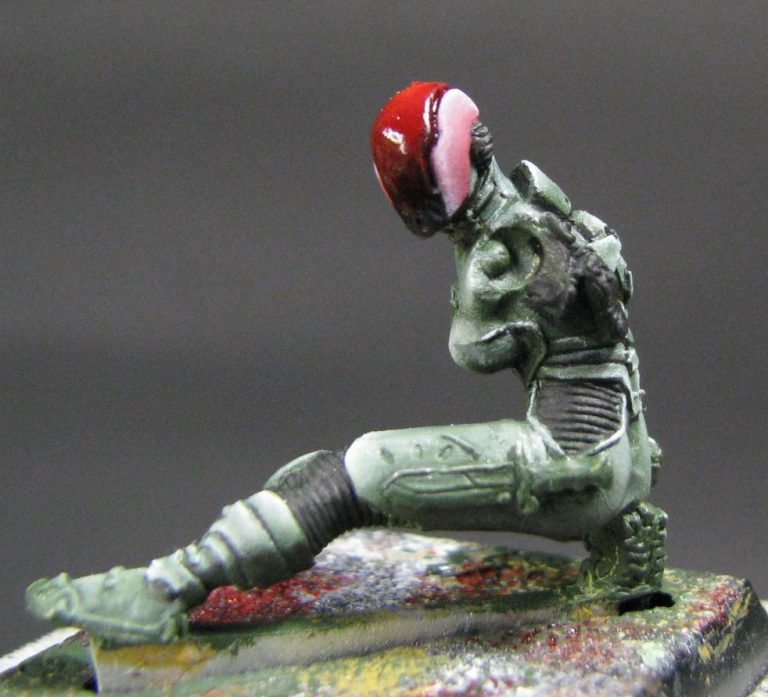
Photo #7 shows a different angle of the figure at the same point in time. I’ve used black under the Tamiya Clear Red on the lower part of the faceplate to hint that this area is transparent.
In the last two pictures I’ve added a couple of washes of Black acrylic to the ribbed areas at the knees, waist and neck where there isn’t any armour.
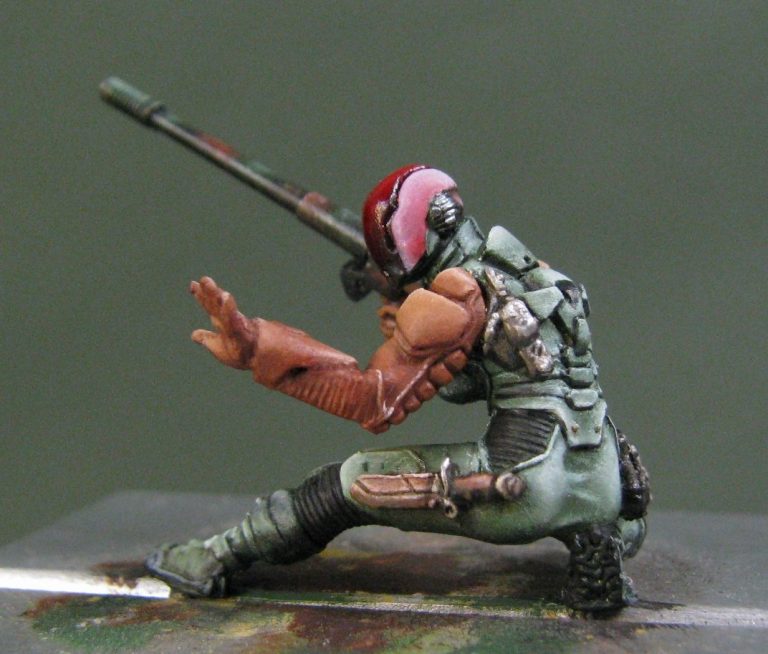
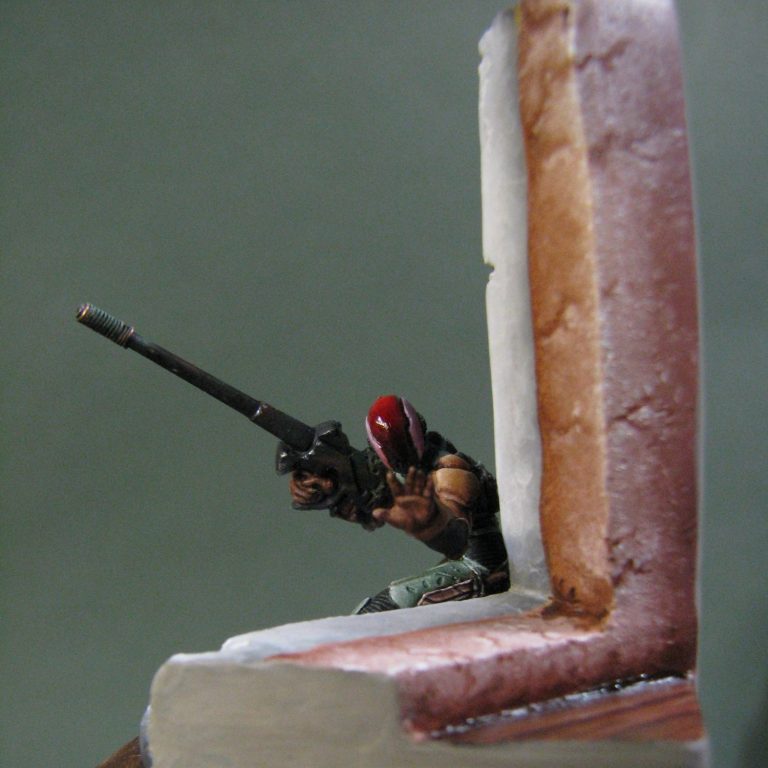
Moving to photos #8, #9 and #10 in which I’ve added the arms. The arms are painted with a red / brown mix of oils, breaking up the monotony of the green clothing and armour, using Mars Brown as a base and adding Light Red for the mod tones and then adding Titanium White to make the highlights and hint at some amount of wear on the edges.
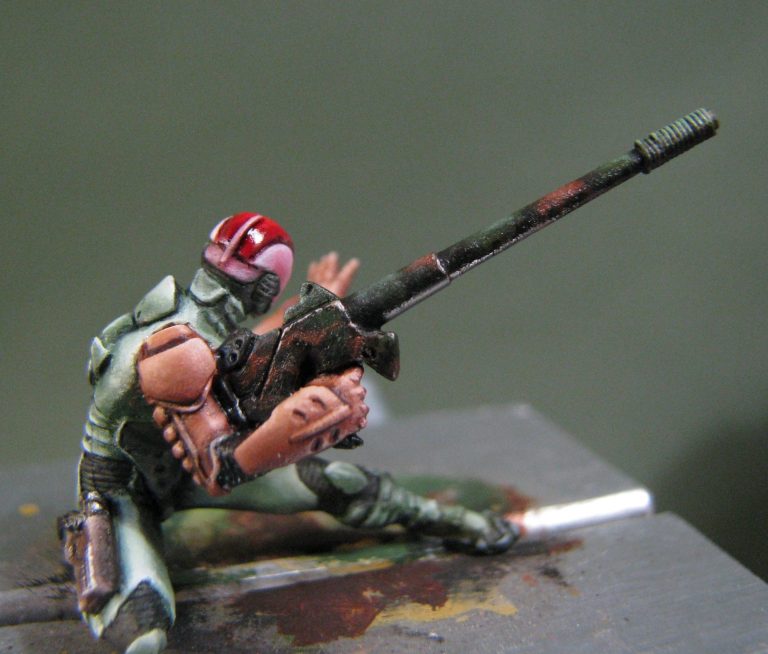
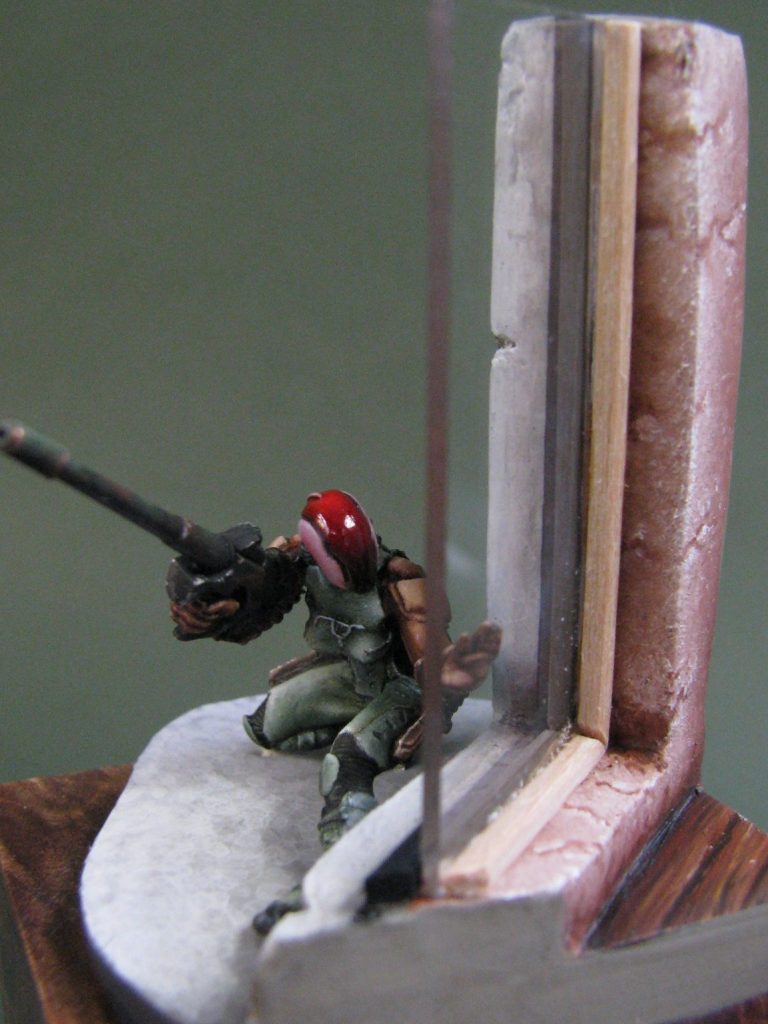
The gun seen more clearly in photo #9 has been altered to look more like a sniper rifle, using a couple of pieces of fine tube – one slotting into the other – and then wrapping some fine wire around the muzzle end to represent a suppression system.
A mix of green and brown camo was added to tie the weapon in to the figure’s clothing.
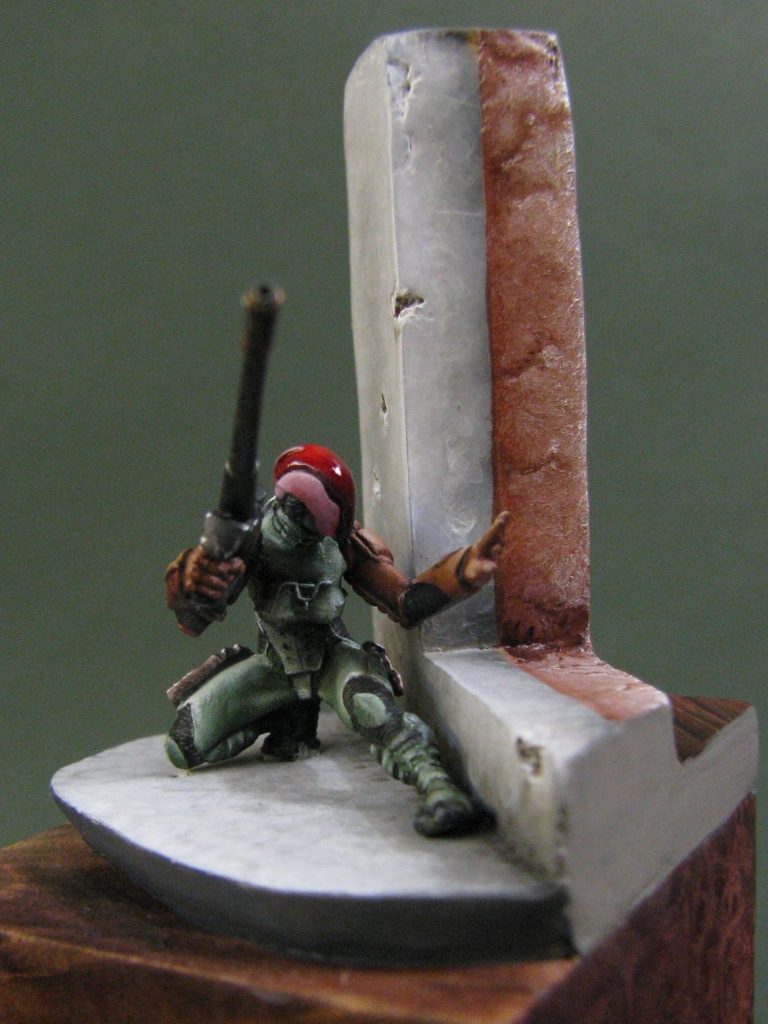
The figure is deigned to be accessing a virtual terminal – a clear sheet with luminous green printing on it being in the figure kit to represent a holographic type of screen that needs to appear to hang in mid-air.
Although it’s a cool idea, I didn’t think I could fasten the clear plastic to the hand in such a way as it would work, and so I decided to think of an alternative idea for why the left hand would be in the position it’s in.
Signalling to someone ?
Pushing at a door maybe ?
The ideas seemed plausible, but maybe a little bit “normal”.
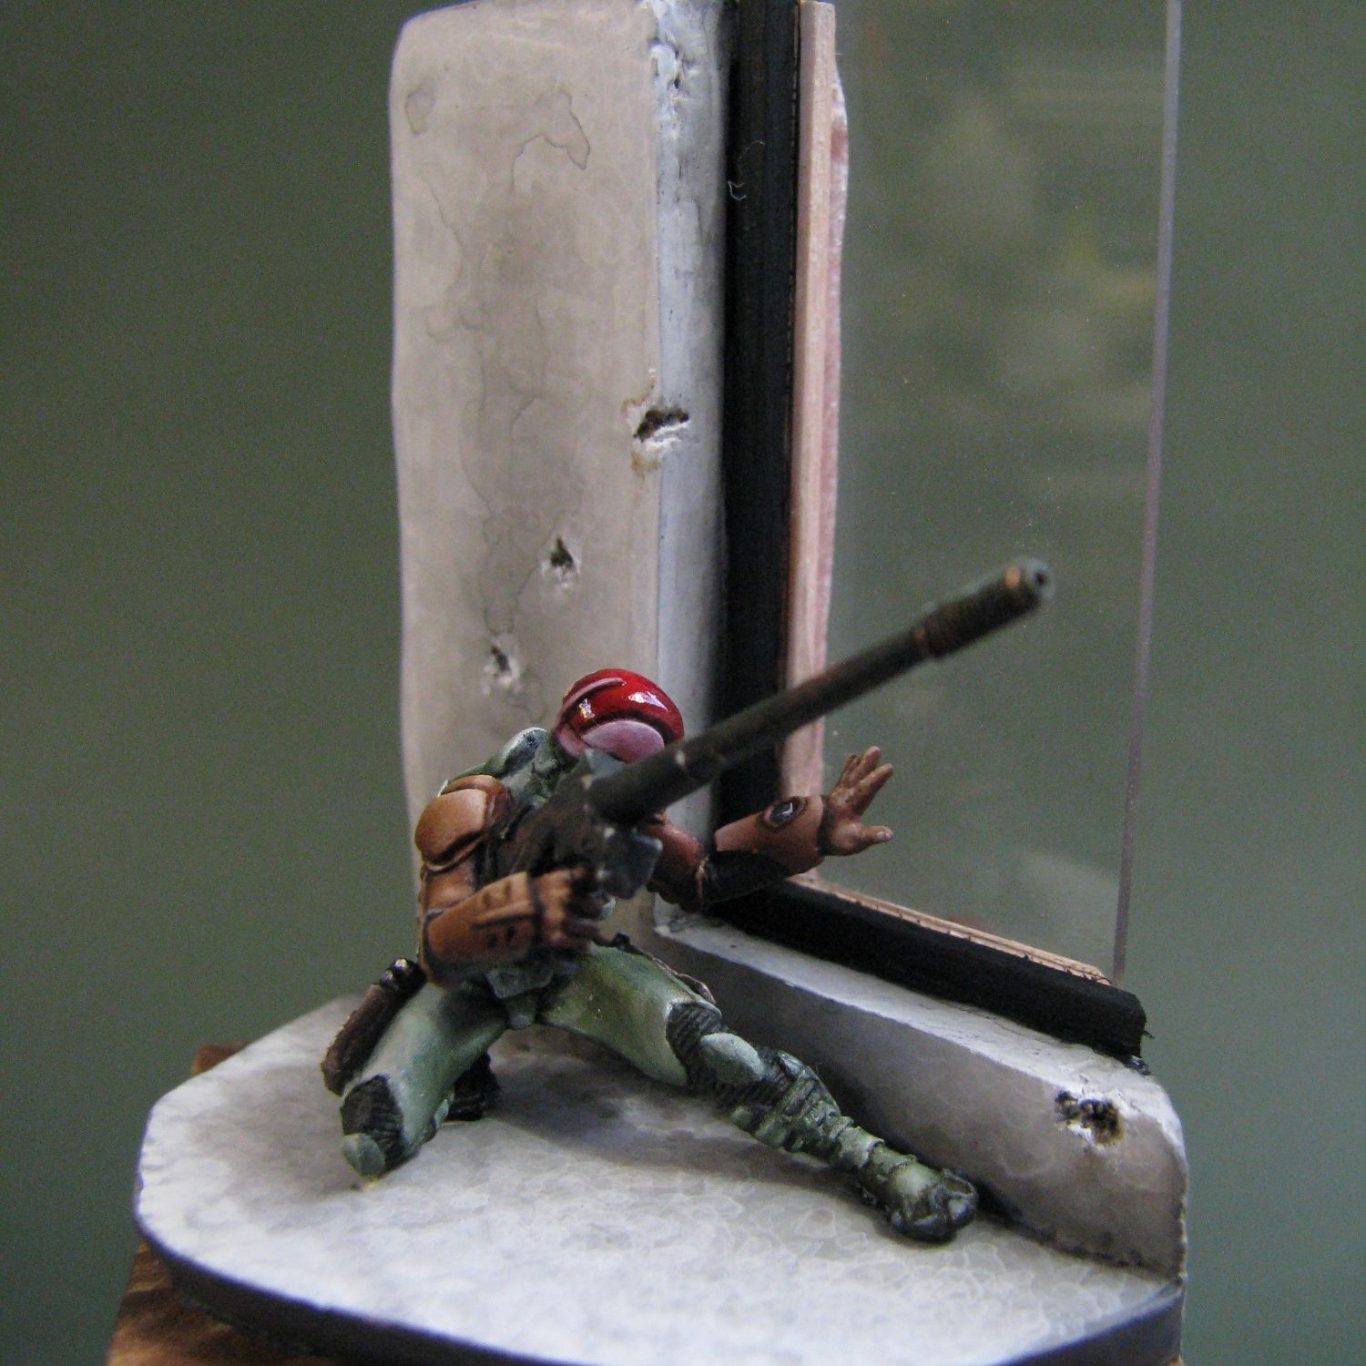
How about placing the hand near a glazed window to feel for vibration ?
Hmm, that might work.
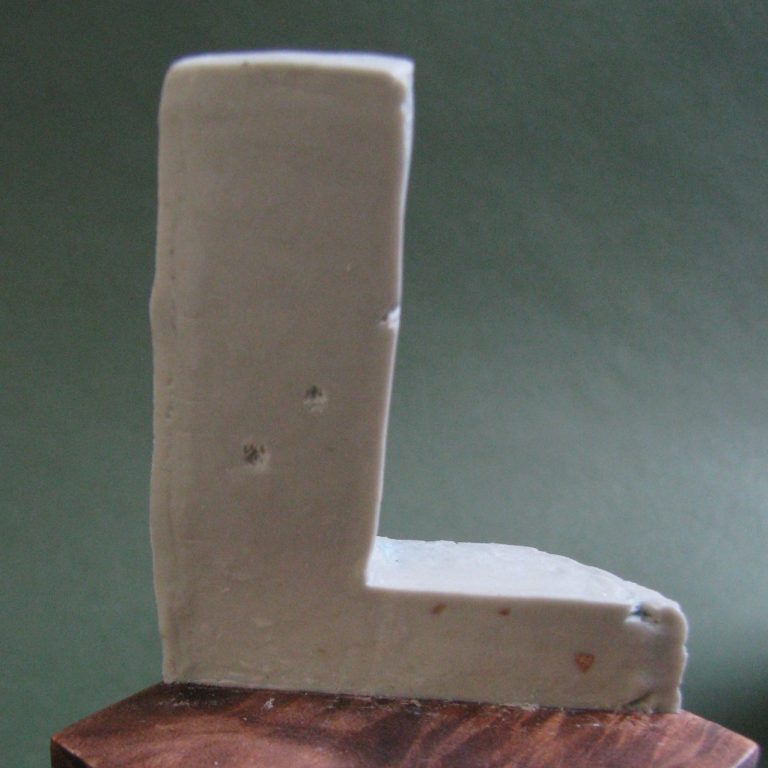
Photo #11 shows an “L” shaped wall that I made from some scrap wood coated in Magic Sculpt epoxy putty and with a few holes and a bit of damage added to the outer surface.
I hesitate to call them “bullet holes” as they could easily be from some kind of energy weapon, so just “Holes” will have to do.
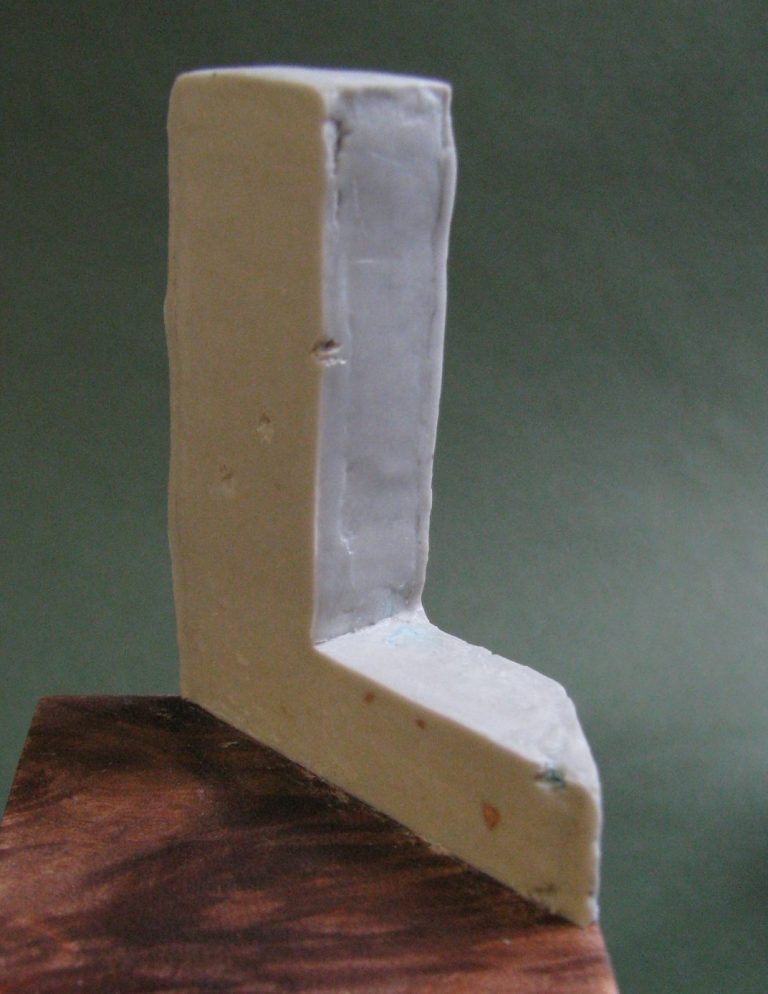
Photos #12 and #13. A lot of aftermarket scenery is either single sided or impossibly thin. Which is why it’s better to think about the structure you want to represent and how sturdy it has to be, and if people are going to view it from the “wrong” side.
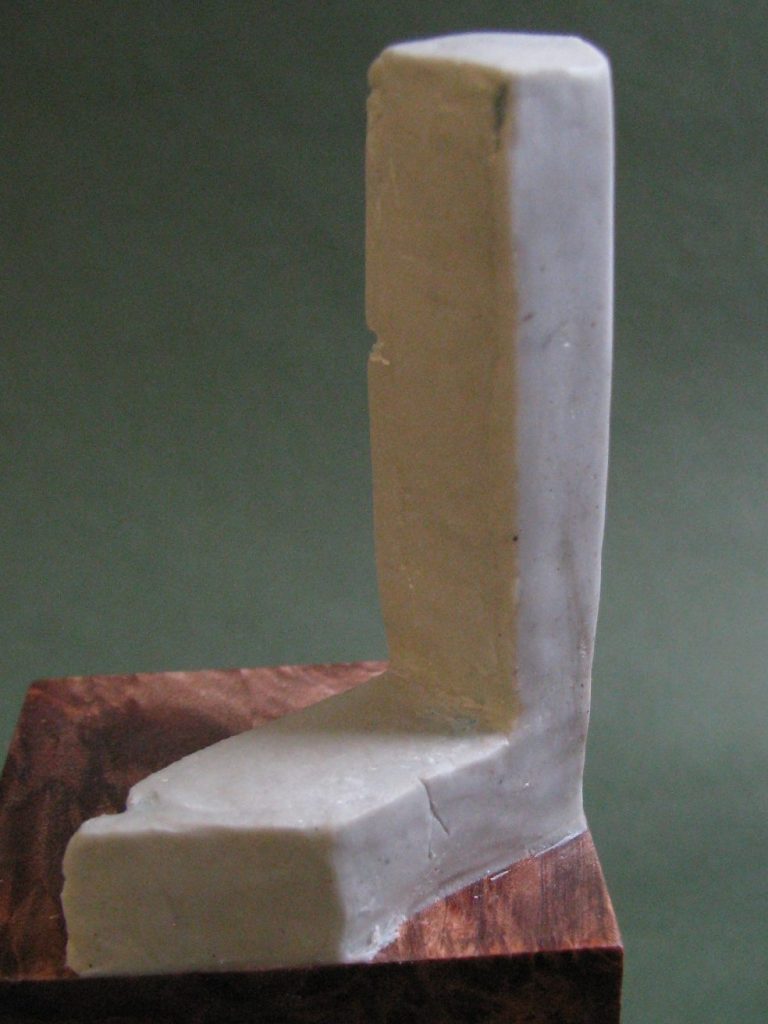
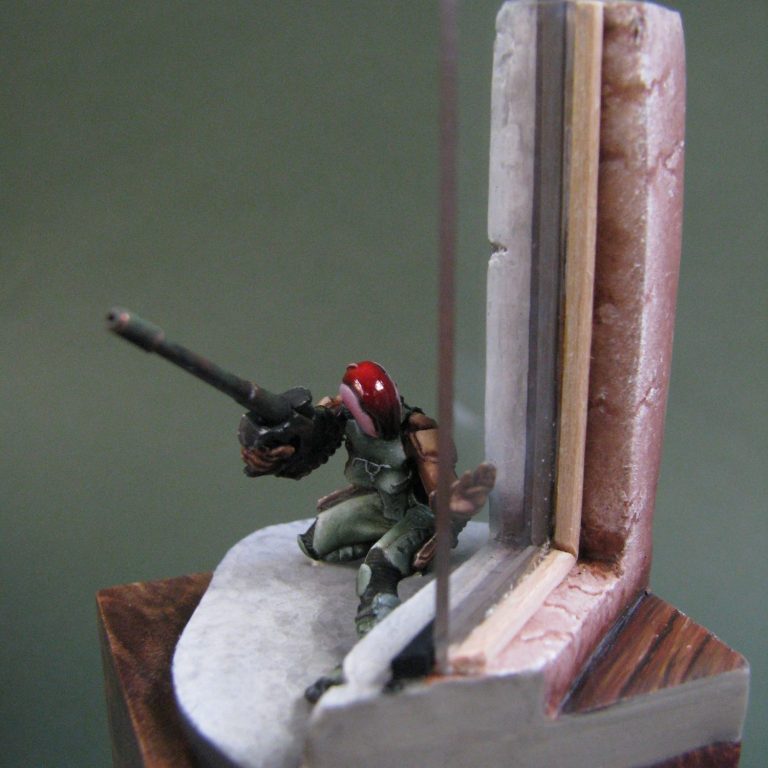
This could be an office building, several stories high maybe, and so the walls are thick, they have an inside which will be different from the outside colouration, and I needed a means to have a glass in the middle to divide the two areas.
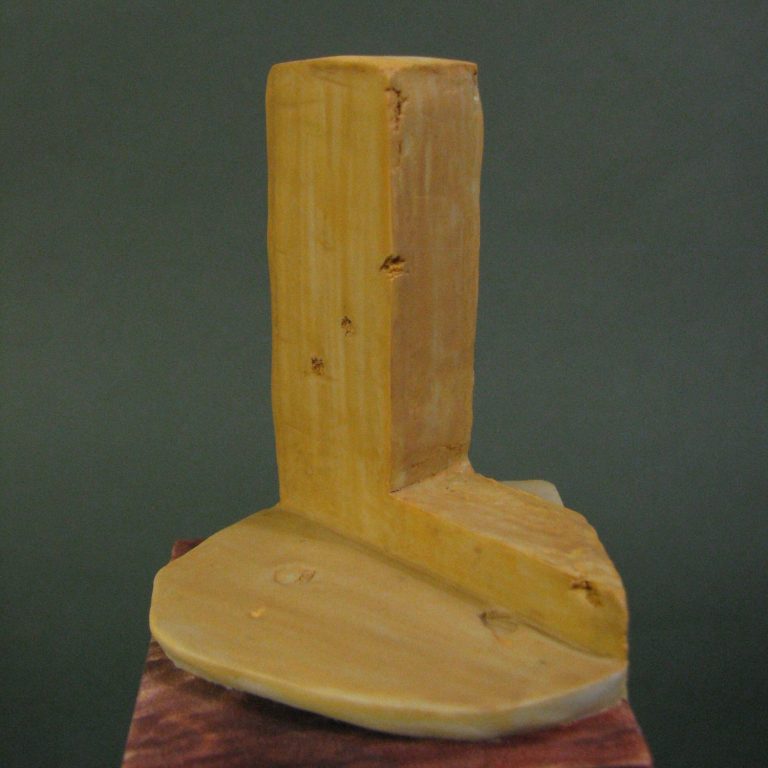
Photo #14 shows the beginning of painting the wall, the outside will be a concrete colour, oh, and I’ve added a bit of pavement too.
The finished shots show the difference between the inside and outside areas, the dividing line being very definite, even though there is cracking to the inner surfaces – well it adds a bit of interest.
The glass is a trimmed down piece of microscope slide, although a section of clear plastic would probably have been easier to cut to size, glass remains clearer over time.
The inner floor was painted to represent wood planking, possibly reproduction laminate rather than real wood, and I was very tempted to add part of a picture frame to the upright wall section, but maybe that was making too much of the back of the scene….. ?
I added some balsa strip to make a frame to hold the glass, and also tried a curved cut to see if that looked better – I didn’t like it as it didn’t match the straight lines of the rest of the scene.
Final thoughts.
Oh I do like these Infinity Corvus Belli figures, they are so well thought out, dynamically posed, very well sculpted and the casting and fit of parts is very high quality.
Looking back and comparing this figure to the ones I have now ( 2024 ) at the time of writing, I think that the faces on the newer figures have improved, particularly the more feminine ones, although the older figures still hold their own against the new ones.
I’ve built up an alarming amount of these figures in my grey army, the problem being that they deserve a bit of time spent on them to get the best finish possible, so I don’t paint them terribly quickly.
However I am rather pleased with them when I do.
This figure is currently in Mario Delgado’s collection, and I think it’s got some good company in his display case with the models he paints.