Mini Cosy
1.16th scale 3D resin print from Creepy Tables
Painted in 2025
I’d seen this bust painted up in both large and “mini” format a few times and thought I’d put it on my vague ( and to be honest rather large ) “want list”.
You know, that list that hangs around the back of your mind and get’s ignored a bit when you see new releases being rolled out at a big show like SMC.
Occasionally I can multi-task and actually remember to get a particular kit whilst looking round at other models, and this was a case in point, although I opted for the smaller version simply because of space in the car for the return journey.
I’ve bought several pieces off Creepy Tables, and to be honest I’ve never been disappointed when opening the packaging to look at the kit parts, and I can safely say that this was repeated again when opening this one.

I’d got a couple of commissions to do just after SMC, so whilst this went in a storage box for a little while, the box is marked “TO DO NEXT” and isn’t actually all that big.
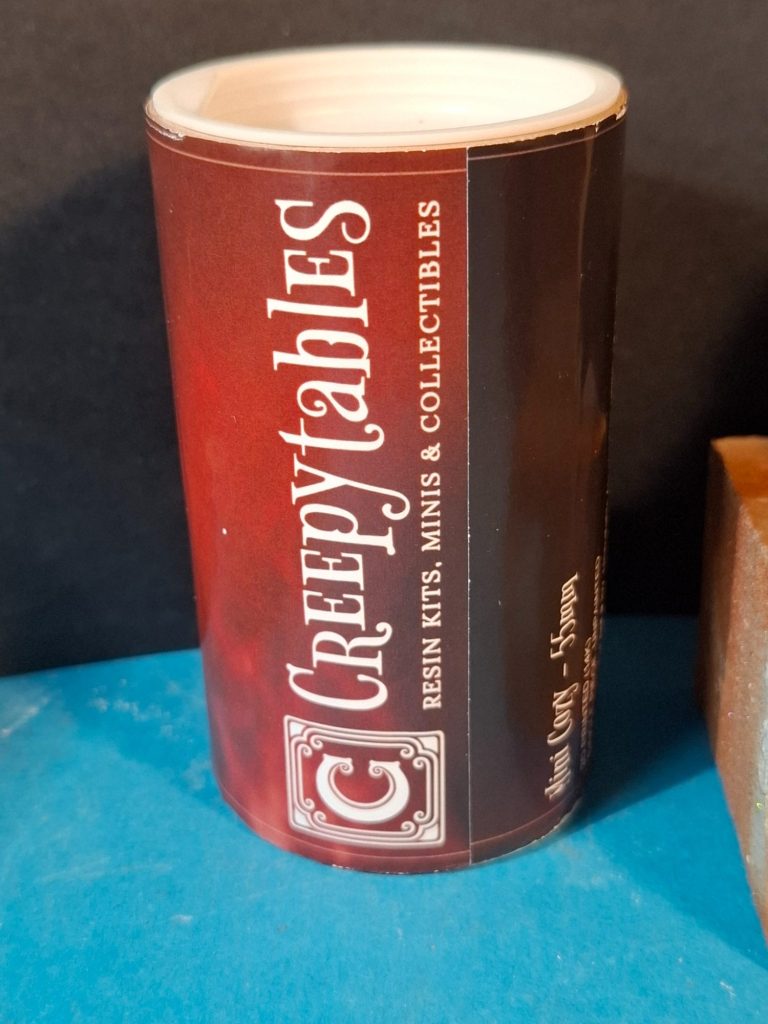
So, Box Art is shown in photos #1 and #2, and remarkable is the fact that this is one of several pieces from Creepy Tables that come in a tube, rather than a square box.
Whilst the picture of the model on the tube isn’t painted, it does give a good idea of what you’ll find inside……
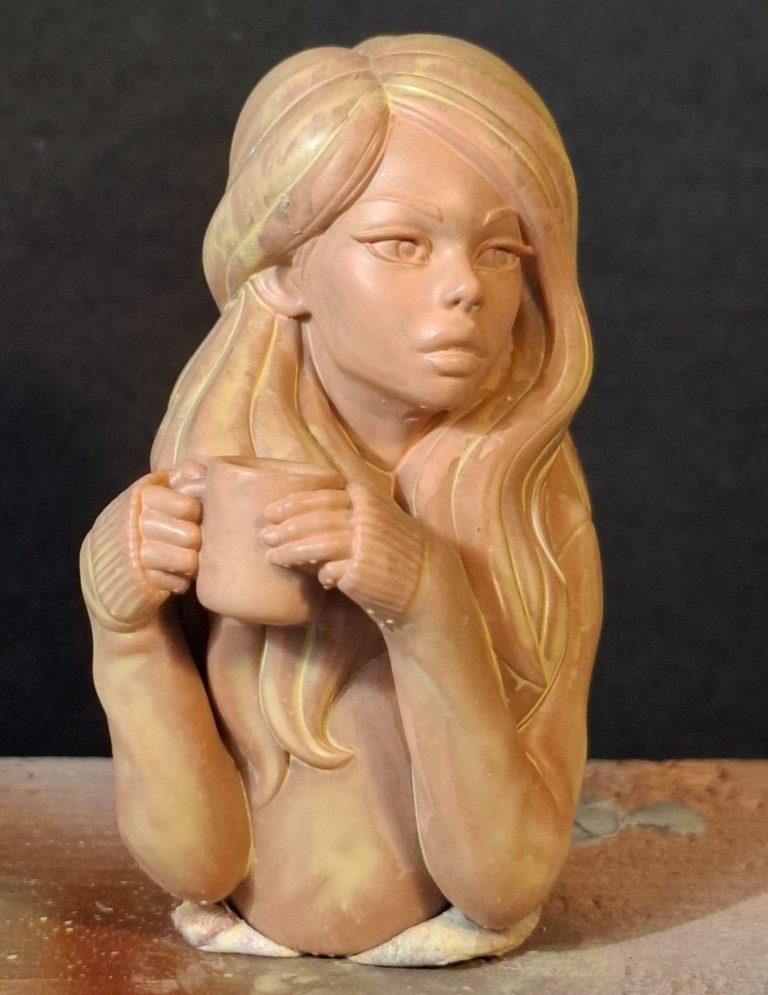
As per photos #3 and #4 which show the single piece that appears to be a 3d print rather than a solid resin casting.
There are a few of the support pips to clean off and the material is a little brittle to work with, but a sharp scalpel and a bit of gentle treatment from a fine file will remove the offending items.
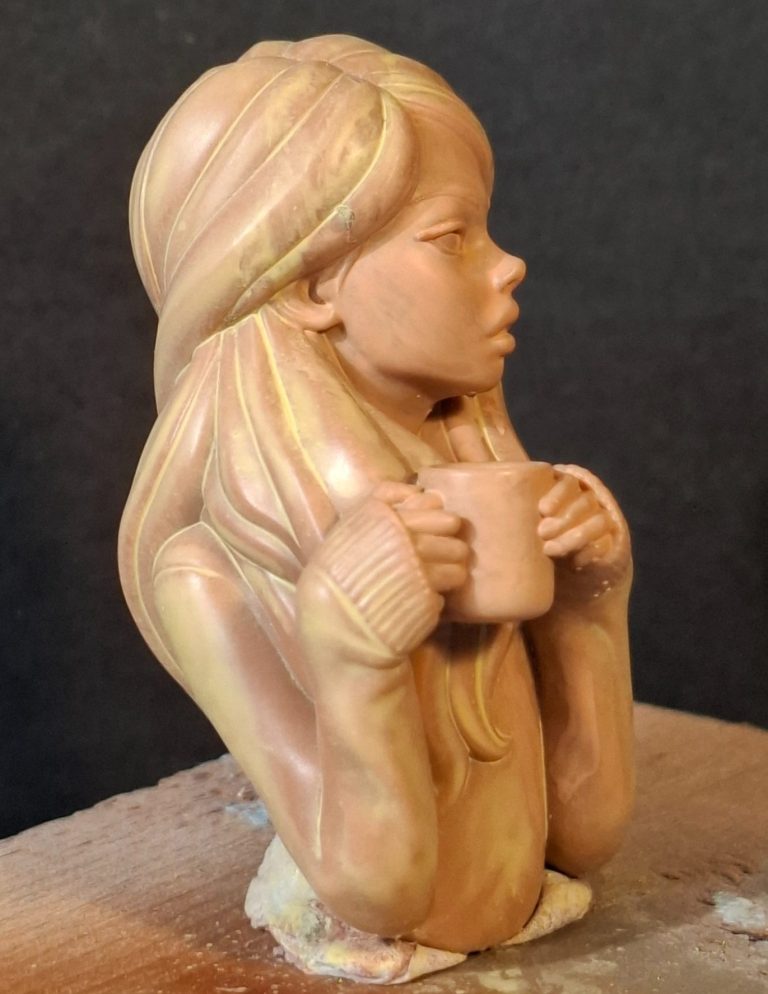
They tend to be on the elbows, the lower area of the hair at the back of the model and the underside of the mug, and as I say, they’re easy to find and pretty easy to clean up.
I’ve primed the whole model with a couple of thin layers of Flesh coloured acrylic, as usual the first coat being mixed with some Isopropyl Alcohol, and the subsequent coat just being thinned with a little water..
Photo #5. This is such an easy piece to paint, it just seems to help you in every way possible, so much so that before I knew it I’d got the face completed and the hair undercoated.
I used my standard Mars Brown and Titanium White mix for the flesh, keeping it fairly pale and not having too much contrast. I only painted the face at this point, the hands would be added later.
The eyes are painted green, although it’s not very visible, and I used Olive Green to mark out the iris, then Chrome Green for the main colour with a spot of Black for the pupil and a very small catchlight of Titanium White.
In photo #6 you can see a couple of the support pips that I missed on the left sleeve, these were cleaned off and a further check around the model to see if there were any more that I’d left that needed sorting.
As the face looked quite pale, I thought I’d paint the hair to represent a ginger colouration, this would allow for some freckles to be added later too. The small mole near the right eye was spotted on with Vandyke brown, then “faded” in to the surrounding skin with a soft brush.
The lips, although they look red are actually Brown Madder with Vandyke Brown providing the colouration for the deeper recess between the lips.
The hair was undercoated with MP paints Rust acrylic, to see how the ginger colouration would work, and to “frame” the face to check if that was working OK.
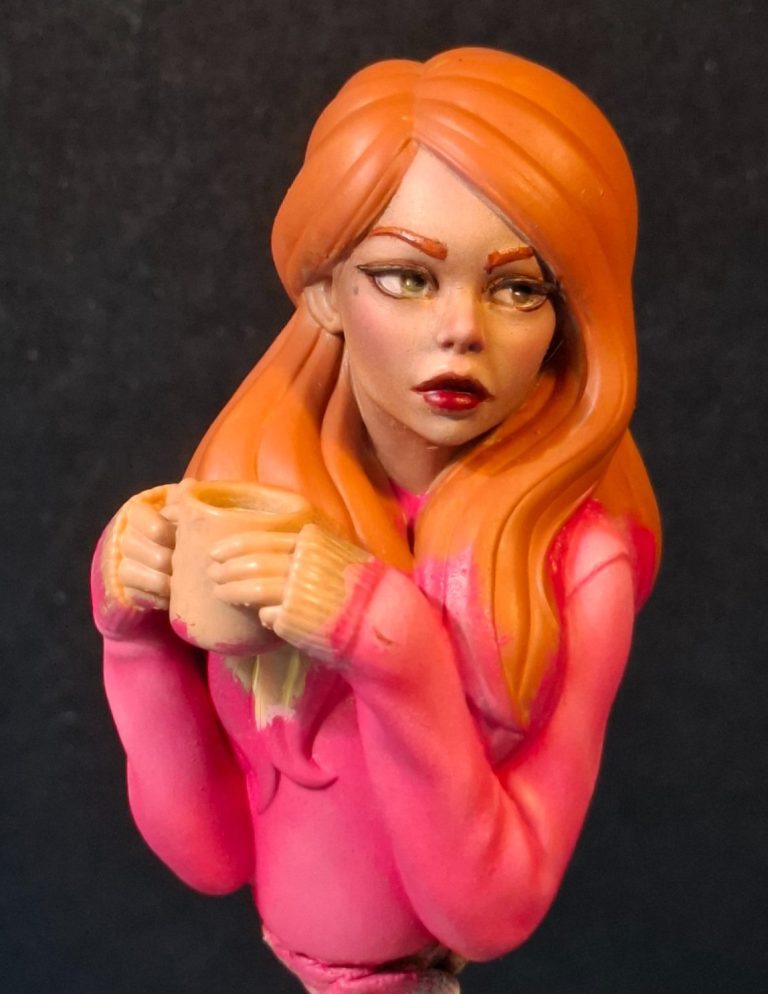
Photos #7 and #8 and rather than paint the hair I moved on to the jumper.
I felt that this piece would be quite bright and so chose a mix of Carmine and Titanium White to arrive at a fairly bright pink. A darker mix was made of the same two colours and I painted this into all the recesses of detail and wherever I thought shadows would need to be established.
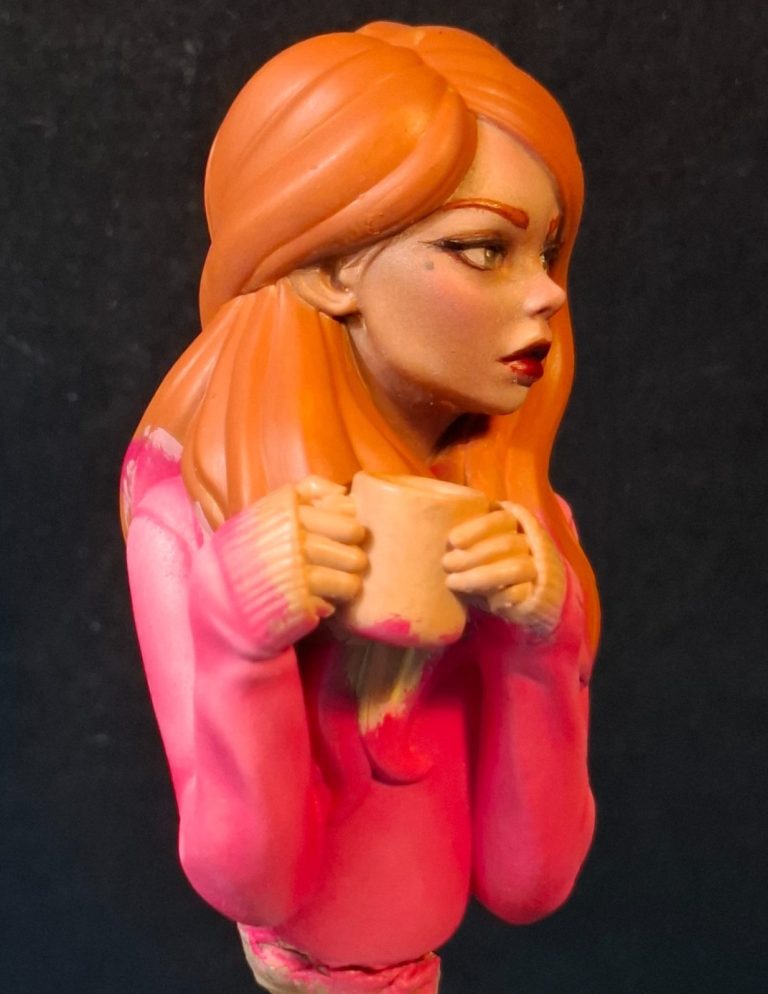
The lighter mix was then used to form the mid-tones, blending the edges of the two colours together wherever they met with a soft brush, wiping it regularly to remove any excess paint, and then highlights were built up with Titanium White.
There is a very small fault in the casting on the left sleeve. I’d left this intentionally, and used the paints to make this into a small tear in the material of the jumper.
These colours – because of the Carmine – take a while to dry, even when placed in a drying cabinet, so the model had to be left for a week before I could add some more Carline to the seams and the deeper recesses unted the arms to form the darkest shadows.
Photo #9 and the hair.
This is my favourite part of painting the model simply because whilst there is some surface detail, the main body of the hair is fairly large sections of swirls that form Volume rather than individual hairs.
For an oil painter this is heaven to paint, because once the shadow colour is added over all the sections of hair, an old brush that the hairs are starting to spread out on can be used to “comb on” the lighter colours of paint so that the bristles leave very fine lines of colour that mimic the individual hairs.
The brush must be wiped clean of any paint it’s picked up off the model after each pass, and then recharges with fresh paint. By gradually adding lighter and lighter mixes of colour, the mid-tones and highlights can be built up and in this case I began with Mars Brown for the shadow colour, then worked through Venetian Red ( which is a rust colour ) then Mars Yellow and finally some very small sections of Buff Titanium.
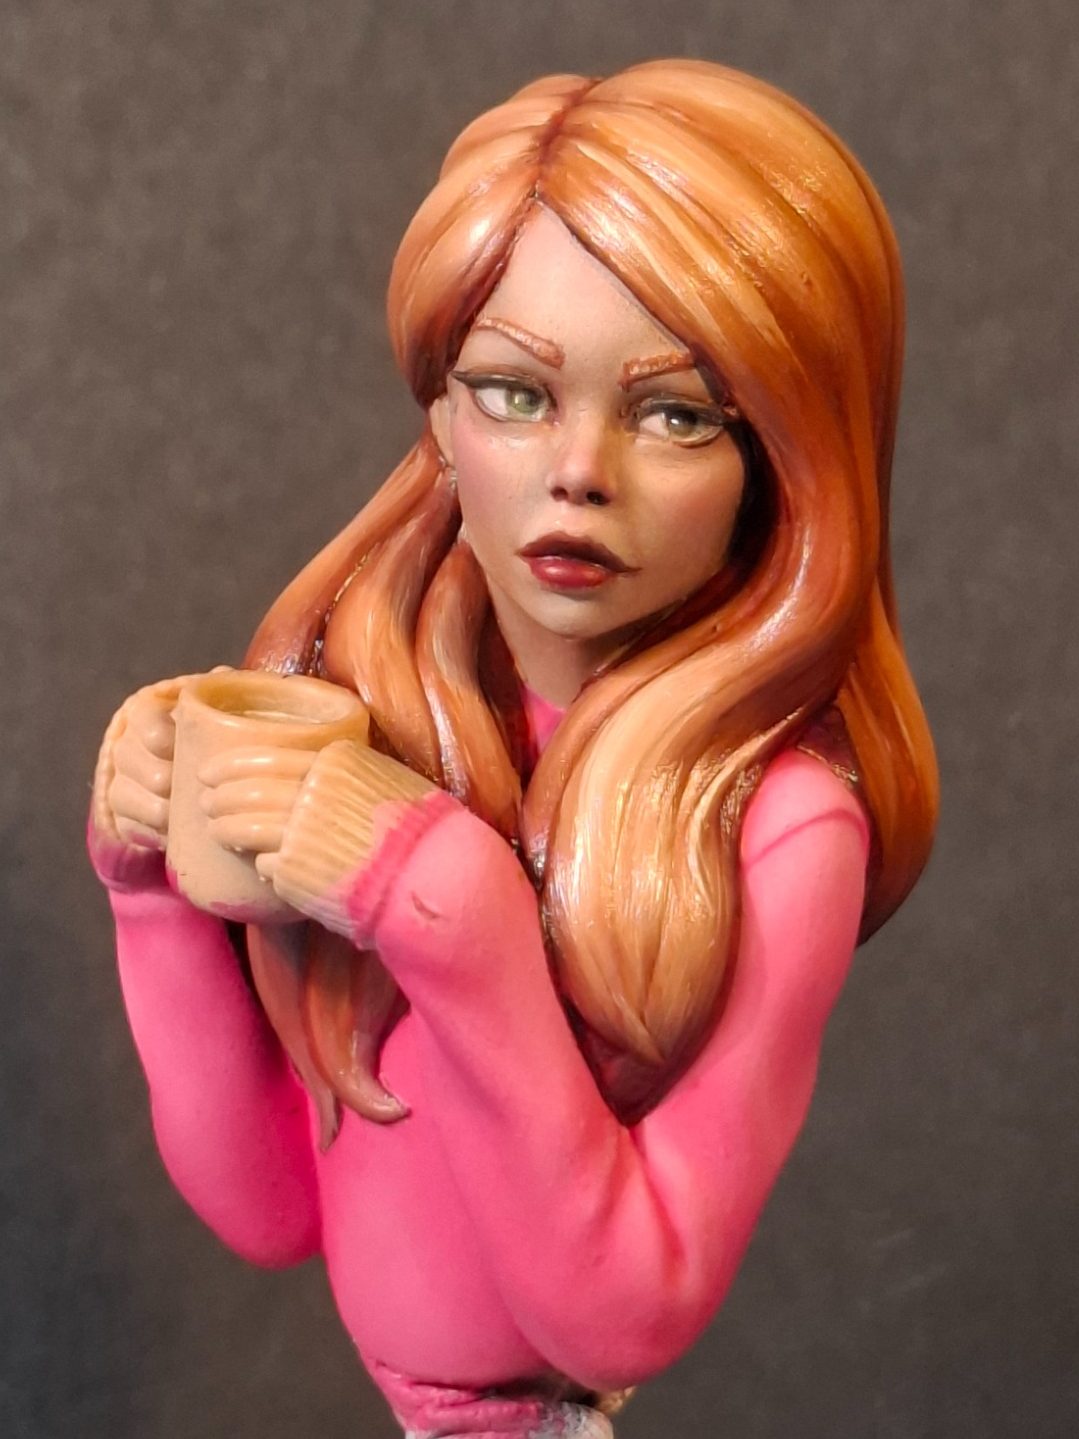
The eyebrows – an area of any model that I detest painting, and hence feel I struggle to get right, were painted to match the hair. Giving a dark line underneath each of them and the lighter colours used to paint in the body of each brow.
If I’m honest here, and if the bust had been a softer resin, then I might have been tempted to remove the eyebrows and simply paint them in place, allowing me to add individual hairs and have them appear less cartoon-like.
However, I wasn’t certain that carving them back wouldn’t cause chipping of the surface, so left them as they were and simply added the paint.
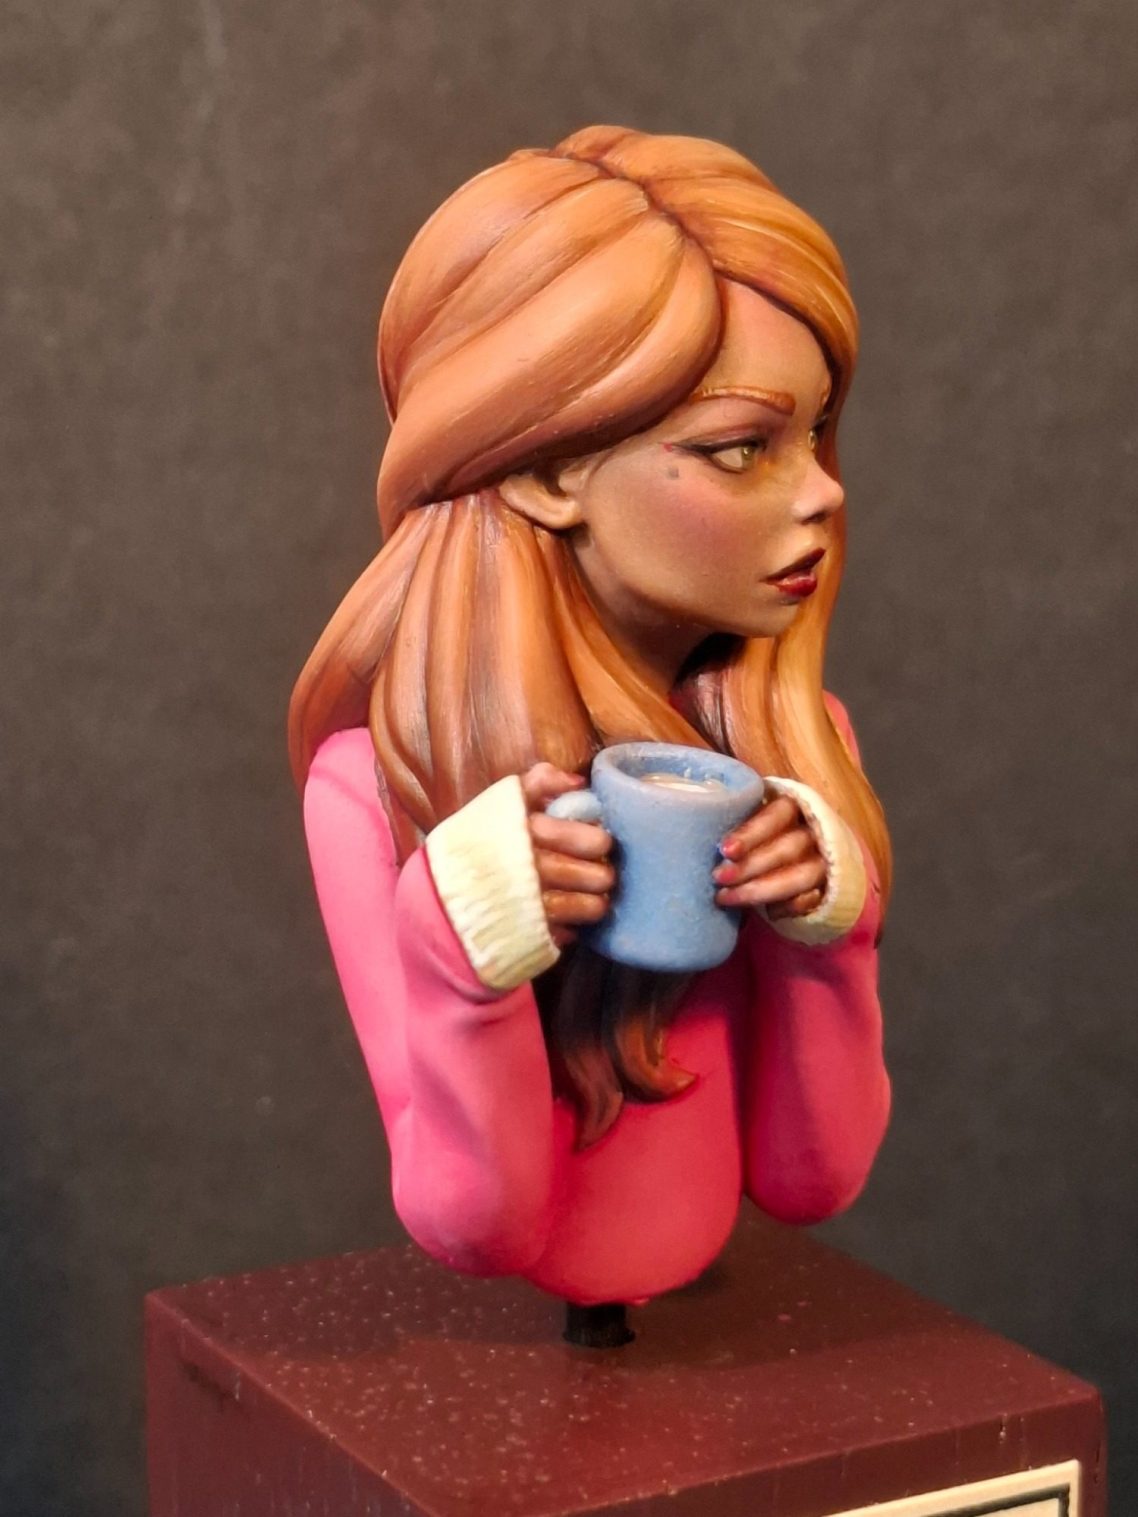
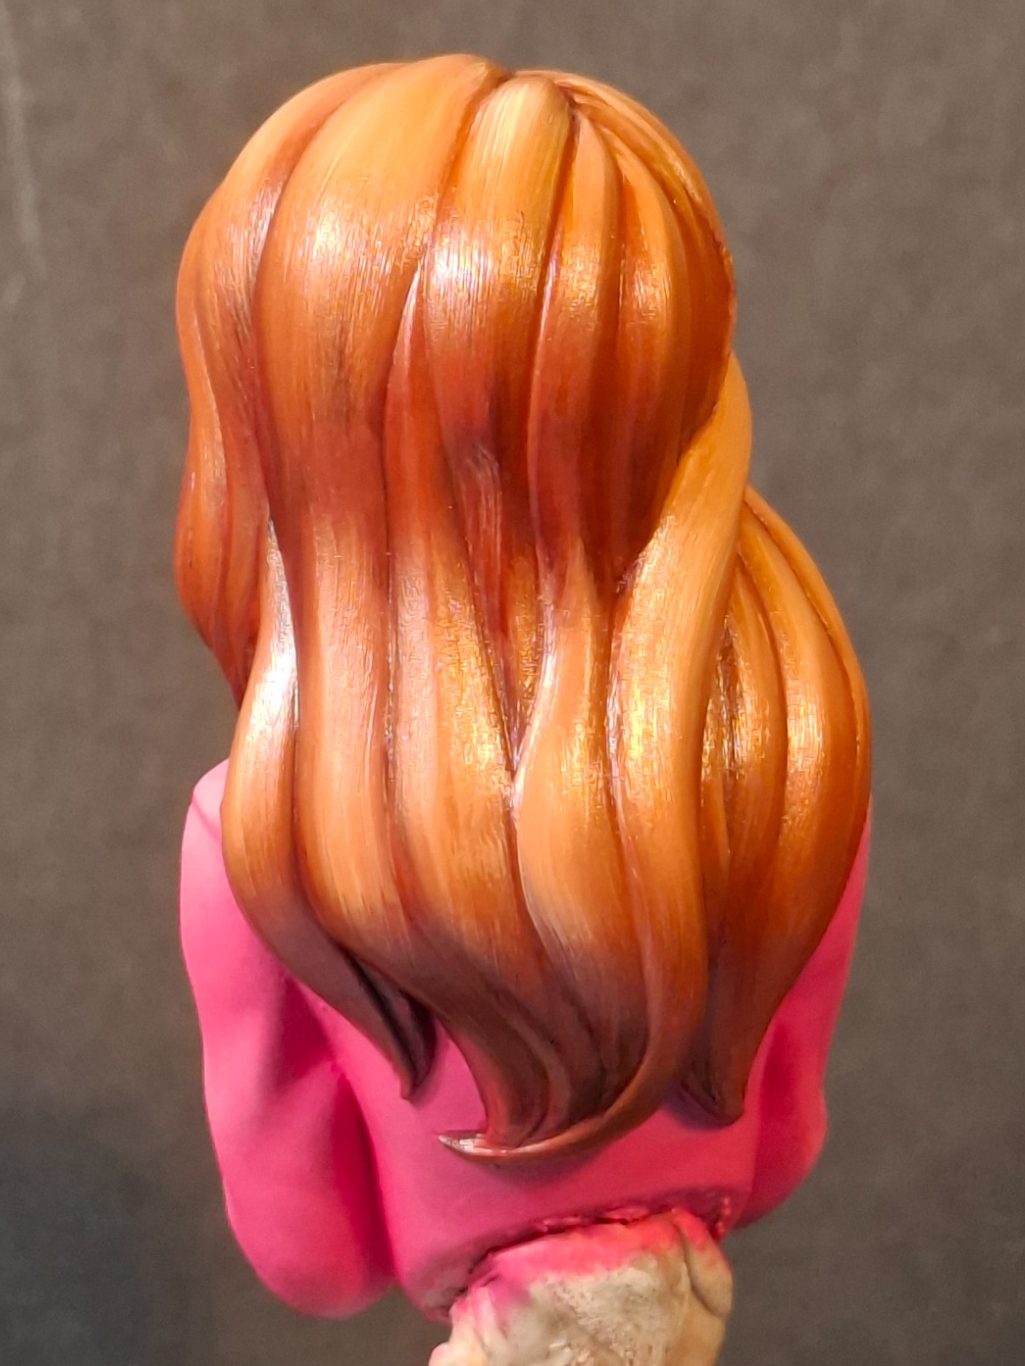
Photo #10 shows the back of the model which is mainly the long flowing hair.
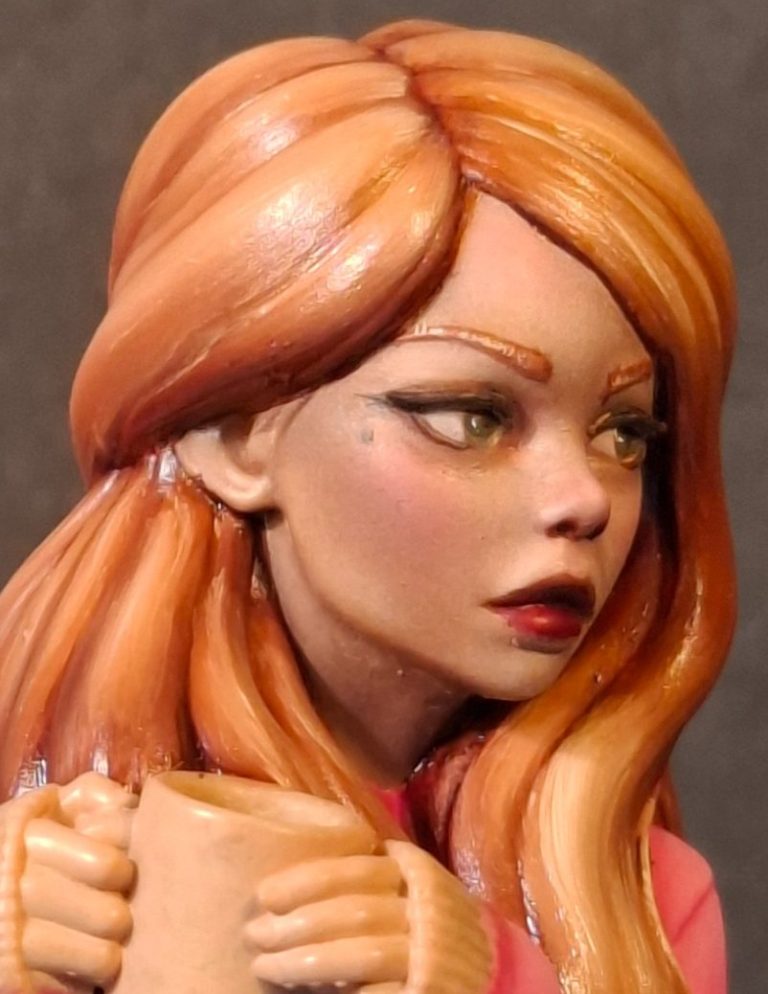
Photo #11 and once the hair was fully dry I added a few darker areas to frame the face and make the hair parting a little stronger.
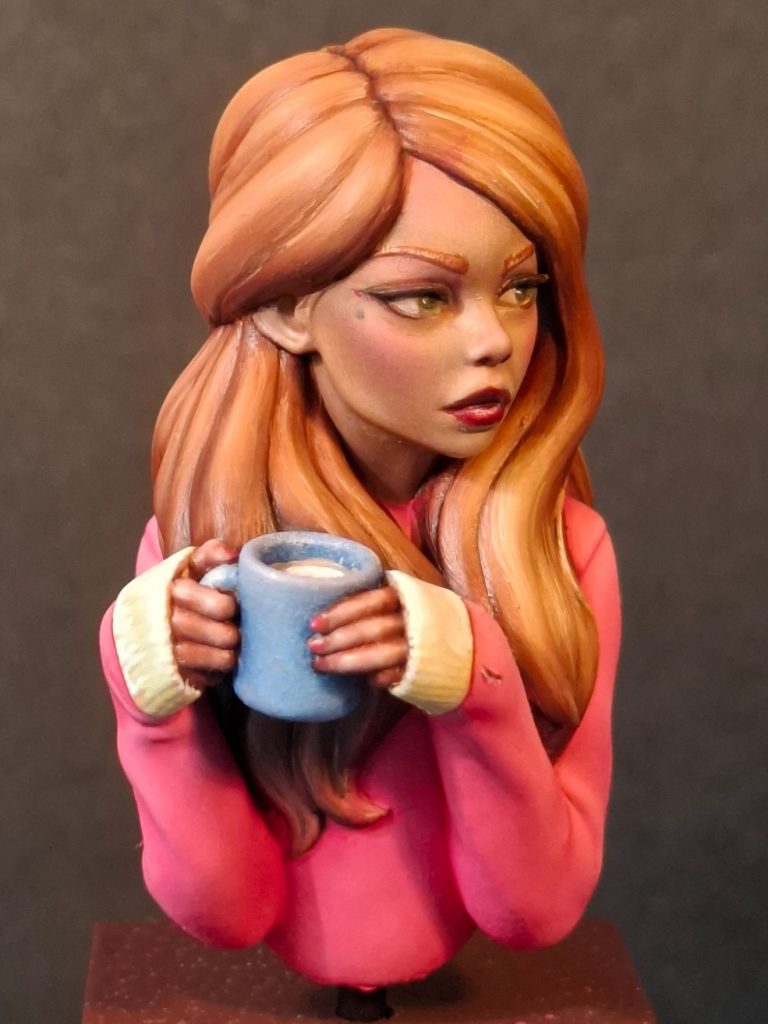
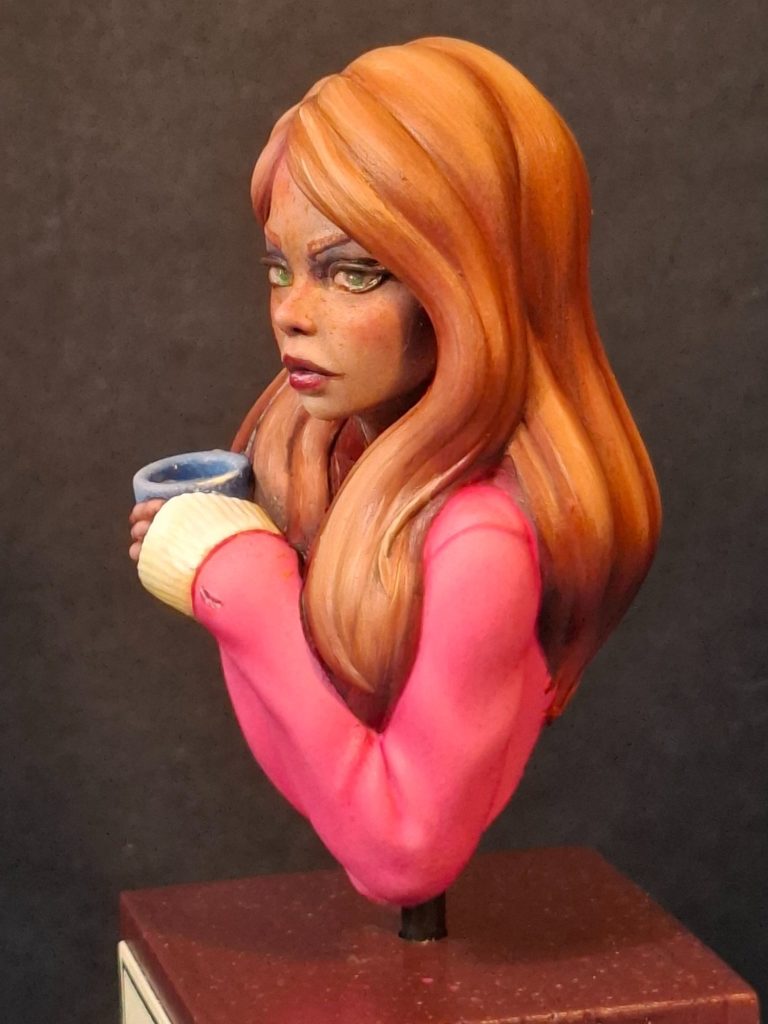
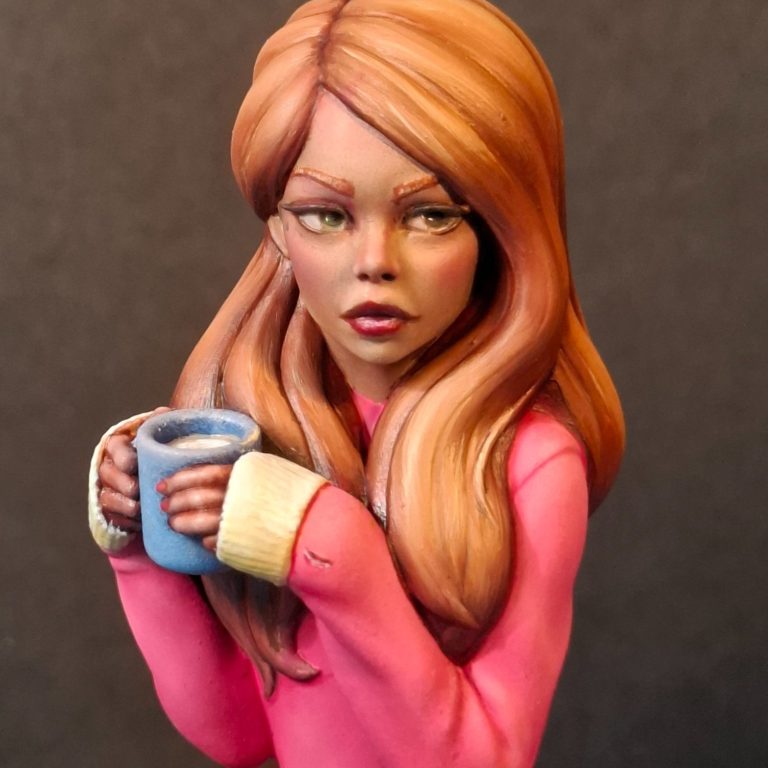
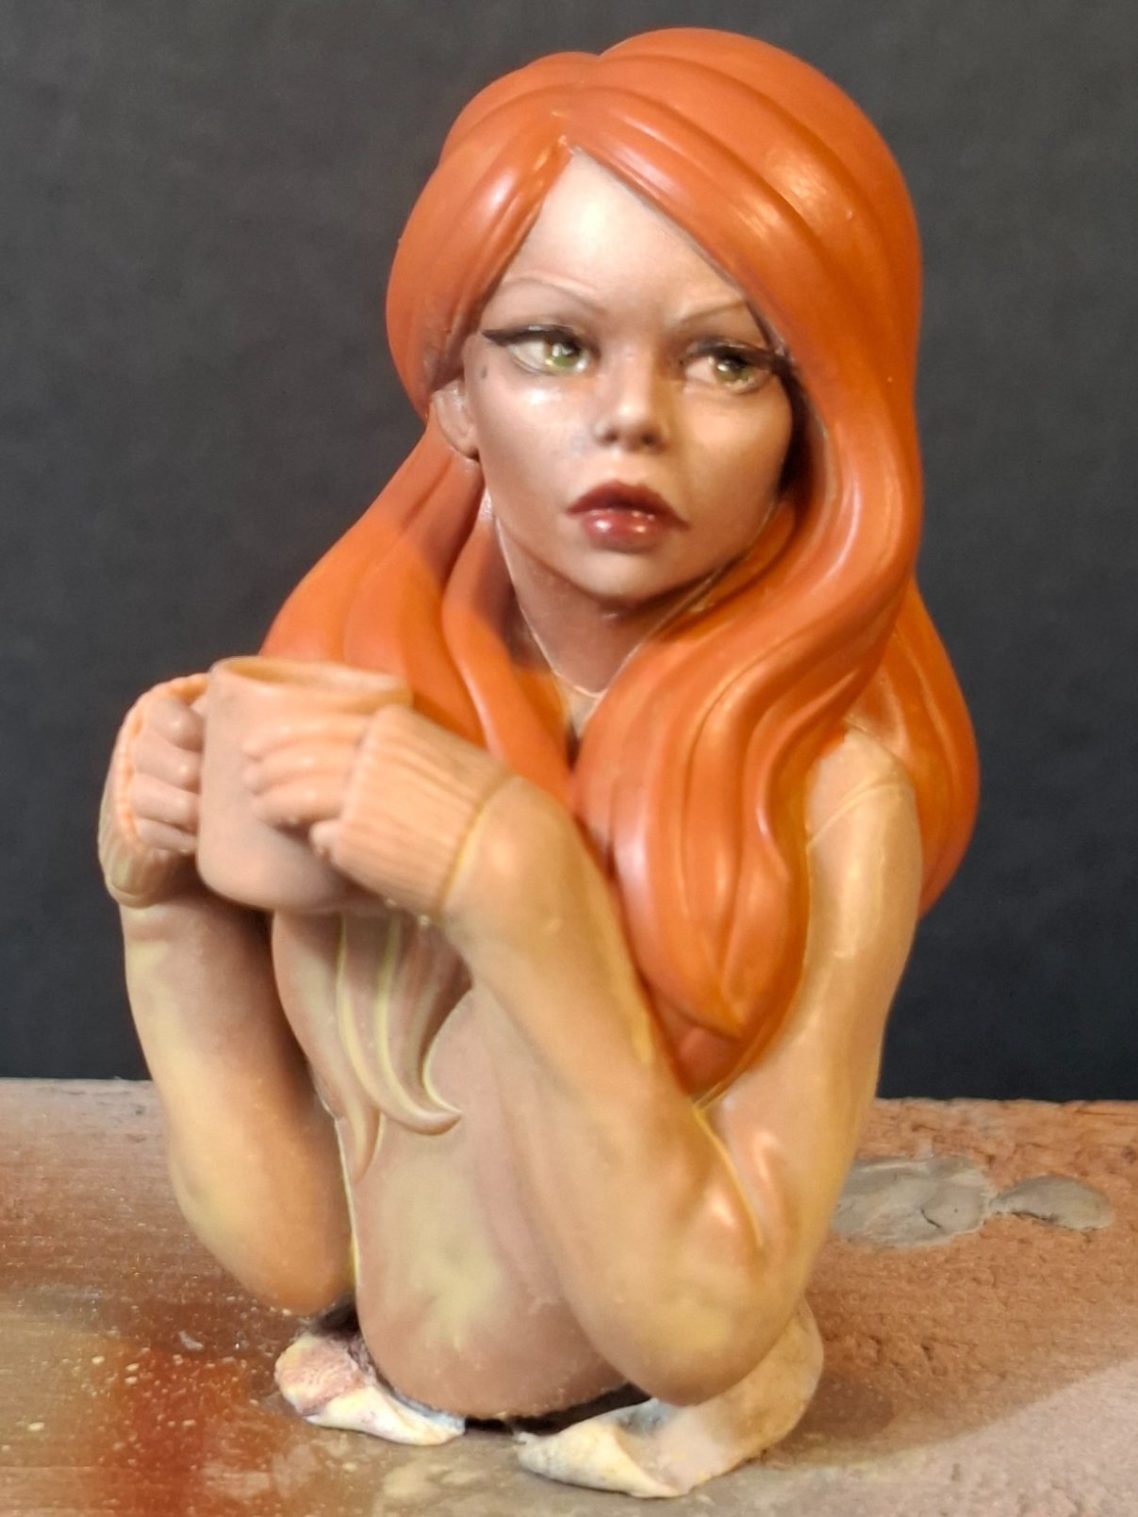
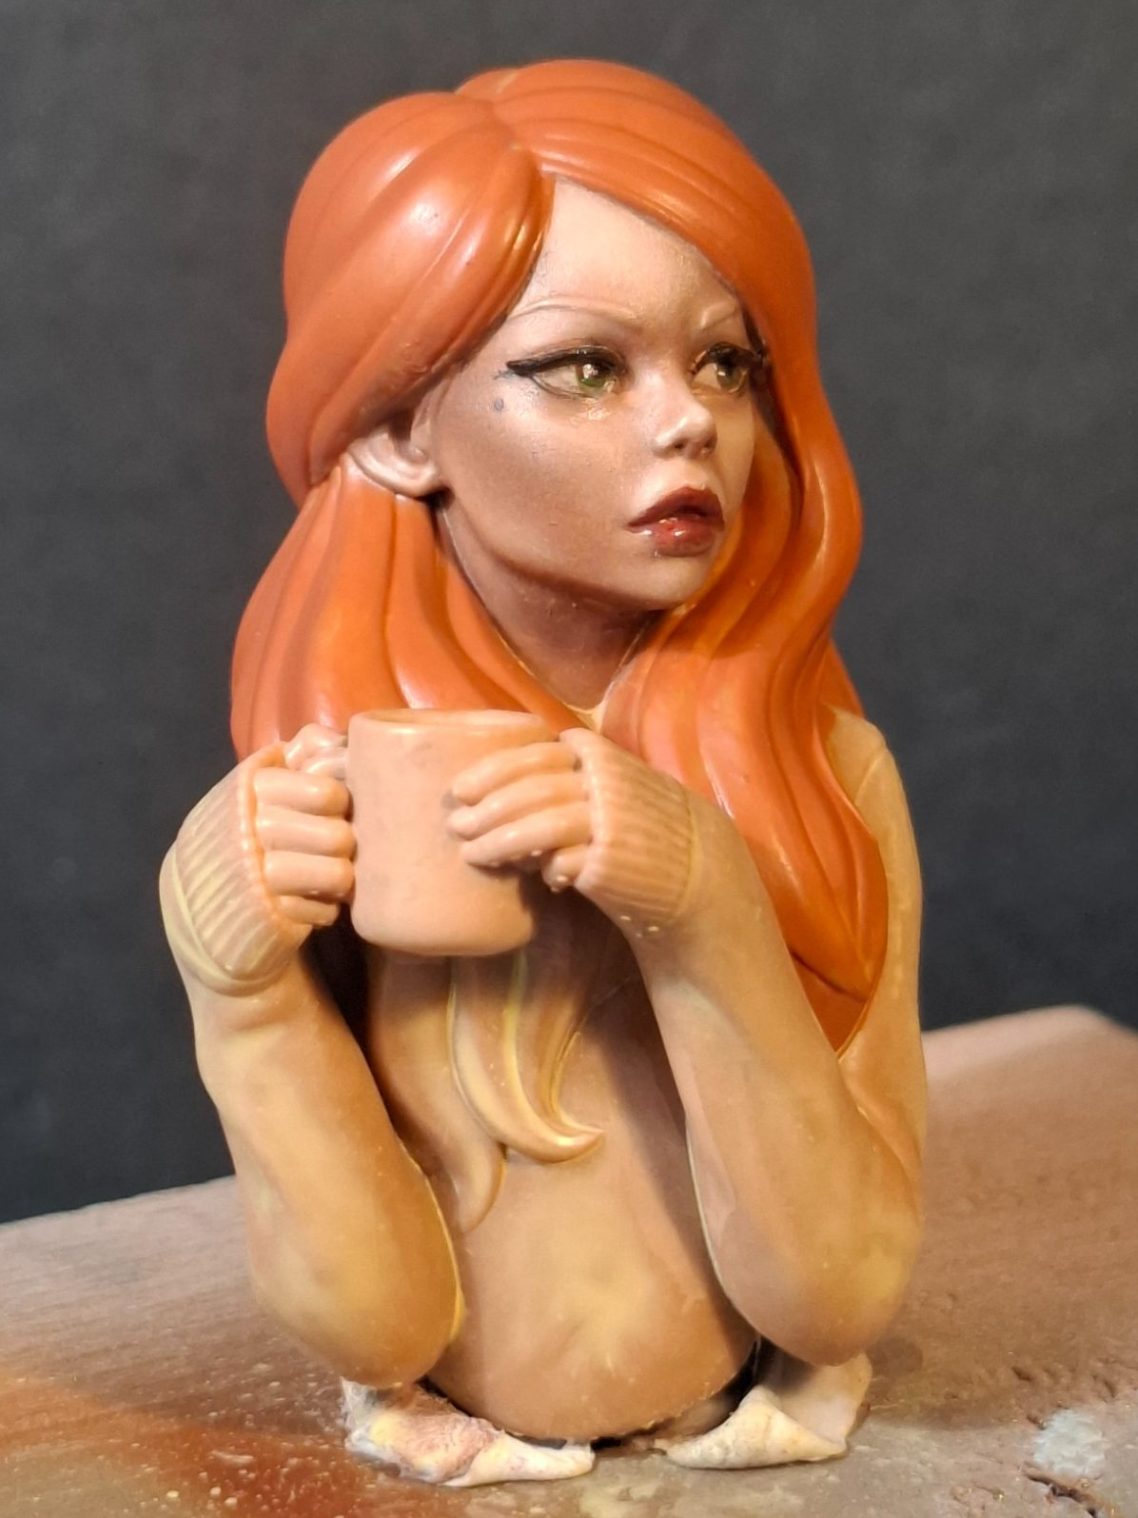
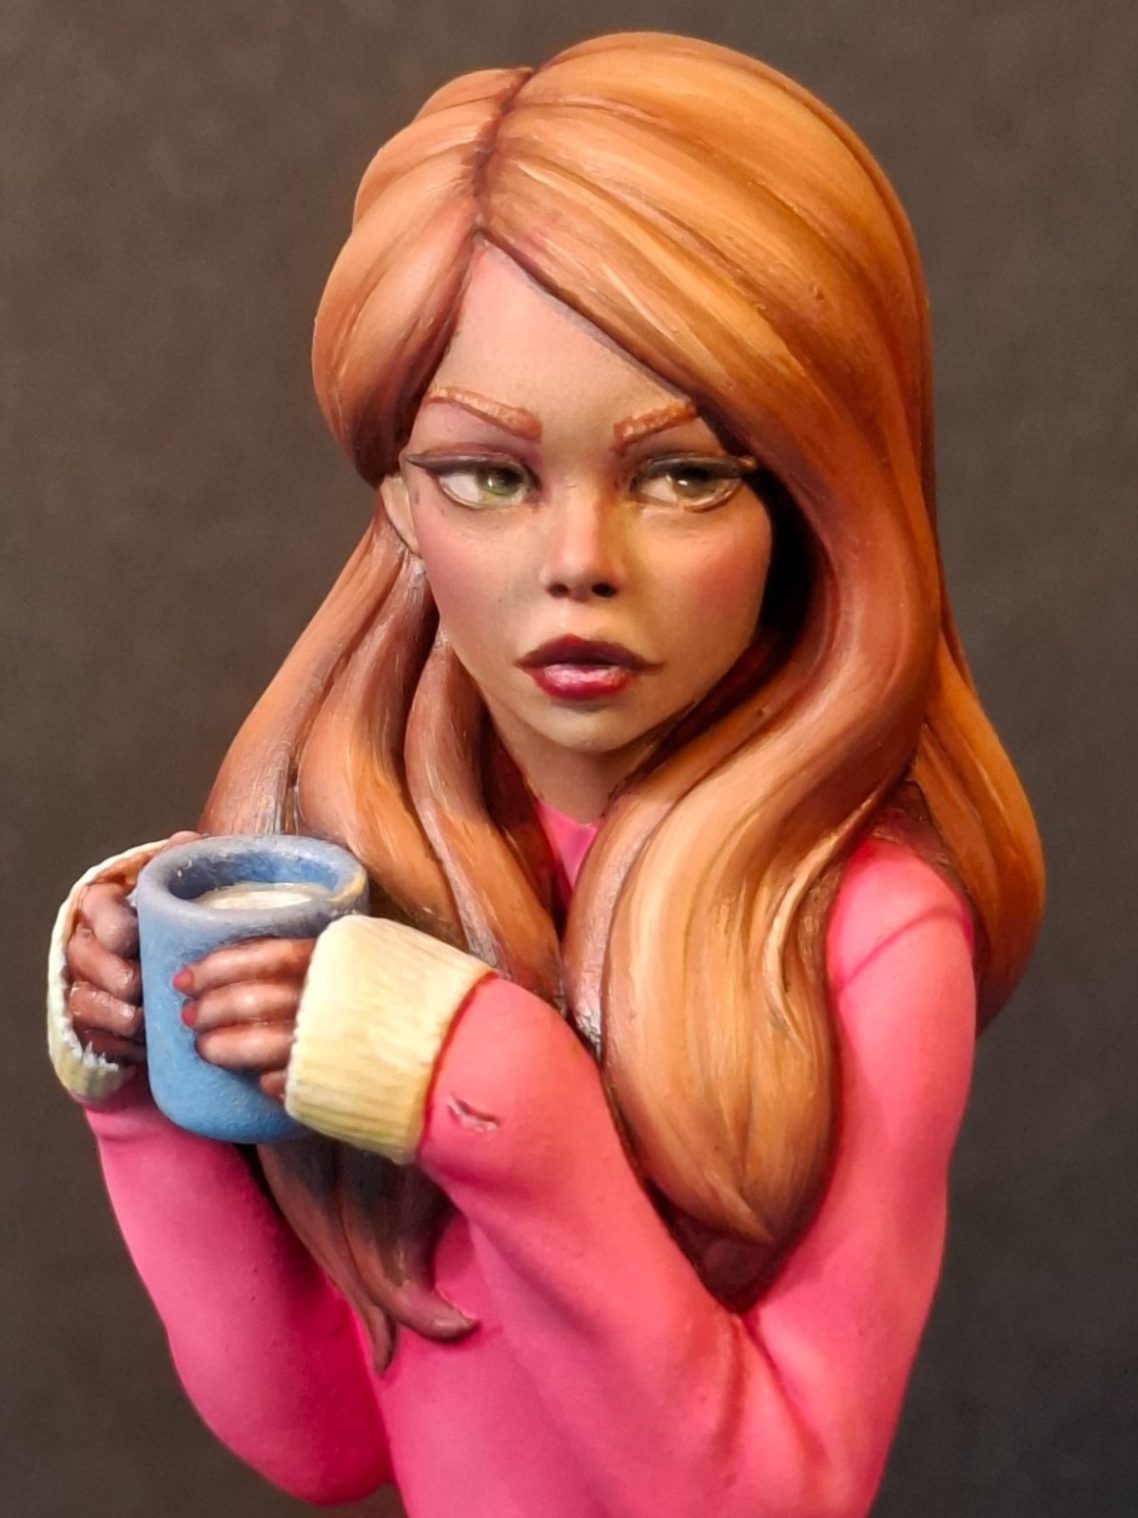
Photo #12 shows the model finished. I needed some blue to help contrast all the pink and rust already on the model, and the cup was perfect for this.
I used Prussian Blue as a starting point with Titanium White stippled in rather coarsely to give a speckled texture.
The fingers were painted to match into the face and I added a slight blush of Carmine to the cheeks and nose, although it’s not very visible in this shot.
The sleeve cuffs of the jumper were painted in a cream colour – Titanium White and Mars Yellow, and then more of the white added to pick out the ribbing.
Finally coffee was added inside the cup with a swirl of Titanium White for a small amount of foam on the surface.
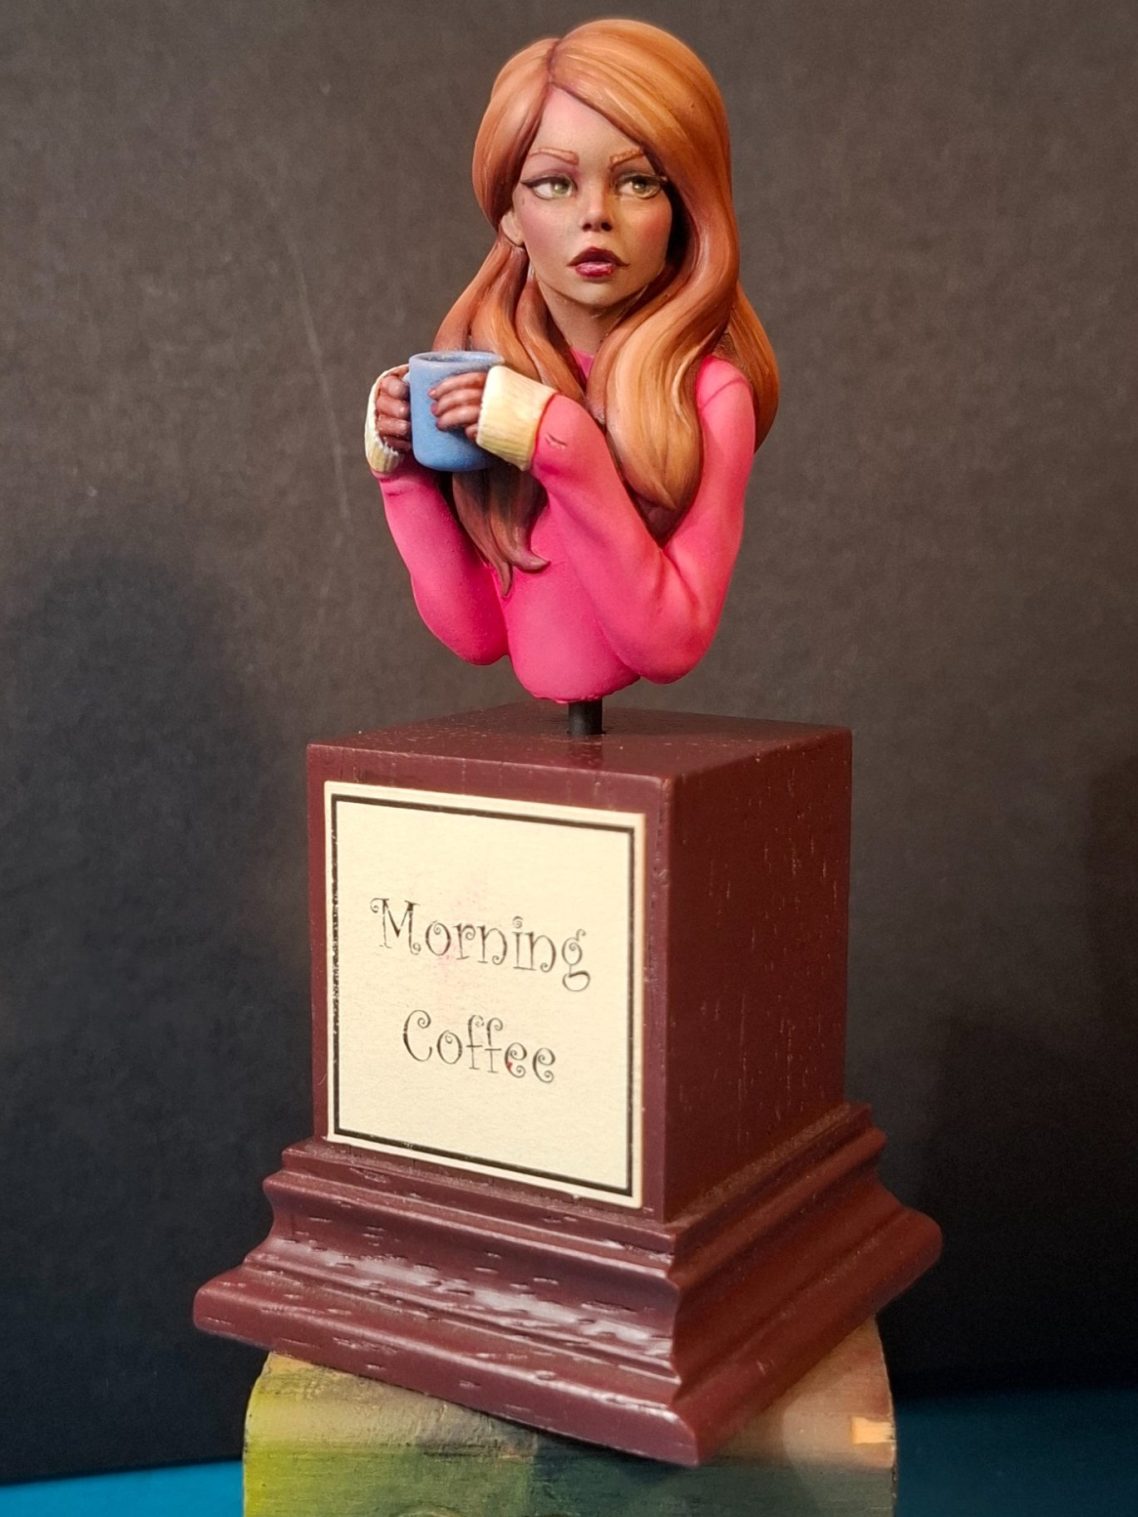
I wanted a fairly simple plinth for the model, although I can’t remember where I got this one from, It might have been Martyn at MDP as it’s a resin casting, which looks like wood.
I’m not convinced that it’s the right plinth, but it will do for the moment, and I’ll garner a few comments regarding whether it’s right for the piece at shows later on in 2025.
Final Thoughts.
Superb little bust, really enjoyed painting it and I’m very likely to purchase the larger version later in the year at SMC 2025.
With being a 3D print, the body and head are hollow, so I filled the void with modelling putty to allow the insertion of a steel rod to then fasten her to the plinth.
It’s a very simple piece, I admit, and partly because of that, but more because it’s just a lovely model to paint, I completed this very quickly, bypassing many other pieces that are on the bench.
I think this is my third Creepy Tables model that I’ve painted, so there must be something about them that fires my imagination and my need to put paint on them, maybe that is enough of a recommendation for you to have a look at their website and search through what they have to offer you.