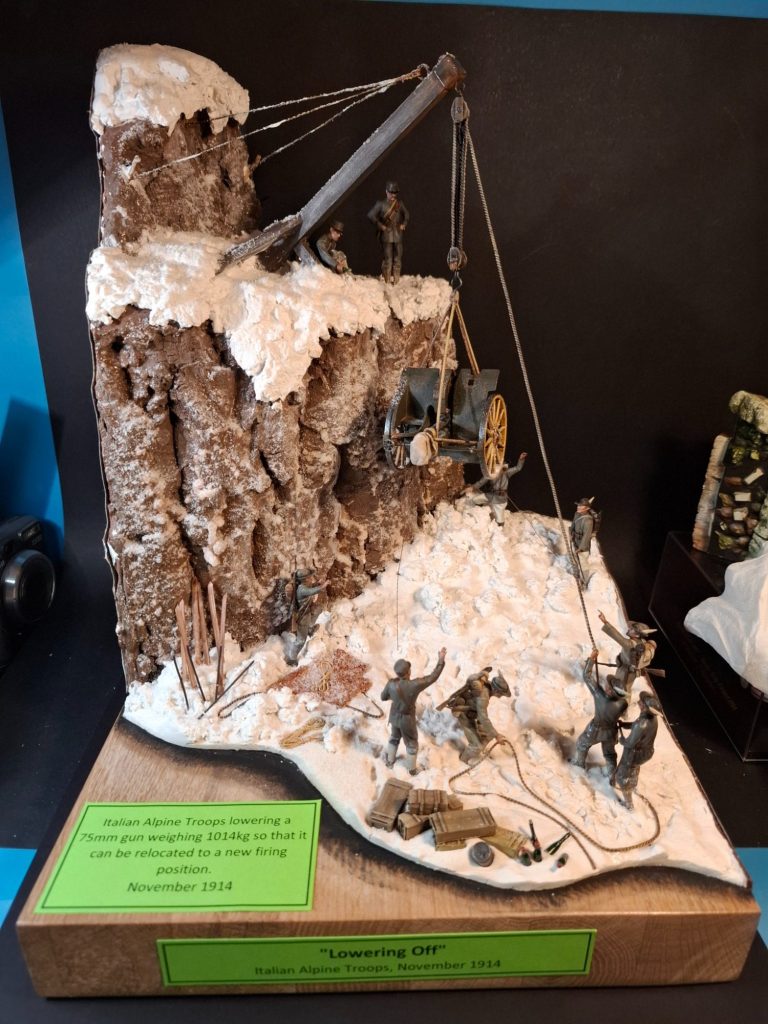
Italian 75mm Cannon and Crew in an Alpine setting
Part 3
1/35th scale 3D printed kit from Art Station
Assembled and painted in 2025
Finishing the figures.
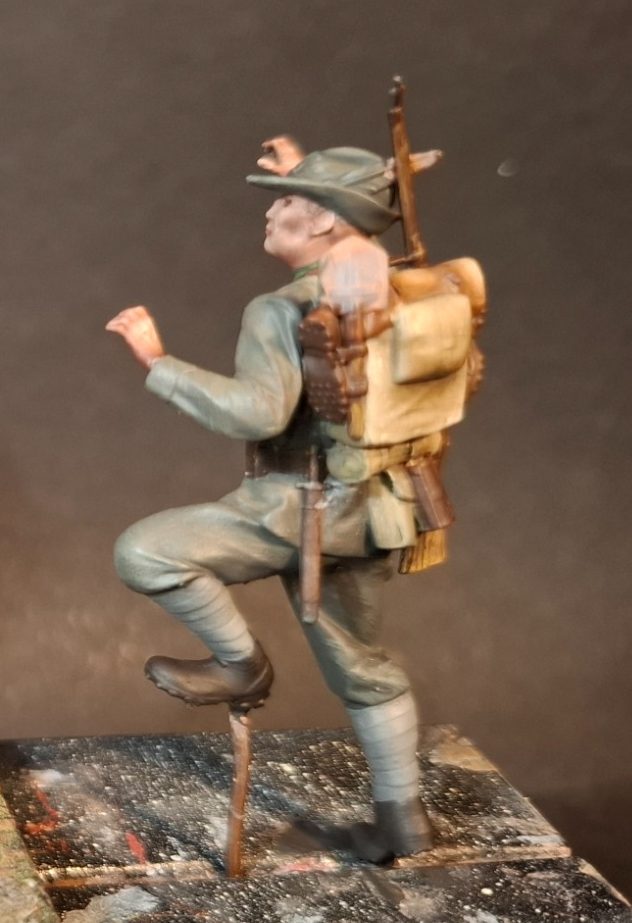
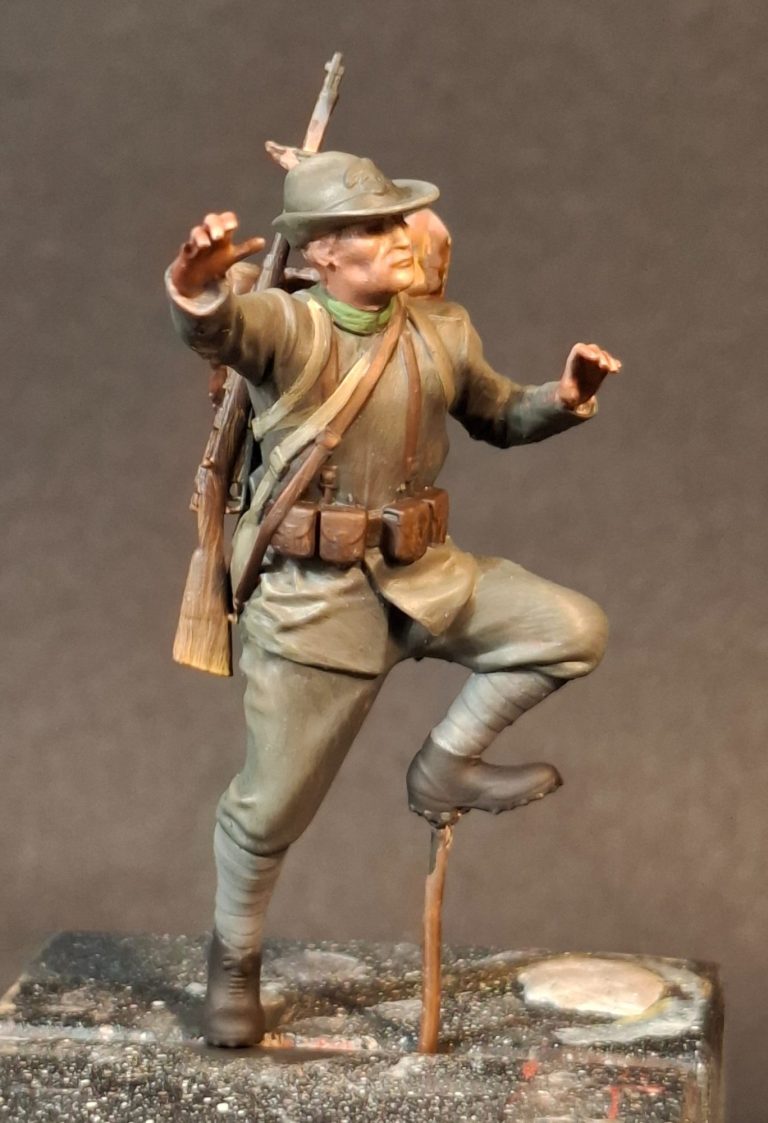
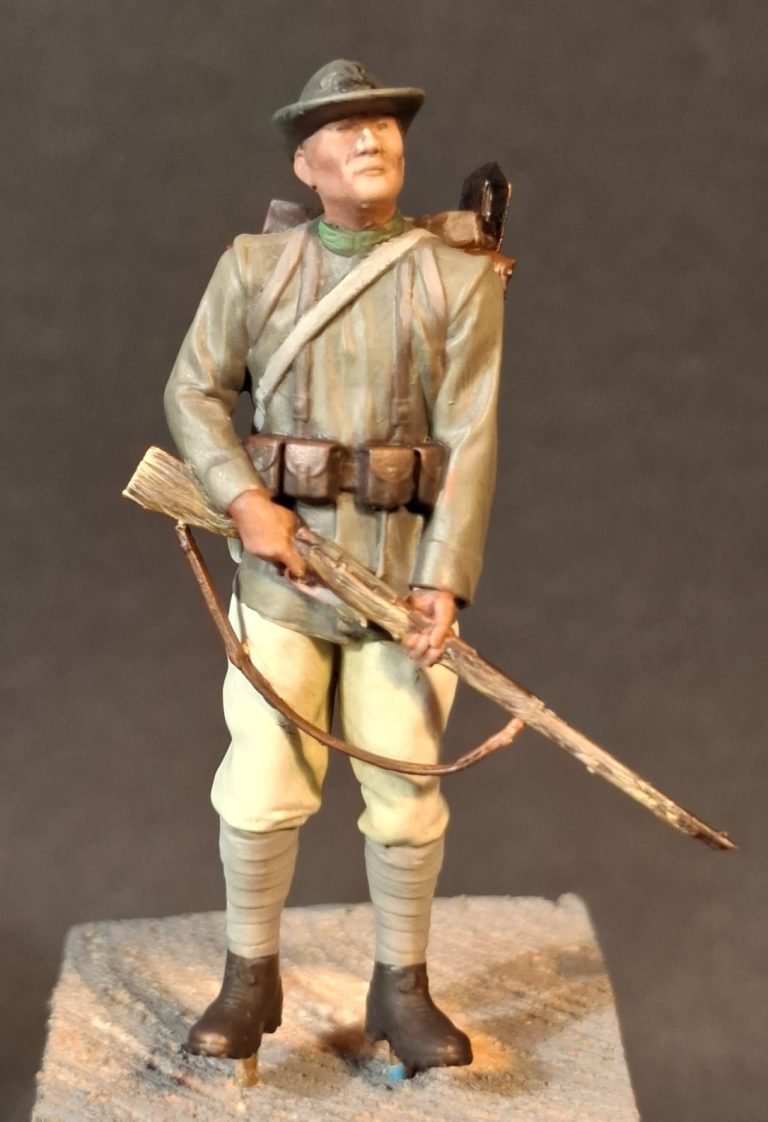
Photos #49 through to #54 show the figures completed and dried; ready to have final details like the eyes painted and then they'll be ready to be added to the diorama once I’d worked out where they needed to be.
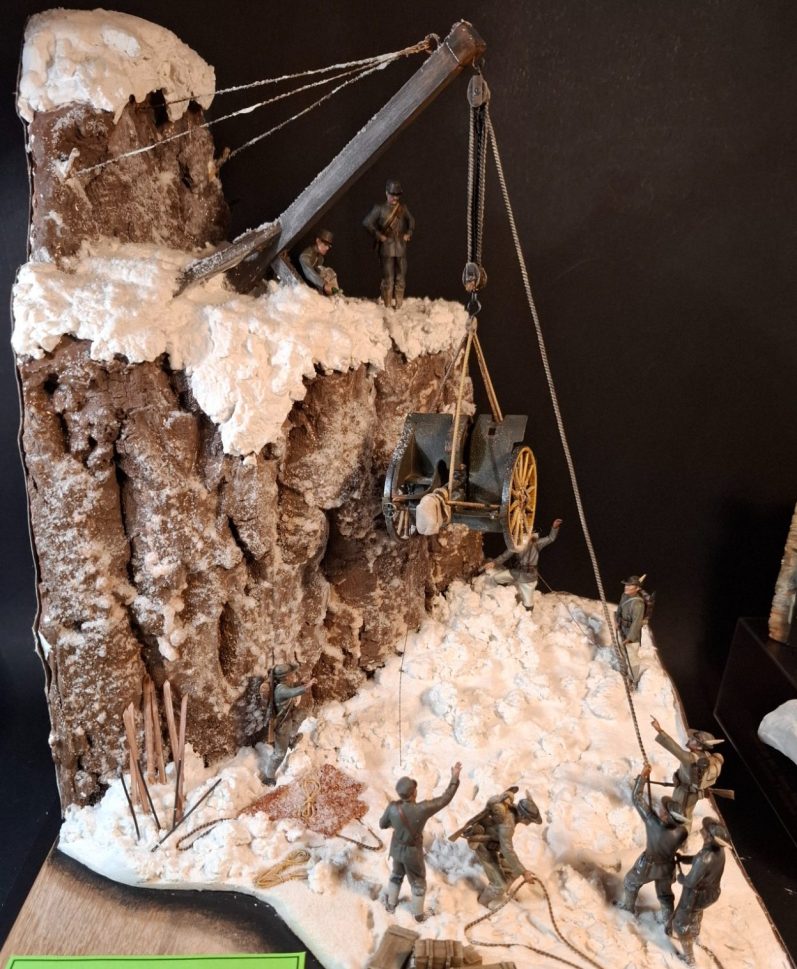
The original diorama has two of the figures climbing the cliff on the left hand side. These would have to be repurposed, as the cliff is much too high for the ladders ( which although pictured on the box art, aren’t included in the kit ), and the figures would have either abseiled down to the lower level using a rope attached to the crane, or more likely got down using ropes that are off to one side of our scene.

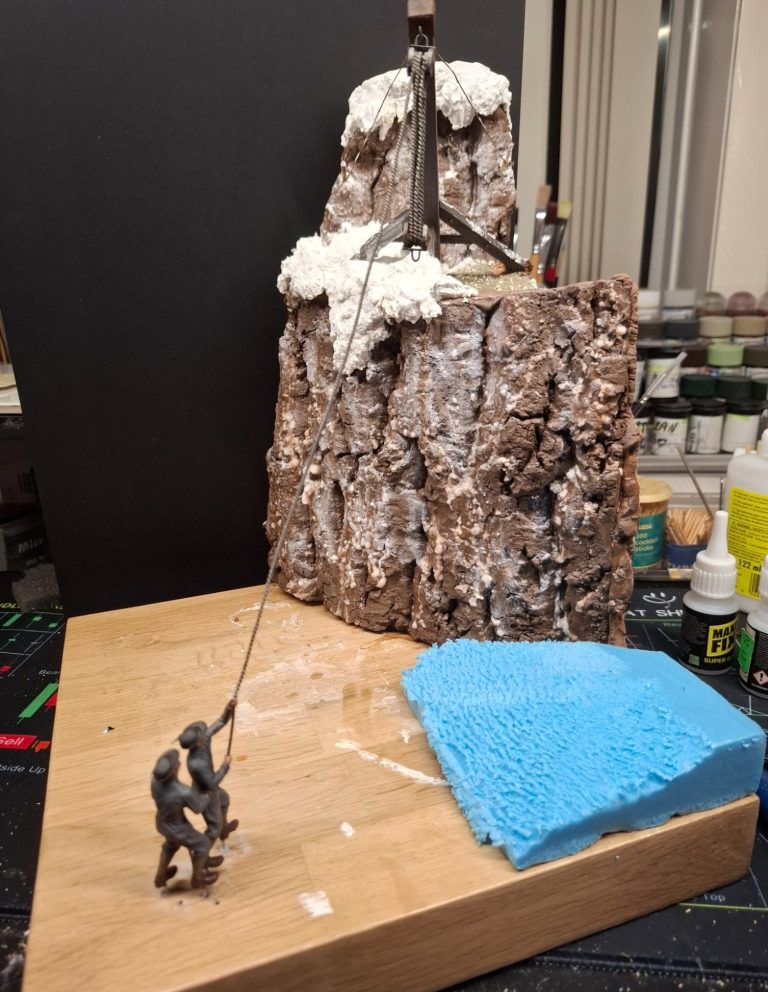
Beginning the figure placement
With all eleven figures completed, I could begin to plan the order in which I would add them to the groundwork.
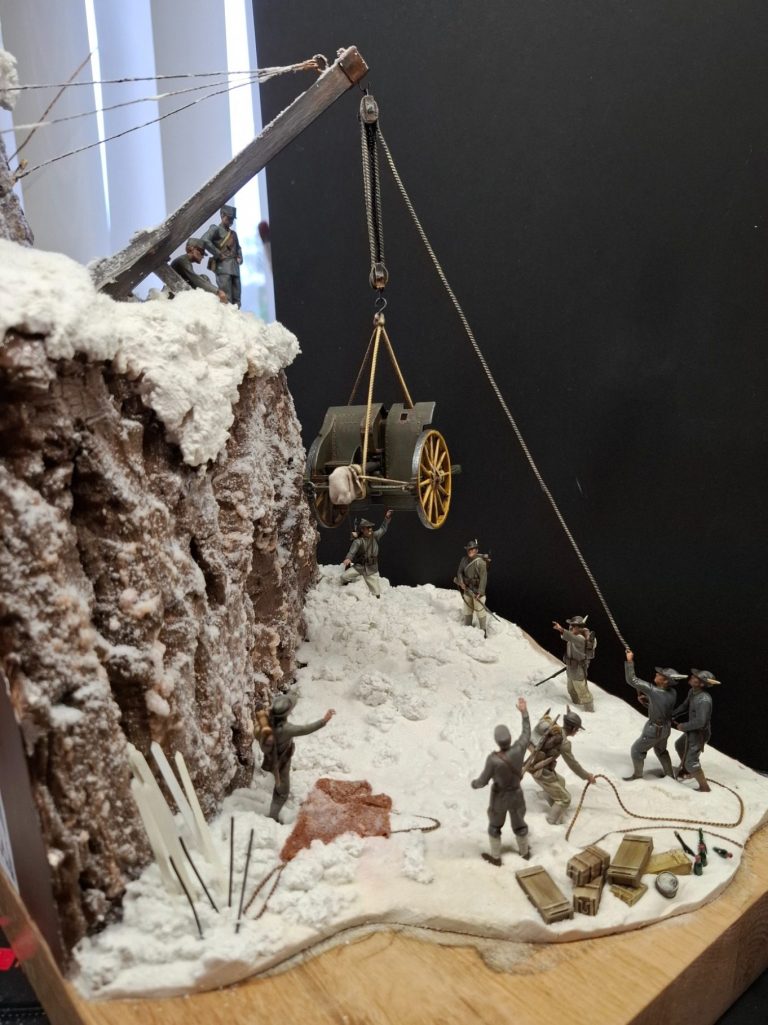
To get any diorama to work, there has to be a story.
There must be a focus, in this case the lowering of the cannon with the crane, and so there need to be some tracks near the crane on the upper level for where the cannon has been pushed over the edge to be supported then by the lift ropes.
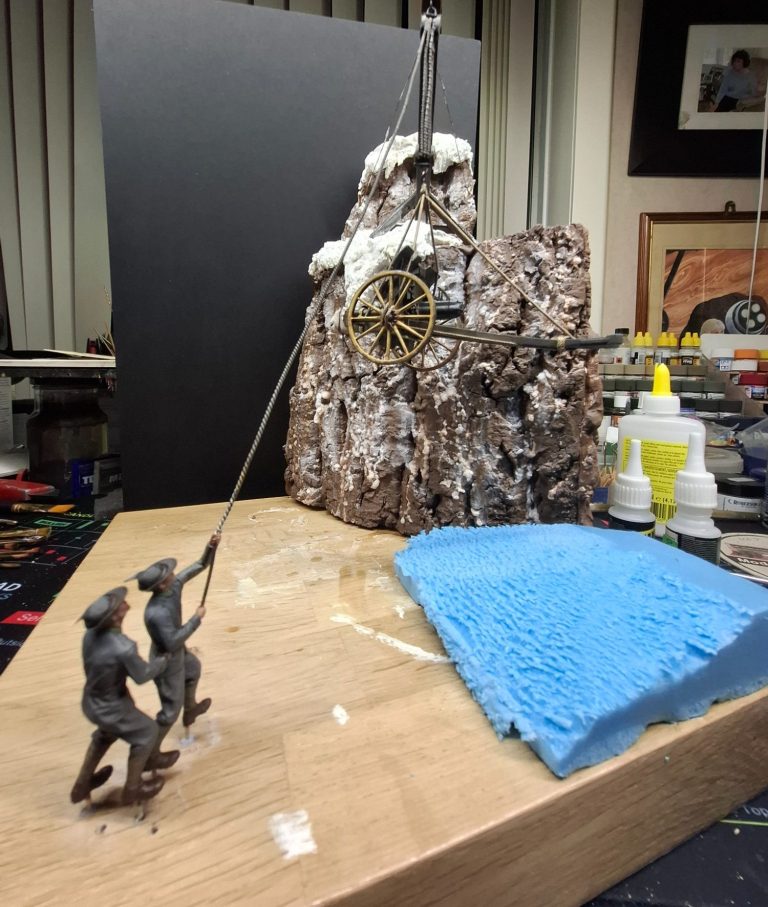
The figures have to be focused on what they are doing, so the first thing to do is to set the crane jib into the side of the cliff, then fasten the lift gear in place.
The placement of the figures would have to be done in a set order too, adding the two guys that are controlling the rope lowering the cannon first. See photos #55 and #56.
A figure that on the original diorama, stooping over to offer a helping hand to the two figures that are climbing would be repurposed to be leaning over to pick up the tail end of the rope to give the initial two figures help.
As I needed to cover the block of blue insulation that is off to one side of the diorama, I needed to add some “walls” to contain the filler that would act as snow in that area. I’ve done this using thick card as seen in photo #57.
You might have noted that the two figures already in position are hovering above ground level. This again is to allow space for the thickness of filler to be added under and around their feet.

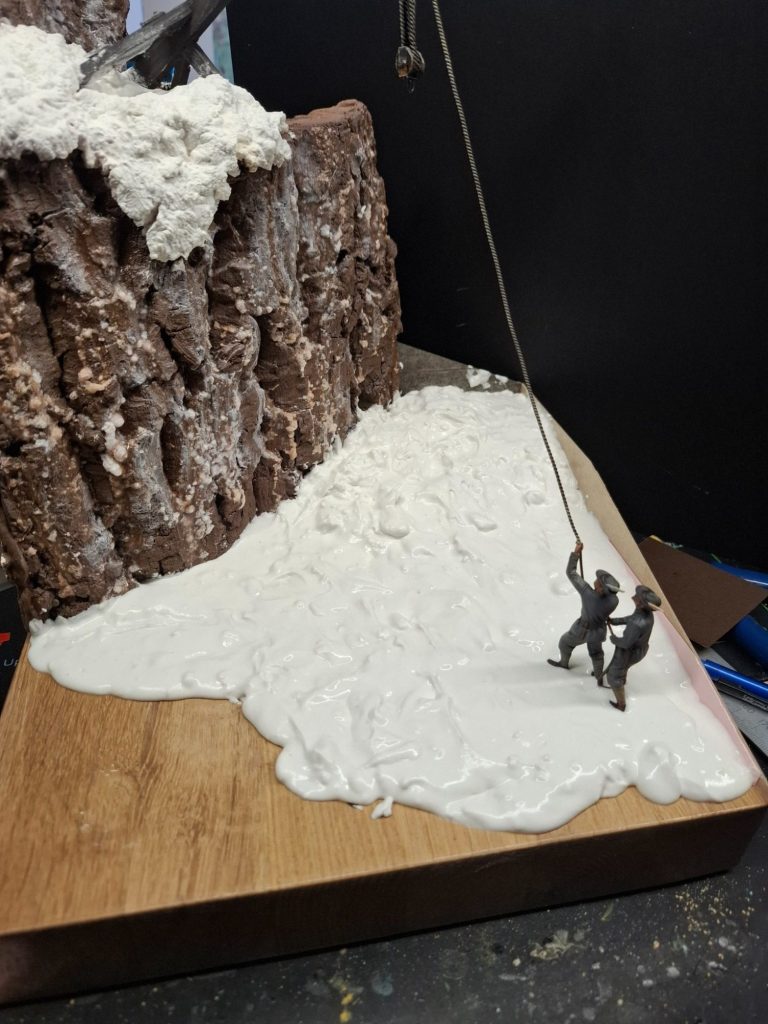
Photo #58. Although the snow that has melted and fallen from higher areas of the cliff needs to be rough and broken up, the rest of the snow on the lower section of the diorama needs to be relatively smooth.
A little water added to the ready-mix filler allows it to be added and with a little prodding and poking, flowed around the two figures in place, and eased up to the cliff face, the “walls” on the edges and down to the foreground.
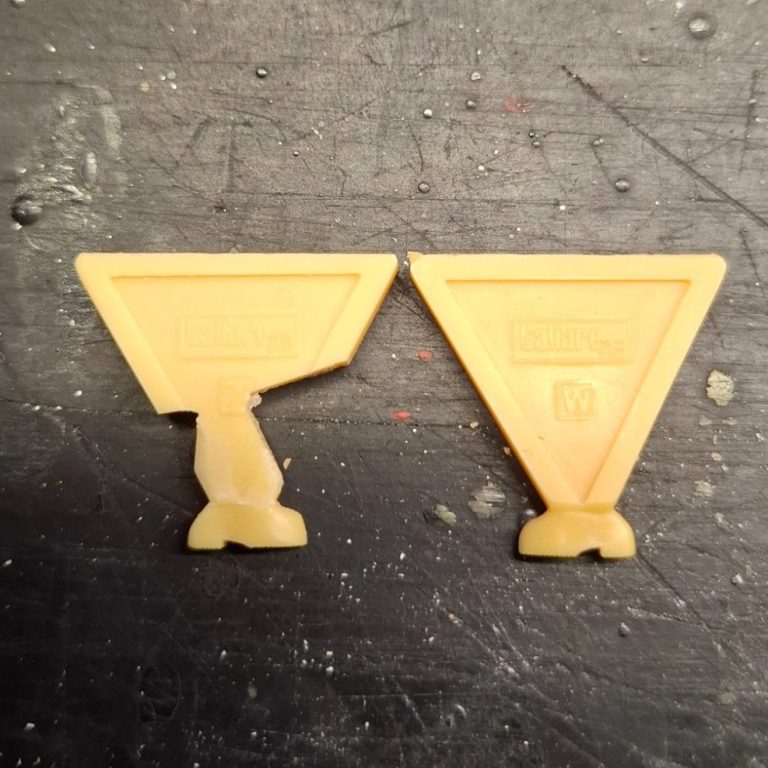
This “wetter” filler needed a bit longer to dry, and I couldn’t fit the diorama in my drying cupboard. Once the filler had become quite firm, but not fully dry, I used these useful little boot print tools ( photo #59 ) to make footprints where the soldiers would have walked onto the scene from the right, moved back and forth as they unloaded supplied that were lowered to the ground level before moving the cannon and also around the area where the two soldiers were holding the rope to lower the cannon now.
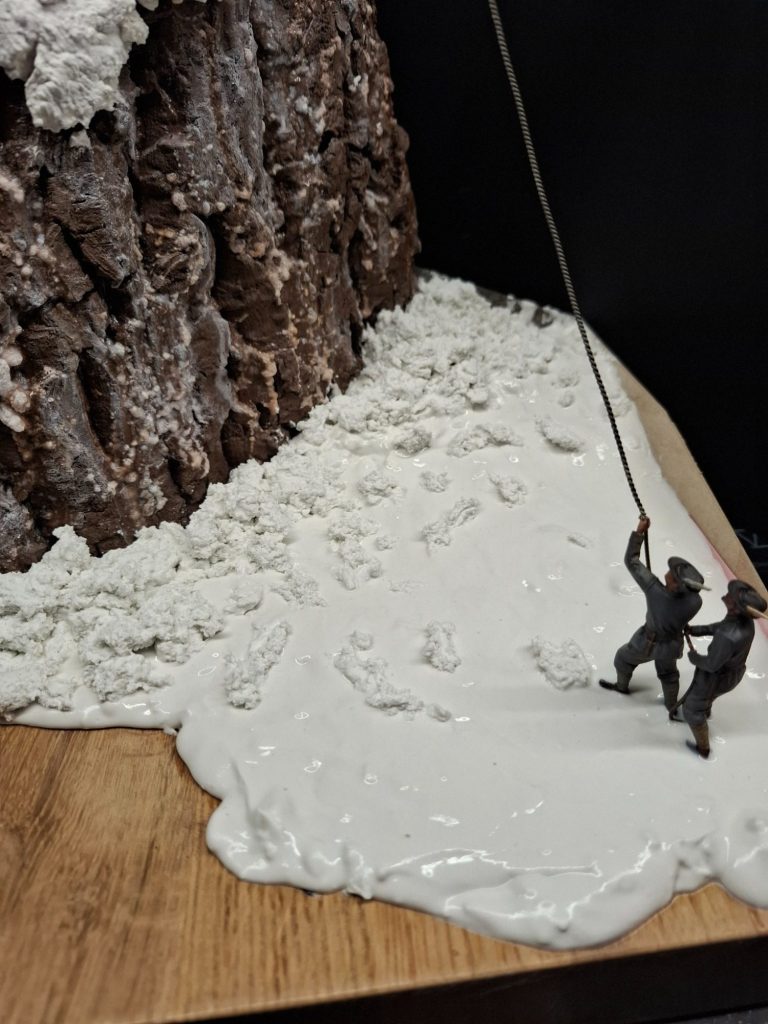
This was done after photo #60 was taken, and you can see in this shot, the smooth surface that logically could not exist if men had been moving back and forth in that area.
Photo #61 and some snow added to the upper level where the cannon has been pushed of the cliff to be supported by the crane.
Wheel ruts have been made in the snow first to show where the cannon had been moved, and then, because there’s going to be two soldiers up on that level, more boot prints were added, some crossing the wheel ruts, as they would when the men moved about as the cannon load is no longer under their control.
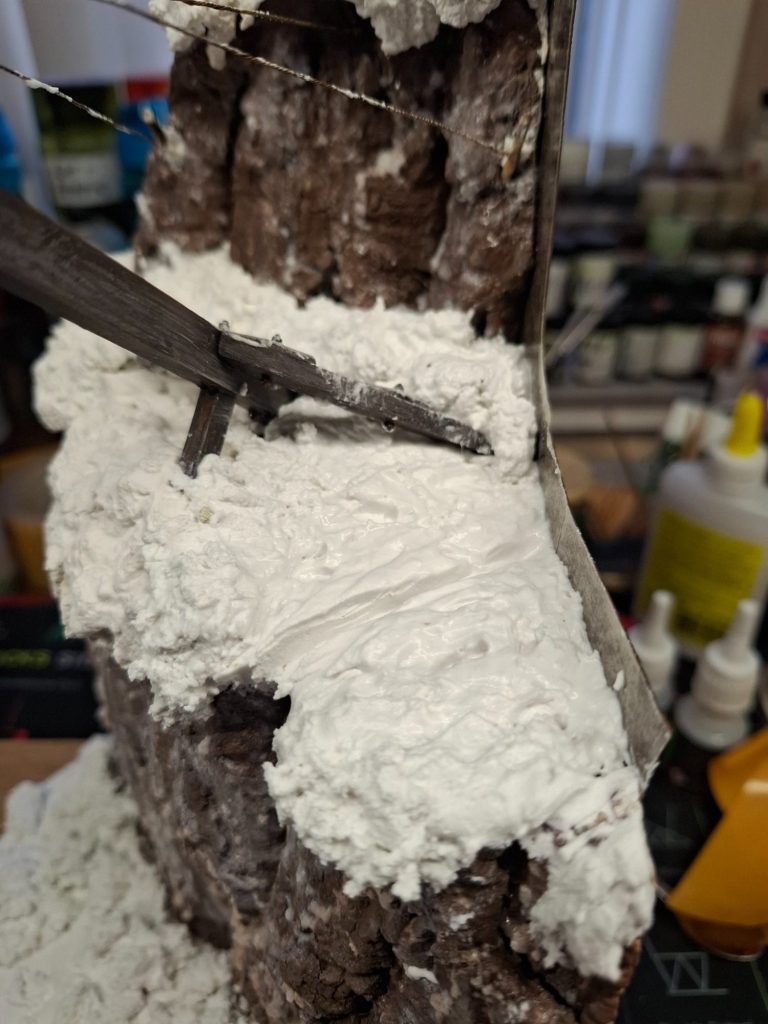
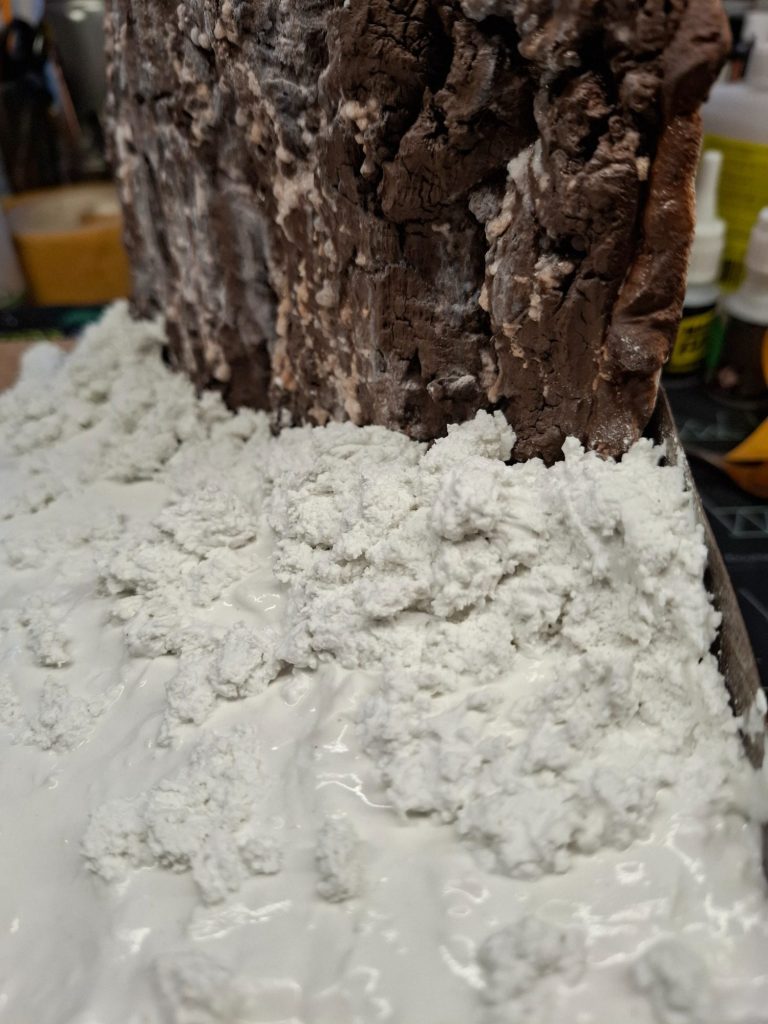
Photo #62, and as the cannon was pushed off the cliff edge, some amount of snow has been disturbed and fallen to the lower level, this is more of the clumped filler that mimics the snow that has fallen. Note also that I’ve added the melted and refrozen ice effect to the cliff face.
I thought I might add some frozen puddles to the lower section, and to make the icy surface of these I stretched cling-film ( saran wrap ) across the top of a mug, making sure it was tight and similar to the upper surface of a drum.
Thick superglue is then spread over the central section of the cling-film, and sprayed with accelerator – Photo #63.
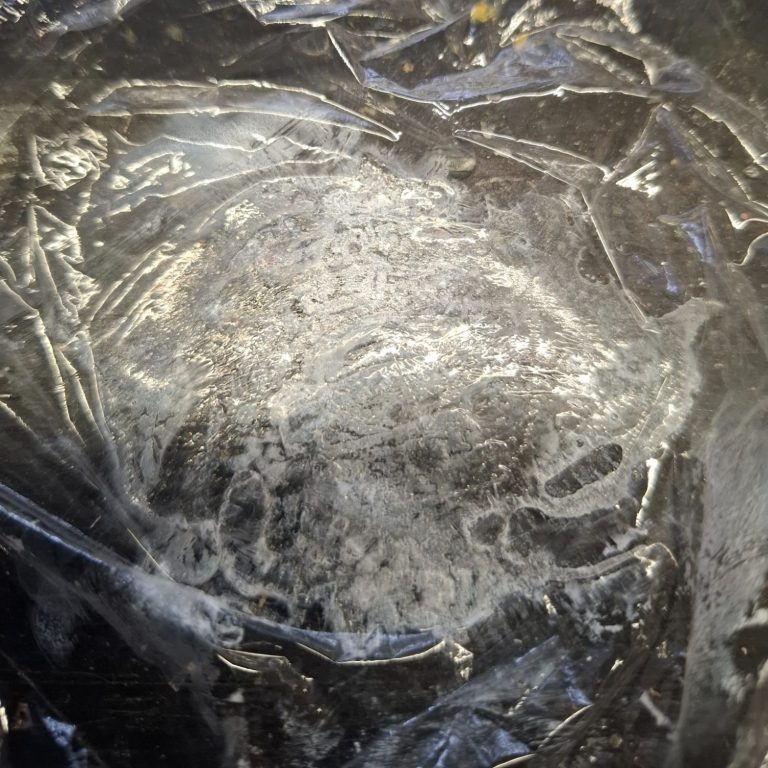
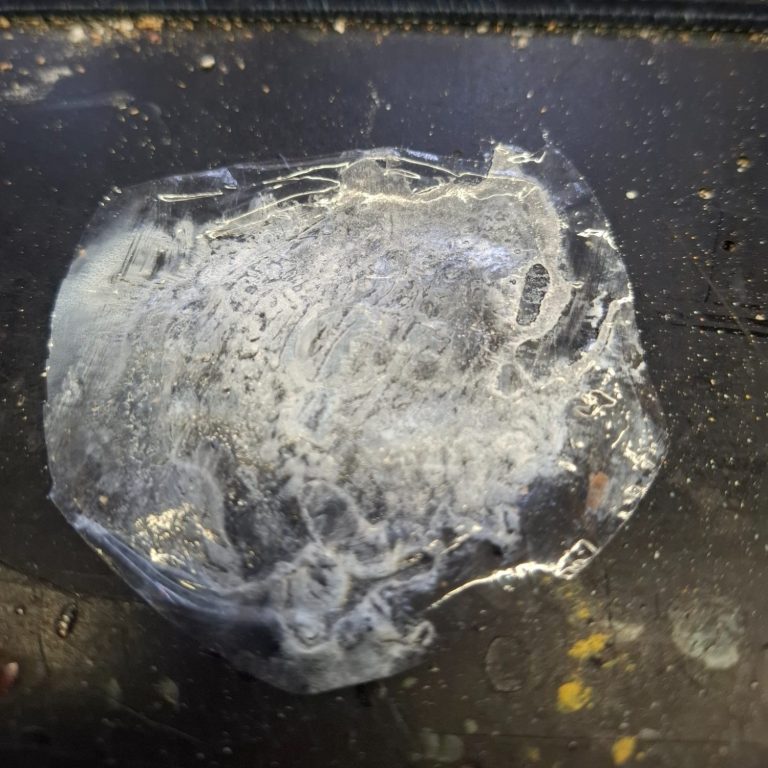
Photo 64. The swift curing of the superglue on the cling-film looks like the surface of a frozen puddle when trimmed and turned upside down.
In the event, I didn’t make any puddles, but I thought it was worth mentioning the method.
Adding more figures.
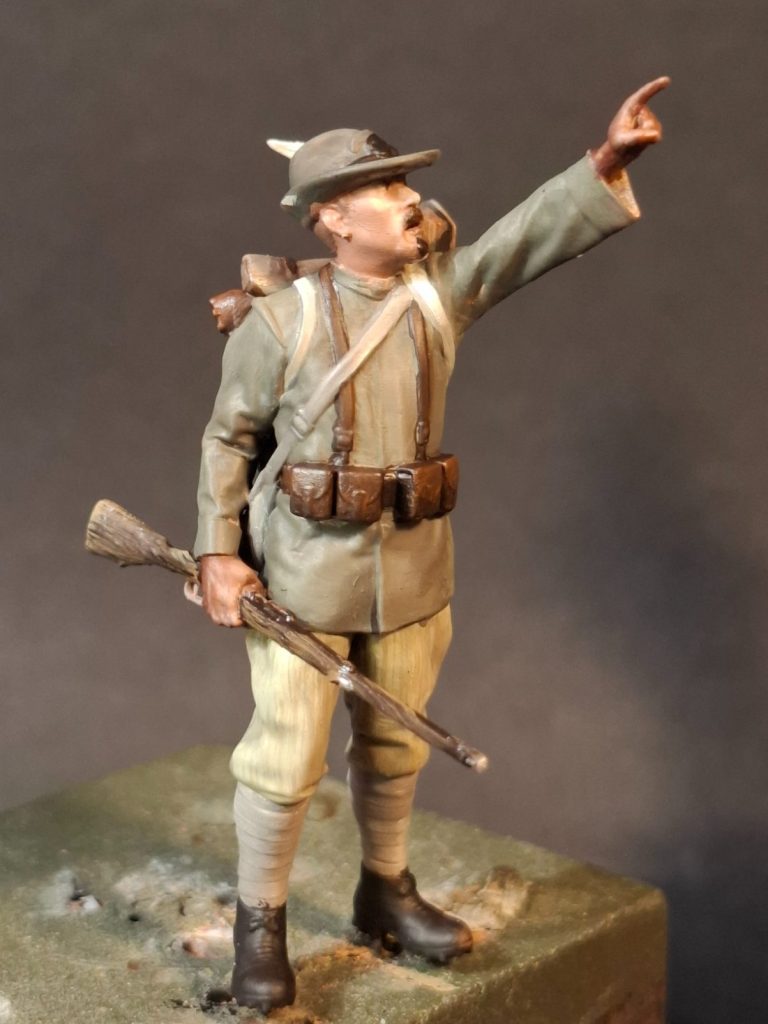
Photo #65. The next figures would be the two officers, one standing up on the cliff by the crane, overseeing the operation, and one on the ground looking up and directing things.
The seated man would still be on the upper cliff, but he would be releasing one of the tag-lines that is attached to the cannon, and the two figures that were climbing up the ladder ( which isn’t included in the kit ) on the original diorama layout, would somehow be positioned on raised sections of the lower cliff face, reaching up to steady the load.
Two further figures would be standing on the lower ground level, watching from a relatively safe distance, ready to assist if necessary.
The final figure, which is another almost seated figure, would be on the upper cliff, bracing himself against part of the crane structure, and looking over the edge, again watching the operation, but who’s job was to help control the cannon as it was pushed over the cliff edge, and is now waiting to see that it gets safely to the ground level.

As things developed, I didn’t use this last figure – he’s gone to abseil down the cliff as his job up top is complete.
in fact I couldn’t find space for him to be leaning on the crane frame and be looking at the cannon being lowered, and I didn’t want to “force” his placement and make his inclusion seem to be an afterthought.
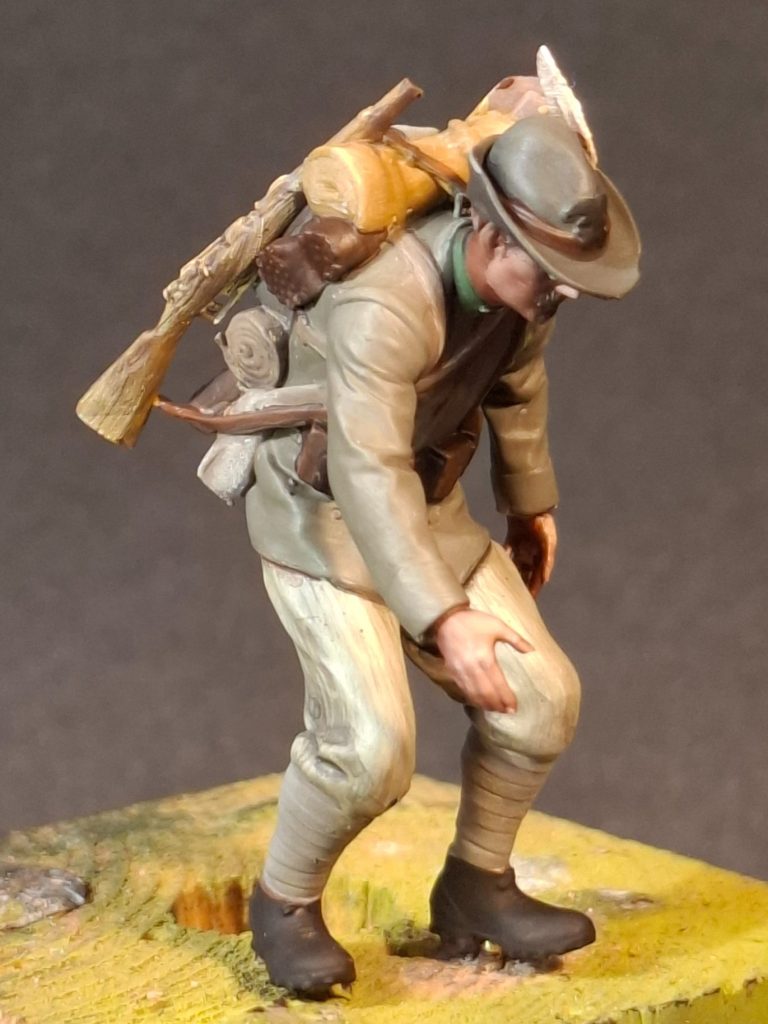
Photo #66 These are alpine troops, and I like adding little details to a scene where possible, so a few sets of skis and ski poles seemed like a simple thing to make. Some thin plasticard cut to size and the tips bent up, some short lengths of appropriately sized wire, and a quick look on Google to see what colour skis were in the second decade of the twentieth century – Wood colour as it happens.
Photo #67 shows a pile of wood boxes that could contain ammunition, food and other supplies, there’s a few bottles of wine or spirit to help keep the men warm in the frozen conditions.
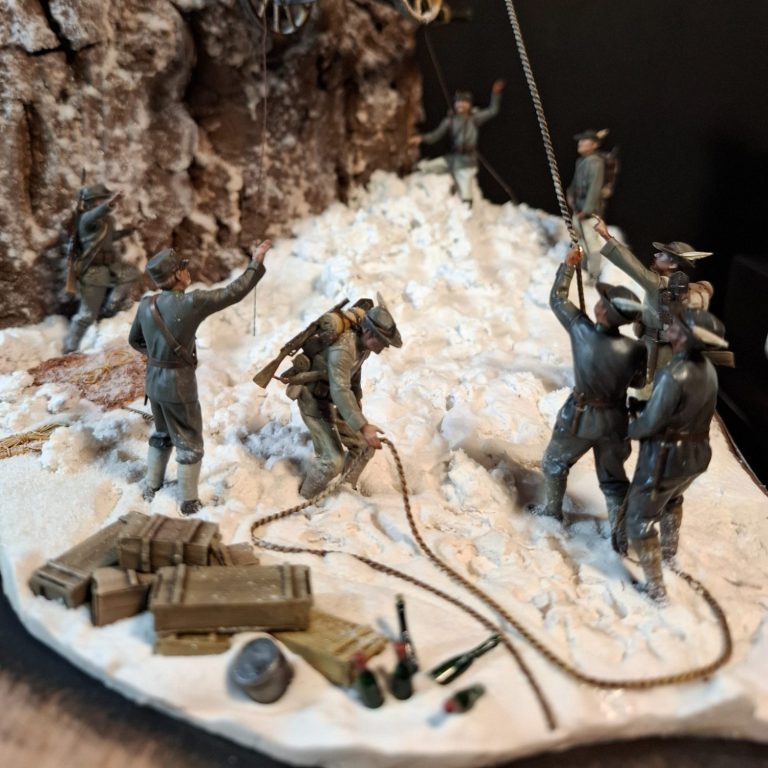
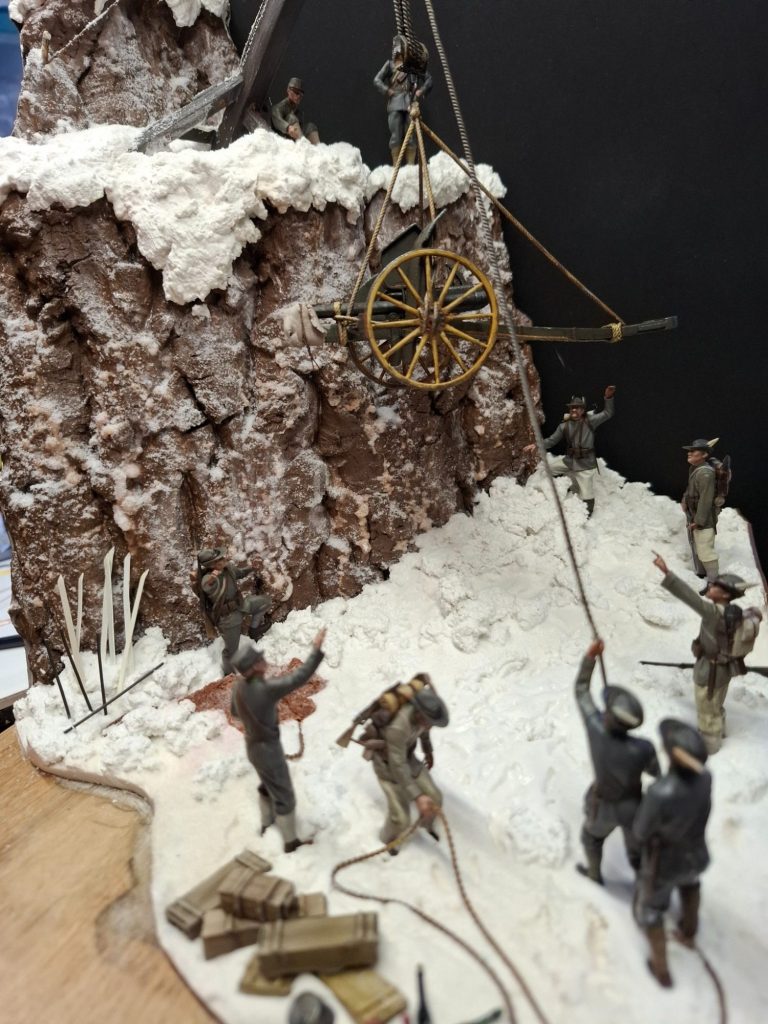
Photo #68 and the scene unfolds, but a problem surfaced too. The extra water I’d added to the “snow” on the lower level had affected the wood where I’d trimmed the snow back once it had almost hardened.
To fix this I had to carefully sand the affected area and apply some paint to cover the worst of the damage.
Also in this picture, I’ve sunk the figures feet to different depths in the snow, hinting at uneven ground beneath.
The boxes of supplies would likely have been placed in a large net to lower several pieces at t time, rather than slinging individual boxes and lowering them one at a time – too much time wasted doing it singly, and pictures show this being done, plus it’s also documented as to how ships etc were loaded with smaller items, and to some extent is still used in practice to present day.
So the folded and discarded net that the soldiers have used in this case is shown next to the skis, and has some ropes lying around it showing how it was attached to the crane.
Photo #69 shows the whole scene, I added two nameplates, the main one on the front of the plinth, and a second one on the left-hand side.
The client also wanted two further figures and a Mule that he had discovered and managed to buy added to the diorama. These would be positioned, according to my initial planning, to the left of the scene on the lower ground area, ready to help drag the cannon to where it was needed next.
I wasn’t going to receive these figures until meeting the client at SMC, but I wanted to include the diorama in the competition at the same show, so a space had to be left for the Mule and it’s two attendants in the appropriate area.
To allow for this and to disguise the fact that a space was “vacant” I added a temporary nameplate to their future location – sneaky of me, I know.