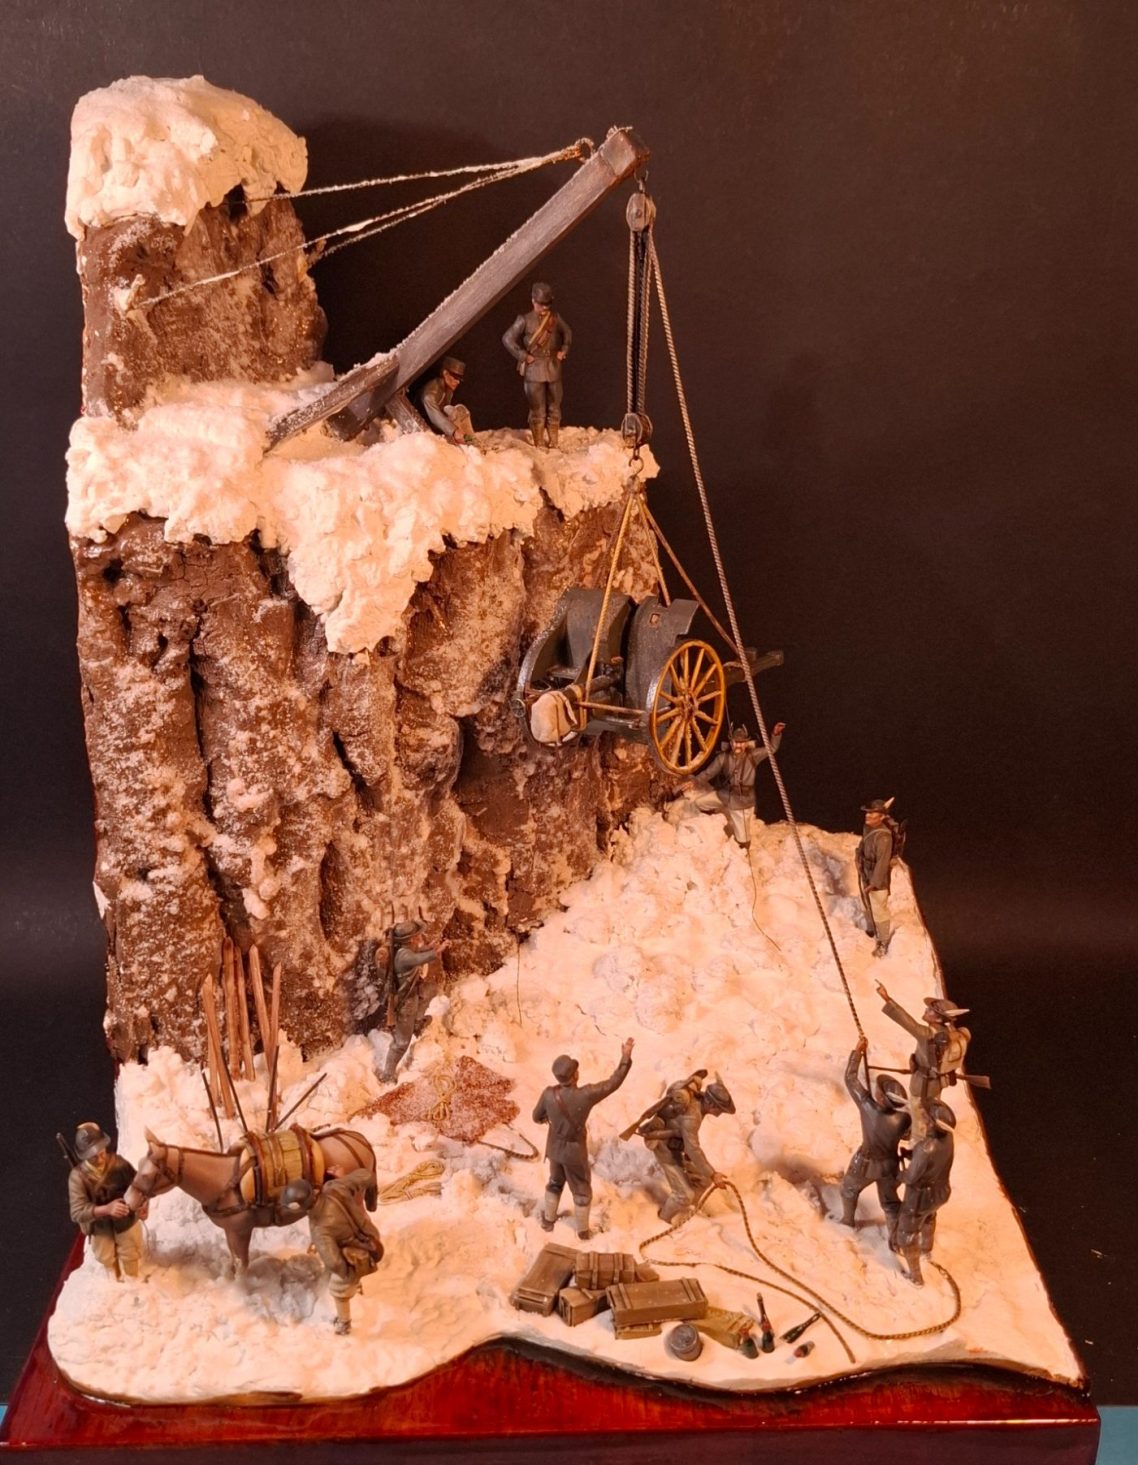
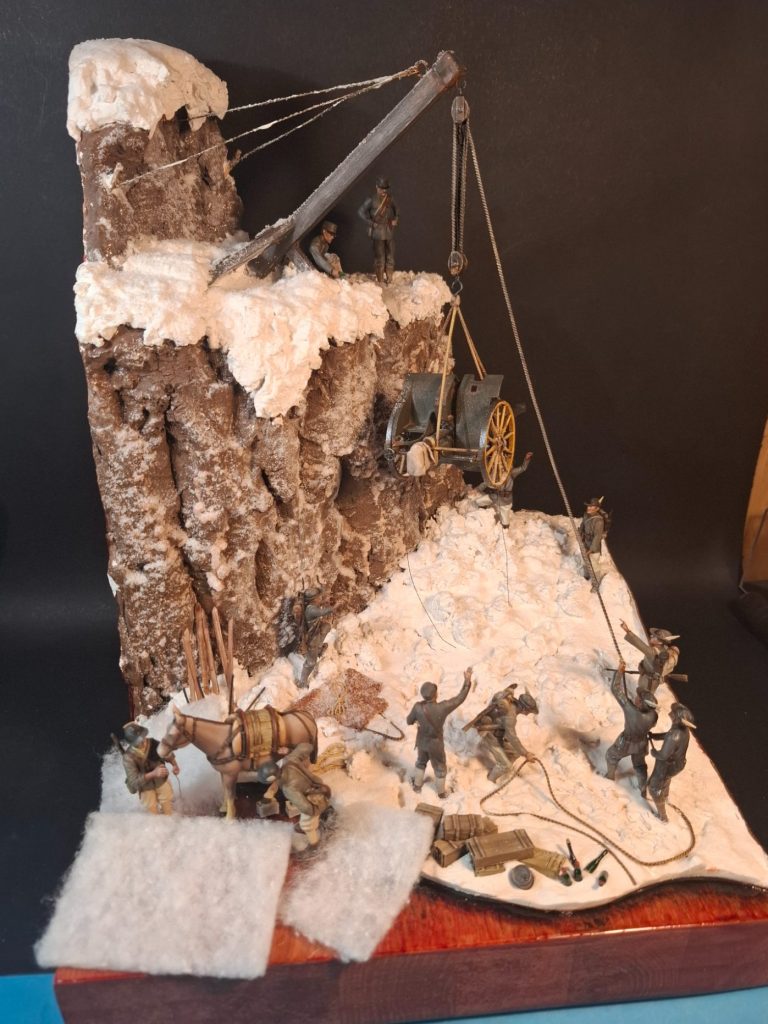
Italian 75mm Cannon and Crew in an Alpine setting
Part 4
1/35th scale 3D printed kit from Art Station
Assembled and painted in 2025
Other additions prior to that though.
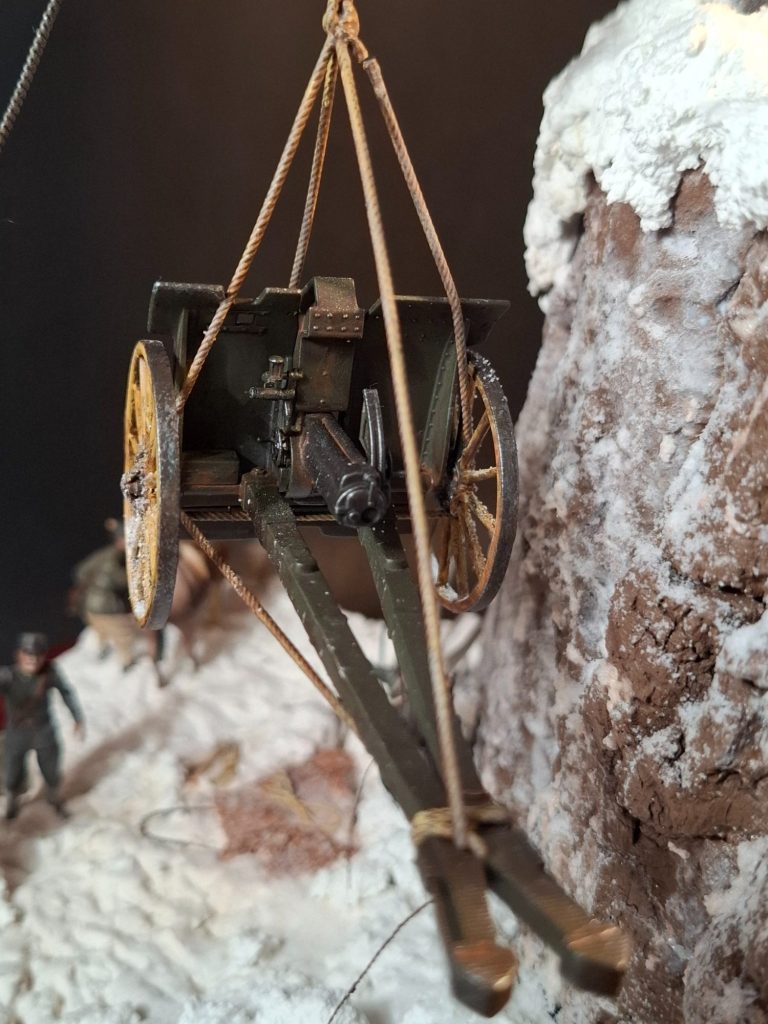
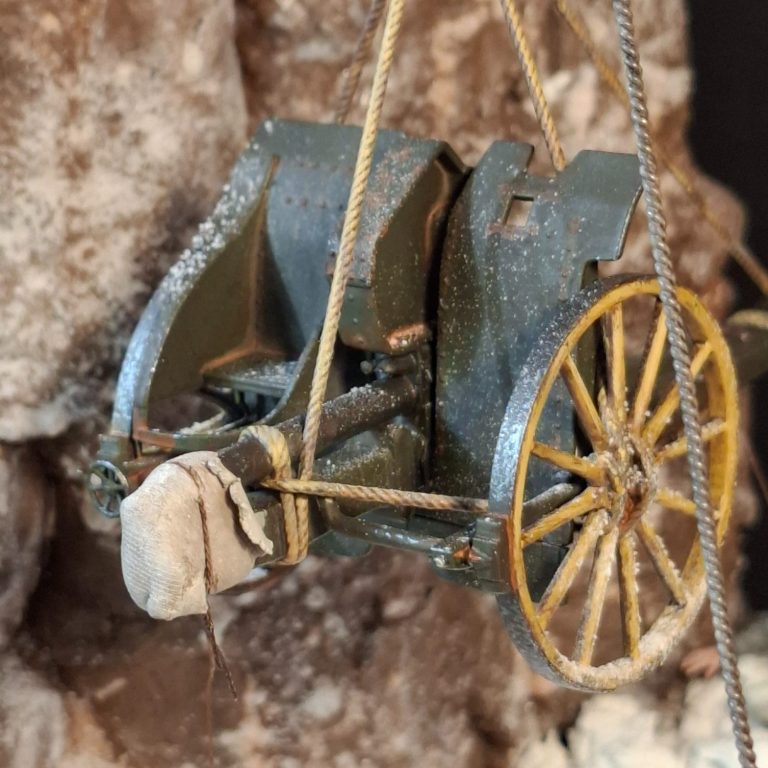
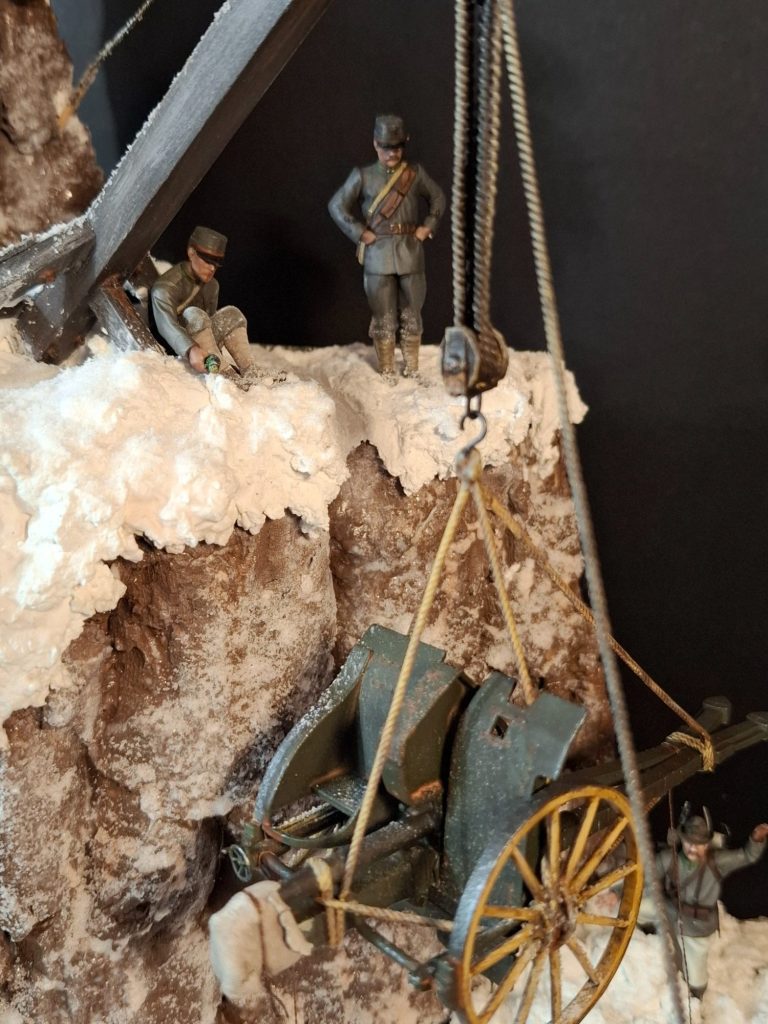
Some snow scatter added all over the groundwork and some to the cannon and jib to hint at recent snowfall and frost.
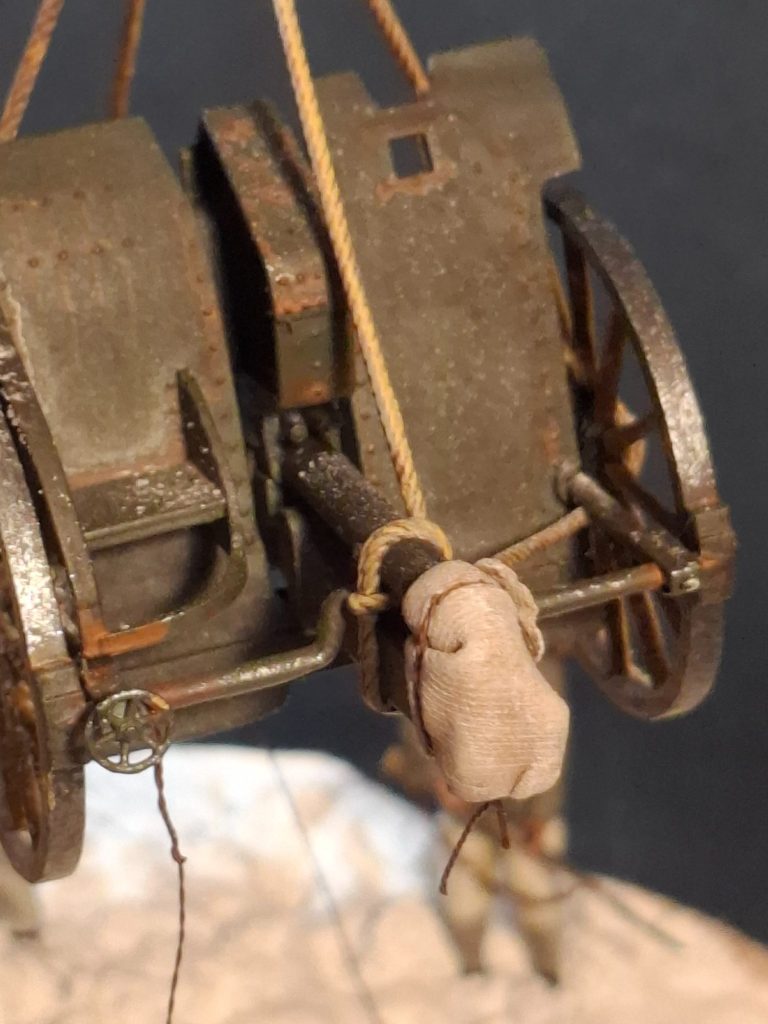
Photo #70. A cover for the open end of the cannon barrel, again my references show this, and it’s simple enough to make with a piece of rolled out putty and some wire to look like the string fastening the cloth in place.
Mule.
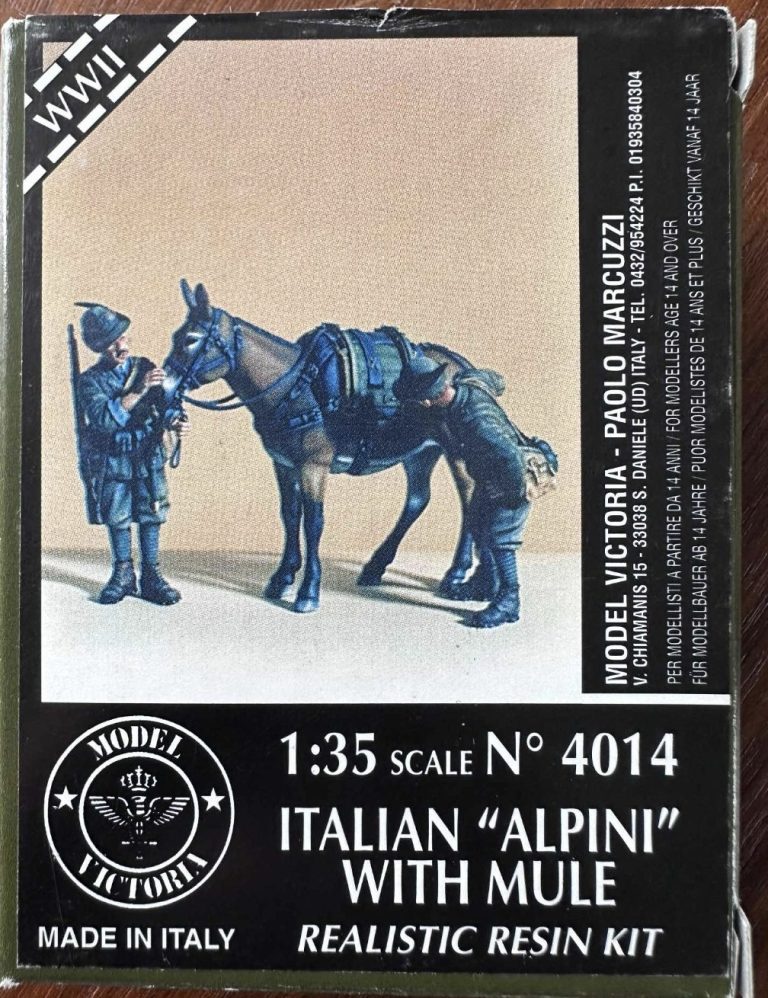
Model Victoria make some nice little figure and accessory kits along with a selection of AFV models.
My client had found this offering of a Mule and a couple of Italian Alpine troops, and although probably aimed at the WWII period, there seemed to be little if any change to the uniform or equipment. The box art is shown in photo #71.
I get the feeling – although I may be incorrect – that the Model Victoria figures in this kit are sculpted in a traditional manner, rather utilising 3D sculpting, and because of that the details are more defined and a little easier to paint when it comes to areas like the puttees.
The resin used to cast the figures is still a little soft, and I managed to snap an ankle on the figure holding the mule’s reins.
No matter, there’s plenty of deep snow to hide his amputation.
Photo #72 shows the mule part painted, and I looked up references for Italian Alpine mules – and yes, there’s images of them on Google – and they seem to be lighter colours than I’d imagined.
Glad I checked then.
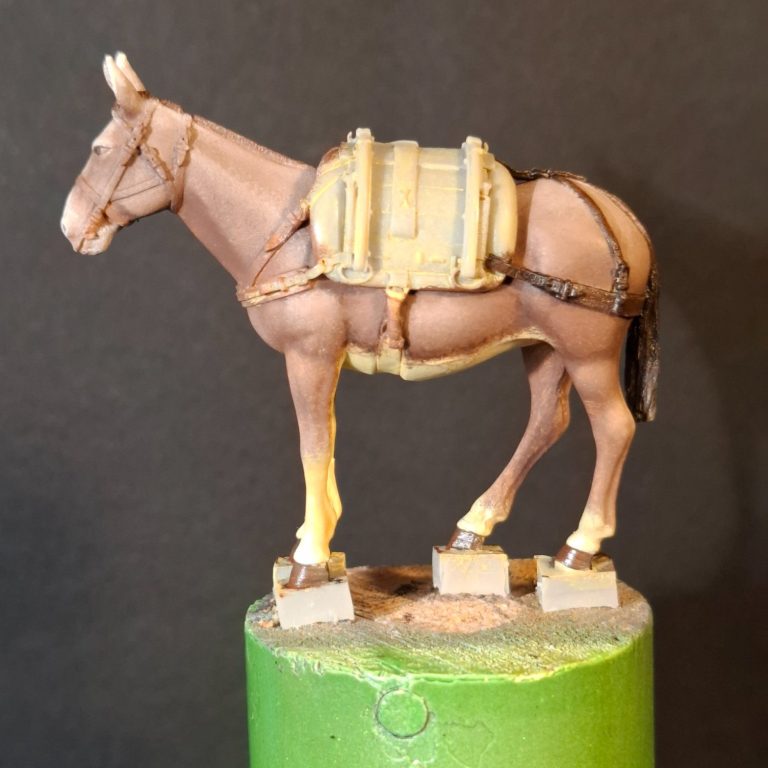
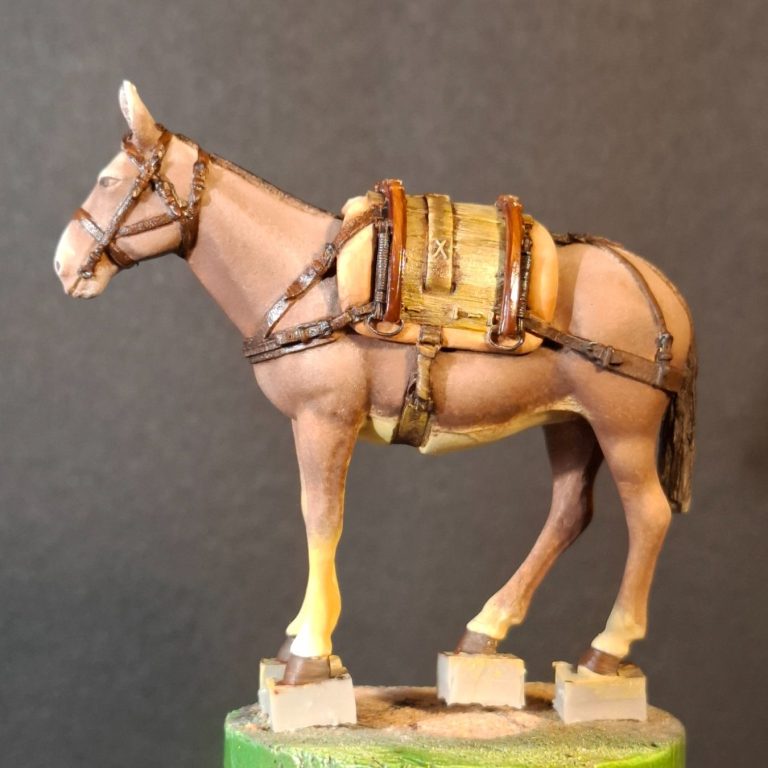
Photo #73 and the mule’s finished, the two figures being painted in very similar manner to the initial Art Station eleven, so no real need to mention anything about them really.
Varnishing the plinth.
I’d used a fairly pale coloured wood for the plinth, but the client asked that future bases be stained a darker colour.
Easy enough to do that with a little Teak coloured varnish, so this left me waiting while the varnish dried before I could set up a test shot of where the donkey and two handlers would be, and see what the client thought – whether they detracted from the scene, or looked like they fitted in.
Once dry, I wasn’t really happy with the Teak colour, I felt that maybe the wood plinth should be even darker, so two further coats of a Dark Oak stain was added which looked a lot better.
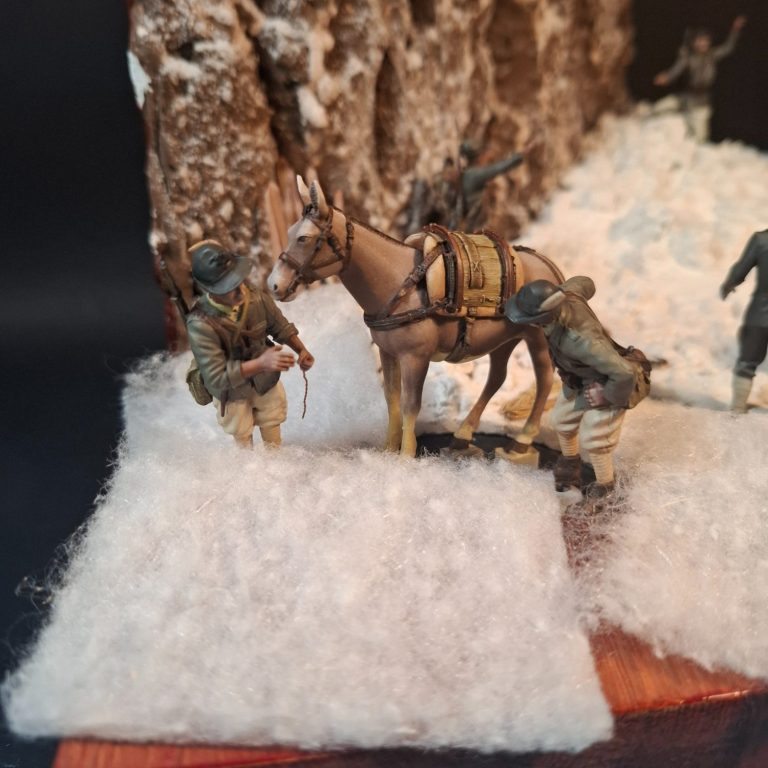
With that varnish fully dry I could test out the pose of the mule and it’s handlers – photo #75. I used some cotton wool to double as the snow ( well, it’s coming to Christmas time as I do this, so whilst it does look like an old style Nativity scene, it does the job ).
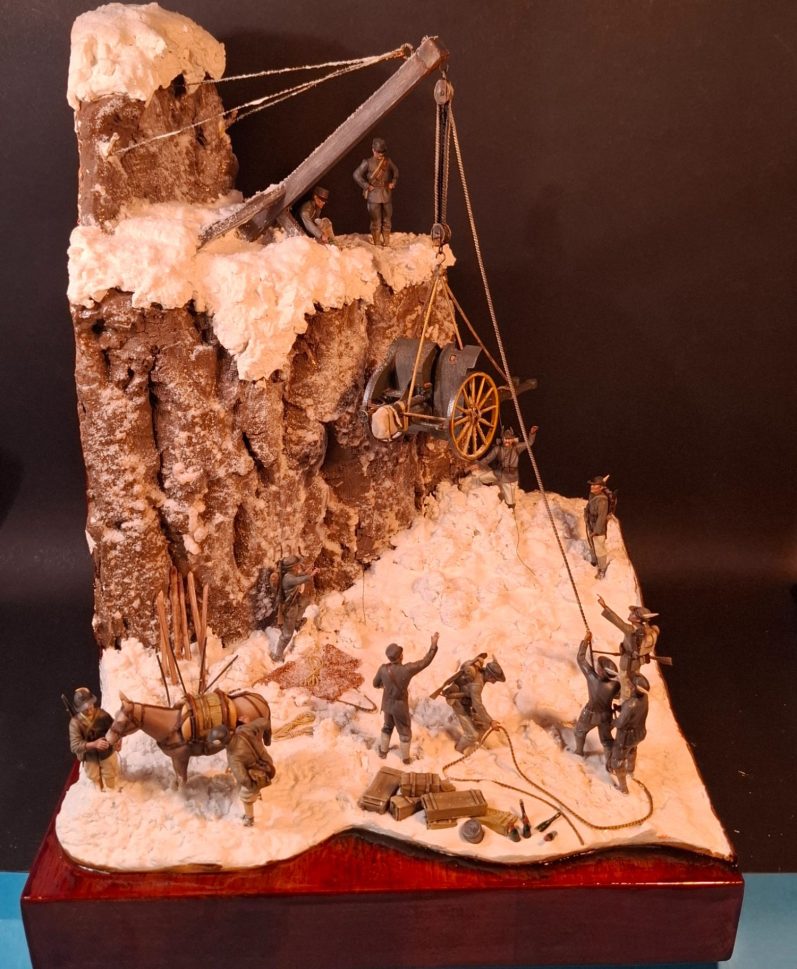
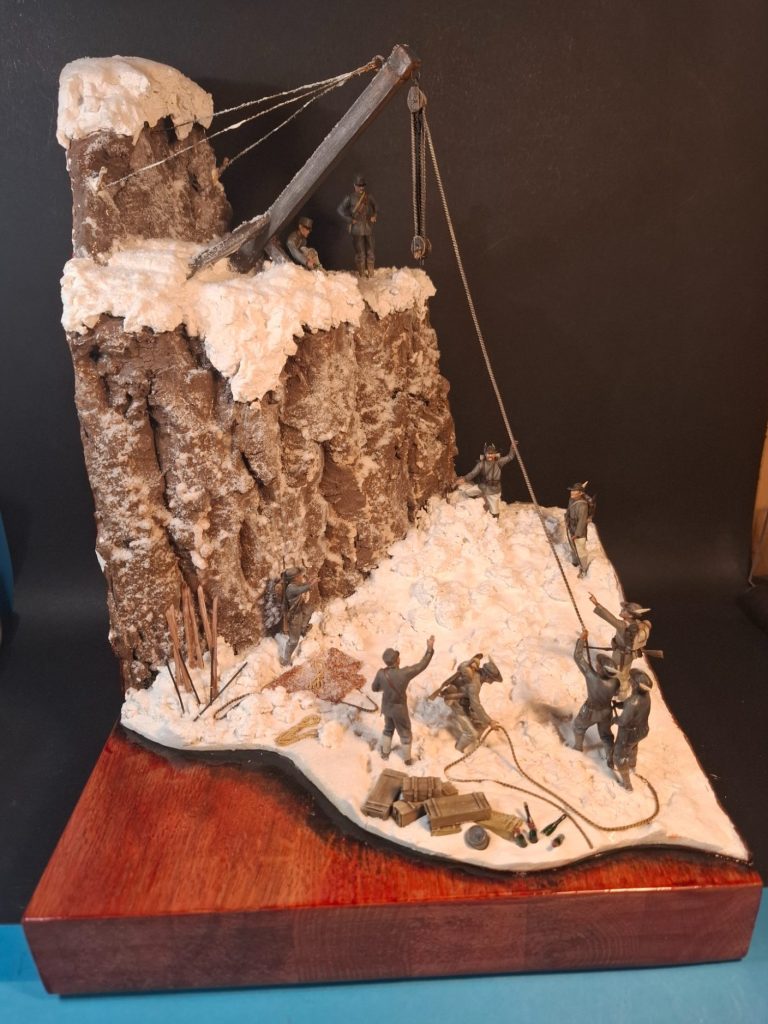
Photo #76, stepping back to look that the scene overall and see if the mule “fits” the narrative, and yes, I think it fills that corner of the diorama very nicely. Whilst it does give a small side story to the diorama overall, I don’t think it pulls the viewer’s attention away from the cannon and the action happening in the main focus of the scene.
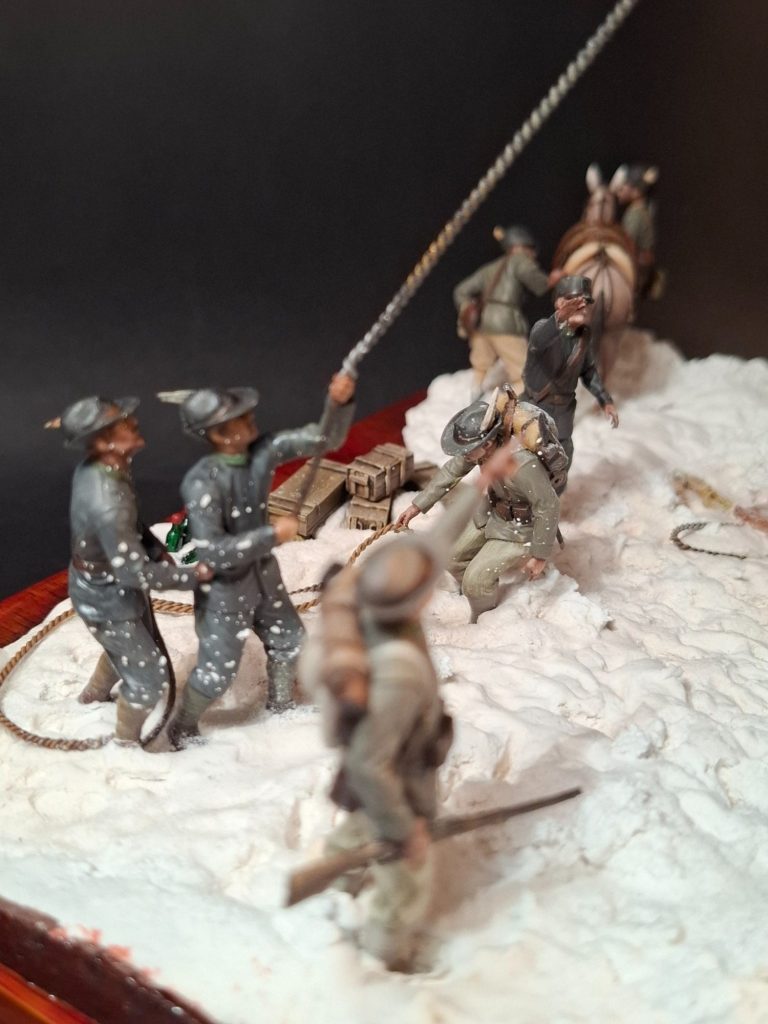
Photo #77, shows the proper “snow” added and the two figures along with the mule settled in to complete the model.
Final thoughts
Alright, my coverage of this model has been long-winded, but in truth, whilst I have made changes, I still maintain that the basic model is really great.
In all fairness, most people probably wouldn’t notice the points I made about the cliff not having anywhere for the cannon to either come from, or go to on it’s upper reaches, and that the crane is located in the wrong place.
But changing that isn’t difficult, or for that matter particularly costly.
Yes, it does require a larger base, and yes it’ll not be particularly quick to do, but it is enjoyable.
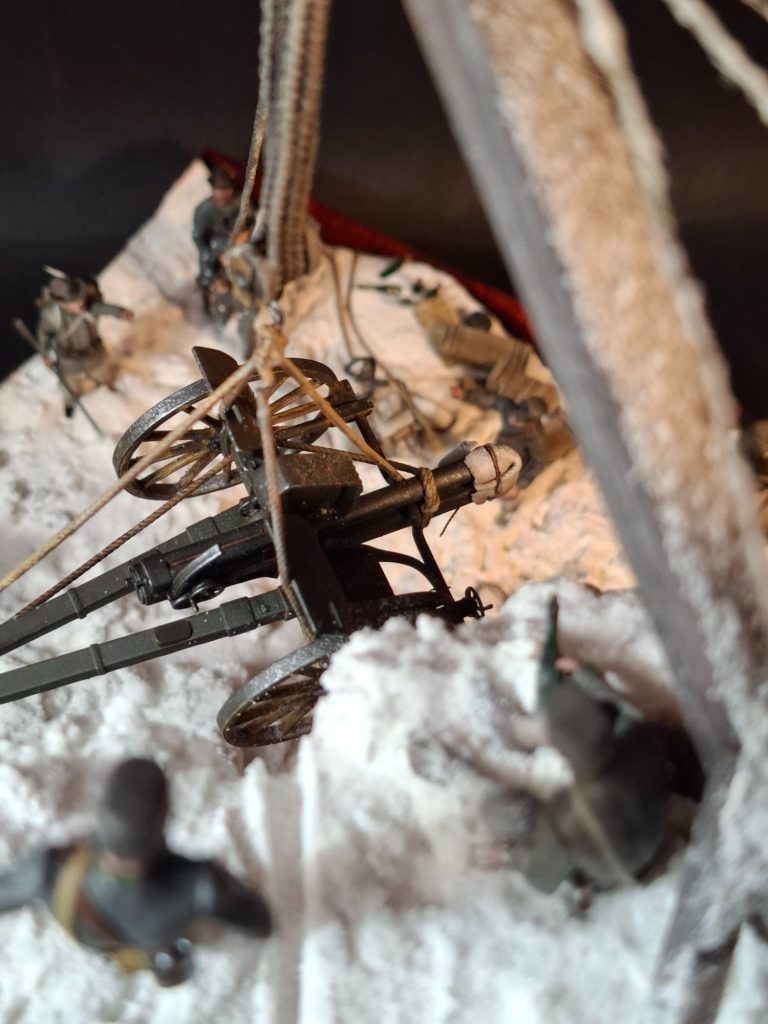
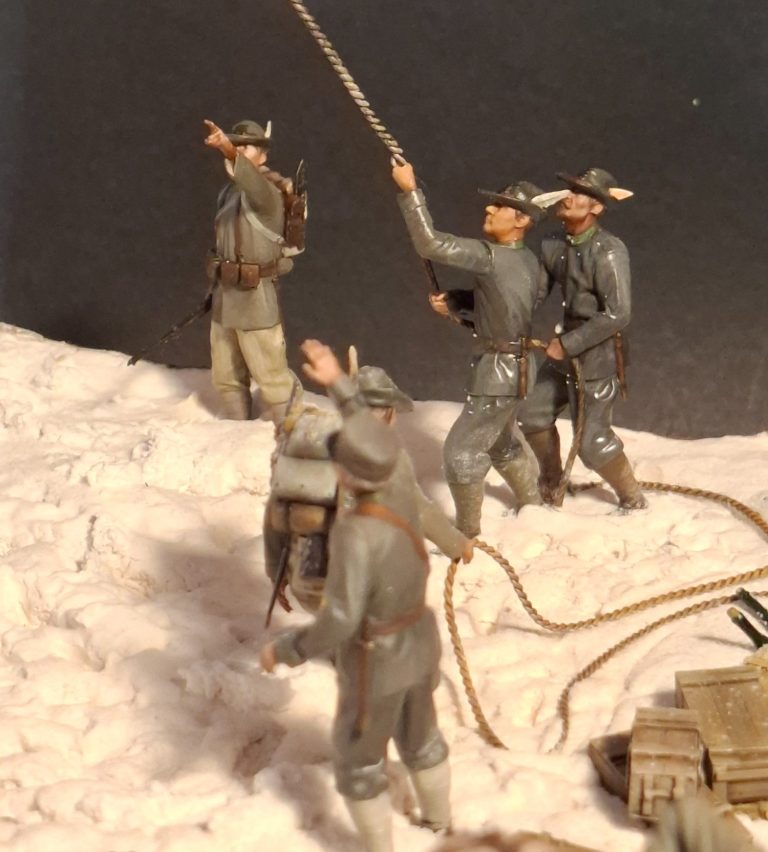
I did end up swapping all the ropes for either twisted copper wire out of some electrical flex, or some soft “lead” wire / solder for the thicker portions, but again, this isn’t going to break the bank.
I’ve mentioned that this was a commission, and I have to thank Peter fro trusting me on this one. There was a lot of discussion even prior to him purchasing the kit, as to what I thought might need changing, and even down to exactly how much space he had in his display cabinets.
That is something to consider when expanding something like this, not simply width and length of the shelves, but also the spacing / height between them.
SO, would I recommend this kit.
YES ! definitely.
There’s a few figure sets that could be added if you wanted to expand it even more, although the eleven figures that come with it are certainly enough to make the diorama “busy” all on their own.
Superb idea, great kit, and my thanks to Art Station for making it available.