Klom
1/9th scale Resin bust from Mindwork Games
Assembled and painted in 2025
I do admit that I get rather enthusiastic about models, I buy way more than I’ll probably ever paint, but there are so many great kits being released, that it’s a case of having to pick the very best, and hope I don’t let any gems slip through the net.
As it is, this is one that I bought at SMC in Eindhoven in October 2024, one of three or four kits I got of Mindwork Games, which are keeping the five or six I got in 2023 company in the “I must do these” box.
This one didn’t go straight on the bench after the show, but was started a few months after, and rattled on fairly quickly.

The character – Klom – and shown as part of the box art in photo #1, is taken from a painting by the fantasy artist Paul Bonner.
This is one of four characters that was designed by him for use in the Zombicide boardgame, and in this case Mindwork games have taken on producing a full figure in about 1/24th scale and this bust which is much larger and approximates to 1/9th scale.
Photo #2 shows another picture from the box art, this time being Paul Bonner’s coloured painting showing how it might be painted.
Some of this I thought I’d copy, and some I decided to alter to make mine slightly different from the artist’s vision, but that’ll all come later. Let’s have a look at the components.
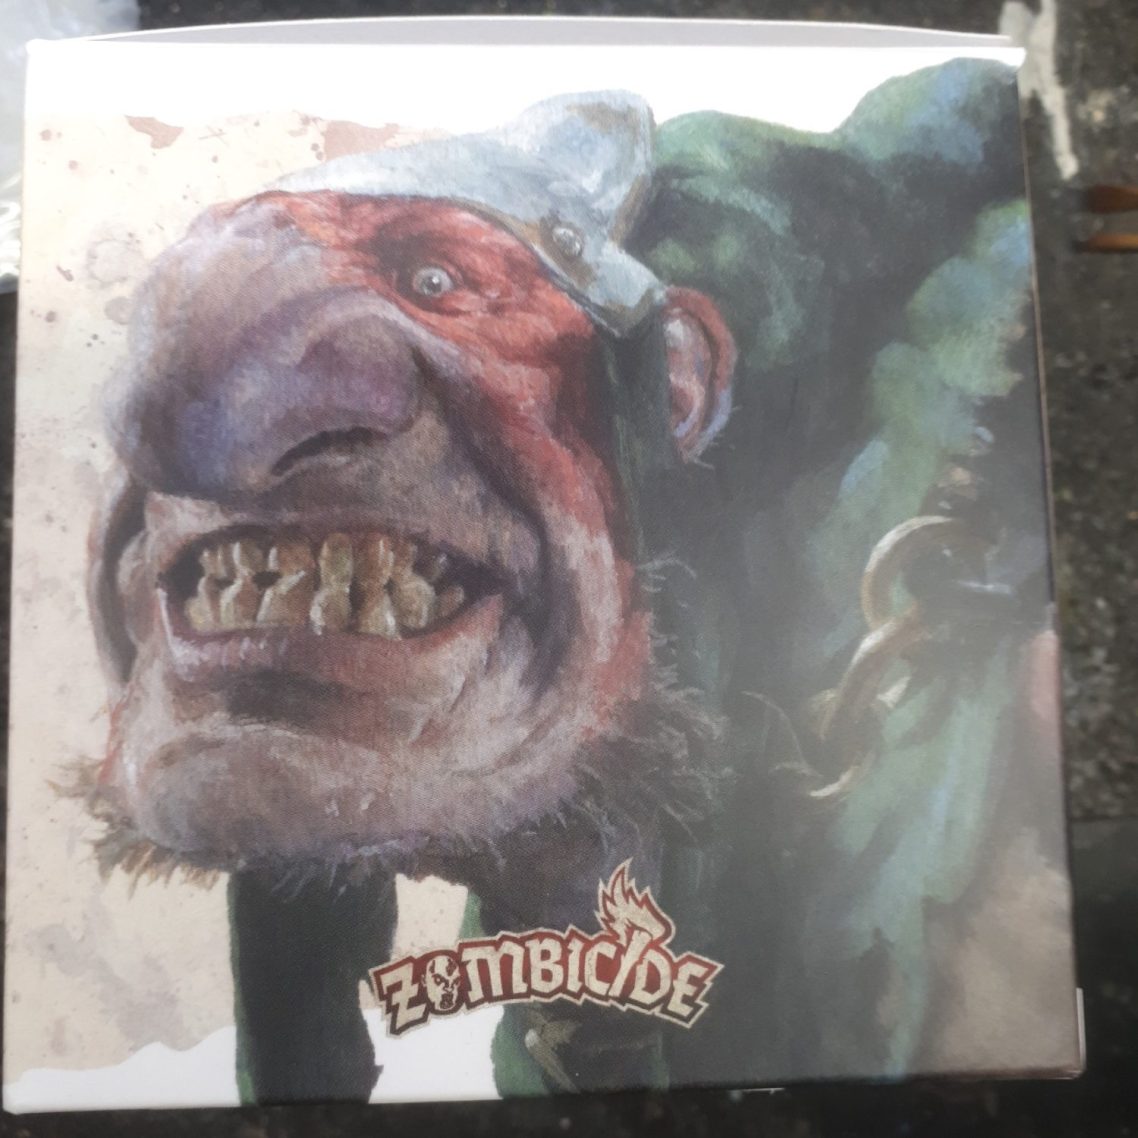
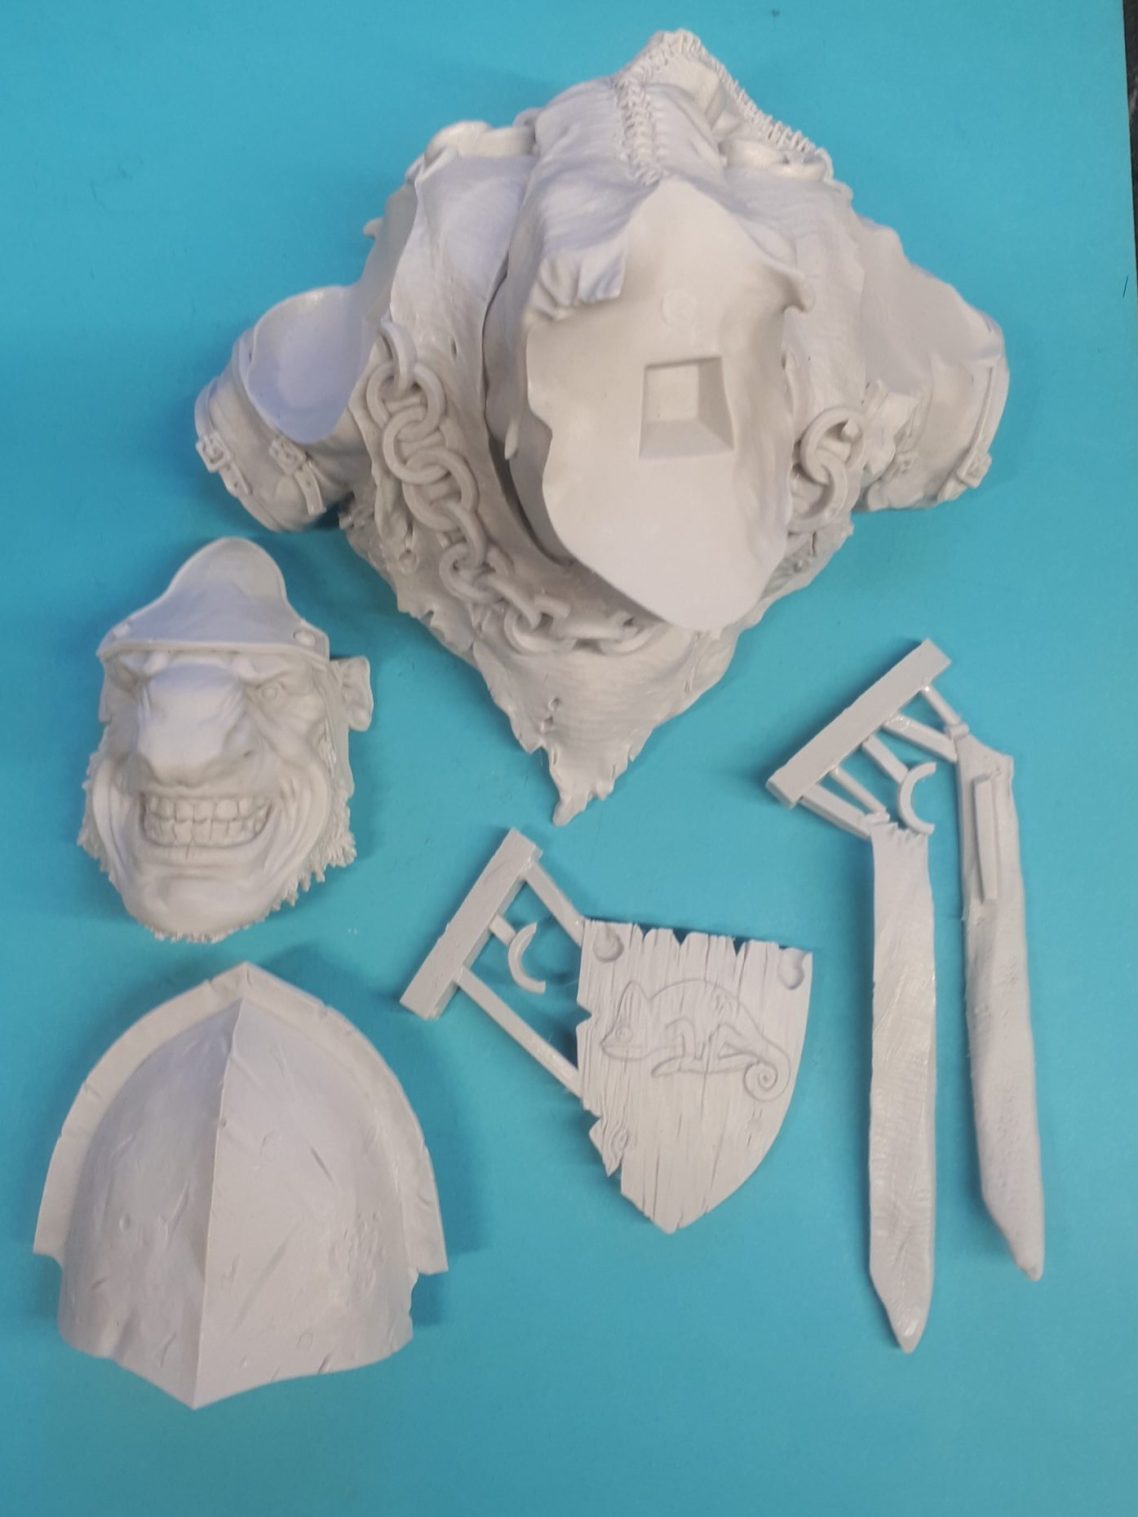
Photo #3 shows them paid out with some of the mould plugs attached. Note the very small curved “C” sections between the runners for the larger pieces, these smaller parts complete the rings on the necklace when the wooden shoulder-plate is fastened in position.
There is a little bit of clean-up necessary from the moulding process, but nothing that a sharp scalpel and a bit of sanding won’t fix, however….
Photo #4 shows the mould step under the neck where the face joins on.
It’s something I was told about many years ago by an experienced sculptor, that the curing process of resin can cause parts to shrink at different rates if one is much larger than another.
I think this might be the case here where the face is a relatively small casting in comparison to the shoulders and neck, and although it looks unsightly, it is pretty much hidden away underneath the chin, so some additional putty to fill the gap and smooth out the joint isn’t too much of a problem.
The gap goes tight up behind the ears, and whilst hidden by the flaps of the headgear to some extent, it will be visible if not sorted out at this point of construction.
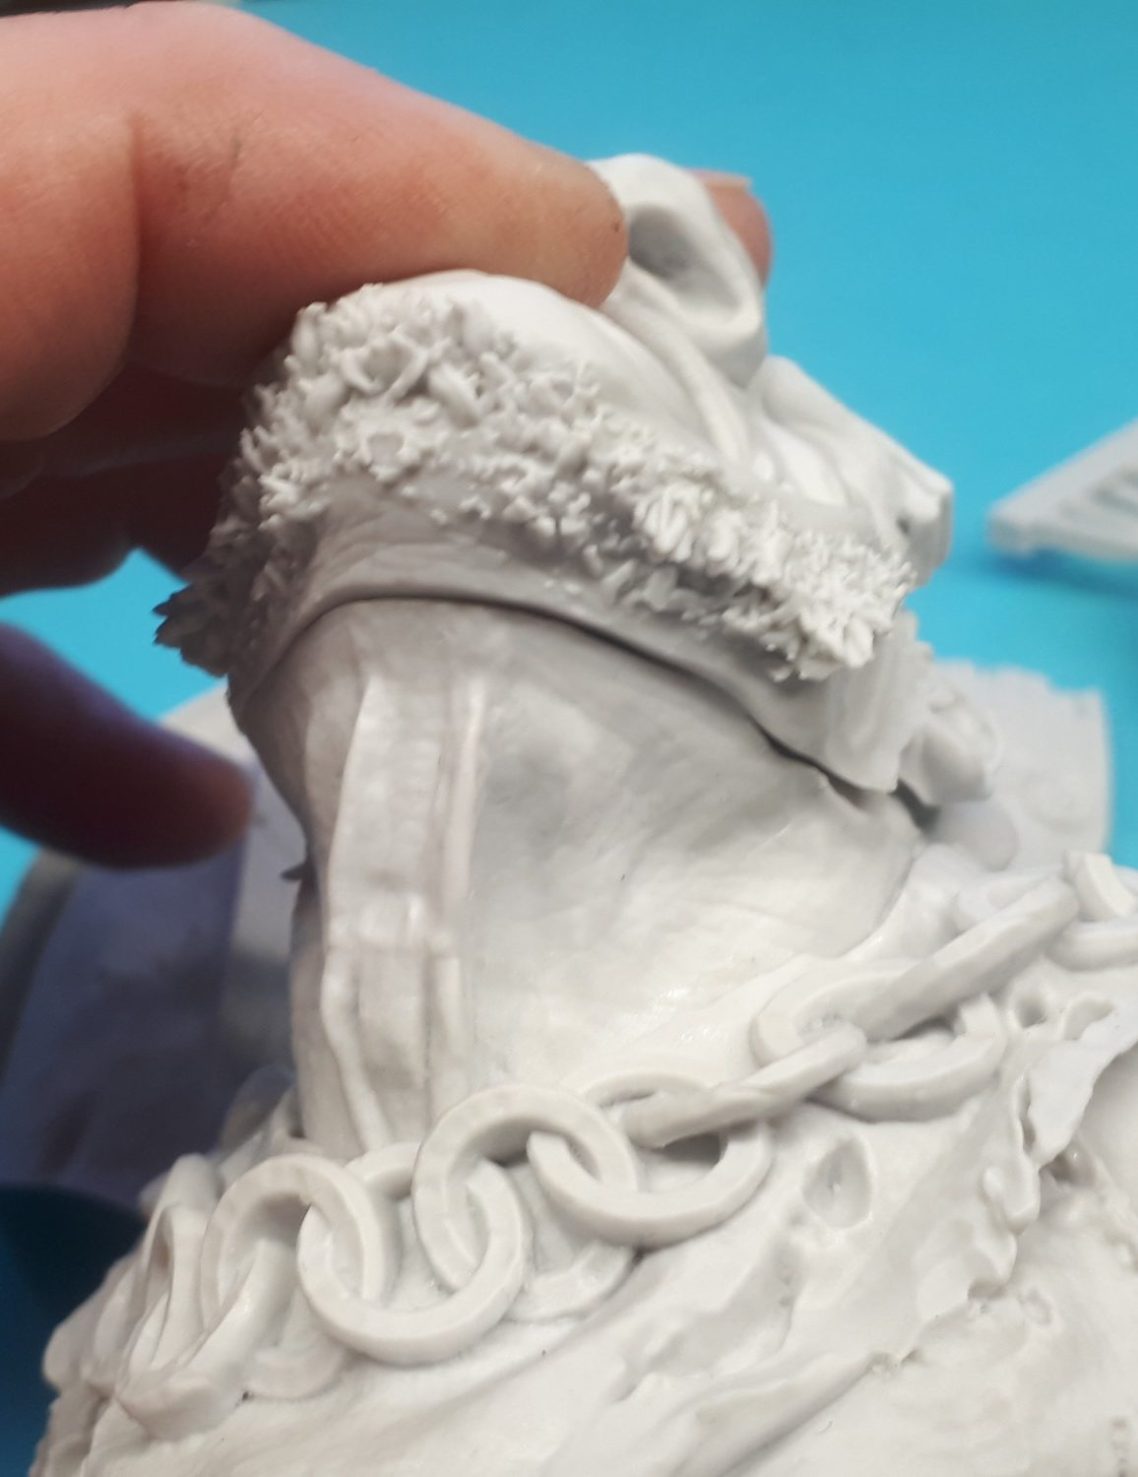
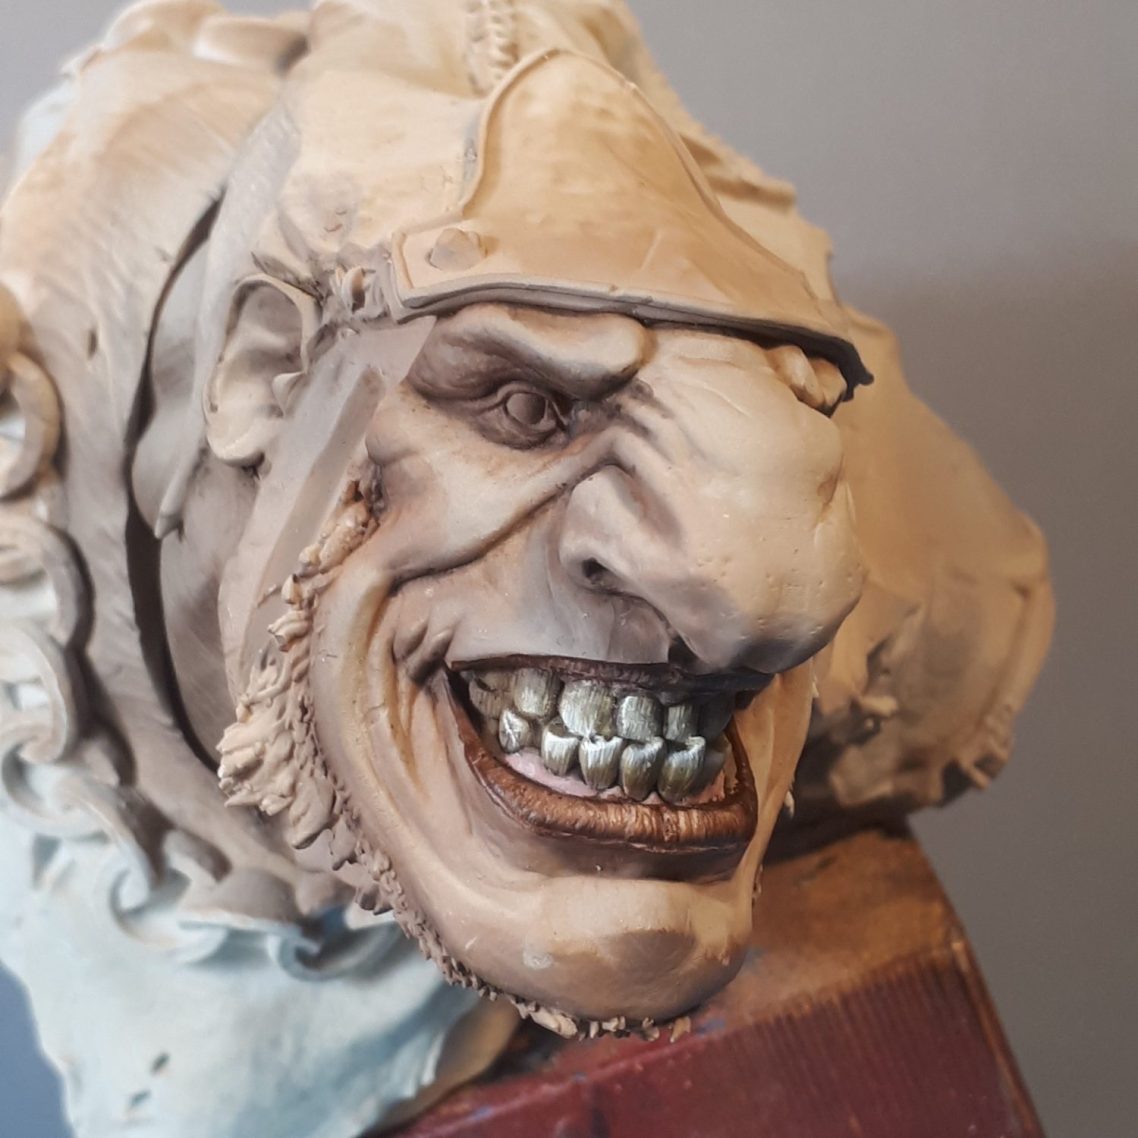
Photo #5 and I’ve begun the skin areas.
I’ve been trying out a new process using an airbrush to block in the main areas of flesh, in this case using Tamiya Nato Brown as a shadow, a mix of that and Desert Sand as a mid tone and then Deck Tan as the highlight.
It’s relatively quick work, and gives a smooth finish as seen here, and after this it’s a case of painting in details like the lips, gums and teeth with oil colours.
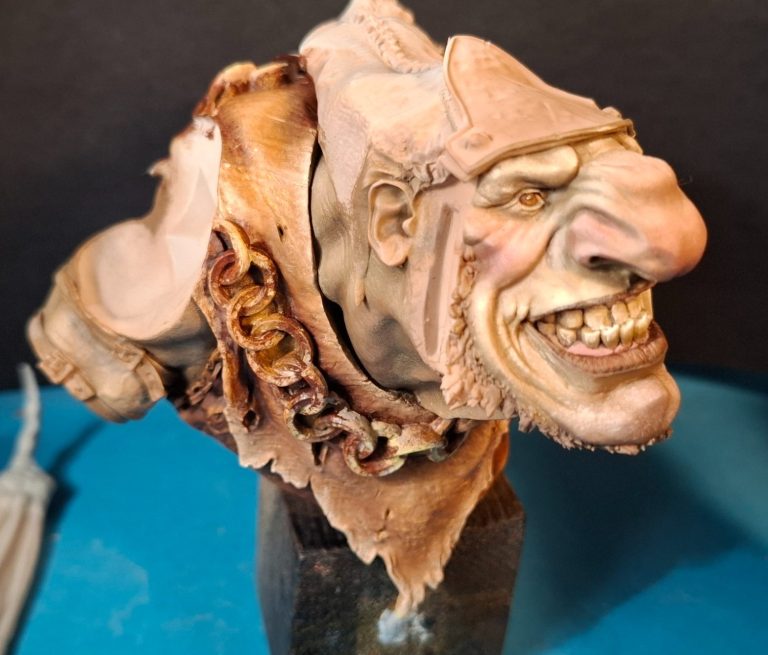
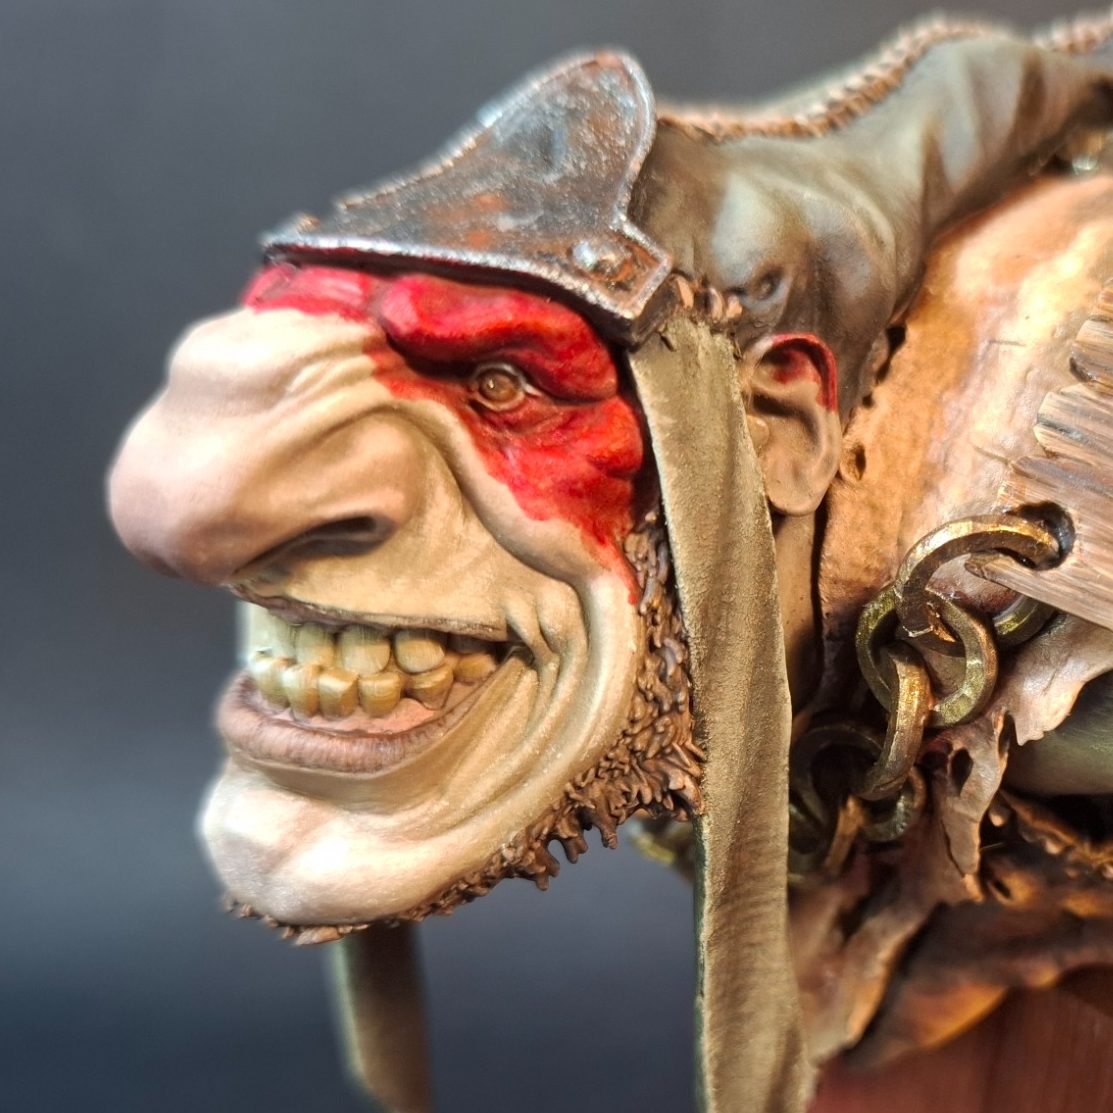
Photos #6 and #7 show a lot of progression - as I mentioned at the beginning, this kit really does help the painter along - and here I’ve added some carmine oils using a large soft brush and only a hint of paint on the bristles to add a slight blush to the cheeks, nose and chin.
The eyes, which considering the size of the model, are tiny, got a very piercing look to them,

and I’ve painted in the leather jerkin along with the large metal rings of the necklace.
I used pale leather coloured oils for the jerkin – Vandyke Brown for the shadows, Light Red for the main sections followed by Mars Yellow to bring out the details, then Buff Titanium and Titanium White for the highlights and worn edges.
Photo #8. The rings on the necklace were painted with Darkstar acrylics, beginning with an undercoat of MP Black, and then the Darkstar Bronze followed by Antique Gold and Bright Gold to top off the highlights.
I’ve glued the two side flaps for the hat onto the side of the head, but painted the inner sides of these with a dark brown mix of acrylics before fastening them in place.
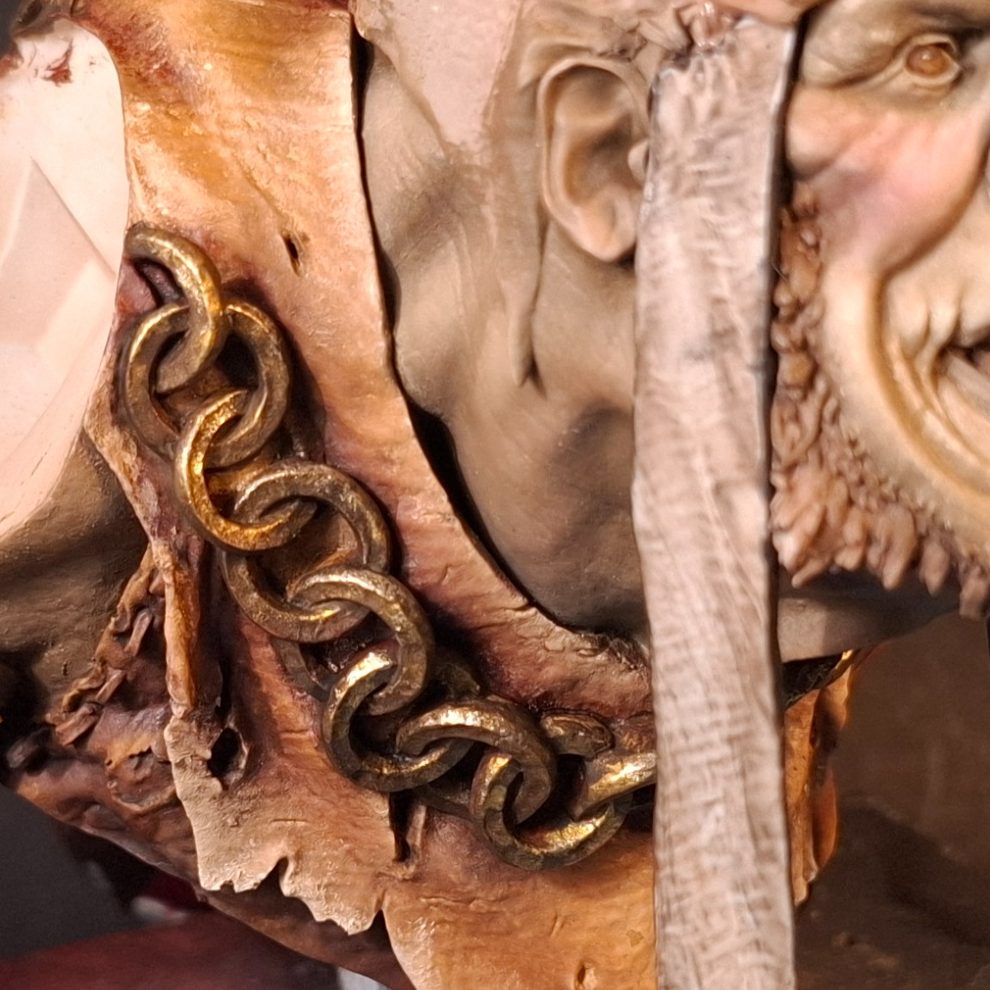
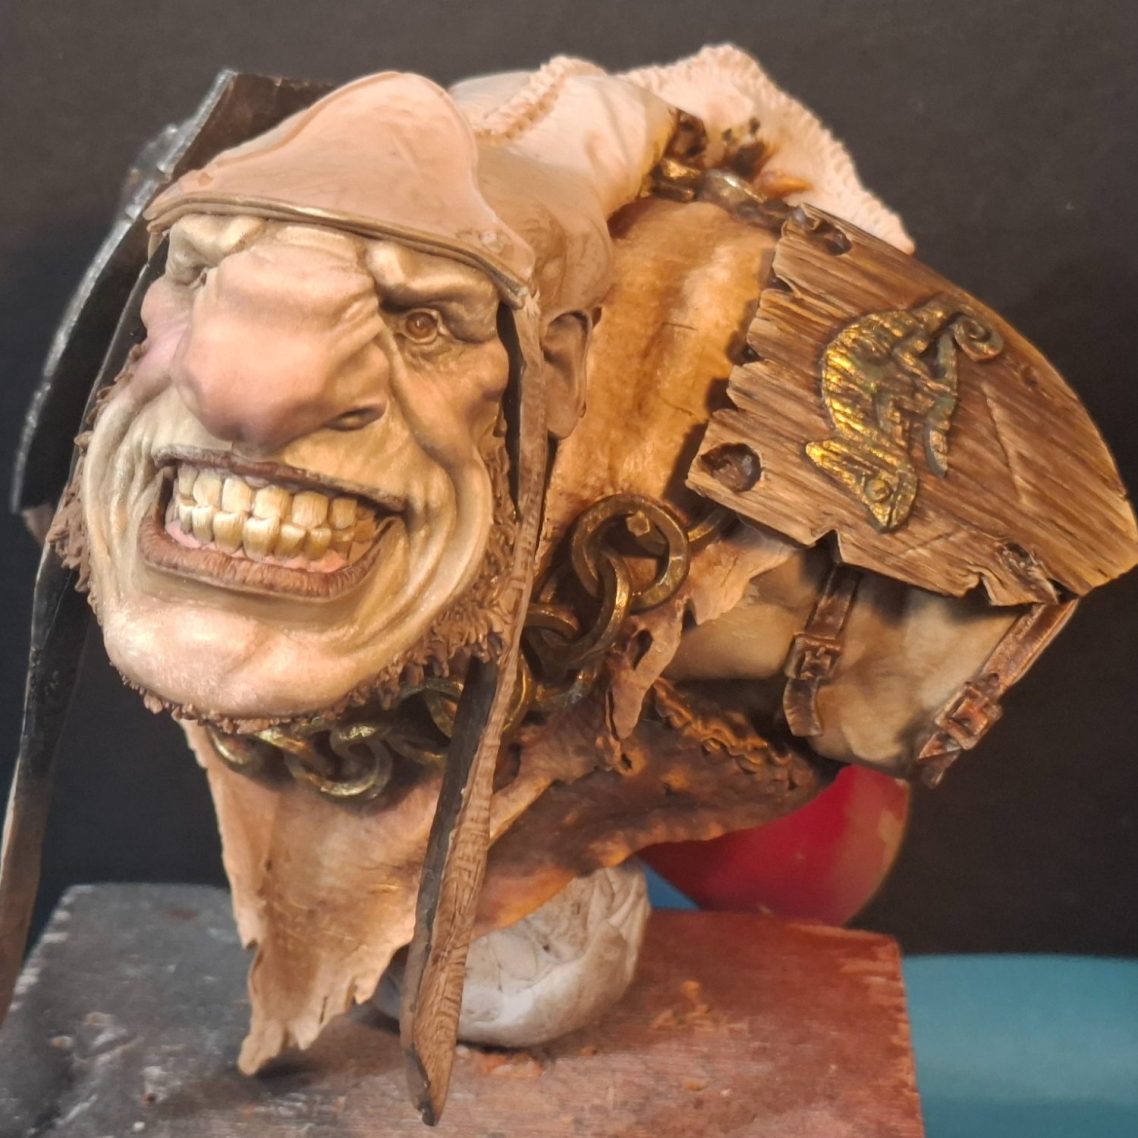
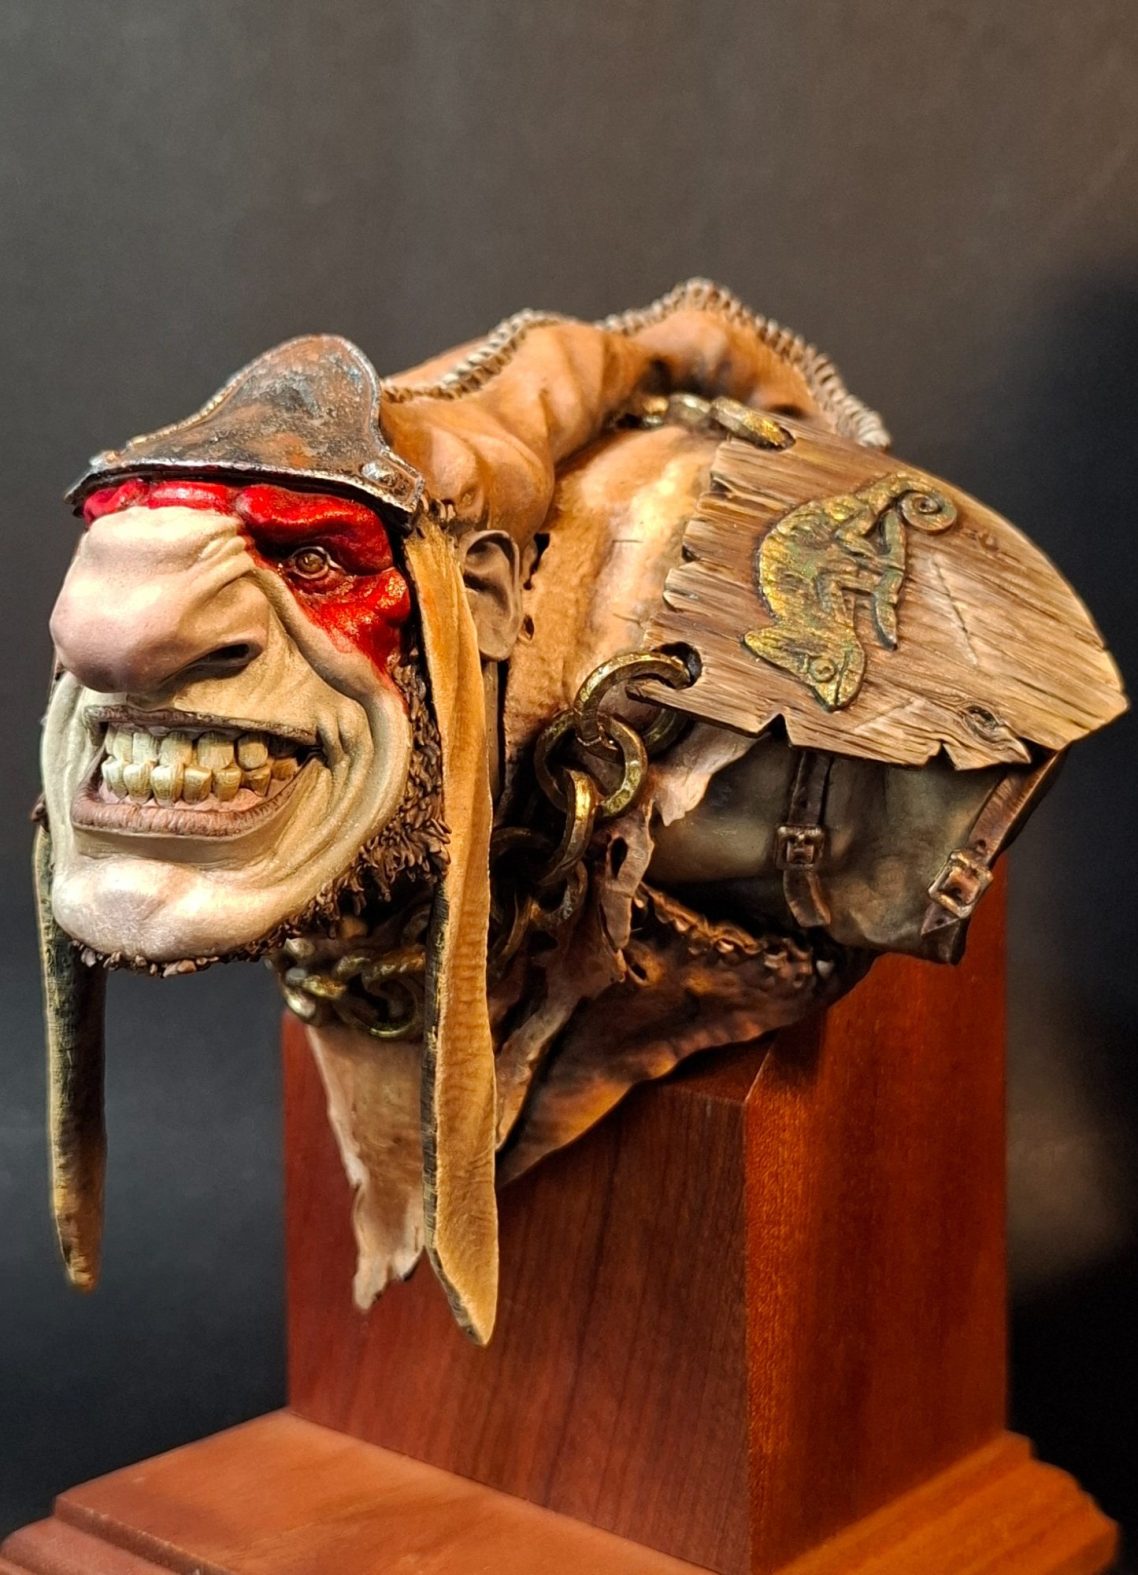
Photo #9 shows the front of the model a little better, and you can see the leather shirt under the jerkin. To preserve the overall colouration of the piece, I used dark leather colours for this, starting again with Vandyke Brown, but adding mars Brown and then just a little Light Red to the outer edges and a few of the highlights on his back.
I’ve temporarily fastened the shoulder pads in place with some small blobs of Blu-tac and in this shot you can see on the wooden one where one of those little semi-circles of resin will go to join up with the rest of the necklace. Another one will be glued in place at the back to form the same kind of connection.
Photo #10 shows the wooden shoulder pad and gives a better view of the location points for the semi-circular parts to complete the necklace and on the upper edge of this shot is a hole to locate a snapped off arrow ( or similar ) just below the curled tail of the chameleon decoration.
The wood was painted with various browns and the chameleon with some bronze and gold metallic, washing a couple of thinned coats of a mid green over the latter to make it look like it’s oxidised a little.
The belts have been painted in now, again using dark leather colours and I’ve put a lot of small scratches and wear along their edges. The buckles will be painted later though once the oils have dried.
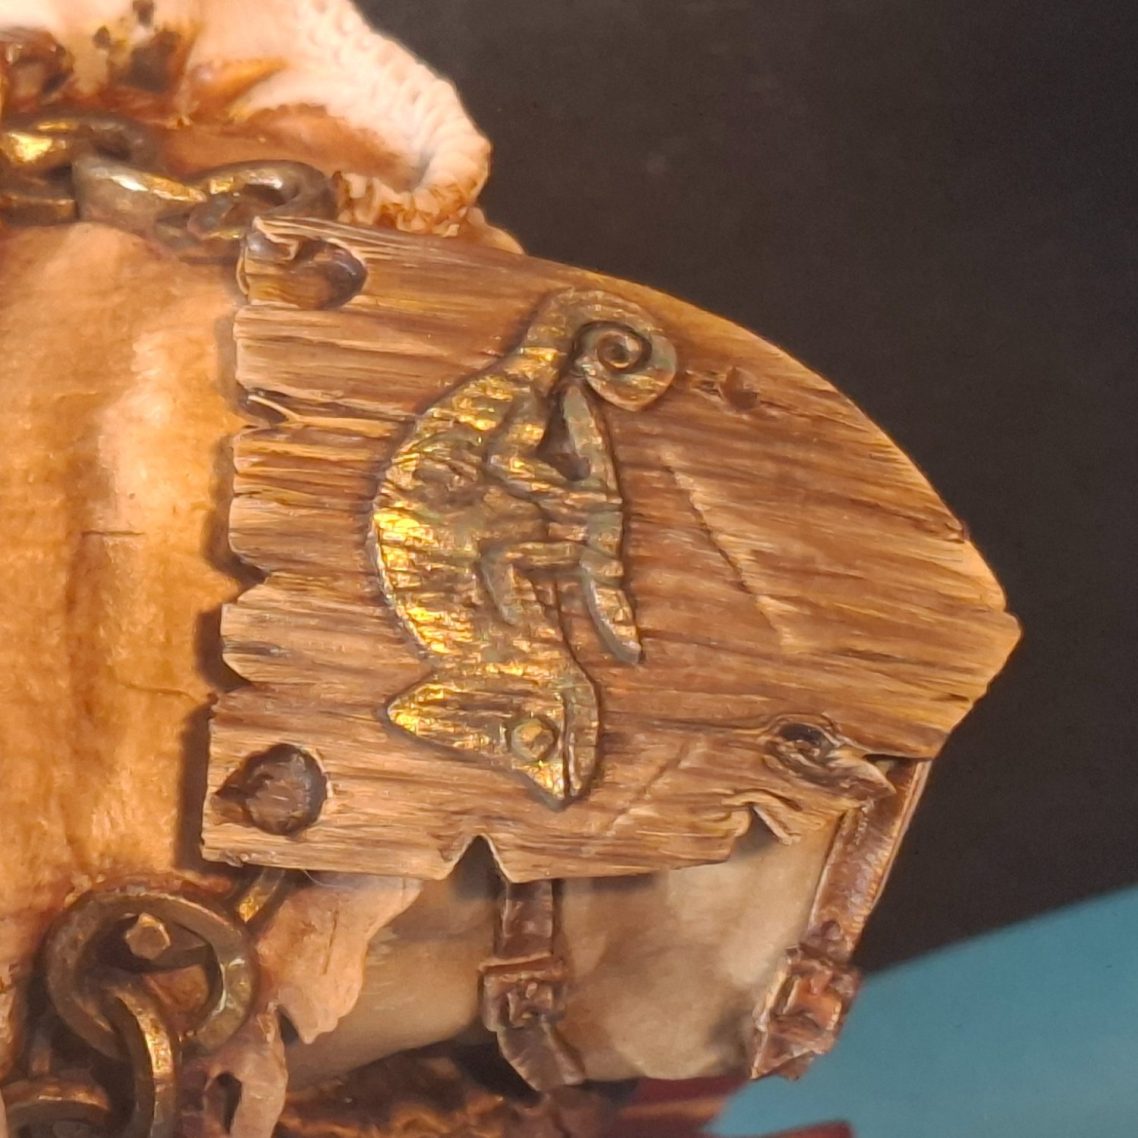
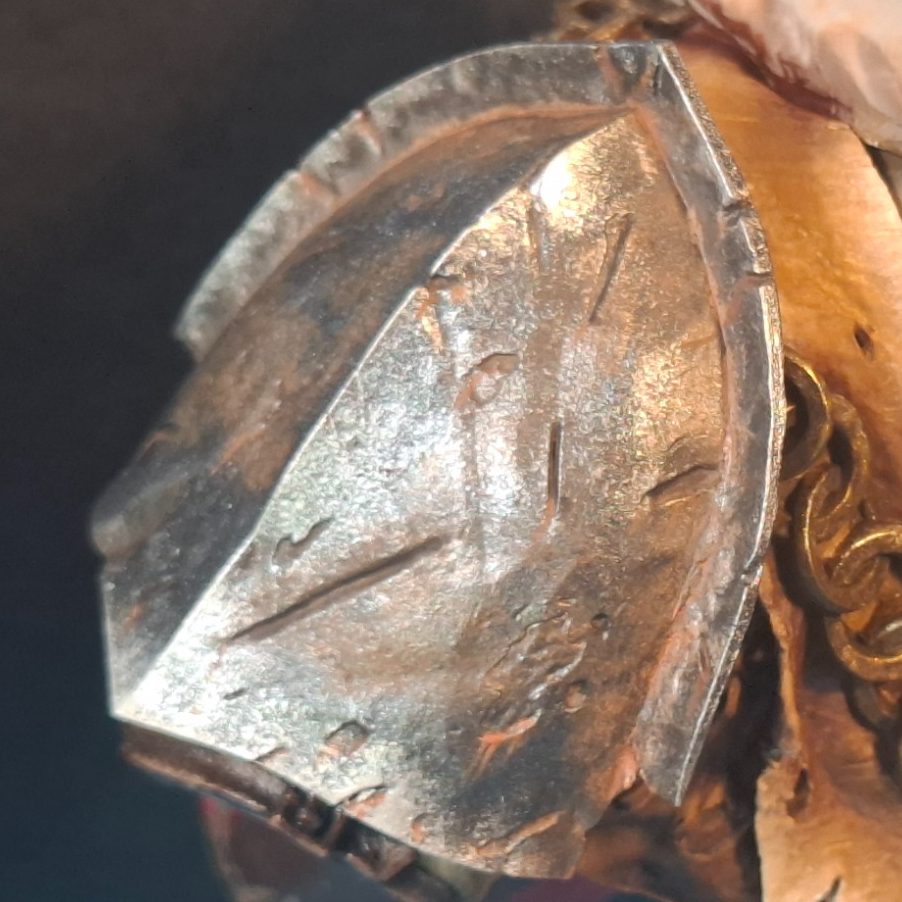
Photo #11 shows the other shoulder pad, this one having been painted to represent some badly damaged and rusting steel.
With a part this size I decided that instead of using a brush to paint it ( OK after giving it a couple of coats of MP Black acrylic ), I’d use the Darkstar metallic colours applied with a very small section of sponge.
I began with Steel mixed with an equal amount of the MP Black, covering almost all of the shoulder pad, then used the Steel colour on it’s own, moving on to a little bit of Antique Silver, then Bright Silver and followed along the edges some very small touches of Molotow Liquid Chrome.
This was all allowed to dry thoroughly overnight, and then I laid on a very thin wash of Venetian Red to act as rust, reinforcing this with smaller spots of the same colour that was not quite as heavily thinned with White Spirit.
Photo #12 shows the metal shoulder pad again, this time I’ve added some Mars Black oils into the deeper recesses of the damage and stippled a little more of the Molotow Liquid Chrome along the bottom edge and up the central spine.
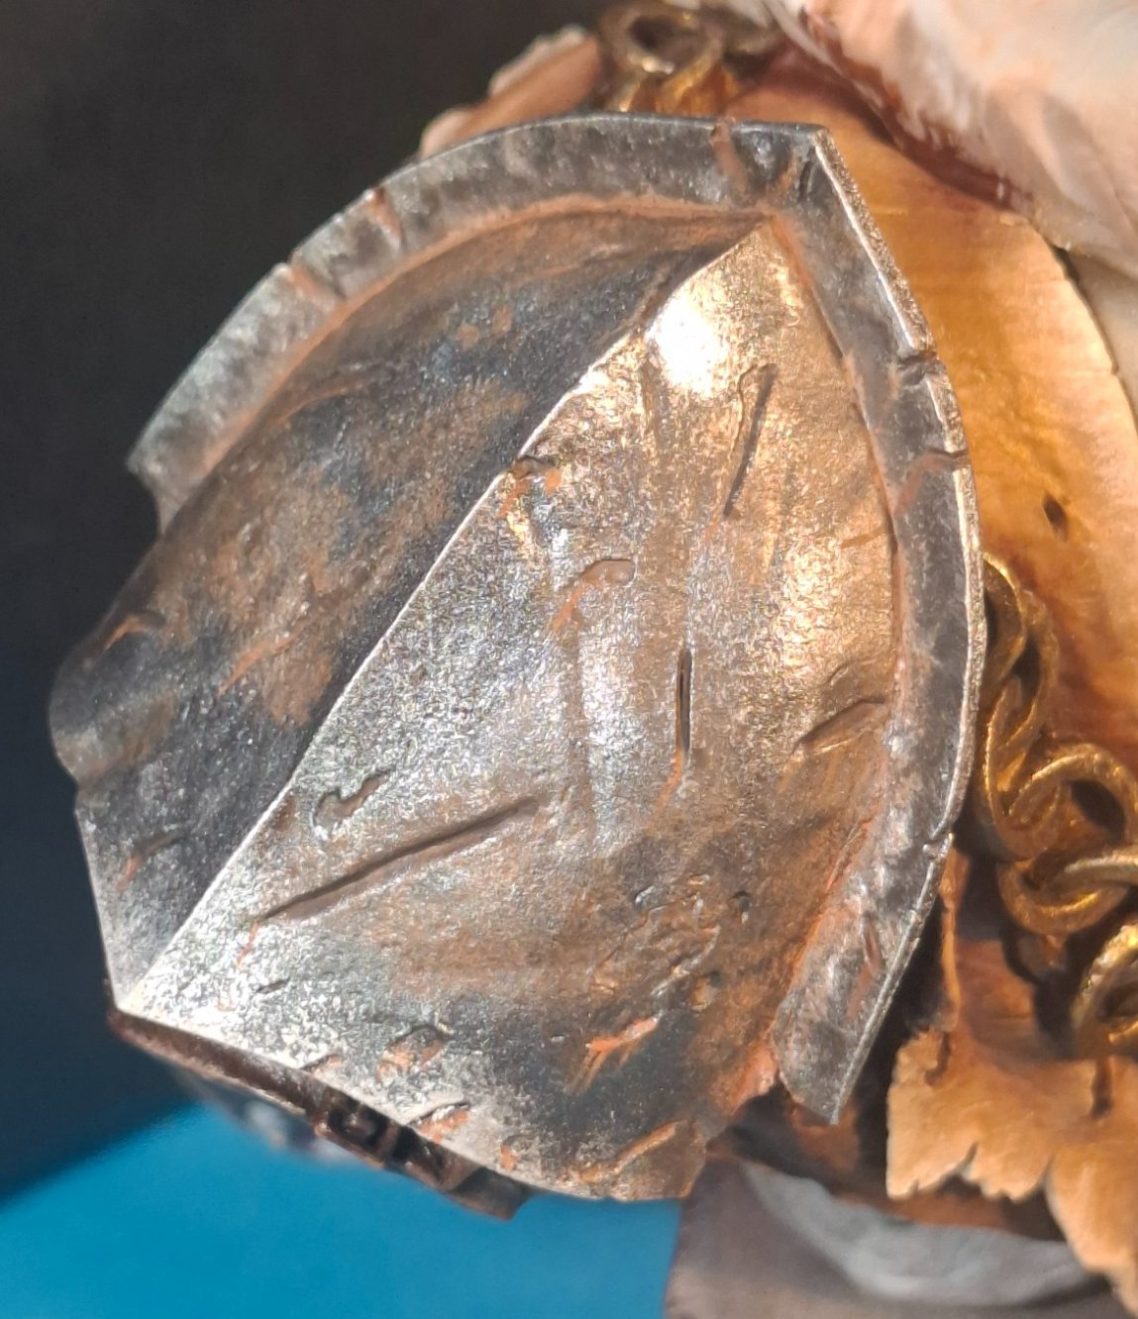
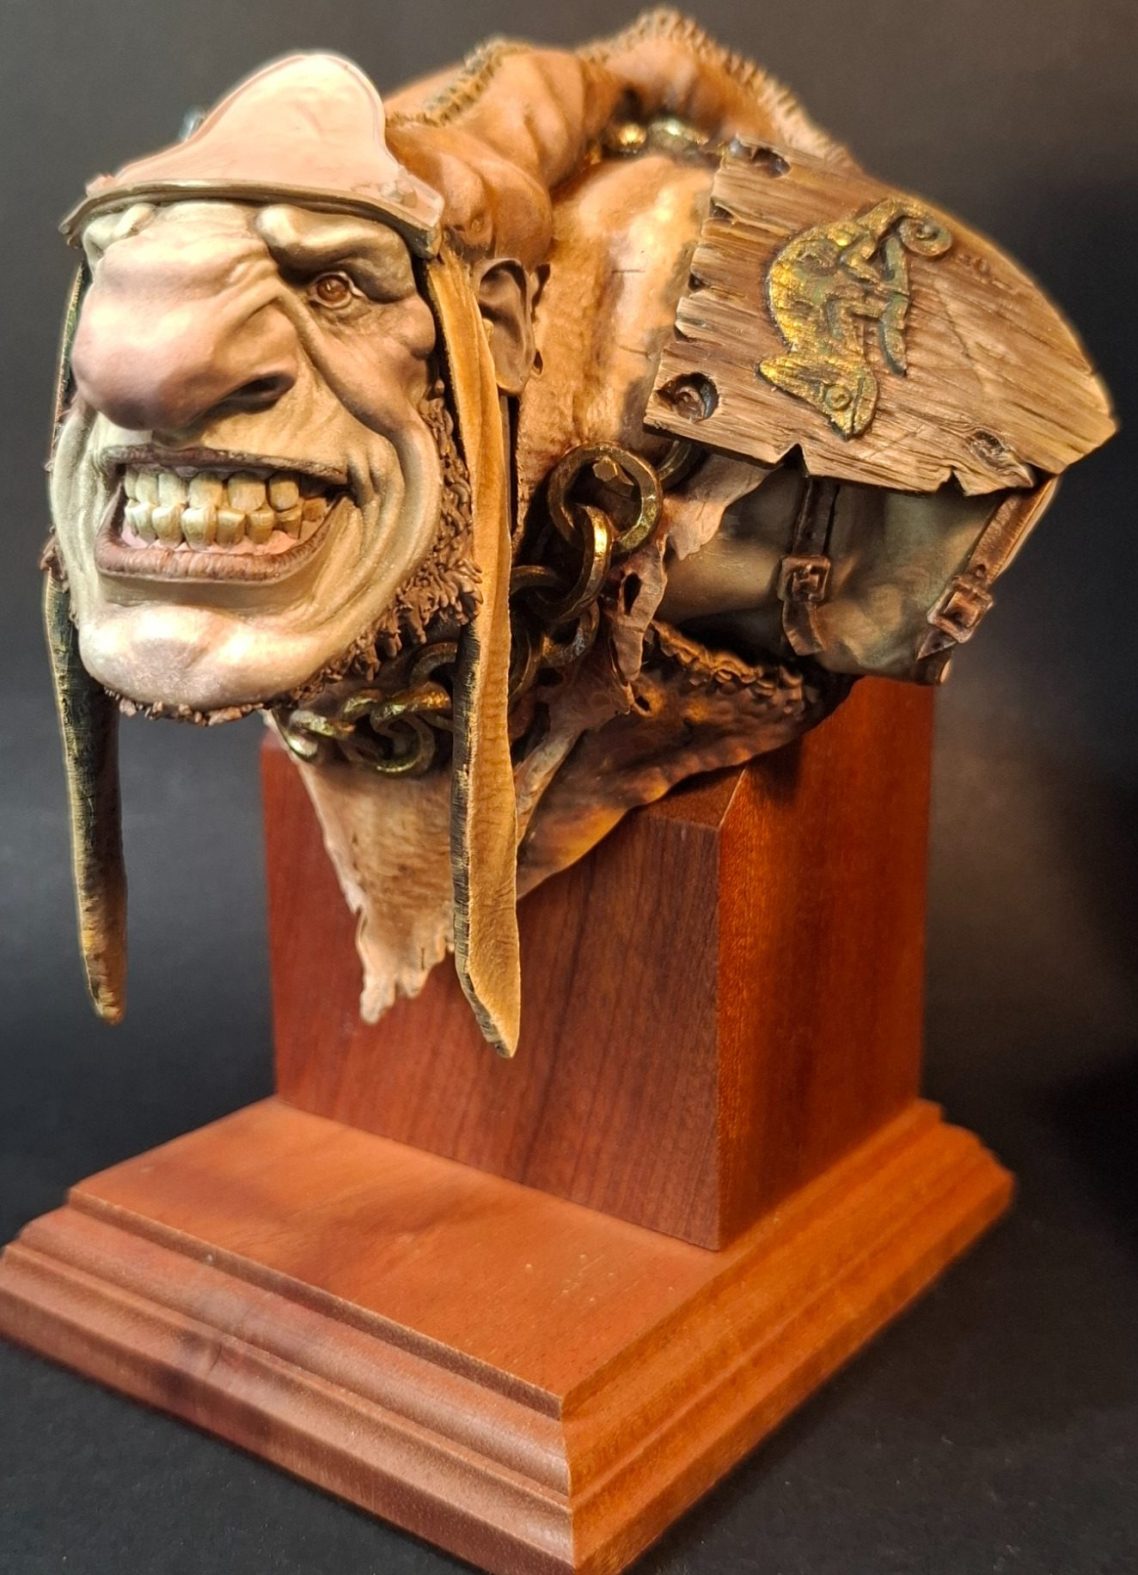
Photo #13. Choosing a plinth for this model wasn’t going to be simple, the angle at which he’s thrusting his head forward and the slope of the back of the bust probably wouldn’t look right on a plinth with a horizontal top.
To my rescue came a plinth that was designed for another model – the Mitches Military Models “Over the Top” seven figure diorama, but the front / lower step of the plinth is too short.
I’d put it back on the spare plinths shelf and kind of forgotten about it, until wracking my brains for how this piece could be displayed.
The sloped top of the plinth allows for the Klom bust to be located on it, and still has space for the “V” shaped front and the ear flaps of the hat space to hang at the front of the base, but still have the lower section – where a nameplate can be attached – protect them from being broken off.
Photo #14, and at this stage you can see I’ve painted the hat. Again I’ve retained the overall earth colours that I’d planned from the start, although the green of Mr Bonners would break the monotone up quite nicely.
The stitching on the hat deserves a careful bit of painting, and to make the piece a little interesting I painted the ear flaps a slightly different colour to the rest of the hat.
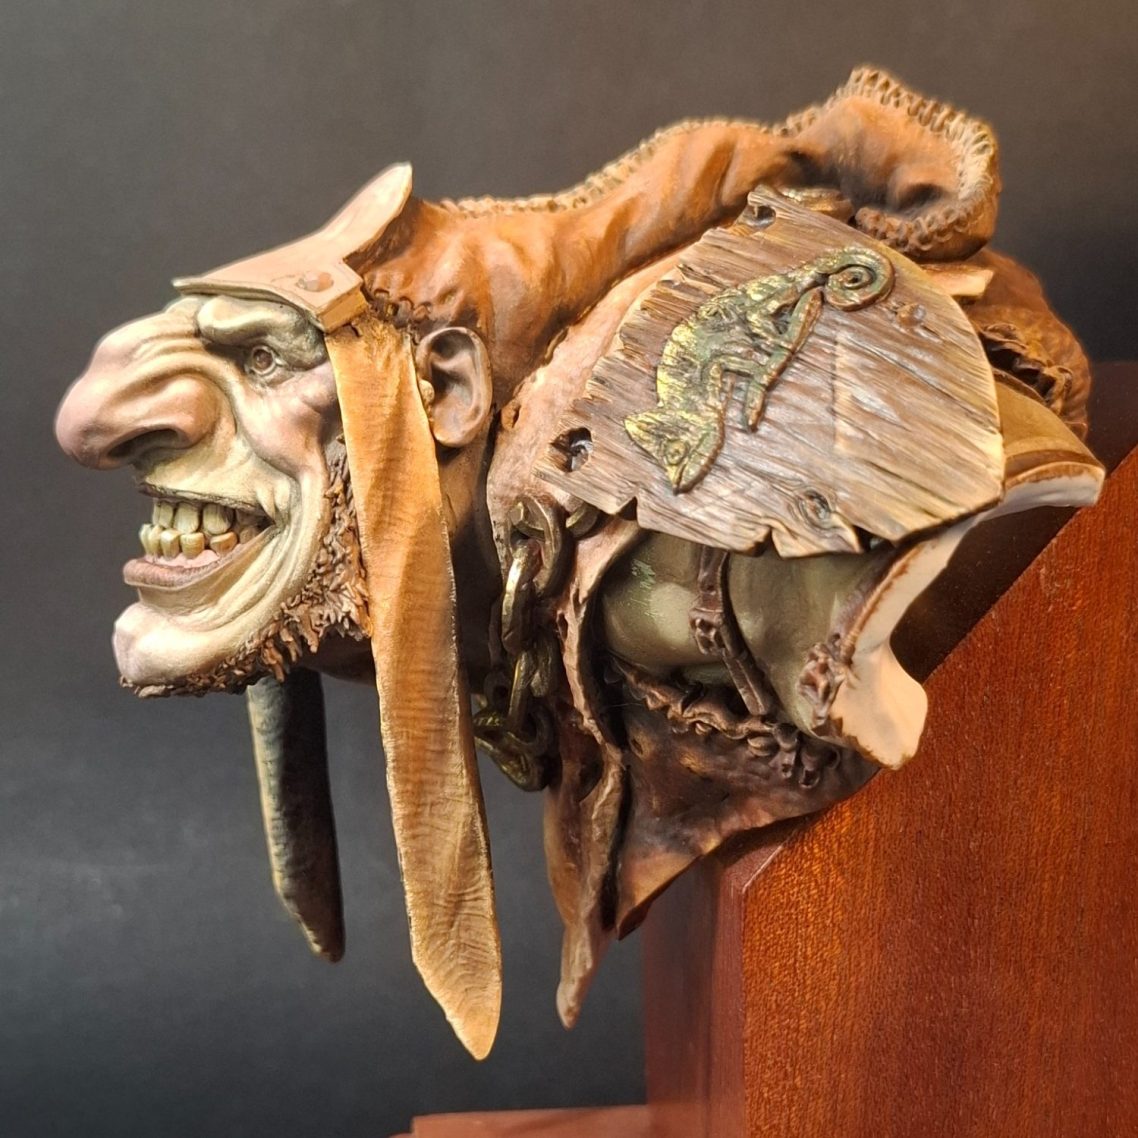
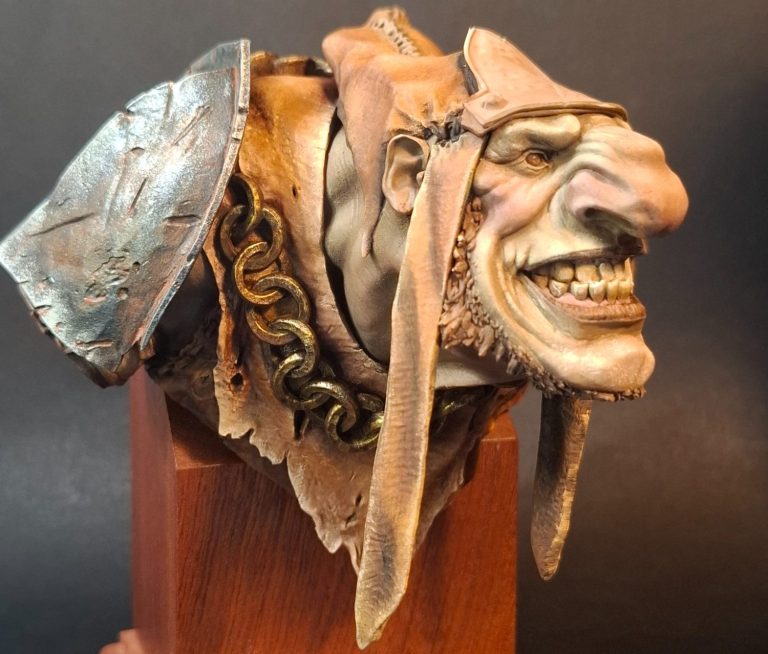
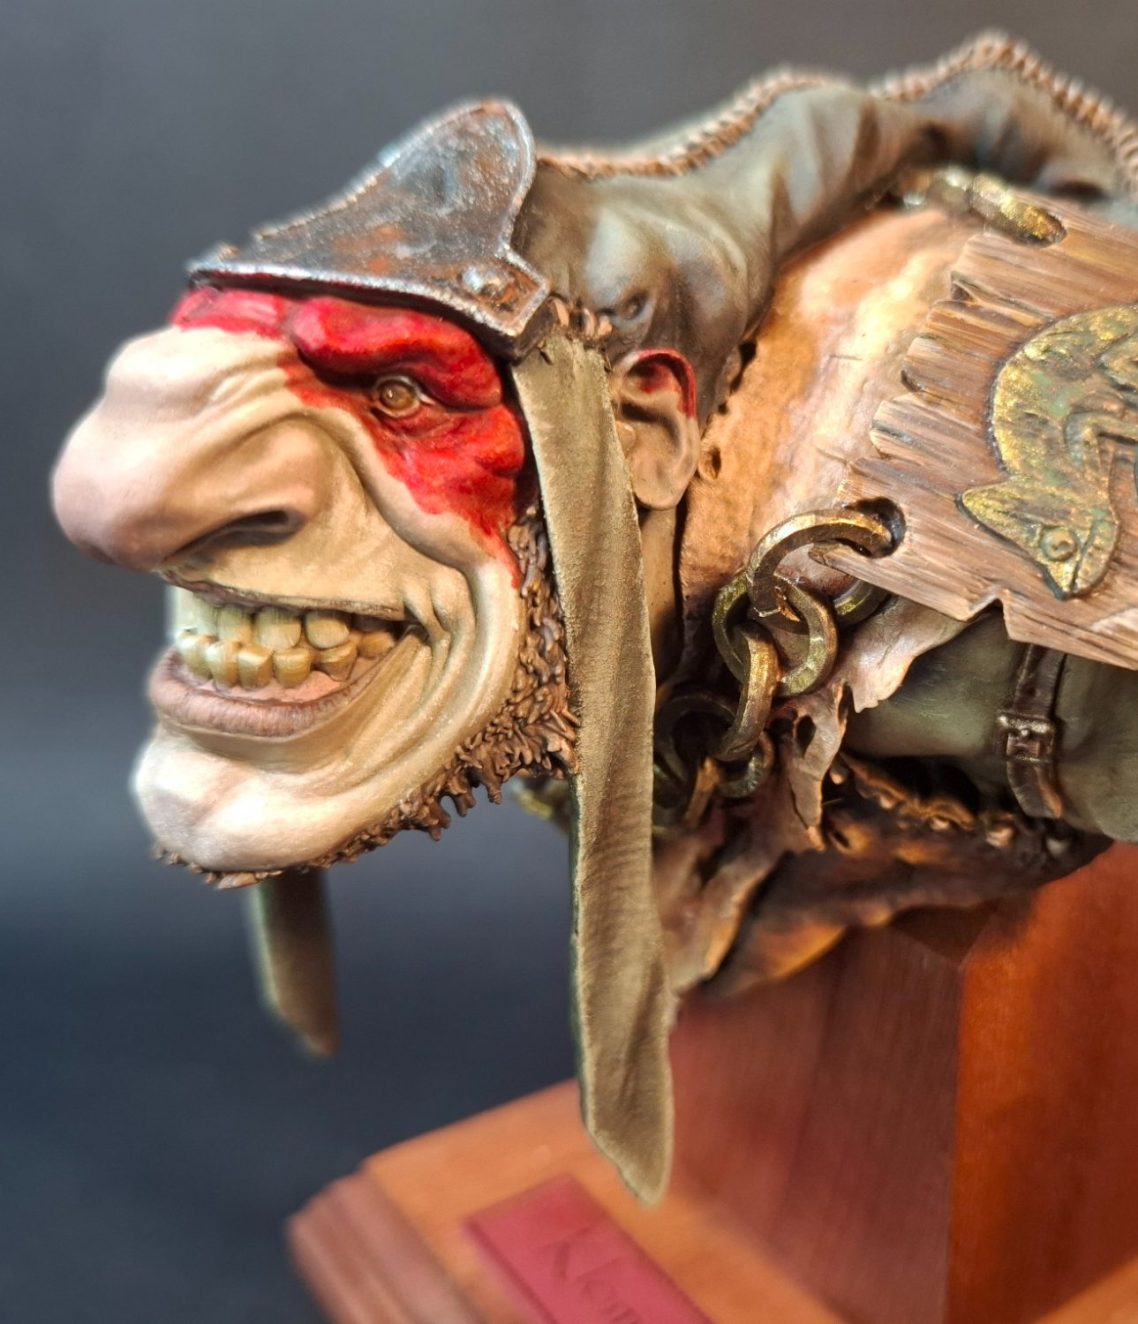
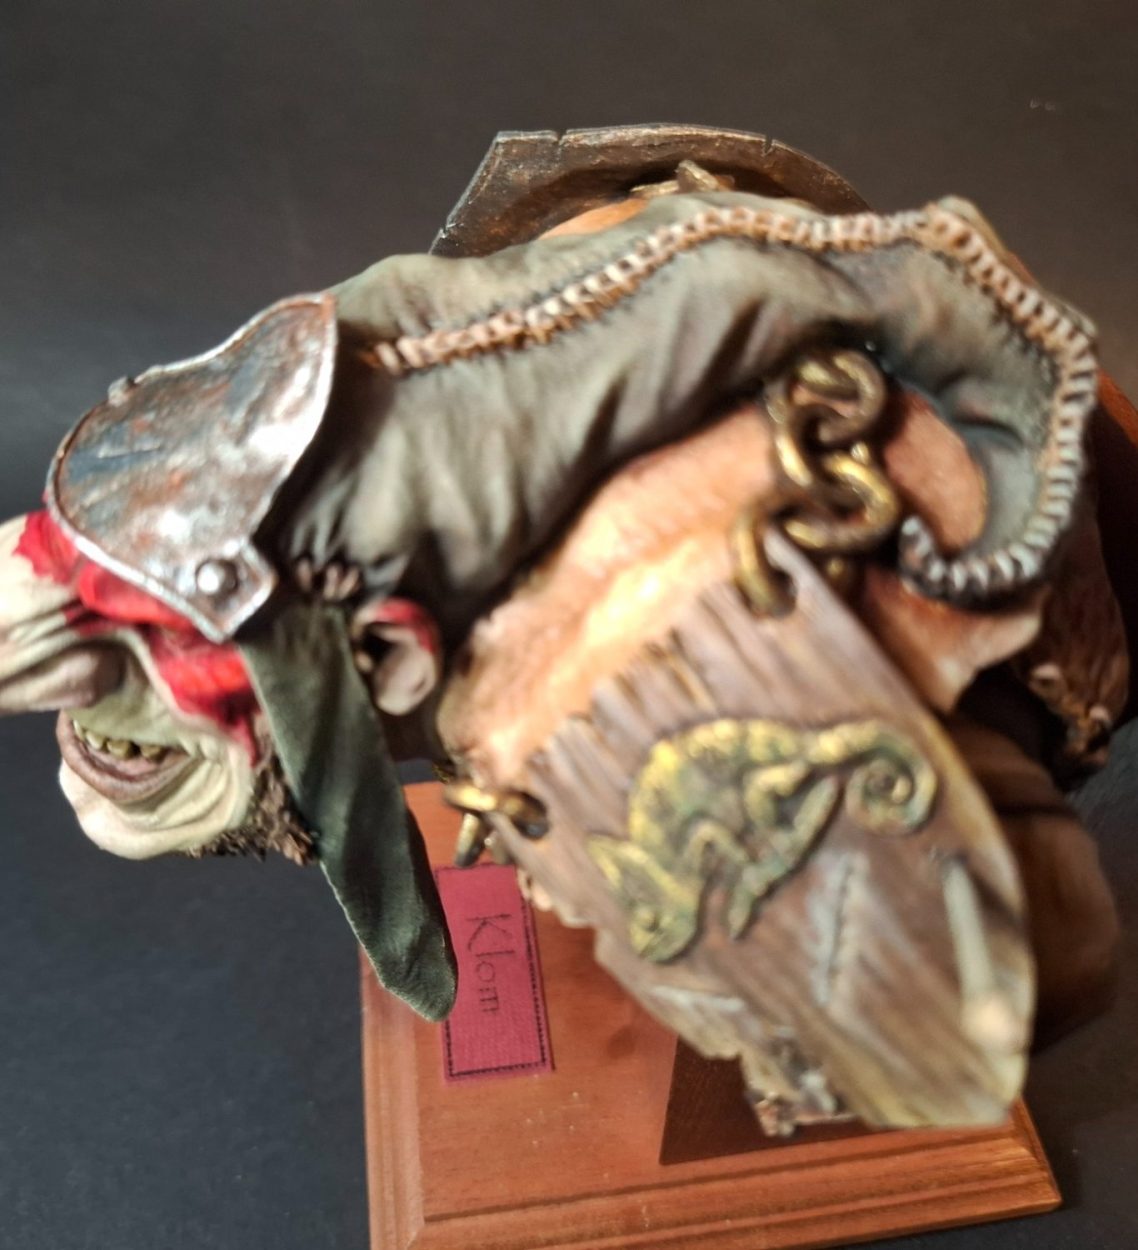
Photo #15 and a view at the same stage from the other side.
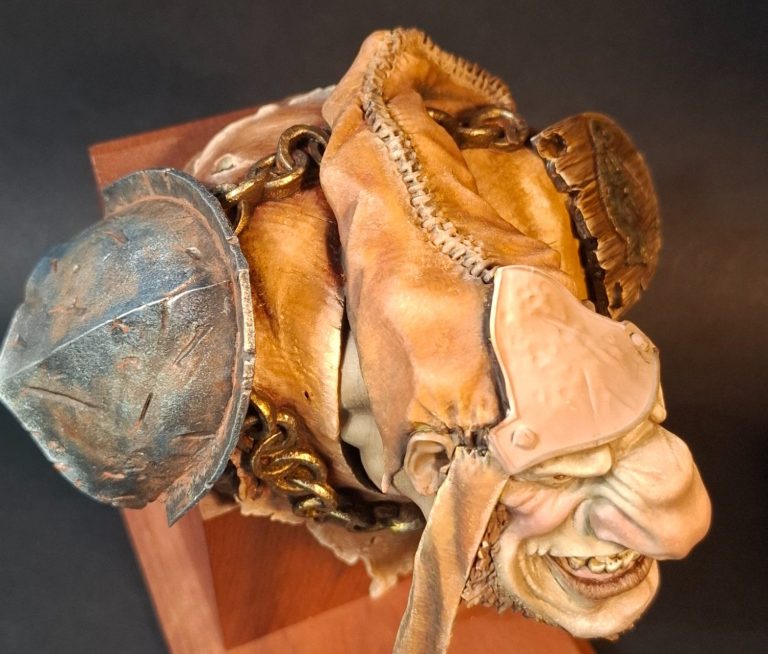
And Photo #16 shows a view from overhead that allows you to see the long row of stitches that fasten the hat together.
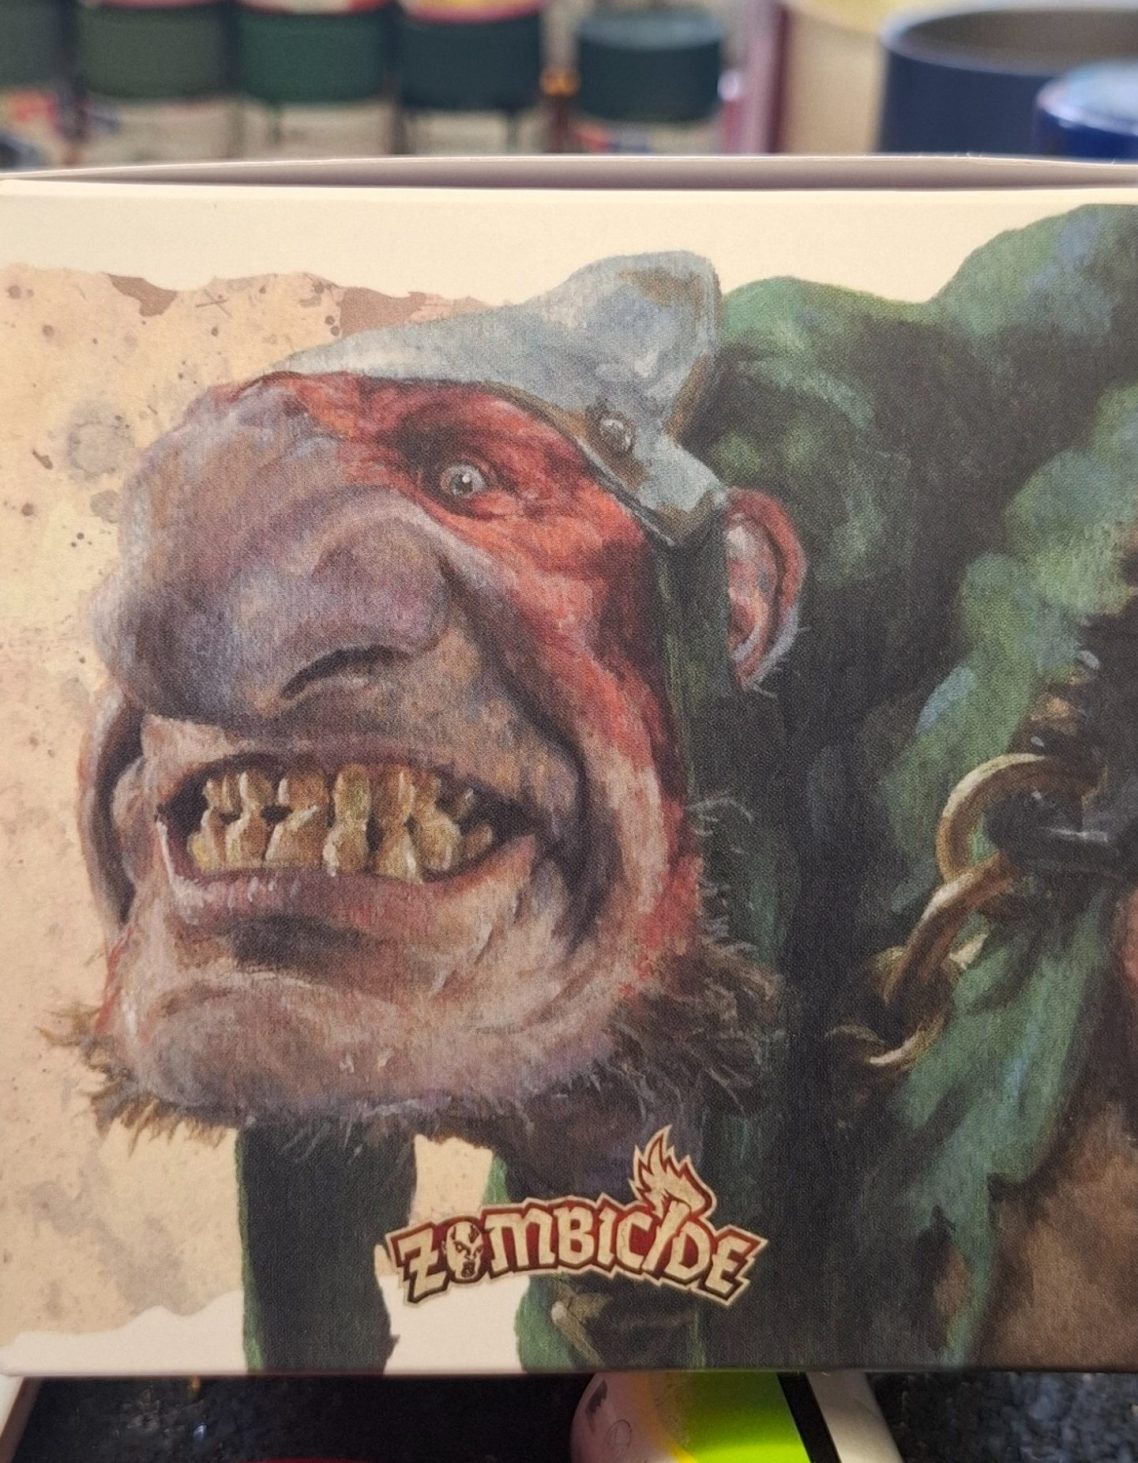
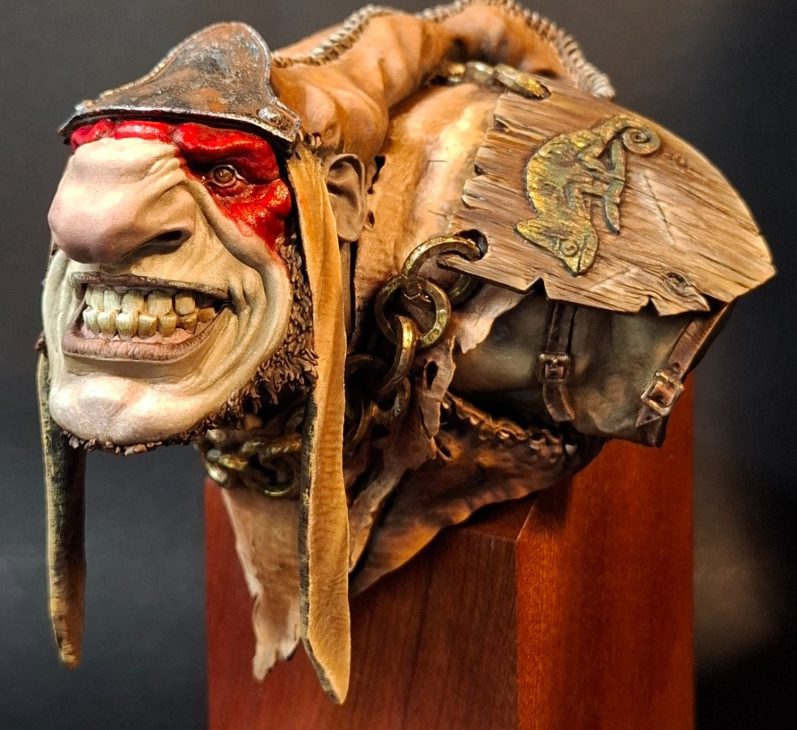
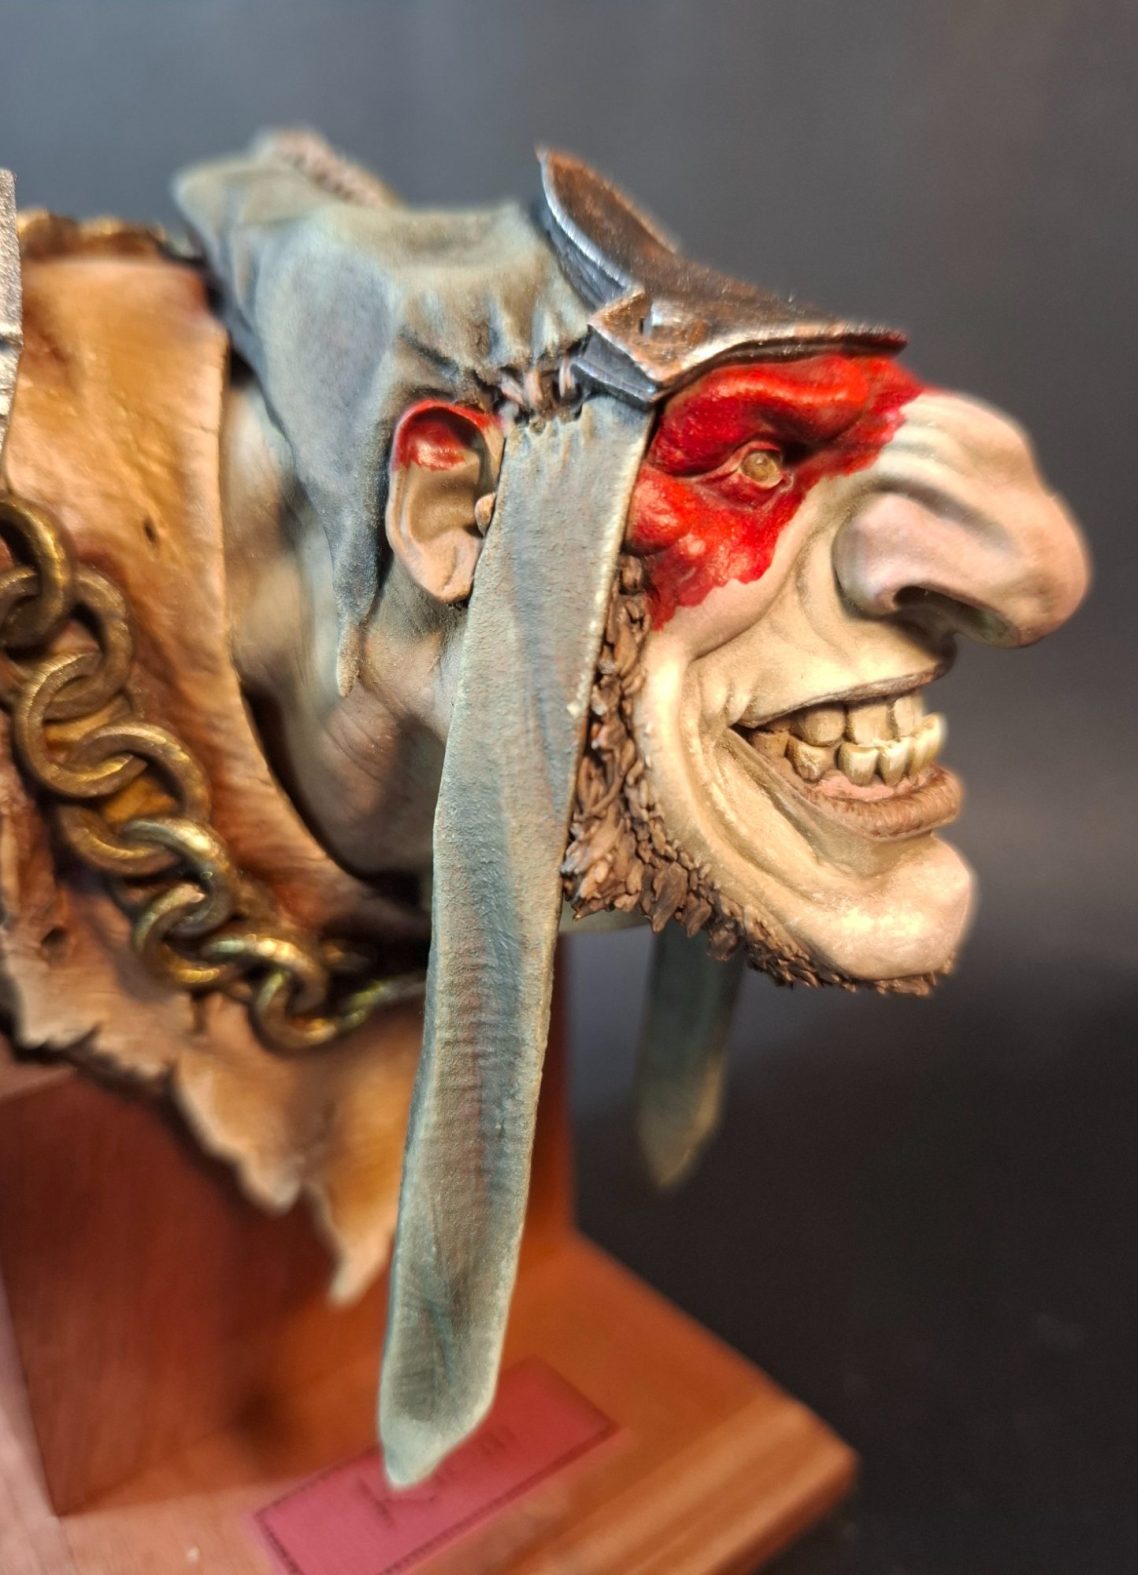
Photo #17 returns to the coloured box art for a second, and the red colouration on the area around the eyes and descending down the cheeks – there’s a little bit on the ears too.
The finished shots show the addition of this colour along with the metal plate on top of the hat having been painted too – this used the same sponge method as the metal shoulder pad.
The red looks shiny in these first couple of shots as it’s still wet, but with a little time in the drying cupboard, it’ll change to a matt finish. The colours used for this were Carmine Oils for the shadows and building up mid tones and highlights with some small amount of Scarlet.
The final shots show the nameplate added and the red colouration carried over onto the ears.
An extra bit.
I don’t seem to get to many shows these days, so getting feedback from different people is sometimes limited to my closest friends or family.
It’s useful though to get someone that you don’t usually see very often to give an opinion of how your painting is going, and I was lucky to be at the Fen Model show in 2025 and get a chance to talk to a couple of very good painters, one of whom was Mark Taylor.
After an in depth discussion, he proposed that I was using similar formulas a lot of the time and a lot of the same colours, possibly because I’d been painting quite a few 20th century historical figures and dull shades, particularly browns, were becoming predominant.
Taking this advice onboard, I returned to this model in particular, because I knew I’d stepped away from some of the artwork colouration, and so made changes to the hat, which should have been a dark, but faded, green.
I know, it’s still a dull colour, but it does lift the model a bit from being predominantly brown.
The next few models in 2025 will have some brighter colours and some different mixes to produce them, branching away from the limited palette that I tend to use.
My thanks to Mark for his honesty, it really was useful to get that different perspective.
Final thoughts
Well, it’s one of those pieces that seems to fall together and almost paint itself.
I really like Paul Bonner’s art, his realisation of characters from the Rackham range of figures really brought them to life for me, and I’m so glad that Mindwork Games along with Journeyman Miniatures have decided to begin producing larger scale kits to represent in three dimensions Mr Bonner’s paintings.
This kit did get put aside a couple of times to allow me to paint commissions, but all the time Klom seemed to be watching me and reminding me that he needed completing.
I’m pleased with the finish, and although Mindwork do a version of Klom as a full figure, I may choose not to get that, simply because I’ve got quite a few of their other kits that really should get my attention.
However, I suspect that the full figure is every bit as well-produced as this bust, and encourage you to have a look at their website, or if they’re attending SMC in October 2025, have a look at their trade stand. But be cautious, you could easily spend a lot of money with them !