Battle Queen
75mm white metal figure from Draconia ? Ares Mythologic
Painted in 2017
I’ve always liked this series of models, so much so that it’s embarrassing to say how many of the figures and busts I’ve got waiting to be painted on the grey army shelf. However I defend this position with the fact that there are rarely duff releases from this Spanish company, so it’s easy to end up with a stockpile of them.
Box art is excellent, sculpting and moulding is very good indeed, with little to clean up. If I was to make a complaint, then it would be that detail is very lightly sculpted. It’s likely in scale actually, but this makes it a painters piece and beginners might struggle to bring out all the detail on some of the finer details.
Fit of parts is excellent, with almost all of them being separated at natural breaks so that filling becomes almost unnecessary.
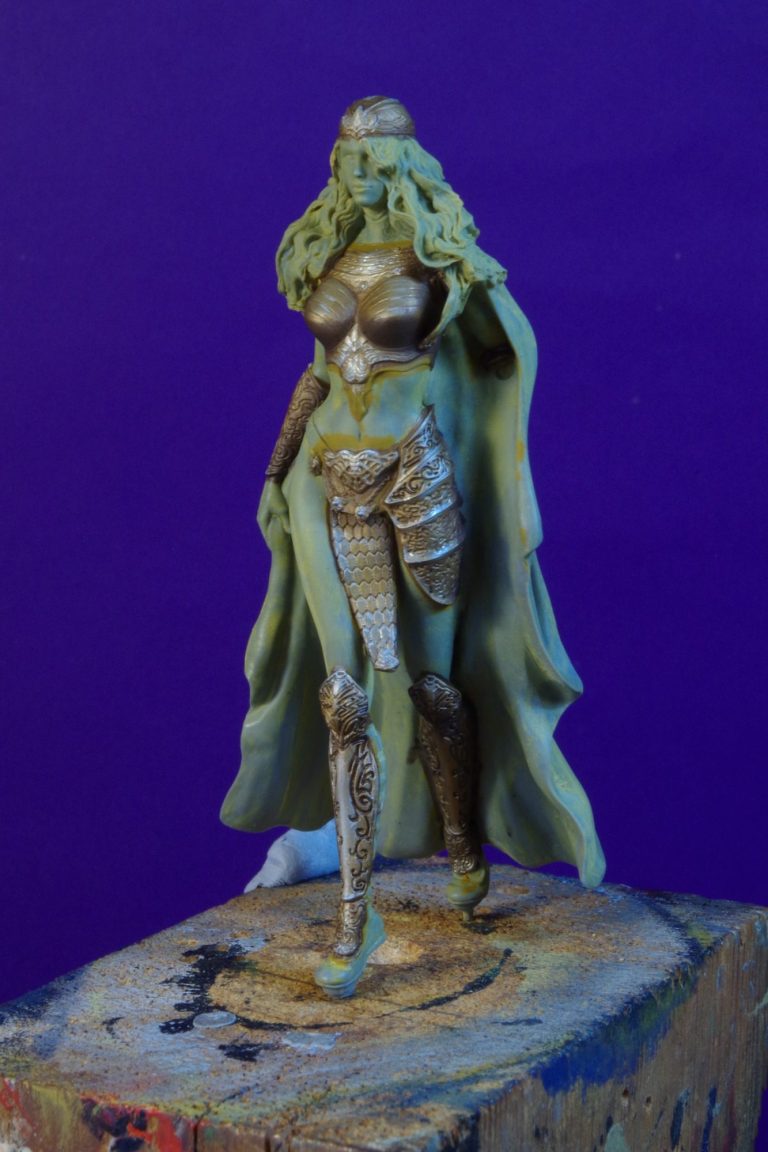
Photo #1 shows the box art, and photo #2 is where I got started.
In this shot I’ve primed the figure with a very weak mix of sand coloured acrylic and a lot of Isopropyl Alcohol.
The alcohol breaks down any oils that are on the components and the small amount of paint is there simply to let me see which areas I’ve covered. After that I can add undercoats, in this case a very pale flesh colour.
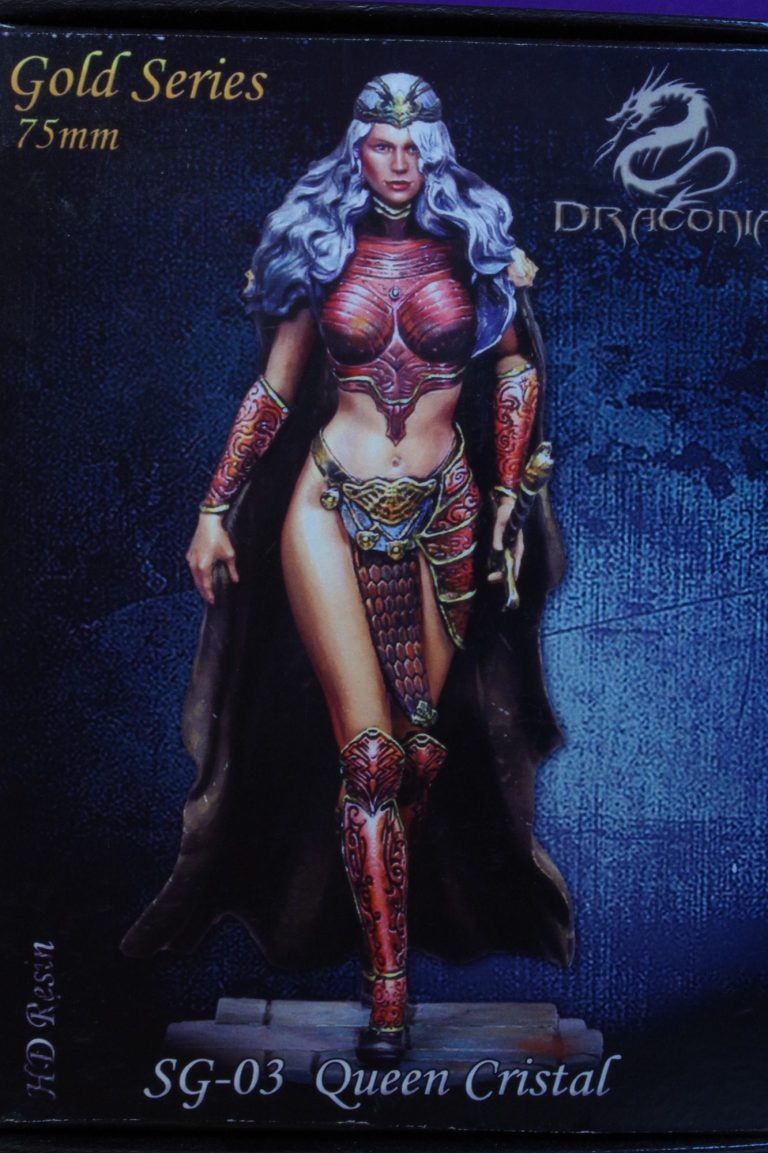
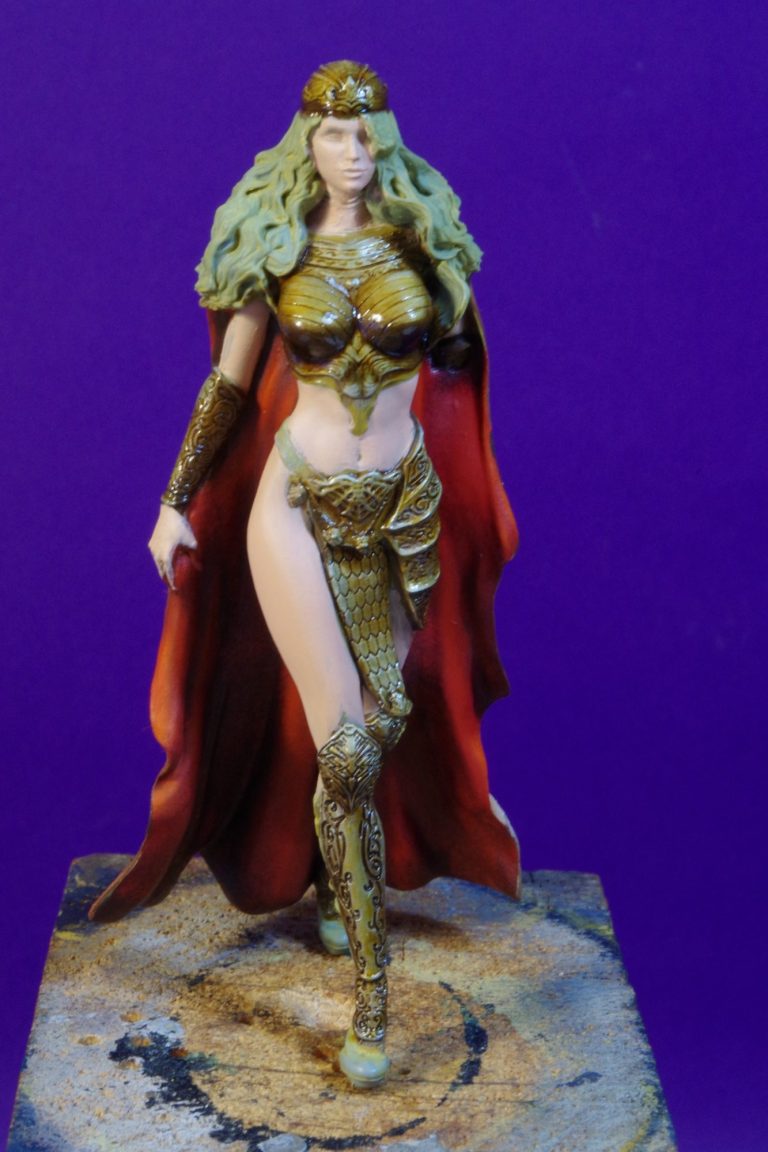
Photo #3 shows this up much better where I’ve added the lining of the cloak with a red acrylic, mixed with just a spot of Tamiya Flat Base, and then coated that with oil paints, starting from a mix of Carmine ( a dark red ) with just a spot of Mars Black. That gives the deepest shadows, and then Carline on its own is used to build up the mid-tone colours. Finally Scarlet is used to bring out the highlights, and the model is then put in a drying cupboard for a couple of days ( Drying cupboard is posh for an old kitchen wall unit with a 25 watt light bulb in it to provide a heat source ).
The purpose of the Tamiya Flat base mixed into the undercoat and then finally the use of the drying cupboard is to help remove the oil based carrier from the pigments. Giving the oils something to soak into – the matt undercoat – and also applying heat afterwards makes the oil paints dry to a matt finish, rather than a semi gloss or gloss that would be the case without these additions.
Also in photo #3 I have added the gold metallic areas of the armour. I prefer to use printers inks for this as they are spirit based ( or sometimes come as a powder ) and can be added to oil paints. The pigment in the printers inks is very finely ground, and gives a very good metallic finish.
In this case I started off with a bronze colour mixed in with some Burnt Umber oils, then adding just the Bronze as a mid-tone, building up with Antique Gold then on to Bright Gold for the highlighted areas.
I must note here that the printers inks have to be dried using a heat source, otherwise they will just rub off the surface of the model at the least touch.
Oh and they dry to a matt finish too, so they tend to look a bit like Non Metallic Metals (NMM ) once fully cured. So they need coating with a varnish of some type, and I find Tamiya Smoke lacquer to be excellent for this.
Another thing to note, the Tamiya Clear colour range are all Lacquers, not acrylics. They have a different carrier medium from an acrylic and if used straight from the jar will dry too fast – creating drag marks in the surface from the brush, and also attack and melt any previous layers of Tamiya clear colour that has been applied........ So how to build then up on a model to control the depth they add ? Well, that’s pretty simple, just dilute then with an equal amount of water. You still have to be pretty quick applying them by brush, but you can add as many layers as you want to build up an effect. In the case of this model, there’s about five layers on the armour to bring out a decent shine.
At last – I bet you thought I’d never shut up about photo #3......
On to photo #4 then.
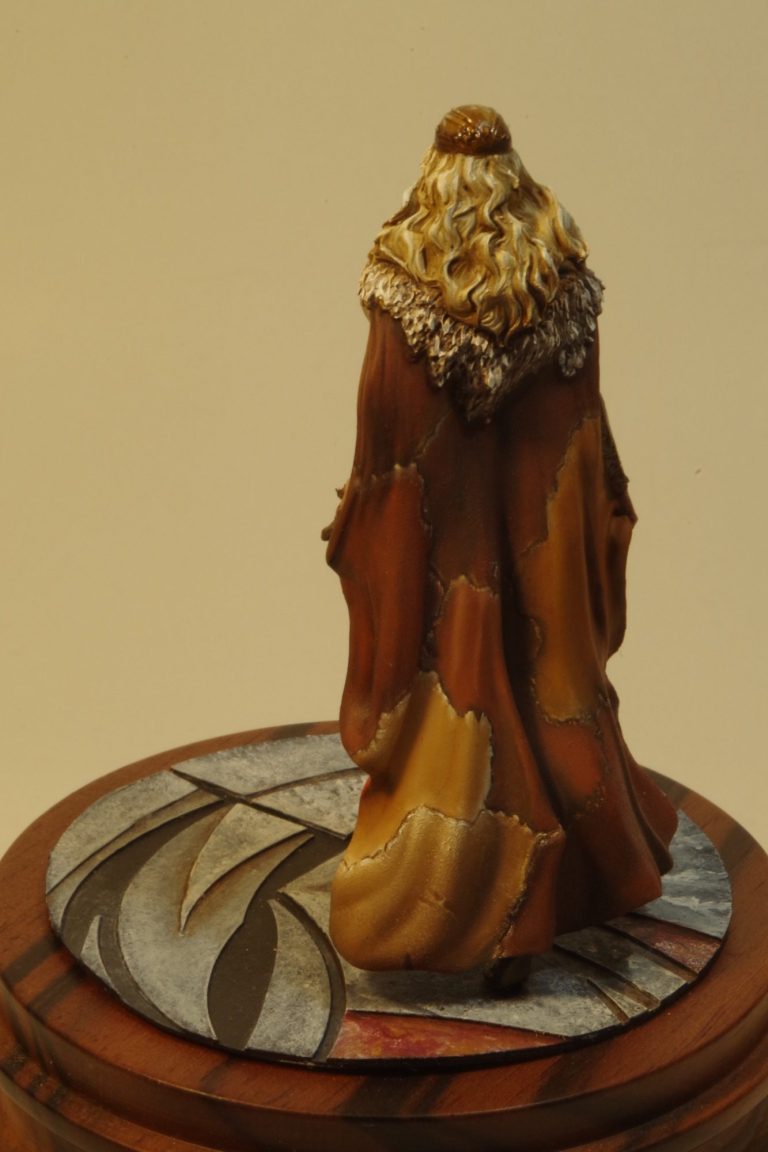
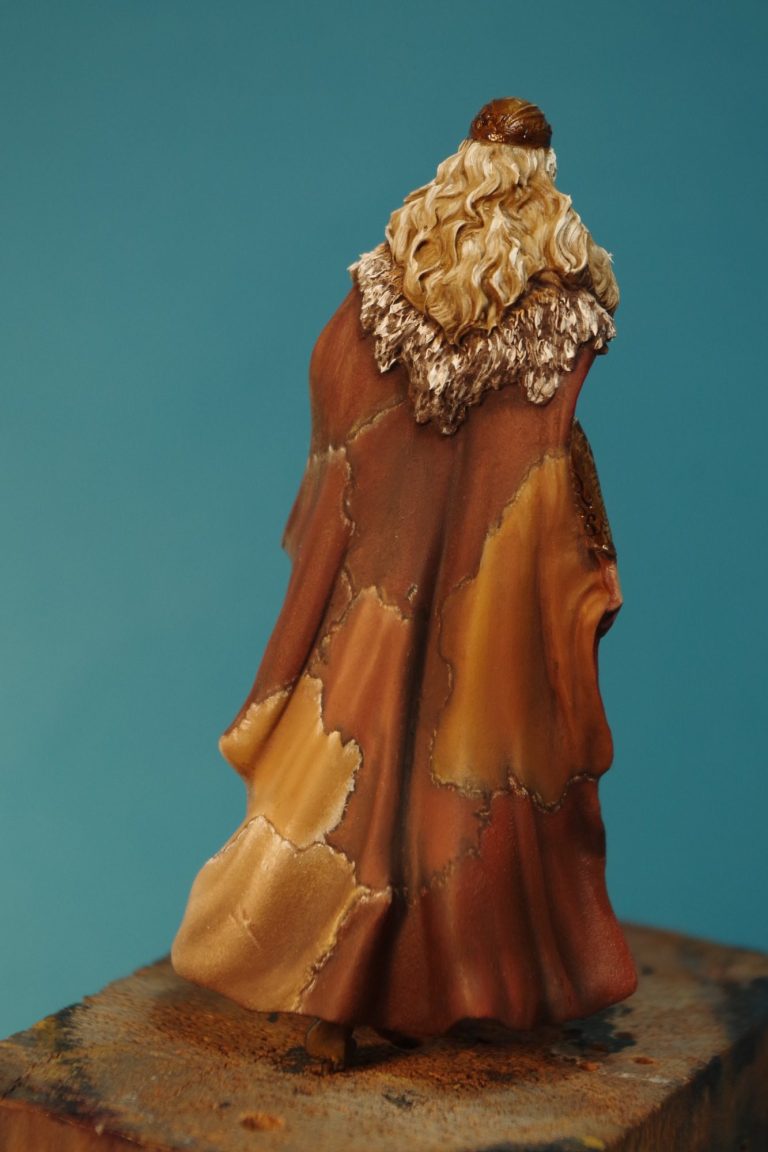
I tend to think the back of a model is as important as the front, and so I thought I’d add a patchwork leather effect to the cloak.
The process is a bit more involved than simply painting it all one colour, but it’s not difficult either. The whole cloak was undercoated in a sand colour acrylic, then I laid out several brown colours – Burnt Umber, Mars Brown, Light Red, Mars Yellow, Buff Titanium and Titanium White. Used in different strengths these colours would give me a vast amount of different shades of brown through to cream.
To begin the painting process I used the Burnt Umber to mark out a random shape for the first patch of leather. Inside this I then added Mars Brown, lightening it with a little Light Red ( which is more of a rust colour ) to build up the highlights. Finally Mars Yellow was used to add extreme highlights and a little of the Buff Titanium ( a cream colour ) to pick out the edges ( Top left as you look at the picture ).
Some areas I started lighter, using the Burnt Umber to mark out the edges, but then going straight to the Mars yellow and then lightening that with the Buff Titanium and Titanium White ( mid right as you look at the picture )
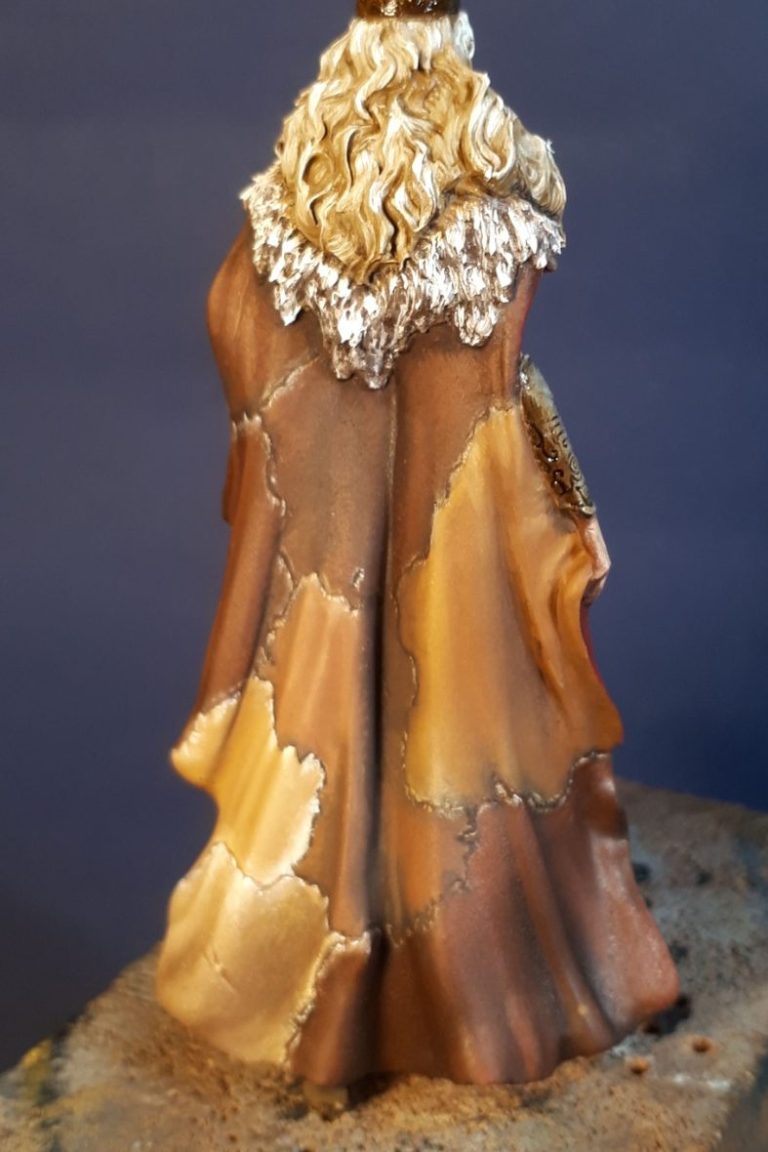
The bottom left ( by this time I was running short of colour mixes ) is Raw Umber, which has more of a green bias that the Burnt Umber, was used as a starting point, with a little Mars Yellow and then the Buff Titanium and Titanium white for highlights.
Photo #5 - Flesh colours. OK, I admit it, these gave me some proper headaches ( not pretend headaches, Proper Headaches ! ). The main problem was that I ( stupidly ) kept breaking off. Either I didn’t have the time to do the whole of the flesh areas, or my paint mix dried up before I got back to the bench. I’m usually pretty good at reproducing colour mixes accurately, but the flesh areas just weren’t having it. That’s why in this shot the right leg looks slightly different to the midriff, which in turn looks slightly different to the face and neck.
In frustration I ended up repainting the whole of the flesh areas when I was sure I had time to do the whole lot in one go and also I mixed up plenty of paint so that I didn’t run out. The paint mix – and here you’re going to laugh, because it’s simple enough – is just Mars Brown, Titanium White and a little bit of Purple Madder Alizarin.
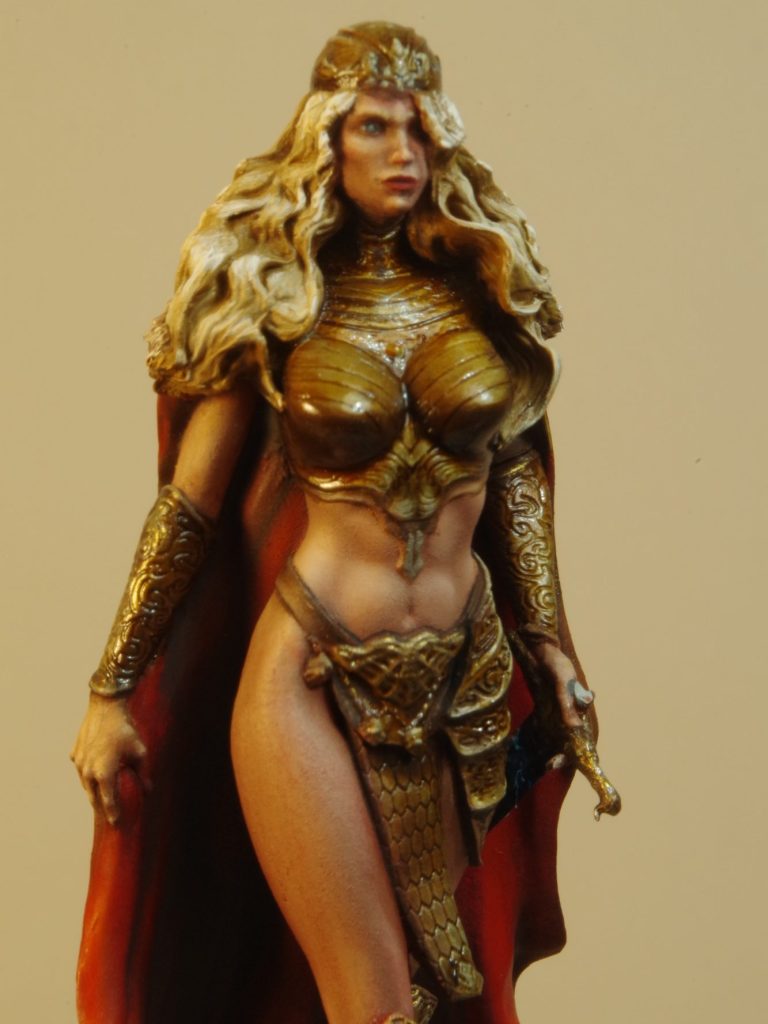
Photo #6, there, that’s better, nice matching skin all over. Oh and the hair painted too.
For the hair, and blonde is a colour I’ve had trouble with for years, I used a shadow colour of Burnt Umber oils, allowing this to dry for a couple of hours, then adding Mars Yellow and Buff Titanium to build up mid-tones and highlights. It would be simple to dry brush the har as the detail is very deeply sculpted, but I find it looks better to paint it as though combing the hair, allowing brush marks to appear which better depict the strands of hair. Using oils, one has to remember to keep wiping the brush on a clean cloth after each pass so that any dark paint is removed, before recharging the brush with fresh paint to add more mid-tones / highlights.
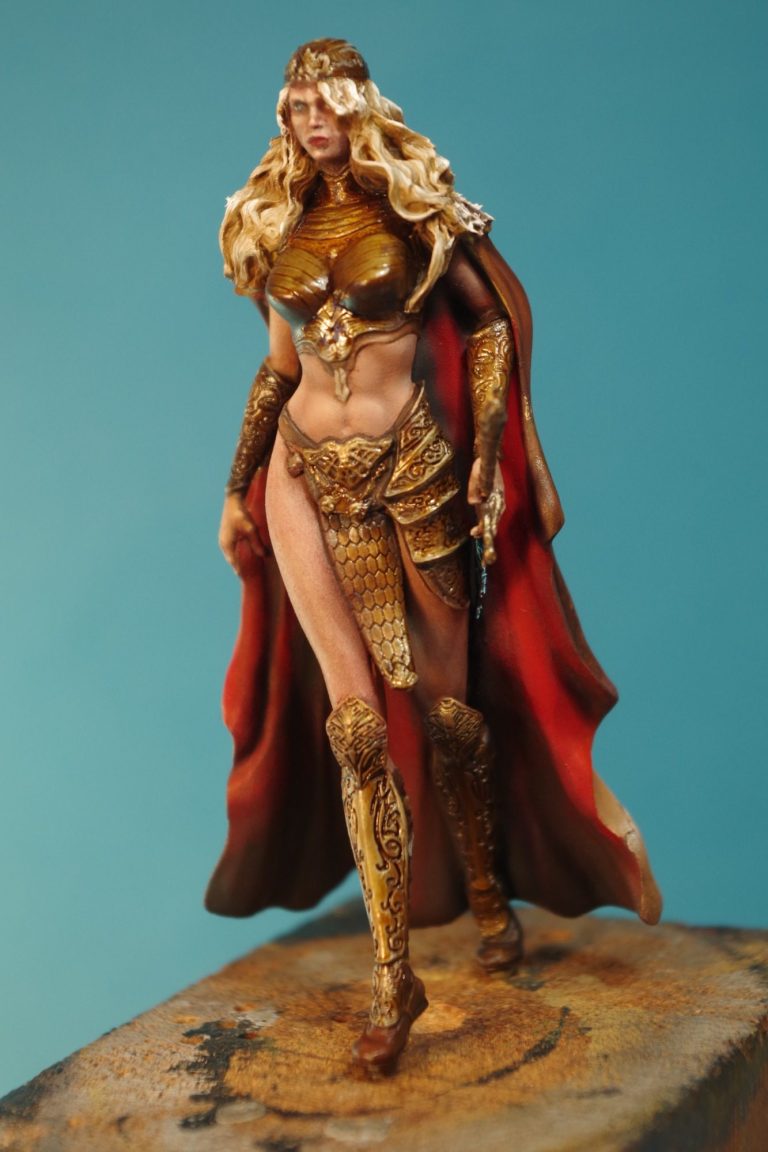
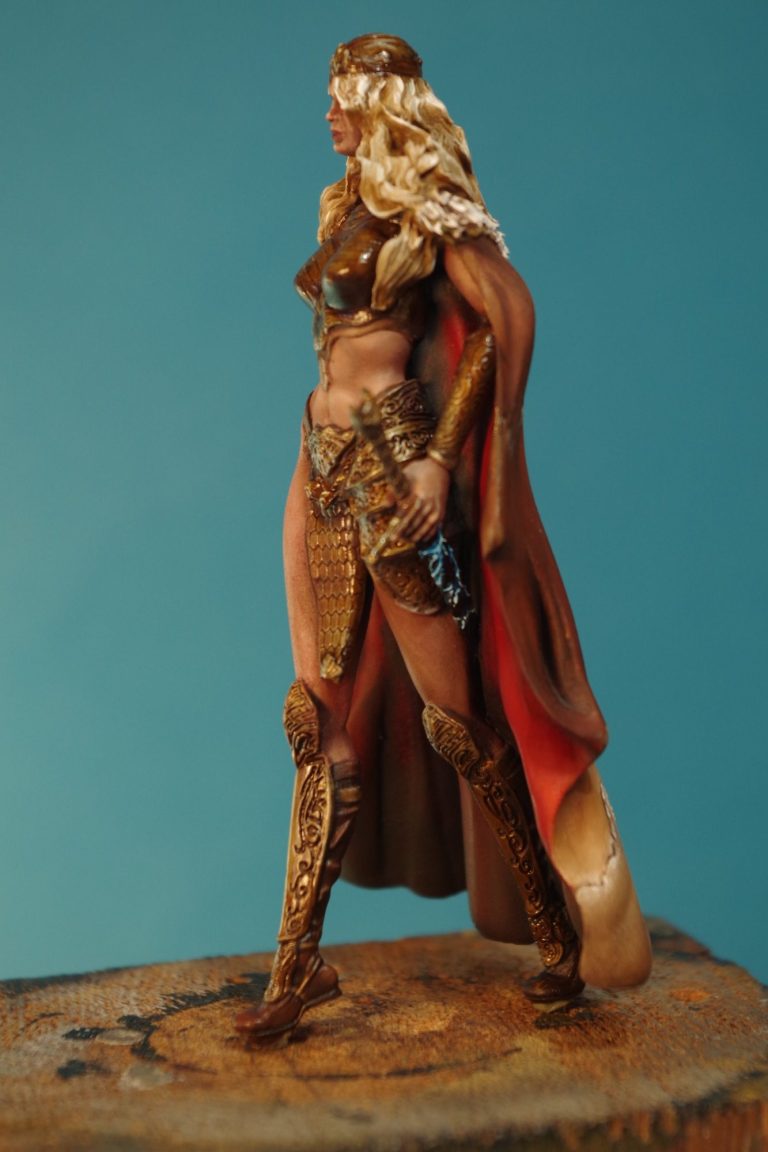
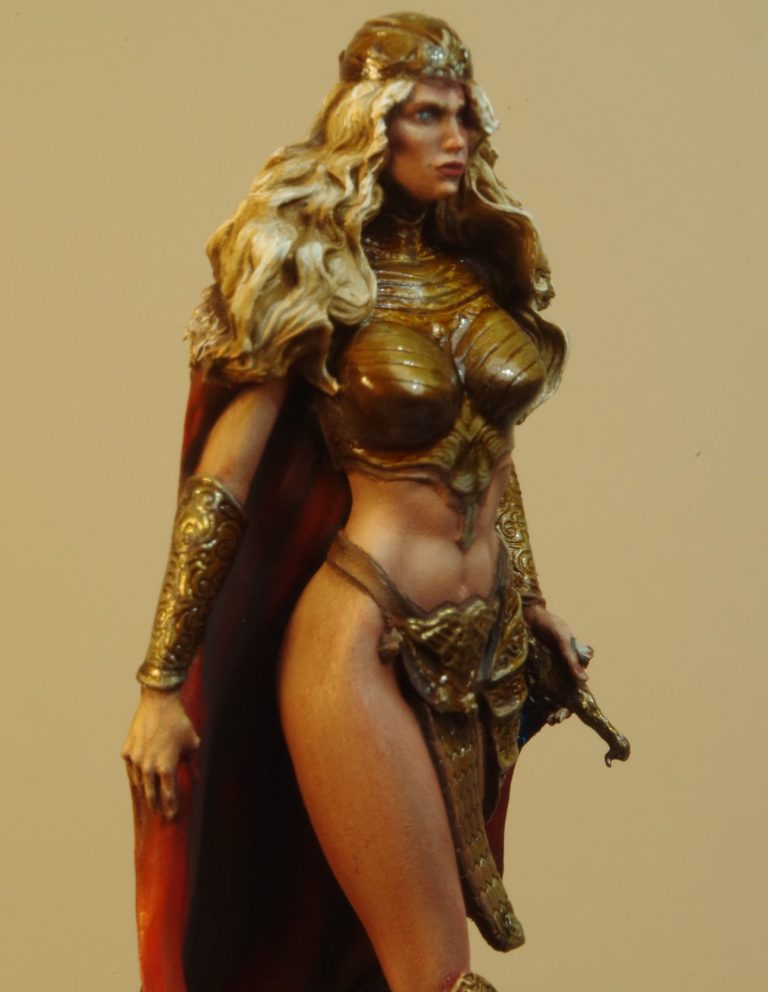
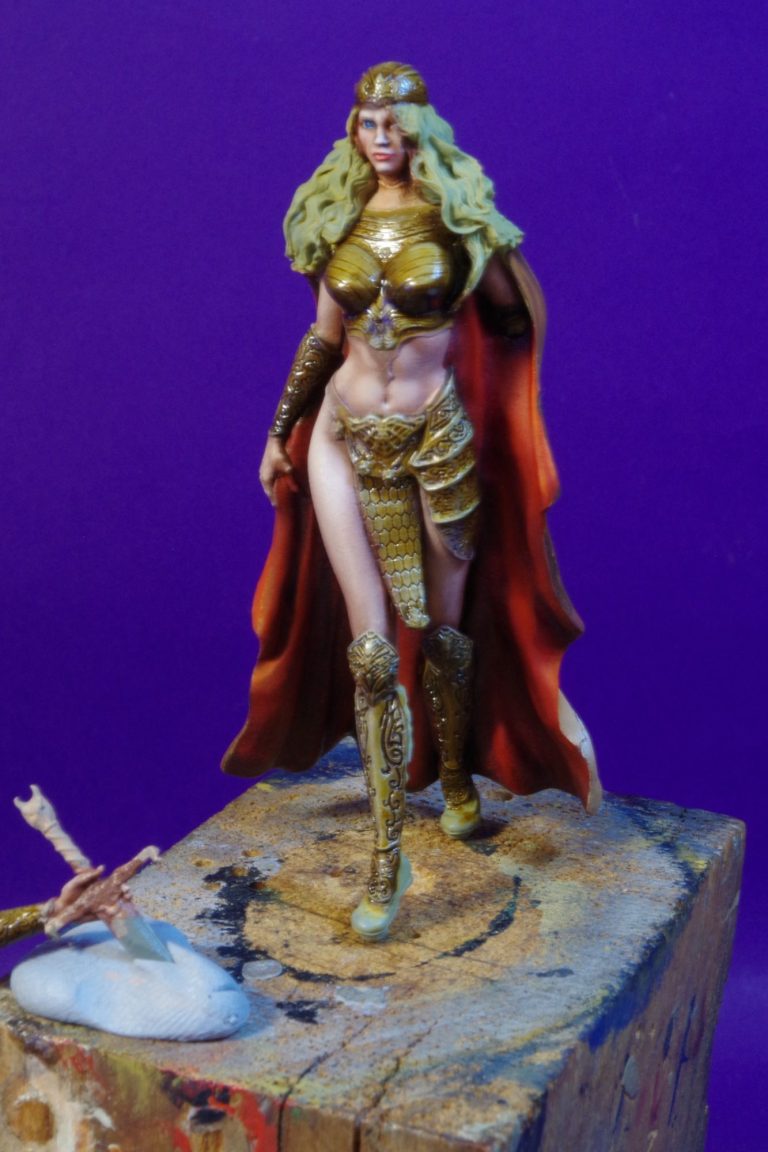
Photo #7 shows a side view and the sword hilt and partial scabbard that I’d left separate until now. I decided I wanted a break from all the reds and browns on the model, so added details in blue to the sword scabbard, although the hilt is still rendered in gold.
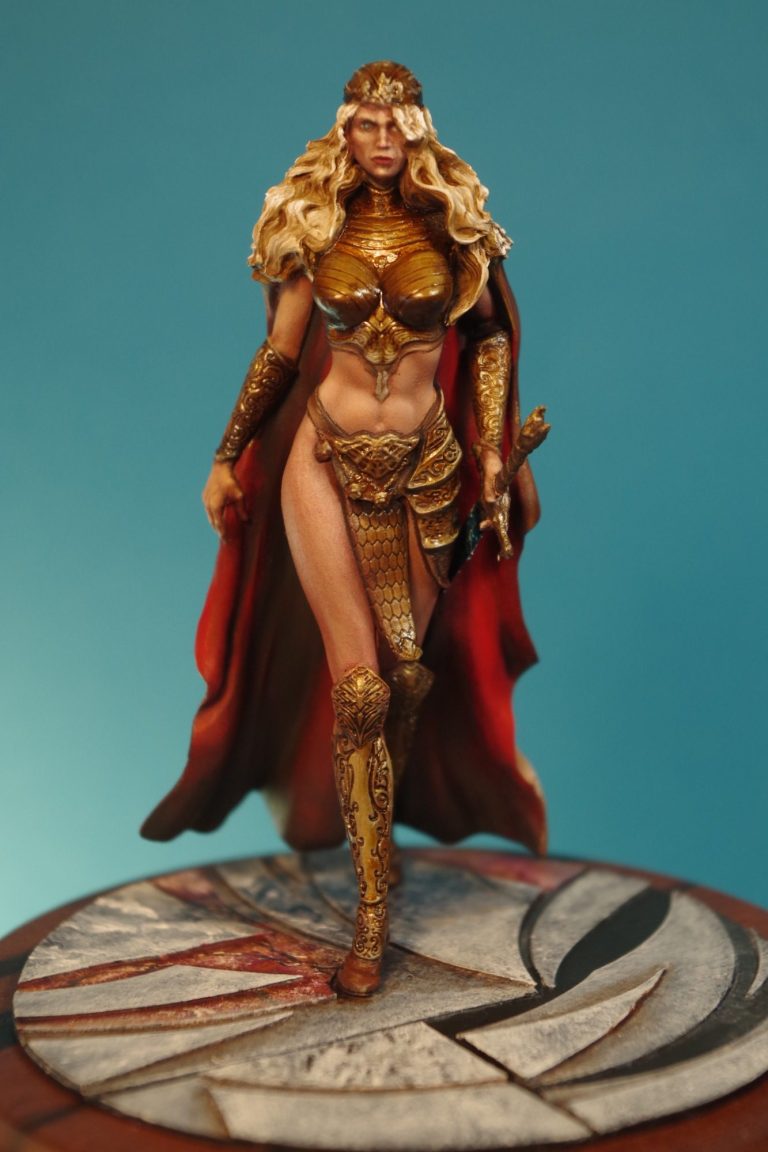
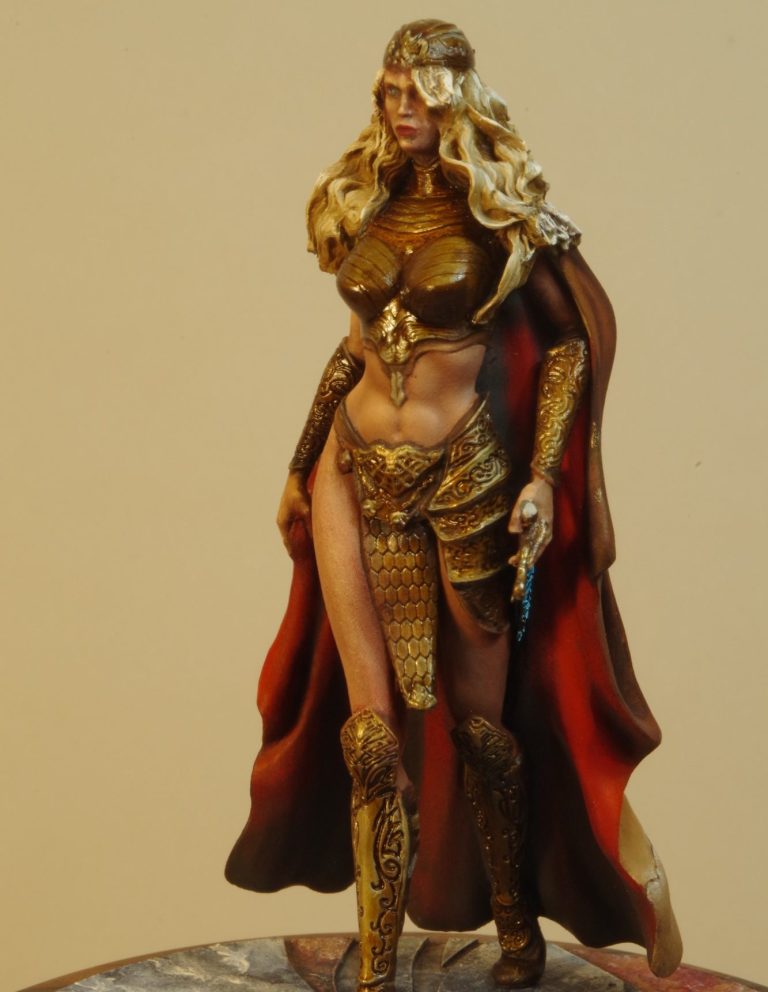
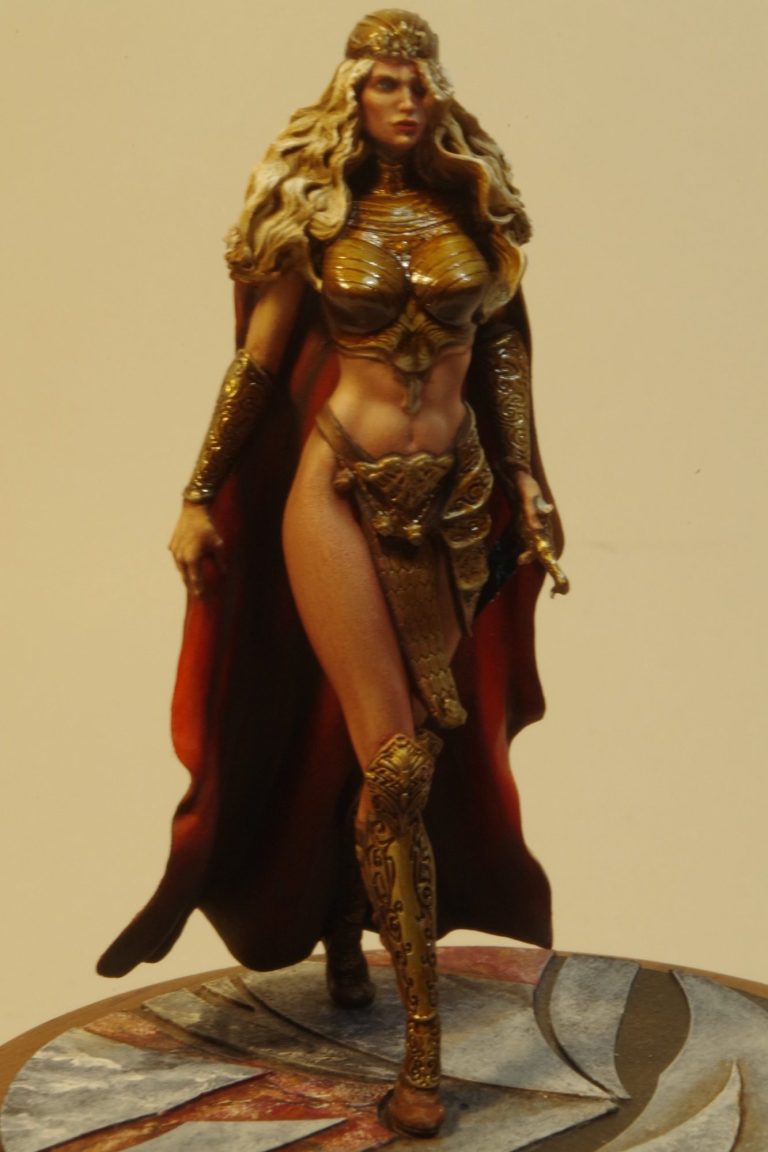
Photo’s #8 and #9 give an all round view of the figure as it nears completion, with a final night in the drying cabinet, that would be about it for the model, now to sort out the base.
Again I wanted to make something relatively complex, but without much to drag the eye away from the figure itself. I’d been inspired by a model by Conrad Mynett some time back where he did a Yin Yang design on a floor for a couple of models ( Luke Skywalker and a Dark Skywalker if memory serves ) and so setting to work with some plastic card of varying thicknesses and an old compass cutter, I made lots of strange curved shapes that when glued together made an almost alien looking floor design.

I used black and grey acrylics to pick out the different shapes, adding mottled effects with lighter, then darker colours to some areas, and to tie the figure in to the base a little, I added a few red areas as well. Photo #10 and the finished shots show all this off, along with a nice round wood plinth from Oakwood Studios.
In conclusion.
I like this figure, and I like this company that produce it. It is a joy to paint, and one of my favourite figures in the cabinet. Why haven’t I painted more Draconia models then? You ask.
“Um.... Well.... You see..... Dunno.” Is the simple answer.
Foolishness cannot be ruled out I guess.