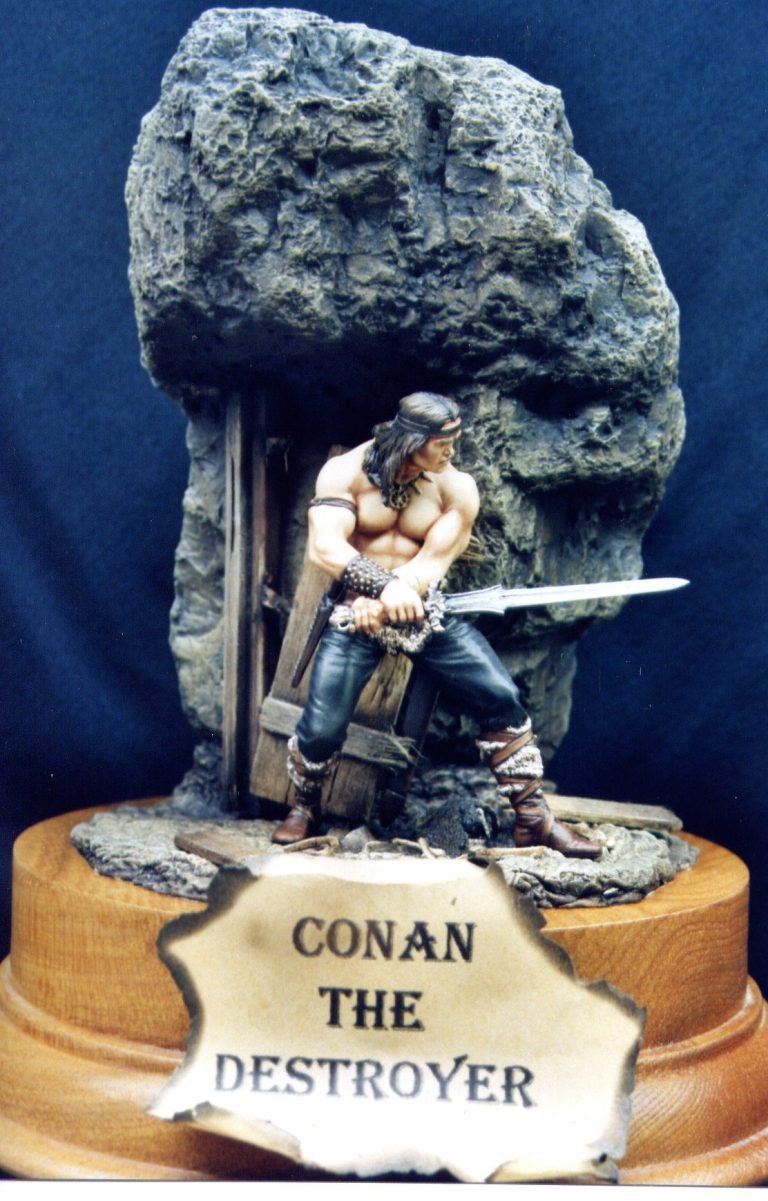
Conan the Destroyer
75mm white metal figure from Pegaso Models
Painted in 2005
At the time this was released, it was an unusual departure from their normal military fare, Pegaso have been releasing one or two large scale resin fantasy kits, and at premium prices too, but this is the first one ( that I know of at least ) that’s in their miniature white metal series.
Then again, Pegaso have released quite a few 80mm “Girlie” models over the past few years, so why not this then ?
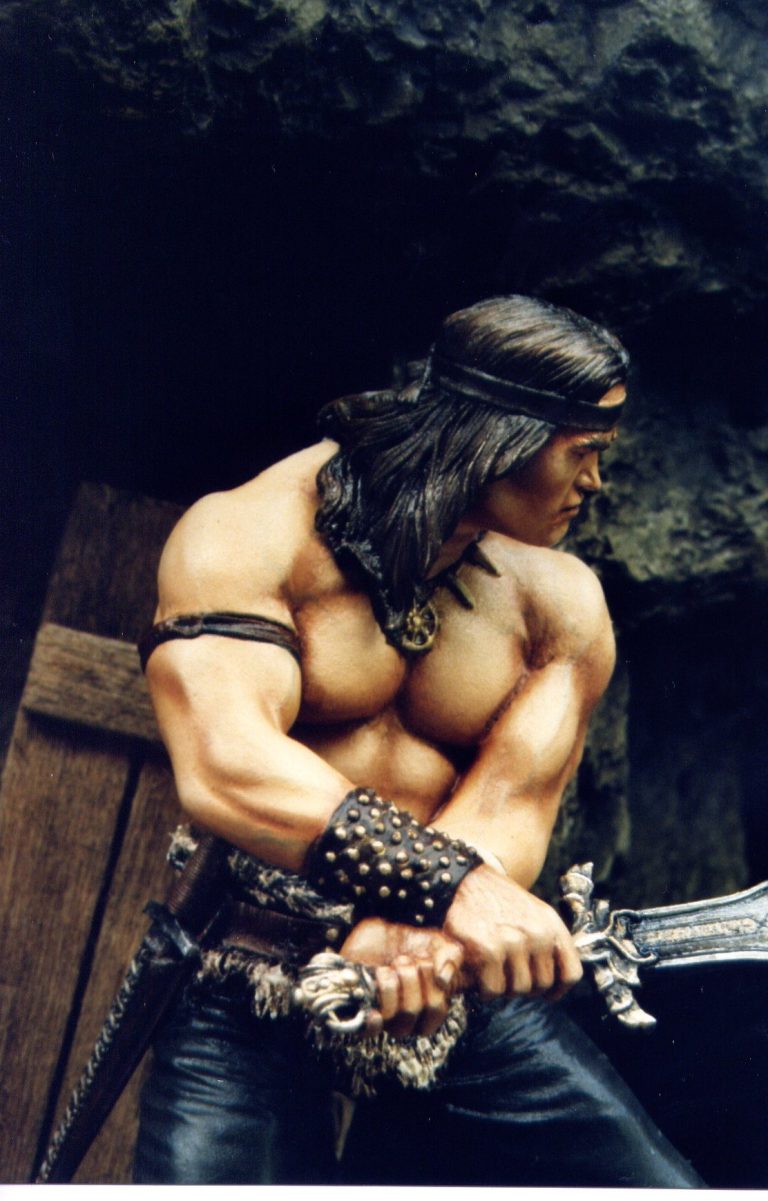
The kit is well up to their usual quality, the box has a good colour photo on of a painted example, and the parts are well protected with foam packing. All the parts of my kit were well moulded, and there was very little cleaning to do, just minimal attention with a small file and some fine emery cloth. The likeness is pretty darn good, but as is usual with character-based figures, the final touches of paint will make or break it.
I decided to paint my model in sub-assemblies and painting is pretty simple, the only snag might be the large expanses of flesh tone.
Unusually, and only because Thomas was consulting me about how to paint a Tyranid ( Dad what colour shall I use, Dad have you got this, Dad have you got that, Dad….. ); I started painting the lower half of the model first.
As the costume worn by Schwarzenegger is pretty dark in the films, I could just prime with some white acrylic ( thinned with Isopropyl Alcohol ) and then add a dark undercoat ( Vermin Fur – Games workshop ) over the boots and fur areas and some Chaos Black to the pants. Photo #1 shows the model held together with Blu-tac and the fur areas painted in undercoat.
Over this I added some oil paints, using Burnt Umber for most of the shadows, Mars Brown as a mid-tone, and then used varying amounts of Mars Yellow and Titanium White to build up highlights on the different areas.
On the fur areas I used an old brush ( around size 0 and with just a stub of bristles left ) to pick up the white paint and to add dabs of it to the fur, almost in the same manner that girls use to comb hair with one of those long tined perm combs. By working from the lower edge of each area, and moving up to the top gradually, the effect of fur can be enhanced greatly. The trick is to keep wiping the brush on a piece of kitchen roll and picking up new paint as soon as that on the brush has been contaminated with the darker colours.
I used some thinned down Mars Black oils to enhance the shadows on the straps around the lower legs once all the above was dry.
For the trousers I used Mars Black, making a mix of Titanium White and Mars Yellow to use as a highlight on the upper edges of the creases and on the knees.
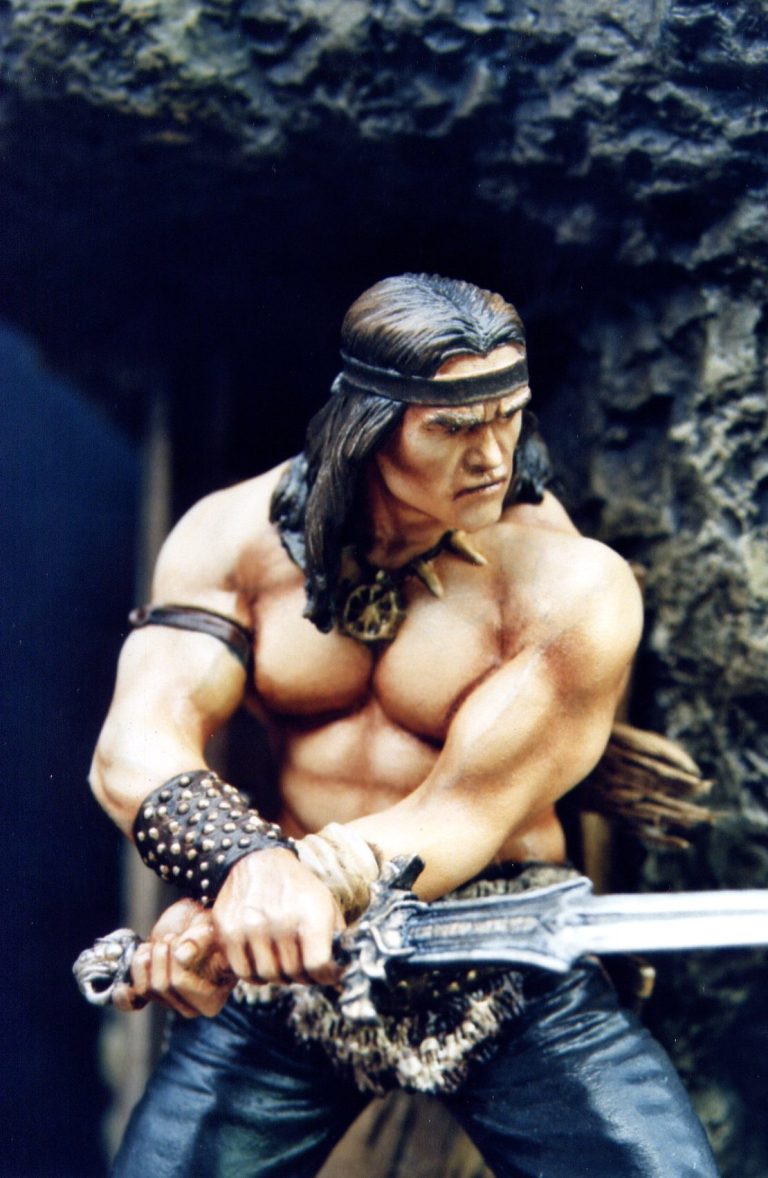
For the skin areas – yes, Thomas had gone to bed now – again I primed with some of the Skull White ( GW ) used a mix of acrylic Humbrol Flesh tone with Orc Brown and some more of the Skull White to lighten it.
In an attempt to get the veins on the arms to look real, I added these now, working on the theory that they would look more realistic if they were covered by a thin layer of oil paints, that if painted on the top as a last minute thought.
Handily, being a well muscled chap, I could reference where the veins should be by looking in the mirror ( I sense some scepticism after that comment ???!! ); anyway, I looked through a couple of old bodybuilding magazines too, just to check positioning O.K. !
With that done, I added the oil flesh tones, as usual mixing the mid-tone and adding that to the model, then putting on Mars Brown for the basic shadows, and using Titanium White as the highlights.
Further shadows were added after with some Burnt Umber to deepen the effect of the recessed detail.
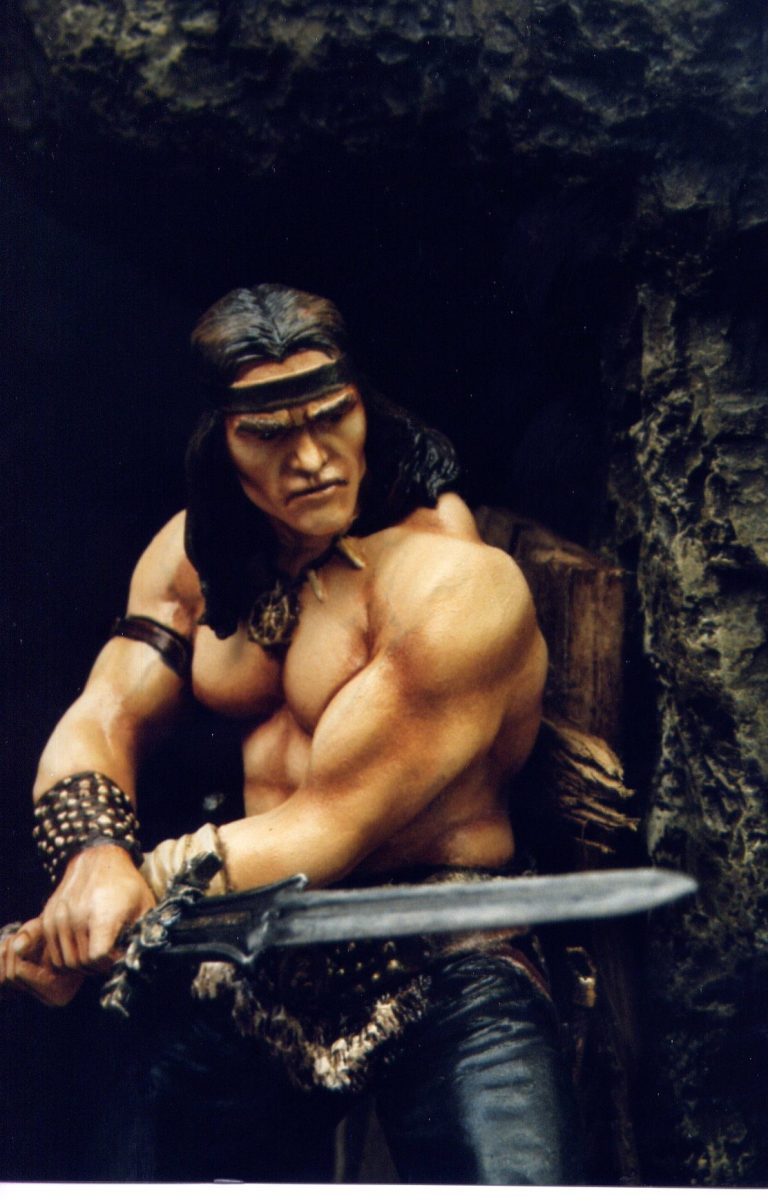
So that I could see if there was enough contrast on the shading on the face, and also to see if the likeness was O.K. I added an initial coat of Chaos Black acrylic to the hair.
The face looked a little pale at this point, so I added some more of the shadow colour to the deeper recesses and used a wash of the mid-tone flesh colour to dampen down the highlights.
The hair was then painted in oils, adding a very dark brown over the black acrylic, ( Vandyke Brown ) and then brushing on Mars Brown and finally a bit of the mid-tone flesh colour to add mod-tones and highlights.
The wrist guard and bandaging were added in and then the metalwork ( brass studs and sword ) were painted with applicable shades of bronze and silver.
And now for the fun.
The groundwork.
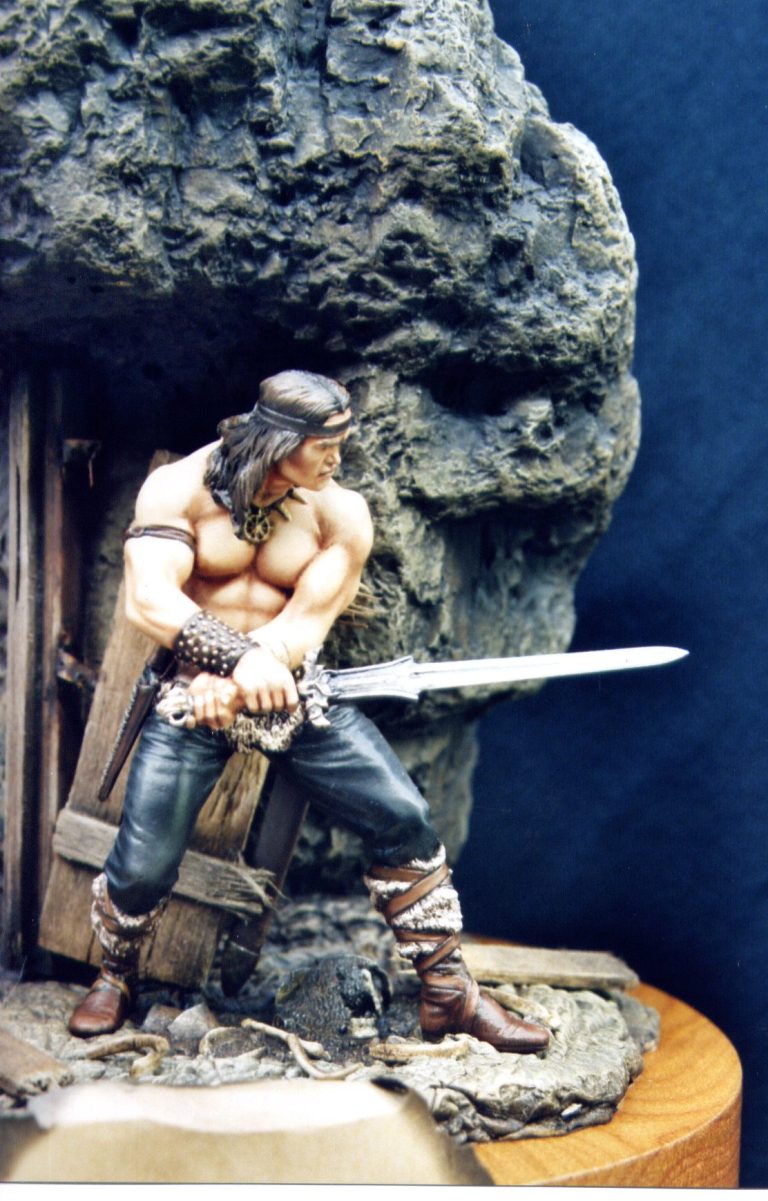
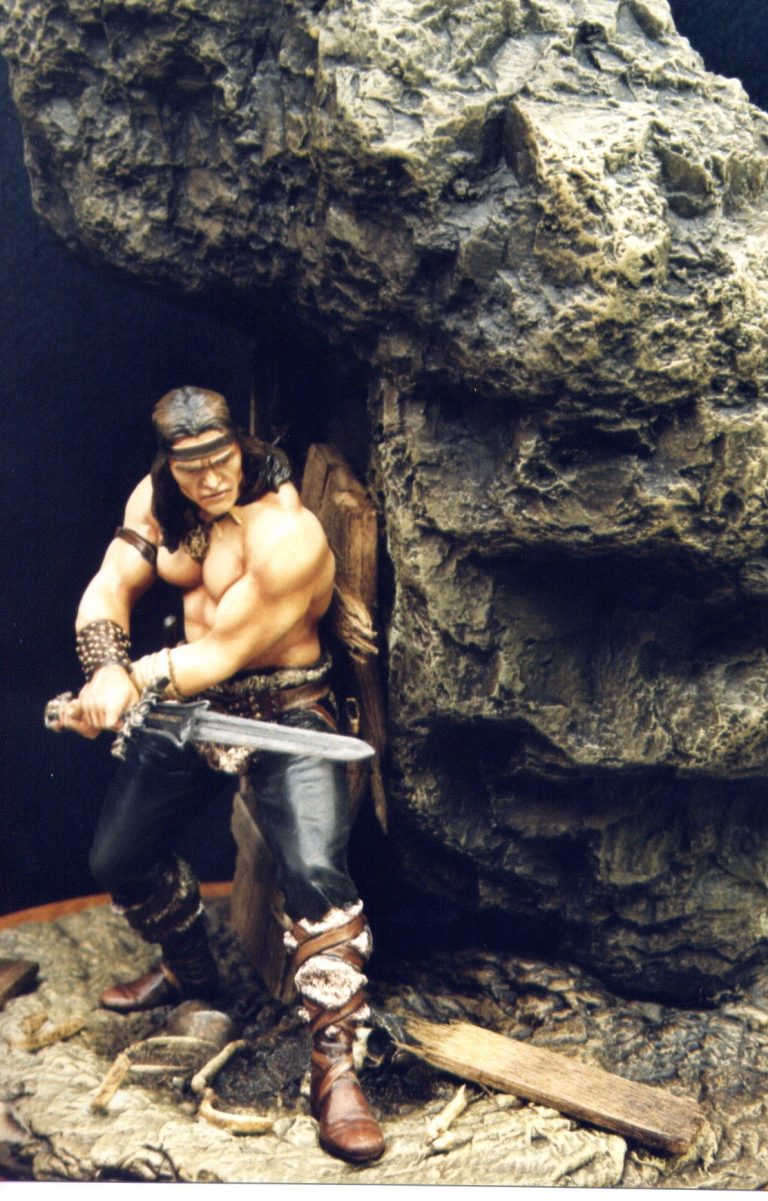
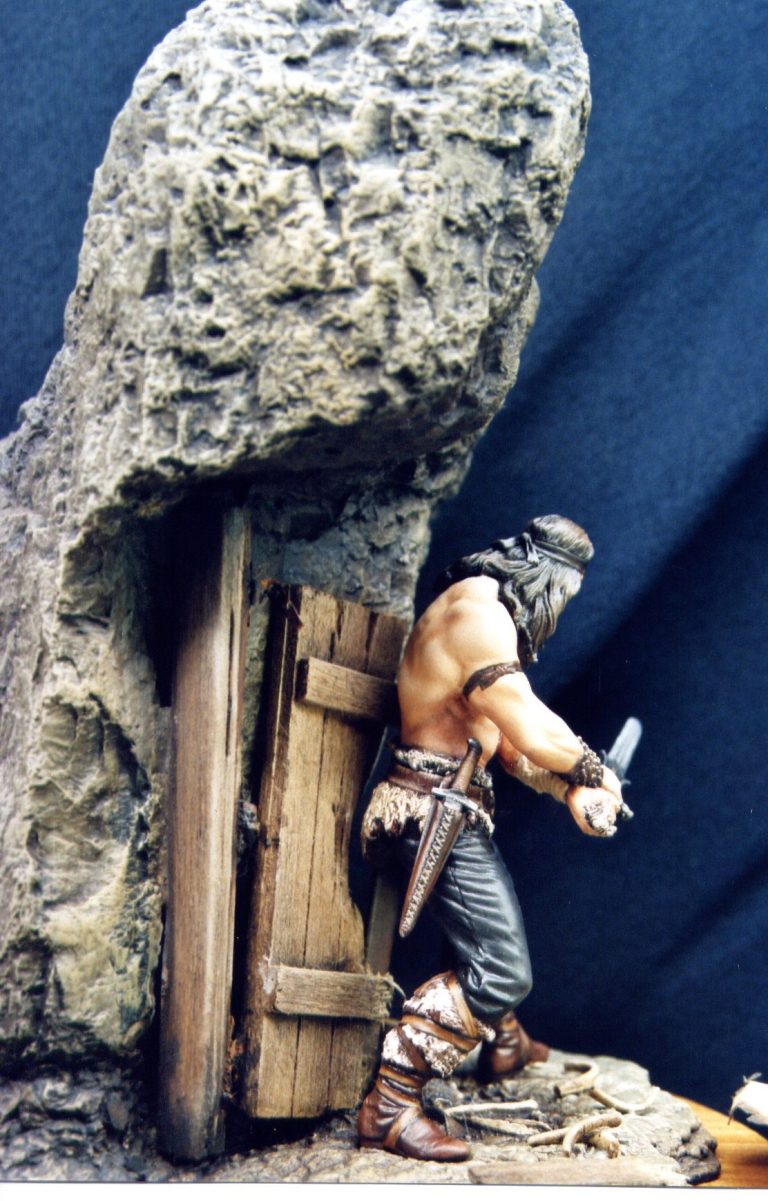
Recently I’d bought a large bag of coal, not for burning, but because coal has a lot of surface detail, and for years I’ve used it for depicting rocks on bases.The difference with this purchase was that the lumps of coal were particularly large compared to what I’d had in the past, and one lump in particular looked promising for this project as it was formed into almost an “L” shape. Turned upside down, it became half of a doorway.
This picture shows the initial groundwork, I’ve used some epoxy putty from Legends to make up the groundwork. This is really good stuff for this kind of thing as it’s more plastic than Milliput, and takes detail really well. I used a smaller piece of the same stone to texture the putty and match it in to the main piece of rock.
On the original base supplied with the kit, there’s some interesting details that I wanted to retain. There’s a skull with a helmet, and also some bones and some mail armour. To keep these, I cut most of the base away, just leaving this clump of detail, and then fastened it into place and added the putty around it, disguising the edges as best I could.
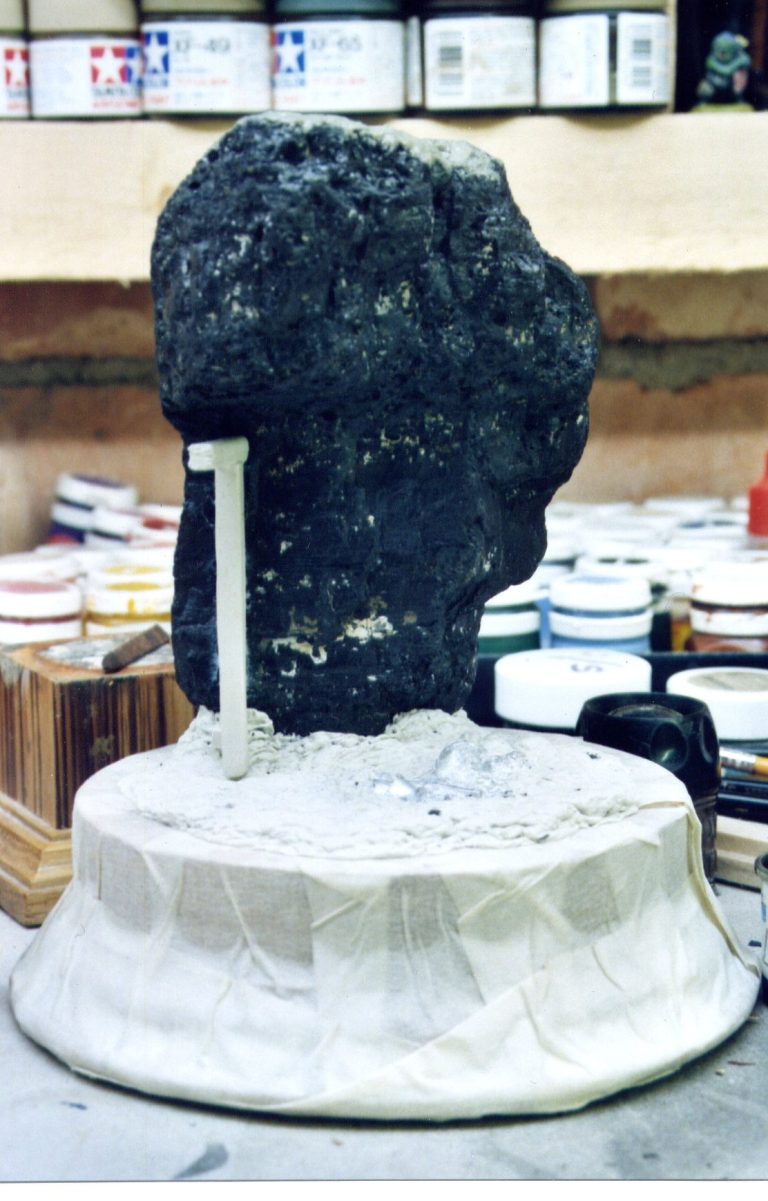
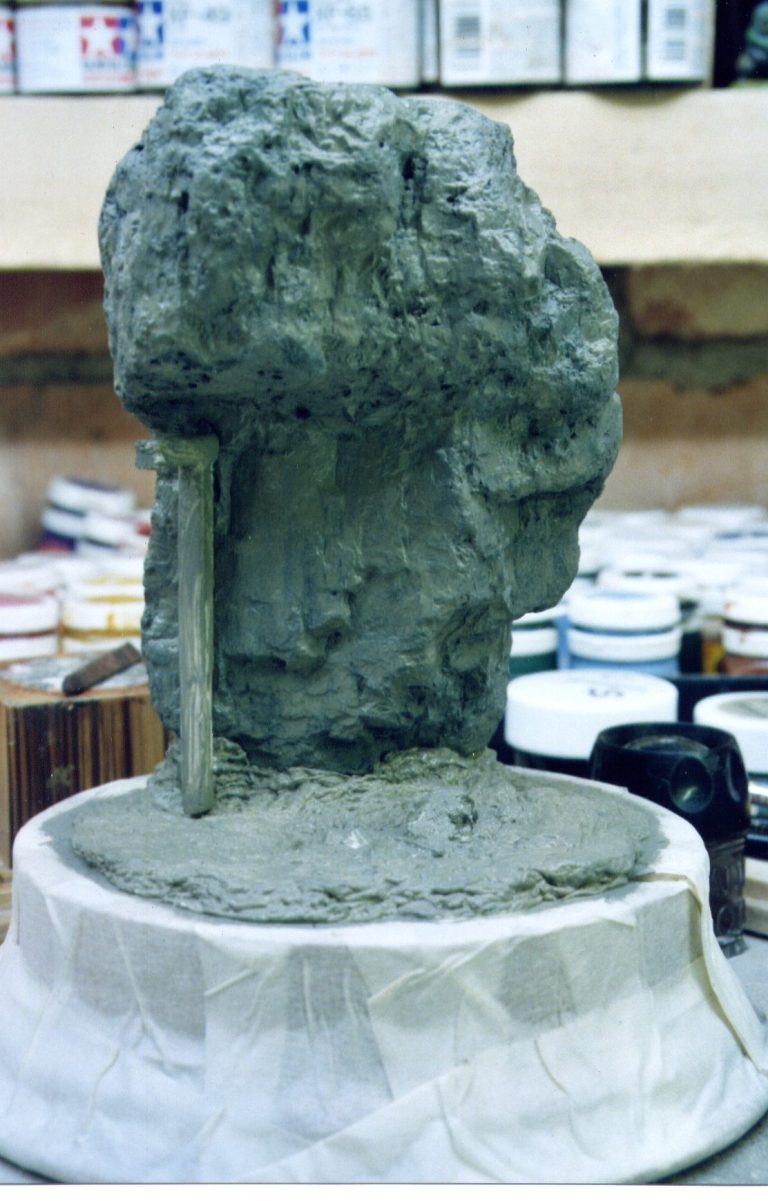
Photo #3 And in this shot an undercoat / primer has been used to unify the putty and the rock. This is a mix of Chaos Black, Skull White and some Orc Brown acrylics.
Also of note is the partial doorframe. Id made this one initially as a trial size, but had to adjust it to be higher, to compensate for the size of the figure. I’d initially hoped to put some bars over the top of it, to hint at a prison cell, and had made it quite small. The figure didn’t look right with it this size; I remade a larger version of the same thing, and didn’t bother with the idea of the bars.
I made part of a shattered door to go with this, using balsa wood, and also used some of the spare putty to make some more bones to be scattered about the floor.
Oil paint was used to add the shading to the rock, using Vandyke Brown, thinned just a little with White Spirit, and then the most of the paint wiped off the rock with an old T-shirt. I allowed this to dry for a couple of hours, and then drybrushed the groundwork with Mars Yellow and some titanium White oils.
The door and bones were added, and the armour pieces on the original piece of base, together with the bones on that, were painted in too.
Finally the figure was glued into position.
Verdict.
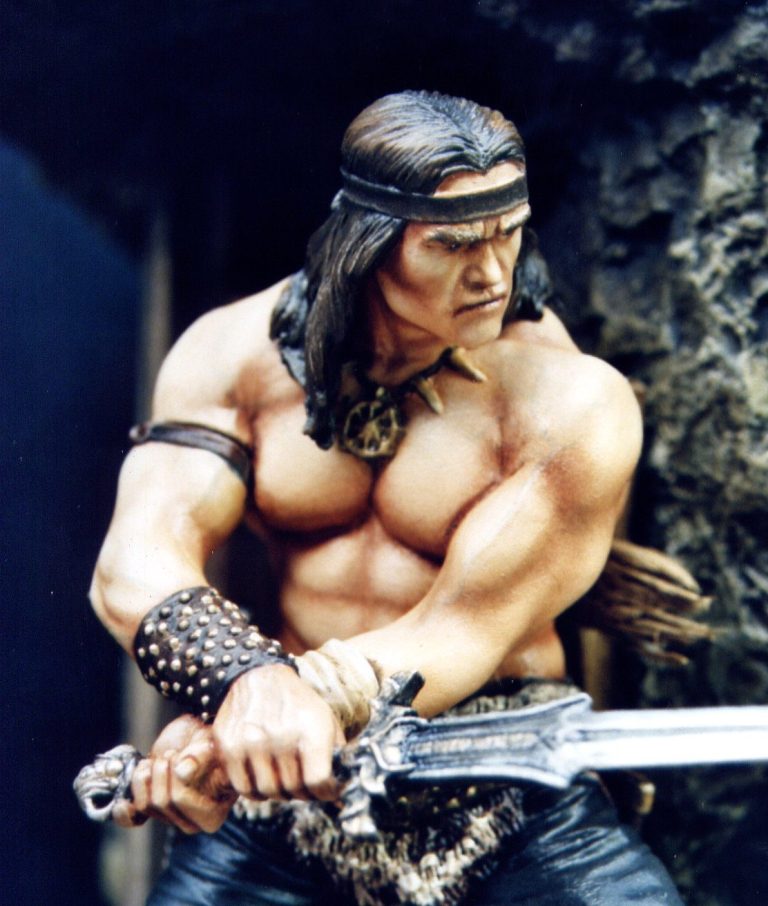
Well, considering the scale, this is rather a good likeness to a young Arnold Schwarzenegger. Bear in mind, he was only in his early 20’s when he made the Conan films, and so looks a little different to how he is today.
I like the pose, although if I had to be picky, I’m not keen on the positioning of the hands and arms and how they grip the sword. It looks neat and menacing, but is extremely uncomfortable, and makes a swing with any power almost impossible. Far better to have a two handed grip with the sword pointed towards the ceiling. But as I say, I’m being picky.
Apart from that, the figure goes together well, just a bit of filler around the hair at the back of the neck, was all that was needed.
For the price, I think it’s good value. I like Pegaso kits, and they can be relied upon to be high quality and something that’s going to draw the eye.
In the twenty one years since this was painted, the large lump of coal used for the background has split and fallen apart.
I'm not sure if this is due to climatic changes of where it's been stored, or just a case of the coal drying out, but whilst the figure is OK, the scenic base is no more.
I should make Arnie a new base really...... when I get the time.