Affair at Nery, 1st September 1914
1/32nd scale resin kits from Tommy's War
Assembled and painted in 2025 /26
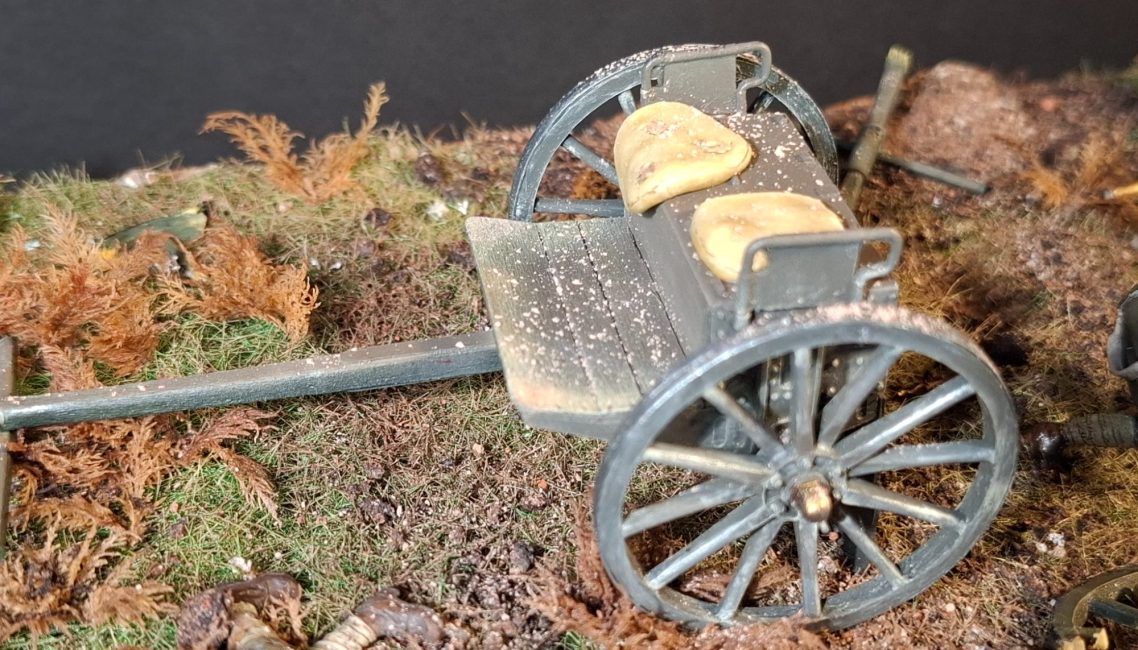
Photo #29 and I’ve used some epoxy putty to make a couple of seat cushions for the limber that is intact. Sitting on that metal lid whilst driving the limber and towing the cannon would be very uncomfortable, and I think that the average Artilleryman would seek some kind of comfort to prevent a sore bum.
I added some tears and holes to each of the cushions to indicate wear, and also perhaps the occasional round hitting them whilst under fire in this action.
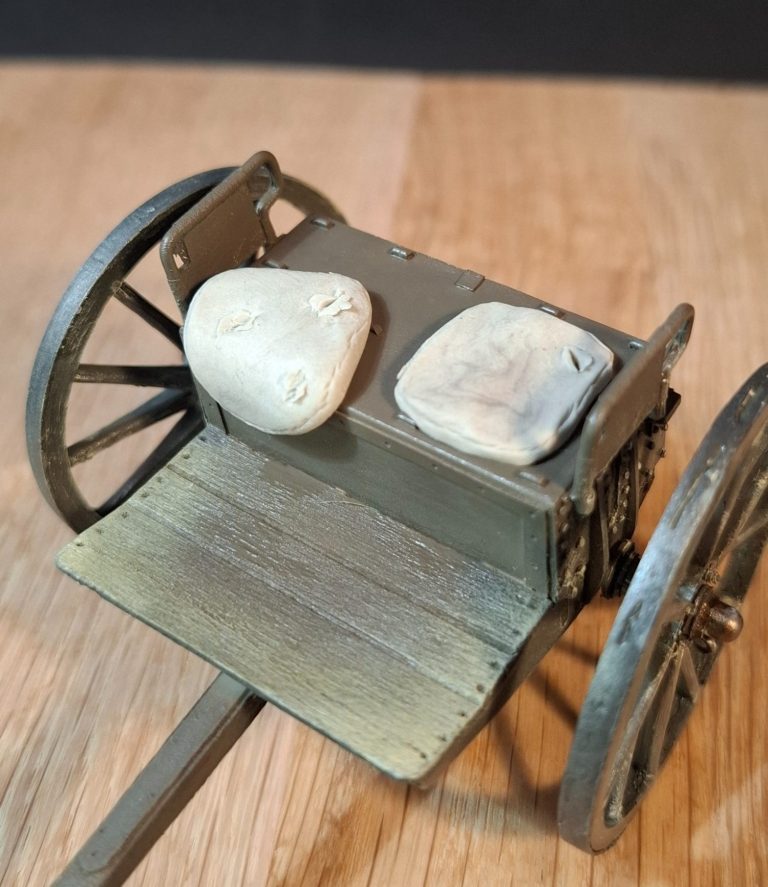
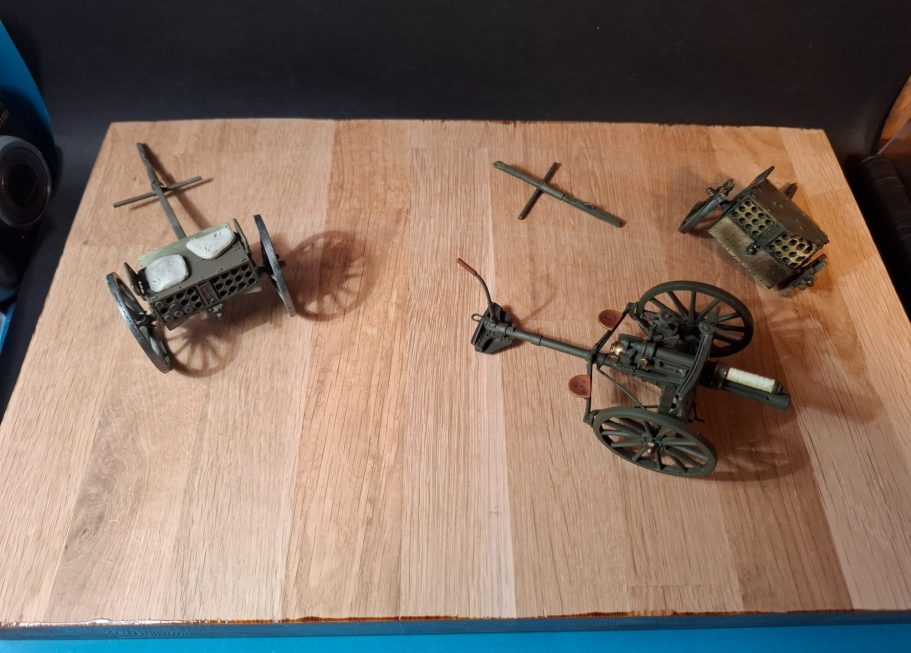
Photo #30 and I’ve selected a nice piece of White Oak blockboard to be used as the plinth, and in this shot I’m making sure that the main elements will fit into the area.
In reality, the limbers were actually a lot further away, the limber for the gun in use here being noted in one artilleryman’s writings was around thirty feet away from the gun, and in drawings from the time, the damaged limber is probably a good twenty feet away from the gun.
There’s two reasons I’m not making the model with those kind of spacings, one being that the plinth would simply be enormous and probably not fit into the client’s display cabinet, and secondly, with this closer spacing the urgency of being under fire is emphasised.

Photo #31 shows the two pieces of foam board that I’ve glued together to make the base for the groundwork. It’s about fifteen inches long and nine inches wide ( 375mm x 225mm ) and having placed the cannon and limbers on it, I’ve marked out where shell holes could be placed.
The one at the lower edge in this shot has been cut our and some spare foam board used to make a raised section around the crater.
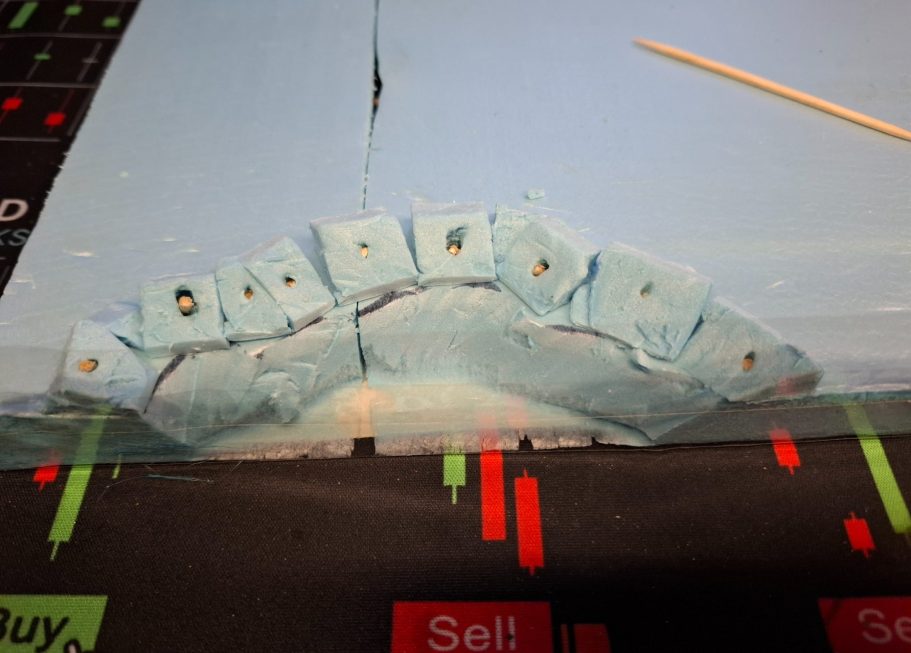
Photo #32 shows this in close-up, the small pieces of foam board being fastened in place with wood glue and some small pieces of cocktail sticks.
I’ve added some clear tape underneath the shell crater and across the front of it so that I can begin adding the sand and cat litter that will form the ground covering.
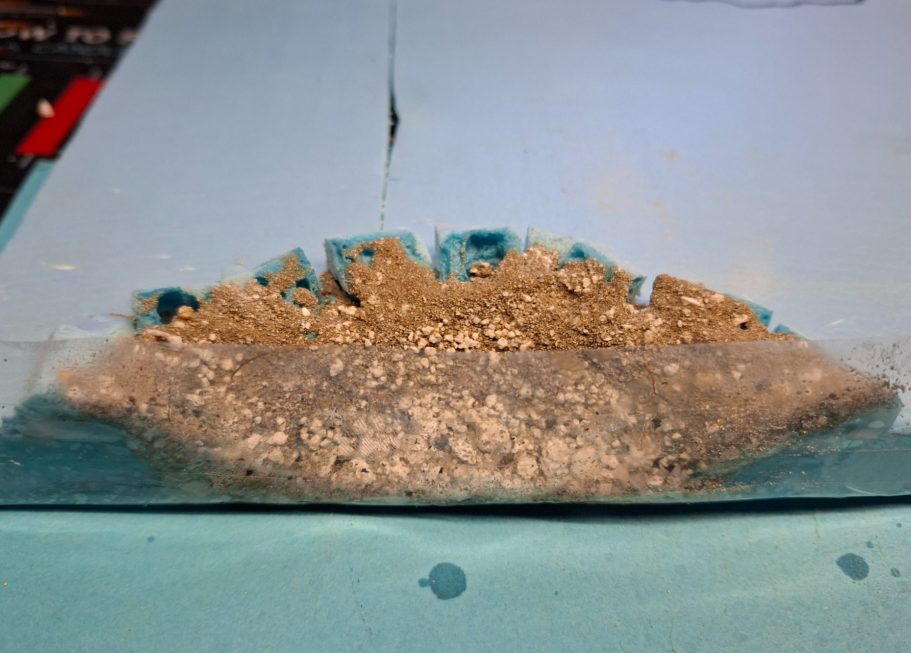
Photo #33 and I’ve begun adding the sand and cat litter. This is fastened in place with thin superglue, dripping on small amounts and avoiding any fumes.
You may be asking why I’m adding shell craters.
Well, the place where the cannon was firing from was pretty open and flat, although shells from the German guns did land close by, and obviously hit the cannon in order to damage the right hand wheel, not to mention the other guns and limbers that were quickly disabled by the German barrage.
So, again I’m taking a liberty or three to make the groundwork just a little bit more interesting, and to show that rounds from the German guns were landing close by.
Photo #34 And it was at this point that I discovered that the superglue I was using melts the foam board. Not to worry though, just pile more sand and cat litter on and cover the holes up.
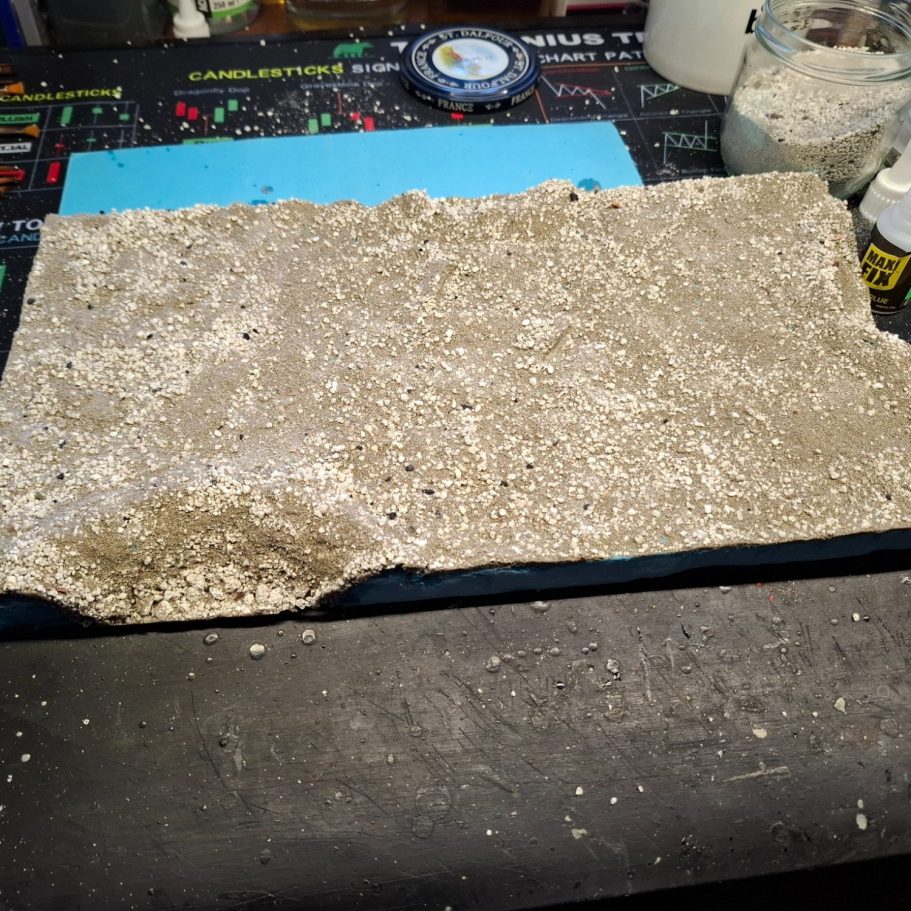
Photo #35 shows the base completed with sand and cat litter although it does appear a lot “flatter” than it actually is in reality. I used a small section of the backing tape from some double-sided tape to make three impressions where the spade on the gun trail would have dug into the soil.
Piling a small amount of sand and cat litter up on one side of it, dripping the superglue onto is and letting it cure fro about five minutes, and the backing tape can be pulled away as the superglue doesn’t stick too well to it.

Photo #36 in which the whole base has been sprayed with a Brown Primer from Falcon aerosol paints. A couple of coats and it’s beginning to look a lot better.
This is a new product, but should be in stock very soon, and it’s very good indeed. Covers smoothly and is a heavy enough pigment to only need one or two light passes.
Photo #37 and although visible in the centre of the previous picture, these are the three “scoops” made by the spade on the cannon trail. The middle one of these will have the cannon placed against it, the other two scoops having been made as the cannon has been repositioned by the gun crew.
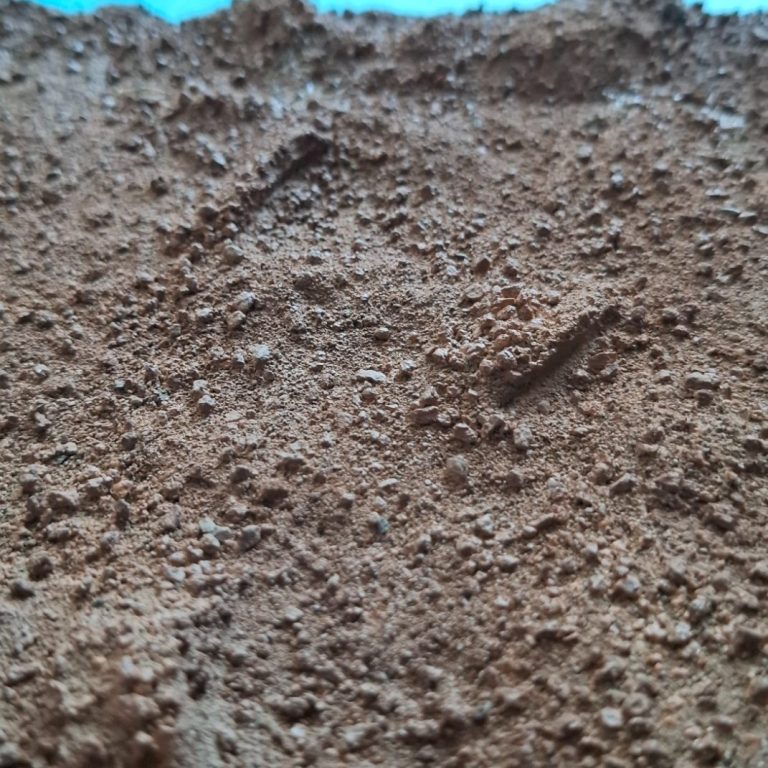
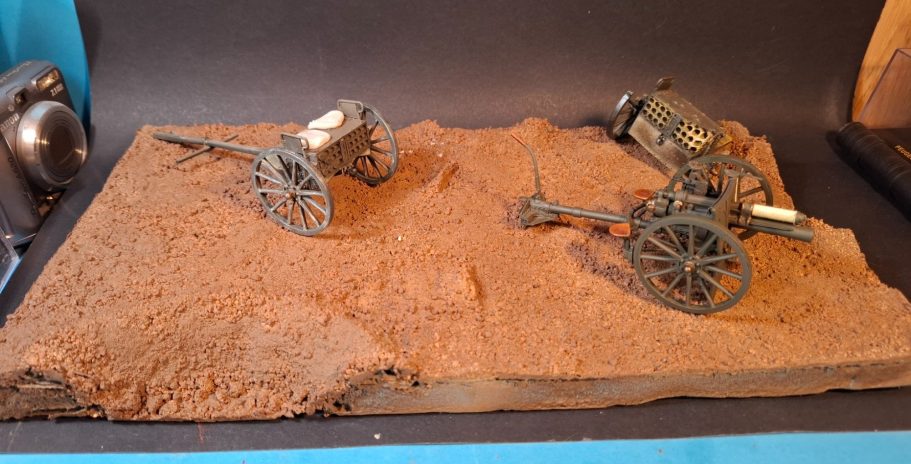
Photo #38 and another test for fit and spacing for the main elements.
There’s four figures to be added to this, plus the forty shell cases and bits of cannon wheels and other debris, so it’ll begin to look busy when everything’s been made, painted and put in place.
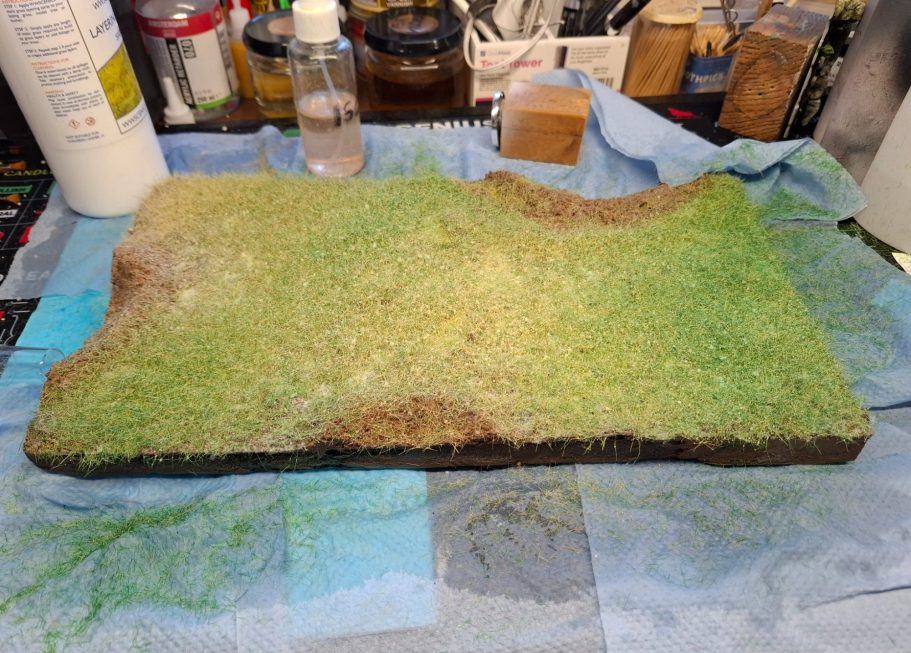
Photo #39. I’d removed the short sections of clear tape from the shell craters, and now added a band of tape all the way around the base, allowing about 5mm of the tape to protrude up over the ground level.
I used a basin to cover the shell craters and then began adding grass flocking material with a static grass applicator.
I used a mix of three different colours / sizes of static grass - a very dark green, a paler green and a straw yellow colour. These were used as a mixed load in the applicator for the first run, fastening them in place by stippling on Matt Acrylic Medium over which I sprayed Isopropyl Alcohol, then the static grass is applied over this.
The grass is given about ten minutes to settle, and then I sprayed on Woodland Scenic’s Layering Glue and then added more static grass with the applicator.
To get the different coloured areas, I added more of the green or the straw yellow static grass again using the layering spray and the applicator to apply it.
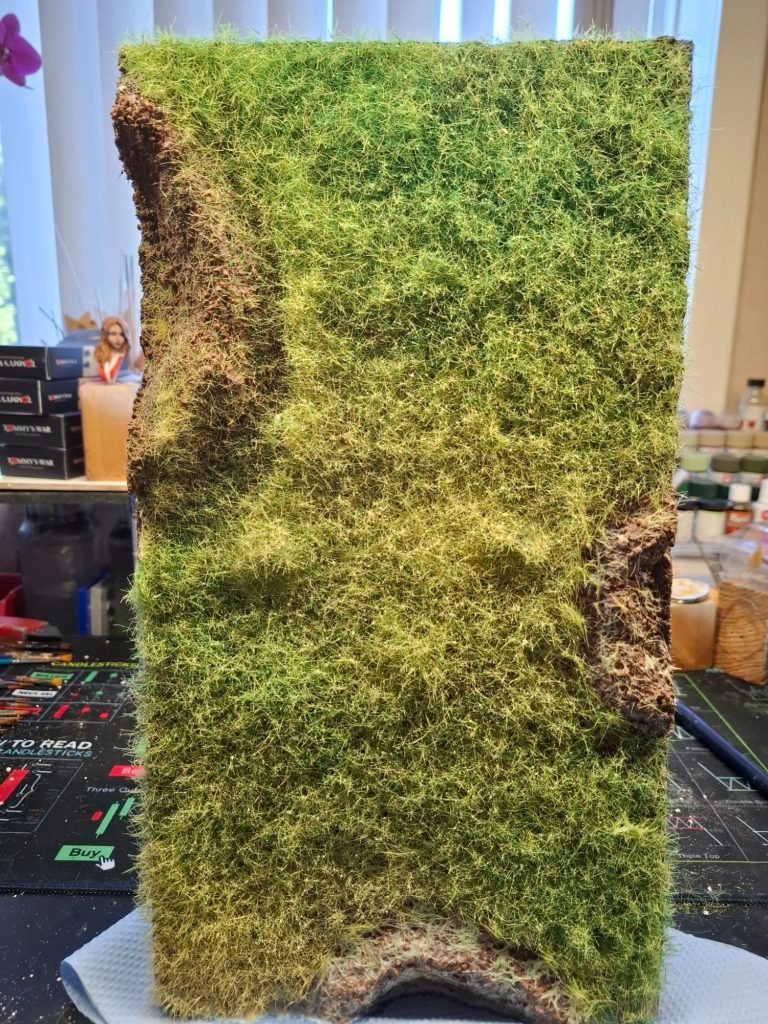
Photo #40. It’s the first time I’ve used this method for applying static grass, and although the groundwork in the previous shot looks rather flat and uniform, in this shot with the base turned onto it’s edge, you get to see the uneven texture a lot better.
Also, the layering spray was probably applied a little too heavily, so tipping the base up like this and putting a good few sheets of kitchen paper underneath the bottom edge helped drain the excess layering spray away and allowed the remaining glue to dry a bit faster.
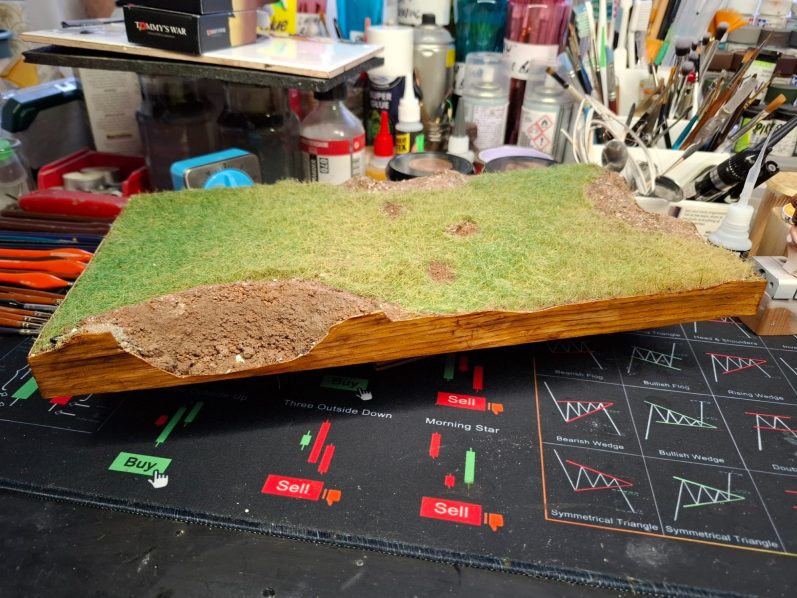
Photo #41 and the groundwork has been neatened up with some White Oak veneer added to the edges of the blue Balsa Foam.
It’s a long time since I put veneer on anything, and I’d forgotten how it likes to curl up when glue is applied.
I did the shorter edges first, balancing the groundwork on the floor and adding a couple of books to the top to weight the veneer flat, then once that was dry, added the front and back pieces, this time using some small sash cramps and some blocks of wood to keep the veneer flat whilst the glue cured.
And yes, the sash cramps weren’t quite long enough to use for the ends, hence the books.
I used a sharp craft knife and some scissors to trim the veneer, and then added a couple of coats of Dark Oak varnish that would match the colour of the plinth that the groundwork would sit on.
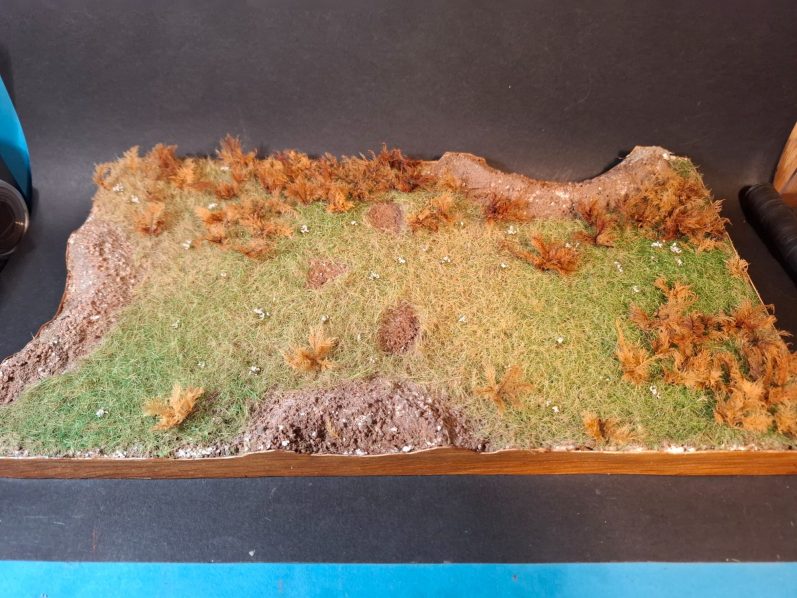
Photo #42 and I’ve done a bit of gardening. I collected a lot of fern from the Lake District many years ago, and treated it with Glycerine ( see the “How to” section ) and after all these years, it’s still useable.
Very small sections were trimmed off the longer fronds, and fastened to the groundwork with superglue, creating sections of planted areas, with one or two that were separate as though seeds had been blown away from the main bunch.
I totally disregarded where the cannon and limbers would be placed, so that the groundwork would appear more natural.
I’d have to flatten down some sections where the cart wheels had crushed the plants as they drew into position, but I’d tackle that later.
Photo #43 shows a close-up of the ferns; and to be honest the detail on these can’t be matched by any laser cut accessory sets that I’m aware of.
However, just visible in this shot are some tiny clumps of white flowers that are accessory sets supplied from Green Stuff World.
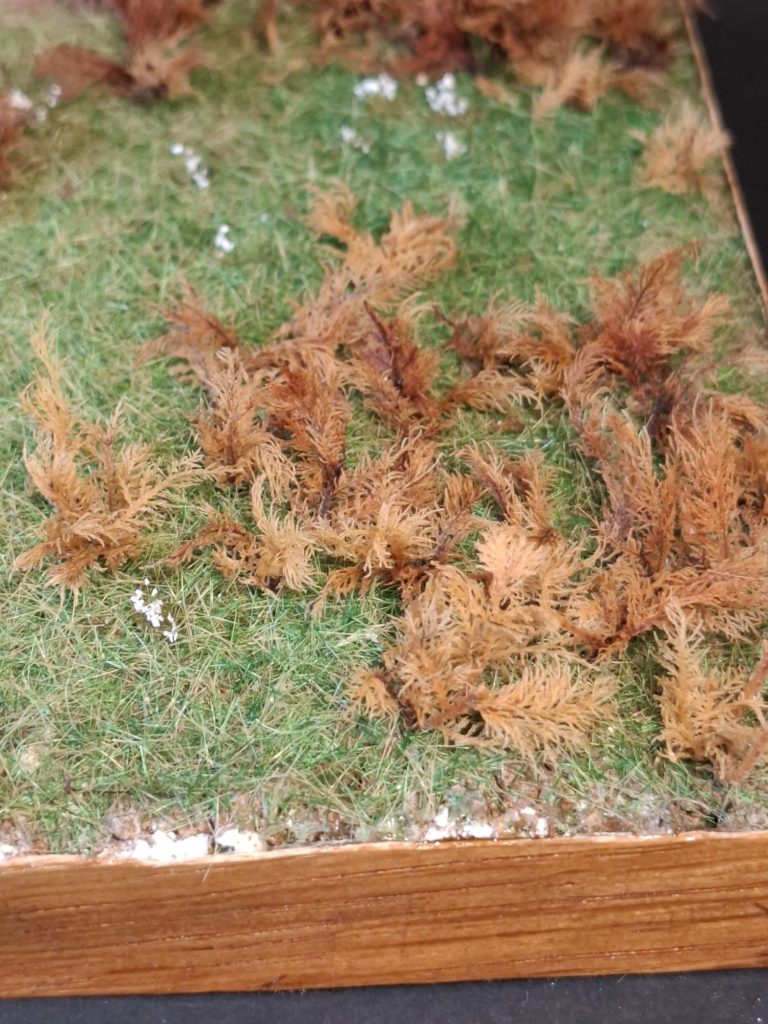
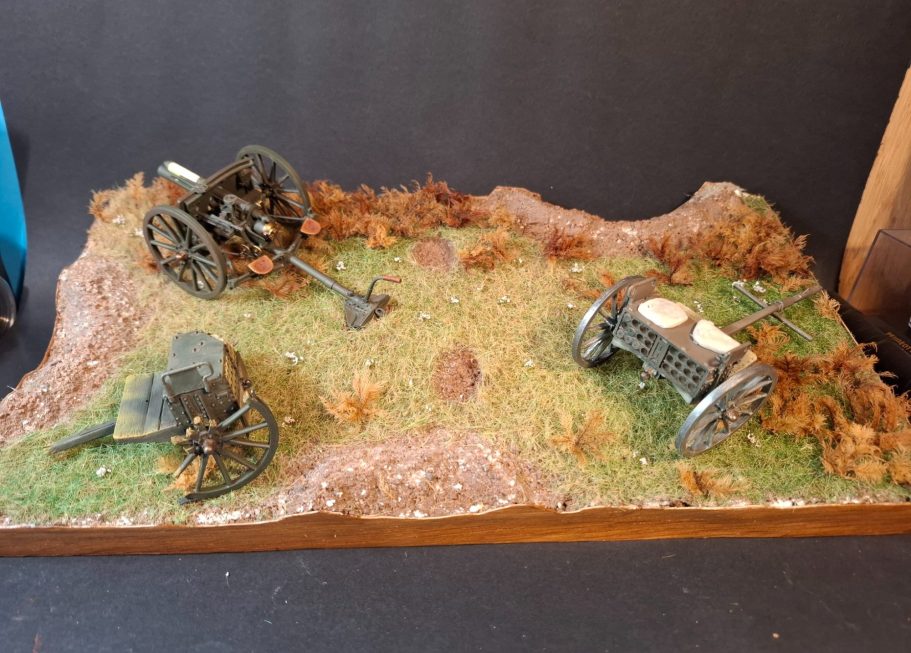
Photo #44 shows the three main items temporarily in position to check how they look.
the scene is much too clean yet, and there’s a list of things to do – like damaging the cannon wheel, painting and adding the figures, adding the empty shell cases and making some discarded cushions that have been thrown off the more damaged limber.
I’d retained the sections of cannon wheel I’d removed, and some of these would be added to the groundwork once I’d got the figures painted, the limbers and cannon permanently in place and the final addition would have to be debris thrown up from the shell craters.
Which brings us nicely around to photo #45.
Cat litter and chinchilla sand is all very good for building up groundwork surfaces, which are then going to be covered with static grass, but I needed something a lot more irregular for debris thrown up by an explosion.
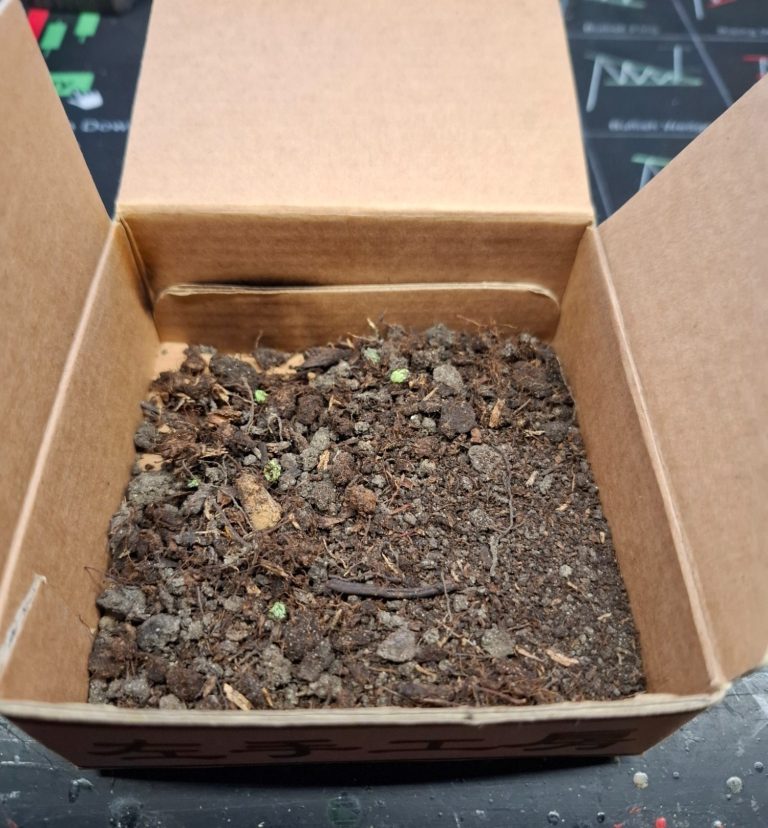
I resorted to going outside ( Scary ! ) and digging a small amount of soil up from one of the flower beds, this when dried and most of the roots removed resulted in the mass of granular material shown in the picture.
There’s all sorts of fine stones and lumps of soil in there, and this would be scattered onto the base and fastened in place with Woodland Scenics Layering Spray.
Photo #46. Prior to that I needed to fasten the groundwork with its veneer surround onto the plinth that I’d prepared.
I scored the top of the plinth with a scalpel and brushed on a thick layer of wood glue, and positioned the groundwork on top of this.
To secure the groundwork, I used four plasterboard screws, selecting these because they’re black and would be easy to hide.
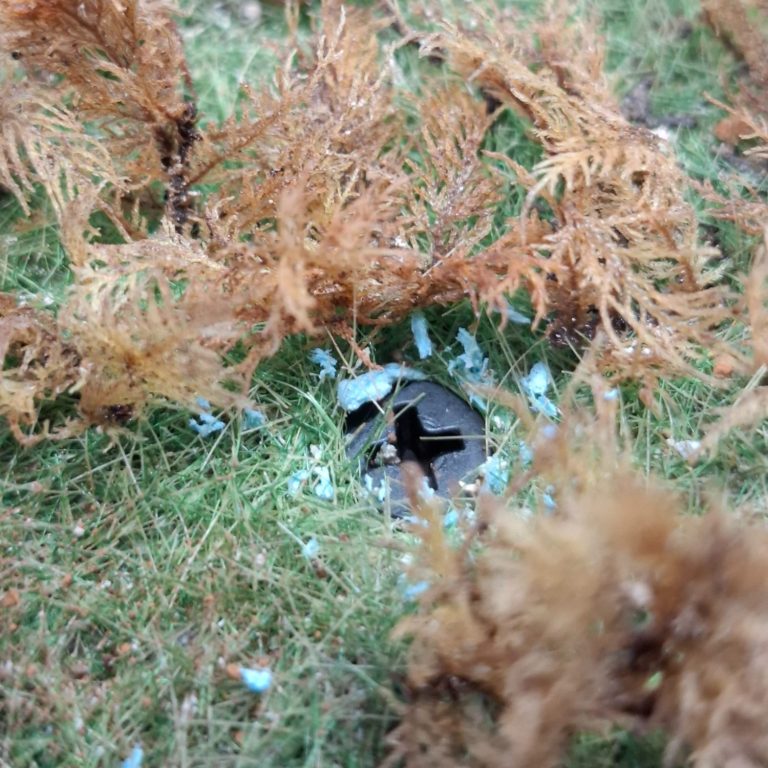
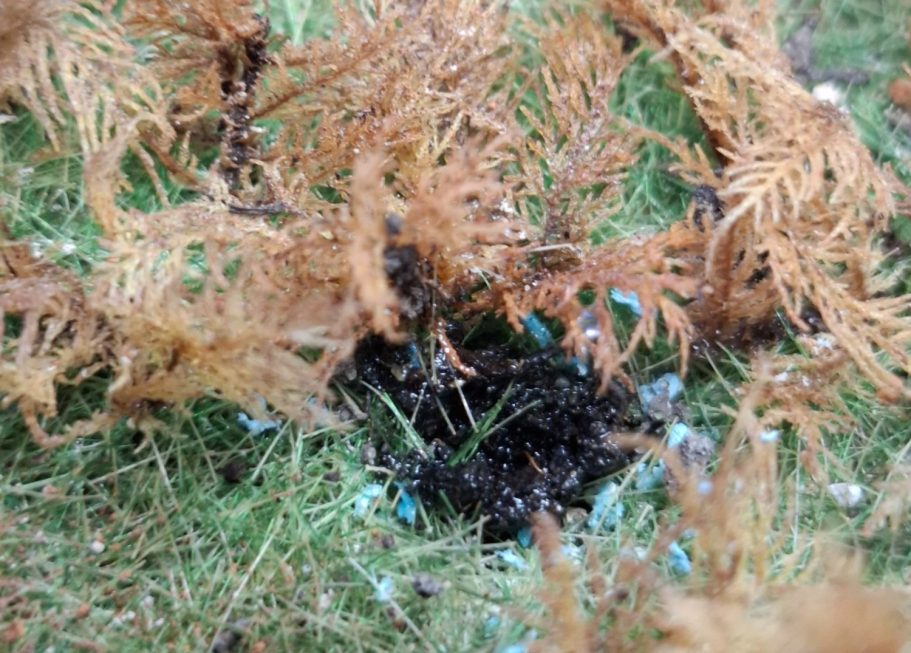
Photo #47, the same position as the last shot, but with some more of the debris added over the tip of the screw and fastened in place with some thin superglue.
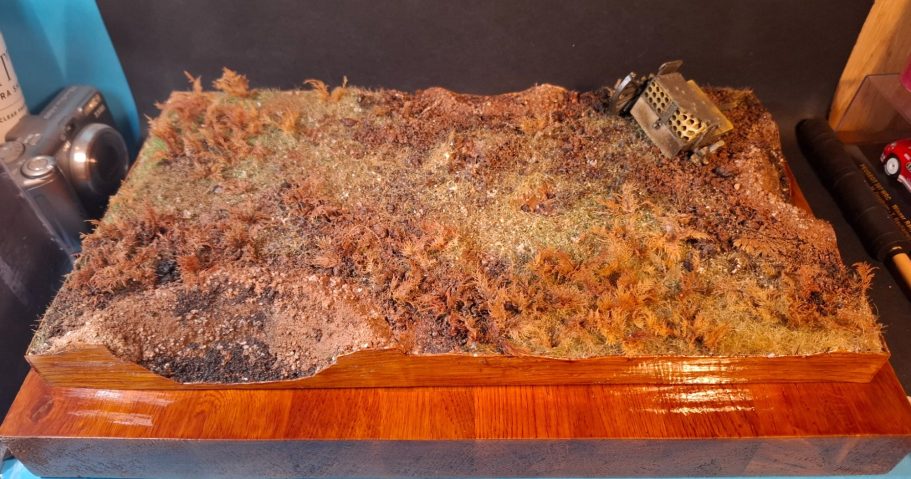
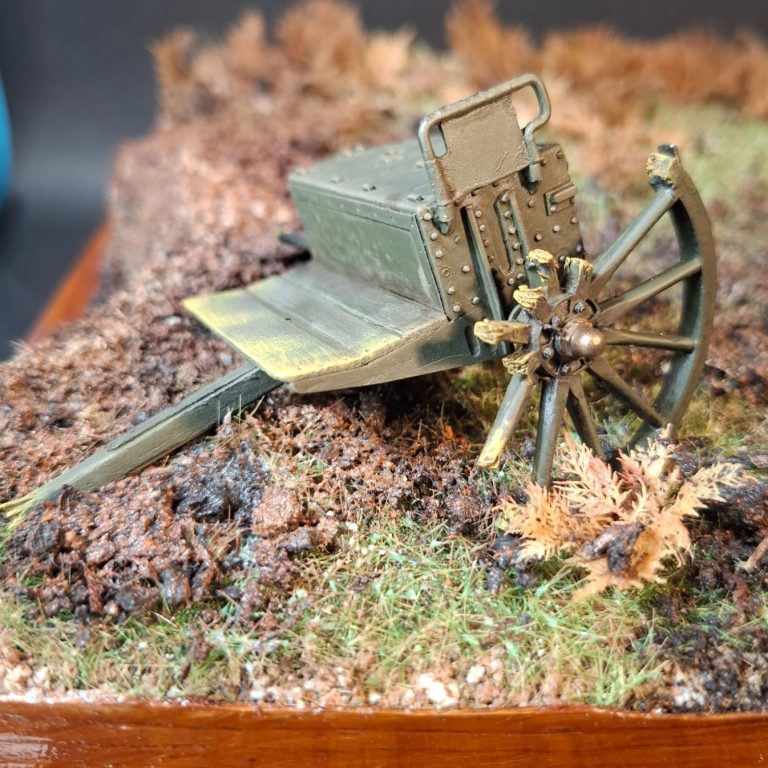
Photo #48 shows the groundwork added to the wood plinth, and I’ve also positioned the highly damaged limber into position at the back right.
Probably not visible in this shot is all the “debris” consisting of dried soil and small roots that I’ve scattered over parts of the diorama.
This was fastened in place with the layering spray, and then five different colours of pastel chalk dust was sprinkled on to give a variety of colours to the groundwork.
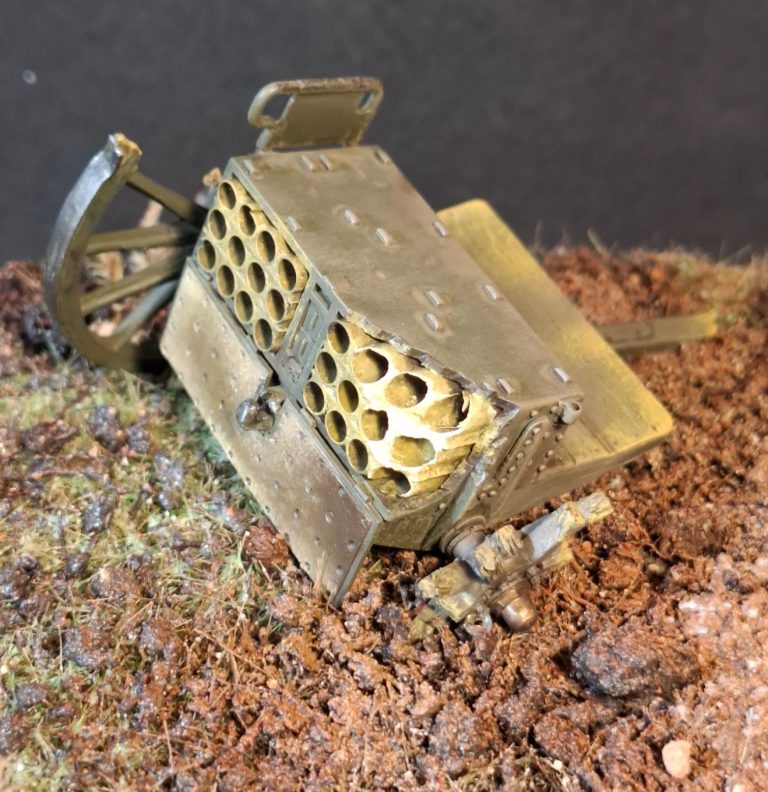
Photos #49 and #50 show close-ups of the damaged limber.
This was fastened in position with superglue, pressing it down firmly into the grass so that it appeared to have “weight”.
The next item to consider was the cannon.