German Tank Officer
1/35th scale resin figure from Scale 75
Painted in 2016
Occasionally I make something other than figures, especially since Military Modelling magazine closed it’s doors, although I’m lucky enough to have collected a couple of AFV’s made by other people as well.
In both cases I said I’d paint up a crew figure or two to go with the vehicles, and this Scale 75 officer was one choice I made to paint up.
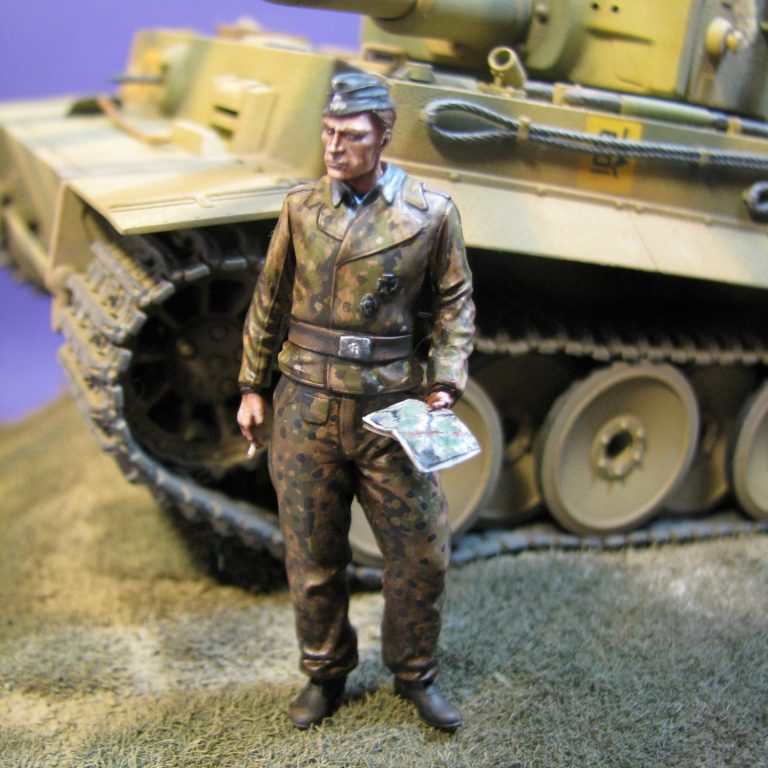
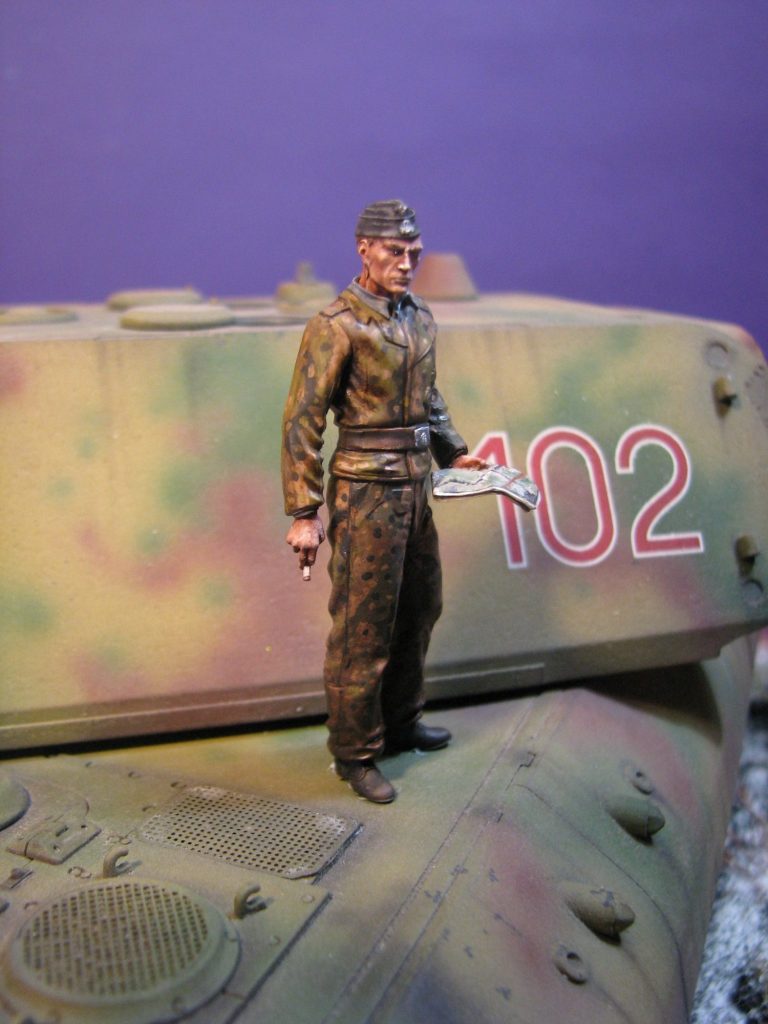
Picture #1 here shows the finished figure standing on the deck of an E100 that was made by Garry Rayson, and was his first vehicle to feature in a magazine article – Military in Scale – and because he had limited space to keep his finished pieces, he regularly broke them up to use as spare parts or on dioramas.
I convinced him to give me this one in return for a new E100 kit instead.
Something else Gary did was reuse figures. He was a decent figure painter, but he preferred making AFV’s and placing a figure on a vehicle gave it scale.
He used to fasten them on with Pritt Stick glue, which was strong enough to hold a 1/35th scale resin or plastic figure in place, but allowed them to be removed without marking the AFV’s paintwork.
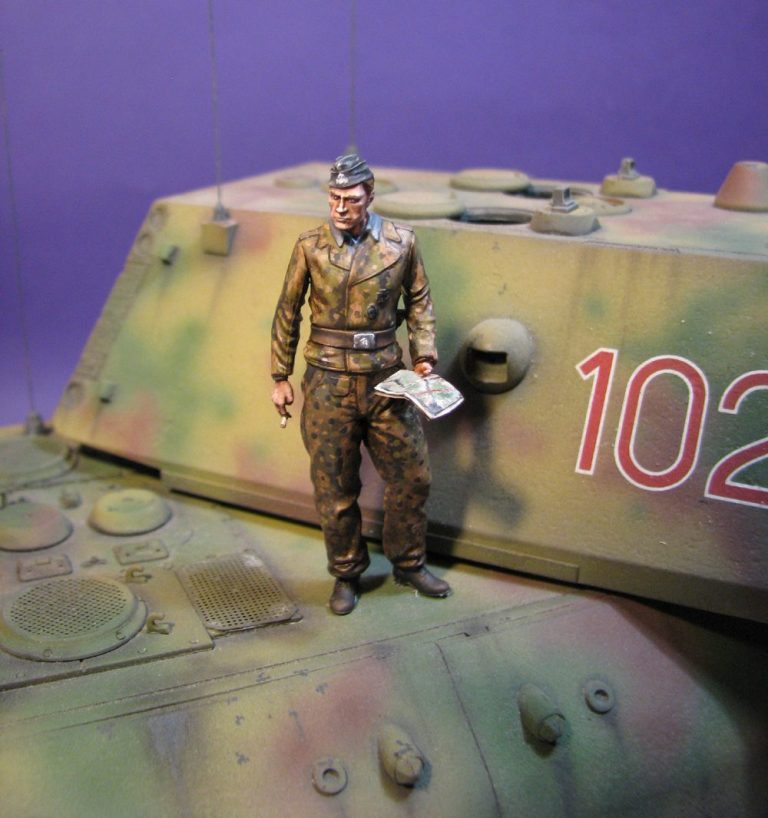
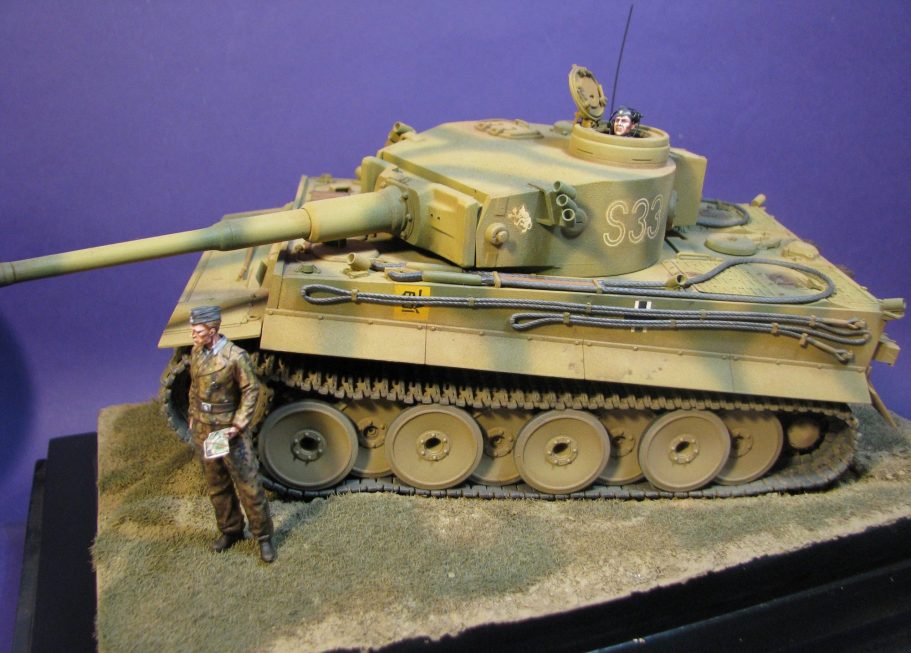
Photo #2 shows the same figure, used in this way, and fastened next to a Tiger I made by the late Mark Fagan.
Just visible in the turret cupola is a second figure, or his head at least, which was painted for this tank in particular.
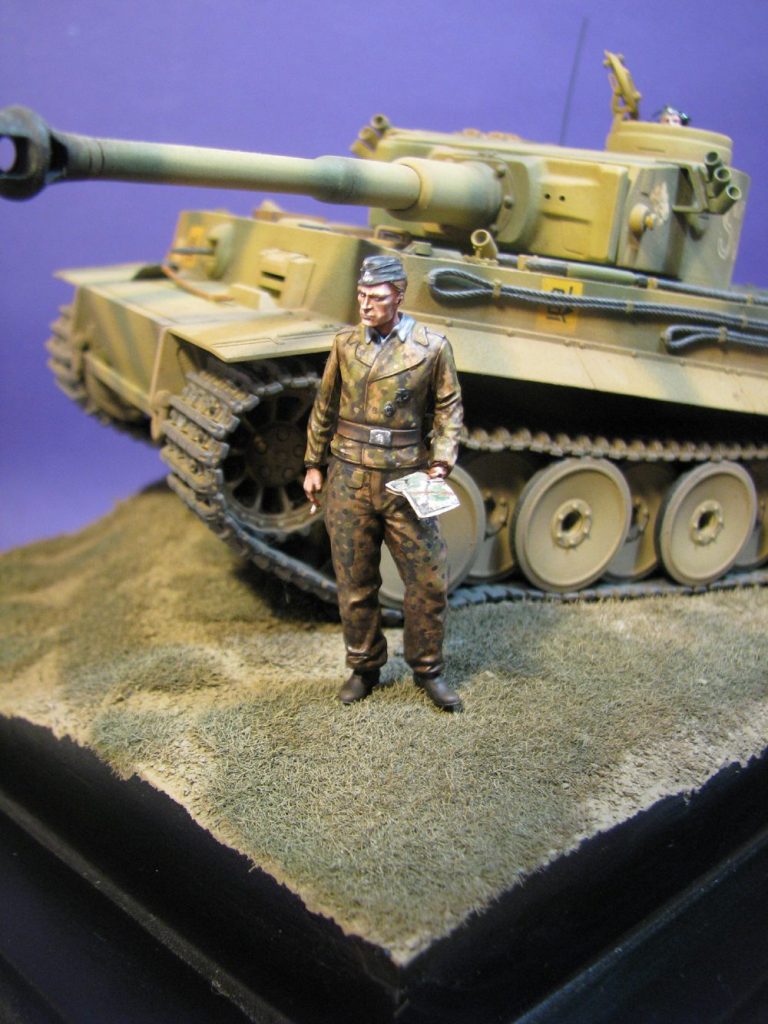
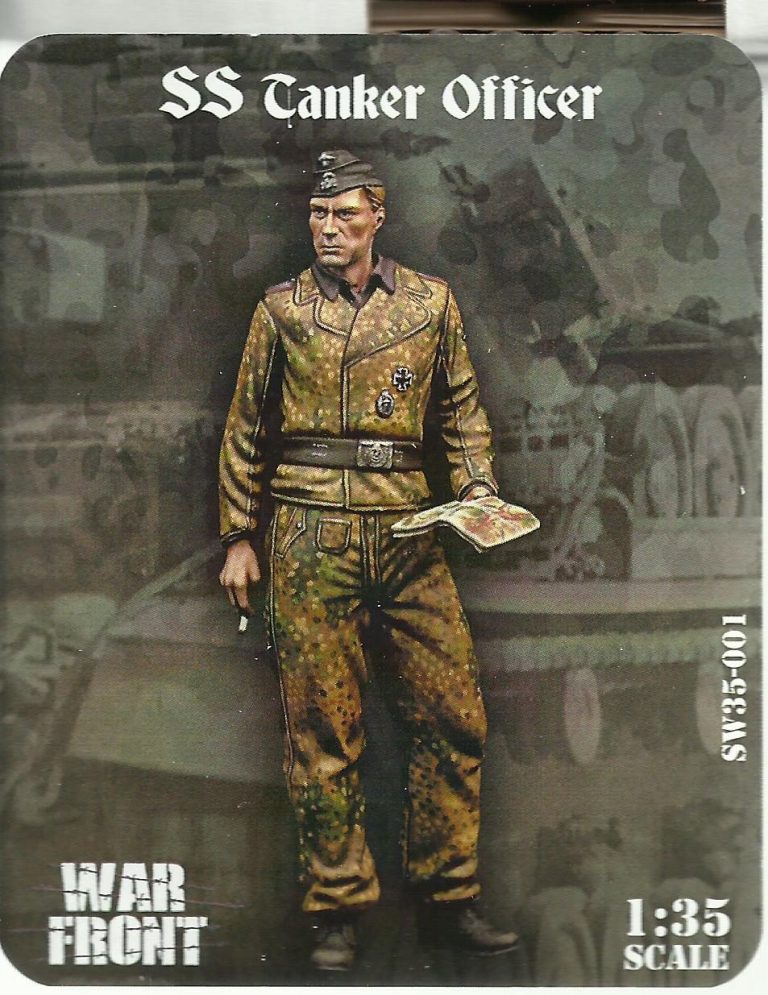
Photo #3 shows the box art for the Scale 75 figure, a rather nicely painted example, in a late war camo pattern.
I was going to attempt to copy this for the trousers at least, although at this time I was still struggling with painting camouflage on figure’s clothing.
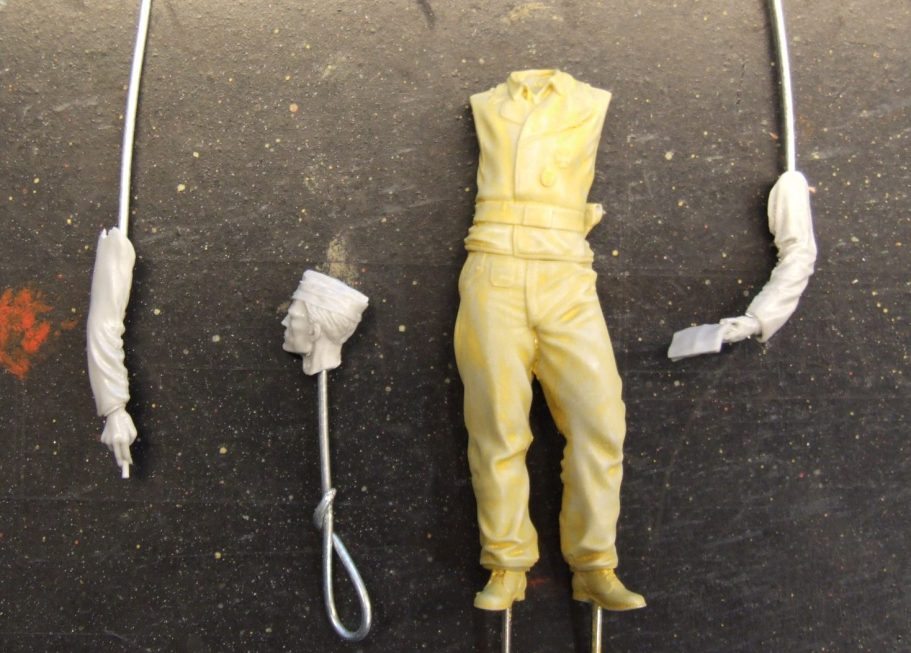
Photo #4 shows the bare resin parts. I’ve drilled holes into them and inserted some wire pins so that they can either be located into wood blocks that I use as handles, or in the case of the arms, longer wires with a look that can be hung on cup hooks in the drying cabinet.
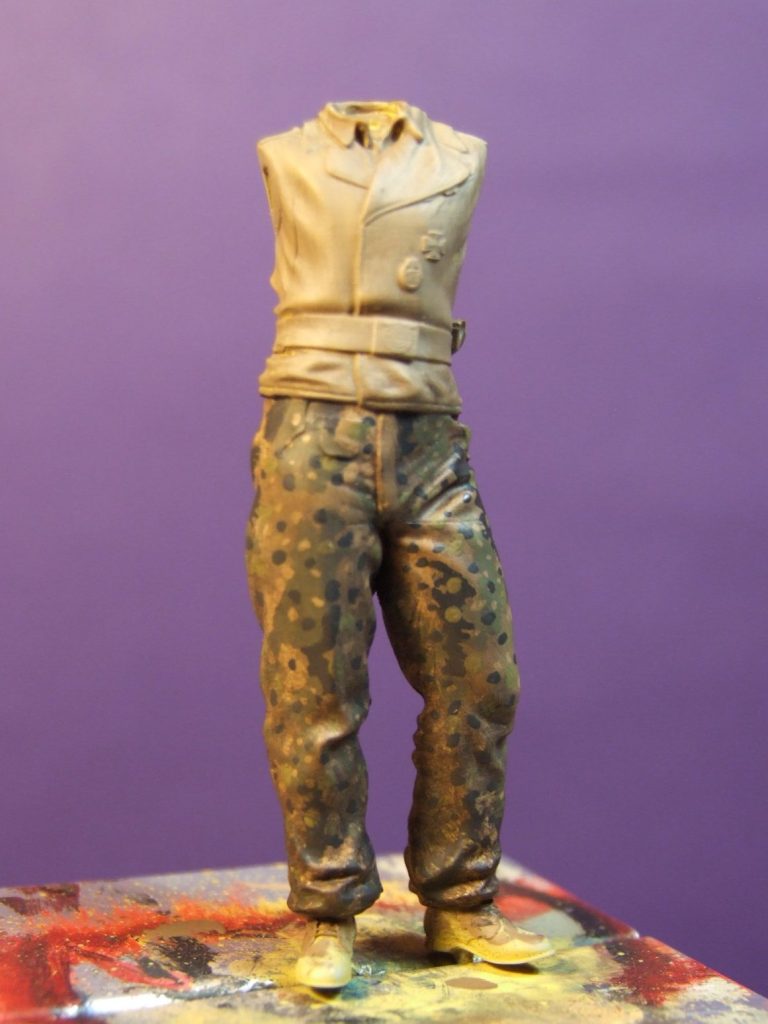
Photo #5 shows the trousers painted.
I’ve returned to acrylics for the painting of camo schemes like this, beginning with the lightest colour and working through to the darkest one.
One tip I would add is to mix a spot of the lightest colour in with each of the subsequent camo colours, this gives them a link to each other and somehow blends them together a little.
Once fully dry, I added a wash of Burnt Umber oils over the trousers. It’s best to keep this very heavily thinned with White Spirit, and don’t allow it to pool anywhere.
A quick blast with a hairdryer will get rod of the excess liquid, and then smaller areas can be treated to more brown, but with less White Spirit thinning it down.
This second, and sometimes a third layer is necessary, is added to the underside of creases and between the legs. I also use a fine brush to pick out any seams in the material and the open edges of pockets.
Photo #6 – I’d left the arms separate so that I could get access to the trousers, but now that they had been painted, the arms could be added.
The problem with any kit that has separate arms, is of course how well they’re going to fit once they’re offered up to the shoulders.
If they’re painted separately, then needing to add filler causes major problems with matching up paint, so it’s probably best to add them and then paint, in this case the jacket, as a whole.
So at this stage I’ve painted on a sand colour that has had just a little red added to tint it to a pinkish colour.
No highlighting or shading is attempted, it’s just one overall colour.
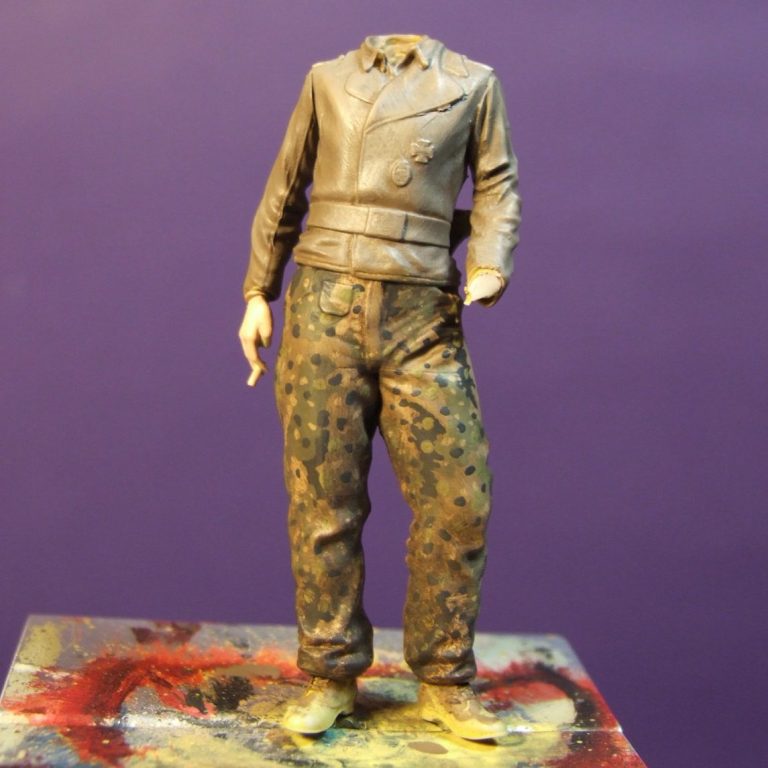
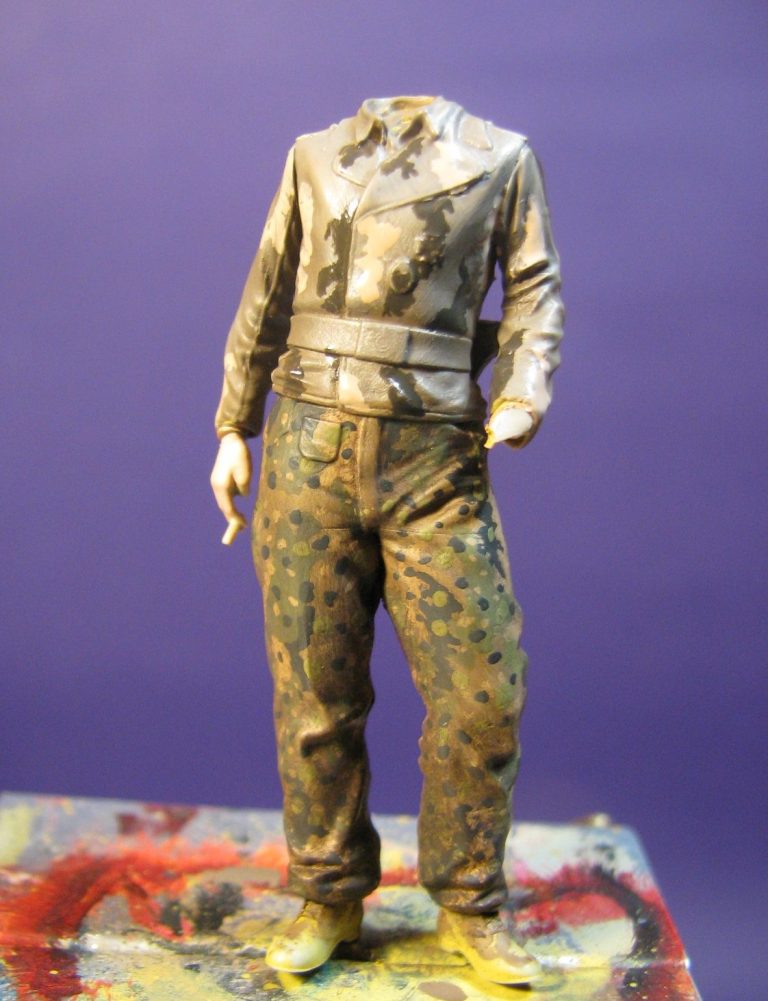
Photo #7 and I’ve begun adding two colours with a fine brush, attempting jagged, random patches of a warm brown and black. Each colour has had just a spot of the pinkish sand colour added.
Photo #8 and a mid-green has been added, again a spot of the pinkish sand colour has been mixed in to it prior to painting it on the jacket.
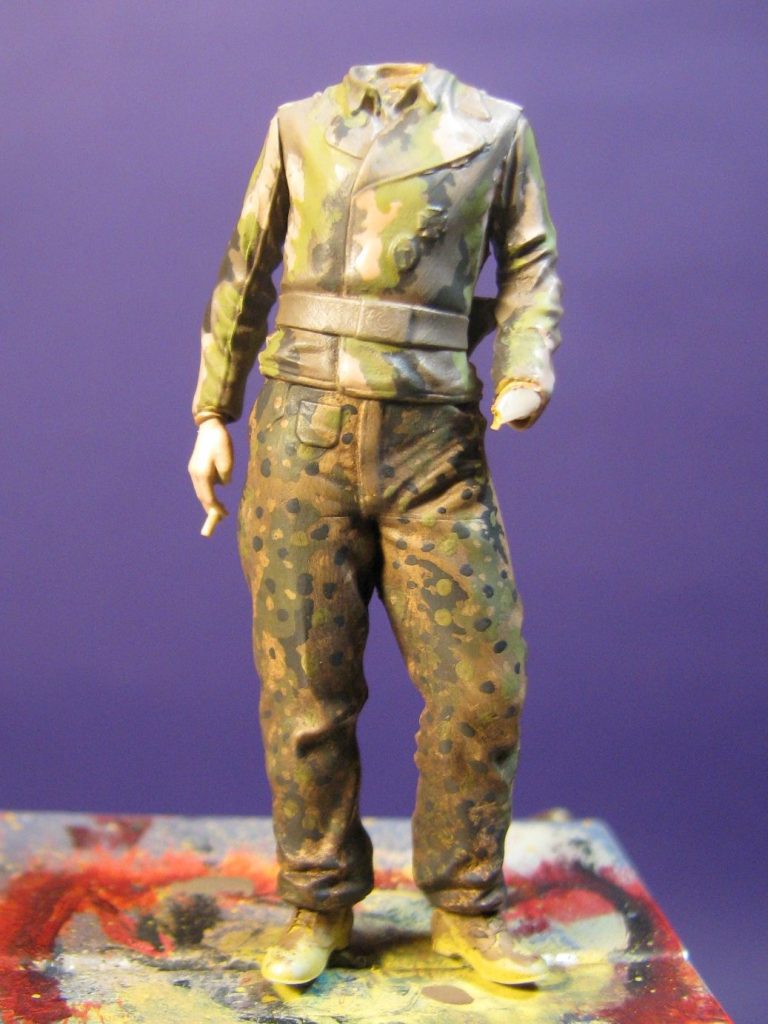
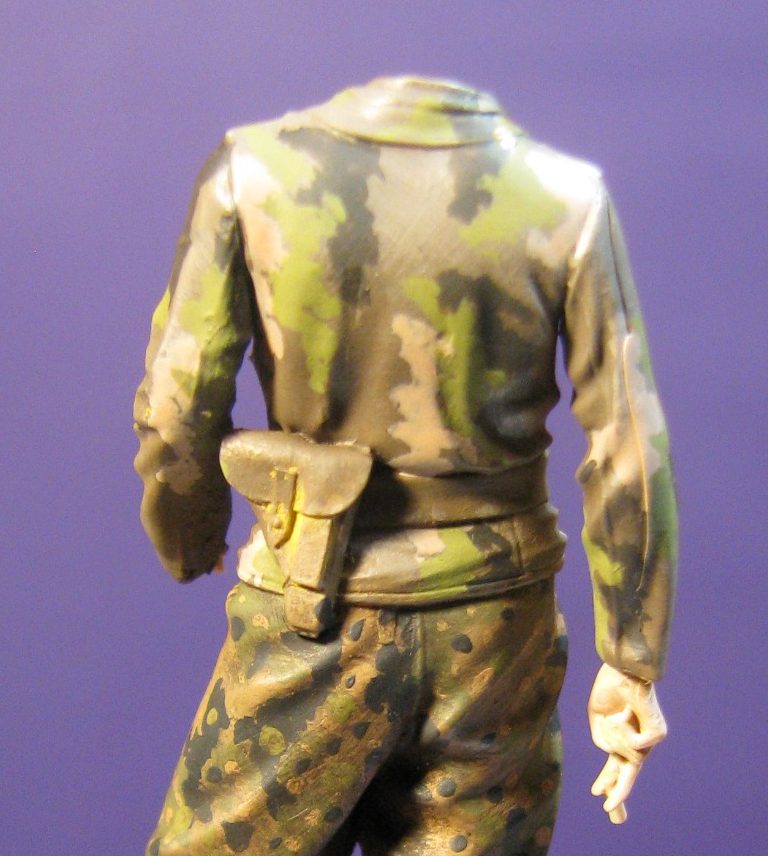
Photo #9 shows the back of the jacket with all four colours having been added.
Photo #10 is the bit on this particular camo that I dislike, which is adding the spots of different colours.
A fine brush and a steady hand….. still don’t seem to work all that well for me, but the results can be seen in this shot. Adding different colours onto the patches of camo colours, and trying to keep them as small as possible and as round as possible.
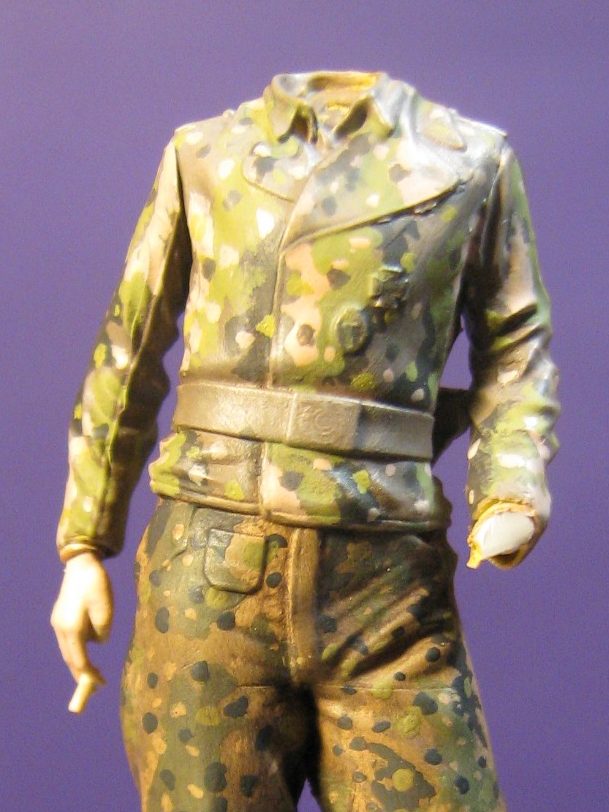
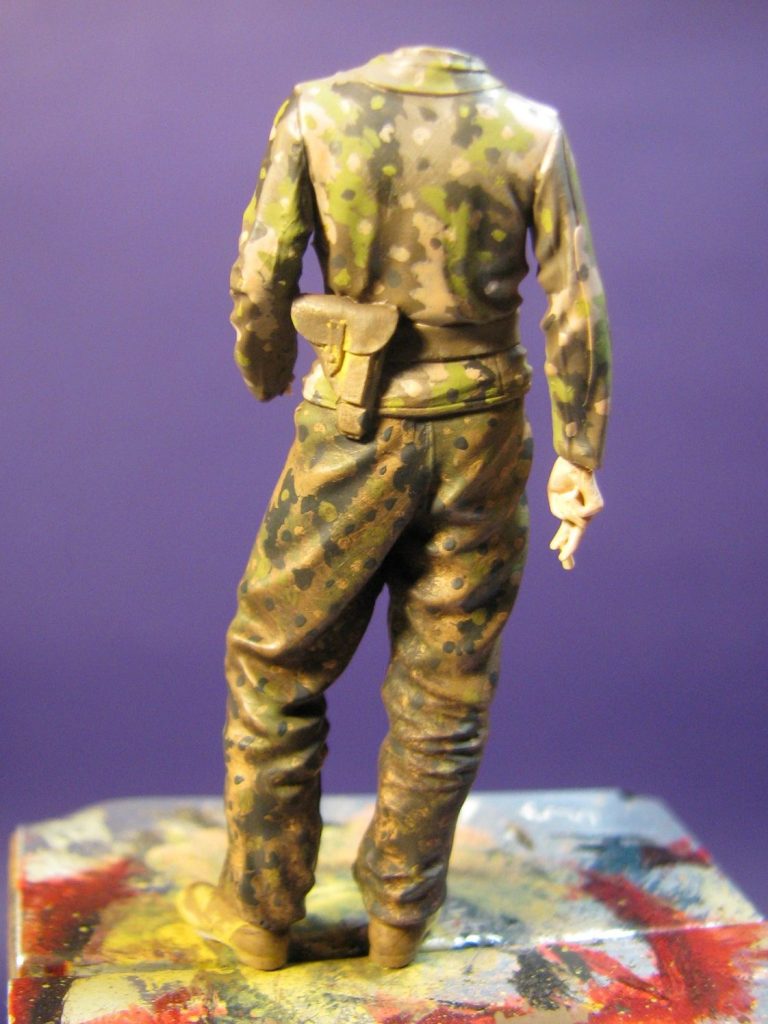
Photo #11 shows the back of the figure at this stage too, and the spots can be seen quite clearly in this picture.
I have to say that I never like the look of the camo at this point, it’s different sections of colour are too distinct, and the colours seem a little bright. But fear not, a final stage has yet to be completed.
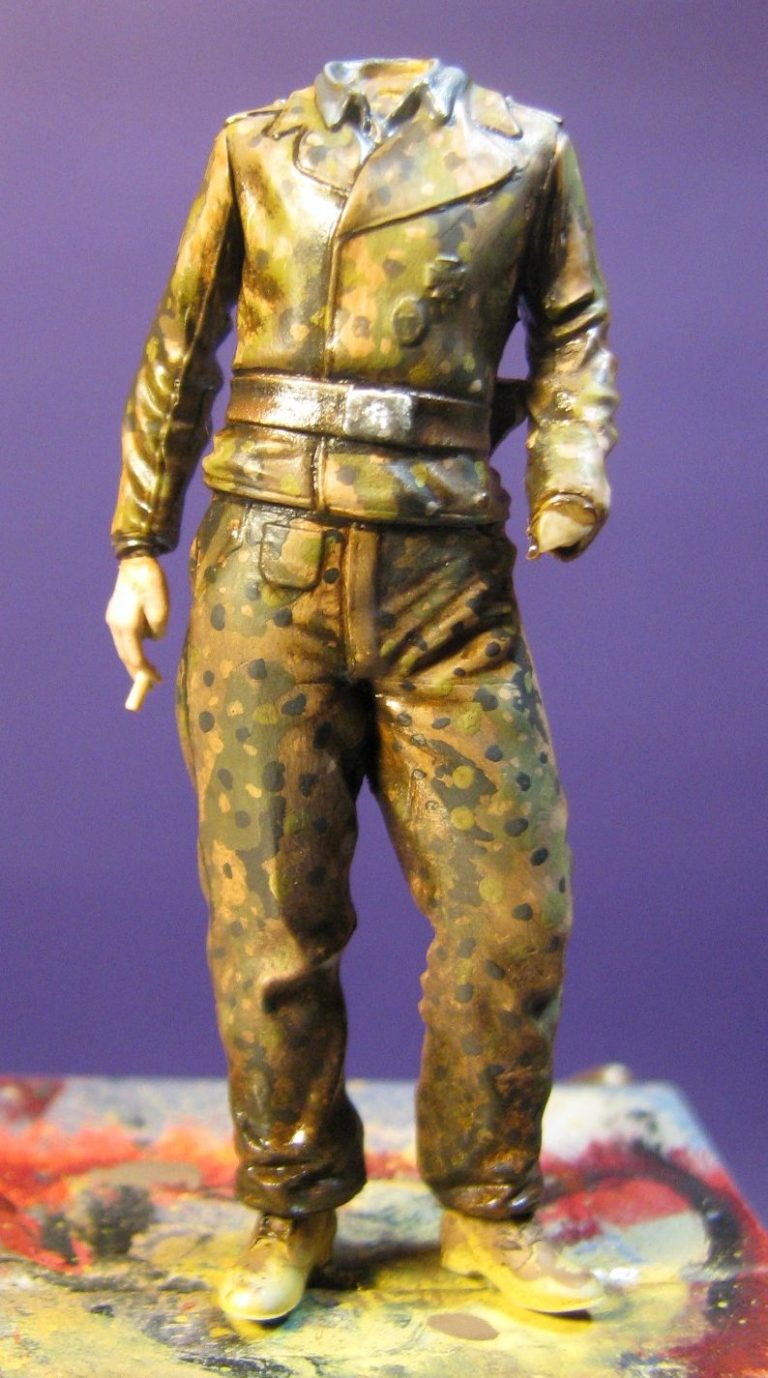
Photos #12 and #13 Shows the jacket after the three separate washes of Burnt Umber.
The colours of the camouflage have blended in somewhat, the seams have been lined in and the belt painted. The effect is a lot better now.
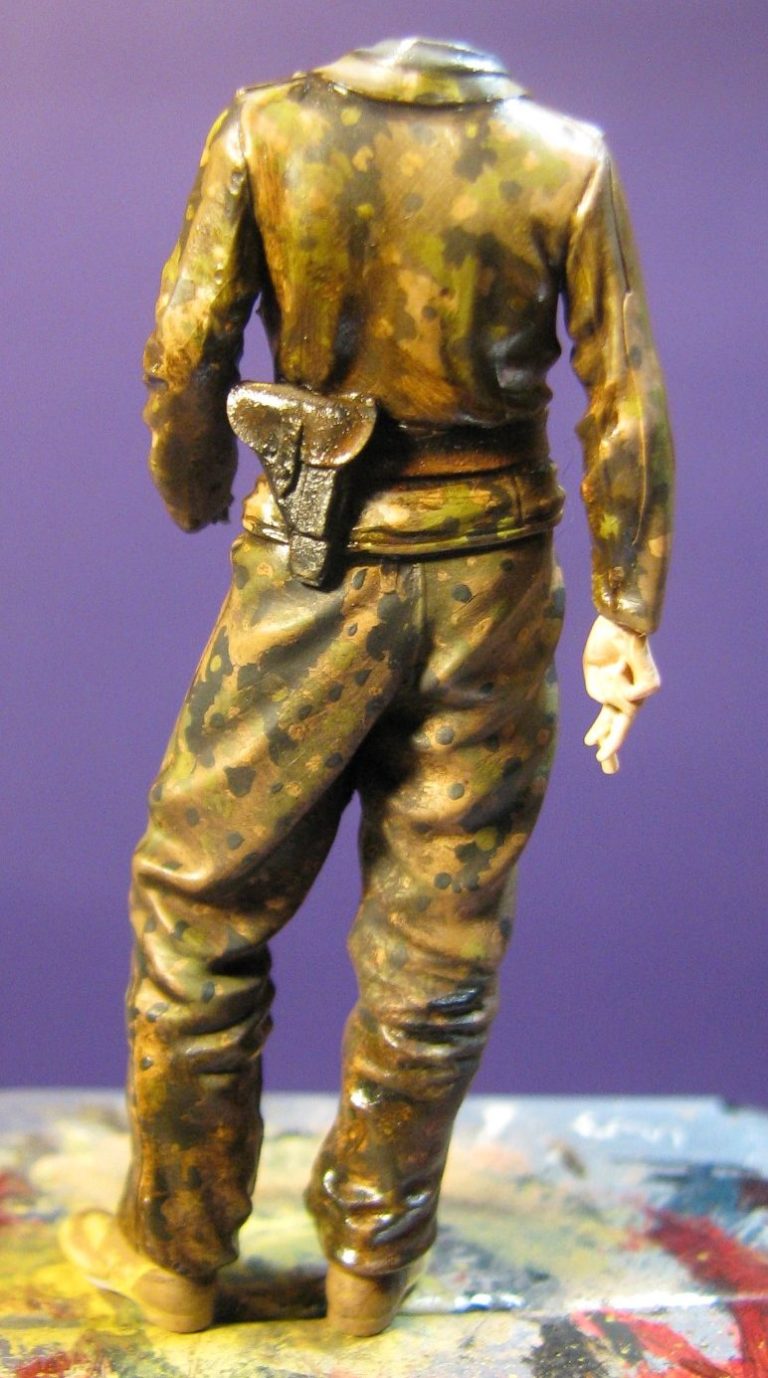
Photo #14 shows the head and shoulders of the figure to go with the Tiger I. An Alpine Tanker body with a Hornet head, the radio headphone band being a particularly fine casting and a mark of Roger Saunders’ skill at casting.
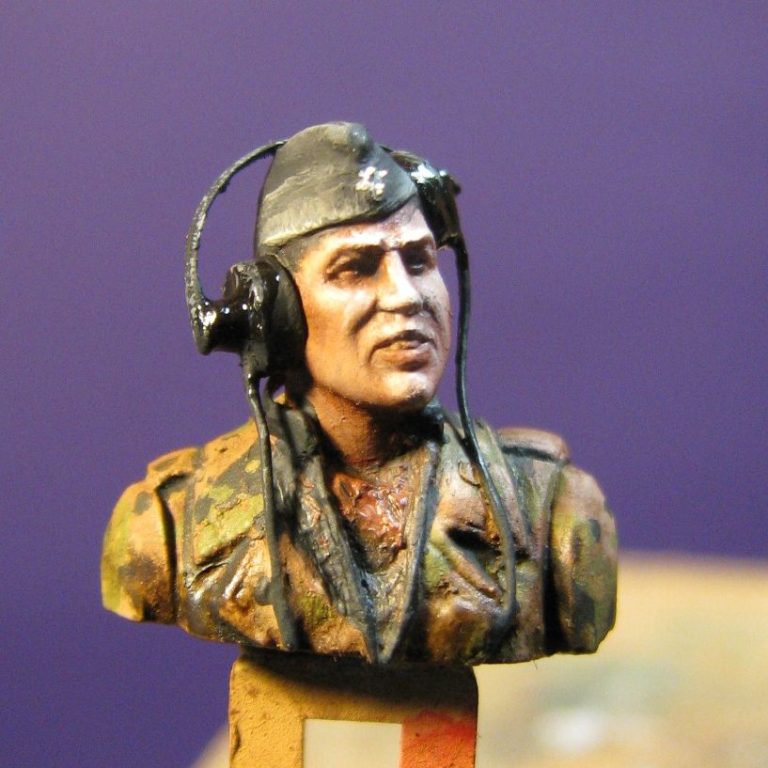
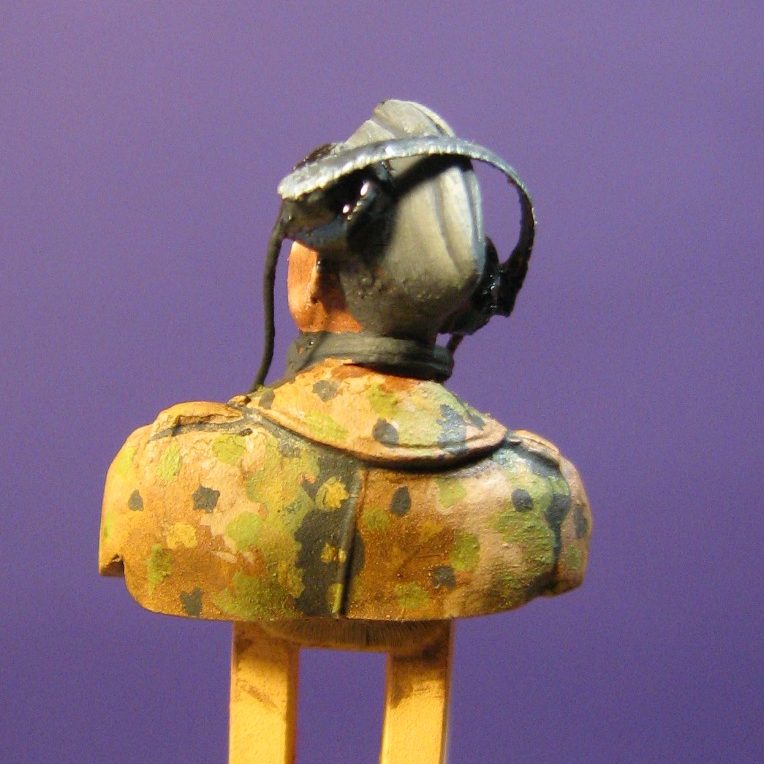
Photo #15 shows the back of the same part figure. The camo wasn’t going to be as visible on this figure, as he’s positioned within the top of the turret, so the camouflage is perhaps a little less skilled in it’s application.
The finished shots show the command figure posed on the two different tanks, the Pritt Stick gum being plenty strong enough to hold him in place, even on the way to a show and back, although if I’m taking figures like this to display, I always carry the Pritt Stick as part of my kit so it can be used to reassign figures to their vehicles, should they decide to go AWOL.

Final thoughts.
Gary had a good idea with the reuse of figures from one vehicle to another. And certainly if you’ve got a particularly good figure, then you can perhaps spend a little more time and care painting it, knowing that it’s going to be used several times.
The Scale 75 range of WWII 1/35th scale figures is relatively small, but they are worth searching out.
The motorcyclist in a long coat is particularly good, although his head is very small, but there’s enough replacements on the market to take care of that if it’s perceived as a problem. He looks good on his own though.
This Tank Commander figure is really good, as too is the Africa Corps figure, and I can recommend them for use next to an applicable vehicle, or even as stand alone subjects.