Stealth Fighter
1/48th scale plastic kit from Revell / Italeri
Assembled and painted in 2022
Another foray into making plastic aircraft, and this time what can only be considered as a fantasy piece.
When the world heard that the US Airforce were to have a new fighter aircraft based along the “stealth” ideas, it was assumed ( quite naturally I suppose ) that the look of the new aircraft would resemble somewhat the SR-71 Blackbird.
It’s a sound enough leap of faith I guess, and how cool would a cut down, shortened version of an SR-71 look. I mean, the idea of what that would look like would have model makers drooling....
A shame really, because the Skunkworks designers came up with what is probably a very sound and effective design that ticks all the boxes on the concept sheets that they got handed.
The fact that the real F-117A stealth fighter looks like a...... OK fill this section in with your own thoughts...... is completely irrelevant.
But hats off to Revell for going out on a limb and producing this kit, if we can’t have it in real life, what the heck, it still looks cool.
I saw this in an auction – someone thinning down their stash – and got it at a very reasonable price. At the time of writing, Ebay have them for around £25 plus postage, so it’s not the most expensive kit in the world.
Moulding of parts is OK, there’s a bit of flash to clean off on some components, but nothing too bad, and fit of parts when you come to the construction stages is easy enough.
There is a small amount of filler necessary – at the base of the two tail fins and the trailing edge of the intake covers, all visible in WIP photo #1. It’s not a big deal, easy enough to do, and as there’s no other kit of this aircraft on the market, you’ll just have to accept it.
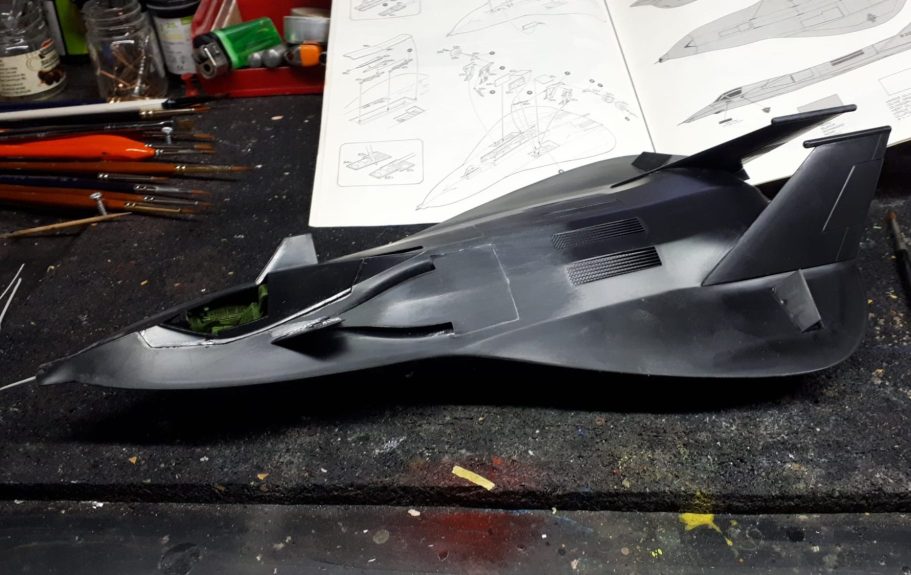
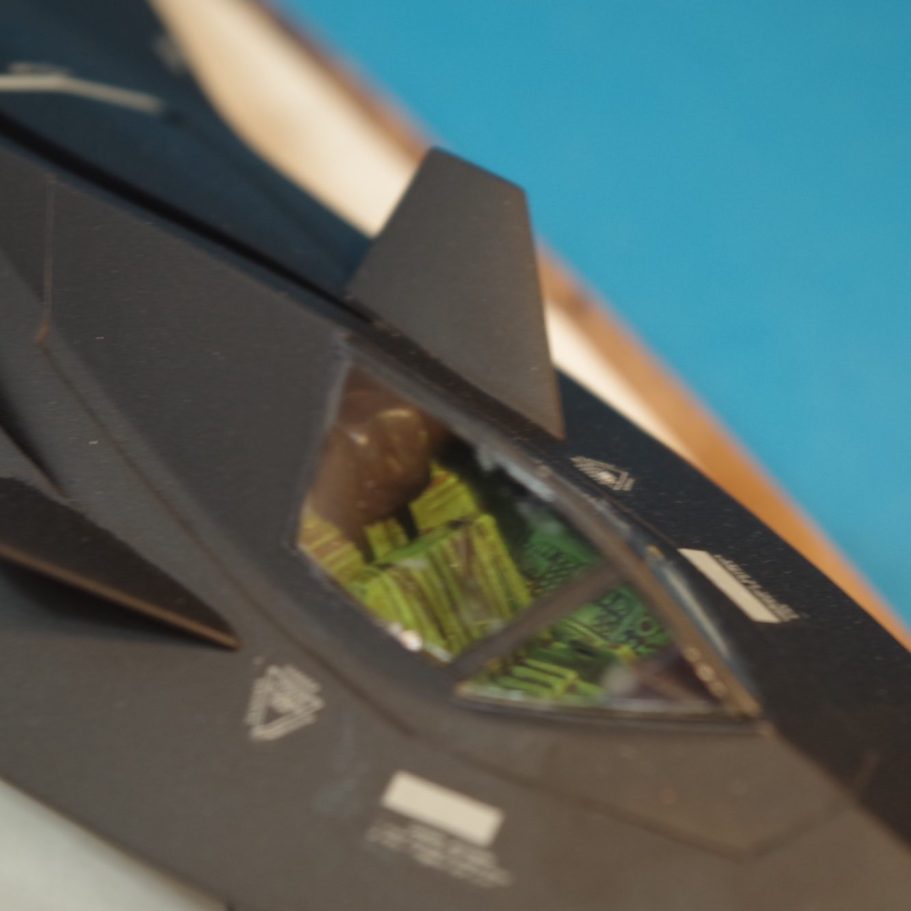
Instead of the fuselage joining longitudinally down the upper and lower central line, this kit has and upper and lower halves with the joint line being around the sharp horizontal edges. The modeller still has to assemble the cockpit, make any additions or improvements and add paint before fastening the two fuselage halves together, and again this can be seen with the green cockpit tub just visible in WIP photo #1.
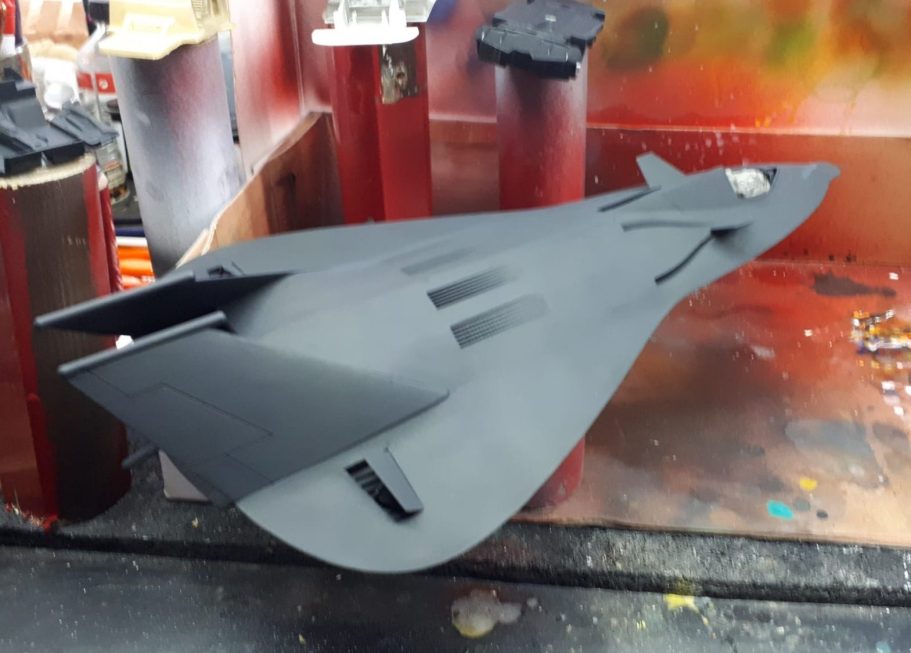
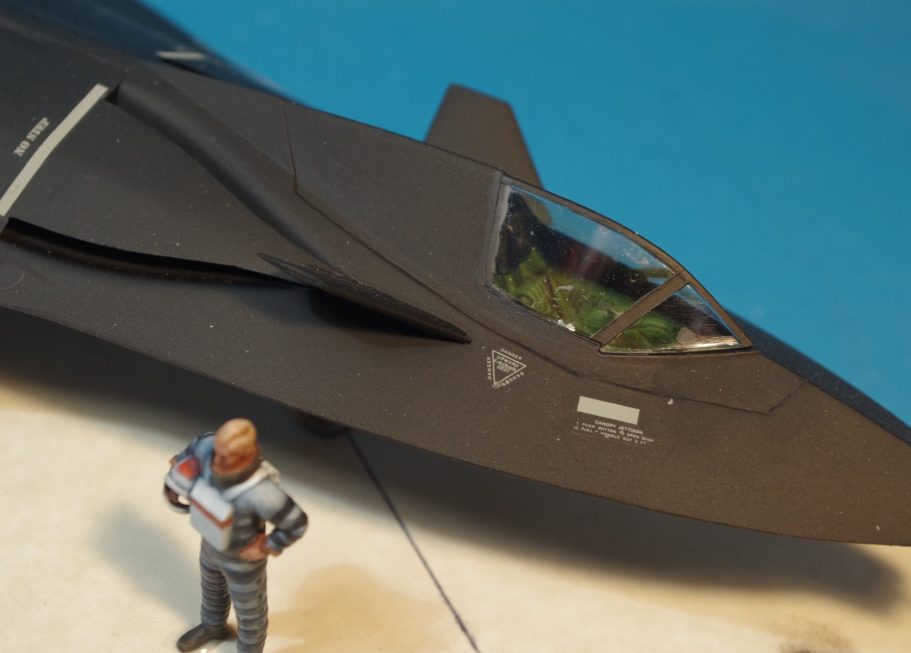
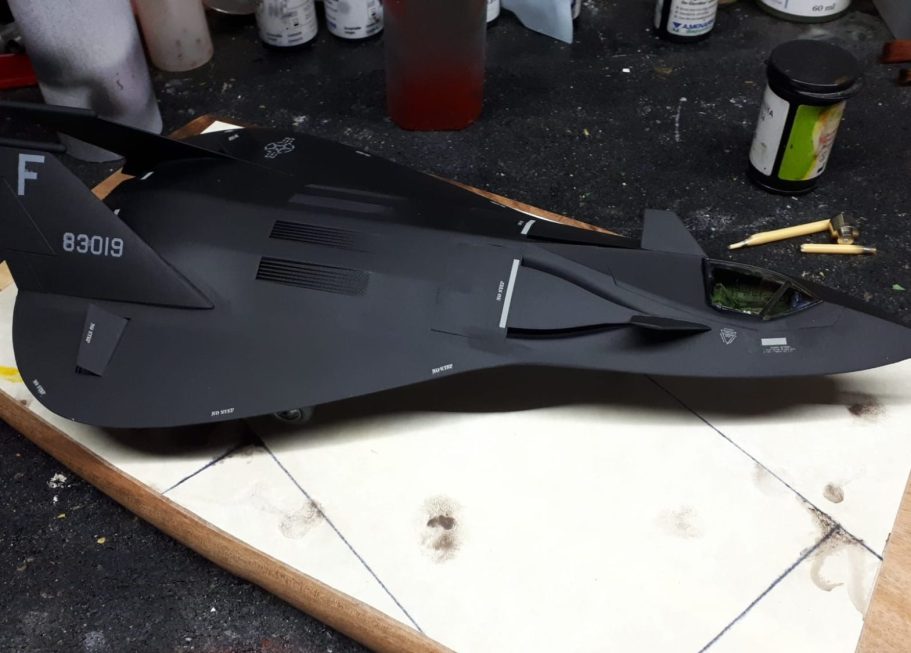
To mask off the cockpit tub ready for painting the fuselage, I used that old and trusted product – loo paper. WIP photo #2 shows this highly technical masking medium in use, and the fuselage has been painted using first a couple of thin coats of Halfords Grey Primer…….. and then some Tamiya Flat Black with a little addition of Tamiya Flat Base, and that mix being thinned down with some Isopropyl Alcohol to then apply it through an airbrush.
A lovely, absolutely matt black finish was achieved, brilliant, I was so pleased with myself !
But decals......
Yes, at the thought of putting decals over the top of this, I was somewhat worried.
I could of course gloss the whole airframe and then apply the decals, but was I sure I could regain that totally matt effect with a further coat of varnish ?
I’m OK with matt varnish since discovering the Mr Hobby’s range of spray cans, but gloss varnish, that my friends, is the work of the devil. I don’t like it, I avoid using it, and it never seems to end well when I do have to apply it.
So, in for a penny, in for a pound, I thought I’d risk adding a couple of the decals to the underside of the airframe, to see how they dried and if they, with some help from setting solutions, behaved nicely.
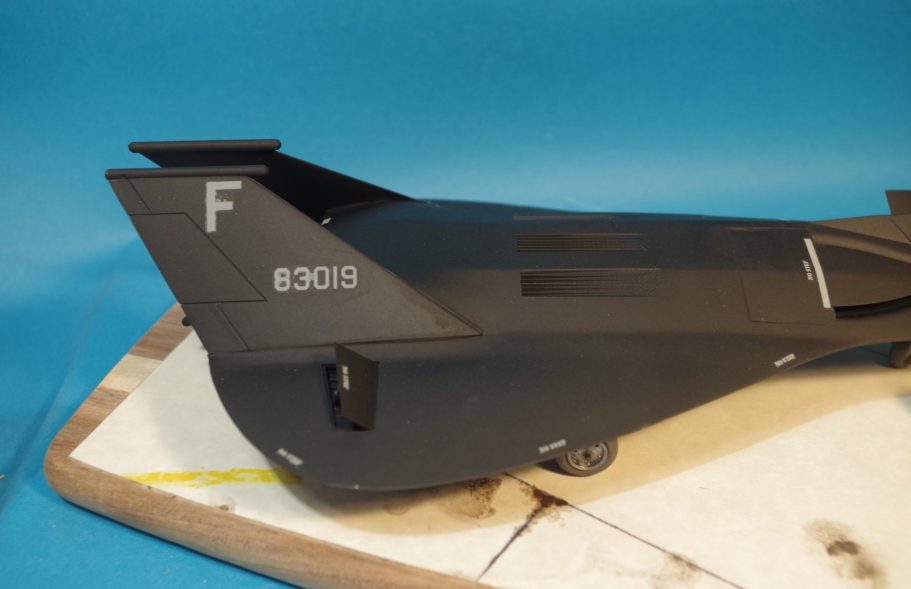
I was fortunate, and whilst there was a very restrained amount of silvering around the edges of the decal film, the form that the decals take – being mainly white text on clear film – means that the decals are cut close to the edge of the text designs, and that silvering is minimal.
Again as a test to see if there were any bad results, I sprayed over these “test” decals with some of the aforementioned Mr Hobby matt varnish.
This seemed to hide the silvering even more, and now I was happy with the results, I could add the rest of the decals and then spray if necessary the whole thing with the matt varnish.
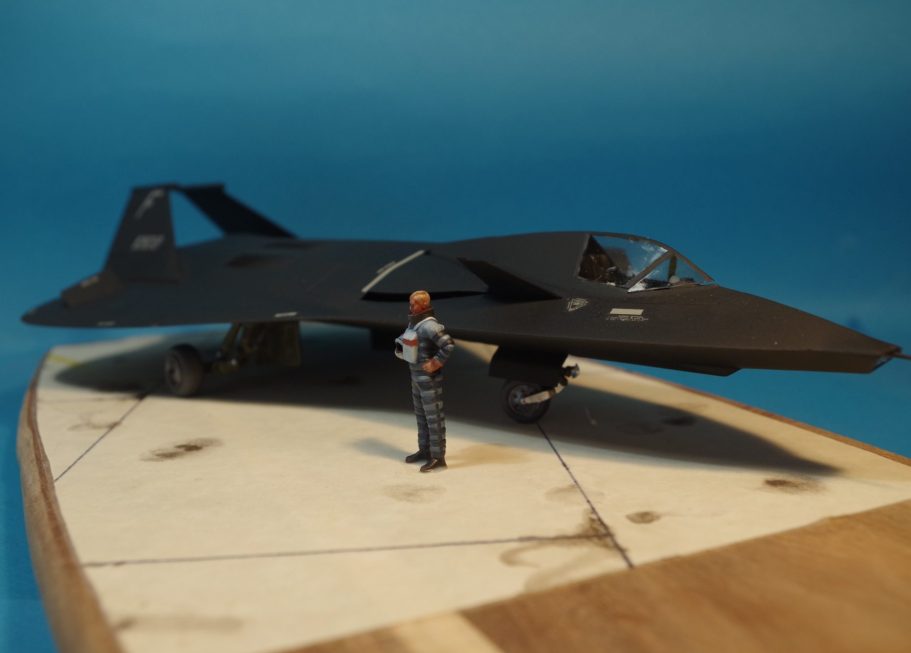
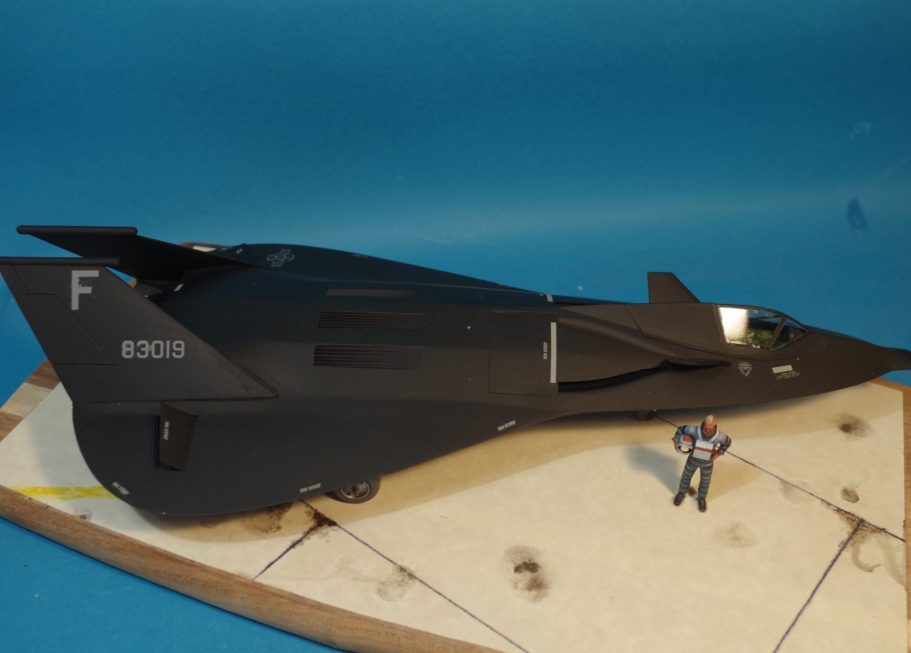
The results are visible in the rest of the photos, and it has been commented on when displayed at shows how good the matt effect of the paint is.
At the Bolton IPMS show in January 2023 I was drawn to a trade stand with Star Trek and Space 1999 models on it ( so sue me, I loved Space 1999..... UFO too ), anyway, on browsing what they had to offer, i saw a pack of Eagle pilots in 1/48th scale to go with the Space 1999 Eagle Transporter kit.....
Two seated figures and one standing.......
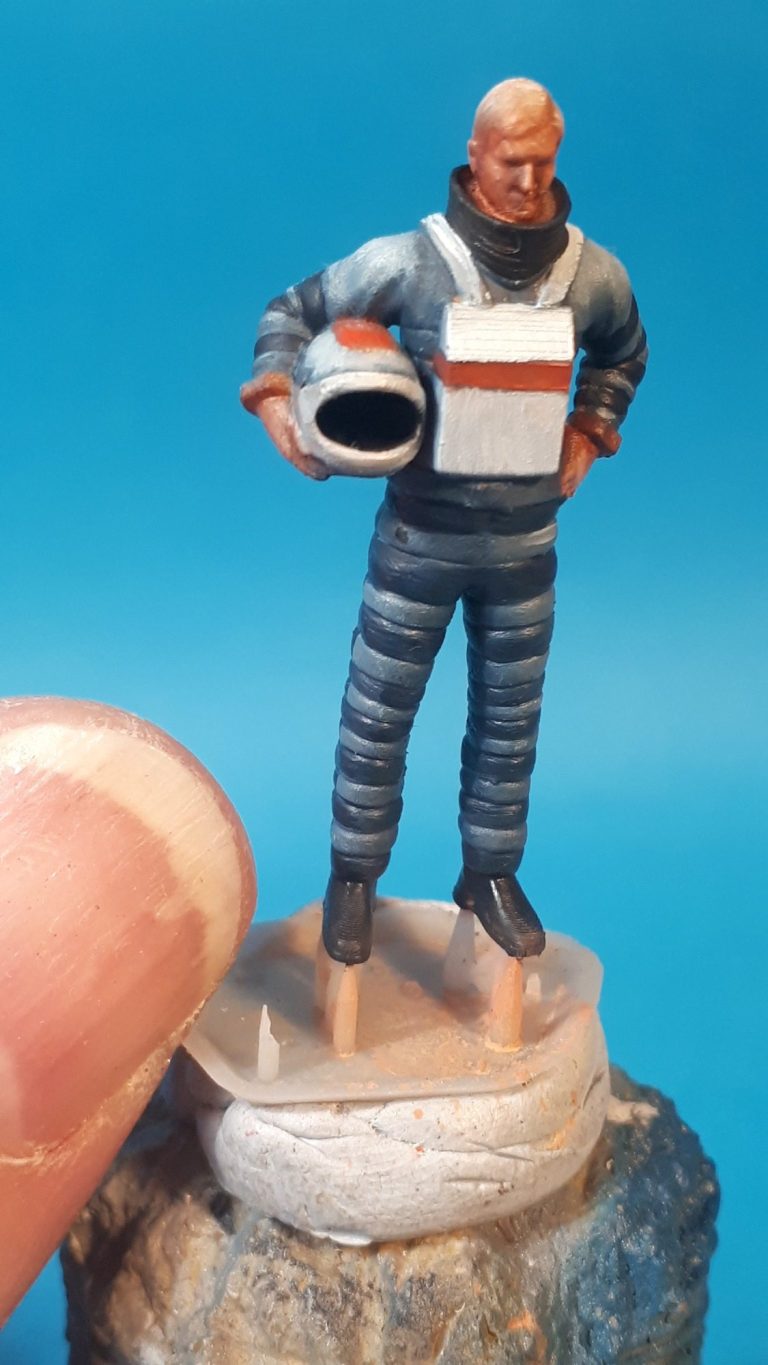
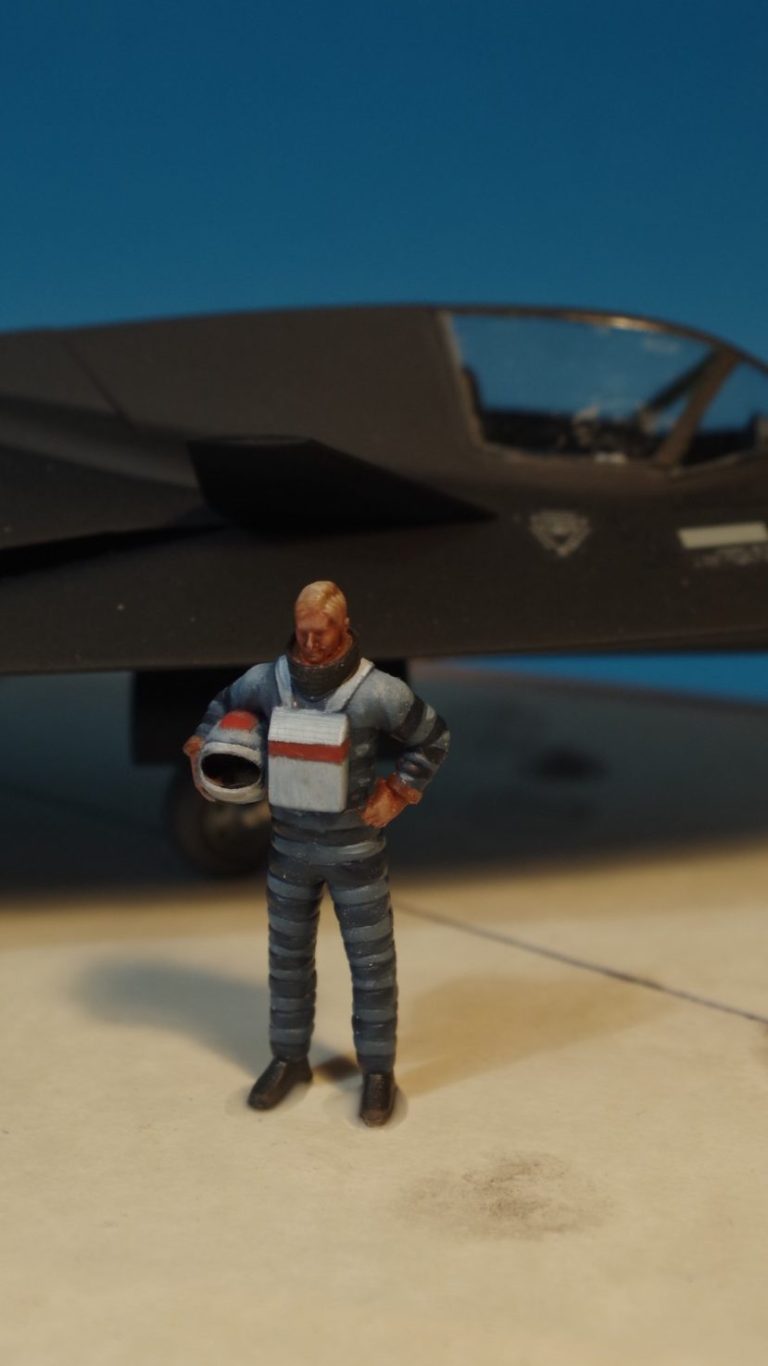
So, I’ve got a driver for this plane ( that comment is so going to draw flak – sorry, couldn’t resist ), a little bit of adjustment to the painting, so that the space suit became a pressure suit similar-ish to the ones worn by SR-71 pilots ( well, about as similar as this aircraft is to the F-117 I guess ), and once painted, glued to the base, and photos taken, well yes, I think that just about finishes the article.
Oh, the base.
If you haven’t read the article about the Saab Draken ( Which will be on here in a couple of weeks), the making of this base is done exactly the same as detailed in that article. There you go, I’ve provided you with an excuse for another cup of tea / coffee and another article to read.
So, finally, all I can add is that I enjoyed this build and paint project immensely. The kit is possibly not up to the same production standards as a Hasegawa offering, but to be honest that really doesn’t matter. Granted it is a step away from any kind of historical accuracy and a step over into fantasy, but on balance, the lines of this make it just so cool, I really don’t care.
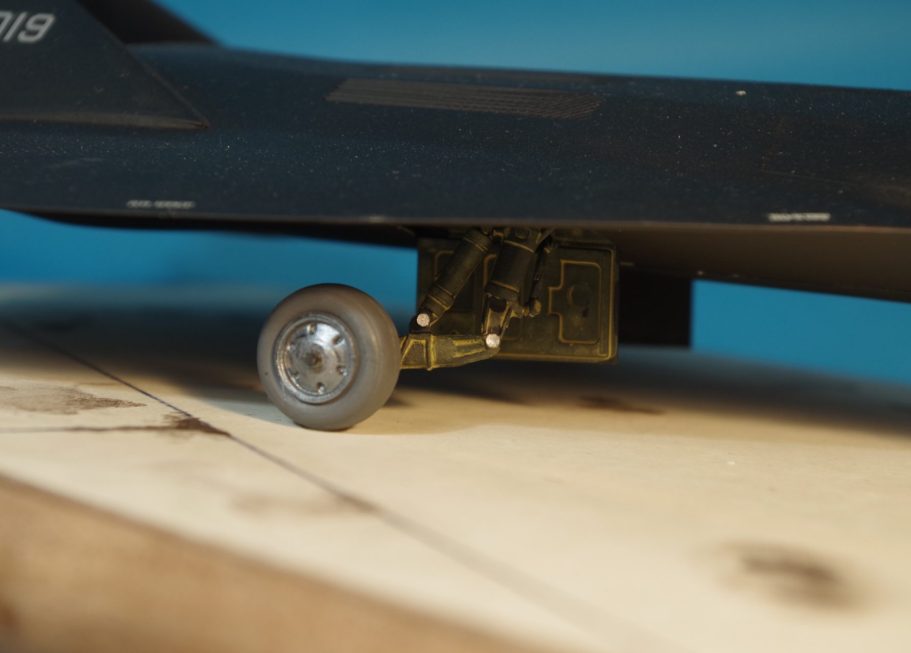
As far as I’m aware, there’s no aftermarket bits for this kit ( at the time of writing ), and the kit has been available for a few years, so I doubt that anyone’s going to rush out and create a better cockpit tub or ejection seat. A shame, but what’s in the kit ( apart from Blob the pilot ) is good enough that it probably doesn’t matter.
Go on, you know you want one of these in your display case...... there’s definitely space for one, just there on the next to bottom shelf.