Lancia Stratos
1/24th scale plastic kit from Italeri
Assembled and painted in 2024

I have a habit of buying second hand kits, either from Veteranus Auctions on Facebook, from model shows or from eBay. This allows me to pick up rare or discontinued kits, or simply something I would like to have in the stash ( note I don’t presume that it’s going to get built any time soon ) and perhaps get a bargain too.
Within these purchases are the occasional “started” or “part built” model, sometimes all I really need to do to complete them is to add the paint, and this particular kit was within that former group, having been partly built and just needing some finishing touches adding.
Obviously there are sometimes problems with second hand kits – the partial assembly can have been done less than perfectly, and sometimes there can be missing parts – nothing to be helped there, simply make do and mend.
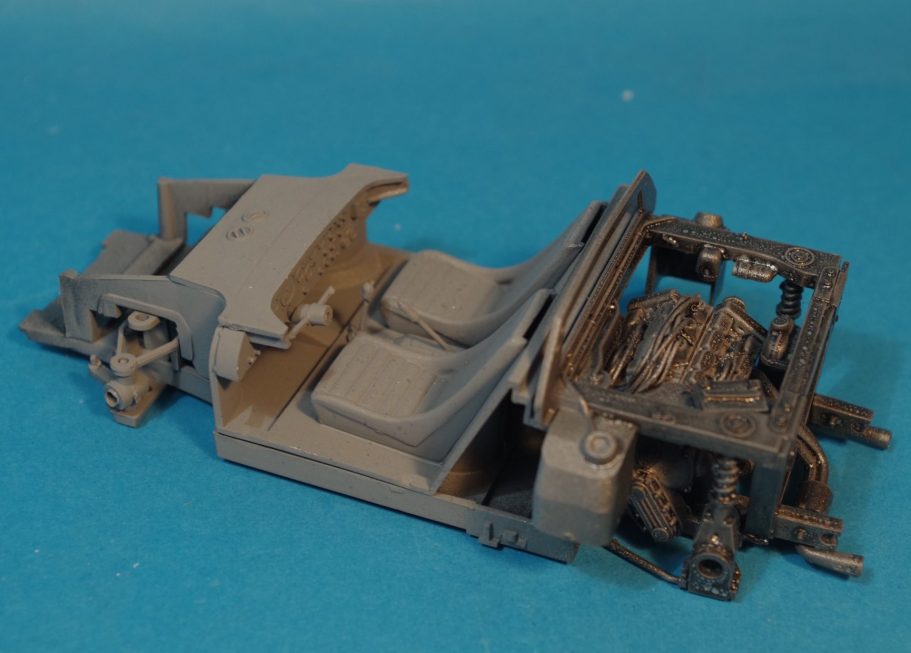
In this case the chassis and engine had been put together – really well actually, and there were a minimum of parts to add, some assembly of the body shell, and that would be all that was needed regarding construction.
Photo #1 shows the cockpit and engine as I got them, all that I’ve done is spray on some metallic paint over the engine and some grey primer on the cockpit ready for detail painting to be started.
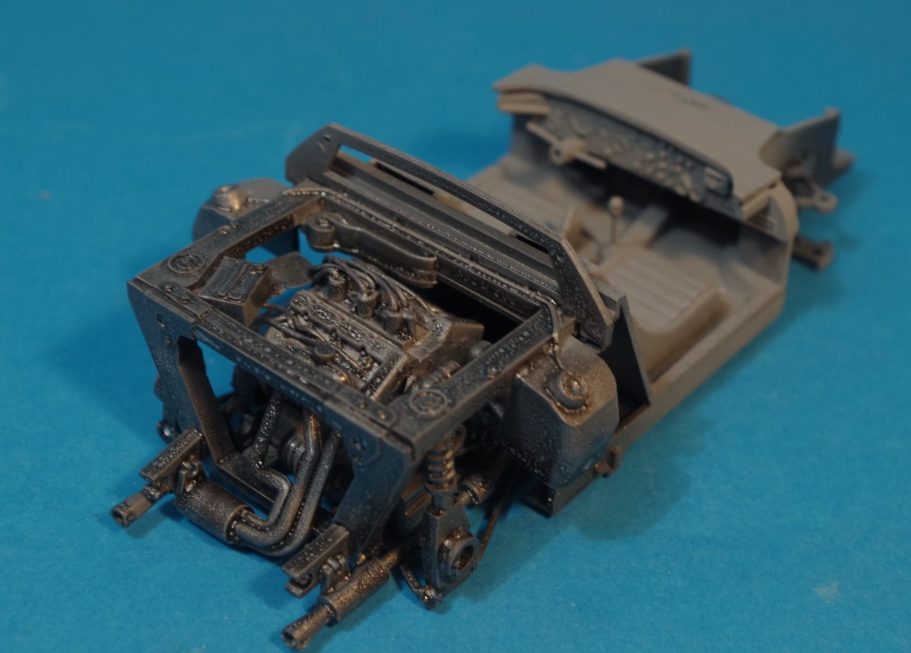
Photo #2 shows a better angle of the rear mounted engine, plenty going on here and although I did add some wiring and cables, they were never in any danger of being seen once the body shell sections were added.
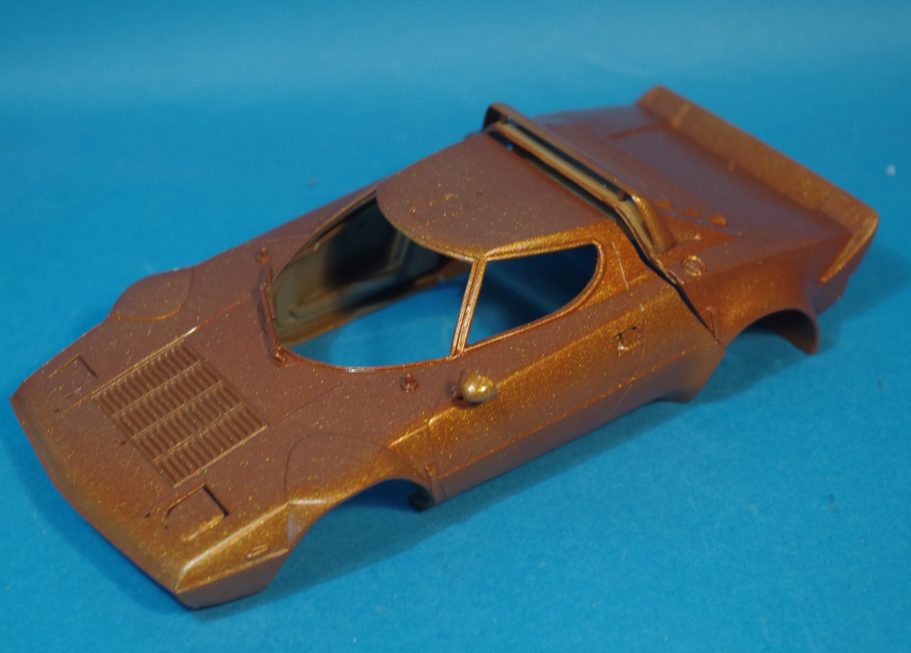
Talking about the body shell, it can be seen on photo #3, the white plastic having been primed with Halfords Grey and then a coat of Tamiya Orange Mica sprayed on.
Having looked at the decals, I’d spotted some cracking and decided that rather than see if they were actually useable, I’d skip the stress and not use them at all.
I did have the mad idea of trying some green interference paint from Alclad that I’ve had for years, and sprayed it over the orange mica.
The effect was less than pleasing, the colour shift was barely noticeable, and I think I should stick to using the Alclad stuff on flat base colours rather than something that already has a particulate pigment already in it.
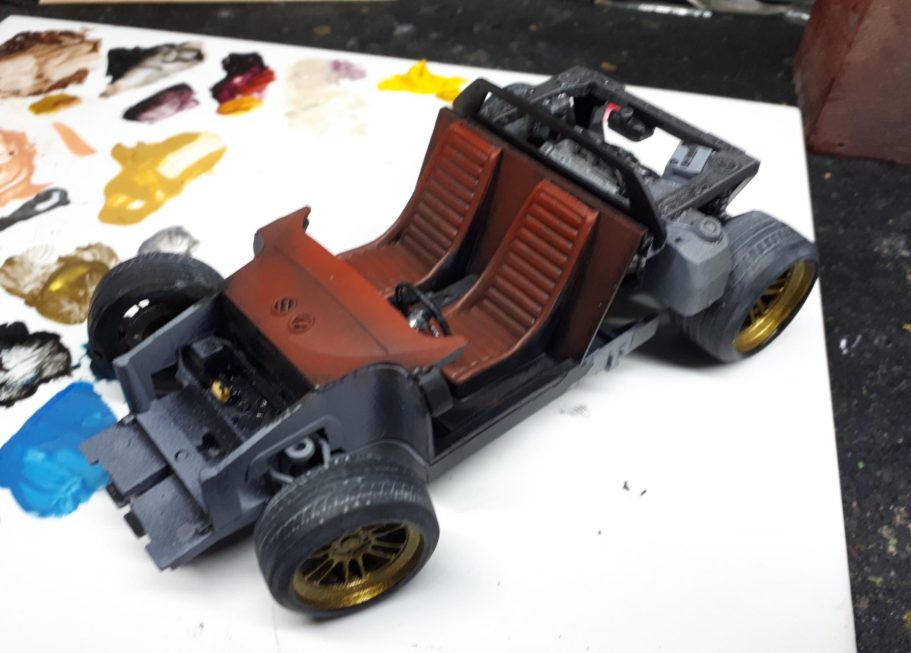
Looking more like a go-cart or a dune buggy, photo #4 shows the cockpit tub having been painted and an aftermarket set of wheels added to replace the kit ones.
I have to admit that I’d temporarily misplaced the kit wheels, having taken them to the shed to prime them, put them somewhere safe to dry and that safe place being one I couldn’t remember….. Um, old age, I blame old age !
Anyway, the replacements look good, the only shortfall on them being drain holes on the tyres because they’re hollow printed 3D offerings. The holes can be hidden under the fairings of the bodyshell, or where the tyres touch the ground.
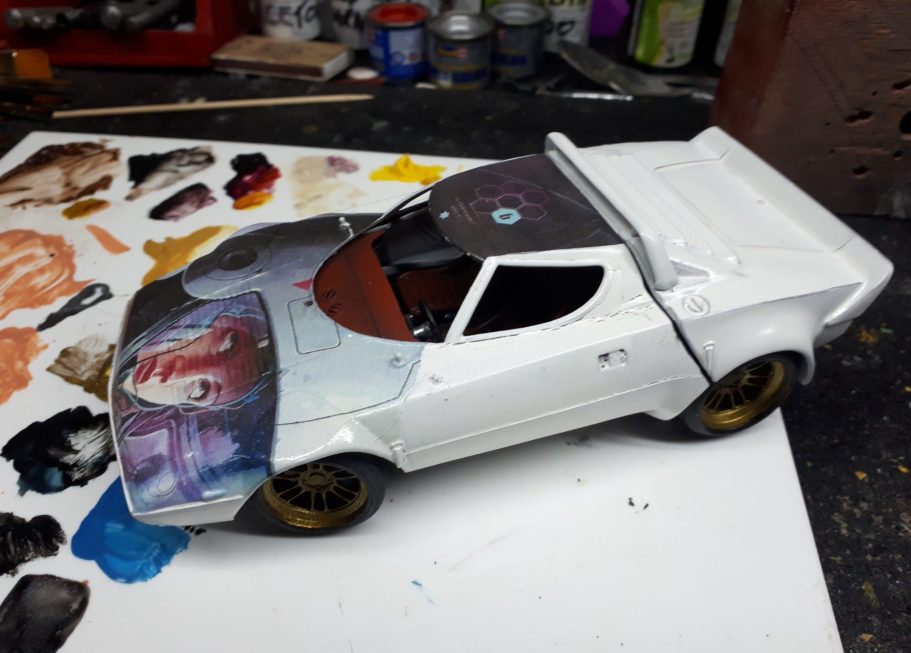
Photo #5 – the Orange mica just didn’t look right, and so I stripped the paint off with Mr Muscle oven cleaner ( the bodyshell left overnight in a zip-lock bag with the oven cleaner squirted in ), and then thoroughly washed and dried the parts prior to repriming them with Halfords White primer.
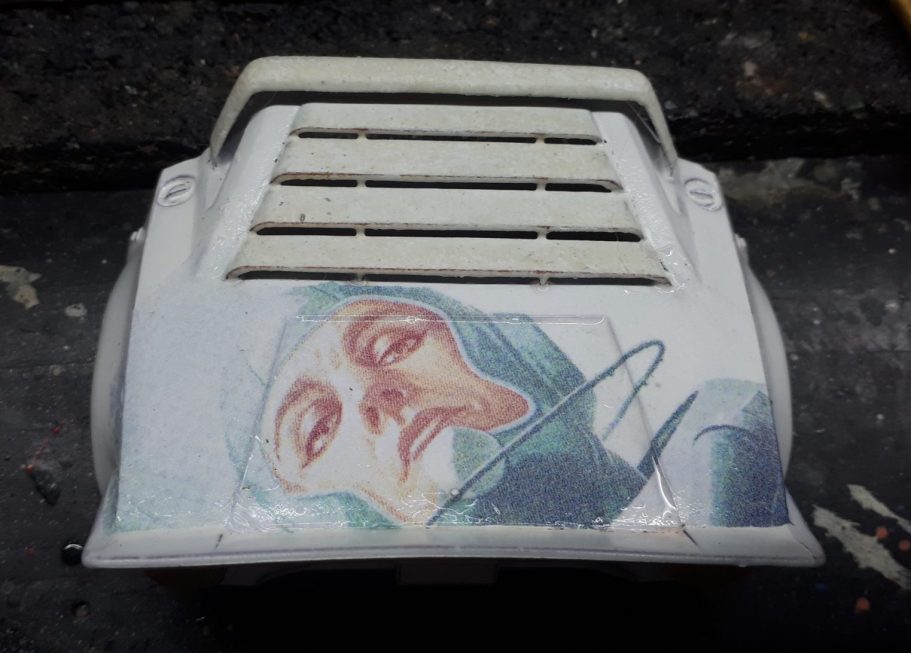
I’ve experimented with making my own decals and felt I’d been quite successful with the Tamiya Supra with it’s Derek Stenning artwork, and having been pleased with that result thought I’d try larger decals featuring Mr Stennings designs on the Stratos.
The roof and bonnet have parts of the same image on them, the decals scanned and then printed with a lazer printer onto white decal sheet, spraying the decal with gloss varnish to fix it, and settling it in place with Micro So and Micro Set.
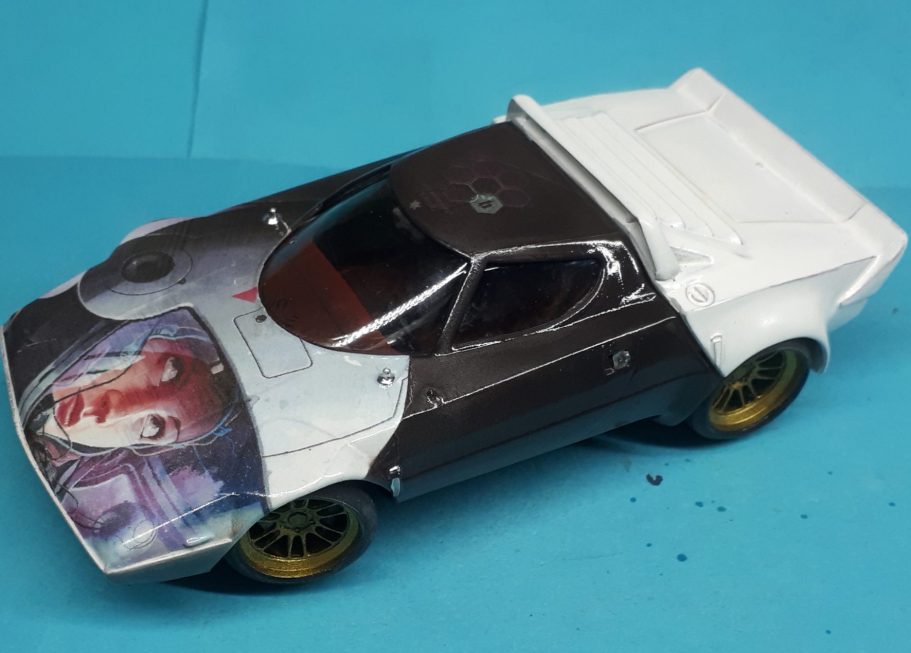
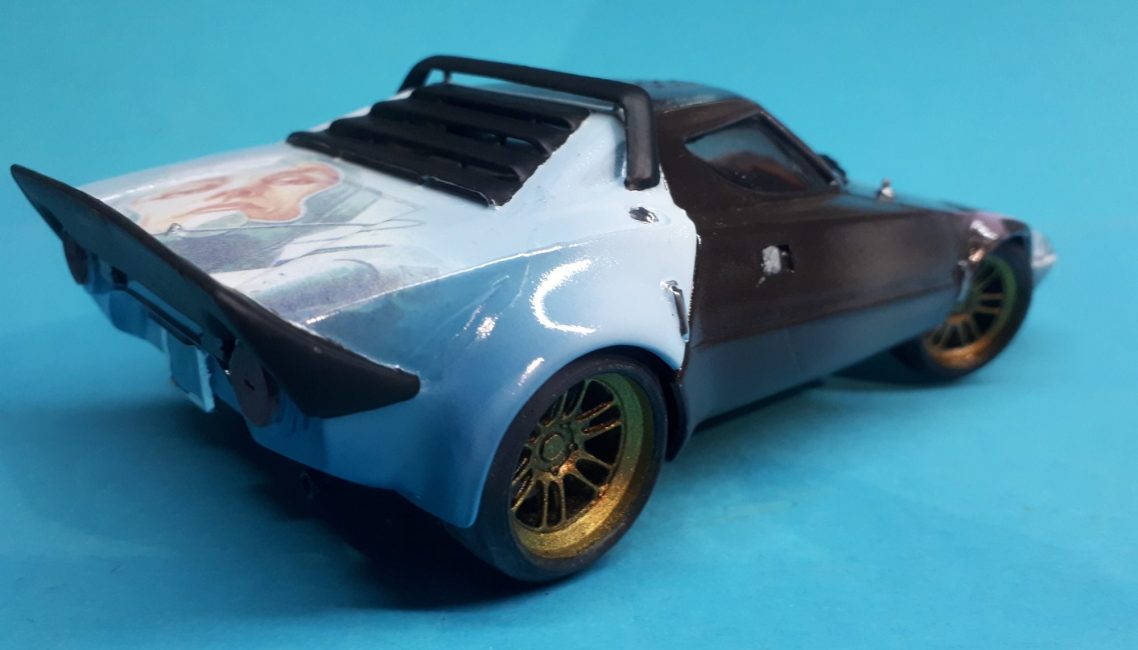
Photo #6 - The decals need to be “joined in” to the surrounding paintwork, so I mixed up some Tamiya Blue and Red colours to make a dark purple / brown colour similar to the darker areas of the decal, and sprayed them onto the white sections of the forward bodyshell.
The hard edge of the helmet on the left side of the car was made by using masking tape to hide the edge of the decal I wanted to retain, and I carefully faded the dark paint in to the right side of the decal on the other side of the car.
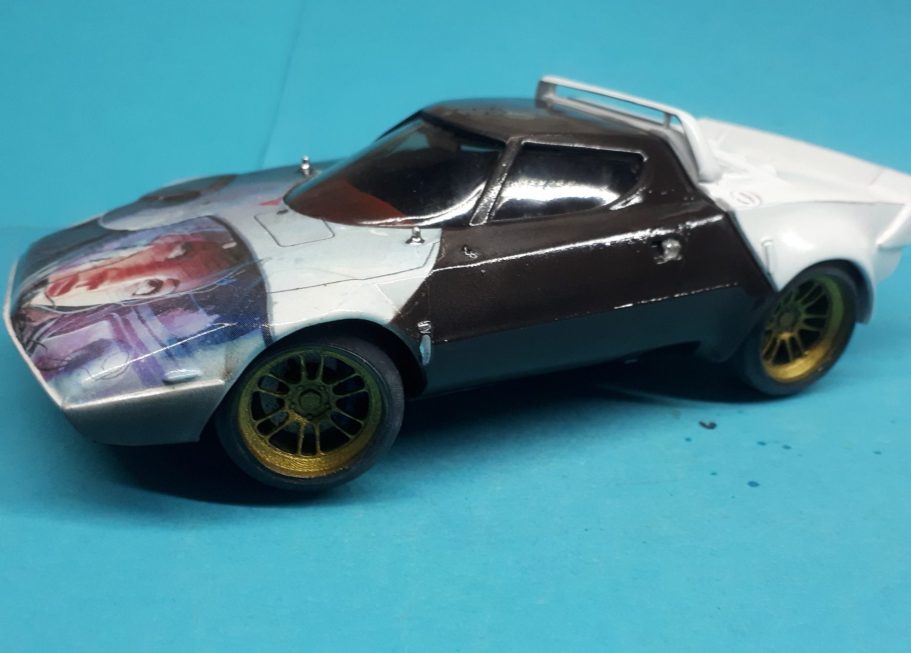
Photo #7 shows a lower angel view of the car at this stage. The surface I’ve got it on is uneven, which is why the front wheel is hanging in mid-air and the glazing has been temporarily put in place to see how clear it is and how much of the cockpit is visible.
I’ve added three coats of gloss varnish from the Mr Hobby range of rattle can spray paints at this point. I find these varnishes very good, they cover well, dry well and are easy to work with. It’s only taken me 40 years to find a range of varnishes that I like and that work for me !
That back end looks a bit disjointed though, still remaining white. I liked the colour difference though, it just seemed a bit empty and stark.
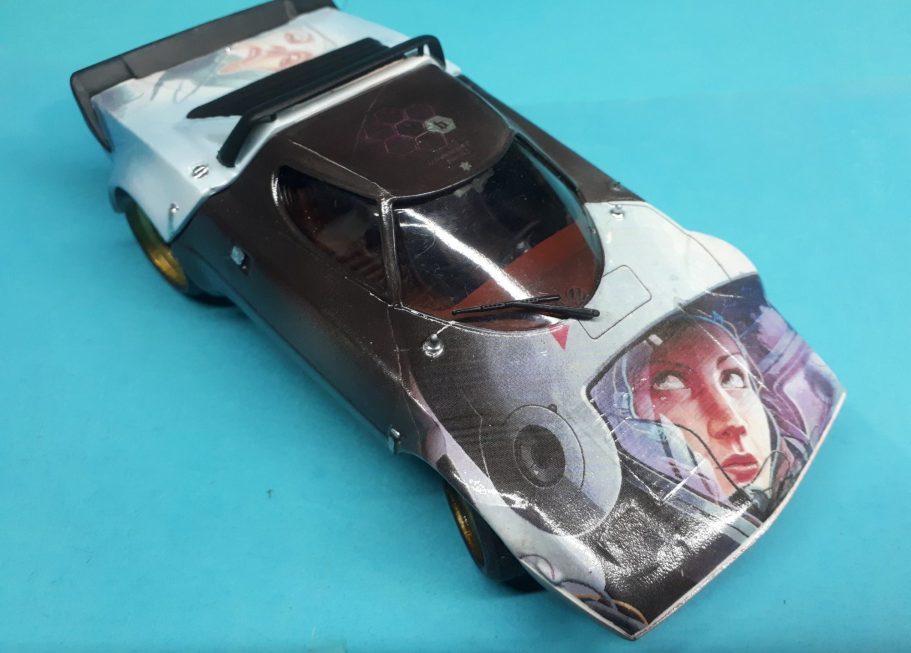
So in photo #8 I’ve added another Derek Stenning home made decal, this time from a series of six pictures showing a character evolving, and the images growing paler and paler as the evolution takes place.
I felt that the lighter colours would be perfect on this one for the back end of the Stratos, keeping the brighter look, but not being “just white”.
Adding decals like this can be a bit of a leap of faith, in that photo #8 looks OK, but a bit unfinished. You have to be able to picture how it can look as a finished piece, mentally adding the other colours to areas to imagine of it’s going to work.
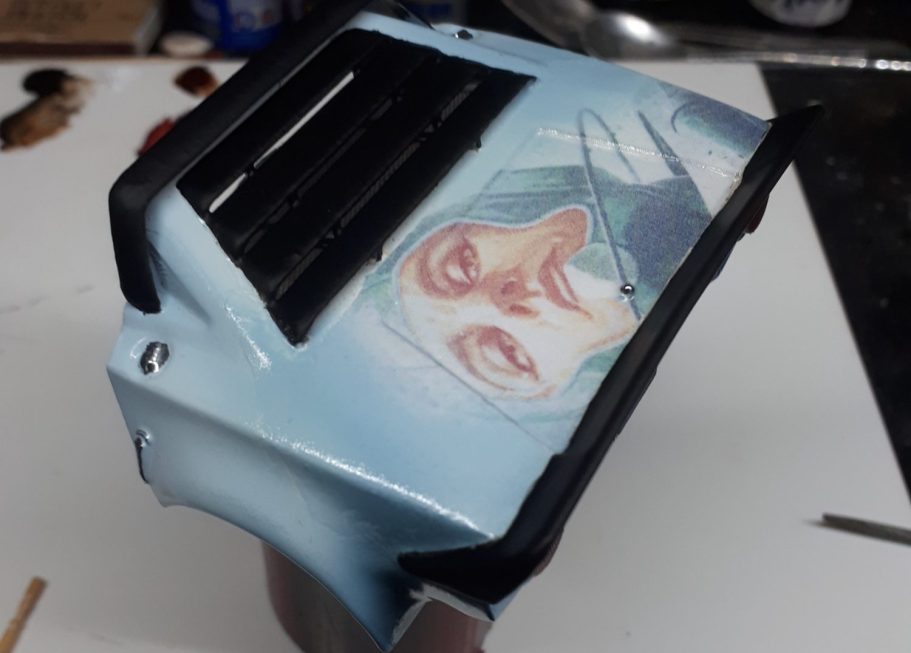
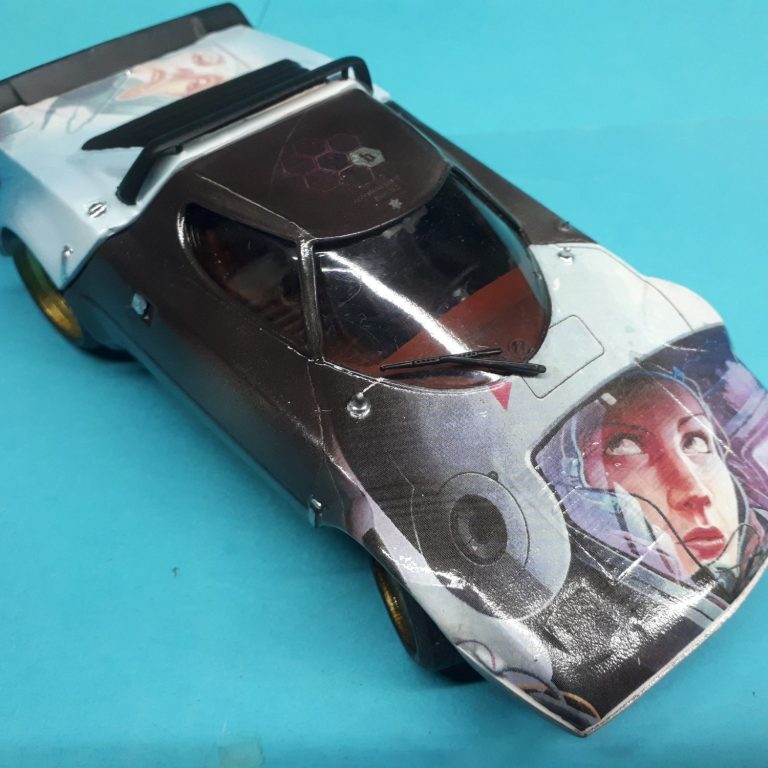
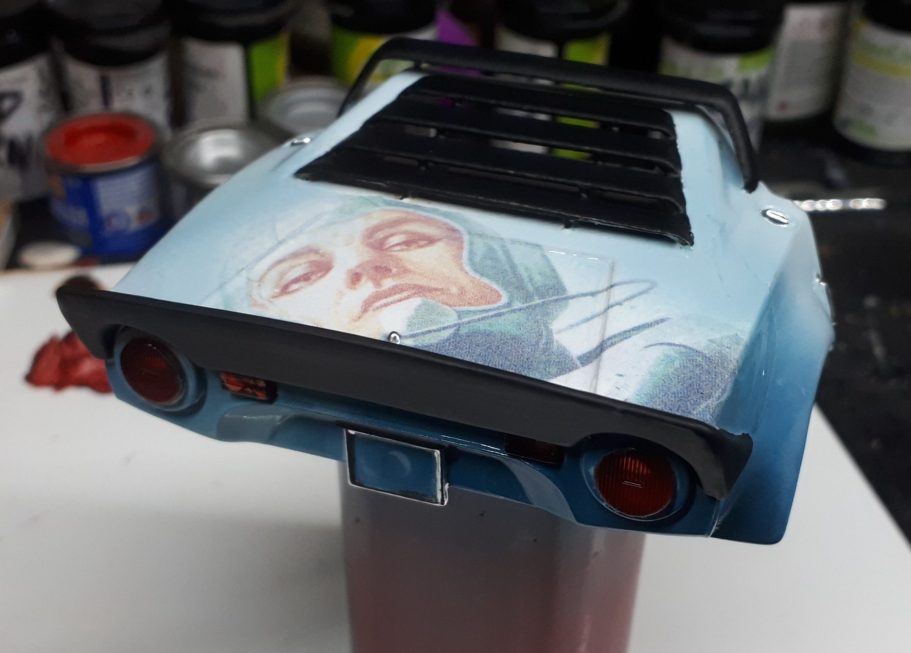
Photo #9 shows a view of the back end having had a pale blue airbrushed on to blend in the decal edges and the fairings and spoilers painted black.
I added a texture to the upper spoiler and fairings with Mr Putty liquid plastic, using an old paintbrush to add it to the surface of the model and stipple a texture into it as it cured.
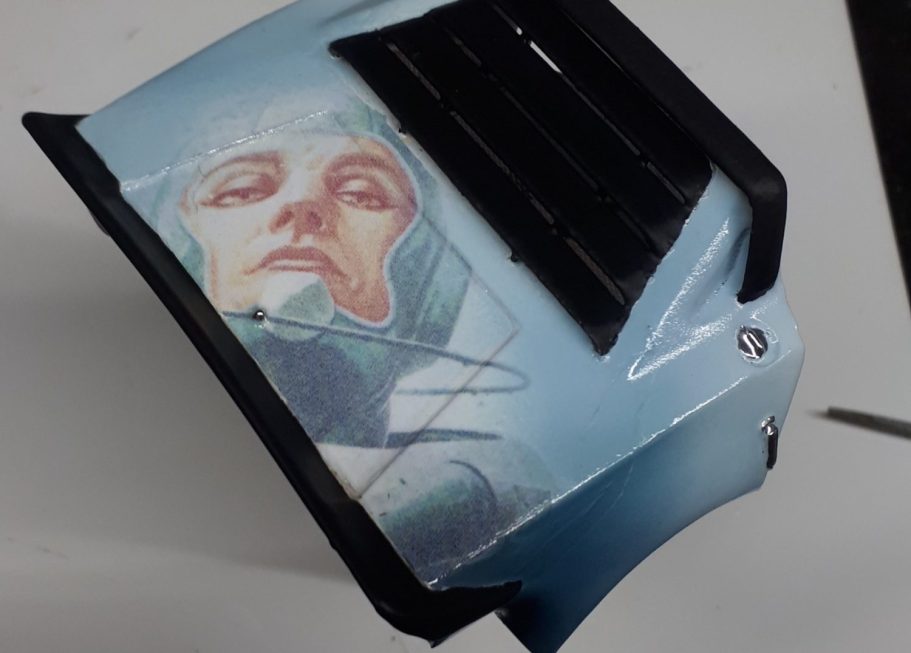
Photo #10 shows a view from the other side, and photo #11the rear of the section with the lights added. The clear parts of the kit are not coloured and I used a couple of coats of Tamiya Clear Red to bring them to life. Chrome areas were added with a Molotow pen.
Finishing up
As I mentioned, second hand kits can have some parts missing, it comes with the territory, and the windscreen wiper had gone AWOL on this kit. I have a little box of spares that I’ve collected from other vehicles over the months I’ve been building cars, and I had a spare that I could use here.
After market products abound now with the rise of 3D printing, and also spare sets of decals, blank decal film in either clear or white, along with many other additions that can be sourced for various vehicles.
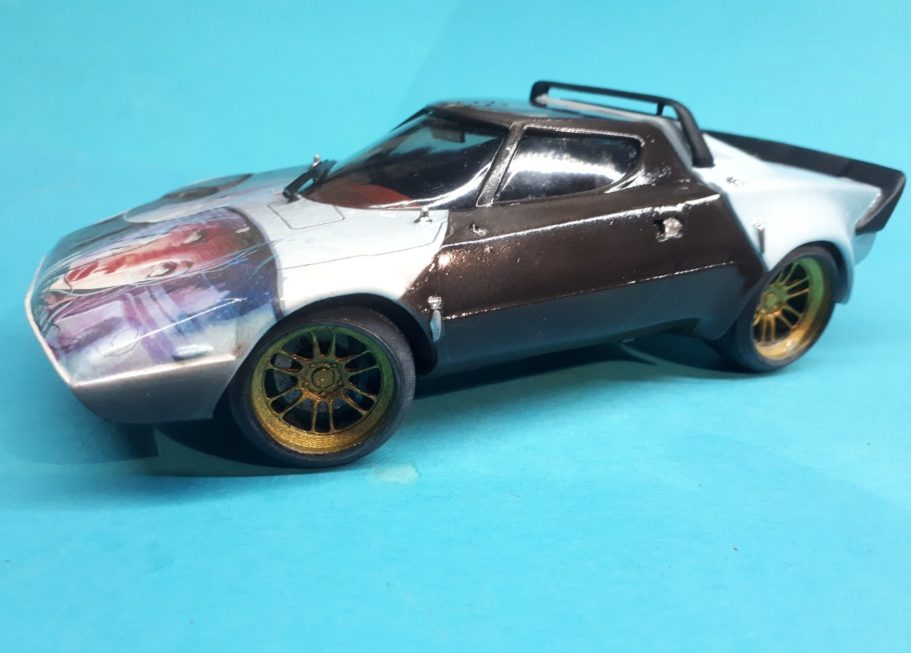
As for this actual kit, it’s old, and the fit of the body shell halves isn’t the greatest, even with a bit of filing and fettling, so the dark to light transition between them helps hide what I think is a pretty large gap.
I don’t consider myself an expert at building these type of kits, but I am inspired by the guys that display on the Racing Car SIG at model shows.
They have some fantastic vehicles on their display stand, and whilst I don’t think I’ll manage to get close to that good, it is something to aim for and take ideas from.
I admit that buying some cheap and / or second hand kits has allowed me to practice a bit without the fear of messing up an expensive model, but I’m getting a bit more confident now to have a go at something a bit more expensive…… when I get the time, that is.
I’m pleased enough with the effects I’ve got on the Supra and this Stratos, they’re not perfect, but that’s something I can work on in future projects.
Content; I think that sums up what I've managed with this and the Supra, I’m content with the result.