Whippet 1919
WWI "What If" diorama with 1/35th scale Emhar plastic Whippet and other figures.
Assembled and painted in 2019
I don’t know why, but British designs of the embryonic fighting vehicles during WWI were so much easier on the eye than their German or French counterparts.
It all seemed to go wrong after that, with the German designs of WWII which appear to be a lot more popular to build than the British vehicles…..
It does make me wonder why this is, and what happened to British ingenuity in the 1920’s and 30’s.
That notwithstanding, I do like a whippet or a Rhomboid tank, although I’ve built precious few of the latter, and this is my first of the former.
Emhar kits have been around for ages, and yet this is the first one I’ve tackled.
It’s surprisingly good for a relatively cheap kit – especially when compared to the price of the more recent offering from Meng.
After all, there’s probably going to be a lot of mud involved with the finished article, so deficiencies, particularly anything to do with the running gear, is going to be easy to hide.
Construction is fairly simple, with little to catch the modeller out, the link and length tracks will need superglue to hold them in place, and to be honest, some replacement machineguns wouldn’t go amiss.
I got some off eBay for under a tenner, and they do look a lot better than the plastic ones supplied in the Emhar kit, but otherwise this is built from the box and I can’t really find much fault with it.
I was tempted to leave the door open at the back of the driver housing, and have a figure standing in it to block any view of the rather bare interior, but couldn’t find a figure that I thought looked right for the task. So I fastened the door closed.
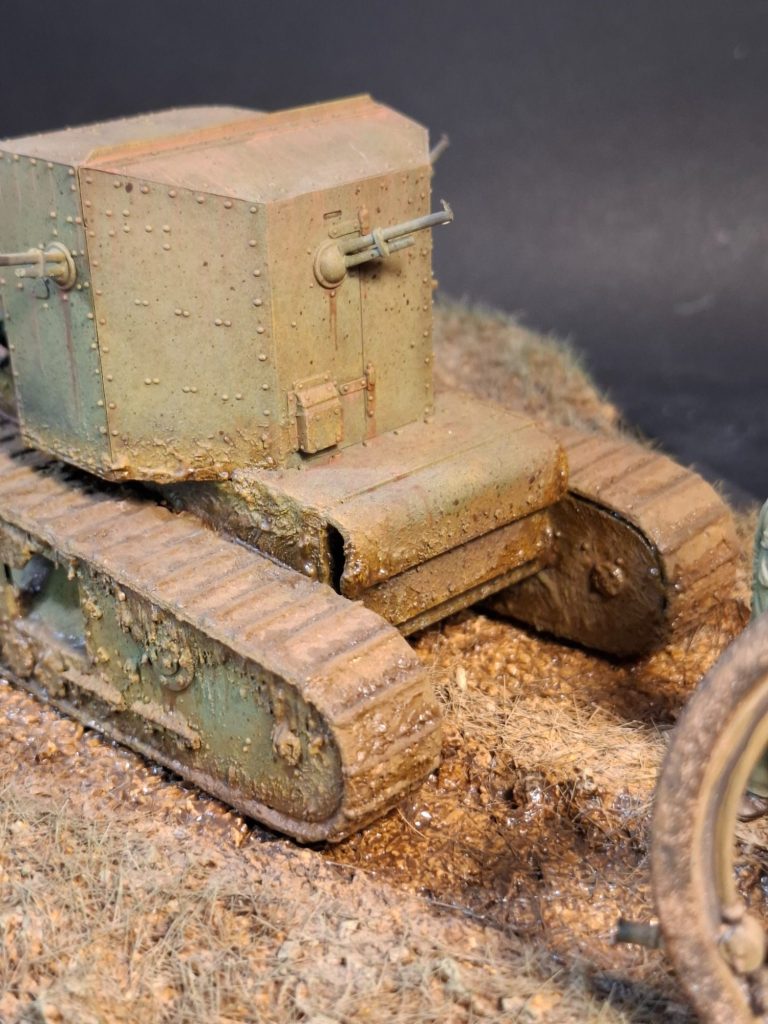
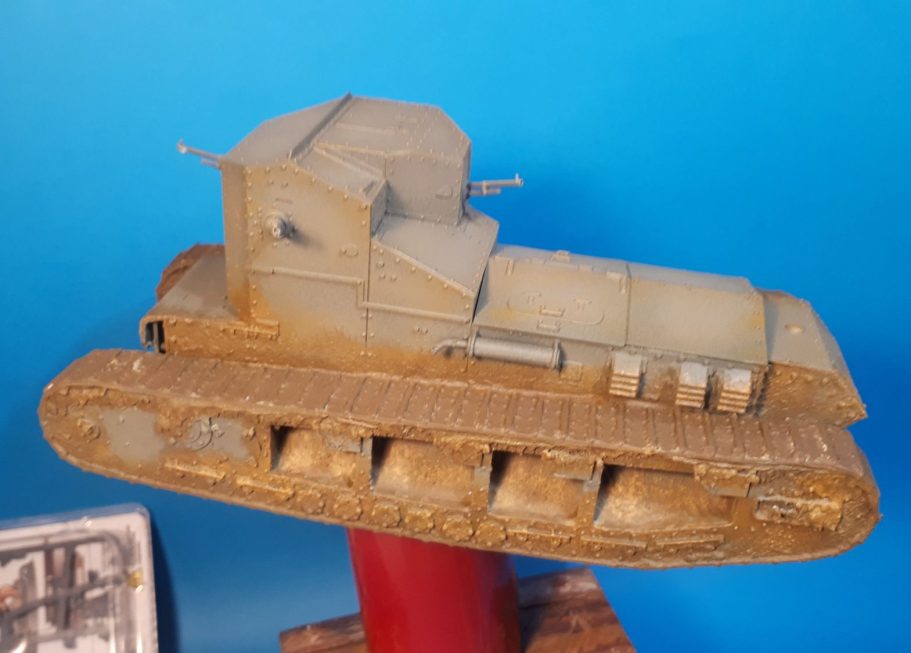
Photo #1 I’d drilled a hole into the underside of the Whippet and fastened a wood block to the tank to be used as a handle when painting.
The mud is a mix of wall filler, some finer pieces of cat litter, a mid-brown acrylic paint and a small amount of water to make it workable with an old hogs hair brush.
Why add paint into the filler, when it’s going to get painted anyway ?
Well if bits bet knocked off or damaged during the finishing process, then at least the white filler won’t show up, the brown might be slightly different to the finished shade, but it’ll be much easier to patch and match.
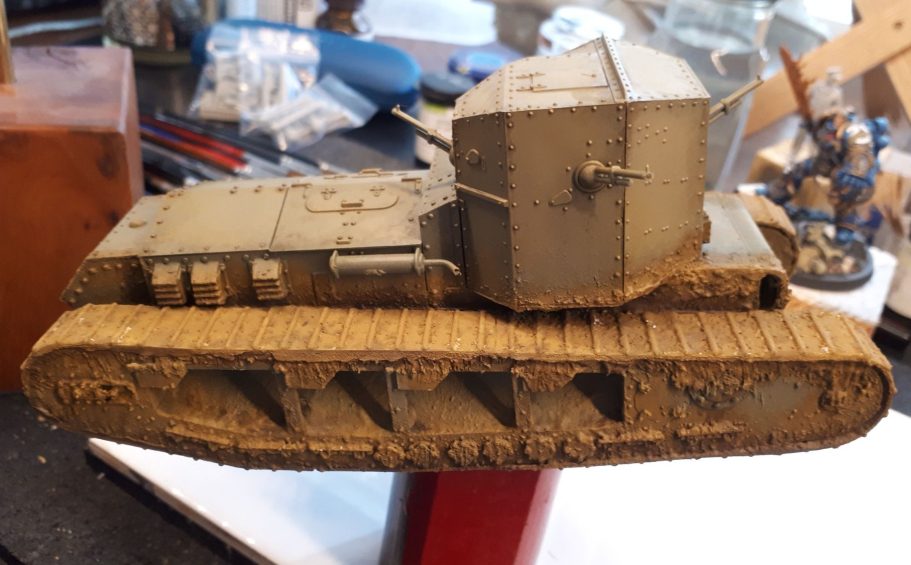
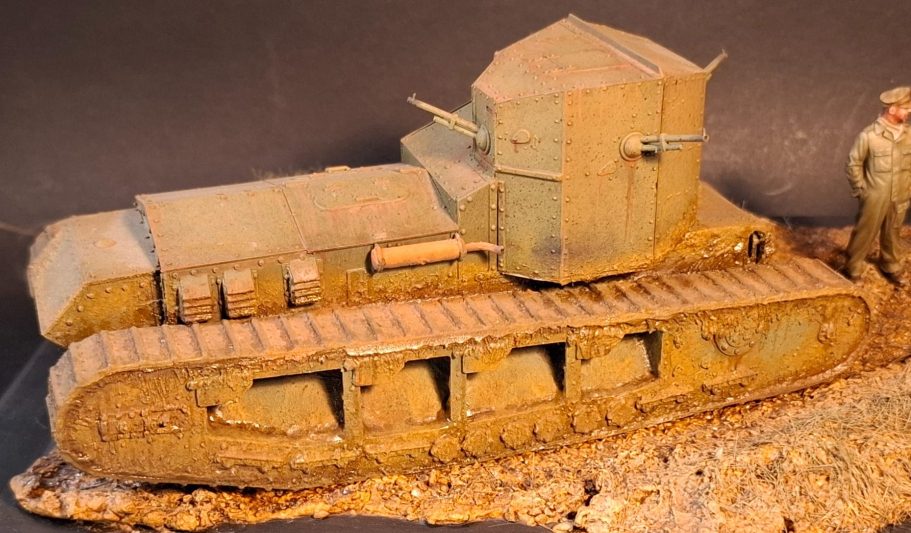
Photo #2 shows the opposite side of the Whippet at this stage, and have you noticed the mistake ?….
Yup, I didn’t think to apply any decals to the model prior to weathering it – D’oh !
But as this is going to be a “what if” model, I suppose that the bright red and white markings applied to these and rhomboid tanks earlier on in WWI might have been removed or left off completely, as the British forces realised that the German’s might have something with this idea of camouflage….. It might catch on, your enemy not having a brightly coloured section of vehicle to target….
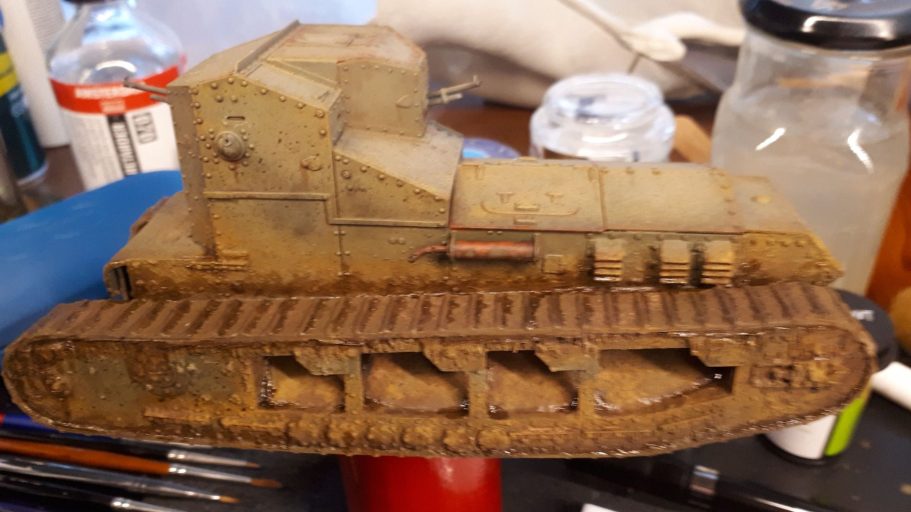
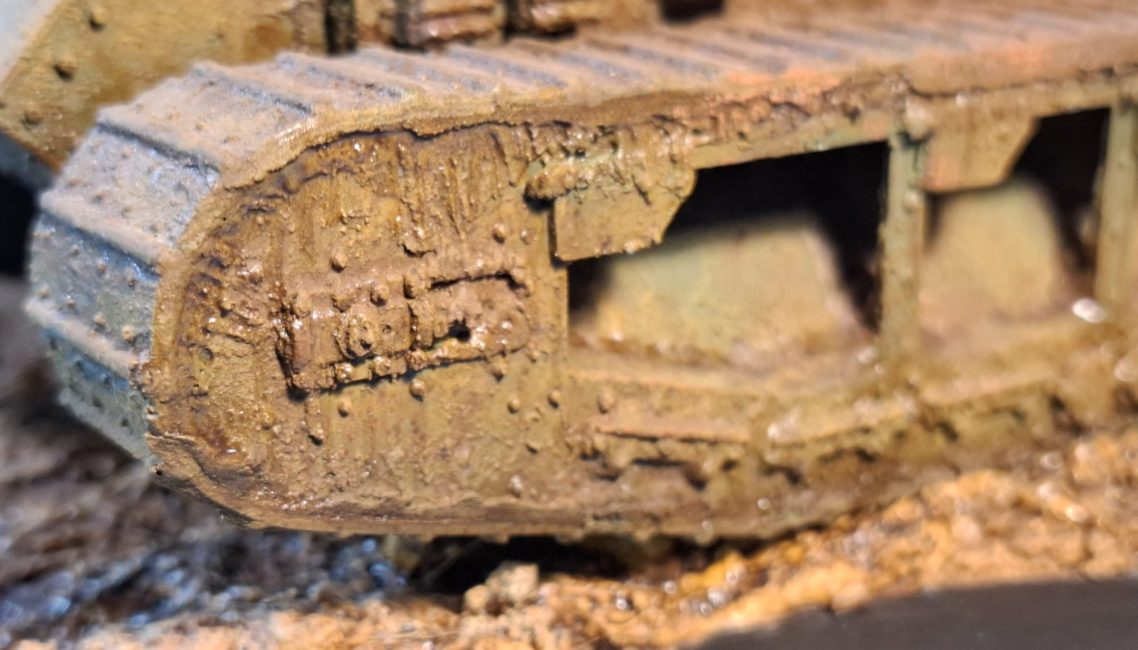
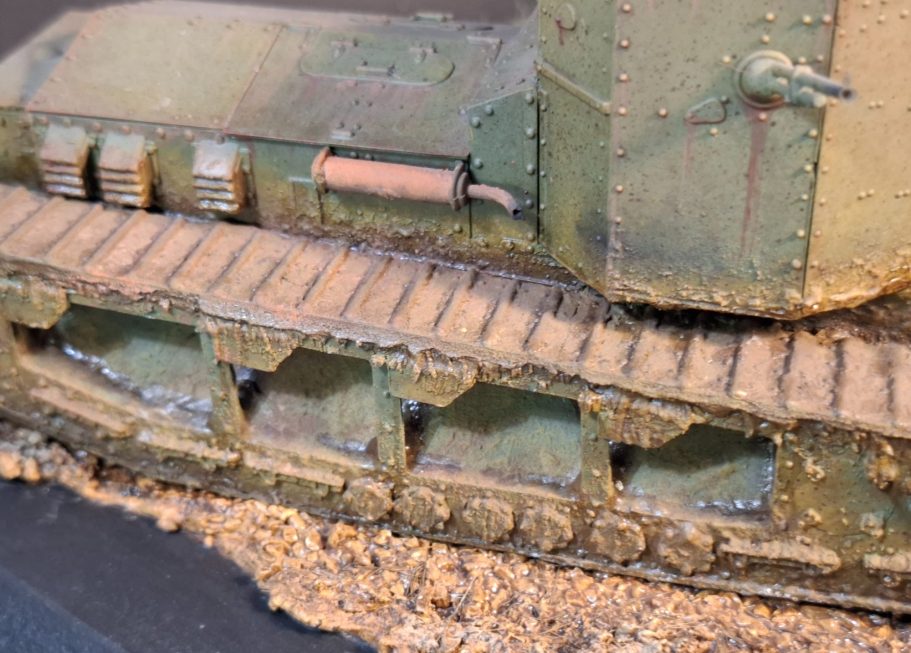
Photo #3 I tried to visualise where the tracks would throw mud up onto the tank as it moved across a pot-hoped and muddy landscape, and once painted and dried fully, I began adding gloss varnish to some areas that might retain moisture because of the wet conditions.
You can see in this shot that I’ve added the varnish in between the separate track links, and also runs of the varnish in the channels on the sides of the suspension sections.
Photo #4. With the model close to finished, I set about making a scenic base for it, selecting a piece of MDF and applying more filler to is, having scratched lines into the painted surface of the MDDF to help the filler adhere to it.
I made track marks in the filler behind the Whippet, and pressed some small rocks and some barley seeds into some areas too. The barley seeds once painted look like that thick, gloopy mud that is semi-liquid in this scale.
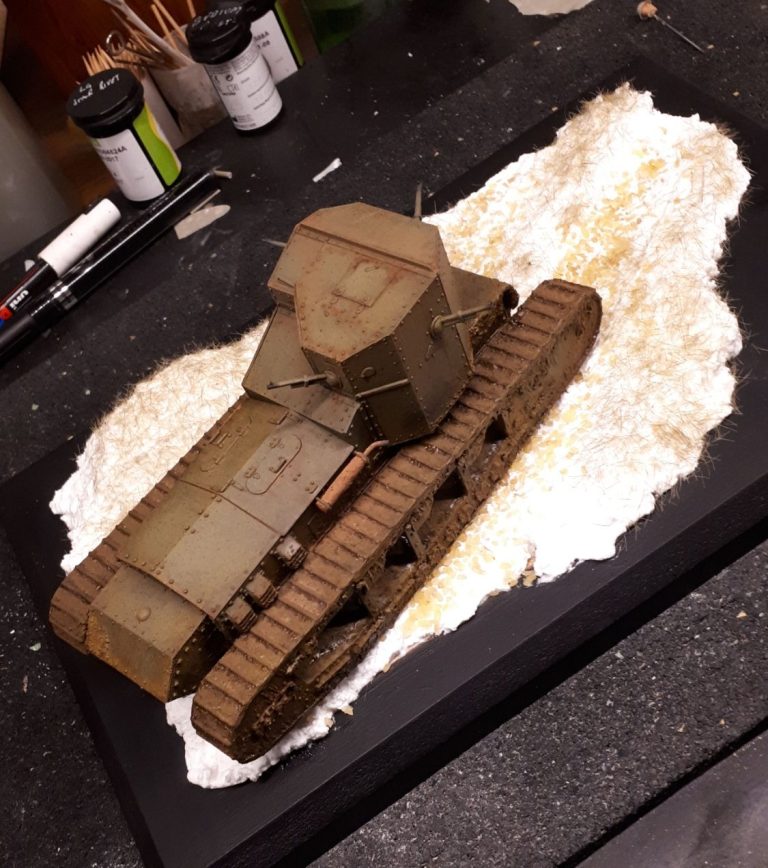

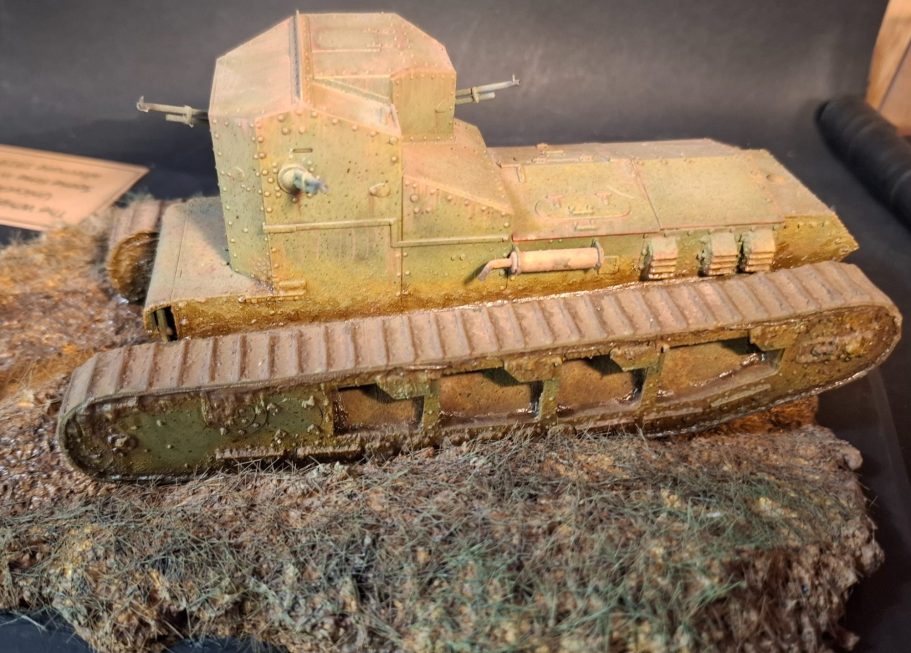
Photo #5. The Whippet is removed from the base, having also made a track in the mud fro the Unicycle – more on that later.
Not much has changed in this picture, just some small runs of varnish around the front end to depict moisture running down the side of the sponsons, and some weathering powders added to the exhausts to bring out that dry, rusty appearance.
I also added some dribbles of rust beneath the gun orbits, thinking that although probably well greased, they would still shed rusty liquid to some small extent as they were worked back and forth, up and down.
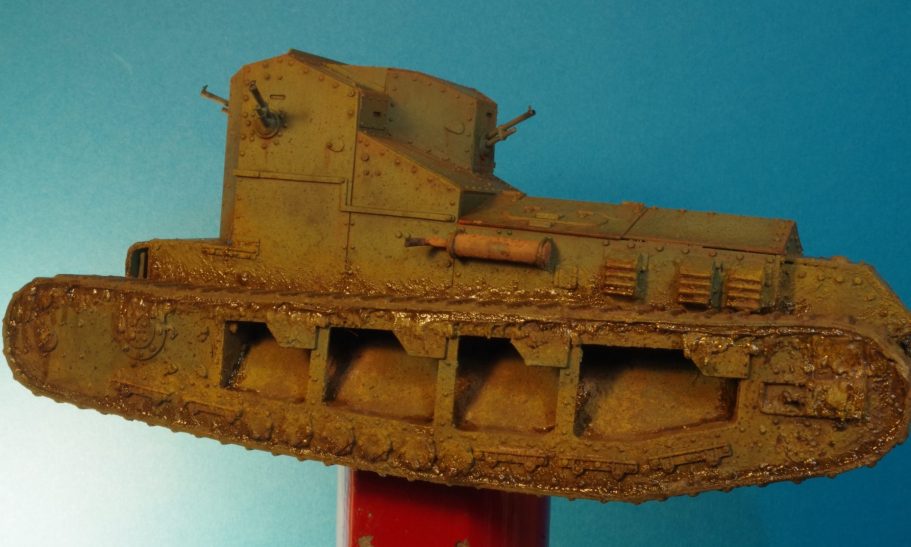
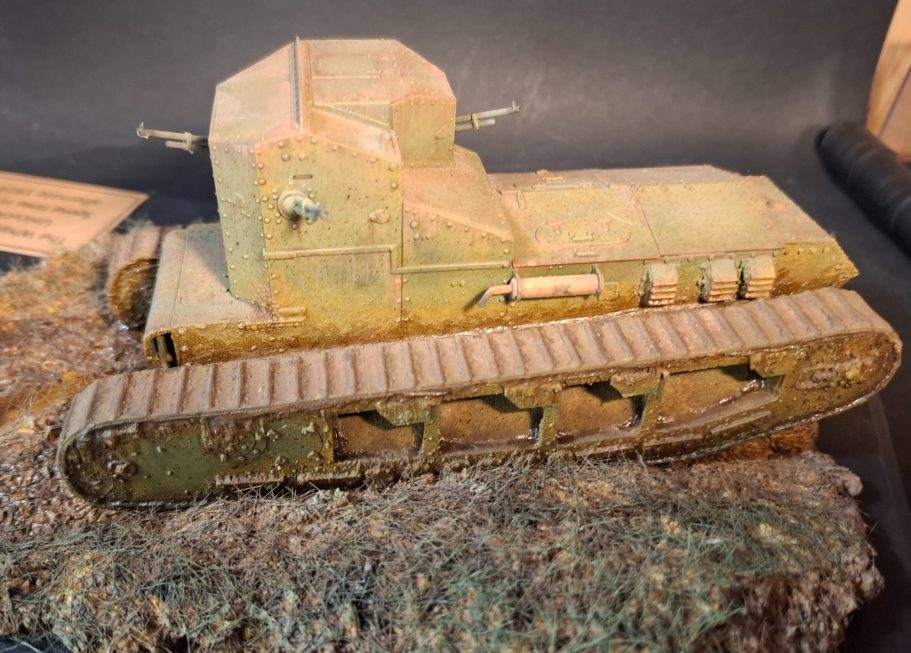
Photo #6 shows the other side of the tank, some small pin washes added here and there to pick out the rivet detail, and that was the Whippet about ready to be added to the base.
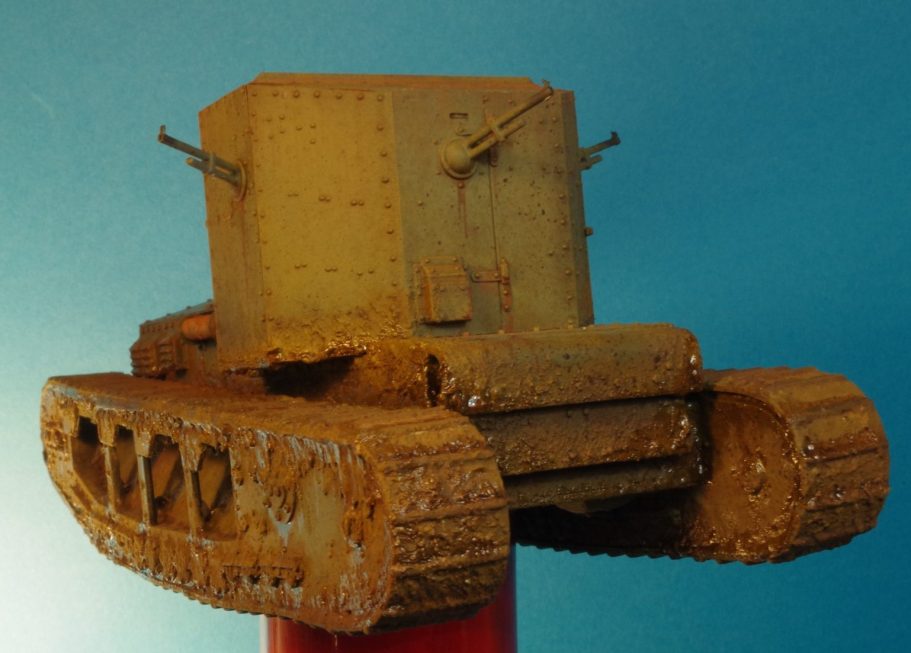
Photo #7 shows the back of the tank – thought I’d add a picture of that, just to prove that it’d been painted.
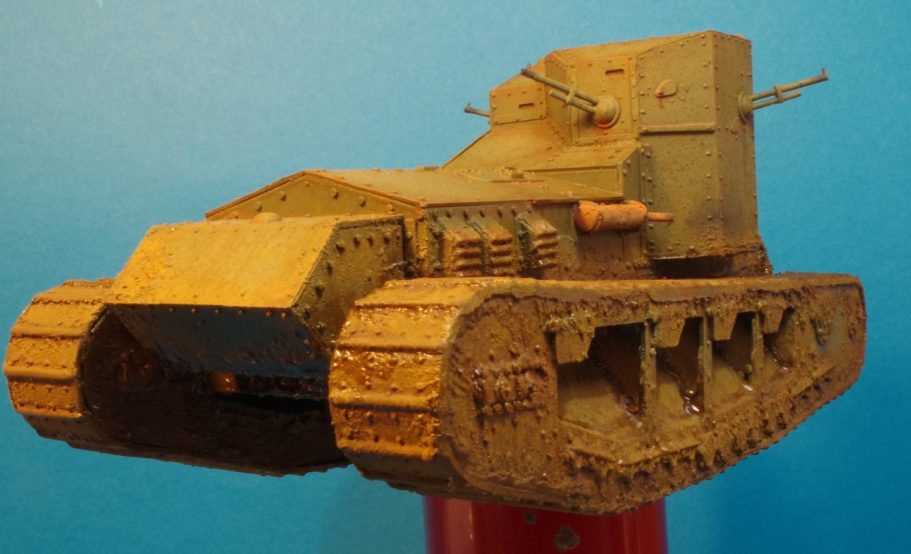
Photo #8, Oh go on then, a picture of the front end too.
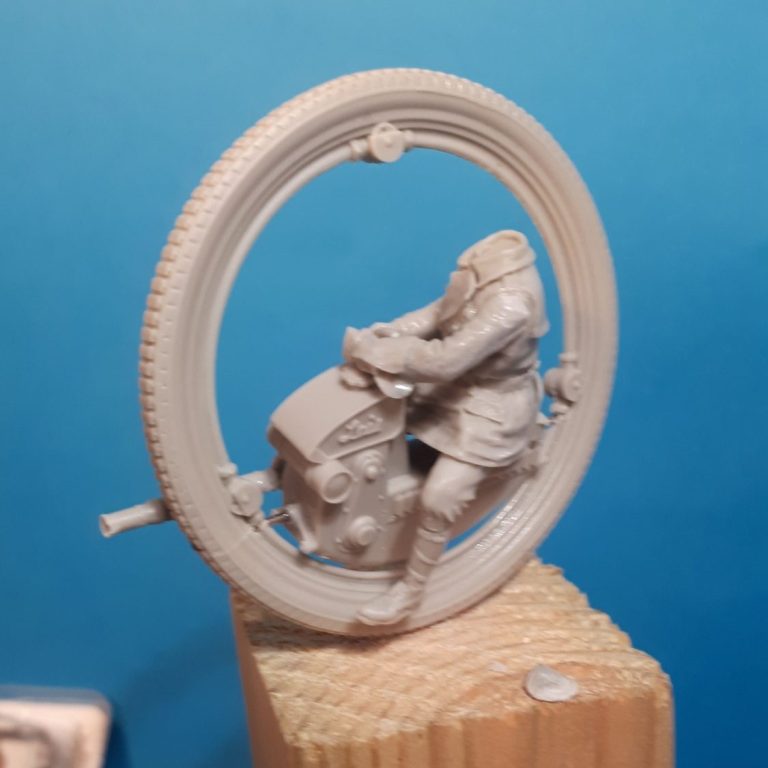
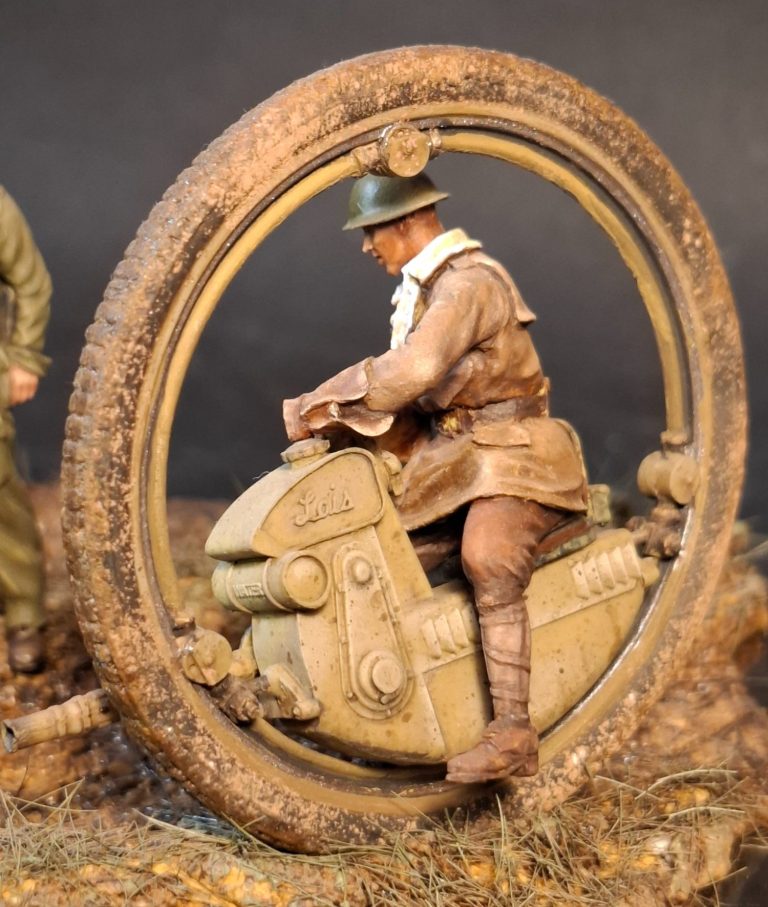
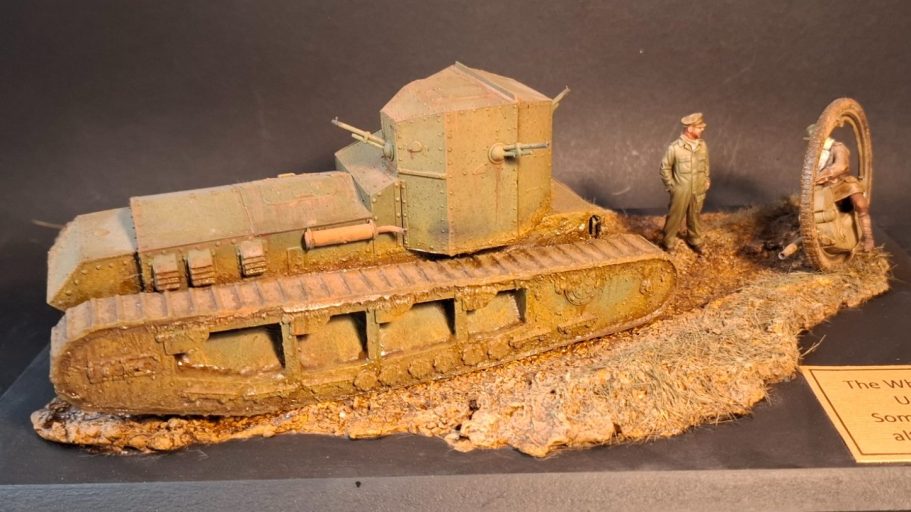
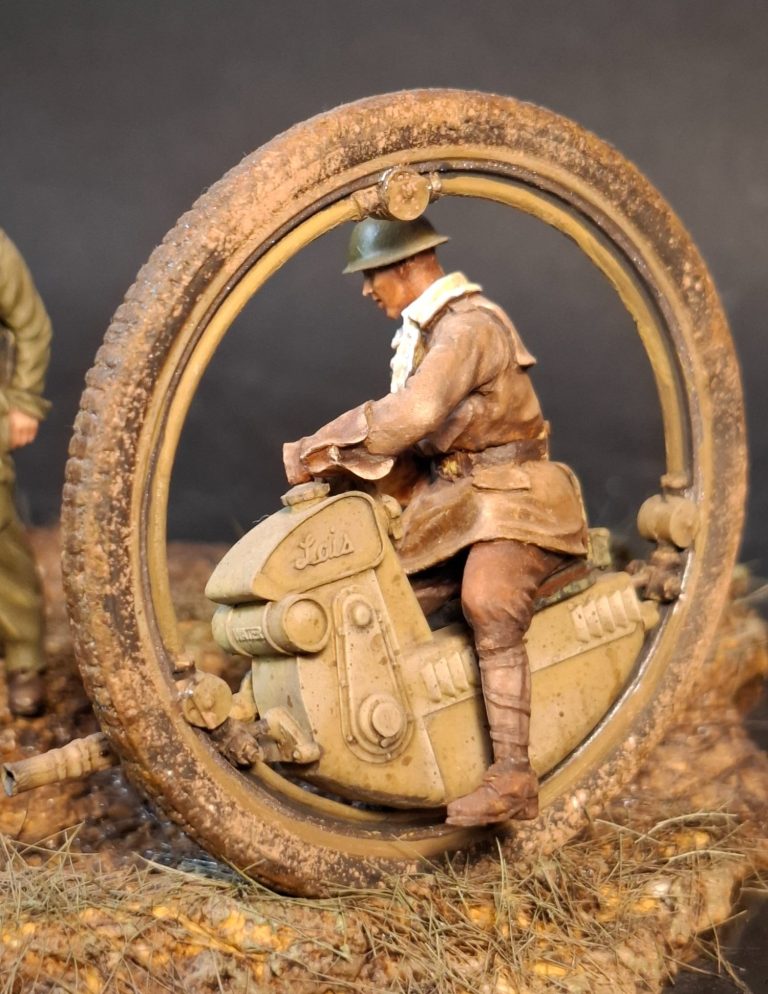
Photo #9 Again I’m going to use the excuse of not realising I would be writing an article about this piece back in 2019 when I made it. And writing the text now in 2025 I cannot for the life of me remember who makes the monocycle kit.
It is cool though and I wanted to add it to the diorama with the Whippet tank, hinting at a “Steampunk” kind of atmosphere.
It’s a resin kit, complete with rider, although he could be discarded and have a figure standing beside the monocylce, although that would mean fabricating some kind of folding stand to stop it falling over.
Photo #10 and I’ve got on with painting the monocycle, the white on the tyre is from rolling it over the filler used to make the base, and rather than wash it off, I chose to paint the white filler with a mud colour to match the groundwork.
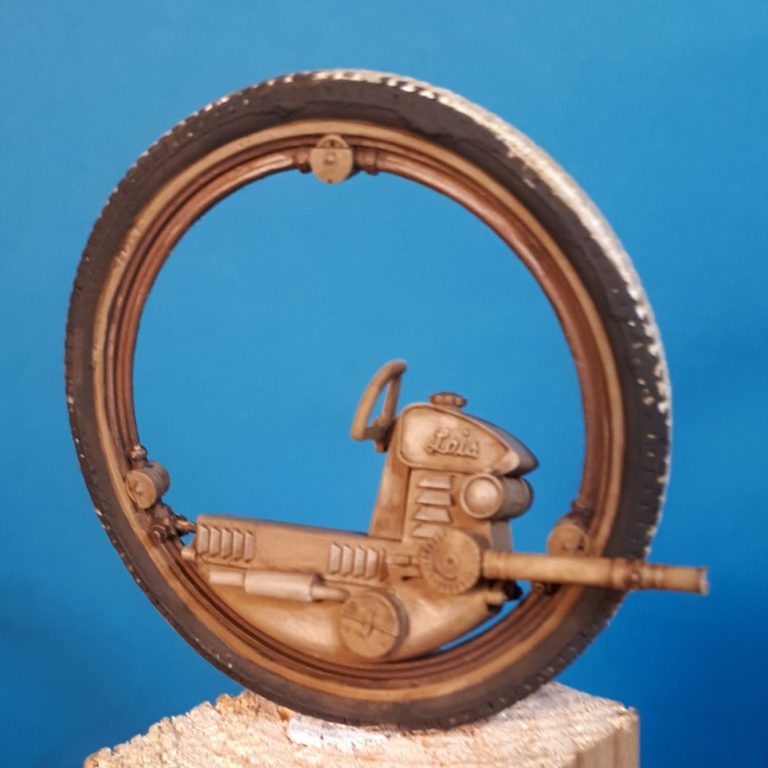
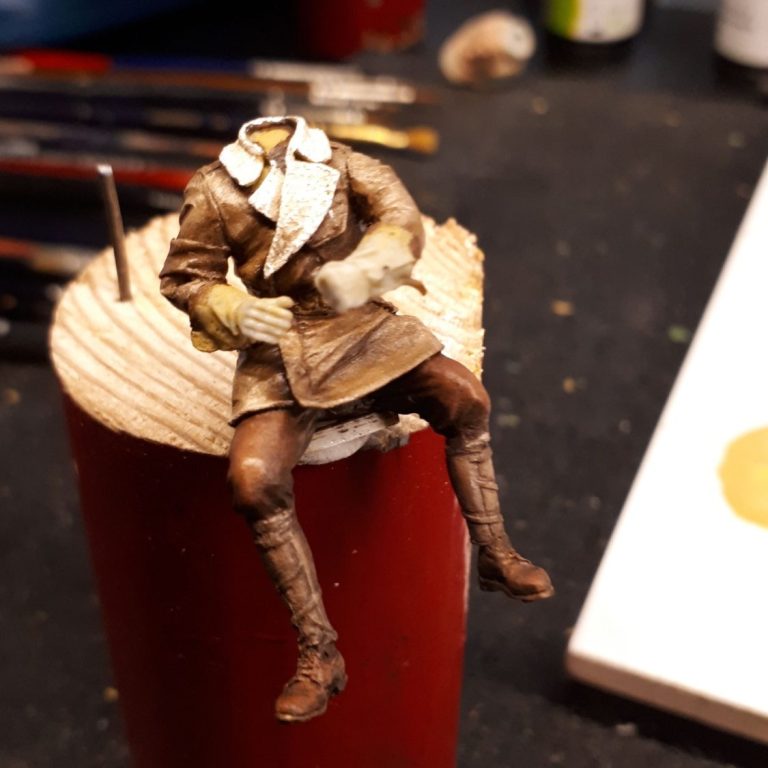
Photo #11 shows the seated figure for the monocycle fully painted. I’d left the head separate so that he could be fitted to the seat more easily, sliding him into place, then adding the head afterwards.
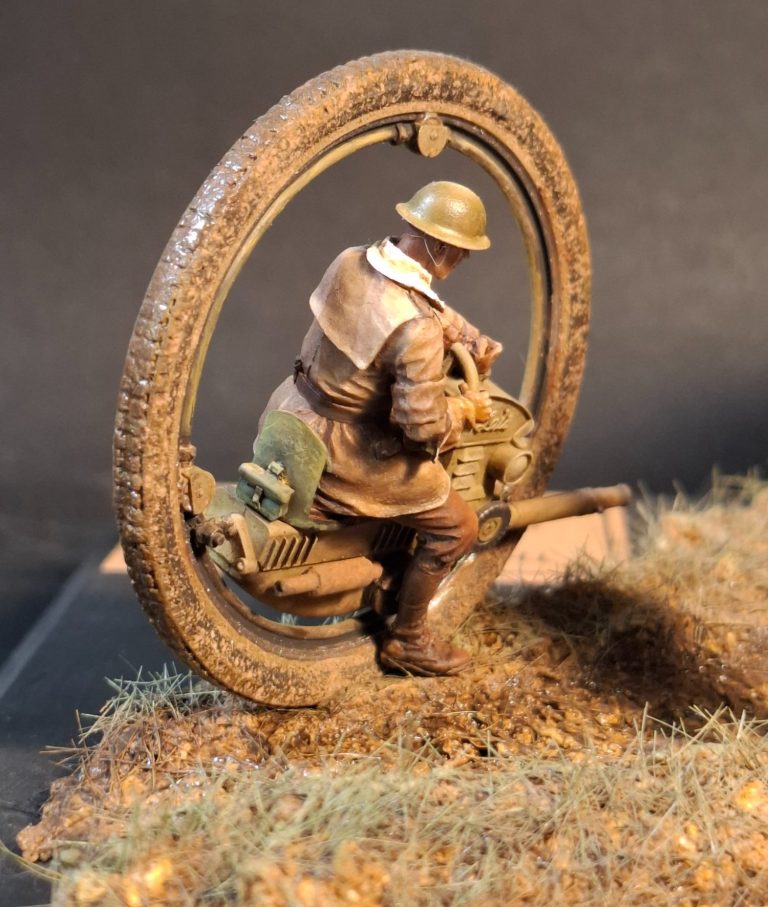
Photo #12 and the monocycle has been finished with plenty of mud and dirt added for weathering.
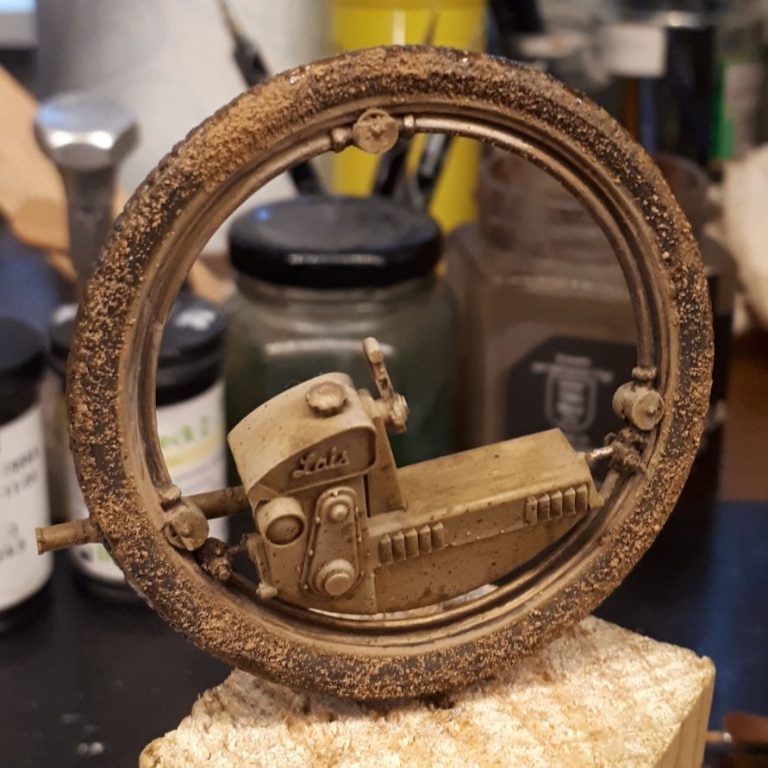
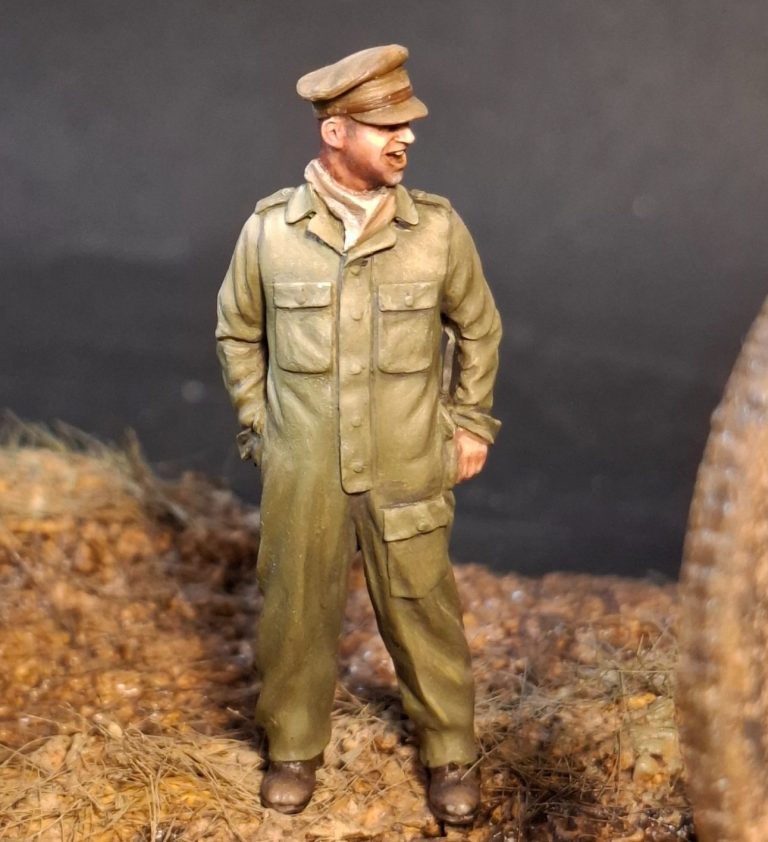
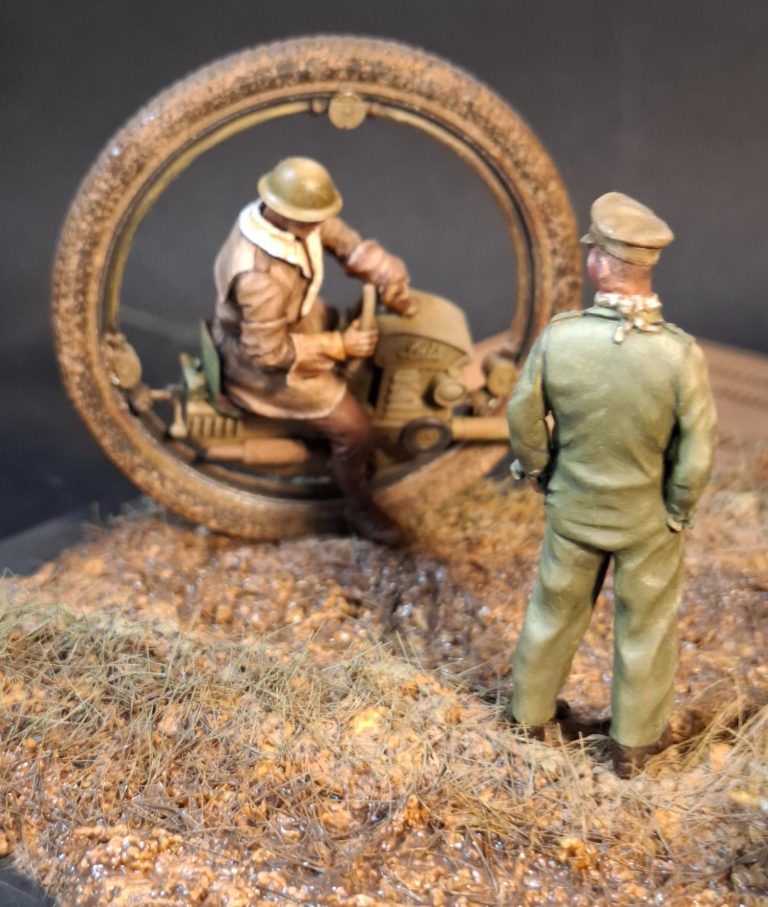
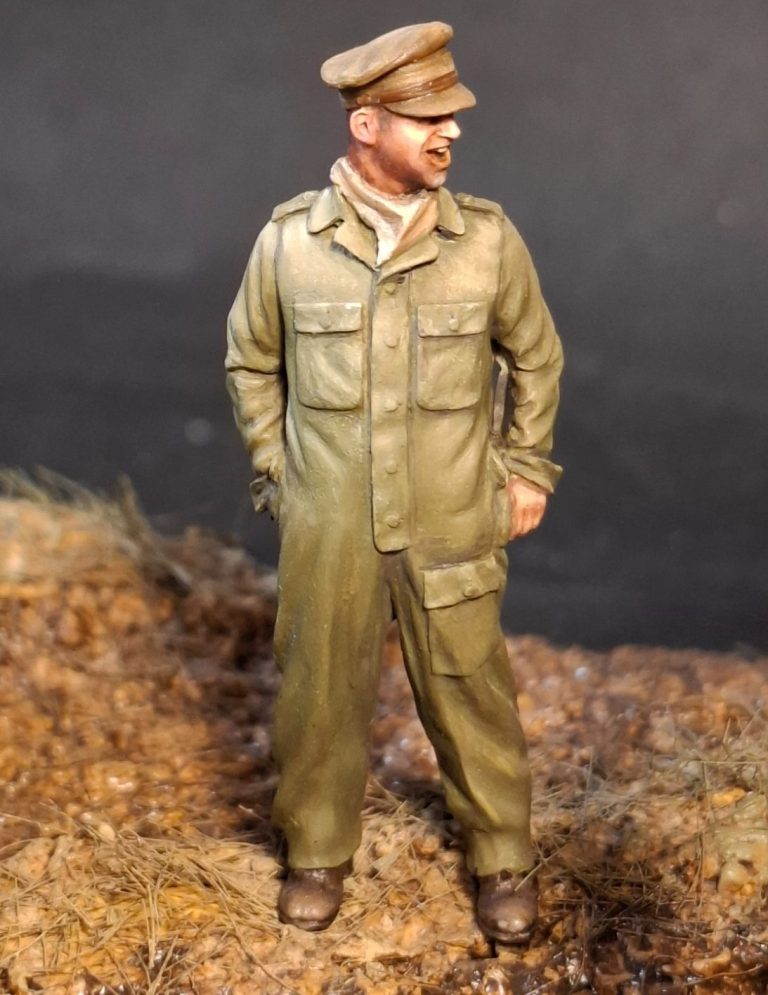
Photo #13. I chose a single figure to stand at the back of the Whippet, laughing at the monocycle rider as he goes past.
The rider might not get much mud on him as he travels, but I think his boots and lower legs would get pretty filthy, and the tanker is possibly finding this funny.
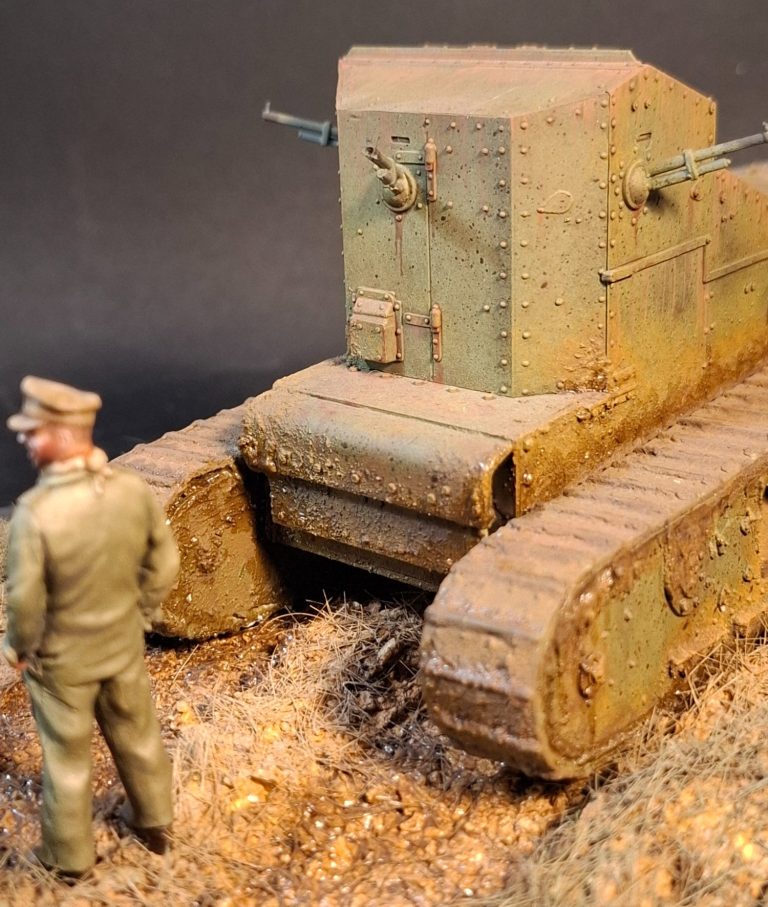
Photo #14. Whilst WWI tankers did wear army uniforms, some of the chose to cover up with boiler-suits which would help stop the oil, grease and gunpowder residue from inside the vehicles making their uniform grubby.
So this figure seemed ideal with the head being replaced with one from Hornet.
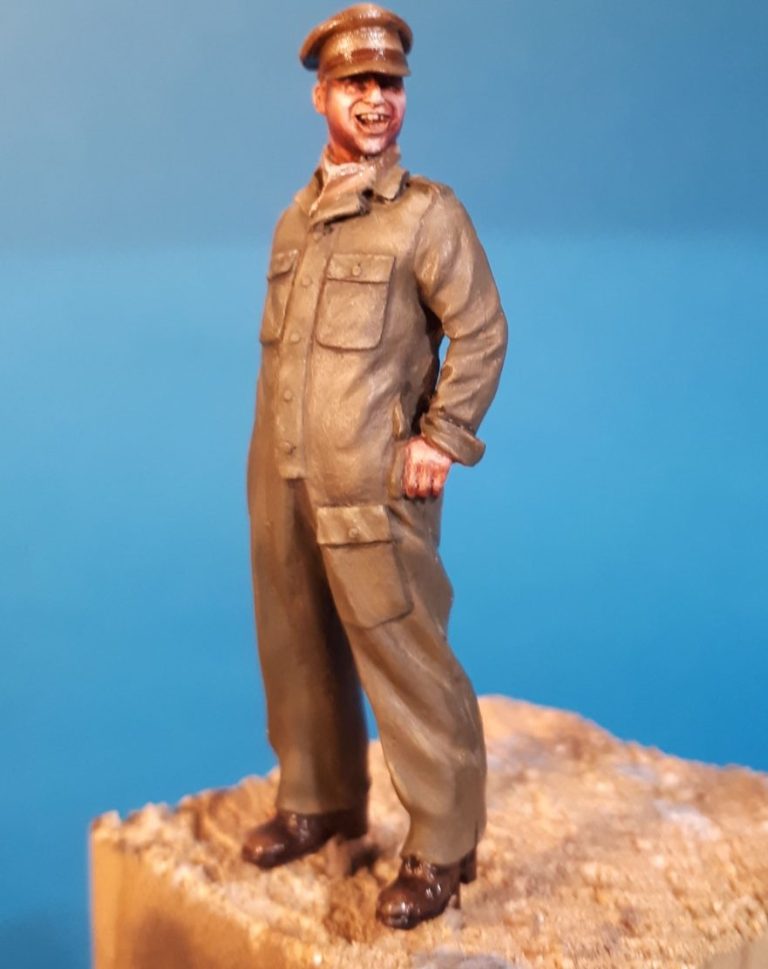
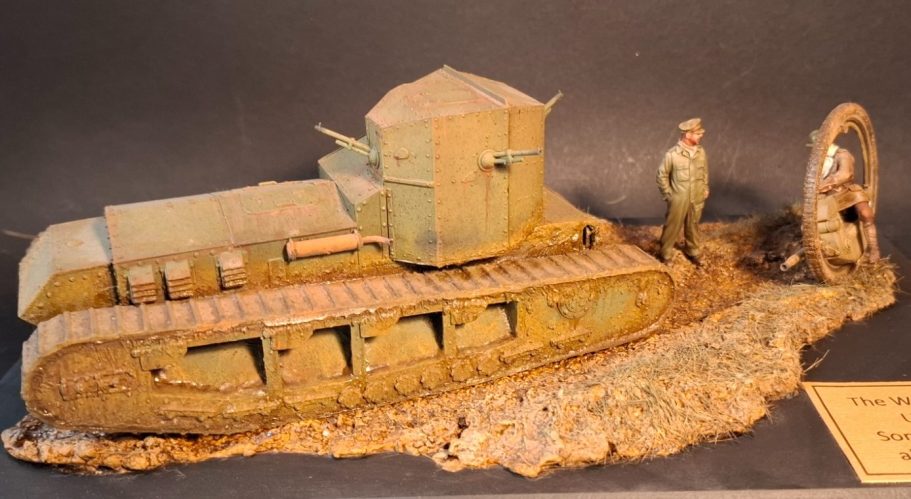
Photo 15 shows the diorama completed, I’ve yet to add a coat of black paint to the top surface of the plinth to tidy up from where I’ve spilt some of the filler, after that, it just needs a nameplate.
Final thoughts
The Emhar kit is very good, OK it lacks internal detail inside the cabin, but really does that matter to the majority of modellers ?
As I proposed, if y
ou want the door open, putting a figure in the doorway will hide any deficit in the cabin itself.
Yes, the machineguns benefit from replacement with better-detailed resin parts, but otherwise it’s really a great kit.
The figure and monocycle, oh I wish I could remember where they were from. Or that I write things down, that’d be an idea.
In the past I’ve not started writing an article until the model is completely finished and on it’s plinth in the display cabinet, however now I’m realising that with so many “started” projects – yes, to my shame bright and shiny new kits, or even “Oh, I’d forgotten I had that…. Isn’t it cool, I should make a start on it straight away” kits seem to be proliferating in my newly named “cabinet of shame”.
It used to be a shelf, you know, but I’ve progressed.
Anyway, to keep track of stalled projects, I now take pictures of the box art, and start a write-up text early on. It might turn out to be better, let’s hope.
So, grungy, grubby and rather monochrome, but I like it, and more to the point, really enjoyed putting it all together.