Flat Portrait
1/4 scale resin flat from Centurion Miniatures
Painted in 2026
Sculpted, or perhaps I should say “edited” by Olivier Boulanger, this is a really beautiful piece that I hoped I could do justice to.
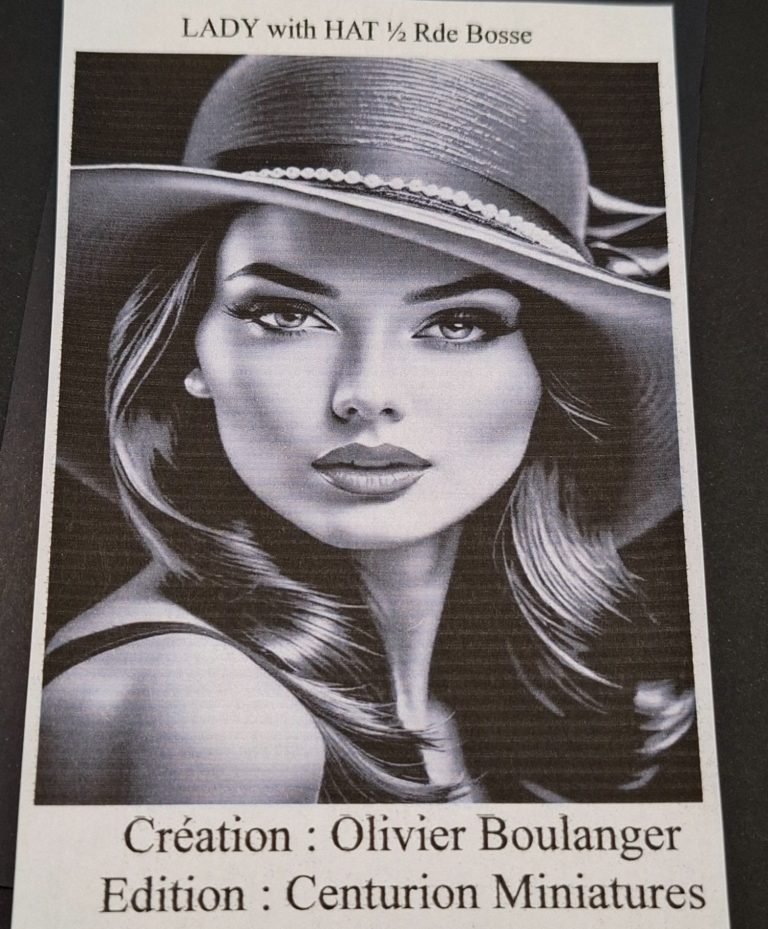
Cast in a pale grey resin and single sided, the “box art” is shown in photo #1 – yes, a challenge to get it looking half as good as that !
I got this from the SMC show in 2025, and although an easy choice to buy, was amongst a great selection of flat subjects.
Sometimes, when you buy a flat, the artwork doesn’t reflect the actual piece that you’re getting, either the picture is what has inspired the flat, or a very good painter has been doing the painting and sometimes, in some cases added a lot of freehand to cover up deficiencies.
Not in this case though, as photo #2 which shows the bare resin casting, albeit helped a little from a light positioned overhead to show up the details.
What you see on the “box art” is exactly what you get, and that is very pleasing.
With this being a rather large scale piece I thought that maybe I could begin the painting with a little airbrushing, particularly the face, which might benefit from some soft transitions in colour.
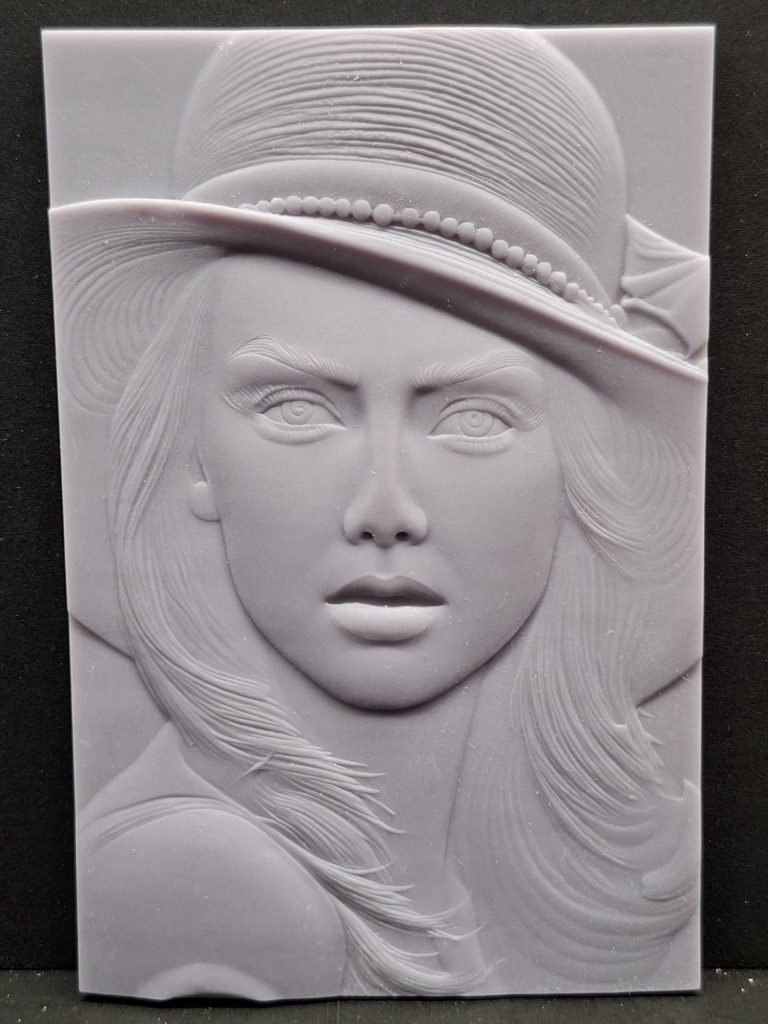
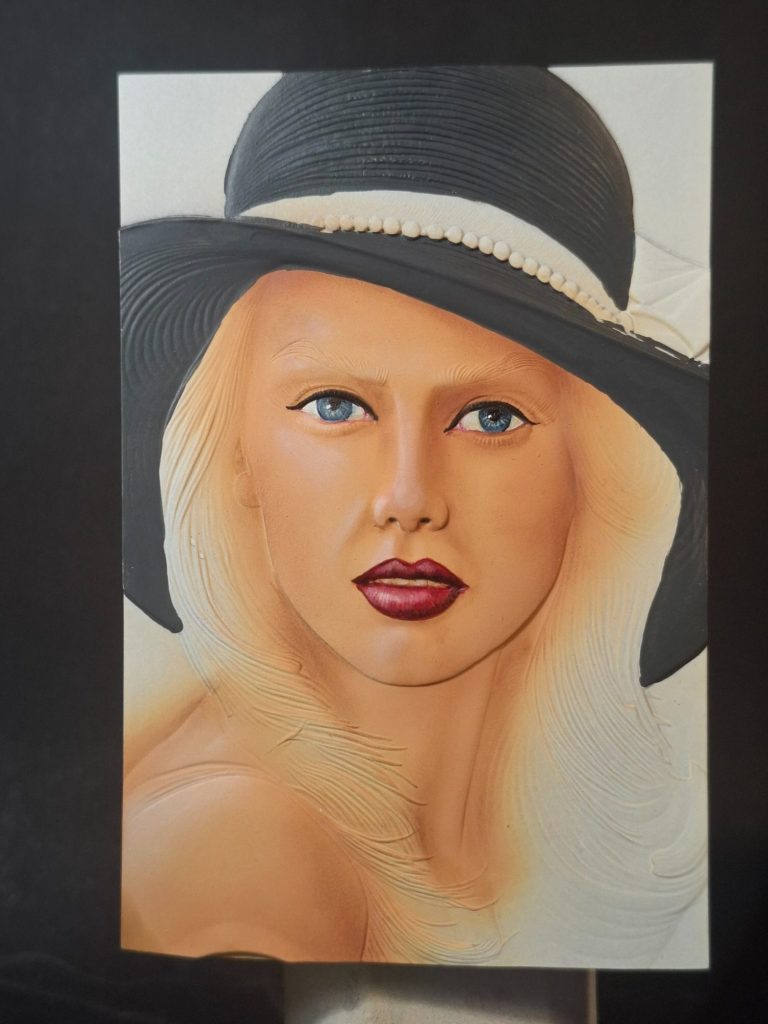
Photo #3. So a lot has happened in this shot, I airbrushed the face first using a mix of Tamiya Nato Brown and Flesh colour for the shadows, topping that off with just the Flesh colour and then added a little Flt White for the brighter highlights.
It gave a decent “map” for how the flesh colours would work, and by adding a very small amount of Mars Brown oils with a wide, soft brush, I began building up some of the shadow areas around the eyes and under the cheekbones.
Think of this process more like a woman adding blusher to her cheeks than actual laying paint on the surface of the model. It’s a case of using a very, very small amount of paint, wiping most of it off on a soft cloth and then testing it on a different surface before trying it on the flat.
More paint can be added, but this process stains the underlying paint and it’s very difficult to remove if too much gets one there.
The lips, these were painted in a conventional manner, I used Purple Alazarin oils as a shadow colour and added Carmine and then some Scarlet. The glossy shine was built up with very small amounts of Titanium White, spreading the bristles of the brush to be like a fan, and wiping the brush on a cloth after each stroke.
Photo #4. The eyes are a different size on the casting, it’s only slight, but it’s going to bug me until I can manage to even them up.
Eyebrows and hair ( I hate painting the former, even on round figures ), were begun with Mars brown, adding Mars Yellow to establish mid-tones and then adding Titanium White for the highlights. As with the white sections of the lips, I added the yellow and the white with the bristles of the brush shaped into a fan so that it created the appearance of individual hairs as the paint was applied. The motion of seeming to comb the hair as the paint was put on helps with the illusion of the hair shifting in a breeze coming from her right.
Further shadows have been added to the left side of the face, intimating that light is coming from around the ten o’clock position. This effect will be increased later.
The hair at her right temple needs bringing forward a little. I followed what I thought the casting was embossed with, but on contemplation, the hair is too far back. Again, this needs correcting and then I can start working out if the hat is casting a shadow across the face too.
The whole idea of a flat is to make the image appear three dimensional, so pushing highlights and shadows is the only way to do this.
For a painter of traditional “round” figures, it’s a superb exercise that will make you think much more about where light catches areas and where it can be almost completely lacking. Basically, how illumination of a model should be done.
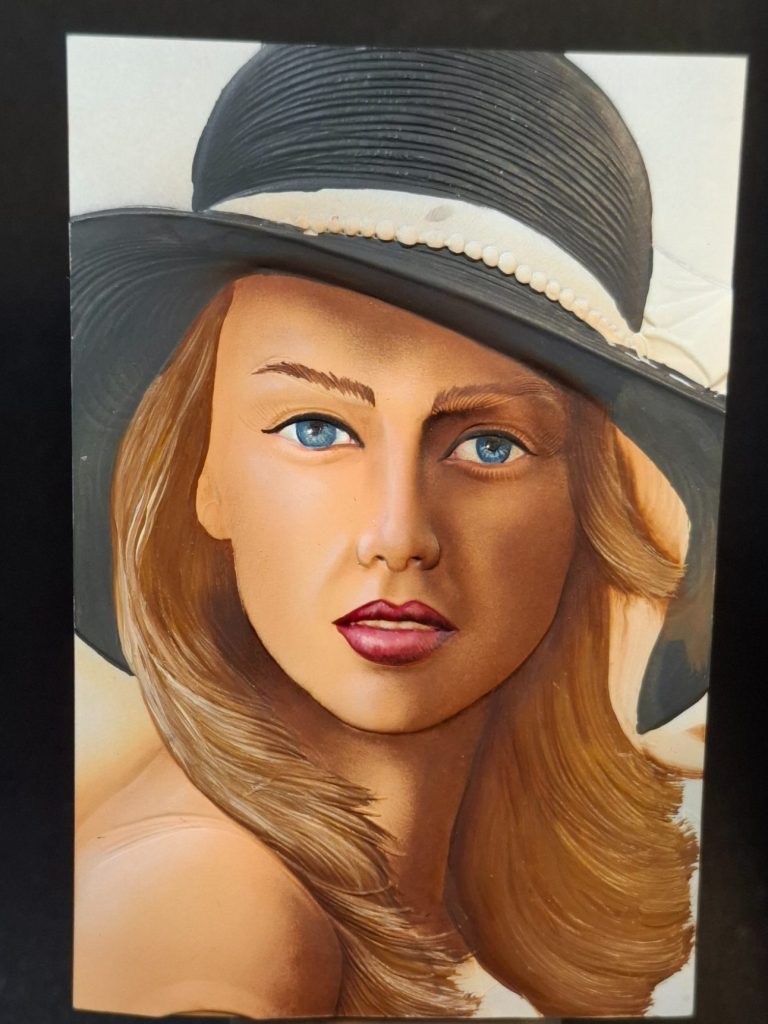
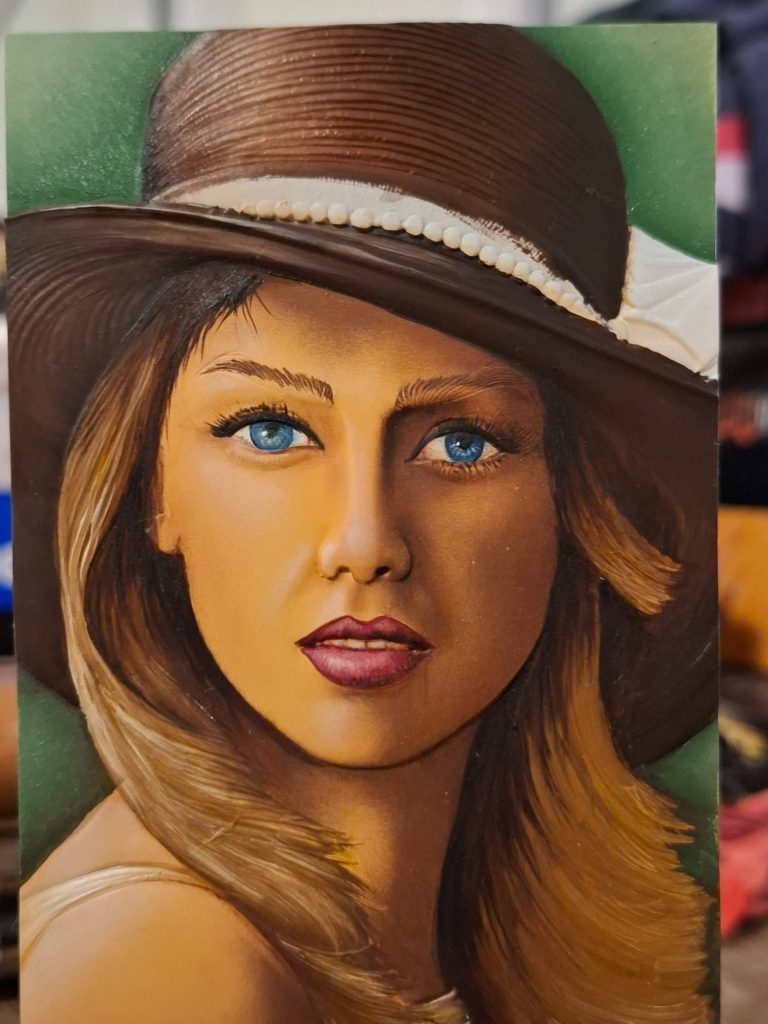
Photo #5 and again quite a lot has happened here – an afternoon at a painting meeting of the Queensland Modellers club.
I used a very old brush that was retaining only a few fine bristles to add the hair detail on her forehead using Warm Sepia from the Mike Harding oils range, and also added some darker shadows under the sweep of hair on her right and left sides.
The hat was painted using a mix of the Warm Sepia, Carmine and a little Mars Yellow, adding more of the yellow to build up mid-tones and highlights on the bowl of the hat, and using a large soft brush to paint along the detail so that lines of shadow colour still remained. This will be reinforced once the paint has dried fully.
The background, which I’d ignored up until now, was painted with Chrome Green, and I stippled on someTitanium White towards the edges to add some colour shift .
Although it doesn’t look much different, I also painted the shoulder strap of the dress and the halter neck with Mars Yellow mixed with some Titanium White.
It doesn’t stand out much, so this might get changed once the paint has dried and I’ve had a think about whether the small amount of dress visible, needs to stand out more.
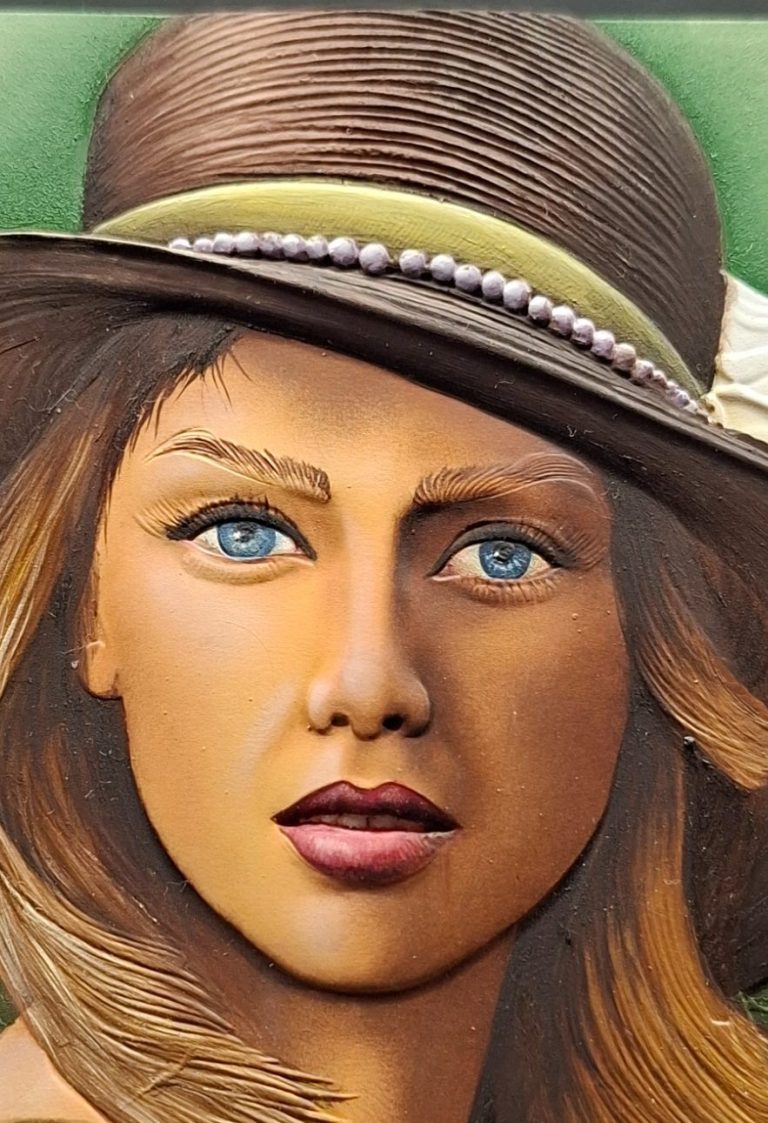
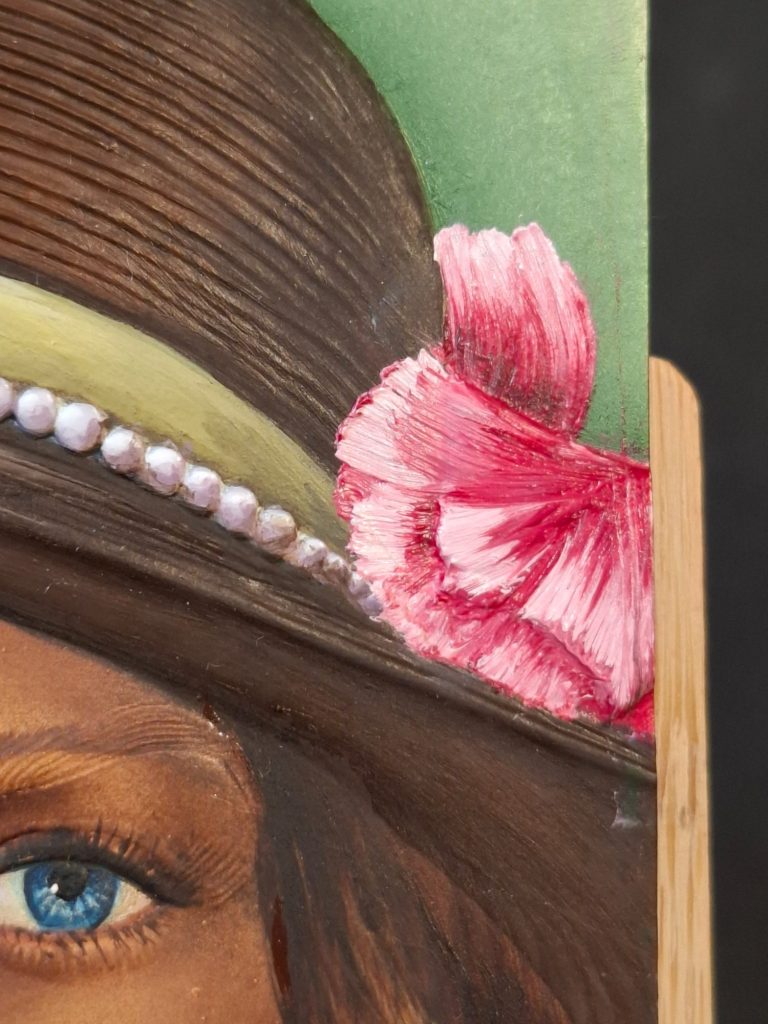
In photos #6 and #7 I’ve painted the hat band and the pearls around the brim.
The pale green on the hatband is a mix of Olive Green and Mars Yellow oils, gradually lightened with Titanium White and finally deep shadows added towards the edges with the original mix plus a little black.
The pearls were painted first with a few coats of MP paints white, and over that I added a mix of MP paints Scarlet and some GW Moody Blue, and then added MP white to make a darkish oyster colour. The mix was gradually lightened with more white, and using a fine brush, I built up mid-tones and highlights, finishing off with pure whit on the pearls left of centre as you look at the piece.
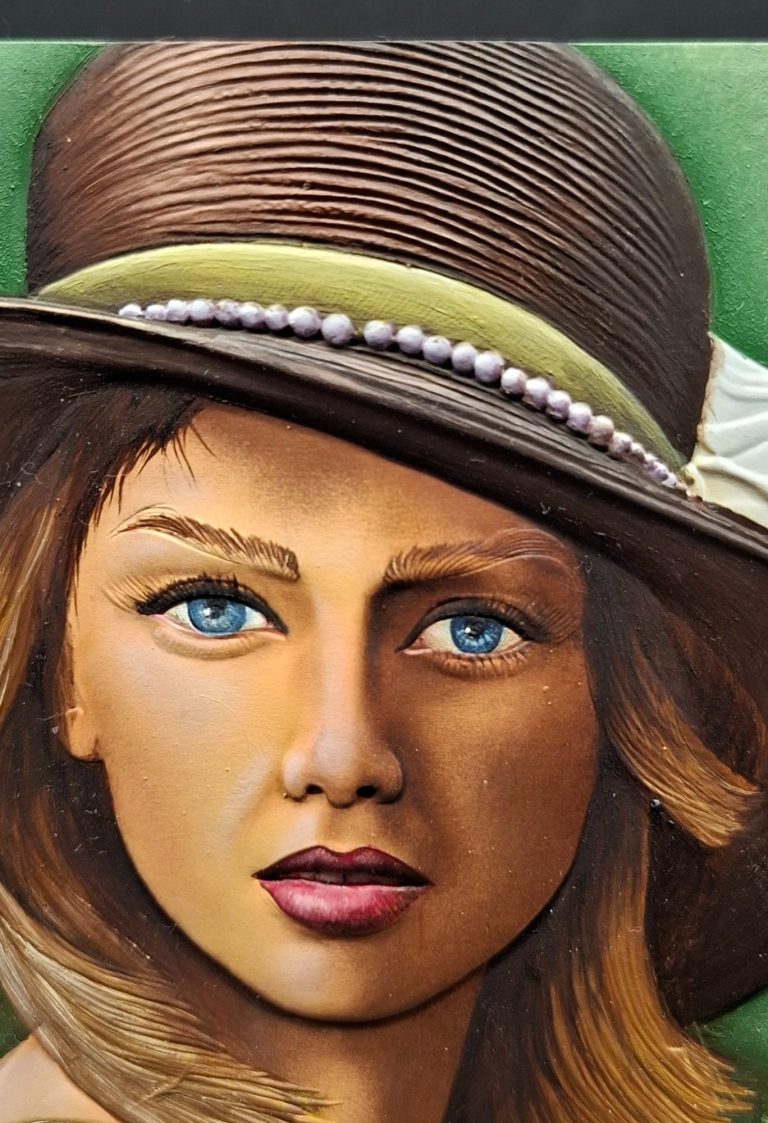
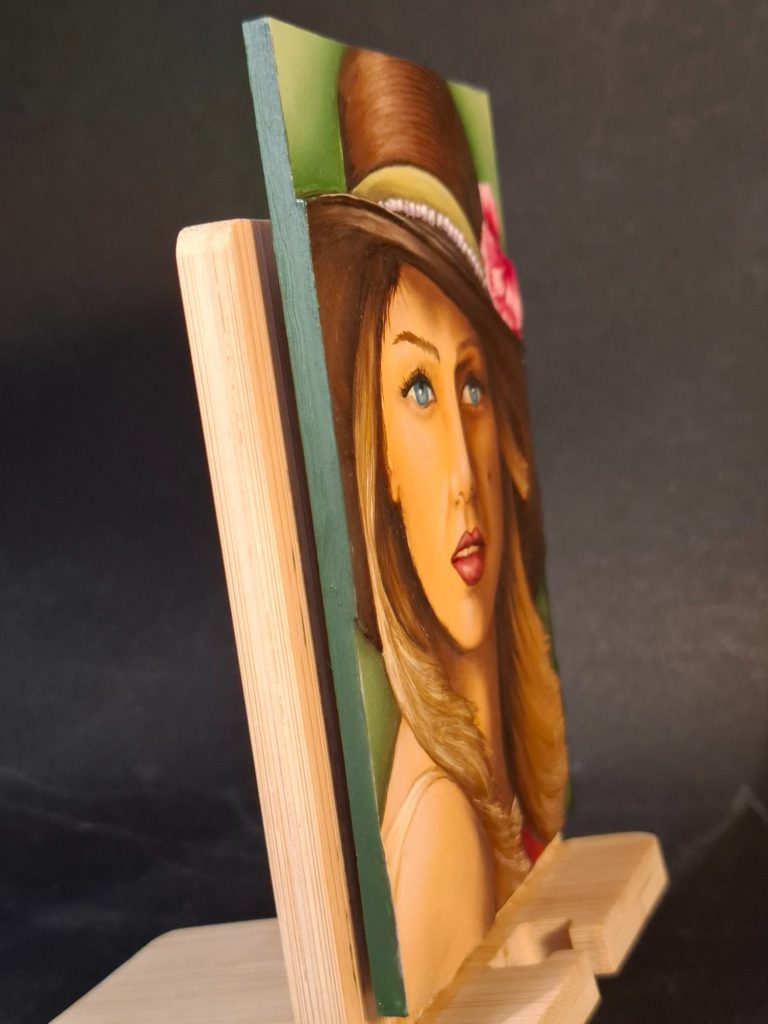
Photo #8 shows how thin the flat actually is when viewed from the side. There is a small amount of relief which guides the detail, but it’s not much, the raised areas are possibly 1.5mm proud of the flat.
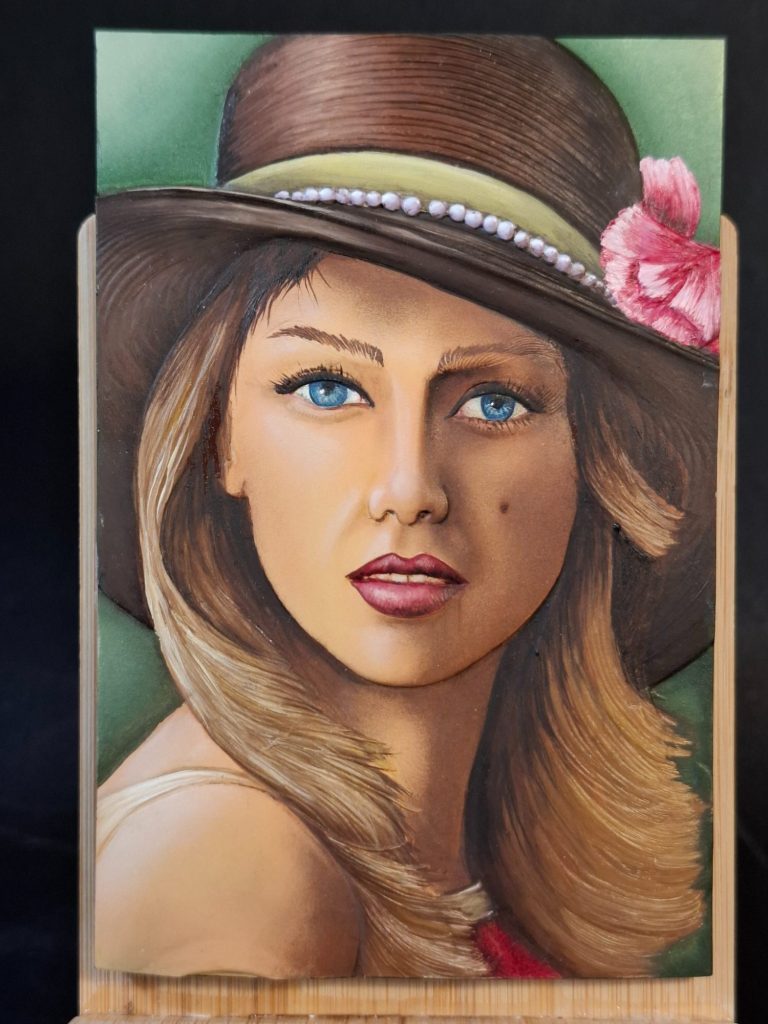
The final pictures show the flower decoration of the hat has been painted.
I used oils for this, adding Carmine to the brush and then dipping the tips of the bristles into some Titanium White. Settle the brush tips onto where the edge of the flower petal is going to be and gently drag the brush whilst allowing the bristles to spread and the body of the brush to come into contact with the surface of the model.
Wipe the brush clean after each sweep, and recharge with the Carmine and White.
Finally, the edges were painted with a dark green oil colour. I thought this might look less stark that having the edges done in black, and now it just needs a nice block of wood to display the flat on.
Final thoughts
It’s good to paint a flat subject now and again, simply because it allow the artist to play about with lighting direction, forced shadows and texture effects that have to be painted on.
This particular flat is superb to work on, the realistic look to the piece from the beginning, before paint is even added, is something that makes you want to paint it.
And to be honest, it rewards the painter all though the process.
Would I change anything ?
OK, just one thing, the eyebrows.
I admit I hate painting them, even on “round” figures, and in this case I wish I’d filled the engraved eyebrow details before beginning adding paint. It would have made doing them a lot easier.
Apart form that, it’s a lovely piece to paint – highly recommended.
Lorem ipsum dolor sit amet, consectetur adipiscing elit. Nulla euismod condimentum felis vitae efficitur. Sed vel dictum quam, at blandit leo.
Lorem ipsum dolor sit amet, consectetur adipiscing elit. Nulla euismod condimentum felis vitae efficitur. Sed vel dictum quam, at blandit leo.
Lorem ipsum dolor sit amet, consectetur adipiscing elit. Nulla euismod condimentum felis vitae efficitur. Sed vel dictum quam, at blandit leo.
Lorem ipsum dolor sit amet, consectetur adipiscing elit. Nulla euismod condimentum felis vitae efficitur. Sed vel dictum quam, at blandit leo.