Daylight Robbery
28mm Games Workshop metal figure
Painted in 2026
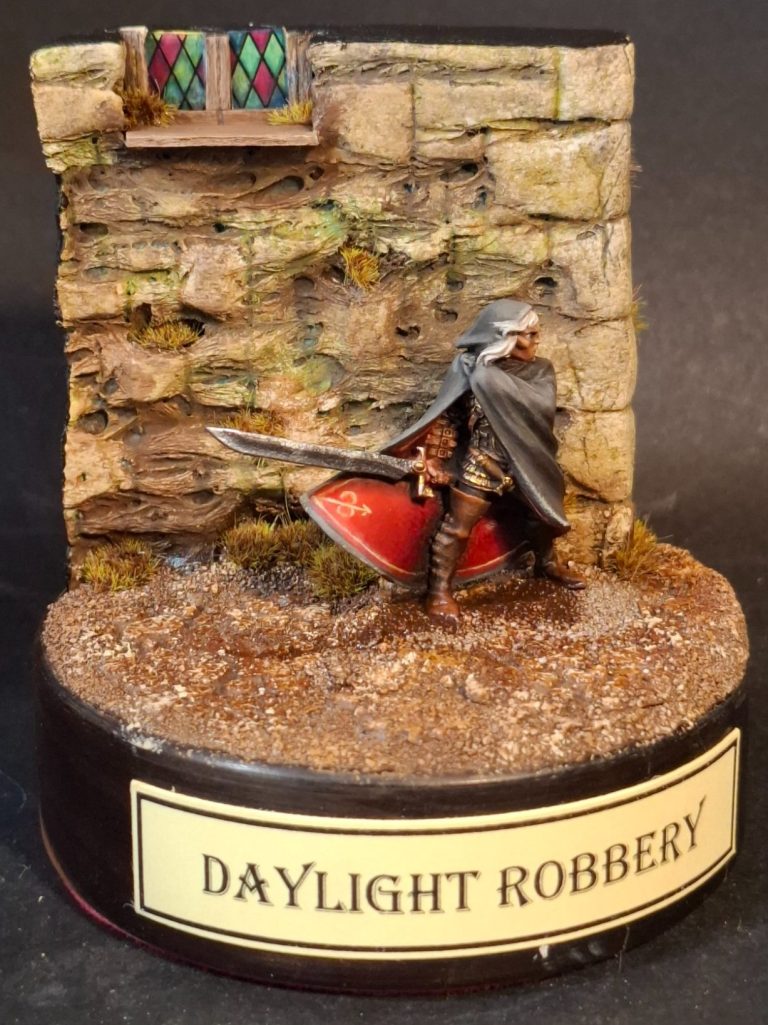
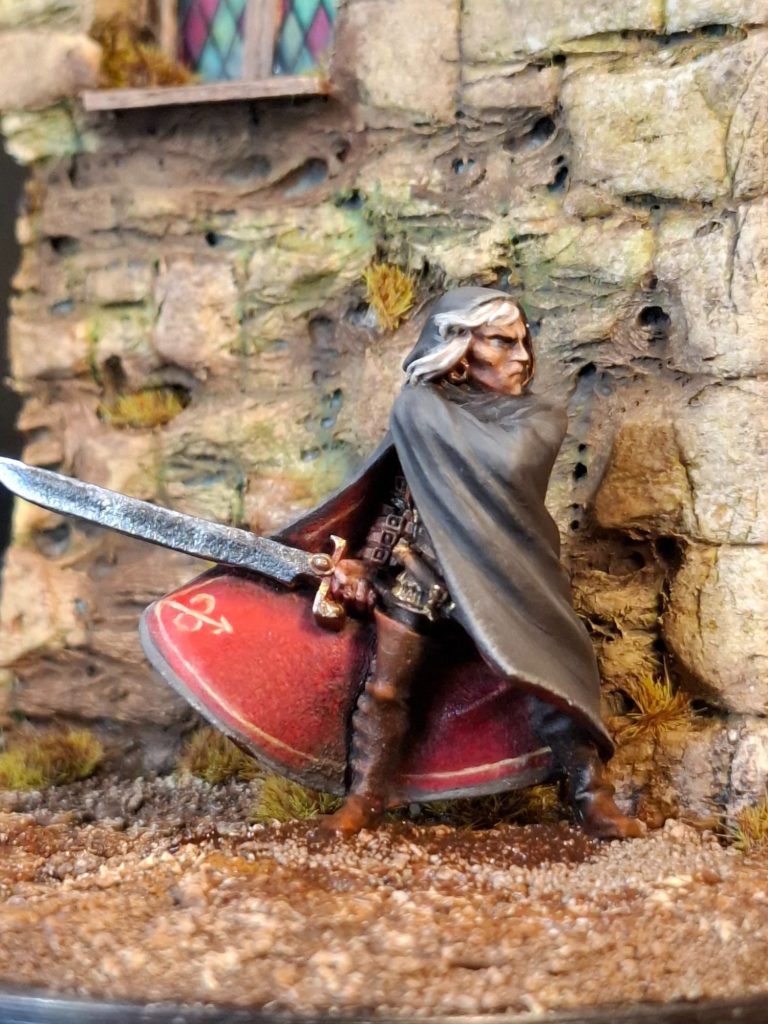
The second hand market can sometimes offer little gems, although more and more people seem to think these things are cast in gold – or you’d think that with the price tags they attach – but no, sometimes you dome across a bargain, and this little fellow is one such.
Bought along with half a dozen other metal figures, mainly dwarves, and to be honest, it was only when I got home and was having a proper look, that I realised what a little gem this is.
It’s not even a figure I recognise as “Oooh, I remember that one being released back in the day”, although I’m told that it’s a popular one on the second hand market, and I can see why.
Back in the day – seeing as we’re regressing to times past – I used to read a lot of the TSR fantasy books, Dragonlance and the like, and there was one particular writer ( R. A. Salvatore ) who developed a character called Drizzt Do’Urden, a Drow or Dark Elf.
This figure, with it’s long face and flowing hair, shrouded in a long cloak seemed to recall that character, and as inspiration goes, I thought I’d go with the flow on that one.
Photo #1 shows the white metal casting having been cleaned up from the normal casting part lines and then primed with some GW flesh colour mixed with Isopropyl Alcohol.
The face and right hand have then been painted with oil colours, beginning with a 50:50 mix of Mars Brown and Titanium White, and then blending in more of the white with a fine brush to build up mid-tones and highlights.
I wanted a very pale flesh colour, but still wanted some contrast.
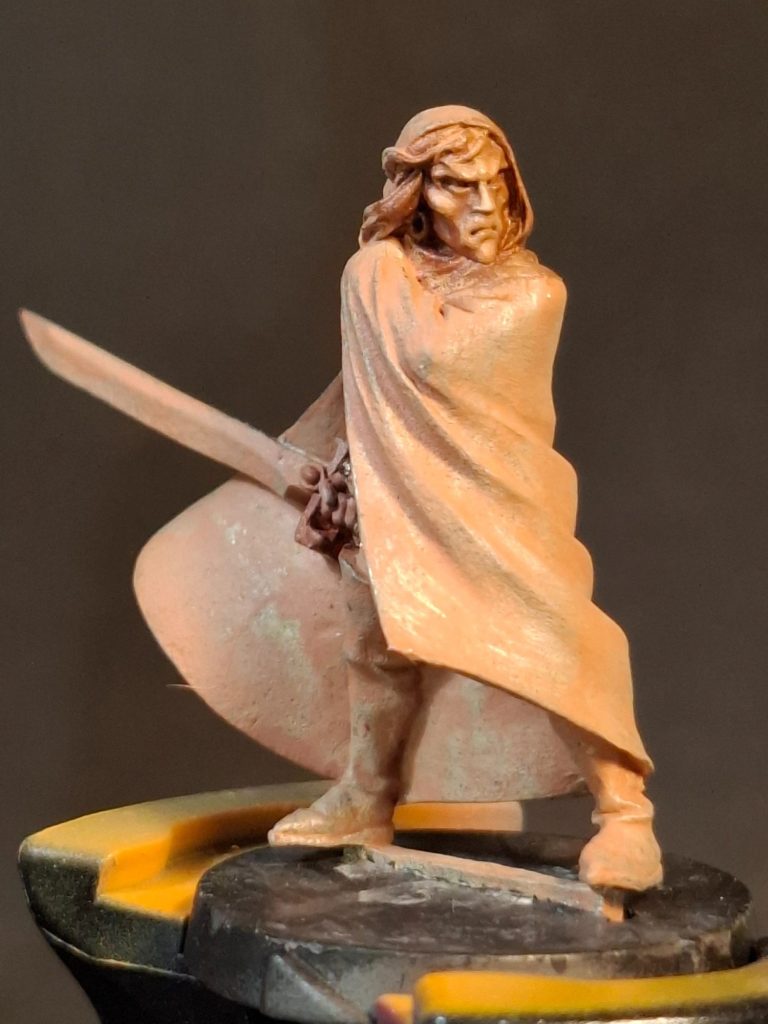
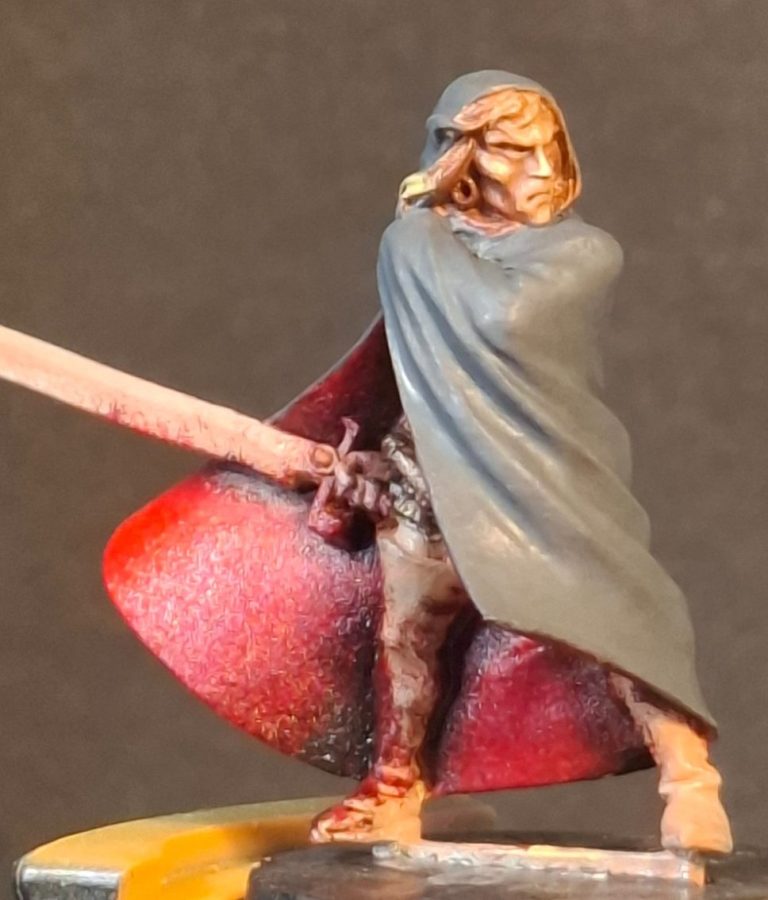
Photo #2 and although you can’t see it, I’ve painted the armour with some bronze metallic colour from Darkstar, and added a wash of Sepia to pick out the details. Once dry, I’ll add some highlights of some gold here and there.
What is visible is the lining of the cloak.
Although I want him to be an assassin and therefore to be dressed in fairly dark colours, I thought that the lining of his cloak could offer a little brightness to the overall whole.
I undercoated with MP scarlet, and once dry added some Carmine oils mixed with just a spot or two of Purple Madder Alizarin. This was worked into the deeper recesses where the shadows would be, and then carmine was added to the rest of the lining.
To brighten it up a lot I blended in Rembrandts Scarlet oils, and used a soft brush and a gentle stippling action to blend the different colours together. You can see the slight texture this leaves in this shot as the paint is still wet.
Photo #3 and the figure has really come to life now. The cloak lining has dried properly and gone nice and matt, and I’ve added the grey hem to the lining as well.
The outer face of the cloak has been painted, and this is still wet and shiny, I’ve used Mars Black oils over a mid-grey undercoat, mixing in some Sepia to the black and a dash of Buff Titanium. I find this latter colour to be better than adding Titanium White when dealing with clothing, the Buff seems to add a warmth and also can be used on edges to hint at wear.
The sword and dagger – the handle of the dagger can just be seen in this shot – have also been painted and I’ve gone for a middle ground between using metallic paints, but adding them in the form of an NMM style….. Not sure if it works, but it was worth experimenting.
The hair is Buff Titanium with Titanium White highlights, and the boots are my usual mix of Mars Brown, Light Red and Yellow Ochre for leather.
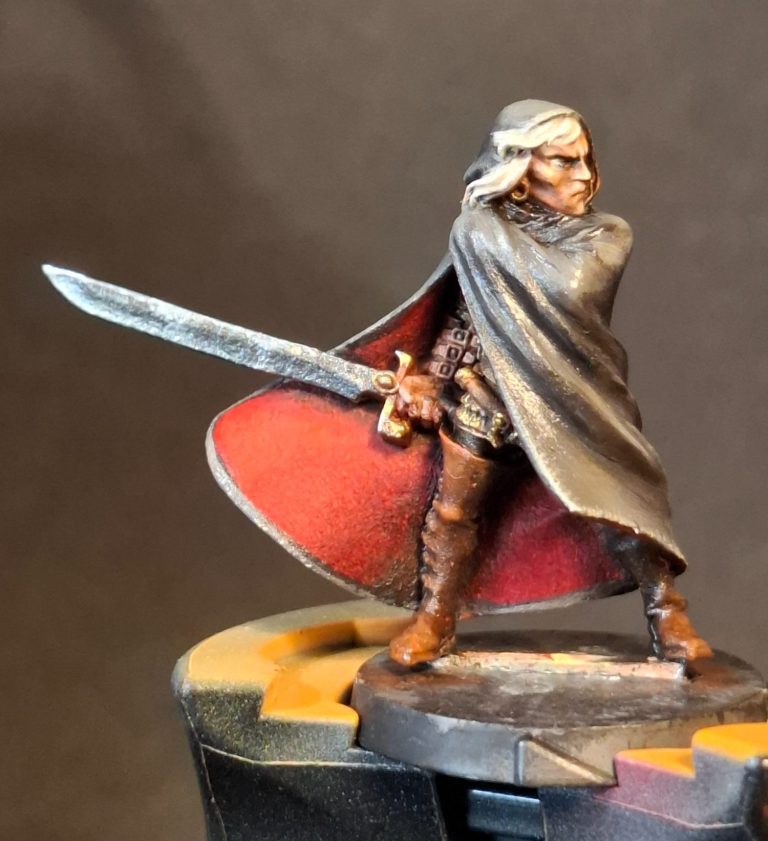
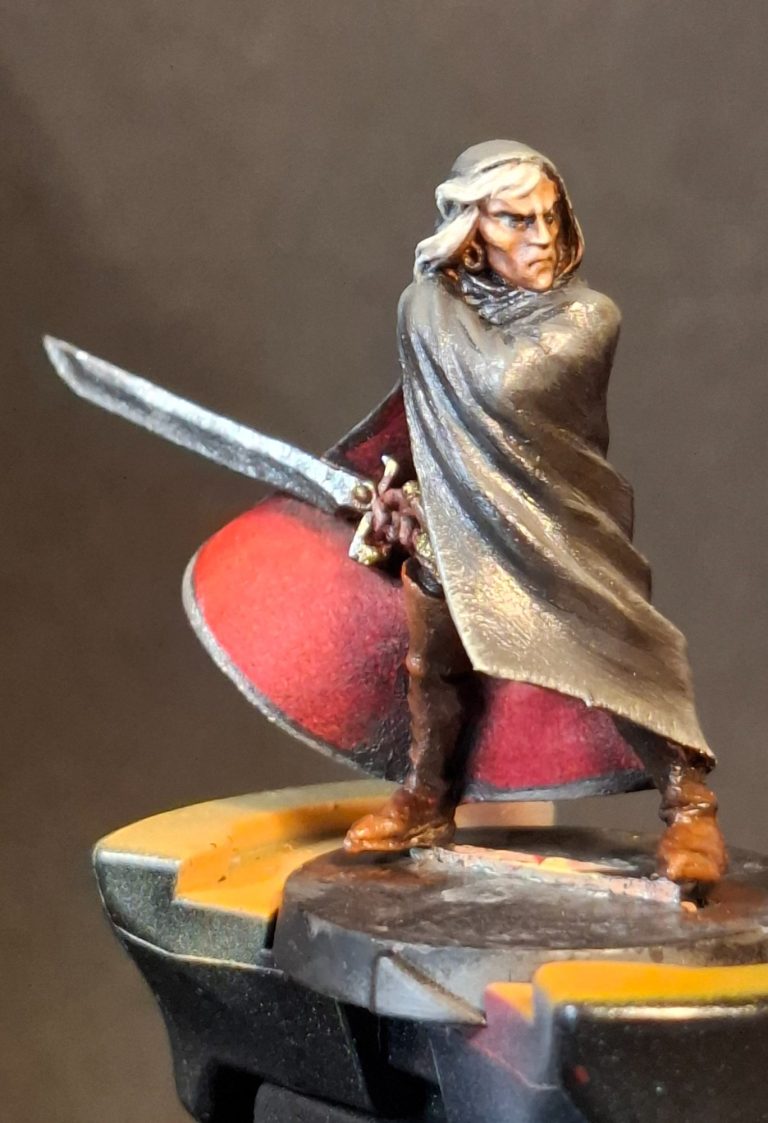
Photos #4 and 5 show the same stage of painting as the previous shot, you can see that the cloak is still wet, although it will matt down with an overnight stay in the drying cabinet.
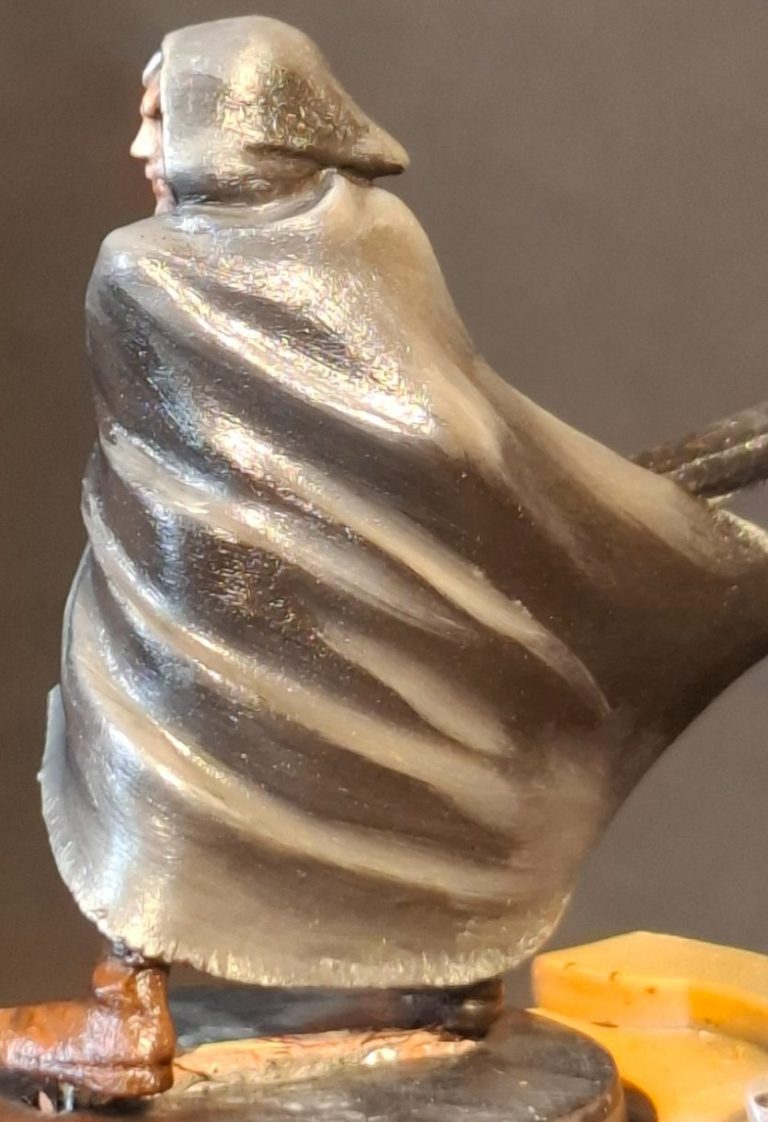
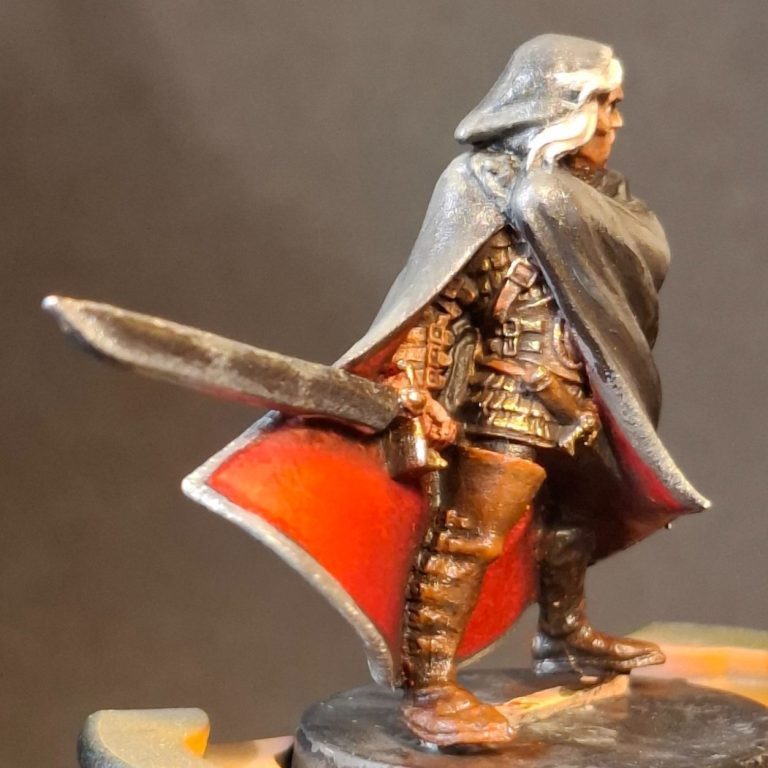
Photo #6 is a better angle to see the armour and the little straps on the sides of the boots. A lot of detail to pick out, and I’ll need to return to this before he’s finished to add some defining shadows
Photo #7, a few more shadows added, and a little bit of simple freehand added to the cloak lining.
It takes a fine brush – in my case I used a Winsor and Newton Series 7 number 0 Sable brush, and I find it easier to use oil colours for things like this – easier to make corrections.
Beginning with a darker colour ( Yellow Ochre ) I mark out the pattern, and once I’m happy with the shape and size of the lines, I add a lighter colour ( Buff Titanium ) to the areas of the design that need highlights.
There’s an amount of cursing, of course, this wouldn’t be the same amount of fun without a little bit of that, but taking one’s time and a little bloody-mindedness usually pays off in the end.
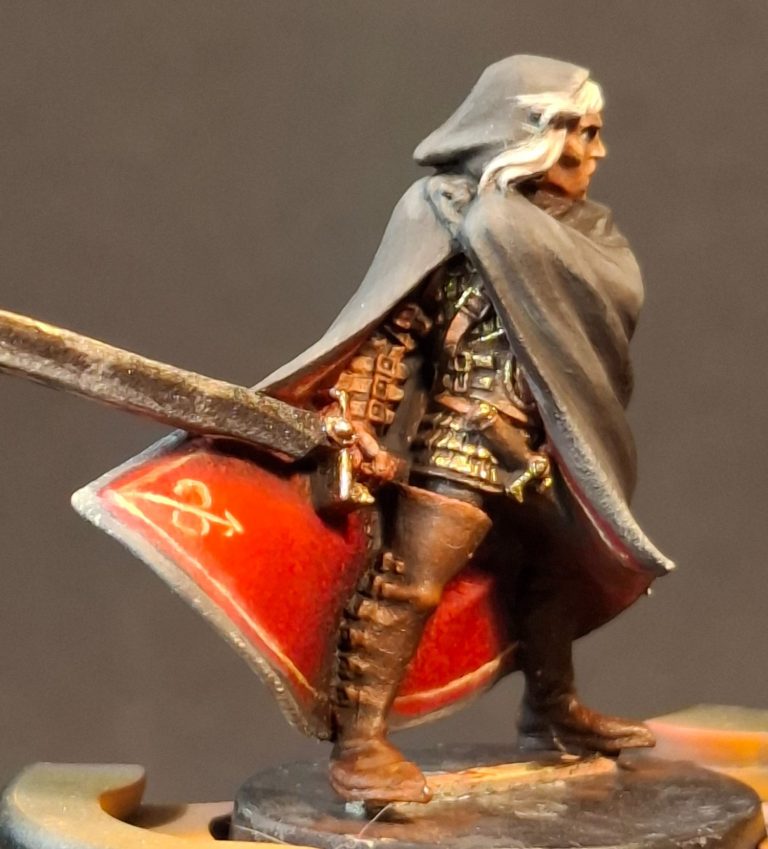
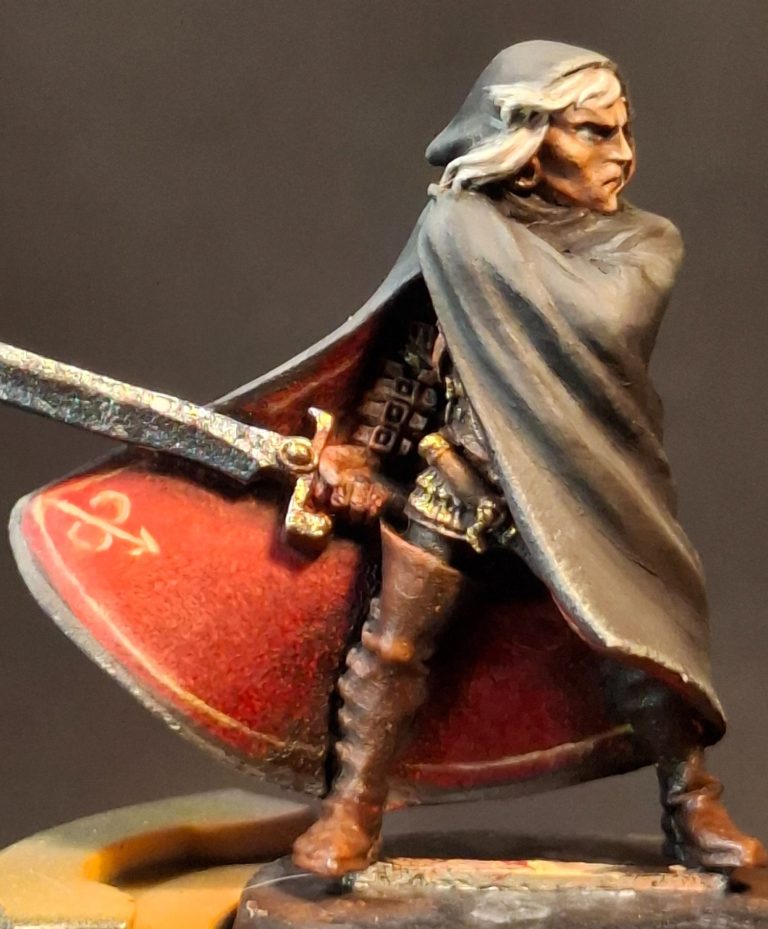
Photo #8 and you can see in the section between his legs that the line on the cloak edge is a little smudged. It was difficult to get the angle on this area to paint the fine line, so I had to strip some of the fresh paint back while it was still wet, using a fine brush dampened with a little White Spirit. The only problem with doing this, is that whilst it does correct the problem of the line being a little thick, it doesn’t completely remove the painting error, and the dampened area leaches a small amount of the paint onto it before the White Spirit has dried.
The texture left by the stippling action of blending the red paint doesn’t help either, allowing the oil colour to leach out into the depressions.
Still, without this kind of magnification – remember the figure is only 28mm tall – the fault won’t be very noticeable.
Photo #9, a bit of a boring shot, but it shows that the grey paint of the cloak has dried to a nice matt finish.
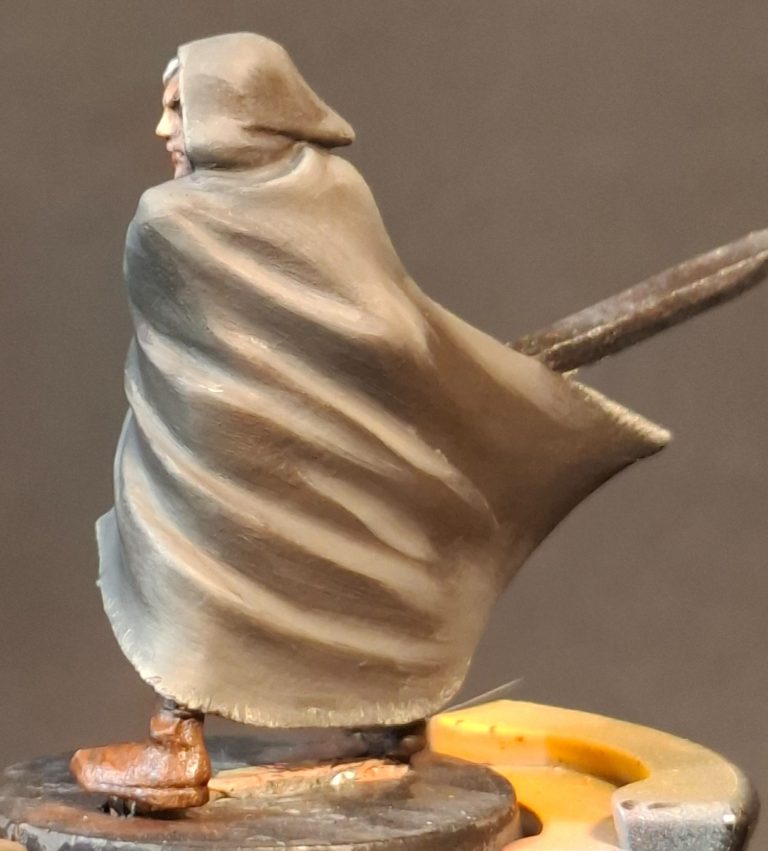
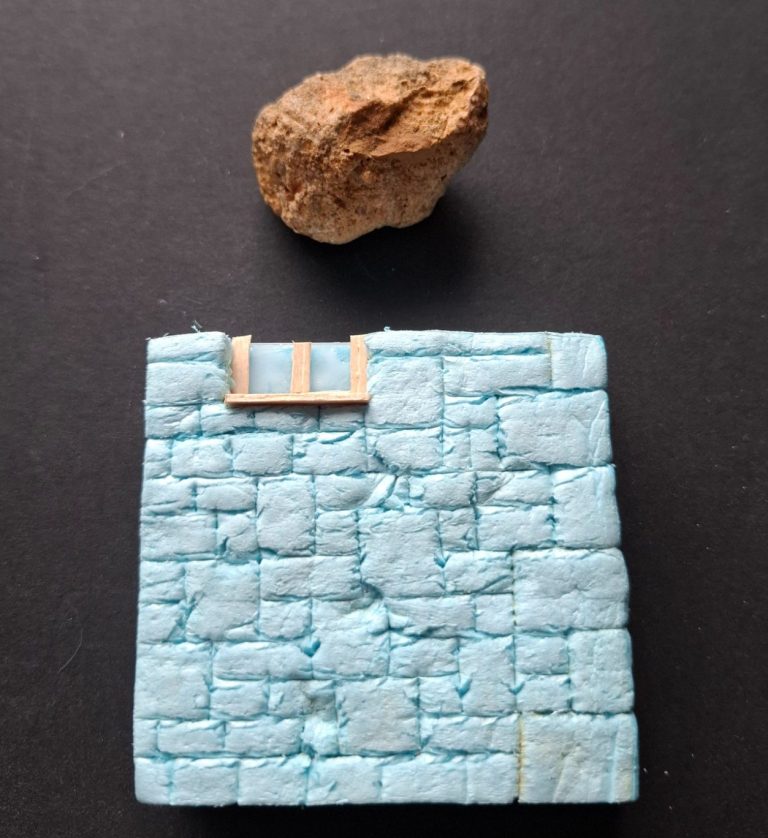
Photo #10 and my thoughts turned to how he would be based up.
Of course the usual thing to do would be to have him posed under a light source in the middle of the night, enabling me to do some very cool directional lighting, and the thought kind of attracted me….. But then I’d lose a lot of the detail I’d already painted on there, so the idea was shelved for a little while as I considered the surrounds he should inhabit.
Obviously a town or city – not much call for assassins in the middle of a field, so I needed a wall.
Photo #11. This shot shows the wall made from foam insulation board, textured with the small stone at the top of the shot by rolling it around on the surface of the foam, and transferring that lovely texture from the stone to the insulation.
A bit of work with a needle and steel rule to mark out the stone blocks, and I had a basic wall corner.
It looked a bit boring, and although I could have added a doorway, what self-respecting assassin would have his back to a door ?
So a window was deemed a better option.
A piece of the stonework was removed and a section of plastic added to form the glazing.
I collect wooden stirrer sticks whenever I buy a coffee, just one or two extra, one of which I used to form the window frame and sill. Wood glue was pressed into service to fasten all this together and I left it overnight to cure.
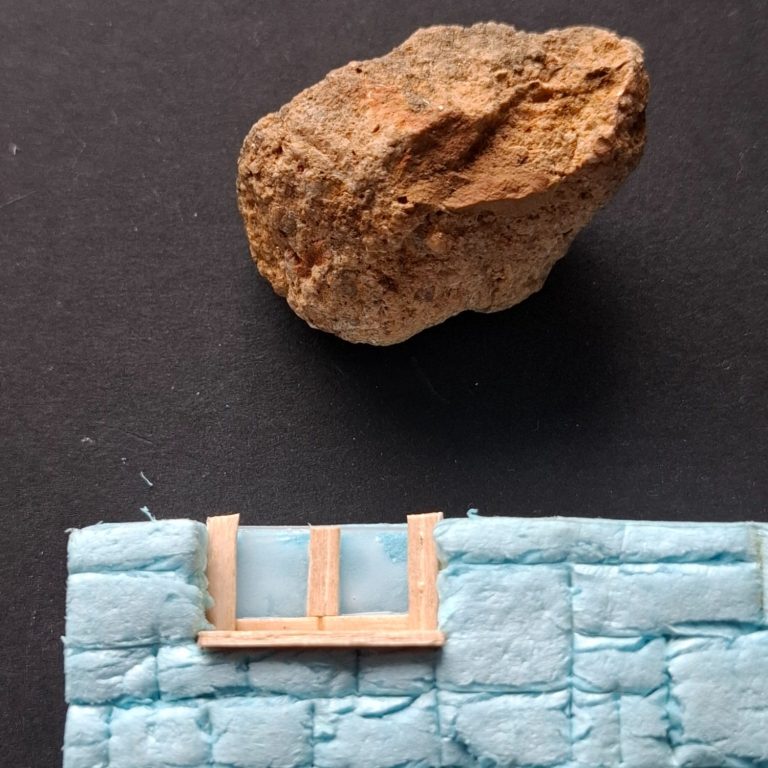
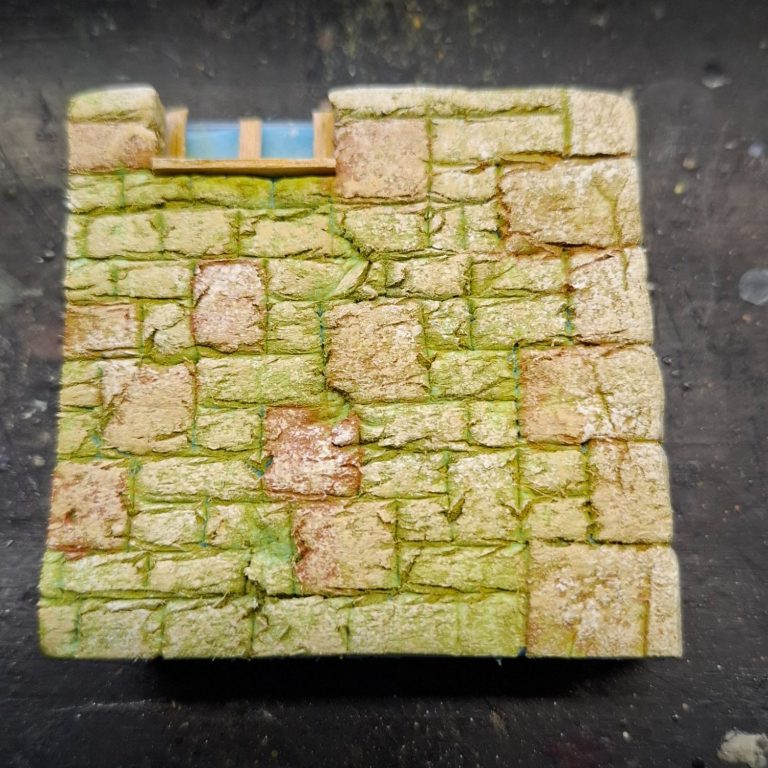
Photo #12 and I’ve primed the wall with some acrylic paint, then added different colours to the stone blocks to make them look a little bit more interesting.
Photo #13. It might not look like it, but this is where things went a little wrong.
I added a wash of Sepia oil paint to the wall to pick out the detail, looks lovely here, doesn’t it ?
It was put in the drying cabinet overnight, thinking, that’ll be ready to move on with tomorrow.
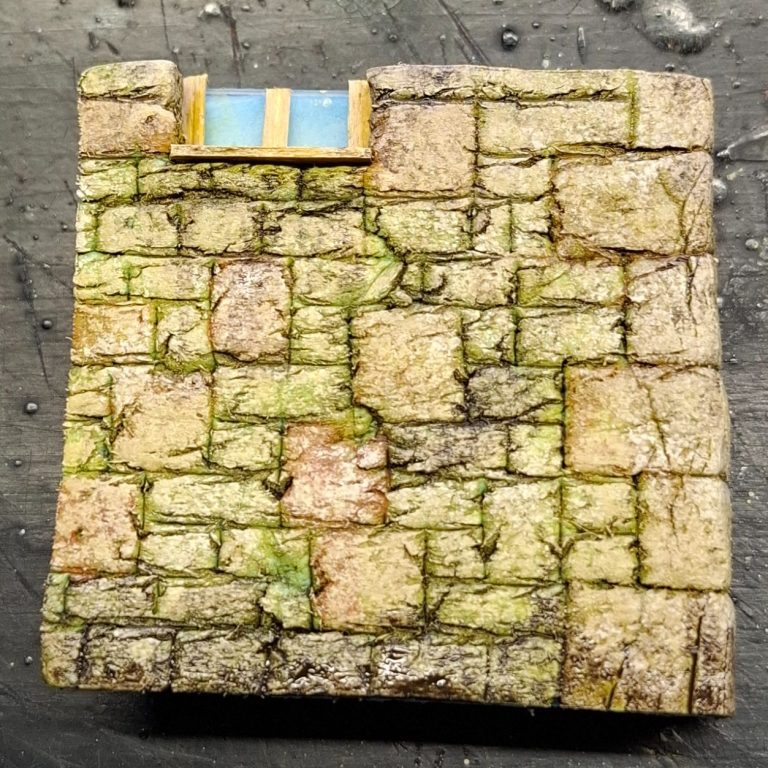
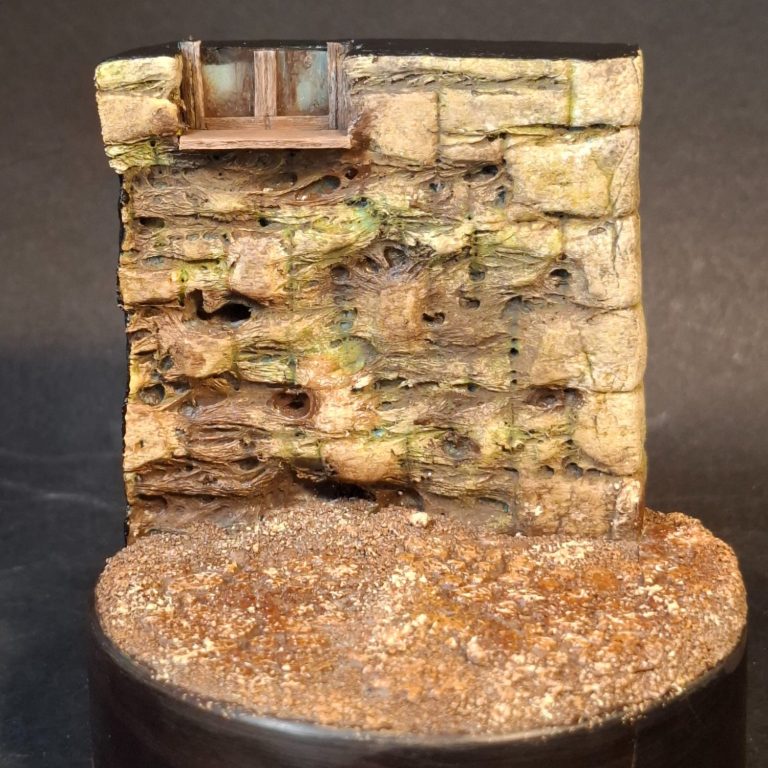
Photo #14. Oh dear ( or words to that effect that possibly aren’t repeatable here ). Removing the wall from the drying cabinet, I found that the oil paint, or rather the White Spirit, had reacted with the blue foam, passing through the acrylic paint to melt the substrate alarmingly.
Well, it is a fantasy piece, so maybe some wizard melted the stone facing of the wall at an earlier date, and I thought that it was still useable, so continued by adding some small sections of cobbles, linked by small sections of sand, painted them up and shown here is the result.
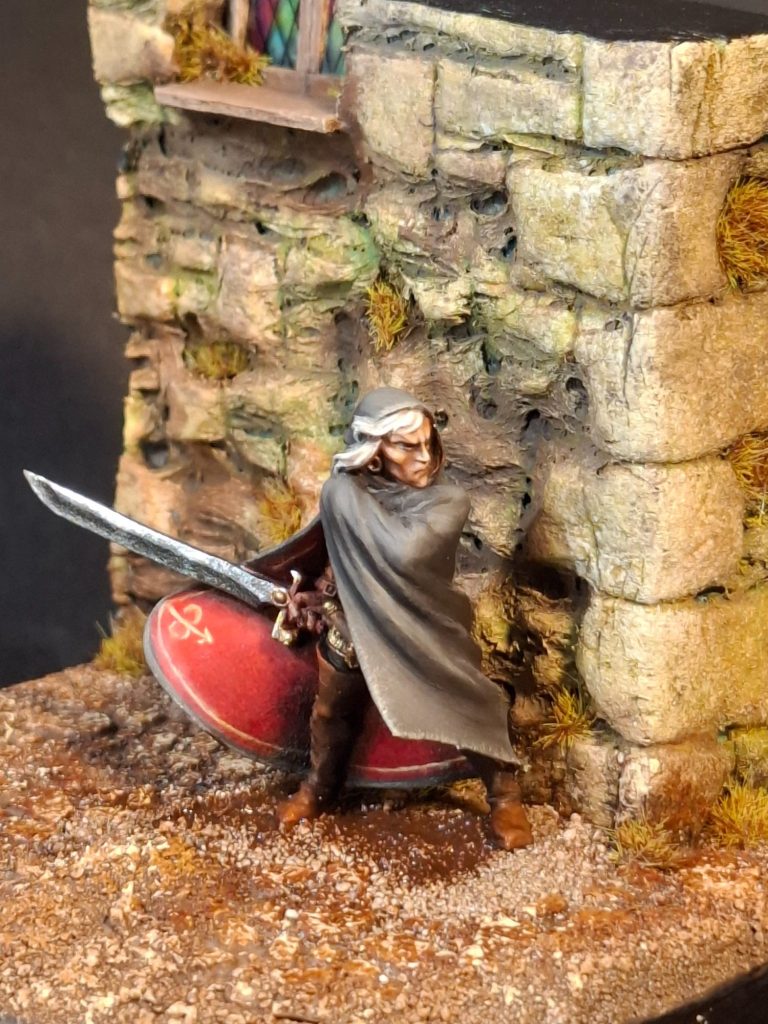
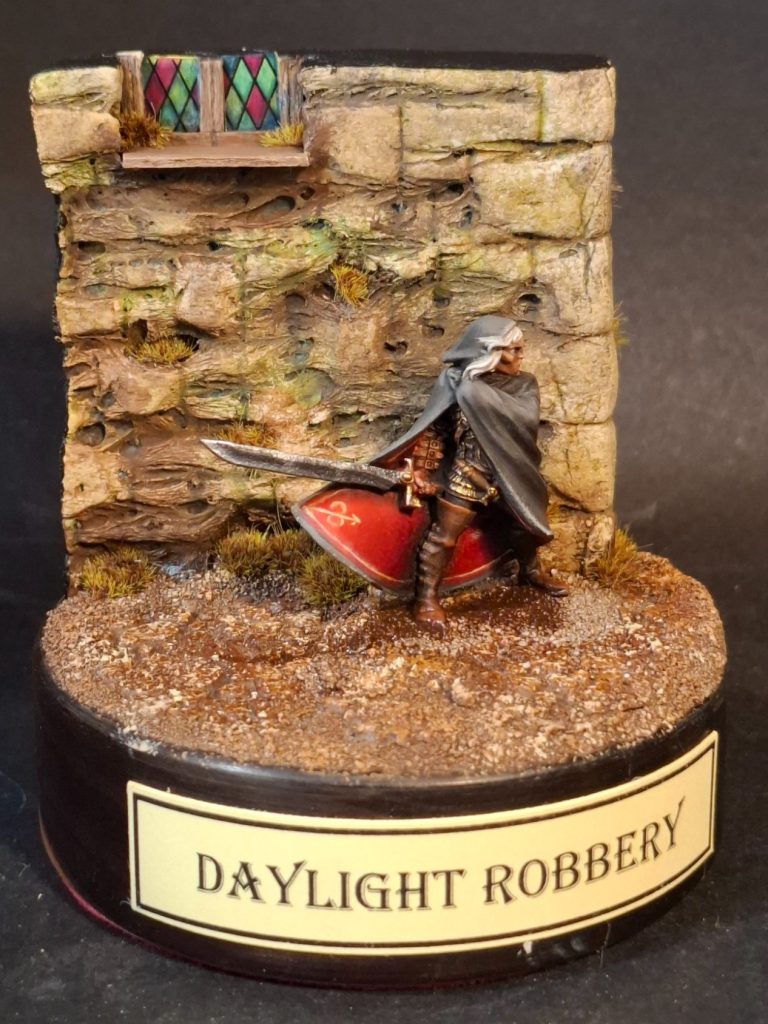
Photo #15, and I’ve added the figure, waiting for his next quarry to appear around the corner.
Because I chose not to paint this with directional lighting effects, I thought the scene would be perfectly acceptable as a midday setting, after all, how many times have you heard someone say “It’s Daylight Robbery !”
Hence the title.
Final thoughts.
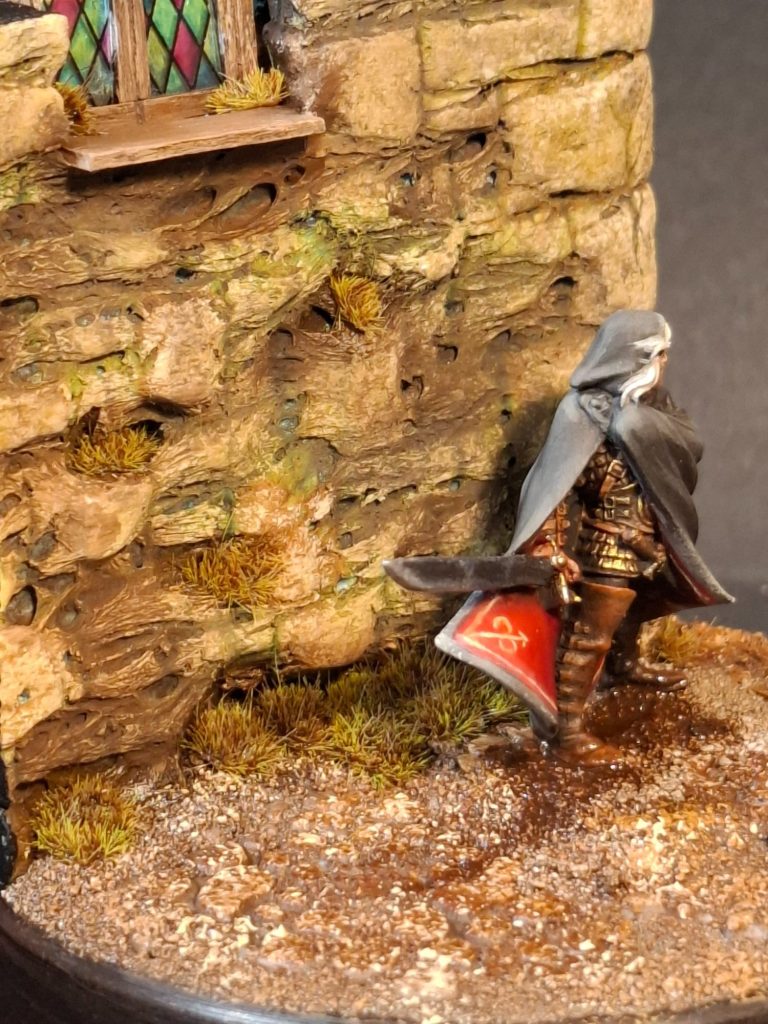
The small hiccup with the dissolving wall was further remedied with the addition of some small portions of static grass, added both around the base of the wall and also to the deeper holes that the White Spirit had caused.
Some little pieces were added to the corners of the window frame too.
It’s a very simple figure, and one that doesn’t really allow for much in the way of flamboyant colouration in the clothing, I’ve done my best though by adding the red lining and a small amount of detail freehand.
It is a beautifully sculpted and cast model though, and I can see why it’s rather sought after by painters.
Whilst I don’t wargame – I’ve all the tactical awareness of a houseplant – I have had a love of Games Workshop figures for the last forty years ( OK- slightly longer than that, and I include Ral Partha and Citadel within that time-span ), which makes me feel old.
However, I am rather blessed that I’ve been in a position to collect a lot of the old metal figures while they were reasonably priced, and still have a lot of them in small tool drawer boxes.
Although it is tempting to paint new releases, and particularly larger scale kits that are a little easier to see, I do rather enjoy picking up a 28mm and having a see if I’ve still got the hand to eye coordination to produce a decent finish.
I’m happy enough with this one, but of course, the final diagnosis is with the observer, you in fact. But whether you think it’s Ok or not, I still thank you for taking the time to read the article.