Jagd-Abrams
1/35th scale conversion of the Trumpeter kit
Assembled and painted in 2018
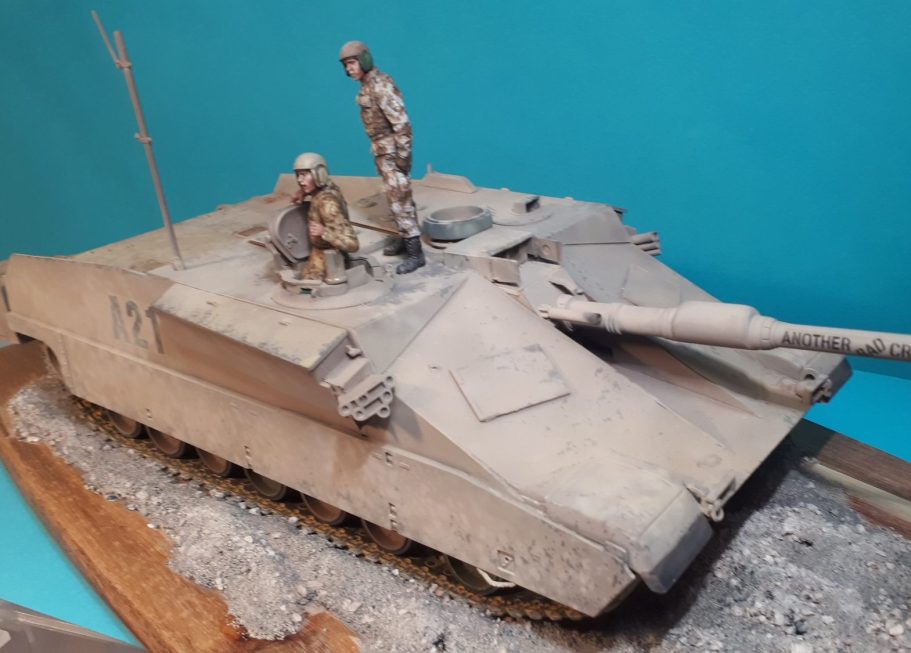
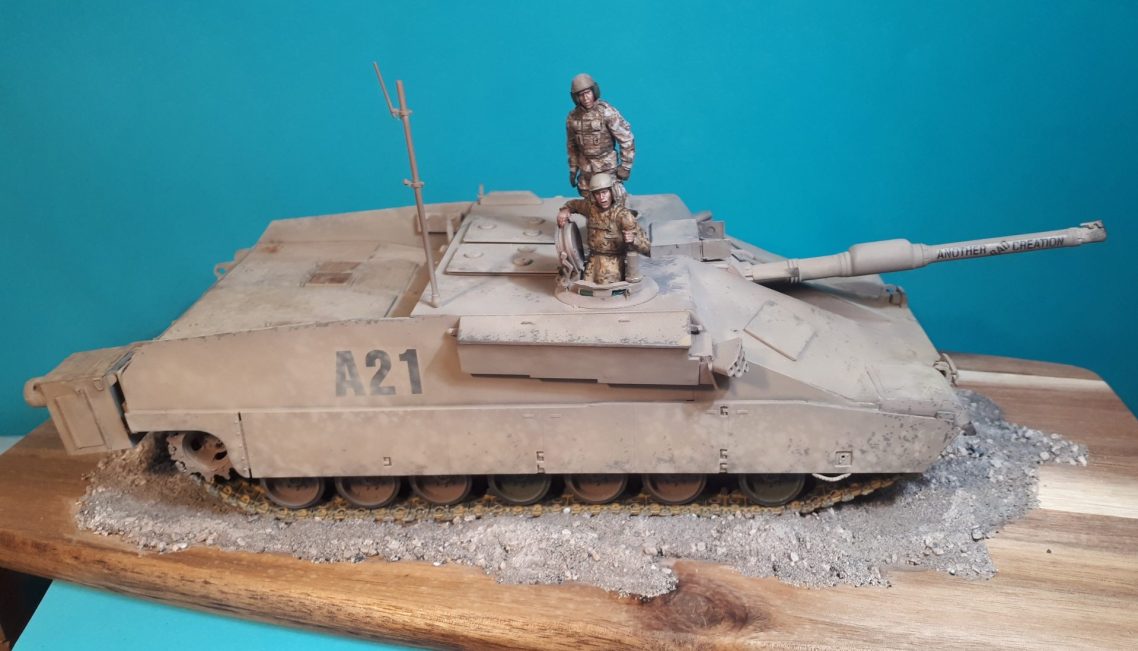
Having been encouraged by certain members of our community to take on silly ideas of AFV’s that have never existed, we come to this, a conversion of the excellent Trumpeter 1/35th scale plastic kit.
I’m told ( by those who have an interest in the Abrams tank ) that there are a lot of vehicles sitting around in holding yards, ready to be commissioned and used should the need arise, and that the chassis design is reckoned to be good for the next fifty years with little or no need for upgrade as technology is unlikely to improve on it as a base vehicle for different arms layout.
The appearance of a photoshopped image of an Abrams that has been converted to have a solid upper hull rather than a rotating turret was passed to me, and whilst I cannot credit the artist, because I haven’t a clue who it was, it is very realistic looking, and I should suppose a “do-able” addition to the Abrams hull.
It looks cool and seemed like something that was within my limited skills as a scratchbuilder, so having managed to find a kit of the regular vehicle with a turret ( Ebay, where would I be without you ? ), I could begin to consider the way I’d go about constructing a JagdAbrams.
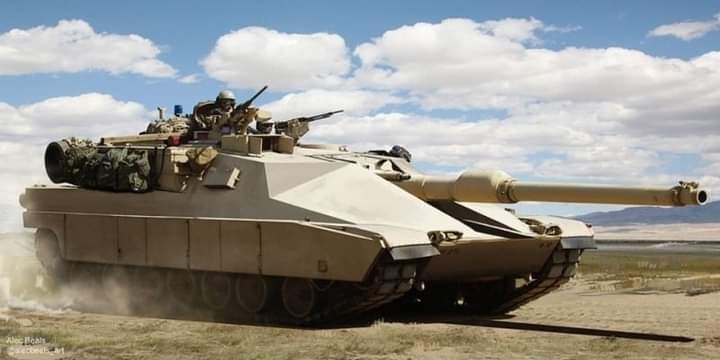
Photo #1 shows the photoshopped picture that I would work from, and you can see how cleverly it’s been made, by masking out the turret but leaving crew, main gun and machine guns in place.
In photo #2 I’ve begun construction, making up the lower hull according to the kit instructions, and then adding a box like structure midway along the upper hull from white plasticard. Onto that I’ve added two plates that are angled to go down the front of the hull, and join onto the box section. At this stage they’re not fastened in place as the location for the main gun needs to be cut away, it’s just a case of seeing if the angles work, and if my cutting has been somewhere near accurate….
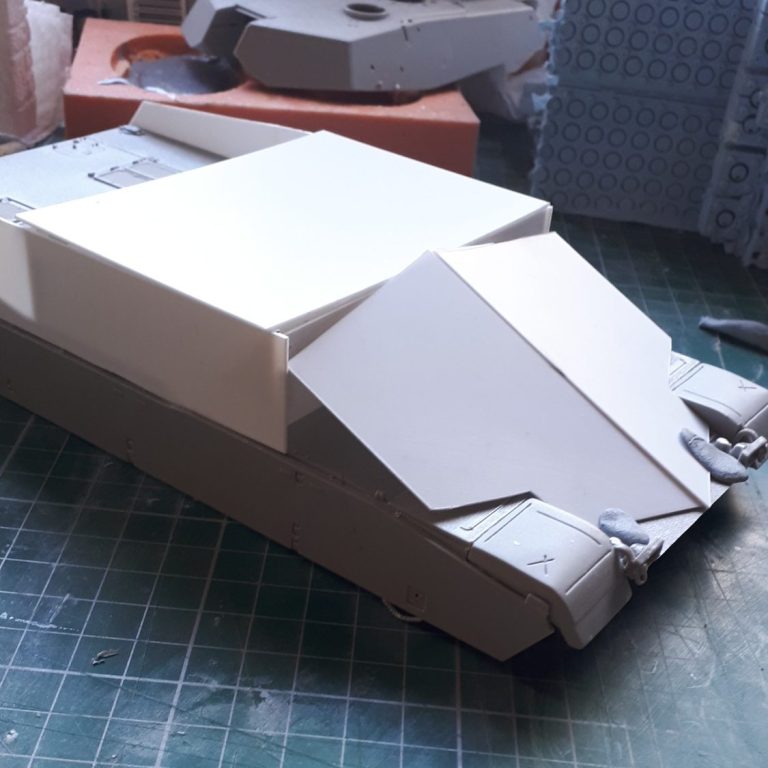
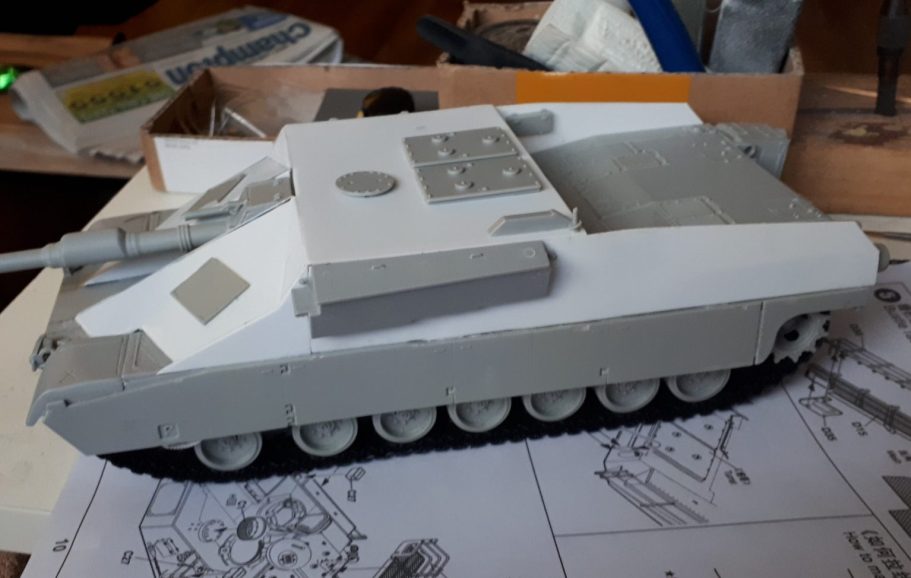
Photo #3 shows a fair an=mount of progress, the front plates have been trimmed to size and glued in place, triangular plates have been cut and glued to fill the gaps at the side and the box section sides covered and extended towards the back of the hull to shield the engine deck.
I’ve made use of some of the hatches and storage boxes from the turret, cut out the slot where the main gun will be, and added filler sections to each side of that.
Here’s where a slight problem occurred, that being the drivers hatch and vision ports.
The driver sits directly below the main gun, and has an access hatch there too. I needed to build around this so that the hatch could theoretically open and although it might be that he could drive the vehicle using camera displays, I retained the vision blocks on the hatch.
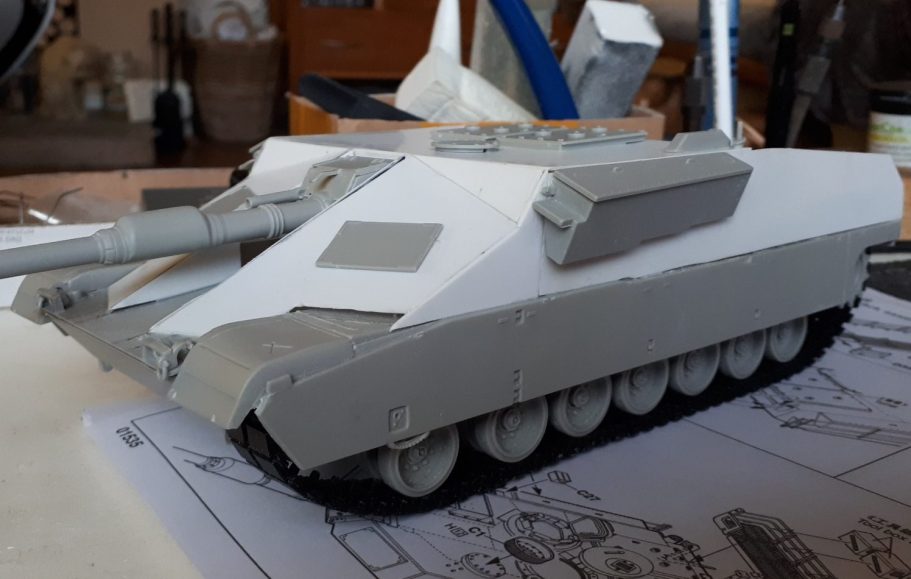
I’m not convinced anyone could exit or enter the vehicle unless the main gun was at maximum elevation, but I’ve done my best to allow the possibility that it might just work.
Photo #4 shows another view of the vehicle at this stage, the tracks have been put in place but are not a continuous loop, having just been threaded into place.
The reason for this ?
Well, I needed to fasten the side skirts on, and I prefer to paint the tracks separately, so, temporary tracks in photo #4.
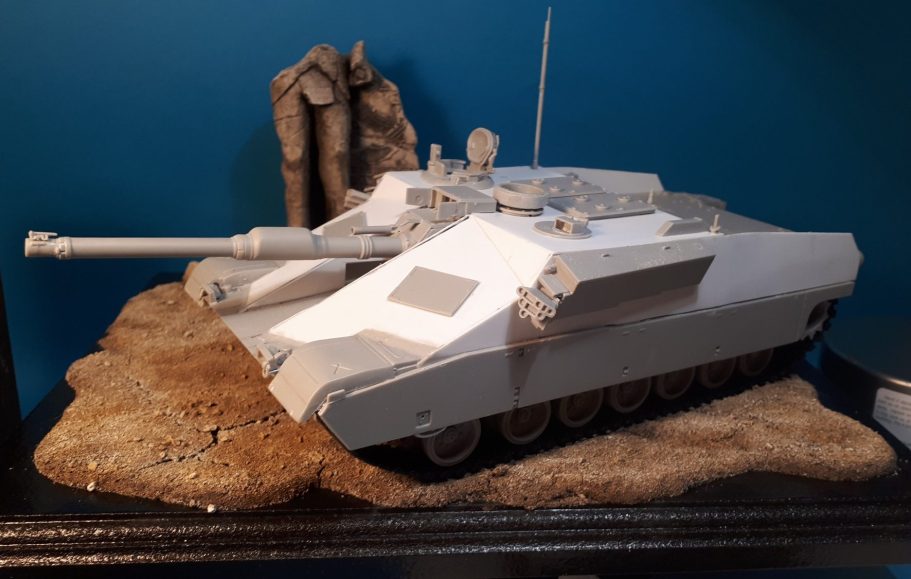
In photo #5 I ( for no apparent reason ) felt the need to try the unpainted vehicle on a desert style base, Having made one up for the Meng Tortoise, I borrowed it for five minutes to take a picture, completely unnecessary, and I now see the error of my ways. Sorry.
Oh, but you might notice in this shot that I’ve added a few more bits and bobs to the roof of the vehicle, plus an aerial mast and some smoke dischargers…..
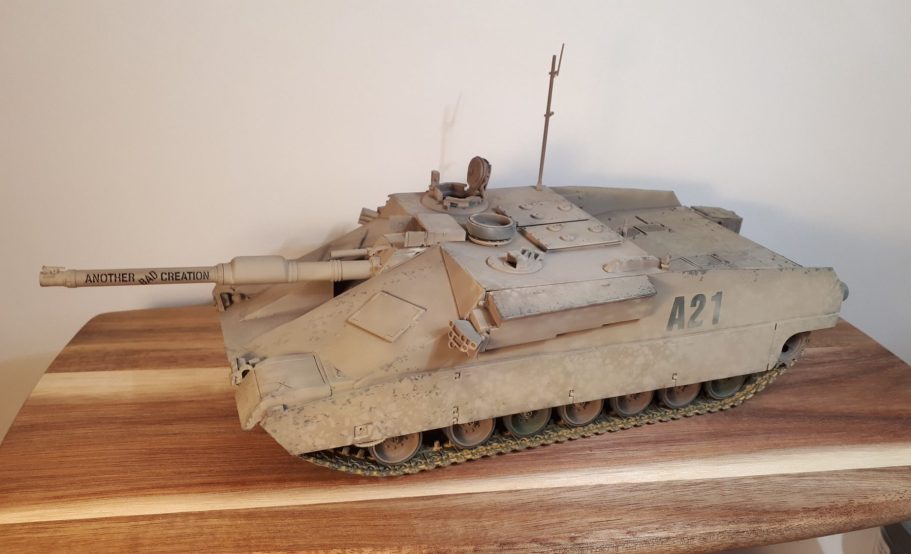
With the thought in my head that, if these things were to actually exist, then the longevity of the chassis might see then in active service for a while, I thought that maybe chipping and damage to the paintwork might well happen, so thought that the painting of the model should reflect that.
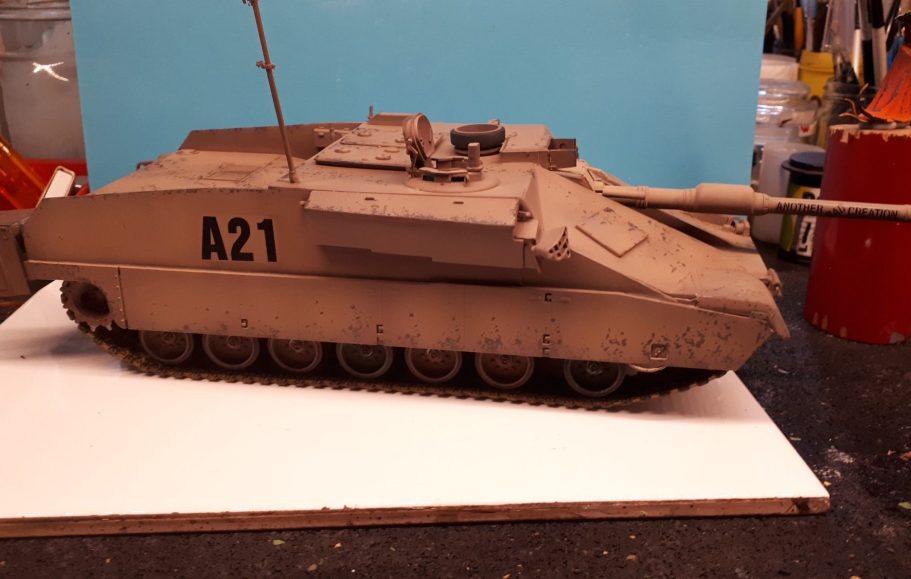
In photo #6 I’ve got about half way through the painting process, adding a primer coat of Halfords red lead primer, followed by stippling some Marmite in places that might see wear and damage to the sand coloured paint, then airbrushing Tamiya Desert Sand acrylic over the top of this, leaving the paint to dry for about an hour and then washing the whole thing with some water, detergent and a soft brush.
You might notice that I’ve got a couple of green wheels alongside their sand coloured friends under the side skirts there. Again a little lateral thinking that maybe wheel changes had been done that saw the use of wheels that were still in their Nato colouration, rather than having painted ready for use in the desert…..
Once the paints had all dried, decals were added, using some of those supplied in the kit.
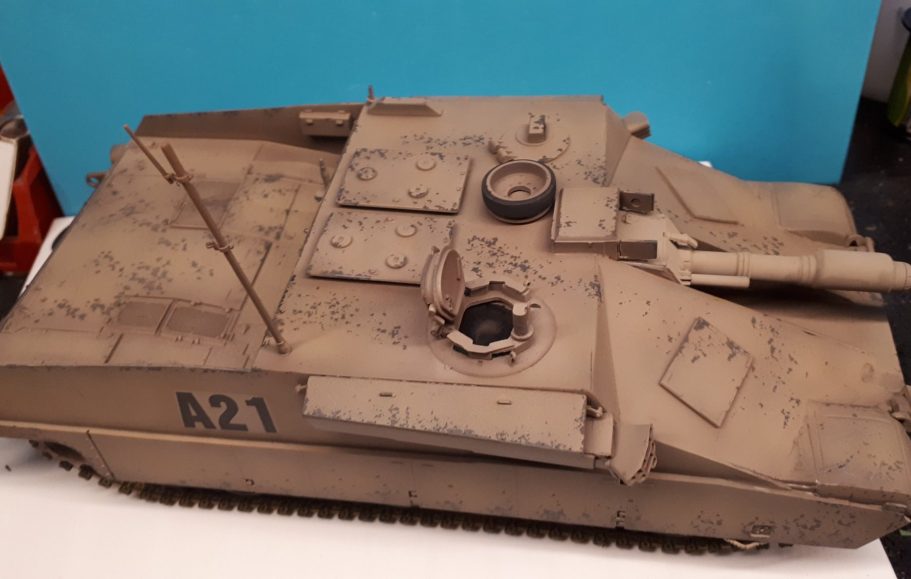
If you’ve read the article about the JagdSherman I made, then you’ll know about the steel etch weathering masks that I used to get a cloudy random effect.
I used the same masks on the JagdAbrams, and photo #7 shows the beginning of this. I used Tamiya Deck Tan which is marginally lighter in colour than the Desert Sand, and does an excellent job of giving the vehicle a dusty grubby look.
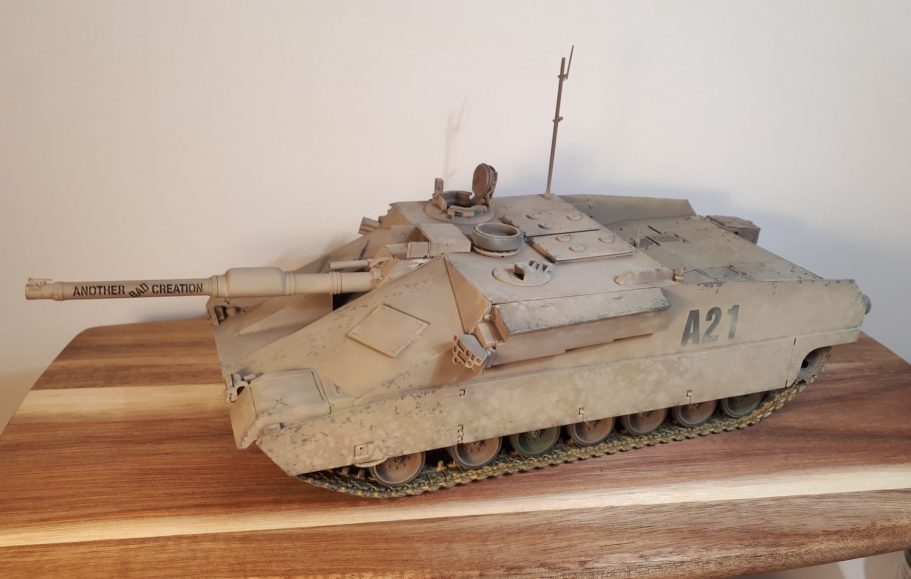
Photo #8 shows the kit having had more of the Deck Tan added, along with some pastel chalks that I found at the back of a drawer.
Also in this shot is the minimalist base that I planned on using for the tank. It’s just a cheap wooden serving / cutting board from Wilko’s and is just the right size for this and many other tanks if you don’t need much in the way of scenery alongside the vehicle.
Figures…..
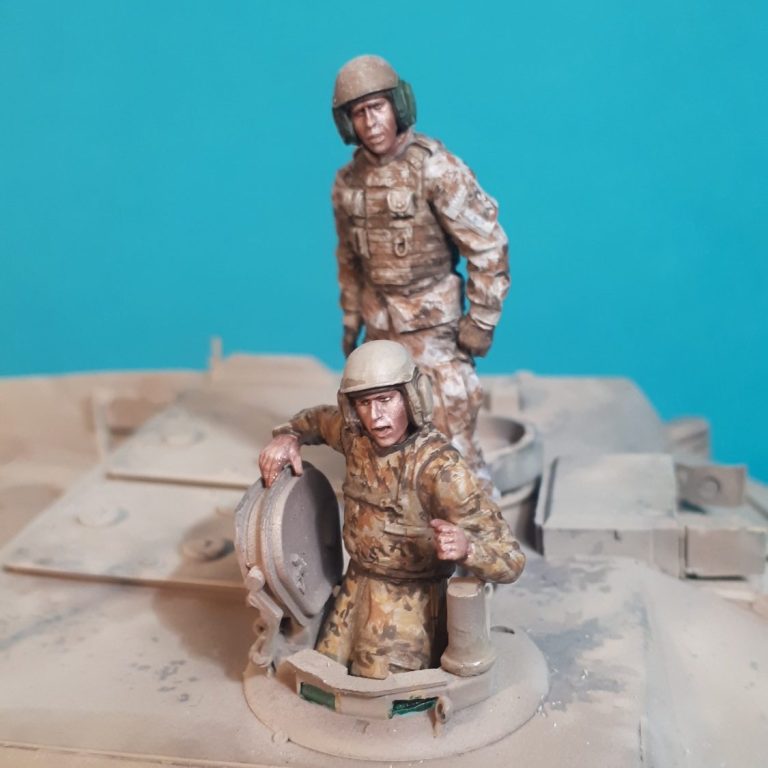
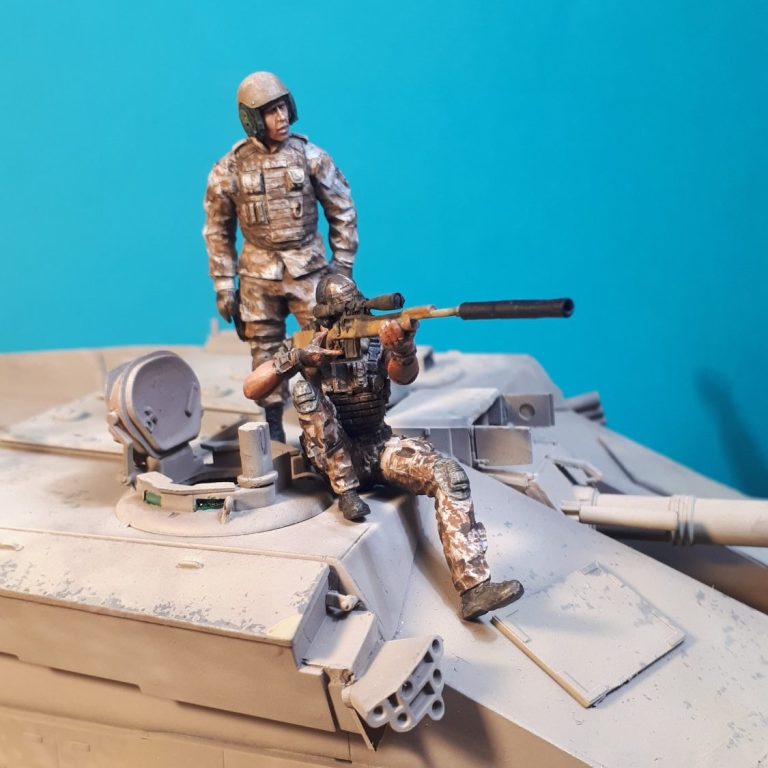
I do like to add figures to any vehicles I make if it’s at all possible. There’s several reasons for this, but the main one is to give a sense of scale, and the JagdAbrams was to be no different. In this shot I’ve got the commander figure ( From Alpine Miniatures ) painted up and standing on top of the tank, with a second figure that’s taking a shot with a sniper rifle ( yes, with a bent barrel, I’ve seen it ! ).
I’d watched Hurt Locker ( yet again ) and noted the part where the SAS ( ? ) unit give over their sniper rifle to one of the other characters take out an enemy soldier. It made me think that maybe such a rifle might be carried in this vehicle for more precise work than the use of the 120mm main gun. See photo #9
So having painted the sniper figure win what can only be stated as a beautiful rendition of desert digital camouflage, I tested him for fit……. Only to find that he’s much to big to go alongside the other figure. Darn, damn and blast, or certainly words to that effect were quietly muttered.
And yes, he was still being too big in photo #10.
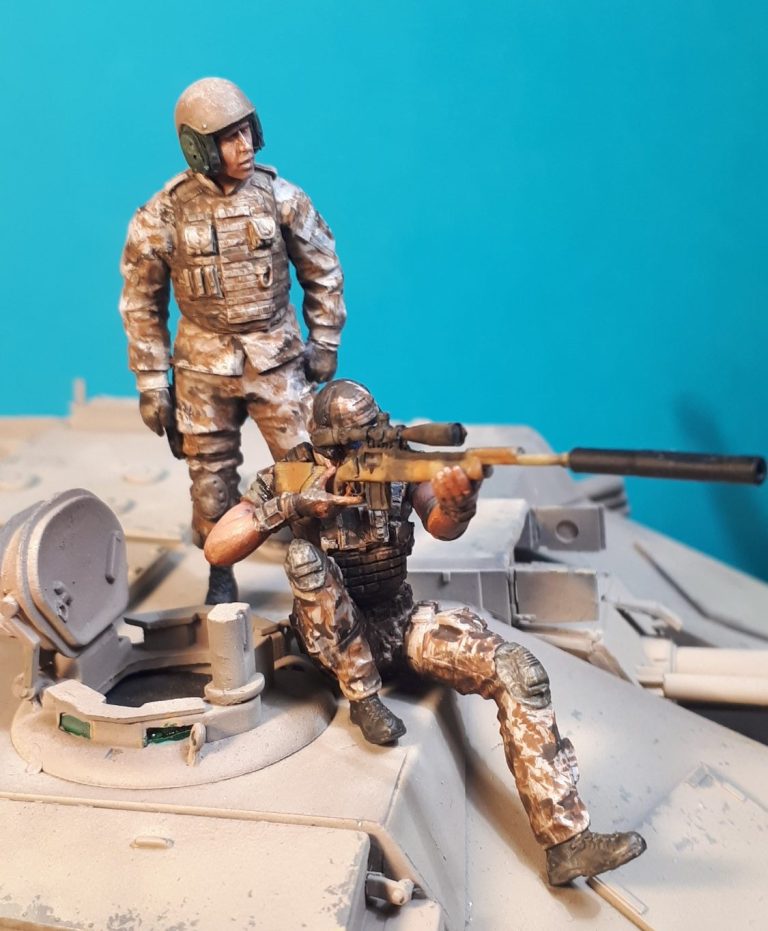
. and it’s worth a close up, just because I’m so pleased with that camouflage ( Photo #11 ).
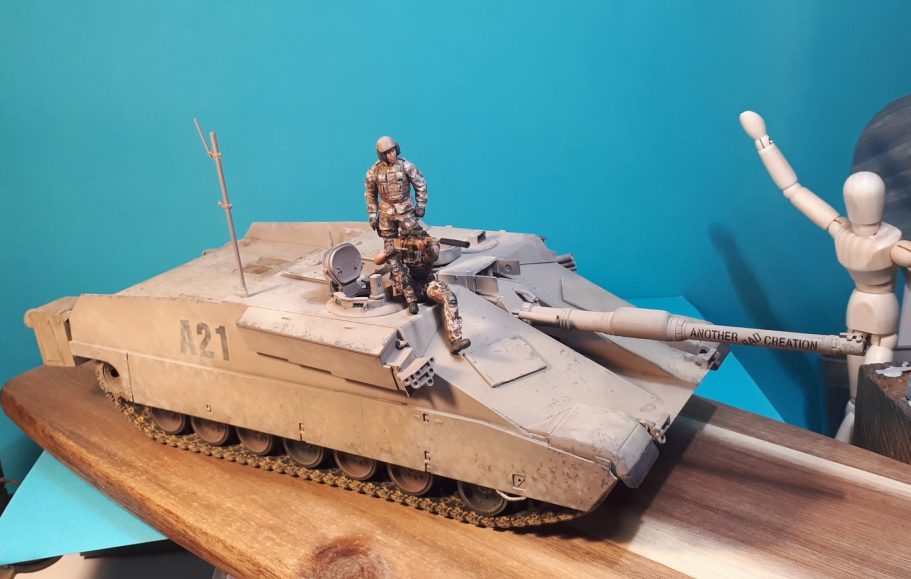
However, I did find another figure to go on the tank, another Alpine Miniatures figure, this time with his legs removed so that he appears to be standing in the open hatch. He looks a little agitated, but maybe he’s noticed the sniper figure getting a better groundwork setting, or the surgery is still fresh from me removing his legs.
Anyway, another nice figure from the Alpine range.
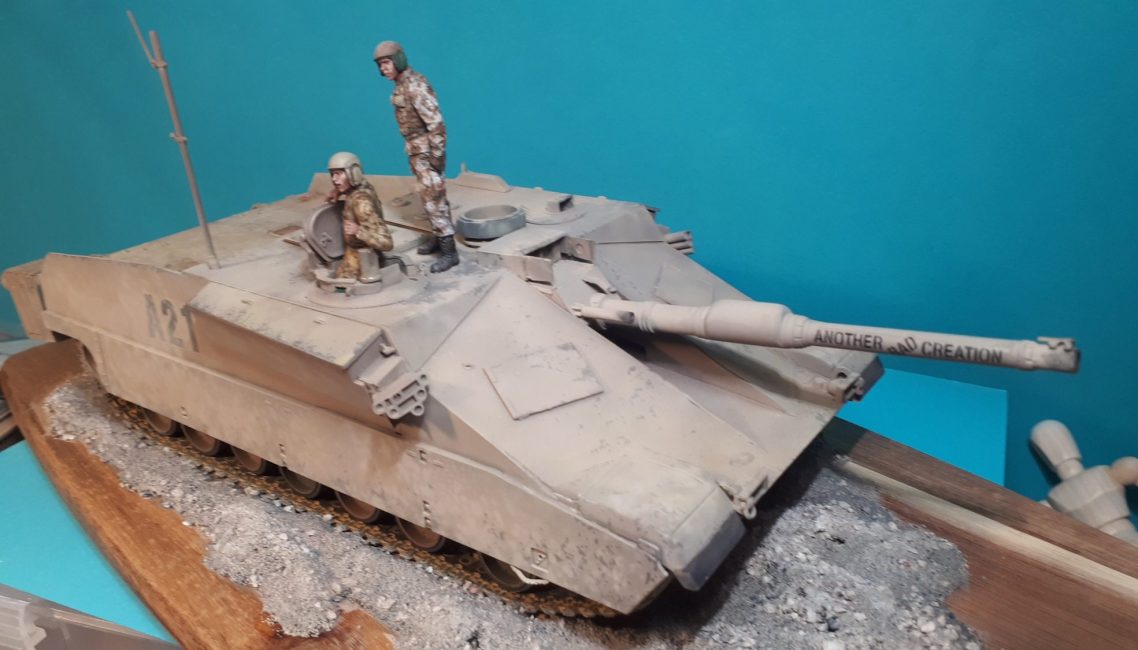
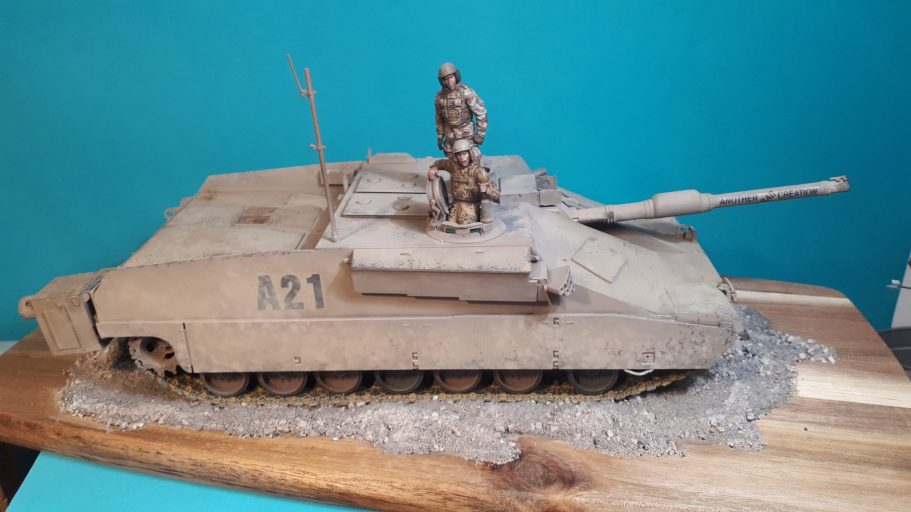
The final shorts show the addition of some groundwork to the wood plinth, some sandy, rocky terrain made from ready mixed wall filler, cat litter and fine sand, along with some wood glue and some sand coloured acrylic paint.
To sum up then, another complete fantasy of an AFV, but another fun one to build and test my skills.
Will I make more of these non-existent vehicles in the future ?
Maybe, but that depends on time, the supply of ideas, and how much encouragement I get from my “friends of bad influence” I suppose.