Light 'Em Up !
28mm plastic figure from Warlord Games
Painted in 2026
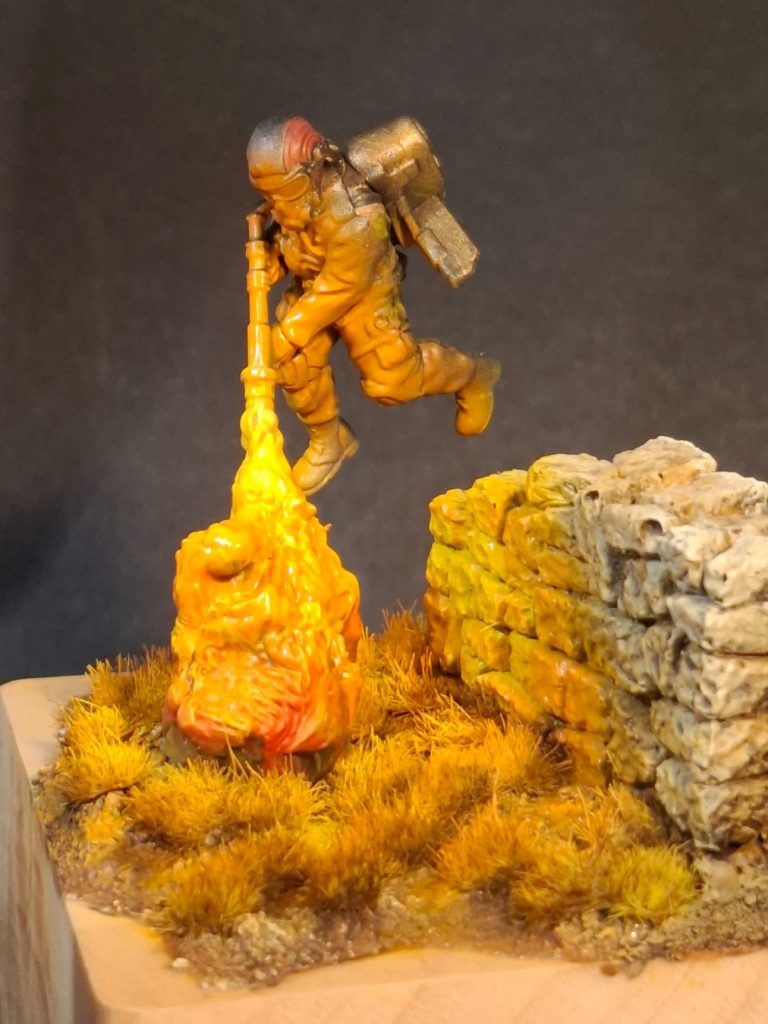
There’s a new shop opened in Wigan recently, one that interested me a lot – Warlord Games !
It’s easy to find, being very close to both the train stations the bus station, and plenty of car parks in the near vicinity, and although I missed the official opening day, it did manage to get there the day after.
The location is 19, Hallgate Street Wigan WN1 1LR
So although I’m focusing on one model, just give me a moment to wax lyrical about the shop.
The staff are welcoming, knowledgeable and helpful, the stock focuses of course on Warlord Games products of figures and sets, but there’s also a good selection of paints, tools and accessories that support the kits on sale.
Oh and books, there’s some seriously tempting books covering old Citadel and early Games Workshop miniatures, selected world renowned artists etc.
And it’d be rude not to buy something…… So I did.
A couple of books, and a figure, and because it was opening weekend I was given this figure for free.
No instructions, no picture of how it might look when painted, but that doesn’t matter, because it was FREE !
The parts come one a plastic sprue tree, and are moulded in a pale grey colour, they are separated in a clever manner so that once detached from the sprue, it’s very difficult to see where the components join together.
There’s no filler needed, and because this wasn’t ever going to be a gaming piece, I scraped off the minimal mould part lines and got things glued together.
OK, the usual problem here of me being much too keen to play, than to think “Oh, I’d better take a picture of that !”
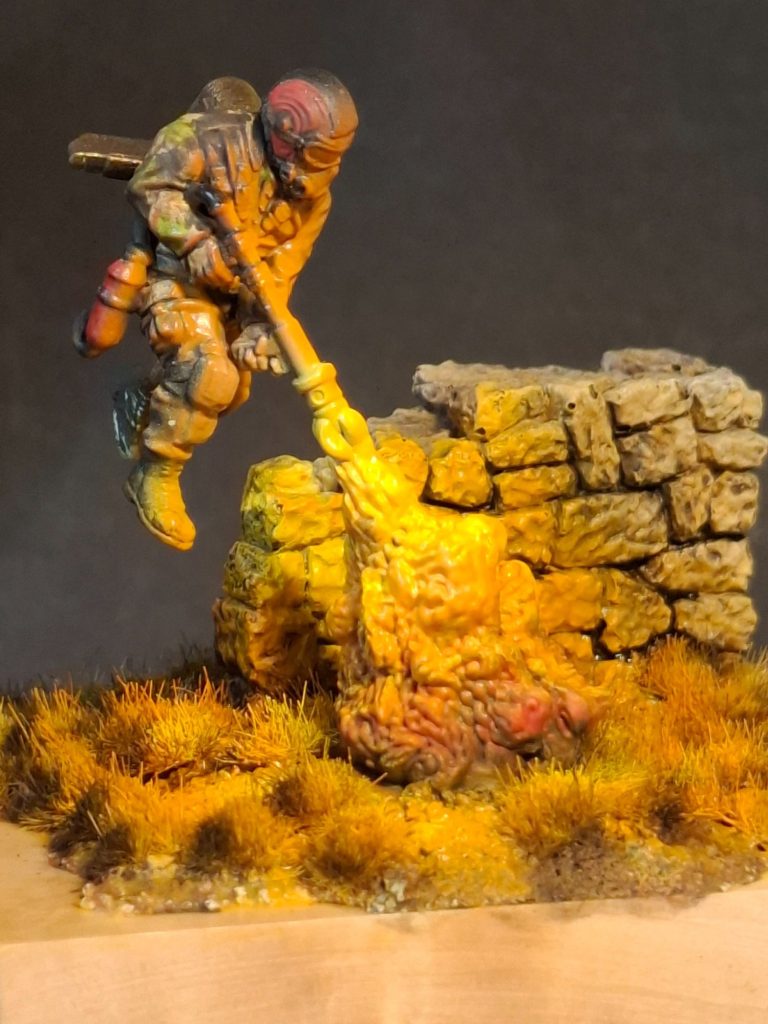
And so photo #1 is of the model with the figure fully painted….. Ooops.
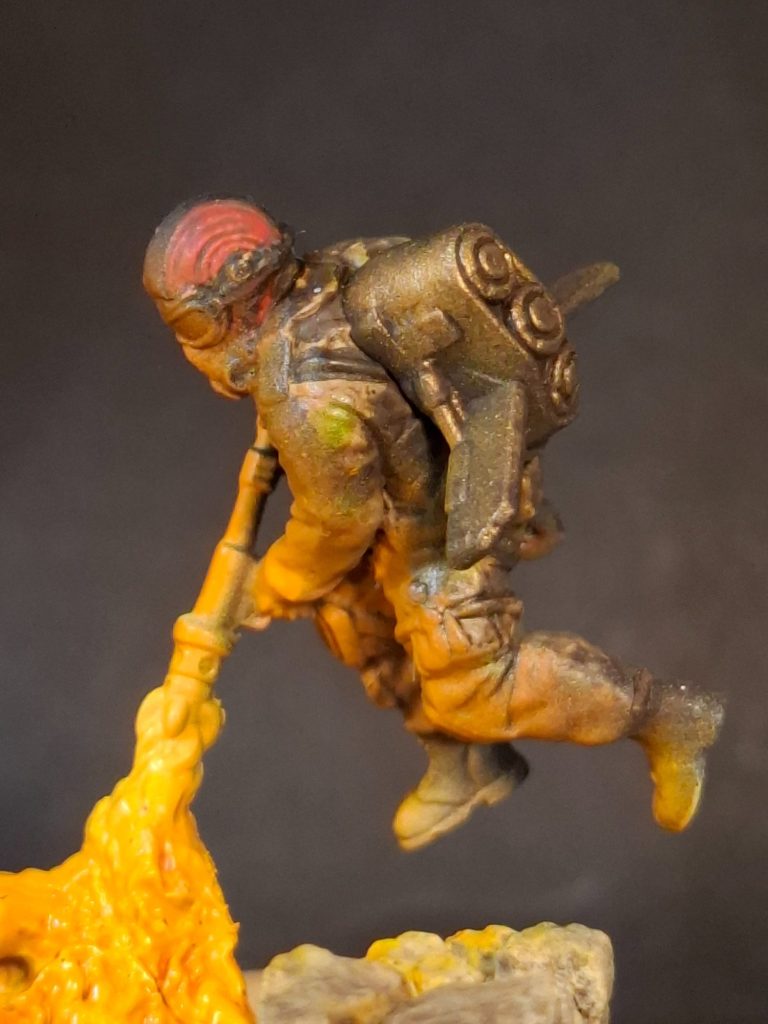
Really though, there’s not much to this, I’ve stolen the method from having painted many 1/35th scale figures to go beside AFV’s, using acrylics to paint the clothing – in this case a mid-brown lightened with a lot of MP paints Cream to begin the camo, then some MP Olive Green, and finally some GW Chaos Black which has been “greyed off” with some more of the MP paints Cream.
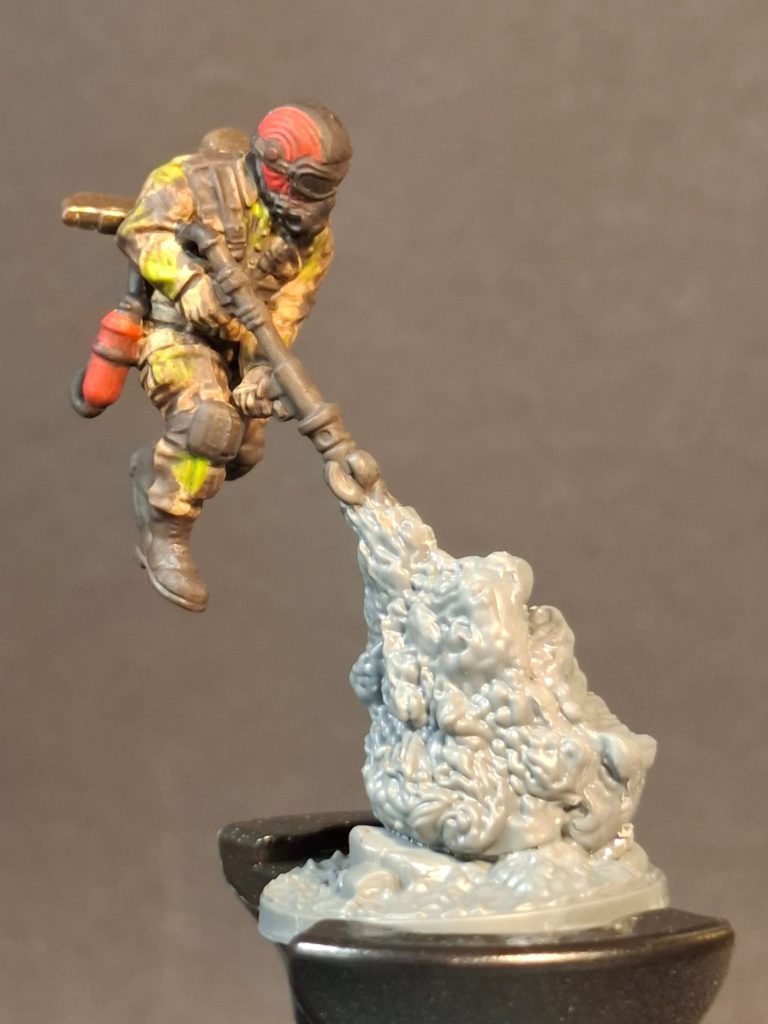
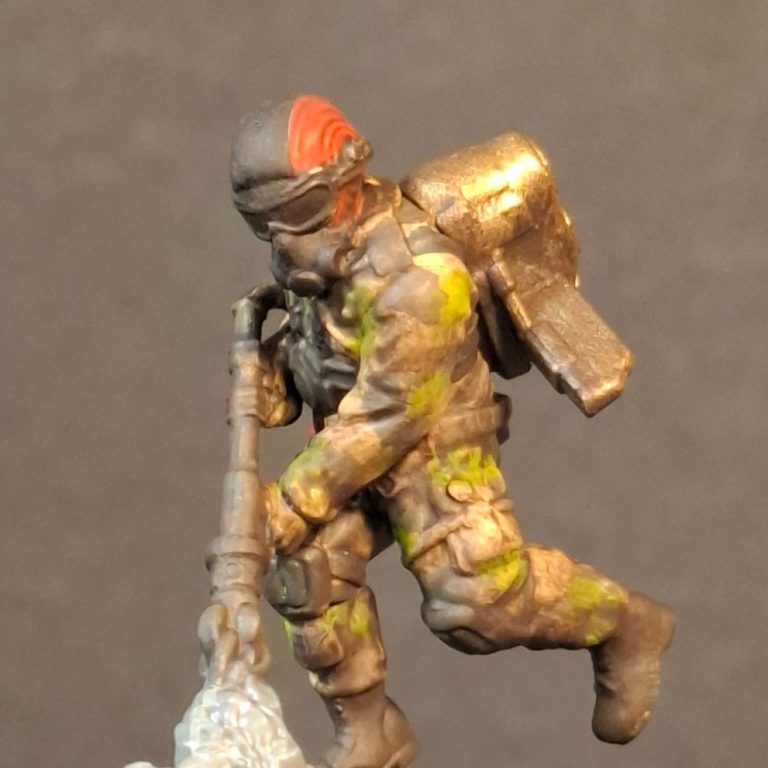
Photo #2. With the ground colour of the pale brown established, the other two colours are applied with a small brush that has seen better days, allowing me to just touch the ends of the brush bristles to the model so that an almost digital dot pattern is formed.
This is done in a random manner and the acrylic colours allowed to dry.
I wasn’t sure whether to paint the flamethrower green or with a dark steel acrylic, but decided on the latter as it probably wouldn’t be seen if what I had planned later actually worked.
Photo #3. The helmet was painted with the greyed off Black, with Scarlet MP paint applied to the sides and also used for the gas bottle.
The only part I didn’t glue in place was the backpack. I painted this separately with Darkstar metallics, using a dark Bronze colour followed by some Antique Gold.
Straps were painted with a dark brown, again in acrylics and the model left to one side whilst I had a cup of tea…… There may or may not have been a biscuit involved too, but I’ll deny it and plead the fifth if interrogated….. There’s no evidence left of the biscuit(s), so who could know ?
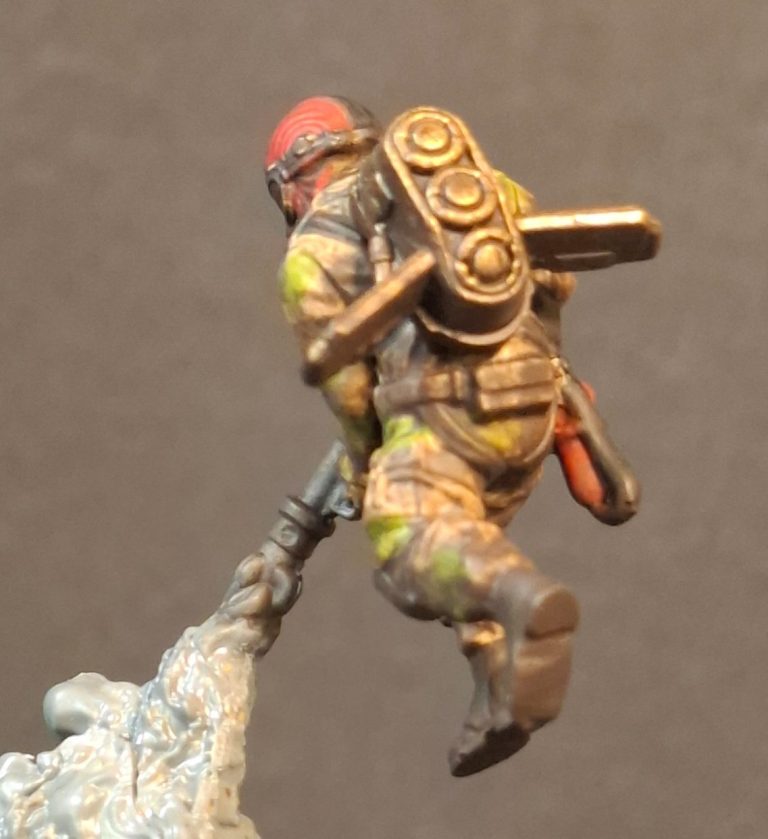
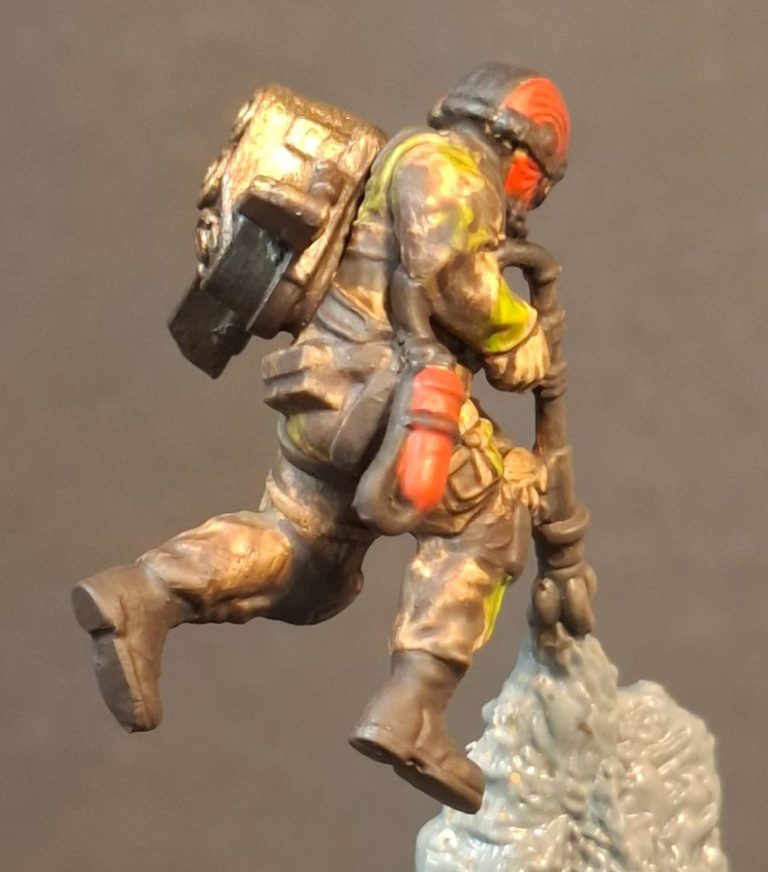
Photo #4. Anyway, it allowed the acrylics, which were looking quite bright at the moment, to dry fully, and a thin wash of Vandyke Brown oils were added over the whole figure.
This was dried off with a hairdryer so that I could strengthen the dark brown shadows on the inside of the legs, the crotch and under the arms with more of the Vandyke Brown oil paints.
So, figure looking good, but how to make the flame effects of the flamethrower in action, and more importantly, the reflection of the blast glowing off the figure.
Photo #5. Now this was the experimental bit, because although I thought I knew how to do this in theory, actually doing it in practice is a little bit worrying.
It’s pretty simple though.
A decent airbrush on a low pressure setting – say about 8psi and some Tamiya White paint.
Load up the airbrush, and fire the paint at the figure parallel to the line of the flamethrower – so you’re holding the figure like he’s on his back, and shooting the paint at him exactly like the light from the flames would be hitting him.
Do it from both sides of the mass of moulded plastic “flames”.
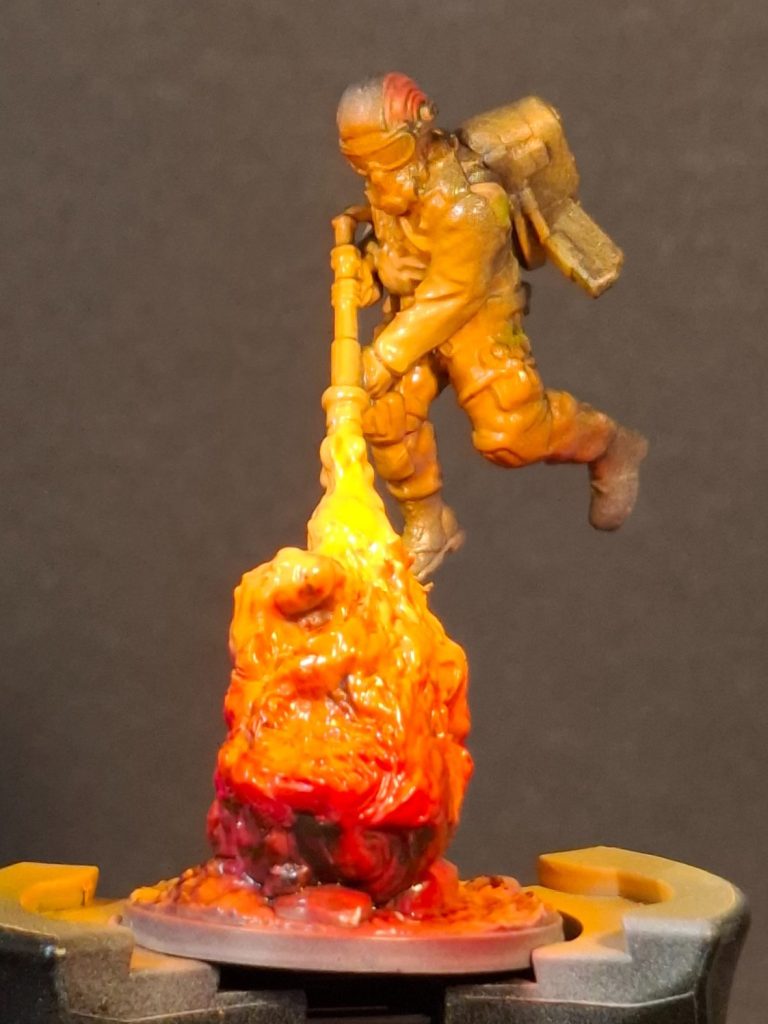
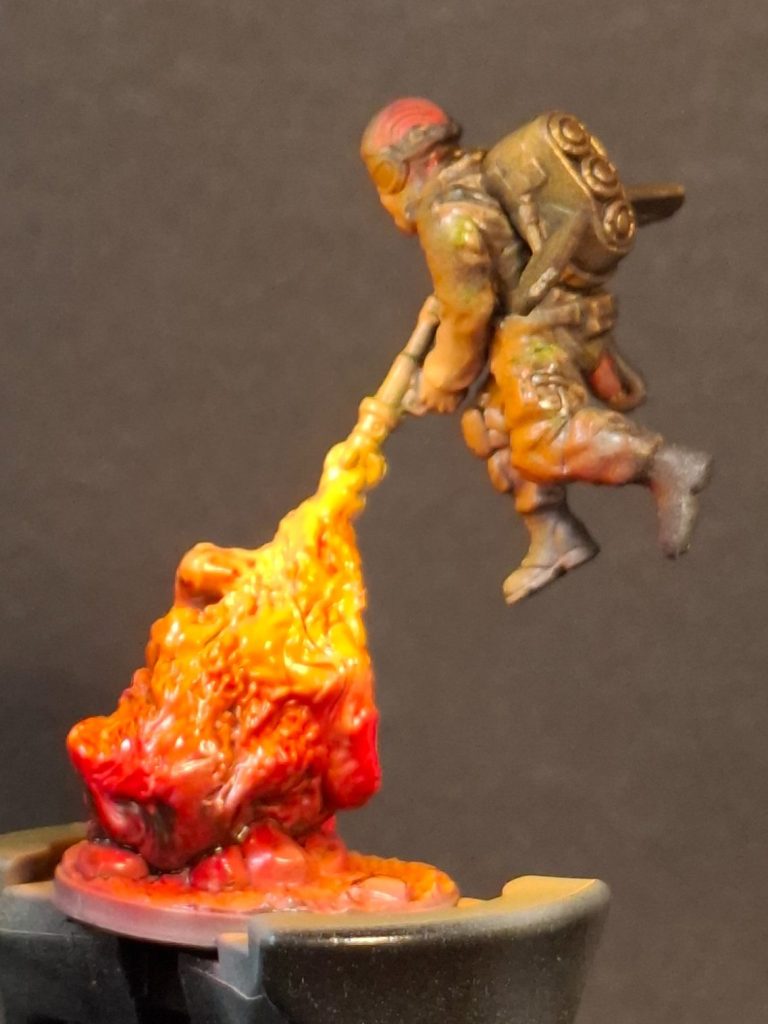
Photo #6. So he’s now mostly white on his front.
Now wash out the airbrush thoroughly and reload with some Tamiya Scarlet and shoot the paint from exactly the same angles as the white was done from, making sure that all the white paint is covered.
Clean the airbrush again and this time load it with Tamiya Orange paint, and shoot the paint from the same ankles, but don’t quite cover all the red.
Wash out the airbrush, and add some white, and use that to not quite cover the orange.
Photo #7. Another wash out of the airbrush – it’s OK, this much cleaning won’t harm it – and the final coat of paint used is yellow, again not trying to cover all the orange.
Finally add some white to any of the yellow left in the airbrush and just paint the bass that is coming out of the end of the flamethrower.
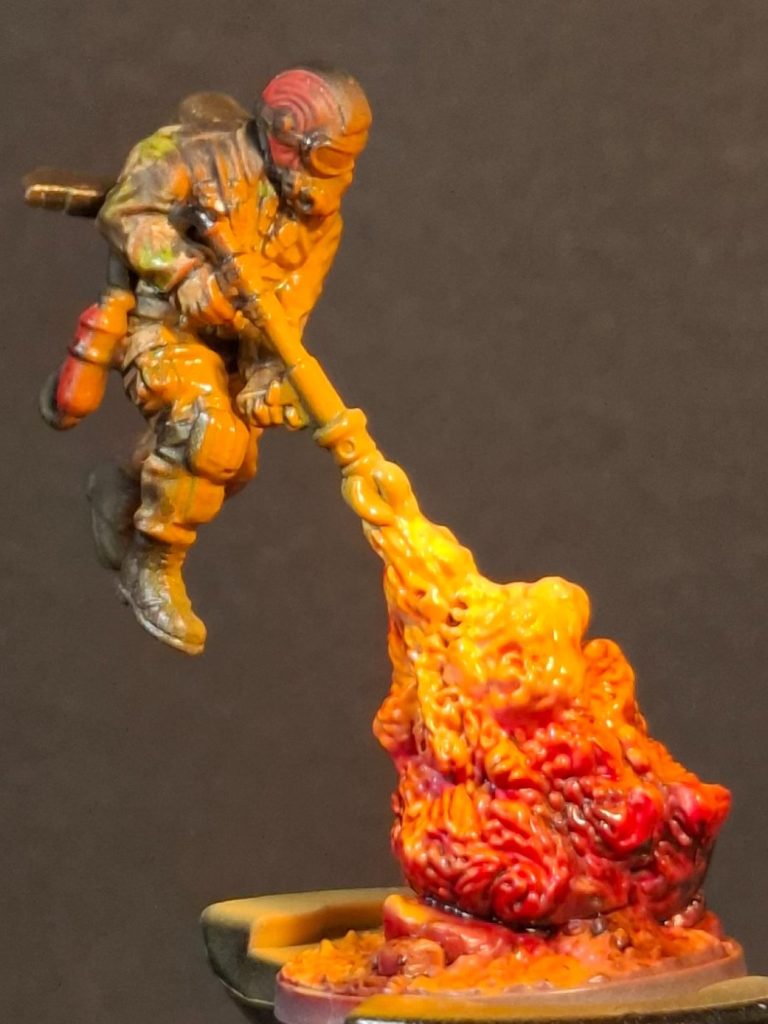
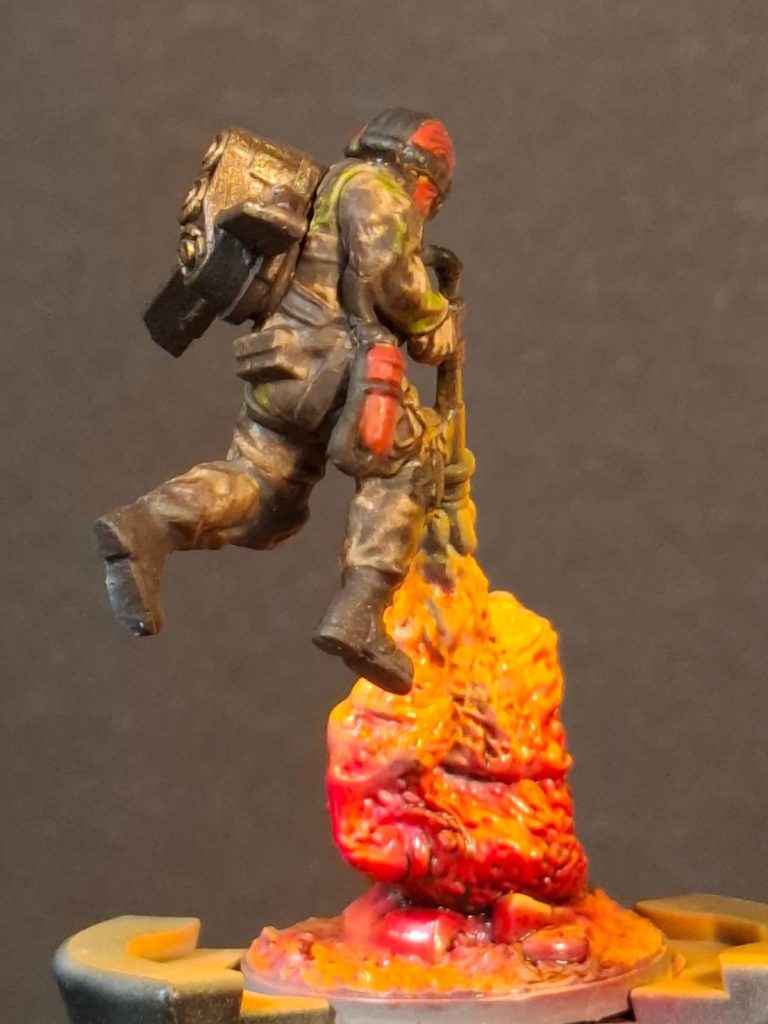
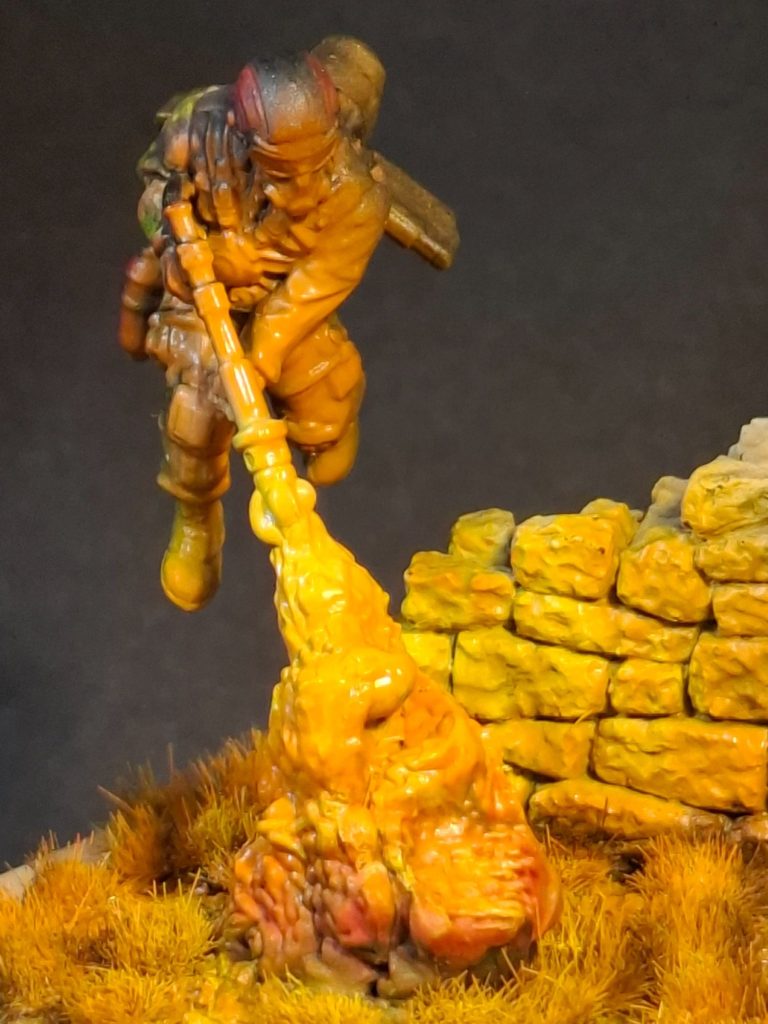
Photo #8. If it’s been done correctly, then the back of the figure should be absolutely untouched by the reflected light effect, and the camo etc be just as it was in the early pictures.
Well, it seems to have worked, and all I added was some Carmine Oils to pick out the details on the lower flames blending Vandyke Brown into these right at ground level.
I’d used the airbrush to colour the groundwork too, but as I planned to add more groundwork to the model, then the airbrush would need to be used again, once I’d constructed a small scene for him.
Photo #9 and I’ve made a small groundwork setting for our little flammable fellow. Simply a resin “stone” wall set into some fine sand and cat litter, painted with some oil paints and then a lot of “ready made” clumps of static grass from Green Stuff.
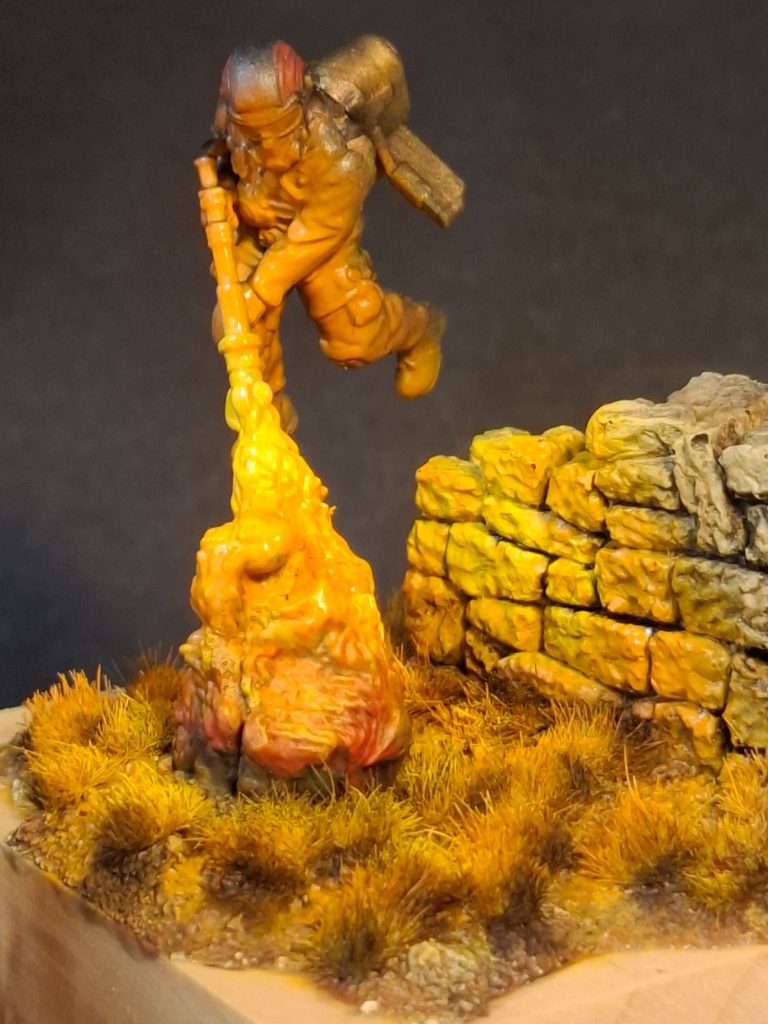
The thing is the flames coming out of that flame thrower need to have reflections painted onto the wall and groundwork too, so again the airbrush was used to paint those using more of the Tamiya orange and yellow onto the wall and surrounding groundwork, using a low angle to the base so that the fire looked like it was casting light onto the grass and side of the wall.
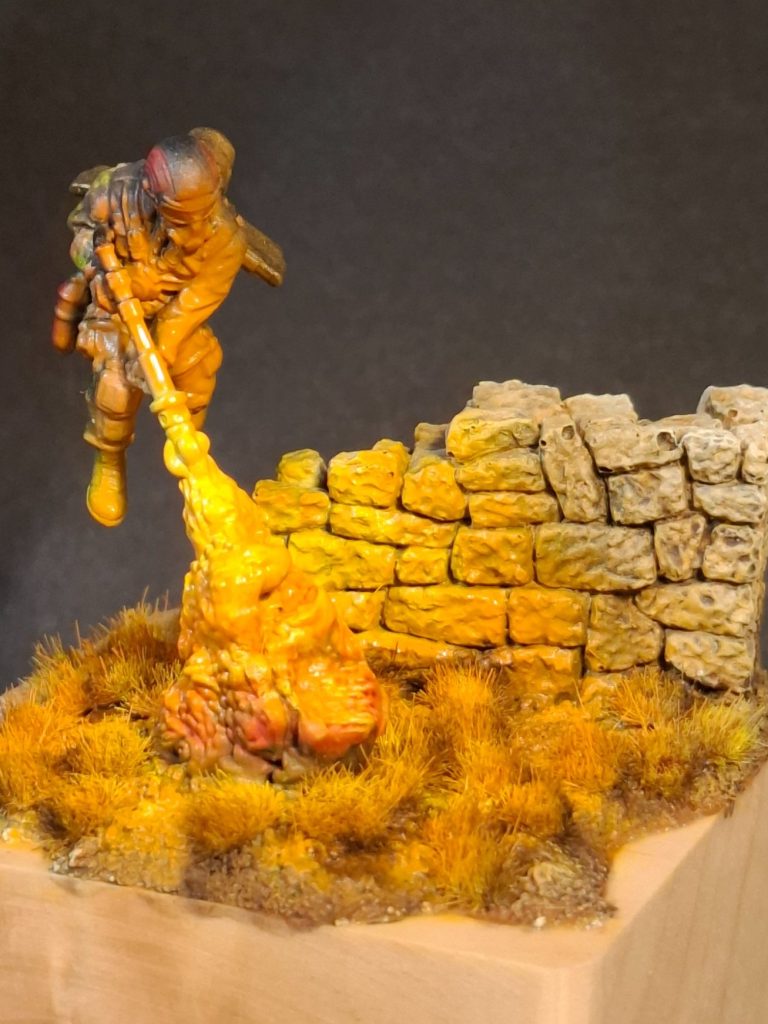
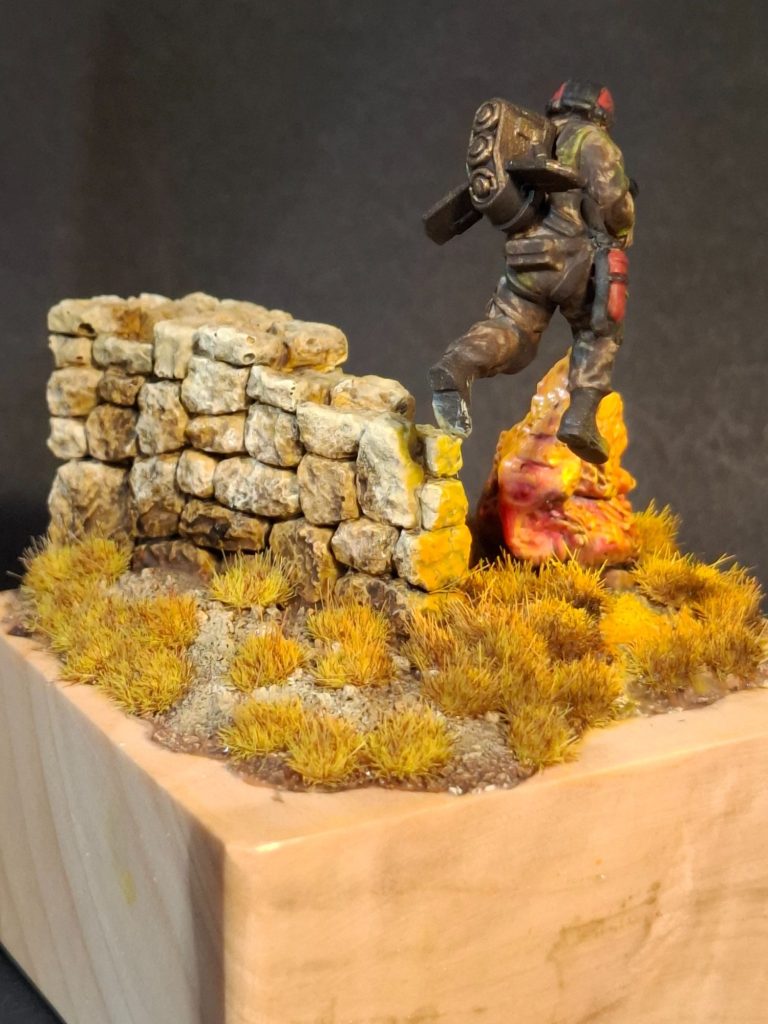
Photo #10, of course the back of the wall doesn’t get any of the lighting effect, in fact I intend going back and darkening this side of the wall and the sides of the static grass that are facing away from the source of the flames so that cast shadows are created.
I’ll use Vandyke Brown oil paint for this, applied with a large brush, and this can be seen in the final photos.
Final thoughts
As an experiment with a painted light source focused on the centre / bottom of the figure, this was interesting. Figuring out where the light would be coming from was simple enough, in that the flames from the weapon controlled all that, but attempting the effect and trying to get it to work believably were a whole new set of ideas and although a relatively simple method, I still felt it was a bit of a risk to shoot bright coloured paint over a nicely camouflage paintjob.
The same shot, photo #11, but the grass and wall have had deeper shadow colours added using thinned Vandyke Brown oil paints.
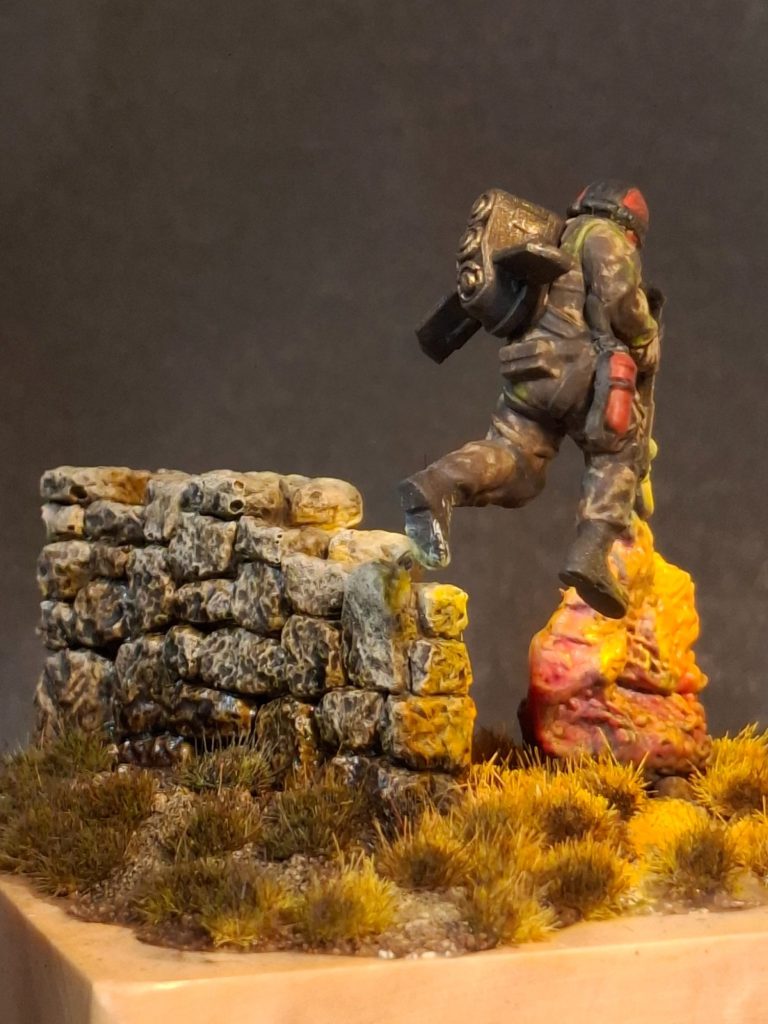
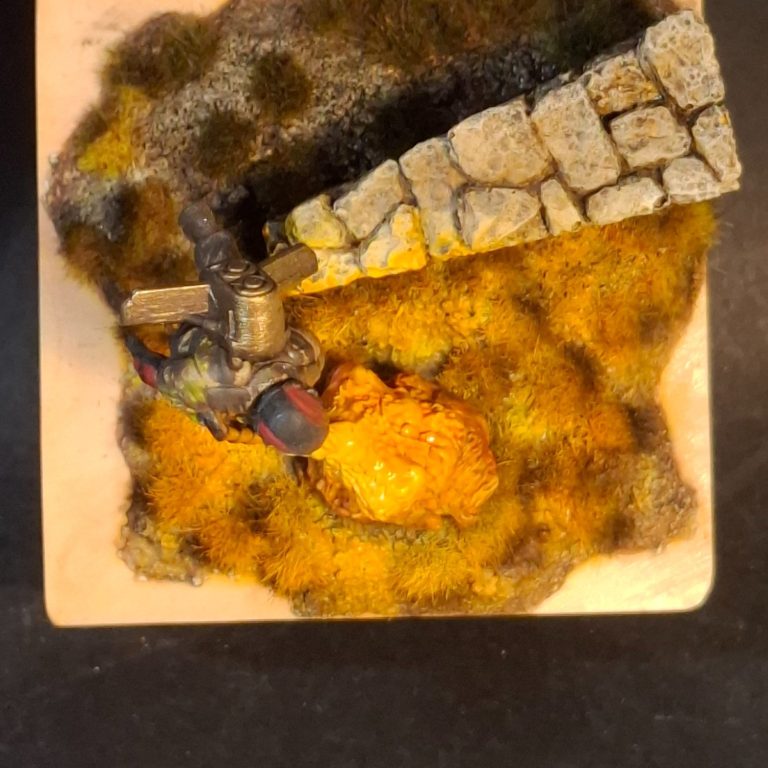
And photo #14 shows a view from above, with the shadow cast by the wall on the ground.
Does it work ?
I think it’s not half bad, considering, and it makes for an interesting look to a superb little figure from quite a wide range of 28mm wargaming figures.
Whilst this range from Warlord Games is pretty new to me, from what I’ve seen on this and another female figure, the kits are well sculpted and the injection moulded plastic offers little in the way of clean-up to slow the modeller down before painting can begin.
Will I buy and paint more ?
Yes to the former, I’ll definitely add a few more figures from this range to my grey army shelves, but as to the latter….. Well I’d like to think I’ll get around to painting them, but only time will tell on that one.
Highly recommended.